Integrate Facebook Leads with Slack and Notion Using Pabbly Connect

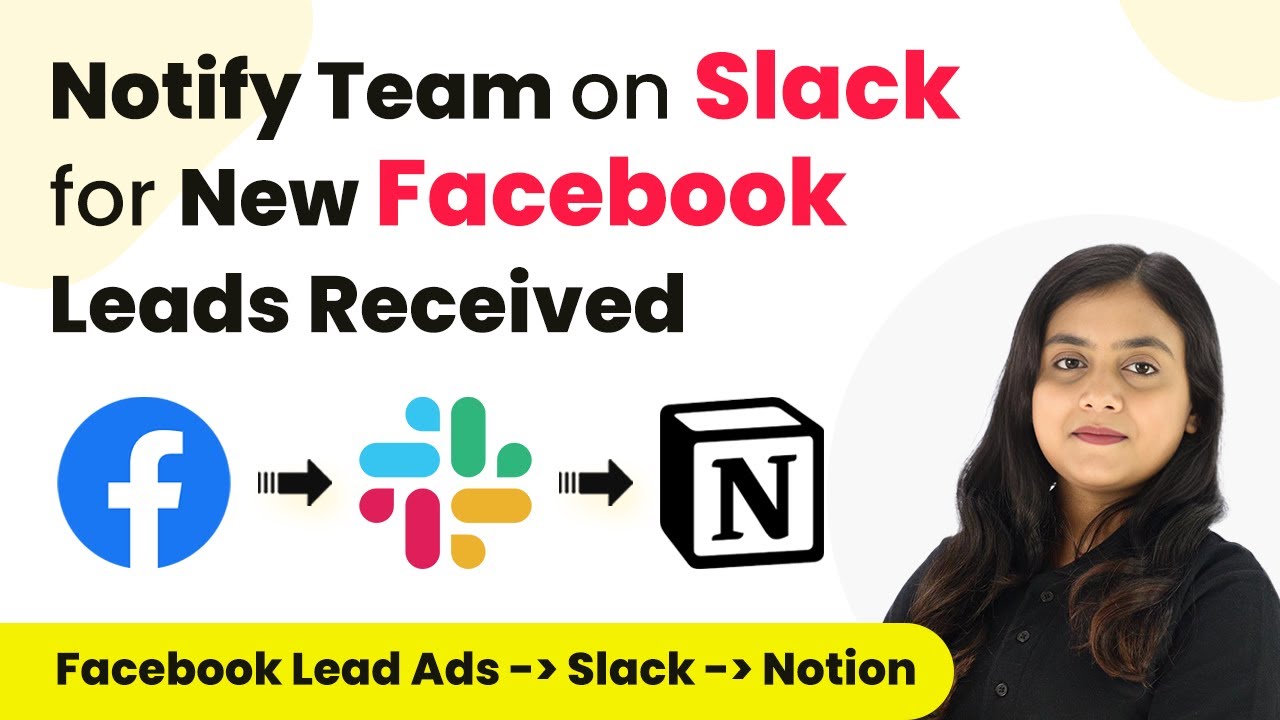
Learn how to automate Facebook lead notifications to Slack and Notion using Pabbly Connect in this detailed tutorial. Discover hidden automation capabilities within your existing tools. This guide shows you how to connect your essential applications and permanently eliminate redundant manual processes.

Watch Step By Step Video Tutorial Below


1. Accessing Pabbly Connect for Integration

To start integrating Facebook leads with Slack and Notion, you need to access Pabbly Connect. First, visit the Pabbly Connect website and sign in to your account. If you are a new user, you can sign up for free and get 100 free tasks every month.

After signing in, you will see the Pabbly Connect dashboard. From here, click on the ‘Access Now’ button to enter the main interface. This is where you will create your automation workflow to streamline your lead management process.


2. Creating a Workflow in Pabbly Connect

Creating a workflow is essential in Pabbly Connect to automate your processes. Click on the ‘Create Workflow’ button in the top right corner. A dialog box will appear, prompting you to name your workflow and select a folder to save it in.

  • Name your workflow: ‘Notify Team on Slack for New Facebook Leads Received and Add Data in Notion Database’.
  • Select the appropriate folder, such as ‘Facebook Lead Ads Automations’.

After naming your workflow and selecting the folder, click ‘Create’. This will set up your workflow, ready for the trigger and action steps that follow.


3. Setting Up the Trigger for Facebook Leads

In this step, you will set up the trigger in Pabbly Connect to capture new leads from Facebook. Click on the trigger application and select ‘Facebook Lead Ads’. Choose the trigger event as ‘New Lead Instant’ to capture leads as they come in.

Next, click the ‘Connect’ button to establish a connection between Facebook Lead Ads and Pabbly Connect. A new window will prompt you to add a new connection. Ensure you are logged into your Facebook account for a smooth connection process.


4. Notifying the Team on Slack

Now that your trigger is set up, the next action is to notify your team on Slack. In Pabbly Connect, select ‘Slack’ as your action application and choose ‘Send Channel Message’ as the action event. This allows you to send a message to your Slack channel whenever a new lead is captured.

Click on the ‘Connect’ button to link Slack with Pabbly Connect. You will need to authorize the connection by selecting your token type (user or bot) and allowing access to your Slack account. After successful authorization, choose the channel you created for lead notifications.

  • Select the channel: ‘New Facebook Leads Details’.
  • Map the message content to include lead details: name, email, and phone number.

Once you have configured the message, click the ‘Save and Send Test Request’ button to verify that the message is sent to your Slack channel correctly.


5. Adding Lead Details to Notion

The final step is to create a record of the lead in your Notion database using Pabbly Connect. Select ‘Notion’ as your action application and choose ‘Create Database Item’ as the action event. This will allow you to log lead details into your Notion workspace.

After connecting Notion to Pabbly Connect, select the database you created for lead details. You will then need to map the fields for the lead’s name, email, and phone number from the previous step.

Select the database: ‘Facebook Lead Details Easy Trade’. Map the lead’s details to the corresponding fields in Notion.

After filling in all required fields, click ‘Save and Send Test Request’ to ensure the lead details are successfully added to your Notion database.


Conclusion

In this tutorial, we demonstrated how to automate the notification of new Facebook leads to Slack and log details in Notion using Pabbly Connect. This integration enhances your lead management process, ensuring no potential clients fall through the cracks while improving team collaboration.

Ensure you check out Pabbly Connect to create business automation workflows and reduce manual tasks. Pabbly Connect currently offer integration with 2,000+ applications.

Integrating Marquiz with ActiveCampaign Using Pabbly Connect

Learn how to integrate Marquiz with ActiveCampaign using Pabbly Connect to automate contact creation from quiz responses. Follow our step-by-step tutorial for seamless integration. Explore efficient methods for automating routine tasks with clear, concise instructions suited for both newcomers and experienced professionals.

Watch Step By Step Video Tutorial Below


1. Accessing Pabbly Connect for Integration

To begin using Pabbly Connect, first, navigate to its homepage. This powerful automation platform allows you to seamlessly connect various applications, including Marquiz and ActiveCampaign.

Once on the homepage, you can either sign in if you’re an existing user or sign up for a free account. Signing up grants you access to 300 tasks per month, enabling you to explore the functionalities of Pabbly Connect.


2. Creating a Workflow in Pabbly Connect

After logging into Pabbly Connect, the next step is to create a new workflow. Click on the ‘Create Workflow’ button located at the top right corner of your dashboard.

  • Name your workflow as ‘Create ActiveCampaign Contact for Marquiz Response’.
  • Select a folder for your workflow, such as ‘Automations’.
  • Click on the ‘Create’ button to finalize your workflow setup.

This workflow will serve as the backbone for your automation, connecting Marquiz to ActiveCampaign through Pabbly Connect.


3. Setting Up the Trigger with Marquiz

In this section, you will set up the trigger for your workflow. Select Marquiz as your trigger application and choose the event as ‘New Leads’. This means that whenever a new lead completes a quiz, Pabbly Connect will initiate the workflow.

After selecting the trigger, Pabbly Connect will provide you with a webhook URL. Copy this URL and head over to your Marquiz account. In your Marquiz form settings, navigate to the Integrations section and select ‘Webhooks’ to add the copied URL. This links your Marquiz form to Pabbly Connect.


4. Configuring the Action with ActiveCampaign

Now it’s time to set up the action step in your workflow. Choose ActiveCampaign as your action application and select the event ‘Create a Contact’. This ensures that each new lead from Marquiz is automatically added as a contact in ActiveCampaign.

To connect ActiveCampaign with Pabbly Connect, you will need to enter your API key and URL. Access these details from your ActiveCampaign account under the Developer settings. Make sure to follow the instructions carefully, especially regarding the URL format.

  • Map the fields for email, first name, last name, and phone number from the Marquiz response.
  • Click on ‘Save and Send Test Request’ to verify the connection.

Once the test is successful, your integration is complete, and Pabbly Connect will handle future lead submissions automatically.


5. Testing the Integration

To ensure everything is functioning correctly, perform a test submission on your Marquiz form. Enter dummy data and submit the form. This action will trigger the workflow in Pabbly Connect and create a new contact in your ActiveCampaign account.

After submitting the form, check your ActiveCampaign account to see if the new contact appears with the correct details. This step confirms that the integration works as intended, allowing you to engage with leads effectively.


Conclusion

In this tutorial, we demonstrated how to integrate Marquiz with ActiveCampaign using Pabbly Connect. This automation streamlines the process of capturing leads and creating contacts, enhancing your marketing efforts. By following these steps, you can efficiently manage your leads and improve engagement.

Ensure you check out Pabbly Connect to create business automation workflows and reduce manual tasks. Pabbly Connect currently offer integration with 2,000+ applications.

Integrate Google Sheets with AWeber Using Pabbly Connect: A Step-by-Step Guide

Learn how to automate your lead management by integrating Google Sheets with AWeber using Pabbly Connect. Follow this detailed guide for seamless setup. This comprehensive guide reveals exactly how to connect your applications and automate repetitive tasks — accessible for professionals of all technical backgrounds.

Watch Step By Step Video Tutorial Below


1. Accessing Pabbly Connect for Integration

To begin integrating Google Sheets with AWeber, you first need to access Pabbly Connect. Open your browser and navigate to Pabbly’s website. You will find options to either sign in or sign up for a free account.

If you are a new user, click on ‘Sign Up for Free’ to create an account. Existing users can simply click on ‘Sign In’. After logging in, you will be directed to the Pabbly Connect dashboard where you can start creating your integrations.


2. Creating a Workflow in Pabbly Connect

Once you’re on the dashboard, the next step is to create a new workflow in Pabbly Connect. Click on the ‘Create Workflow’ button. You will be prompted to name your workflow and select a folder to save it in.

  • Name your workflow as ‘Create AWeber Subscriber from Google Sheets’.
  • Select the folder named ‘Automations’.

After filling in these details, click on ‘Create’. This action will open the workflow window where you can set up triggers and actions for your integration.


3. Setting Up Google Sheets as Trigger in Pabbly Connect

The next step involves setting Google Sheets as the trigger application in Pabbly Connect. In the workflow window, search for and select Google Sheets as your trigger application.

Choose the trigger event as ‘New or Updated Spreadsheet Row’. After selecting this, Pabbly Connect will provide you with a webhook URL. Copy this URL as it will be used to connect your Google Sheets.


4. Configuring Google Sheets to Work with Pabbly Connect

To connect Google Sheets with Pabbly Connect, open your Google Sheets document. Navigate to Extensions, then Add-ons, and select ‘Get Add-ons’. Search for ‘Pabbly Connect Webhooks’ and install the add-on if you haven’t done so already.

  • After installation, refresh your Google Sheets page.
  • Go to Extensions, select Pabbly Connect Webhooks, and click on ‘Initial Setup’.
  • Paste the copied webhook URL and select the trigger column, which is typically the final data column.

After configuring these settings, click on submit. This will establish a connection between Google Sheets and Pabbly Connect, allowing for automated data transfer.


5. Setting Up AWeber as Action in Pabbly Connect

Now that your trigger is set, the next step is to configure AWeber as the action application within Pabbly Connect. Search for AWeber in the action application field and select it.

Choose the action event as ‘Add or Update a Subscriber’. If you haven’t connected your AWeber account yet, you will need to add a new connection and log in to your AWeber account to grant Pabbly Connect access.

Map the required fields such as full name, email, phone number, and city from the previous Google Sheets response. After mapping these details, click on ‘Save and Send Test Request’. If everything is set up correctly, you will receive a positive response indicating a new subscriber has been successfully created in AWeber.


Conclusion

This tutorial demonstrated how to integrate Google Sheets with AWeber using Pabbly Connect. By following these steps, you can automate your lead management process, ensuring that new leads are promptly added to your email marketing system. This integration enhances your ability to follow up with potential customers efficiently.

Ensure you check out Pabbly Connect to create business automation workflows and reduce manual tasks. Pabbly Connect currently offer integration with 2,000+ applications.

Integrating Just with GPT: A Step-by-Step Guide to Automated WhatsApp Responses

Learn how to integrate Just with GPT for personalized WhatsApp messages using Elementor forms in this detailed tutorial. Discover hidden automation capabilities within your existing tools. This guide shows you how to connect your essential applications and permanently eliminate redundant manual processes. with Pabbly Connect.

Watch Step By Step Video Tutorial Below


1. Setting Up the Elementor Form for Just and GPT Integration

In this section, we will focus on setting up the Elementor form that will collect user responses. The form is crucial for integrating Just and GPT effectively. To create the form, you will need to include fields for the user’s name, email, mobile number, and a service selection. using Pabbly Connect

Once the form is created, ensure it is configured to capture all necessary information. You can include the following fields:

  • User Name
  • Email Address
  • Mobile Number
  • Service Selection
  • Description of Requirements

After setting up the form, ensure it is published on your website. This will allow users to submit their information, which will trigger the automation process.


2. Connecting Elementor to Pabbly Connect for Automation

The next step is to connect your Elementor form to Pabbly Connect. This connection will allow the form submissions to trigger automated actions. Start by accessing your Pabbly Connect dashboard and create a new workflow.

Select Elementor as the app and choose the ‘New Form Submission’ trigger event. Pabbly Connect will provide you with a webhook URL, which you need to copy. Next, go back to your Elementor form settings:

  • Edit the form and navigate to ‘Actions After Submit’.
  • Select ‘Webhook’ from the dropdown options.
  • Paste the copied webhook URL into the field provided.
  • Click on ‘Update’ to save your changes.

Now, your Elementor form is successfully connected to Pabbly Connect, and it will send form responses to the webhook URL upon submission.


3. Generating Personalized Messages with GPT

With the Elementor form connected, the next step is to generate personalized messages using GPT. In Pabbly Connect, add a new action step and select GPT as the application. Choose the action event as ‘Ask GPT’.

To connect to GPT, you will need to enter your API key. You can generate this key from your OpenAI account. Once connected, you will set up the prompt for GPT:

Select the AI model you want to use (e.g., GPT-4). Craft a prompt that includes the service and requirement details from the form submission. Map the service and requirement responses from the Elementor trigger step.

This setup will ensure that GPT generates a personalized message based on the user’s input, which can then be sent via WhatsApp.


4. Sending WhatsApp Messages Using the Cloud API

After generating the personalized message with GPT, the next step is to send this message via WhatsApp using the WhatsApp Cloud API. In Pabbly Connect, add another action step and select WhatsApp Cloud API. using Pabbly Connect

Choose the action event as ‘Send Template Message’. You will need to connect your WhatsApp Cloud API account by entering the necessary credentials:

Access token Phone number ID WhatsApp Business account ID

Once connected, select the message template you created in the WhatsApp Cloud API. Map the recipient’s mobile number and the personalized message generated by GPT to the appropriate fields in the template. This setup will allow you to send personalized WhatsApp messages automatically whenever a user submits the form.


5. Testing the Integration for Just and GPT

Now that everything is set up, it’s time to test the integration. Go back to your Elementor form and make a test submission with sample data. Ensure that the form responses include all necessary details. using Pabbly Connect

After submitting the form, check your WhatsApp account to see if you receive the personalized message. This message should include the user’s name and the details generated by GPT based on their input. If the message is received successfully, it confirms that your integration is working correctly.

In case of any issues, double-check the connections and mappings in Pabbly Connect. Make sure all webhook URLs and API keys are correctly configured. Once everything is functioning, your automation is ready to go live!


Conclusion

This tutorial demonstrated how to integrate Just with GPT to automate personalized WhatsApp messages using Elementor forms. By following these steps, you can enhance your customer engagement through automated messaging.

Thanks for following along with this tutorial! Remember to subscribe to the channel for more helpful content like this.

If you found this guide useful, please consider giving it a thumbs up and sharing it with others who might benefit from it.

How to Send Emails Instantly from a Table Using Pabbly Connect

Learn how to use Pabbly Connect to send instant emails from a table with the click of a button, streamlining your communication process. Master proven automation processes with practical implementation examples and strategic recommendations you can apply immediately in your workflow.

Watch Step By Step Video Tutorial Below


1. Accessing Pabbly Connect for Email Automation

To start using Pabbly Connect for email automation, first, navigate to the Pabbly Connect website. Here, you can either sign in or create a free account. This allows you to access the dashboard where you can set up your workflows.

Once logged in, click on the ‘Create Workflow’ button. You will be prompted to name your workflow. For this tutorial, name it something descriptive, like ‘Send Emails from a Table with a Click of a Button.’ This is the first step in leveraging Pabbly Connect for seamless email communication.


2. Setting Up the Trigger in Pabbly Connect

The next step involves setting up a trigger in Pabbly Connect. This is crucial as it defines what action will initiate the email sending process. In this case, the trigger application will be ‘Webhook by Pabbly.’ Select the ‘Catch Webhook’ event as your trigger.

  • Select the ‘Webhook by Pabbly’ application.
  • Choose the ‘Catch Webhook’ event.
  • Copy the provided Webhook URL.

After copying the Webhook URL, you will need to integrate this URL into your table system. This allows Pabbly Connect to listen for requests triggered by button clicks in your table.


3. Creating the Button in Airtable

Now that you have the Webhook URL, go to your Airtable account and create a new column for the button. This button will trigger the email sending process through Pabbly Connect. To do this, click on the plus icon to add a new field, and select ‘Button’ as the field type.

  • Name the button field, e.g., ‘Send Email’.
  • Add a formula that includes the Webhook URL and the record ID.
  • Save your changes in Airtable.

After saving, clicking this button will send a request to Pabbly Connect, which will then trigger the email sending process automatically.


4. Getting Record Details from Airtable

With the button set up, the next step is to configure the action in Pabbly Connect to retrieve the record details from Airtable. For this, you will add another action step in your workflow. Select ‘Airtable’ as the action application and choose the ‘Get Record’ action event.

Connect your Airtable account to Pabbly Connect by selecting the base you previously created. You will need to map the record ID received from the Webhook response to dynamically fetch the relevant details.

Make sure to toggle the mapping option on and select the record ID from the previous step. Once you save this action, Pabbly Connect will retrieve all necessary details to send the email.


5. Sending Email Through Gmail

The final step in this integration is to send the email using Gmail. To do this, add another action step in Pabbly Connect and select ‘Gmail’ as the action application. Choose the ‘Send Email V1’ action event.

You will need to connect your Gmail account and allow Pabbly Connect to access it. After connecting, map the necessary fields such as recipient email, subject, and body using the data retrieved from Airtable.

Once all fields are filled and mapped, click on ‘Save and Send Test Request’. If everything is set up correctly, you will receive a confirmation that the email has been sent successfully. You can then check your Gmail account to verify the email was delivered.


Conclusion

In this tutorial, we demonstrated how to use Pabbly Connect to send emails instantly from a table with just a click of a button. By integrating Airtable and Gmail through Pabbly Connect, you can streamline your email communication process effectively.

Ensure you check out Pabbly Connect to create business automation workflows and reduce manual tasks. Pabbly Connect currently offer integration with 2,000+ applications.

Automate Invoice Creation from Pipe Drive Deals with Simply

Learn how to automate invoice creation in Simply from new deals in Pipe Drive using Pabbly Connect. Step-by-step guide included. This comprehensive guide reveals exactly how to connect your applications and automate repetitive tasks — accessible for professionals of all technical backgrounds.

Watch Step By Step Video Tutorial Below


1. Setting Up Pabbly Connect for Drive and Simply

To automate invoice creation from Drive deals in Simply, we first need to set up a connection using Pabbly Connect. Begin by visiting the Pabbly Connect homepage and signing in or creating a new account. Existing users can simply click on ‘Sign In,’ while new users should select ‘Sign Up for Free’ to create an account.

After logging in, navigate to the dashboard and click on ‘Create Workflow’. You will be prompted to name your workflow. Enter ‘Create Zero Invoices on New Pipe Drive Deals’ and choose a folder for organization. Click on ‘Create’ to proceed. This sets the stage for automating the process between Drive and Simply.


2. Setting Up Trigger for New Deals in Drive

In this section, we will configure the trigger for new deals in Drive. Select Drive as the trigger application and set the event to ‘New Deal’. This means that whenever a new deal is created in Drive, it will trigger an action in Simply. using Pabbly Connect

Next, connect your Drive account by clicking on ‘Add New Connection’. You will need to provide your API token, which can be obtained from your Drive account. Follow these steps to retrieve your API key:

  • Click on your profile icon in the top right corner of Drive.
  • Select ‘Personal Preferences’ from the dropdown.
  • Navigate to the API section and copy your API key.

Paste the API key into Pabbly Connect and save the connection. This allows Pabbly Connect to interact with your Drive account effectively.


3. Configuring Action to Create Invoices in Simply

Now that we have set up the trigger, it’s time to configure the action to create invoices in Simply. In the action step, select Simply as the application and choose the ‘Create Invoice’ event. This action will be executed whenever a new deal is created in Drive. using Pabbly Connect

Connect to your Simply account by clicking on ‘Add New Connection’. Grant Pabbly Connect permission to access your Simply account. Once the connection is established, you will need to fill in the invoice details using the data received from the Drive deal.

Map the fields received from Drive to the corresponding fields in Simply. For example, use the deal title from Drive as the invoice description and the deal amount as the invoice amount. This ensures that every invoice reflects the details of the new deal created in Drive.


4. Mapping Data Between Drive and Simply

Mapping data correctly is crucial for the automation to work seamlessly. In this step, we will map the data from the Drive deal to the Simply invoice fields. Use the data from the previous response to fill in the necessary fields in Simply. using Pabbly Connect

For instance, you will map the contact name, email address, and deal amount. Ensure that the due date is formatted correctly. You may need to use a date-time formatter to adjust the date format to match Simply’s requirements.

  • Map the contact’s name and email from Drive to Simply.
  • Select the correct due date format for Simply.
  • Ensure all mandatory fields are filled out correctly.

After mapping all necessary fields, save your workflow. This completes the setup for automating invoice creation in Simply whenever a new deal is created in Drive.


5. Testing the Automation Workflow

To ensure that our automation works correctly, we need to test the workflow. Go back to your Drive account and create a new deal. Fill in all required fields, such as contact name, organization, deal title, and amount. using Pabbly Connect

Once the deal is created, check Pabbly Connect for a response. If everything is set up correctly, you should see the details of the new deal captured in Pabbly Connect. This indicates that the trigger is functioning as expected.

Finally, check your Simply account to verify that the invoice has been generated. You should see the invoice created with the details from the new deal in Drive. If the invoice appears correctly, your automation is successful!


Conclusion

In this tutorial, we learned how to automate invoice creation in Simply from new deals created in Drive using Pabbly Connect. By following the steps outlined, you can streamline your sales process and enhance operational efficiency.

Thanks for following along with this tutorial! Remember to subscribe to the channel for more helpful content like this.

If you found this guide useful, please consider giving it a thumbs up and sharing it with others who might benefit from it.

Automate Your Workflow: Integrating Google Sheets with Five Star Reputation Using Pabbly Connect

Learn how to automate your workflow by integrating Google Sheets with Five Star Reputation using Pabbly Connect. Step-by-step guide included. Eliminate manual repetitive tasks from your workflow. Discover proven automation methods with intuitive steps designed for efficiency-minded professionals.

Watch Step By Step Video Tutorial Below


1. Setting Up Pabbly Connect for Google Sheets Integration

In this section, we will explore how to set up Pabbly Connect to automate the integration between Google Sheets and Five Star Reputation. First, access the homepage of Pabbly Connect by visiting the URL provided in the video. You will see options to sign in or sign up for a free account.

If you are a new user, click on ‘Sign Up Free’ to create your account. Once you are logged in, you will land on the Pabbly Connect dashboard where you can create a new workflow to connect your applications seamlessly.


2. Creating a Workflow in Pabbly Connect

To create a workflow in Pabbly Connect, click on the ‘Create Workflow’ button located in the top right corner of the dashboard. A dialog box will appear prompting you to name your workflow. For this integration, name it ‘Create Five Star Reputation Contact from New Google Sheets Rows’ and select the folder as Google Sheets.

  • Click on the ‘Create’ button to proceed.
  • You will see the two main components: Trigger and Action.
  • Select Google Sheets as your trigger application.

After selecting Google Sheets, choose the trigger event as ‘New or Updated Spreadsheet Row’. This setup ensures that every time a new row is added, Pabbly Connect will initiate the workflow.


3. Connecting Google Sheets with Pabbly Connect

To connect Google Sheets with Pabbly Connect, you will receive a webhook URL. Copy this URL as it will be used in your Google Sheets. Open your Google Sheets and navigate to Extensions > Add-ons > Get Add-ons.

Search for ‘Pabbly Connect Webhooks’ and install the add-on. Once installed, go back to Extensions, select ‘Pabbly Connect Webhooks’, and click on ‘Initial Setup’. Here, paste the copied webhook URL and set the trigger column, which should be the final data column (e.g., Column G).


4. Setting Up Five Star Reputation in Pabbly Connect

Now, let’s set up the action step in Pabbly Connect. Choose Five Star Reputation as your action application. Select the action event as ‘Create Contacts’. This step will ensure that whenever a new row is added in Google Sheets, a new contact is created in Five Star Reputation automatically.

Click on ‘Connect’ to create a new connection. You will need to enter an API token from your Five Star Reputation account. Access your account, navigate to the integration section, and generate a new token. Copy this token back to Pabbly Connect and click ‘Save’ to establish the connection.


5. Testing the Integration with Pabbly Connect

To test your integration, return to your Google Sheets and add a new row with dummy data. Make sure to enter data in the correct format, including the country code for phone numbers. After entering the data, go back to Pabbly Connect and check for a webhook response.

If everything is set up correctly, you should see the new contact appear in your Five Star Reputation account. This confirms that the automation is working as intended, allowing you to manage leads efficiently without manual entry.


Conclusion

This tutorial demonstrated how to effectively integrate Google Sheets with Five Star Reputation using Pabbly Connect. By following these steps, you can automate your workflow, saving time and reducing manual errors. Enjoy a streamlined process that enhances your lead management.

Ensure you check out Pabbly Connect to create business automation workflows and reduce manual tasks. Pabbly Connect currently offer integration with 2,000+ applications.

Integrating Moxy with Pabbly Connect for Freelancers

Learn how to integrate Moxy with Pabbly Connect to streamline workflows for freelancers. Step-by-step guide included. Follow this definitive guide to creating powerful automated workflows with straightforward, efficiency-focused solutions that save valuable time.

Watch Step By Step Video Tutorial Below


1. Setting Up Pabbly Connect for Moxy Integration

To begin the integration process, you first need to access Pabbly Connect. This platform serves as the central hub for connecting various applications, including Moxy, which is designed for freelancers. After logging into your Pabbly Connect account, create a new workflow to initiate the setup.

In your workflow, you will see two main sections: Trigger and Action. The Trigger is the event that starts the automation, while the Action is what happens as a result of that trigger. This structure is crucial for setting up efficient integrations using Pabbly Connect.


2. Choosing the Trigger Event in Moxy

Once you have your workflow ready, the next step is to select Moxy as your trigger application in Pabbly Connect. The trigger event we will choose is ‘Form Submitted’. This event captures any form submission made in Moxy, allowing Pabbly Connect to respond accordingly.

  • Select Moxy as the trigger application.
  • Choose ‘Form Submitted’ as the trigger event.
  • Copy the webhook URL provided by Pabbly Connect.

After selecting the trigger event, you will see a unique webhook URL generated by Pabbly Connect. This URL is essential for linking Moxy with Pabbly Connect, allowing it to capture the responses from form submissions.


3. Configuring Moxy Settings for Webhook

Now that you have the webhook URL, log into your Moxy account to configure the integration. Navigate to the Workspace Settings and select Integrations. Here, you will find the option to add a new webhook.

Follow these steps to configure your webhook:

  • Go to Workspace Settings in Moxy.
  • Select Integrations and click on ‘Add Rest Hook’.
  • Paste the webhook URL from Pabbly Connect into the endpoint field.
  • Save the settings to finalize the webhook setup.

After saving, you will see a confirmation that the webhook has been successfully added. This integration allows Moxy to send form submission data directly to Pabbly Connect.


4. Testing the Integration with a Form Submission

With the webhook successfully configured, it’s time to test the integration. Go back to your Moxy account and submit a test form. Fill in the required fields and submit the form to initiate the process.

Once the form is submitted, return to Pabbly Connect and check if the response has been captured. You should see the details of the form submission reflected in your workflow.

When testing, ensure that the following information is correctly captured by Pabbly Connect:

First Name Last Name Email Address Phone Number

If all the information appears as expected, the integration is working correctly. This confirms that Pabbly Connect is successfully capturing data from Moxy.


5. Finalizing the Integration Steps

After confirming that the integration works, you can proceed to set up action steps as needed. For example, you can create a record of the form submission in Google Sheets, further enhancing your workflow.

Using Pabbly Connect, you can customize how you want to process the data captured from Moxy. This flexibility allows freelancers to streamline their operations effectively.

To summarize the final steps:

Decide on the action steps based on your requirements. Use the captured data for various applications.

This concludes the tutorial on how to set up a webhook inside Moxy using Pabbly Connect. With this integration, freelancers can manage their workflows more efficiently.


Conclusion

In this tutorial, we explored how to integrate Moxy with Pabbly Connect for freelancers. By following the steps outlined, you can easily capture form submissions and streamline your workflow. This integration enhances productivity and organization for freelancers.

Ensure you check out Pabbly Connect to create business automation workflows and reduce manual tasks. Pabbly Connect currently offer integration with 2,000+ applications.

Integrating Digistore24 with Pabbly Connect: A Step-by-Step Guide

Learn how to integrate Digistore24 with Pabbly Connect using webhooks for seamless automation. Follow our detailed tutorial for step-by-step instructions. Follow this definitive guide to creating powerful automated workflows with straightforward, efficiency-focused solutions that save valuable time.

Watch Step By Step Video Tutorial Below


Understanding Webhooks with Pabbly Connect

In this section, we will explore how webhooks function within Pabbly Connect to facilitate integration. A webhook acts as a bridge between different applications, allowing them to communicate in real-time when specific events occur. This automation enhances efficiency and reduces manual tasks.

Webhooks are essential for triggering actions in Pabbly Connect based on events in applications like Digistore24. For instance, when a new order is placed, the webhook sends the order data to Pabbly Connect, which can then trigger further actions in other connected applications.


Setting Up Webhook in Digistore24 Using Pabbly Connect

To set up a webhook in Digistore24 through Pabbly Connect, first, log into your Digistore24 account. Navigate to the settings and find the integrations section. Here, you will add a new connection for webhooks, which will allow Digistore24 to send data to Pabbly Connect whenever a specified event occurs.

Follow these steps to set up the webhook:

  • Log into your Digistore24 account.
  • Go to Settings > Integrations > Add New Connection.
  • Select Webhook from the available options.

After selecting Webhook, you will need to provide a name for your webhook and the webhook URL generated by Pabbly Connect. This URL is crucial as it directs the data from Digistore24 to your Pabbly Connect workflow.


Configuring Webhook Settings in Pabbly Connect

Once you have set up the webhook in Digistore24, the next step is to configure the webhook settings in Pabbly Connect. This involves specifying the trigger event that will initiate the workflow. In this case, you will choose the ‘New Order’ event to capture details whenever a new order is placed.

To configure the settings, perform the following actions:

  • Select the trigger application as Digistore24.
  • Choose ‘New Order’ as the trigger event.
  • Copy the webhook URL provided by Pabbly Connect.

These steps ensure that every time a new order is made, the relevant data is sent to Pabbly Connect, allowing for further automation and processing.


Testing the Webhook Connection

After configuring the webhook, it’s essential to test the connection to ensure everything is functioning correctly. In Pabbly Connect, you can initiate a test submission to verify that the data is being received as expected. This step is crucial for confirming that your setup is correct and ready for live transactions.

To test the webhook connection, follow these steps:

Go to your Digistore24 account and select a product. Make a test purchase using the checkout page. Return to Pabbly Connect and check for the webhook response.

By performing these steps, you will be able to see if the data from the new order is captured correctly by Pabbly Connect, allowing you to proceed with further automation.


Automating Tasks with Pabbly Connect

Now that the webhook has been set up and tested, you can leverage Pabbly Connect to automate various tasks based on the data received from Digistore24. For example, you can automatically update your CRM with new sales data or send notification emails to customers after a purchase.

Here are some tasks you can automate using Pabbly Connect:

Update customer information in your CRM. Send confirmation emails to customers. Trigger follow-up marketing campaigns.

These automated tasks enhance your workflow efficiency and ensure timely communication with your customers, making Pabbly Connect an invaluable tool for businesses.


Conclusion

In conclusion, using Pabbly Connect to integrate Digistore24 through webhooks simplifies the process of managing online sales and automating tasks. By following the steps outlined in this tutorial, you can efficiently set up and test your webhook, ensuring seamless data transfer and automation.

Ensure you check out Pabbly Connect to create business automation workflows and reduce manual tasks. Pabbly Connect currently offer integration with 2,000+ applications.

Automate WhatsApp Reminders for Webinars Using Pabbly Connect

Learn how to automate WhatsApp reminders for webinars using Pabbly Connect. Step-by-step guide to integrate Webinar Kit and WhatsApp Cloud API. Navigate the automation landscape confidently with clear, structured guidance suitable for professionals regardless of prior technical experience.

Watch Step By Step Video Tutorial Below


1. Accessing Pabbly Connect for Webinar Automation

To automate WhatsApp reminders for webinars, the first step is to access Pabbly Connect. You can do this by visiting the Pabbly Connect website and signing in to your account. If you are a new user, you can sign up for free and get 100 free tasks every month.

After logging in, you will be directed to the Pabbly Connect dashboard. Here, you will find various applications available for integration. Click on the ‘Access Now’ button under Pabbly Connect to start creating your automation workflow.


2. Creating a Workflow in Pabbly Connect

Once on the Pabbly Connect dashboard, creating a workflow is essential for setting up your automation. Click on the ‘Create Workflow’ button located at the top right corner. A dialog box will prompt you to enter a workflow name and select a folder for saving. using Pabbly Connect

  • Enter the workflow name: ‘Sending Automated WhatsApp Reminders for Webinars’.
  • Select a folder where you want to save this workflow.

After filling in these details, click on the ‘Create’ button. This will set up your workflow, allowing you to define the trigger and action processes required for sending WhatsApp reminders.


3. Setting Up the Trigger in Pabbly Connect

The next step is to configure the trigger in Pabbly Connect. Click on the arrow in the ‘Trigger’ section and select ‘Webinar Kit’ as your trigger application. The trigger event will be set to ‘New Webinar Registration’.

After selecting the trigger application, Pabbly Connect will provide you with a unique webhook URL. Copy this URL, as it will be used to connect your Webinar Kit to Pabbly Connect. Open your Webinar Kit dashboard, navigate to the integrations section, and paste the webhook URL in the registration webhook URL field.


4. Configuring Action Steps for WhatsApp Reminders

After successfully setting the trigger, it’s time to configure the action steps in your workflow. The first action will be to create a delay using Pabbly Connect. Select ‘Delay by Pabbly’ as your action application and set the action event to ‘Add Delay Time’.

  • Set the delay to one day before the webinar.
  • Add another action step to format the date and time.

Configure the delay time and ensure it is correctly set to send reminders at the specified intervals. This allows you to automate the sending of WhatsApp messages a day and an hour before the webinar.


5. Finalizing Integration with WhatsApp Cloud API

To complete the automation, you will need to integrate the WhatsApp Cloud API. In the action step, select ‘WhatsApp Cloud API’ and choose the action event ‘Send Template Message’. Connect your WhatsApp account by entering the required details such as token, phone number ID, and WhatsApp business account ID. using Pabbly Connect

Once connected, select the template you created for your WhatsApp reminders. Map the recipient’s mobile number and other variables as required. After setting up these details, click on ‘Save and Send Test Request’ to verify that your reminders are sent correctly.


Conclusion

In this tutorial, you learned how to automate WhatsApp reminders for webinars using Pabbly Connect. By integrating Webinar Kit and WhatsApp Cloud API, you can ensure your attendees receive timely reminders, enhancing their overall experience.

Ensure you check out Pabbly Connect to create business automation workflows and reduce manual tasks. Pabbly Connect currently offer integration with 2,000+ applications.