Automate Medium Posts Using Pabbly Connect and ChatGPT

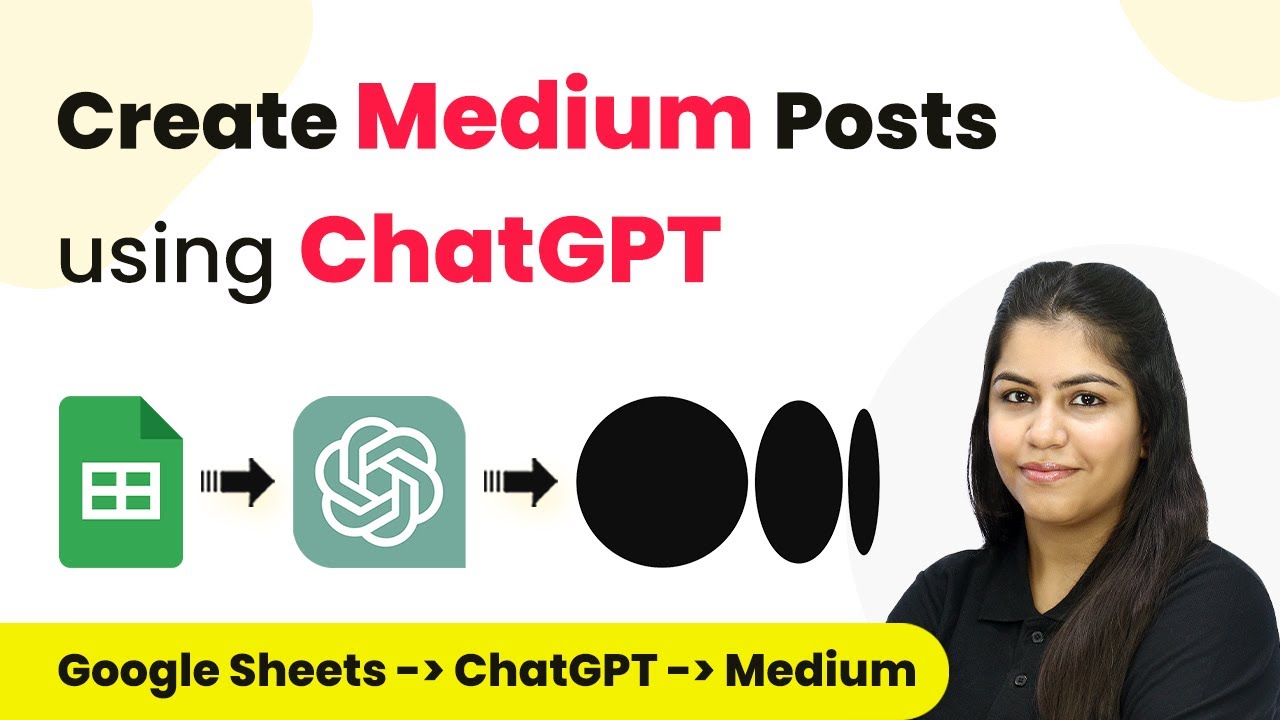
Learn how to automate Medium posts with Pabbly Connect, Google Sheets, and ChatGPT in this step-by-step guide. Streamline your content creation process effortlessly! Transform complex automation concepts into accessible, actionable steps that eliminate unnecessary manual work while maximizing existing application capabilities.

Watch Step By Step Video Tutorial Below


1. Accessing Pabbly Connect for Automation

To start automating your Medium posts, first, access Pabbly Connect by searching for it in your browser. This platform allows you to connect various applications seamlessly, facilitating the integration process.

Upon reaching the landing page, you will find options to sign in or sign up for free. New users can register and enjoy 100 free tasks every month. Existing users should click on ‘Sign In’ to enter their accounts and access all available tools.


2. Creating a Workflow in Pabbly Connect

After signing in, navigate to the dashboard of Pabbly Connect and click on the ‘Create Workflow’ button. Here, you need to name your workflow and select a folder for saving it.

  • Name your workflow, for example, ‘Create Medium Post Using ChatGPT’.
  • Select the folder where you want to save this workflow.
  • Click on ‘Create’ to proceed.

Once created, you will be directed to the workflow window. This is where you will set up triggers and actions for your automation.


3. Setting Up the Trigger in Pabbly Connect

In this step, you will set up the trigger for your automation using Pabbly Connect. Select Google Sheets as your trigger application. This will allow the workflow to initiate whenever a new title is added to your spreadsheet.

For the trigger event, choose ‘New or Updated Spreadsheet Row’. This configuration ensures that every time a new entry is made, it will trigger the workflow. After this, you will be provided with a Webhook URL, which will be used to connect your Google Sheets to Pabbly Connect.

  • Copy the Webhook URL provided by Pabbly Connect.
  • Open your Google Sheets and go to Extensions > Add-ons > Get Add-ons.
  • Search for and install the Pabbly Connect Webhooks add-on.

This setup creates a direct link between your Google Sheets and Pabbly Connect, enabling automated data transfer.


4. Generating Content with ChatGPT via Pabbly Connect

Now that you have set up the trigger, the next step involves generating content using ChatGPT through Pabbly Connect. Select ChatGPT as your action application and choose the action event as ‘Ask ChatGPT’.

When prompted, you will need to create a new connection by entering your OpenAI API key. This key is essential for authenticating your requests to ChatGPT. After successfully connecting, you will set the prompt to generate content based on the title from your Google Sheets.

Map the title from the Google Sheets response to the prompt. Click on ‘Save and Send Test Request’ to generate the content. Check the response to ensure the content was generated successfully.

This step effectively uses Pabbly Connect to automate the content generation process, saving you time and effort.


5. Posting to Medium Using Pabbly Connect

Finally, you will set up the action to post the generated content to Medium through Pabbly Connect. Select Medium as your action application and choose the action event as ‘Create Post’.

After connecting your Medium account, you will map the post title and content generated by ChatGPT. Ensure you select the correct format for the post and adjust the posting status as desired (Pabbly or draft).

Map the post title and content from the previous step. Click on ‘Save and Send Test Request’ to create the post on Medium. Verify the new post appears on your Medium profile.

This integration through Pabbly Connect allows for seamless content sharing, enhancing your online presence without the hassle of manual posting.


Conclusion

In this tutorial, we explored how to automate Medium posts using Pabbly Connect, Google Sheets, and ChatGPT. This process streamlines content creation, enabling users to engage with their audience effectively. By leveraging Pabbly Connect, you can enhance your productivity and maintain a consistent posting schedule effortlessly.

Ensure you check out Pabbly Connect to create business automation workflows and reduce manual tasks. Pabbly Connect currently offer integration with 2,000+ applications.

Automate Content Generation with Pabbly Connect, Google Gemini, and Slack

Learn how to automate content generation using Pabbly Connect, Google Gemini, and Slack for efficient business operations. Master proven automation processes with practical implementation examples and strategic recommendations you can apply immediately in your workflow.

Watch Step By Step Video Tutorial Below


1. Accessing Pabbly Connect for Automation

To start automating content generation, first access Pabbly Connect. This platform allows you to integrate various applications seamlessly. Sign in to your Pabbly Connect account or create a new one if you are a first-time user. After logging in, you will see the dashboard where you can begin creating your workflows.

Once in the dashboard, click on the ‘Create Workflow’ button located at the top right corner. You will be prompted to name your workflow and select a folder for organization. Choose a name like ‘Automatically Generate Content via Google Gemini and Share for Reviews on Slack’ and select a suitable folder.


2. Setting Up Google Sheets as a Trigger in Pabbly Connect

In this step, you will set Google Sheets as the trigger application. Click on the trigger section in Pabbly Connect and select Google Sheets. The trigger event should be set to ‘New or Updated Spreadsheet Row’. This means that every time a new title is added to your Google Sheets, Pabbly Connect will capture this update.

  • Select Google Sheets as the trigger application.
  • Choose ‘New or Updated Spreadsheet Row’ as the trigger event.
  • Copy the Webhook URL provided by Pabbly Connect.

After copying the Webhook URL, open your Google Sheets document. Navigate to Extensions, then to Add-ons, and search for Pabbly Connect Webhooks. Install the add-on if you haven’t already. Once installed, go back to Extensions, select Pabbly Connect Webhooks, and click on Initial Setup. Paste the Webhook URL and set the trigger column to the final data column, which is typically Column B.


3. Generating Content Using Google Gemini

Next, you will set up the action step in Pabbly Connect to generate content using Google Gemini. For this, select Google Gemini as the action application and the action event as ‘Generate Content’. This step will utilize the title and keywords from your Google Sheets to create the desired content.

To connect Google Gemini, click on the connect button and enter the required API key. You can obtain this key from the Google AI Studio by creating a new API key for your project. Once connected, you will need to fill in the prompt field with a detailed request for content generation.

  • Map the title and keywords from the previous step into the prompt.
  • Select the model as Gemini Pro.
  • Click on Save and Send Test Request to generate content.

Once the content is generated, you will receive a response containing the new content created by Google Gemini. This confirms that the integration between Pabbly Connect and Google Gemini is successful, allowing for efficient content generation.


4. Sending Generated Content to Slack for Review

After generating the content, the next step is to send it to your Slack channel for review. In Pabbly Connect, add another action step and select Slack as the action application. The action event should be set to ‘Send Channel Message’ to notify your review team.

Connect Slack to Pabbly Connect by selecting the token type as ‘Bot’. Authorize the connection, then select the channel where you want to send the message, typically named something like ‘Review Team’. In the message field, craft a message explaining that new content has been generated and include the mapped title and content.

Select the Review Team channel in Slack. Map the title and generated content into the message. Click on Save and Send Test Request to send the message.

Check your Slack channel to confirm that the message has been successfully sent. This integration ensures that your review team receives the latest content generated by Google Gemini, streamlining your workflow.


5. Conclusion

In this tutorial, you learned how to automate content generation using Pabbly Connect, Google Gemini, and Slack. By setting up triggers in Google Sheets and actions in Google Gemini and Slack, you can efficiently manage your content workflow. This integration not only saves time but also enhances collaboration within your team.

Ensure you check out Pabbly Connect to create business automation workflows and reduce manual tasks. Pabbly Connect currently offer integration with 2,000+ applications.

With Pabbly Connect as the central platform, you can easily connect various applications to streamline processes and improve productivity. Start automating today to experience the benefits of seamless integration.

Integrating Page with Old Street Using Pabbly Connect: A Step-by-Step Guide

Learn how to integrate Page with Old Street Using Pabbly Connect in this detailed tutorial. Follow the exact steps to automate your processes effectively. Transform complex automation concepts into accessible, actionable steps that eliminate unnecessary manual work while maximizing existing application capabilities. with Pabbly Connect.

Watch Step By Step Video Tutorial Below


1. Setting Up Integration with Page

To begin, we focus on integrating Page to streamline our workflow. The first step is to access the Page dashboard and create a new workflow. This integration allows us to connect various applications seamlessly. using Pabbly Connect

After logging into your Page account, navigate to the workflow section. Here, you can create a new workflow by clicking on the ‘Create Workflow’ button. Name your workflow appropriately, for instance, ‘Page Integration with Old Street’. Once named, select the folder where you want to save this workflow and proceed.


2. Configuring Old Street Integration

Next, we will configure the Old Street application as part of our workflow. The integration with Old Street is crucial for managing our data and ensuring it flows correctly between applications. using Pabbly Connect

  • Select Old Street as your trigger application.
  • Set the trigger event to ‘New Submission’.
  • Connect your Old Street account by following the authorization steps.

After setting the trigger, ensure that you test the connection to verify that it works correctly. This step is essential to confirm that data from Old Street will flow into your Page workflow without any issues.


3. Mapping Data Between Page and Box

In this section, we focus on mapping data between Page and Box. This is vital for ensuring that the information captured in Page is accurately sent to Box. using Pabbly Connect

To map the data, go to the mapping section in your workflow. Here, you will select fields from your Page data and correspond them to the fields in Box. Ensure that you include fields such as email, name, and any other relevant information.

  • Map the email field from Page to Box.
  • Include the name and mobile number fields in the mapping.
  • Double-check that all fields are correctly mapped to avoid data loss.

Once the mapping is complete, save your changes and proceed to the next step in your workflow setup. This ensures that data is correctly transferred from Page to Box whenever a new submission occurs.


4. Finalizing Integration with Make

Now we focus on finalizing the integration with Make. This step is crucial for automating the processes between Page, Box, and Old Street. using Pabbly Connect

In the Make dashboard, navigate to the automation section and select your newly created workflow. Here, you will need to review all the settings and ensure that the triggers and actions are correctly set up.

Make sure to run a test of the entire workflow to confirm that data is flowing correctly between all applications. This test will help identify any issues that may need to be addressed before going live.


5. Testing and Verifying Integration

Finally, we will test and verify the integration to ensure everything works as expected. This is the last step before fully implementing the integration. using Pabbly Connect

To test the integration, submit a test entry through Page and monitor the data flow to Old Street and Box. Check that all fields populate correctly and that the data is accurately reflected in both applications.

If everything works as intended, you can confidently launch your integration. This automation will save time and ensure accuracy in your data management processes.

Conclusion

This guide summarizes the key points and helps you understand the essential features and benefits of using this tool.

Thanks for following along with this tutorial! Remember to subscribe to the channel for more helpful content like this.

If you found this guide useful, please consider giving it a thumbs up and sharing it with others who might benefit from it.


In conclusion, integrating Page with Old Street Using Pabbly Connect streamlines workflows and enhances data management. By following these steps, you can automate your processes effectively and improve efficiency.

How to Use Pabbly Connect for Automated Student Enrollment Based on Google Forms Results

Learn how to automate student enrollment in courses using Pabbly Connect, Google Forms, and Zenler based on quiz results. Revolutionize your productivity approach with just a few strategic clicks. Uncover professional methods for connecting applications and creating workflows that reclaim hours of your week.

Watch Step By Step Video Tutorial Below


1. Accessing Pabbly Connect for Integration

To automate student enrollment based on Google Forms results, first, access Pabbly Connect. This powerful integration platform allows you to connect various applications seamlessly. Begin by signing in to your Pabbly Connect account or create a new one if you are a first-time user.

Once logged in, navigate to the dashboard where you will see options for various applications. To initiate the automation process, follow these steps:

  • Click on ‘Create Workflow’ in the top right corner.
  • Name your workflow appropriately, such as ‘Enroll Students Based on Quiz Results’.
  • Select a folder to save your workflow.

After creating the workflow, you will see options for setting up triggers and actions. This is where Pabbly Connect truly shines, enabling you to automate tasks efficiently.


2. Setting Up Google Forms as the Trigger

In this section, you will set Google Forms as the trigger application in Pabbly Connect. This means that every time a student submits their quiz responses, it will activate the workflow. To do this, select Google Forms from the trigger application options.

Choose the trigger event as ‘New Response Received’. This event will capture responses whenever a student completes the quiz. Here’s how to proceed:

  • Copy the provided webhook URL from Pabbly Connect.
  • Open your Google Form and navigate to the Responses tab.
  • Link the form to a new Google Sheets spreadsheet for response tracking.

After linking, ensure that the Google Sheets document is set to capture all responses. This setup will allow Pabbly Connect to receive data automatically whenever a student submits their quiz.


3. Connecting Google Sheets to Pabbly Connect

Once Google Forms is set up, the next step is to connect Google Sheets to Pabbly Connect. This connection allows the automation to work seamlessly by sending the captured responses directly to Pabbly Connect.

To connect Google Sheets, follow these steps:

Click on Extensions in Google Sheets, then select Add-ons and Get Add-ons. Search and install the Pabbly Connect Webhooks add-on. After installation, go back to Extensions, select Pabbly Webhooks, and click on Initial Setup.

In the Initial Setup dialog, paste the webhook URL you copied from Pabbly Connect. Set the trigger column to the last column of your spreadsheet, which will contain the final responses from students. This setup ensures that every new submission triggers the automation.


4. Enrolling Students in Zenler Based on Scores

Now that you have connected Google Forms and Google Sheets to Pabbly Connect, the next task is to enroll students in Zenler based on their quiz scores. This involves setting up routing conditions in Pabbly Connect to determine which course a student should be enrolled in.

Begin by selecting Router by Pabbly as the action application. This allows you to create conditional paths based on the quiz scores. Here’s how to set it up:

Set the first route to check if the score is greater than 3. If true, enroll the student in the Advanced PHP course in Zenler. For scores less than 3, set up a second route to enroll them in the PHP course for beginners.

After configuring these routes, map the necessary fields such as email, first name, and last name from the Google Forms response to the Zenler enrollment fields. This ensures that the correct student data is sent to Zenler, completing the automation process.


5. Testing the Automation Workflow

With everything set up, it’s time to test the automation you created using Pabbly Connect. Testing ensures that the workflow functions as intended and students are enrolled correctly based on their quiz results. Begin by submitting a response through the Google Form.

After submitting the form, check the Google Sheets to confirm that the response has been recorded. Then, verify in Pabbly Connect that the response was captured correctly. Finally, check Zenler to see if the student was enrolled in the appropriate course based on their score. Here’s what to do:

Submit a quiz response as a test student. Monitor the Google Sheets for the recorded response. Check Zenler to confirm enrollment in the correct course.

By following these steps, you can ensure that your automation is working flawlessly, allowing for efficient student enrollment based on quiz performance.


Conclusion

In this tutorial, we explored how to use Pabbly Connect to automate student enrollment in courses based on Google Forms quiz results. By integrating Google Forms, Google Sheets, and Zenler, you can streamline the enrollment process effectively.

Ensure you check out Pabbly Connect to create business automation workflows and reduce manual tasks. Pabbly Connect currently offer integration with 2,000+ applications.

This automation not only saves time but also enhances the learning experience for students by ensuring they are placed in the right course based on their performance. With Pabbly Connect, managing educational workflows becomes seamless and efficient.

Integrating Facebook Lead Ads with QuickBooks Online Using Pabbly Connect

Learn how to automate customer creation in QuickBooks Online from Facebook Lead Ads using Pabbly Connect. Step-by-step guide included. Transform complex automation concepts into accessible, actionable steps that eliminate unnecessary manual work while maximizing existing application capabilities.

Watch Step By Step Video Tutorial Below


1. Accessing Pabbly Connect to Start Integration

To begin using Pabbly Connect, first visit the Pabbly website and sign in to your account. If you are new, you can sign up for free and utilize 100 tasks each month. Once logged in, you will see the Pabbly dashboard, which displays all available applications.

In the dashboard, locate the option for Pabbly Connect and click on ‘Access Now’ to proceed. This will take you to the workflow creation interface, where you can set up your automation.


2. Creating a Workflow in Pabbly Connect

To create a workflow in Pabbly Connect, click on the ‘Create Workflow’ button located at the top right corner of the dashboard. A dialog box will prompt you to enter a workflow name and select a folder.

  • Workflow Name: Create QuickBooks Online Customer from Facebook Lead Ads
  • Select Folder: Facebook Lead Ads Automations

After filling in the details, click on ‘Create’ to establish your workflow. This sets the stage for automating the integration between Facebook Lead Ads and QuickBooks Online.


3. Setting Up the Trigger in Pabbly Connect

For the automation to function, you need to set up a trigger in Pabbly Connect. Choose Facebook Lead Ads as your trigger application. The event to select is ‘New Lead Instant’, which captures new leads generated through Facebook ads.

After selecting the trigger event, click on the ‘Connect’ button. You will be prompted to add a new connection to Facebook Lead Ads. Ensure you are logged into your Facebook account in a separate tab for a smoother connection process.


4. Configuring the Action Step with QuickBooks Online

Once your trigger is set up, it’s time to configure the action step in Pabbly Connect. Select QuickBooks Online as the action application and choose the ‘Create Customer’ event. This action will create a new customer record in QuickBooks whenever a new lead is captured.

Click the ‘Connect’ button to establish a connection to QuickBooks Online. You will need to log into your QuickBooks account if you haven’t already. After connecting, the system will prompt you to map the lead details from Facebook to the customer fields in QuickBooks.

  • Map First Name: Select from previous step data
  • Map Last Name: Select from previous step data
  • Map Email: Select from previous step data
  • Map Phone Number: Select from previous step data

After mapping the required fields, click on ‘Save and Send Test Request’ to verify the integration. A successful test will confirm that the automation is working as intended.


5. Testing the Integration with Facebook Lead Ads

To ensure everything is functioning correctly, generate a test lead using the Facebook Lead Ads Assisting Tool. Select the appropriate page and lead form, fill in the lead details, and submit the form.

After submitting the test lead, check your QuickBooks Online account to see if the new customer was created successfully. Refresh the customer page, and you should see the new entry reflecting the lead details captured by Pabbly Connect.

This confirms that your automation between Facebook Lead Ads and QuickBooks Online is successfully set up. You can now automate customer creation seamlessly, saving time and effort.


Conclusion

In this tutorial, we explored how to use Pabbly Connect to automate the creation of customers in QuickBooks Online from Facebook Lead Ads. This integration streamlines your workflow, ensuring that all lead information is efficiently captured and recorded.

Ensure you check out Pabbly Connect to create business automation workflows and reduce manual tasks. Pabbly Connect currently offer integration with 2,000+ applications.

Integrating Trigger with Simply Using Pabbly Connect: A Step-by-Step Guide

Learn how to integrate Trigger with Simply Using Pabbly Connect in this detailed tutorial. Follow our step-by-step guide to automate your Google Sheets and Agile processes. with Pabbly Connect.

Watch Step By Step Video Tutorial Below


Setting Up Trigger with Simply for Automation

To begin the integration process, we will set up Trigger to work seamlessly with Simply. This setup allows us to automate the creation of contacts from Google Sheets. Start by logging into your Pabbly account to access the dashboard.

After logging in, click on the option to create a new workflow. Name your workflow appropriately, such as ‘Create Contacts from Google Sheets’. Select the folder where you want to save this workflow, then click on the create button. You will see two boxes appear: one for the trigger and another for the action.


Connecting Google Sheets to Trigger

In this step, we will connect Google Sheets to Trigger to ensure that new data entries are captured. Select Google Sheets as your trigger application and choose the event as ‘New or Updated Spreadsheet Row’. This event will initiate the automation whenever a new row is added to your Google Sheets.

Next, you will need to connect Google Sheets with Pabbly. To do this, a webhook URL will be generated for you. Copy this URL and paste it into your Google Sheets. Ensure you have the Pabbly Connect Webhooks add-on installed in your Google Sheets for this to work. Follow these steps:

  • Click on Extensions > Add-ons > Get Add-ons.
  • Search for Pabbly Connect Webhooks and install it.
  • After installation, refresh your Google Sheets.

Once installed, go to Extensions > Pabbly Connect Webhooks > Initial Setup. Here, paste the webhook URL you copied earlier and specify the trigger column. In this case, it is column D, where the final data will be entered. Click submit to complete the setup.


Testing the Integration with Google Sheets

Now that we have connected Google Sheets to Trigger, it’s time to test the integration. Add a new row to your Google Sheets with the required details such as first name, last name, phone number, and email address. After entering the data, go back to Pabbly Connect and check if it captures the response.

If everything is set correctly, you will see the response indicating that the data has been successfully sent from Google Sheets to Pabbly. This confirms that the connection is working correctly. Now we can move on to the next step, which is setting up the action application.


Creating Contacts in Simply

For the action part of the workflow, we will use Simply to create contacts automatically. Select Simply as the action application and choose ‘Create Contact’ as the action event. If you have a pre-existing connection, you can save it; otherwise, click on ‘Add New Connection’.

You will need to enter your API key from Simply. To obtain this key, log into your Simply account, go to settings, and find the API settings. Copy the API key and paste it into Pabbly Connect. After saving, you will see an authorization success message.

  • Map the fields from Google Sheets to Simply.
  • Enter the first name, last name, email, and any other required fields.
  • Click on ‘Save and Send Test Request’ to create the contact.

Once you receive a successful response, check your Simply account to verify that the contact has been created successfully.


Verifying the Automation Works

Now it’s crucial to verify that the automation between Trigger and Simply is functioning correctly. Go back to Google Sheets and add another new entry. This time, ensure the details are different to see if the automation captures the new data correctly.

After adding the new row, return to your Simply account and check the contacts section. You should see the new contact added automatically with the information from your Google Sheets. This confirms that the integration is working smoothly and efficiently.

In summary, we successfully integrated Google Sheets with Simply using Trigger through Pabbly Connect. This automation saves time and ensures that your contact information is always up to date without manual entry.


Conclusion

This tutorial demonstrated how to integrate Trigger with Simply Using Pabbly Connect effectively. By following these steps, you can automate your data entry from Google Sheets to Simply, ensuring a seamless workflow. This integration enhances efficiency and accuracy in your processes.

Thanks for following along with this tutorial! Remember to subscribe to the channel for more helpful content like this.

If you found this guide useful, please consider giving it a thumbs up and sharing it with others who might benefit from it.

Integrating Google with GetResponse Using Pabbly Connect

Learn how to seamlessly integrate Google with GetResponse using Pabbly Connect in this step-by-step tutorial. Discover how to seamlessly connect your essential tools through accessible instructions that make powerful automation available to professionals at every skill level.

Watch Step By Step Video Tutorial Below


1. Creating Automation with Google and GetResponse

In this section, we will create automation using Pabbly Connect to connect Google with GetResponse. Start by visiting the Pabbly Connect dashboard and signing in to your account. If you’re a new user, you can sign up for free and get 100 tasks per month.

Once logged in, click on Pabbly Connect and select the option to create a workflow. Name your workflow something descriptive, like ‘GetResponse Contact from New Google Sheets.’ This will help you identify the automation later.


2. Setting Up Trigger with Google Sheets

The next step involves setting up the trigger using Google Sheets. Click on the trigger option and select Google Sheets as the application. Choose the event as ‘New or Updated Spreadsheet Row.’ This means the automation will trigger when a new row is added or updated in your specified Google Sheet.

  • Ensure your Google Sheet has columns for Name, Phone Number, and Email.
  • Connect your Google account to Pabbly Connect by following the on-screen prompts.
  • Select the specific Google Sheet you want to use.

After configuring the trigger, click on the ‘Test Trigger’ button. This ensures that the connection between Pabbly Connect and Google Sheets is working correctly. If the test is successful, proceed to the next step.


3. Creating Action in GetResponse

Now that we have set up the trigger with Google Sheets, it’s time to create the action in GetResponse. Click on the action step and select GetResponse as the application. Choose the action event as ‘Create Contact.’ This action will add the new contact details to your GetResponse account. using Pabbly Connect

Fill in the required fields for creating a contact in GetResponse. You will need to map the data from Google Sheets to the corresponding fields in GetResponse. For instance, map the Name field from Google Sheets to the Name field in GetResponse.

  • Map the Phone Number from Google Sheets to the Phone Number field in GetResponse.
  • Map the Email address from Google Sheets to the Email field in GetResponse.

After mapping all required fields, click on the ‘Save’ button to finalize the action setup. This step ensures that whenever a new entry is made in Google Sheets, it will automatically create a contact in GetResponse.


4. Testing the Integration

With the trigger and action set up, it’s time to test the integration. Go back to your Google Sheet and enter some dummy data in the specified columns. This data should include a name, phone number, and email address.

Once you have entered the data, return to Pabbly Connect and click on the ‘Send Test Request’ button. This will send the data from Google Sheets to GetResponse. If everything is set up correctly, you should see a success message confirming that the contact has been created in GetResponse.

To verify, log into your GetResponse account and check the contacts section. You should see the new contact listed there, confirming that the integration between Google and GetResponse via Pabbly Connect is working perfectly.


Conclusion

This tutorial demonstrates how to effectively integrate Google with GetResponse using Pabbly Connect. By following the steps outlined, you can automate the process of adding contacts from Google Sheets to GetResponse seamlessly. This integration enhances your workflow and saves time.

Thanks for following along with this tutorial! Remember to subscribe to the channel for more helpful content like this.

If you found this guide useful, please consider giving it a thumbs up and sharing it with others who might benefit from it.

Recovering Abandoned Carts with Pabbly Connect and WhatsApp Integration

Learn how to recover abandoned carts using Pabbly Connect and WhatsApp Cloud API to boost your BigCommerce sales. Follow our detailed tutorial step-by-step! Explore efficient methods for automating routine tasks with clear, concise instructions suited for both newcomers and experienced professionals.

Watch Step By Step Video Tutorial Below


1. Setting Up Pabbly Connect for Integration

To recover abandoned carts, the first step is to set up Pabbly Connect. Start by visiting the Pabbly Connect website and signing in or signing up for a new account. If you are new, click on the ‘Sign Up for Free’ button to create your account, which takes only a few minutes. Once logged in, you will be directed to the dashboard where you can create a new workflow.

After accessing the dashboard, click on the ‘Create Workflow’ button. Name your workflow something descriptive, like ‘Recover BigCommerce Abandoned Carts with WhatsApp’. Select the appropriate folder for saving your workflow. This sets the foundation for your integration with BigCommerce and WhatsApp.


2. Configuring BigCommerce as the Trigger in Pabbly Connect

In this section, we will configure BigCommerce as the trigger application in Pabbly Connect. After creating your workflow, click on the trigger section and search for BigCommerce. Select it as your trigger application. The trigger event will be set to ‘Cart Abandoned’. This means that every time a cart is abandoned, Pabbly Connect will initiate the workflow.

  • Search for BigCommerce in the trigger application section.
  • Select ‘Cart Abandoned’ as the trigger event.
  • Connect BigCommerce to Pabbly Connect by providing the necessary credentials.

After setting up the trigger, click on ‘Save and Send Test Request’. This will allow Pabbly Connect to listen for any abandoned carts from your BigCommerce store. Make sure to abandon a cart in your store to test this setup.


3. Integrating WhatsApp Cloud API with Pabbly Connect

The next step involves integrating WhatsApp Cloud API for sending messages to customers who abandon their carts. In your Pabbly Connect workflow, add an action step and search for WhatsApp Cloud API. Choose ‘Send Template Message’ as the action event. This will enable you to send personalized messages to customers on WhatsApp. using Pabbly Connect

To connect WhatsApp Cloud API, you will need to provide your Access Token, Phone Number ID, and WhatsApp Business Account ID. If you haven’t set up your WhatsApp Cloud API account yet, follow the instructions provided by Pabbly Connect to create your account and obtain these details.

  • Access your WhatsApp Cloud API account to retrieve the Access Token and Phone Number ID.
  • Paste these details into Pabbly Connect to establish the connection.
  • Select the message template you want to use for sending notifications.

After successfully connecting WhatsApp Cloud API, you can now customize the message template that will be sent to customers who abandon their carts. This makes it easier to engage with customers directly and encourage them to complete their purchases.


4. Testing the Integration and Sending Messages

Now that you have set up both BigCommerce and WhatsApp Cloud API in Pabbly Connect, it’s time to test the integration. Ensure you have abandoned a cart in your BigCommerce store. After the cart is abandoned, Pabbly Connect will automatically trigger the WhatsApp message to be sent to the customer.

Check your WhatsApp to see if the message has been received. The message should inform the customer about the abandoned items and offer a special discount or link to complete their purchase. This direct communication is crucial for enhancing customer engagement and recovering lost sales.

Verify that the customer receives the WhatsApp message. Ensure the message contains the correct product details and a valid link. Confirm that the discount or offer is accurately represented in the message.

Once you confirm that the messages are being sent correctly, your integration is fully functional. This automation between BigCommerce and WhatsApp using Pabbly Connect will significantly improve your ability to recover abandoned carts.


5. Conclusion: Boosting Sales with Pabbly Connect

In conclusion, using Pabbly Connect to integrate BigCommerce and WhatsApp Cloud API is a powerful method for recovering abandoned carts. By automating the process of sending personalized messages, you can increase customer engagement and drive sales. Whether you are a small business or a large enterprise, this integration can streamline your operations and enhance your revenue.

Ensure you check out Pabbly Connect to create business automation workflows and reduce manual tasks. Pabbly Connect currently offer integration with 2,000+ applications.

Follow these steps to set up your integration and start recovering lost sales through effective communication with your customers. With Pabbly Connect, you can create seamless workflows that enhance your business efficiency and customer satisfaction.

Integrating Central Station CRM with Facebook Lead Ads Using Automation

Learn how to integrate Central Station CRM with Facebook Lead Ads using Automation. Follow this step-by-step tutorial to streamline your lead management process. Explore systematic approaches to creating efficient automation solutions that convert technical concepts into practical, implementable instructions. with Pabbly Connect.

Watch Step By Step Video Tutorial Below


1. Setting Up Automation with Central Station CRM

To integrate Central Station CRM with Facebook Lead Ads, the first step is to set up your automation. This process allows you to automatically create a new contact in Central Station CRM whenever a lead is generated through Facebook Ads. This integration simplifies lead management for businesses.

Next, you will need to use an automation software like Make. After logging into your account, you can create a workflow to manage the integration. Ensure you have both your Central Station CRM and Facebook accounts ready for connection.


2. Creating a Workflow for Facebook Lead Ads

The next step is to create a workflow for your Facebook Lead Ads. Click on the ‘Create Workflow’ button in Make. Name your workflow something descriptive, like ‘Facebook Lead Ads to Central Station CRM’. This helps in identifying the automation later. using Pabbly Connect

  • Select the folder where you want to save the workflow.
  • Choose the trigger application as Facebook Lead Ads.
  • Set the trigger event to ‘New Lead Instant’.

After setting up the trigger, connect your Facebook account to Make. This connection will allow Make to capture new leads automatically. Ensure you have the correct permissions set for your Facebook account.


3. Connecting Facebook Lead Ads to Central Station CRM

Once you have your workflow set up, the next step is to connect your Facebook Lead Ads to Central Station CRM. You will need to select your Facebook page and lead form that you want to use. This is crucial for ensuring that the leads generated are sent to the right destination.

After selecting your page, you will need to run a test submission. This is done by generating a test lead through the Facebook testing tool. Once you have submitted a test lead, Make will capture this information, and you can proceed to the next step.


4. Creating New Contacts in Central Station CRM

The final step in this automation process is to create new contacts in Central Station CRM using the lead information captured from Facebook. Select the action application as Central Station CRM and choose the action event as ‘Create Person’.

To connect your Central Station CRM account, you will need your API key. Navigate to your Central Station CRM settings, generate a new API key, and input it into Make. This step is essential for establishing a secure connection.

  • Map the lead data fields such as name, email, and phone number from the Facebook lead submission.
  • Ensure that required fields are filled correctly.
  • Click on ‘Save and Send Test Request’ to check if the contact is created successfully.

If everything is set up correctly, you will see a confirmation that a new contact has been created in your Central Station CRM. This confirms that your automation is working as intended.


5. Testing Your Automation Workflow

After setting up your automation, it’s crucial to test it to ensure everything functions smoothly. Generate a new test lead through your Facebook Lead Ads and check if the contact appears in Central Station CRM.

To do this, delete any previous test leads in your Facebook Lead Ads testing tool. Then, submit a new test lead with the required information. After submission, refresh your Central Station CRM to check for the new contact.

Upon successful testing, your integration will allow seamless lead management from Facebook to Central Station CRM, streamlining your business processes.

Conclusion

This guide summarizes the key points and helps you understand the essential features and benefits of using this tool.

Thanks for following along with this tutorial! Remember to subscribe to the channel for more helpful content like this.

If you found this guide useful, please consider giving it a thumbs up and sharing it with others who might benefit from it.


In conclusion, integrating Central Station CRM with Facebook Lead Ads using automation simplifies lead management. Following the steps outlined ensures that new leads are captured and organized effectively, enhancing your business’s efficiency.

Integrating The Happening, Channel, and Slack with Pabbly Connect

Learn how to integrate The Happening, Channel, and Slack using Pabbly Connect in this step-by-step tutorial. Automate your workflows effortlessly! Learn to create powerful connections between your critical applications without requiring specialized programming knowledge or extensive technical background.

Watch Step By Step Video Tutorial Below


1. Setting Up Pabbly Connect for Integration

To begin using Pabbly Connect, log in to your Pabbly Connect account. This platform is essential for integrating various applications like The Happening, Channel, Simply, Google, Google Sheets, and Slack. Once logged in, navigate to the dashboard to start creating your automation workflows.

In the Pabbly Connect dashboard, you will see options to create a new workflow. This is where you will set up triggers and actions that define how data flows between applications. Remember, Pabbly Connect acts as the intermediary that allows you to automate tasks across these platforms seamlessly.


2. Creating a Trigger Event in Pabbly Connect

For this integration, we will set up a trigger event using Pabbly Connect to capture when a new task is created in The Happening. Start by selecting The Happening as your trigger application. This is crucial because it defines the event that will initiate your workflow.

  • Select ‘The Happening’ as your trigger application.
  • Choose the trigger event, such as ‘New Task Created’.
  • Copy the generated webhook URL provided by Pabbly Connect.

After copying the webhook URL, you will need to log into The Happening and configure the webhook to point to this URL. This allows The Happening to send data to Pabbly Connect whenever a new task is created.


3. Configuring The Happening for Webhook

In The Happening, navigate to the settings section and find the webhook configuration options. This step is vital as it establishes the connection between The Happening and Pabbly Connect. Paste the copied webhook URL into the designated field to link the two applications.

Ensure you select the event type that you want to track. For instance, if you want to capture new tasks, choose the ‘Task Created’ event. This way, every time a task is created, The Happening will send the relevant data to Pabbly Connect.


4. Testing the Integration and Adding Actions

Once the webhook is configured, it’s time to test the integration. Go back to Pabbly Connect and create a new task in The Happening. This action will trigger the webhook and send data to Pabbly Connect. Check the response in Pabbly Connect to ensure that the data is being captured correctly.

  • Create a new task in The Happening.
  • Verify that Pabbly Connect receives the task details successfully.
  • Add Slack as an action application to send notifications.

By adding Slack as an action step, you can automatically notify your team whenever a new task is created. This integration enhances communication and ensures everyone is informed in real time, showcasing the power of Pabbly Connect.


5. Finalizing the Workflow in Pabbly Connect

To finalize your workflow, ensure that all actions are correctly set up in Pabbly Connect. You can add multiple actions, such as sending the task details to Google Sheets for record-keeping or notifying your team via Slack. This flexibility makes Pabbly Connect a powerful tool for managing integrations.

After configuring all the actions, save your workflow and enable it. This will ensure that every time a new task is created in The Happening, the specified actions will automatically occur, demonstrating the efficiency of using Pabbly Connect for automation.


Conclusion

In summary, this tutorial has demonstrated how to integrate The Happening, Channel, and Slack using Pabbly Connect. By following these steps, you can automate your workflows and enhance productivity across your applications. Embrace the power of automation with Pabbly Connect!

Ensure you check out Pabbly Connect to create business automation workflows and reduce manual tasks. Pabbly Connect currently offer integration with 2,000+ applications.