Automate Subtitle Generation Using Pabbly Connect with Dropbox and Google Docs

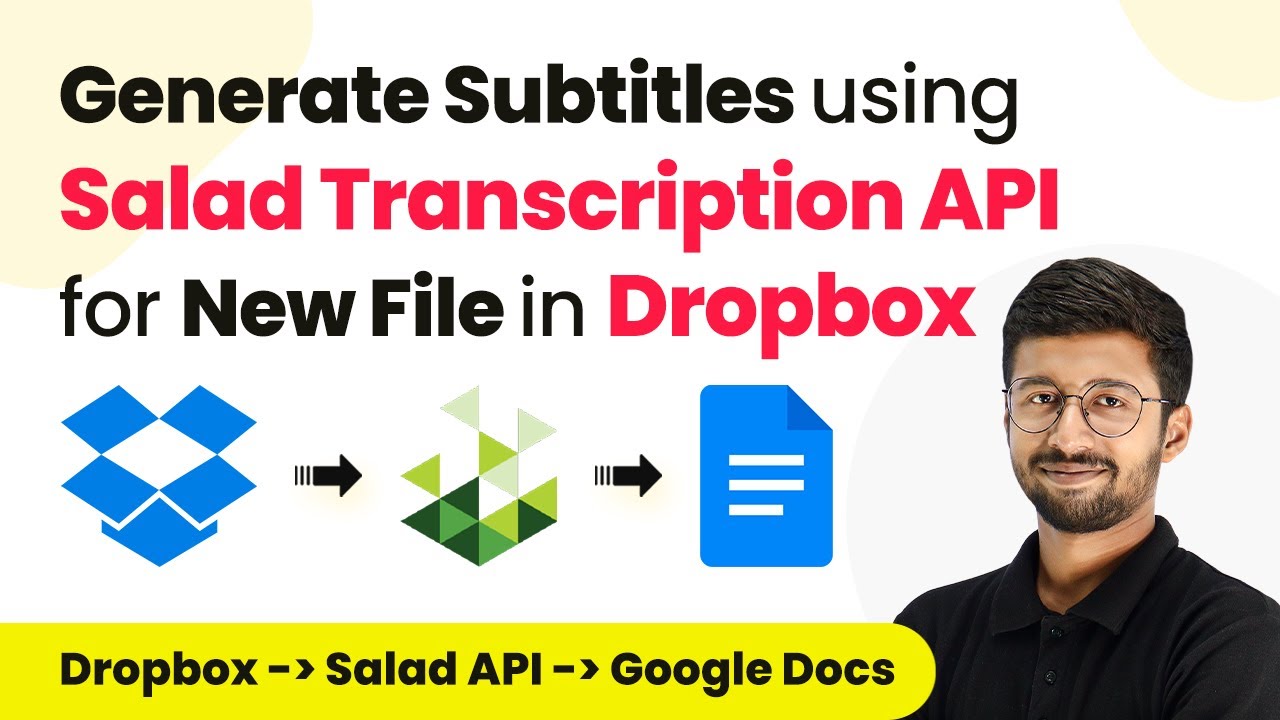
Learn how to automate subtitle generation using Pabbly Connect, Dropbox, and Google Docs. Follow this step-by-step tutorial for seamless integration. Navigate the automation landscape confidently with clear, structured guidance suitable for professionals regardless of prior technical experience.

Watch Step By Step Video Tutorial Below


1. Accessing Pabbly Connect for Automation

To start automating subtitle generation, first, access Pabbly Connect. This platform allows seamless integration between Dropbox and Google Docs, streamlining your workflow. Sign up for a free account to get started.

After logging into Pabbly Connect, navigate to the dashboard where you can create a new workflow. Click on the ‘Create Workflow’ button and name your workflow, for example, ‘Dropbox to Salid API to Google Docs’. This naming helps in identifying your automation easily.


2. Setting Up the Dropbox Trigger in Pabbly Connect

The first step in your automation is setting up a trigger from Dropbox. In Pabbly Connect, choose Dropbox as the app and select the trigger event as ‘New File’. This ensures that every time a new video is uploaded, it activates the workflow.

  • Select the Dropbox account you want to connect.
  • Specify the folder path where new videos will be uploaded.
  • Click ‘Save and Send Test Request’ to ensure the connection works properly.

After these steps, you’ll receive a response from Dropbox confirming the new file details. This response will include the sharable link, which is crucial for the next steps in your automation.


3. Sending Video Files to Salid Transcription API

Once you have the Dropbox trigger set up, the next step is to send the video file to the Salid Transcription API using Pabbly Connect. In the action step, select Salid Transcription API and choose the action event as ‘Create AI Transcription’.

Connect your Salid account by entering the API key and organization name. Then, map the direct Pabbly URL of the video file received from Dropbox into the designated field in Pabbly Connect. Ensure you provide the correct language code, which for English is ‘en’.

  • Select whether you want word-level timestamps.
  • Choose to receive subtitles in SRT format.

After setting these parameters, click ‘Save and Send Test Request’ to initiate the transcription process. This step allows you to automatically generate subtitles for the uploaded video.


4. Adding Subtitles to Google Docs

After obtaining the transcription, the final step is to add the subtitles into a Google Docs template using Pabbly Connect. Choose Google Docs as the app in your action step and select ‘Create Document from Template’ as the action event.

Connect your Google Docs account and select the template document you previously set up. Then, map the required fields, including the file name, file URL, and subtitle content from the Salid API response.

Specify the folder in Google Drive where the new document will be saved. Ensure that the variables in the template are correctly mapped to the data from Dropbox and Salid.

Once everything is set, click ‘Save and Send Test Request’ to create the new document. Your subtitles will now be automatically added to a Google Docs document, making the process efficient and organized.


5. Testing the Automation Workflow

To ensure your automation is working correctly, upload a new video file to the designated Dropbox folder. Pabbly Connect will check for new files every 10 minutes and trigger the workflow.

After the video is uploaded, wait for a few moments, and check your Google Drive folder. You should see a new document created with the subtitles included. This confirms that the integration between Dropbox, Salid API, and Google Docs via Pabbly Connect is functioning smoothly.

By following these steps, you can automate subtitle generation efficiently. This not only saves time but also enhances your content creation process significantly.


Conclusion

In this tutorial, we explored how to automate subtitle generation using Pabbly Connect, Dropbox, and Google Docs. By implementing this workflow, you can streamline your video production process and save valuable time.

Ensure you check out Pabbly Connect to create business automation workflows and reduce manual tasks. Pabbly Connect currently offer integration with 2,000+ applications.

How to Integrate WhatsApp and Slack Using Pabbly Connect

Learn how to automate notifications on Slack and send messages via WhatsApp using Pabbly Connect in this detailed tutorial. Streamline your workflow, save valuable time, and eliminate repetitive tasks through powerful automation capabilities.

Watch Step By Step Video Tutorial Below


1. Setting Up Pabbly Connect

To start automating your processes, the first step is to set up Pabbly Connect. You need to sign in to your Pabbly account or create a new one. This platform allows you to connect various applications without any coding.

After signing in, you will see a dashboard displaying all Pabbly applications. Click on Pabbly Connect to access the workflow creation feature. This is where you will set up your automation between LinkedIn, WhatsApp, and Slack.


2. Creating a New Workflow in Pabbly Connect

Next, you will create a new workflow in Pabbly Connect. Click on the ‘Create Workflow’ button, and you will be prompted to enter the workflow name and select a folder for saving it. Name your workflow something descriptive, like ‘Send WhatsApp Messages and Notify Team on Slack’.

  • Click on ‘Create’ after entering the workflow name.
  • You will see two boxes: one for the Trigger and another for Action.

The trigger will be an event that starts your automation. In this case, select LinkedIn as the trigger application and choose the event as ‘New Lead Generated’. This means whenever a new lead is generated through LinkedIn, the workflow will be triggered.


3. Configuring the Trigger with LinkedIn

After selecting LinkedIn as your trigger, you will need to connect your LinkedIn account. Click on ‘Connect’ and follow the prompts to authorize Pabbly to access your LinkedIn account. Once connected, select the lead generation form you want to monitor.

Fill in the required details, such as your email and phone number, to test the trigger. Once you submit the form, go back to Pabbly Connect and click on ‘Save and Send Test Request’ to ensure the connection is successful. This will capture the response from the LinkedIn form.


4. Sending WhatsApp Messages via Pabbly Connect

Now that your trigger is set up, it’s time to send a WhatsApp message. Select WhatsApp as your action application and choose ‘Send Template Message’ as the action event. This will allow you to send a pre-defined message to your leads. using Pabbly Connect

  • Connect your WhatsApp account by clicking on ‘Connect’.
  • You will need to enter your WhatsApp API details, including the access token.

Once connected, draft your message using dynamic fields that will change based on the lead’s information. For example, include the lead’s name and company in the message. After drafting, click on ‘Save and Send Test Request’ to send a test message through WhatsApp.


5. Notifying Your Team on Slack with Pabbly Connect

The final step is to notify your team on Slack. Select Slack as the next action application and choose ‘Send Channel Message’ as the action event. Again, you will need to connect your Slack account to Pabbly Connect.

After connecting, select the channel where you want to send the message. Draft a message that includes details about the new lead, such as their name and email. Click on ‘Save and Send Test Request’ to ensure that your team receives the notification on Slack.

Conclusion

This guide summarizes the key points and helps you understand the essential features and benefits of using this tool.

Thanks for following along with this tutorial! Remember to subscribe to the channel for more helpful content like this.

If you found this guide useful, please consider giving it a thumbs up and sharing it with others who might benefit from it.


In this tutorial, we covered how to automate sending WhatsApp messages and notifying your team on Slack using Pabbly Connect. This integration helps streamline your workflow and keeps your team informed about new leads effectively.

Integrating LinkedIn Leads with Active Campaign and Notion Using Pabbly Connect

Learn how to automate the process of adding LinkedIn leads to Active Campaign and Notion using Pabbly Connect in this step-by-step tutorial. This comprehensive guide reveals exactly how to connect your applications and automate repetitive tasks — accessible for professionals of all technical backgrounds.

Watch Step By Step Video Tutorial Below


1. Accessing Pabbly Connect for Integration

To begin integrating LinkedIn leads with Active Campaign and Notion, first, you need to access Pabbly Connect. Start by visiting the Pabbly Connect website and sign in to your account. If you are a new user, you can sign up for free and get 100 free tasks every month.

Once logged in, you will see the Pabbly Connect dashboard. Click on the ‘Access Now’ button under the Pabbly Connect app to enter the automation setup area. Here, you can create a workflow that automates the process of adding leads to Active Campaign and recording them in Notion.


2. Creating a Workflow in Pabbly Connect

In this section, we will create a workflow to automate the integration process. Click on the ‘Create Workflow’ button located at the top right corner of your Pabbly Connect dashboard. A dialog box will prompt you to name your workflow. using Pabbly Connect

  • Name your workflow, for example, ‘Add LinkedIn Leads to Active Campaign as Contacts’.
  • Select a folder to save your workflow.

After naming your workflow and selecting the appropriate folder, click on the ‘Create’ button. You will then see two sections: Trigger and Action. The Trigger section captures the event that starts the automation, while the Action section defines what happens as a result.


3. Setting Up Trigger in Pabbly Connect

For this automation, we will set up the trigger as LinkedIn Lead Gen Forms. This means that whenever a new lead is generated through LinkedIn, it will trigger the workflow in Pabbly Connect. Select ‘LinkedIn Lead Gen Forms’ as your trigger application and choose ‘New Lead Gen Form Response’ as your trigger event.

Click on the ‘Connect’ button to establish a connection. If prompted, add a new connection by clicking on the ‘Add New Connection’ option. You will need to authorize Pabbly Connect to access your LinkedIn account. After successful authorization, select the specific LinkedIn account and the lead form you created earlier.


4. Action Steps in Pabbly Connect for Active Campaign

Now that the trigger is set up, we will move to the Action step to add the lead as a contact in Active Campaign. Select ‘Active Campaign’ as your action application and choose ‘Create or Update Contact’ as the action event. Click on the ‘Connect’ button to link your Active Campaign account with Pabbly Connect.

For the connection, you will need the API key and URL from your Active Campaign account. Navigate to the settings in Active Campaign, find the Developer section, and copy the API URL and key. Make sure to remove the ‘https://’ part from the URL before pasting it into Pabbly Connect.

  • Map the email, phone number, and other necessary fields from the LinkedIn lead response.
  • Click on ‘Save and Send Test Request’ to confirm that the contact is created in Active Campaign.

After mapping the fields and saving the request, check your Active Campaign account to see if the new contact appears. This confirms that the integration is functioning correctly.


5. Adding Lead Details to Notion Using Pabbly Connect

Finally, we will set up another action step to create a record of the lead details in Notion. Select ‘Notion’ as your action application and choose ‘Create Database Item’ as the action event. Click on ‘Connect’ to link Notion with Pabbly Connect.

After connecting, select the Notion database where you want to store the lead details. Map the email and phone number fields from the LinkedIn lead response to the corresponding fields in your Notion database. Once all necessary details are filled out, click on ‘Save and Send Test Request’ to create the item in Notion.

Check your Notion database to confirm that the lead details have been successfully added. This means that the integration between LinkedIn leads, Active Campaign, and Notion is complete and functional.


Conclusion

In this tutorial, we demonstrated how to automate the process of adding LinkedIn leads to Active Campaign as contacts and recording their details in Notion using Pabbly Connect. This integration streamlines lead management, making it efficient and error-free.

Ensure you check out Pabbly Connect to create business automation workflows and reduce manual tasks. Pabbly Connect currently offer integration with 2,000+ applications.

Integrating Google Ads Leads with Salesforce and Microsoft Teams Using Pabbly Connect

Learn how to integrate Google Ads leads into Salesforce and notify your team on Microsoft Teams using Pabbly Connect. Step-by-step tutorial included. Master proven automation processes with practical implementation examples and strategic recommendations you can apply immediately in your workflow.

Watch Step By Step Video Tutorial Below


1. Accessing Pabbly Connect for Integrations

To start using Pabbly Connect, first visit the Pabbly Connect website. You need to sign in to your account. If you are a new user, you can sign up for free, which allows you to get 100 free tasks every month.

Once logged in, you will see the dashboard with multiple applications. Click on Pabbly Connect to proceed. This will take you to the main interface where you can create workflows for your integrations.


2. Creating a Workflow in Pabbly Connect

To create an automation process, click on the ‘Create Workflow’ button located in the top right corner. A dialog box will appear asking for a workflow name and folder selection. Name your workflow as ‘Create Google Ads Leads as Salesforce Contact and Notify Teams on Microsoft Teams’. using Pabbly Connect

  • Select a folder for your workflow, such as ‘Google Ads Automations’.
  • Click ‘Create’ to finalize the workflow setup.

After creating the workflow, you will see two windows labeled ‘Trigger’ and ‘Action’. The trigger is the event that starts the automation, while the action is the response to that trigger. You can only have one trigger but multiple actions in this setup.


3. Setting Up the Trigger with Google Ads

For the trigger application, select Pabbly Connect and choose Google Ads as the trigger event. Specify the event as ‘New Lead Form Entry’. This means that whenever a new lead is generated via Google Ads, it will automatically be captured by Pabbly Connect.

After selecting the trigger application, you will receive a unique webhook URL. Copy this URL and navigate to your Google Ads campaign settings. In the lead form section, paste the webhook URL into the designated field for webhook integration.

  • Select the fields you want to capture, such as first name, last name, phone number, and email.
  • Send test data to verify that the integration works correctly.

With this setup, Pabbly Connect will now capture the lead details whenever a new lead is generated.


4. Adding Action to Create Salesforce Contacts

Next, it’s time to set up the action step. For the action application, select Salesforce and the action event as ‘Create Contact’. This allows you to add the generated lead as a contact in your Salesforce account.

Click the connect button to authorize Pabbly Connect to access your Salesforce account. After successful authorization, you will be prompted to fill in the contact details using the data from the previous step.

Map the fields for last name, first name, phone number, and email from the lead details received. Specify the lead source as Google Ads.

Once you have filled in all necessary details, click on ‘Save and Send Test Request’. This will create the contact in Salesforce, confirming that the integration is successful.


5. Notifying Teams on Microsoft Teams

Finally, you need to notify your team on Microsoft Teams about the new lead. For this, select Microsoft Teams as the action application and ‘Send Message in a Channel’ as the action event.

Authorize Pabbly Connect to access your Microsoft Teams account. Select the team and channel where you want to send the notification. Write a message template that includes the lead details such as first name, last name, email, and phone number.

Map the lead details into the message template. Send a test message to ensure everything is functioning correctly.

With this final setup, Pabbly Connect will send notifications to your Microsoft Teams channel whenever a new lead is generated, keeping your team informed in real-time.


Conclusion

This tutorial demonstrated how to effectively use Pabbly Connect to integrate Google Ads leads into Salesforce and notify your team on Microsoft Teams. By following these steps, you can automate your lead management process efficiently.

Ensure you check out Pabbly Connect to create business automation workflows and reduce manual tasks. Pabbly Connect currently offer integration with 2,000+ applications.

Integrate Google Sheets with Zoho Sheet Using Pabbly Connect: A Step-by-Step Guide

Learn how to automate data entry between Google Sheets and Zoho Sheet using Pabbly Connect in this detailed tutorial. Streamline your workflow today! Follow this definitive guide to creating powerful automated workflows with straightforward, efficiency-focused solutions that save valuable time.

Watch Step By Step Video Tutorial Below


Accessing Pabbly Connect for Integration

To integrate Google Sheets with Zoho Sheet, we will utilize Pabbly Connect. First, access the Pabbly Connect website at Pabbly.com/connect. If you’re new, you can sign up for a free account that provides 100 tasks each month. Existing users can simply log in.

Upon logging in, you will see various Pabbly applications. Click on the Pabbly Connect option to enter the dashboard where all your automation processes can be managed. This platform is essential for setting up the workflow between Google Sheets and Zoho Sheet.


Creating a Workflow in Pabbly Connect

After accessing Pabbly Connect, the next step is to create a workflow. Click on the ‘Create Workflow’ button located in the top right corner of the dashboard. A dialog box will appear, prompting you to name your workflow and select a folder.

For this integration, name your workflow something like ‘Connect Google Sheets with Zoho Sheet’. Select a relevant folder, such as ‘Google Sheets Automations’, to keep your workflows organized. Once you have entered the name and selected the folder, click on the ‘Create’ button to proceed.

  • Click on the ‘Create Workflow’ button.
  • Enter a name for your workflow.
  • Select a folder for organization.

Now you have successfully created a workflow that will facilitate the integration between Google Sheets and Zoho Sheet using Pabbly Connect.


Setting Up Trigger for Google Sheets

The next step involves setting up the trigger in Pabbly Connect. For the trigger application, select Google Sheets, as this is where you will be entering your lead data. Choose the trigger event as ‘New or Updated Spreadsheet Row’. This event will activate whenever new data is entered into your Google Sheet.

After selecting the trigger application and event, Pabbly Connect will provide you with a unique webhook URL. Copy this URL, as you will need it to connect Google Sheets to Pabbly Connect. Open your Google Sheet and navigate to Extensions > Add-ons > Get Add-ons. Search for ‘Pabbly Connect Webhooks’ and install it if you haven’t already.

  • Select Google Sheets as the trigger application.
  • Choose ‘New or Updated Spreadsheet Row’ as the trigger event.
  • Copy the provided webhook URL.

After setting up the trigger, you will be ready to test the integration and ensure that Pabbly Connect captures the data from Google Sheets accurately.


Connecting Google Sheets to Pabbly Connect

To connect Google Sheets to Pabbly Connect, go back to your Google Sheet, click on Extensions, then on Pabbly Connect Webhooks, and select ‘Initial Setup’. Paste the webhook URL you copied earlier into the designated field. Specify the trigger column, which is the final data column where new entries will be added. In this case, it is column D.

After pasting the URL and selecting the trigger column, click on the ‘Submit’ button. You will receive a confirmation that the setup was successful. Next, make sure to enable the ‘Send on Event’ option in the Pabbly Connect Webhooks menu. This step is crucial, as it allows Google Sheets to automatically send data to Pabbly Connect whenever new data is entered.

Paste the webhook URL in the Initial Setup. Select column D as the trigger column. Enable ‘Send on Event’ option.

Once this is completed, Pabbly Connect will be ready to capture any new lead details entered in your Google Sheet.


Setting Up Action to Create Rows in Zoho Sheet

The final step involves setting up the action in Pabbly Connect. For the action application, select Zoho Sheet and the action event as ‘Create Row’. This action will create a new record in your Zoho Sheet whenever a new lead is added to Google Sheets.

Click on the ‘Connect’ button to establish a connection between Zoho Sheet and Pabbly Connect. You will need to provide the domain from your Zoho Sheet URL, which typically appears as ‘zoho.com’. After entering the domain, click on the ‘Save’ button to authorize the connection.

Select Zoho Sheet as the action application. Choose ‘Create Row’ as the action event. Enter the domain from your Zoho Sheet URL.

After the connection is authorized, select the workbook and worksheet where you want to create the new lead records. Map the fields from Google Sheets to the corresponding columns in Zoho Sheet. Finally, click on the ‘Save and Send Test Request’ button to test the integration.


Conclusion

In this tutorial, we successfully integrated Google Sheets with Zoho Sheet using Pabbly Connect. This automation allows for seamless data transfer whenever new leads are added, enhancing efficiency and accuracy in tracking sales data. By leveraging Pabbly Connect, your sales team can make timely decisions based on up-to-date information.

Ensure you check out Pabbly Connect to create business automation workflows and reduce manual tasks. Pabbly Connect currently offer integration with 2,000+ applications.

Automate CRM Leads with Pabbly Connect and Google Sheets

Learn how to automate CRM lead creation using Pabbly Connect with Google Sheets. Step-by-step guide to integrate your applications seamlessly. Transform complex automation concepts into accessible, actionable steps that eliminate unnecessary manual work while maximizing existing application capabilities.

Watch Step By Step Video Tutorial Below


1. Accessing Pabbly Connect for Integration

To start automating lead creation in no CRM with Google Sheets, first, access Pabbly Connect. This platform simplifies the integration process without any coding skills required.

Visit the Pabbly Connect website by typing Pabbly.com/connect in your browser. Sign in if you are an existing user, or create a free account to start with 100 tasks monthly. Upon logging in, you’ll see your dashboard with various Pabbly applications.


2. Creating a New Workflow in Pabbly Connect

Next, you need to create a new workflow in Pabbly Connect. Click on the ‘Create Workflow’ button on the dashboard to initiate this process.

  • Name your workflow, for example, ‘Create New CRM Lead from Google Sheets’.
  • Select the folder where you want to save this workflow.
  • Click on ‘Create’ to proceed.

After creating the workflow, you will see two boxes: one for the trigger and another for the action. Here, the trigger will be Google Sheets, and the action will be no CRM.


3. Setting Up the Google Sheets Trigger

In this step, you will set Google Sheets as the trigger application in Pabbly Connect. Choose ‘New or Updated Spreadsheet Row’ as the trigger event.

To connect Google Sheets with Pabbly Connect, a webhook URL will be provided. Copy this URL to use in Google Sheets. Open your Google Sheets, navigate to Extensions, and select Pabbly Connect Webhooks.

  • Click on ‘Initial Setup’ and paste the webhook URL.
  • Select the trigger column, which is the last column where data will be added.
  • Click on ‘Submit’ to configure the setup.

Once configured, go back to Pabbly Connect and ensure it is waiting for the webhook response. Add some dummy data in your Google Sheets to test the connection.


4. Creating the Action in No CRM

Now, it’s time to set no CRM as the action application in Pabbly Connect. Choose ‘Create Lead’ as the action event.

Connect your no CRM account by entering the API key and account name. To obtain the API key, log into your no CRM account, navigate to the tools menu, and find the API settings.

Generate a new API key and copy it. Paste the API key and your account name in the Pabbly Connect action setup. Map the necessary fields like title and description using the data from Google Sheets.

After filling in all necessary details, click on ‘Save and Send Test Request’ to create a lead in no CRM. Verify that the lead appears in your no CRM dashboard.


5. Testing the Integration Workflow

Finally, test the integration to ensure everything works smoothly. Go back to Google Sheets and add new dummy details into the specified columns.

As soon as you add this data, Pabbly Connect should automatically create a new lead in no CRM. Refresh the no CRM dashboard to confirm that the lead has been successfully created.

By following these steps, you’ve successfully automated the lead creation process between Google Sheets and no CRM using Pabbly Connect. This integration will save time and enhance productivity for your sales team.


Conclusion

In this tutorial, we explored how to use Pabbly Connect to automate lead creation from Google Sheets to no CRM. This integration streamlines your workflow and ensures efficiency in managing leads.

Ensure you check out Pabbly Connect to create business automation workflows and reduce manual tasks. Pabbly Connect currently offer integration with 2,000+ applications.

How to Automate Mail Using Pabbly Connect: A Step-by-Step Guide

Learn how to automate your email marketing with Pabbly Connect. This guide walks you through integrating Mailchimp and other applications seamlessly. Revolutionize your productivity approach with just a few strategic clicks. Uncover professional methods for connecting applications and creating workflows that reclaim hours of your week.

Watch Step By Step Video Tutorial Below


1. Introduction to Pabbly Connect for Email Automation

Pabbly Connect is an excellent platform for automating your email marketing tasks. In this tutorial, we will explore how to set up the connection between Mailchimp and Pabbly Connect. By utilizing Pabbly Connect, you can streamline your email campaigns and manage your subscriber lists effortlessly. using Pabbly Connect

This integration allows you to automate various email marketing workflows, enhancing efficiency and personalization. With Pabbly Connect, you can sync subscriber data, trigger targeted email campaigns, and manage customer relationships seamlessly.


2. Setting Up Mailchimp as a Trigger in Pabbly Connect

To begin, log into your Pabbly Connect account. Here, you will see options for setting up triggers and actions. For this automation, we will use Mailchimp as the trigger application. This means that an event in Mailchimp will initiate the workflow in Pabbly Connect. using Pabbly Connect

Follow these steps to set up Mailchimp as a trigger:

  • Select Mailchimp as your trigger application.
  • Choose the trigger event, such as ‘New Subscriber’.
  • Copy the generated webhook URL provided by Pabbly Connect.
  • Log into your Mailchimp account and navigate to the audience settings.
  • Create a new webhook, pasting the URL into the callback URL field.

Once you have completed these steps, the connection will be established, allowing Pabbly Connect to capture data from Mailchimp whenever a new subscriber is added.


3. Capturing Data from Mailchimp in Pabbly Connect

After setting up Mailchimp as a trigger, the next step is to capture the data. When a new subscriber is added in Mailchimp, Pabbly Connect will receive the subscriber’s details. This is essential for further actions within your workflow. using Pabbly Connect

To capture the data, perform the following actions:

  • Submit a test subscriber through your Mailchimp audience.
  • Return to Pabbly Connect and click on ‘Recapture Webhook Response’.
  • Verify that the test data is successfully captured in Pabbly Connect.

Once you see the captured data, the connection between Mailchimp and Pabbly Connect is confirmed, allowing you to proceed with further automation steps.


4. Adding an Action to Google Sheets Using Pabbly Connect

With Mailchimp successfully set up as a trigger, you can now add an action to your workflow. In this case, we will integrate Google Sheets to store the subscriber information automatically. This is where Pabbly Connect shines, enabling seamless data transfer between applications. using Pabbly Connect

To set up Google Sheets as an action, follow these steps:

Select Google Sheets as your action application in Pabbly Connect. Choose the action event, such as ‘Add Row’. Connect your Google account to Pabbly Connect. Map the fields from Mailchimp to the corresponding columns in Google Sheets.

After mapping the fields, every new subscriber added in Mailchimp will automatically create a new row in your Google Sheets, keeping your records updated without manual effort.


5. Sending WhatsApp Notifications Through Pabbly Connect

In addition to integrating Mailchimp with Google Sheets, you can also send notifications to subscribers via WhatsApp. This is an excellent way to enhance customer engagement and keep your audience informed. using Pabbly Connect

To set up WhatsApp notifications, follow these steps:

Select WhatsApp Cloud API as an action application in Pabbly Connect. Choose the action event, such as ‘Send Message’. Map the subscriber’s phone number and message content in the action setup.

Once configured, this setup will allow you to send automated WhatsApp messages to new subscribers, enhancing your communication strategy.


Conclusion

In this tutorial, we explored how to automate email marketing using Pabbly Connect by integrating Mailchimp with Google Sheets and WhatsApp. By following these steps, you can streamline your email marketing efforts and enhance customer engagement effectively. With Pabbly Connect, automating your workflows has never been easier!

Ensure you check out Pabbly Connect to create business automation workflows and reduce manual tasks. Pabbly Connect currently offer integration with 2,000+ applications.

How to Integrate Salesforce with Active Campaign using Pabbly Connect

Learn how to automate the integration of Salesforce with Active Campaign using Pabbly Connect. Follow our step-by-step guide for seamless data transfer. Revolutionize your productivity approach with just a few strategic clicks. Uncover professional methods for connecting applications and creating workflows that reclaim hours of your week.

Watch Step By Step Video Tutorial Below


1. Accessing Pabbly Connect for Integration

To start using Pabbly Connect for integration, first open the landing page of Pabbly by searching for Pabbly Connect in your browser. Once you reach the page, you will see options to sign in or sign up. If you are a new user, click on ‘Sign up for free’ to create an account. Existing users should click on ‘Sign in’ to access their dashboard.

After signing in, you will be directed to the Pabbly Connect dashboard. From there, click on the ‘Access Now’ button for Pabbly Connect. This will take you to the workflow creation section where you can start your integration process.


2. Creating a Workflow in Pabbly Connect

In this section, we will create a workflow to automate the process of updating contacts in Active Campaign from Salesforce leads. Click on the ‘Create Workflow’ button on the dashboard. You will be prompted to name your workflow; enter ‘Create or Update Contact Records in Active Campaign from Salesforce Leads’ and select a folder to save it in. using Pabbly Connect

  • Click on the ‘Create’ button to open the workflow window.
  • In the workflow window, select Salesforce as the trigger application.
  • Choose ‘New Lead’ as the trigger event.

Once you have set the trigger, click on the ‘Connect’ button to establish the connection between Pabbly Connect and Salesforce. If you have not connected your Salesforce account before, you will need to create a new connection by following the prompts provided.


3. Connecting Salesforce with Pabbly Connect

After you click on ‘Connect’ for Salesforce, you will be asked to authorize Pabbly Connect to access your Salesforce account. Click on ‘Allow’ to grant the necessary permissions. Once connected, you need to enter your Salesforce instance URL. This information can be found in your Salesforce account under ‘Company Settings’ and ‘Company Information’. using Pabbly Connect

Copy your instance URL and paste it into the Pabbly Connect interface. Make sure to save your changes and then click on ‘Save and Send Test Request’. This action will allow Pabbly Connect to pull the latest lead data from Salesforce.

  • Ensure that your Salesforce account is set to check for new data every 10 minutes.
  • Perform a test submission using a lead form to verify the connection.
  • Refresh your Salesforce leads page to check for new entries.

Once you have confirmed that the lead has been successfully created in Salesforce, you can proceed to the next step of the integration process.


4. Creating or Updating Contacts in Active Campaign

Now that we have successfully set up the trigger with Salesforce, it’s time to configure the action in Active Campaign. Search for Active Campaign in the action application selection and choose it. The action event will be ‘Create or Update Contact’. Click on the ‘Connect’ button to link your Active Campaign account with Pabbly Connect. using Pabbly Connect

As with Salesforce, you will need to enter your Active Campaign API Key and URL. You can find these details in your Active Campaign account under ‘Settings’ and then ‘Developers’. Make sure to copy and paste the API Key and URL correctly into Pabbly Connect.

Ensure to provide the URL without the ‘https://’ prefix. Map the email, first name, last name, and phone number fields from the Salesforce lead data. Click on ‘Save and Send Test Request’ to create or update the contact in Active Campaign.

After successfully executing the action, you can verify the contact creation by checking your Active Campaign contacts list to ensure the new lead appears with the correct details.


5. Testing and Verifying the Integration

With the workflow set up, it is crucial to test the integration to ensure everything functions as expected. Perform a new test submission using the lead form again. After submitting, wait for the designated polling interval, which is typically 10 minutes for Salesforce.

After waiting, check your Active Campaign account to confirm that the new contact has been created with the test lead details. This verification step ensures that Pabbly Connect is accurately transferring data between Salesforce and Active Campaign.

Refresh both Salesforce and Active Campaign to see the updates. Make sure that the details match what was entered in the lead form. Adjust trigger timings if necessary for quicker data updates.

By successfully completing these steps, you will have automated the process of creating or updating contacts in Active Campaign from Salesforce leads using Pabbly Connect.


Conclusion

In this tutorial, we demonstrated how to integrate Salesforce with Active Campaign using Pabbly Connect. This integration allows for seamless data transfer between platforms, enhancing your lead management process and improving customer engagement.

Ensure you check out Pabbly Connect to create business automation workflows and reduce manual tasks. Pabbly Connect currently offer integration with 2,000+ applications.

Integrate InstaMojo Payments with Pabbly Connect and Google Sheets

Learn how to automate your payment processes using Pabbly Connect to integrate InstaMojo with Google Sheets and Pabbly Connect. Learn to create powerful connections between your critical applications without requiring specialized programming knowledge or extensive technical background.

Watch Step By Step Video Tutorial Below


1. Accessing Pabbly Connect for Integration

To begin the integration process, you first need to access Pabbly Connect. Start by visiting the Pabbly Connect website and signing in to your account. If you are a new user, you can sign up for free to get started.

Once logged in, you will see the dashboard where you can select various applications. Click on the ‘Access Now’ button for Pabbly Connect to begin creating your workflow for integrating InstaMojo with Google Sheets.


2. Creating a Workflow in Pabbly Connect

In this section, we will create a workflow in Pabbly Connect that automates the process of capturing payments from InstaMojo and logging them into Google Sheets. Click on the ‘Create Workflow’ button located at the top right corner of the dashboard.

  • Enter a name for your workflow, such as ‘Create P Email Marketing Subscriber on InstaMojo Payment and Add Details in Google Sheets’.
  • Select a folder to save your workflow; for example, choose the ‘InstaMojo Automations’ folder.
  • After entering the details, click on the ‘Create’ button.

Your workflow will now be created, setting the stage for the integration steps that follow. This automation will ensure that customer payment details are captured and recorded efficiently.


3. Setting Up the Trigger in Pabbly Connect

Next, we will set up the trigger in Pabbly Connect. The trigger will be initiated when a payment is made via InstaMojo. Select ‘InstaMojo V1’ as the trigger application and choose ‘New Sale’ as the trigger event.

After selecting the trigger event, Pabbly Connect will provide you with a unique webhook URL. Copy this URL as it will be used to connect InstaMojo to Pabbly Connect.

  • Go to your InstaMojo account and navigate to the smart page you’ve created for payments.
  • Edit the page and paste the webhook URL into the designated field for successful payments.
  • Save the changes to update the smart page.

Now, your workflow is set to capture payment responses whenever a transaction occurs on InstaMojo.


4. Adding Subscriber in Pabbly Email Marketing

After setting up the trigger, the next step is to add the customer as a subscriber in Pabbly Email Marketing using Pabbly Connect. Select ‘P Email Marketing’ as the action application and choose ‘Add Subscriber’ as the action event.

Click on the ‘Connect’ button and create a new connection by providing the necessary token from your P Email Marketing account. Once the connection is established, select the list where you want to add the subscriber.

Map the email and name fields from the InstaMojo payment response to the corresponding fields in P Email Marketing. Click on the ‘Save and Test Request’ button to verify the addition of the subscriber.

Once the subscriber is added successfully, you will see a confirmation message indicating that the process was completed without any issues. This ensures that your customer is now part of your email marketing strategy.


5. Recording Payment Details in Google Sheets

The final step is to record the payment details in Google Sheets using Pabbly Connect. For this, select ‘Google Sheets’ as the action application and choose ‘Add New Row’ as the action event.

Connect your Google Sheets account to Pabbly Connect by clicking on the ‘Connect’ button and authorizing access. Next, select the spreadsheet you created for InstaMojo payment details and choose the relevant sheet.

Map the payment ID, name, email, phone number, address, city, and other required fields from the InstaMojo payment response. Click on the ‘Save and Send Test Request’ button to add a new record to your Google Sheets.

After completing these steps, you can check your Google Sheets to confirm that the payment details have been successfully recorded. This integration streamlines your payment tracking and enhances your business operations.


Conclusion

In this tutorial, we explored how to use Pabbly Connect to integrate InstaMojo payments with Google Sheets and Pabbly Email Marketing. By automating these processes, you can efficiently manage customer payments and enhance your marketing efforts.

Ensure you check out Pabbly Connect to create business automation workflows and reduce manual tasks. Pabbly Connect currently offer integration with 2,000+ applications.

Automating Appointment Records with Pabbly Connect: A Step-by-Step Guide

Learn how to automate appointment records from Go High Level to Microsoft Excel using Pabbly Connect in this detailed tutorial. Transform complex automation concepts into accessible, actionable steps that eliminate unnecessary manual work while maximizing existing application capabilities.

Watch Step By Step Video Tutorial Below


1. Accessing Pabbly Connect for Integration

To start with Pabbly Connect, visit the homepage by typing Pabbly.com/connect in your browser. Here, you will find options to sign in or sign up for free. If you are an existing user, simply log in to your account. New users can create an account and enjoy 100 free tasks every month.

Once logged in, navigate to the ‘All Apps’ section and select Pabbly Connect to access the dashboard. This dashboard will display all your workflows, allowing you to create new ones easily. Click on ‘Create Workflow’ to begin setting up your automation.


2. Creating a New Workflow in Pabbly Connect

Within Pabbly Connect, you need to name your workflow. For this tutorial, we will name it ‘Go High Level Appointment Details in Microsoft Excel’. Select the appropriate folder for saving this workflow and click on ‘Create’.

  • Name your workflow appropriately.
  • Select the folder for organization.
  • Click on ‘Create’ to set up the workflow.

After creating the workflow, you will see two main sections: Trigger and Action. The trigger is what starts the workflow, while the action is what happens as a result. Here, we will select Go High Level as our trigger application and Microsoft Excel as the action application.


3. Setting Up the Trigger with Go High Level

In this step, select Go High Level as the trigger application in Pabbly Connect. The trigger event will be ‘Customer Booked Appointment’. This means that whenever a new appointment is booked, the workflow will be activated.

Once you select the trigger event, Pabbly Connect will provide you with a webhook URL. This URL is crucial as it acts as a bridge between Go High Level and Pabbly Connect. Copy this URL and proceed to your Go High Level account to set up the automation.


4. Configuring Go High Level for Automation

Now, log into your Go High Level account and navigate to the ‘Automation’ section. Here, create a new workflow and name it appropriately. Set the trigger as ‘Customer Booked Appointment’ to link it with Pabbly Connect. This ensures that every time an appointment is booked, the data will be sent to Pabbly Connect.

  • Go to Automation and create a new workflow.
  • Set the trigger as ‘Customer Booked Appointment’.
  • Paste the webhook URL from Pabbly Connect.

After setting up the trigger, save and publish the workflow. This will ensure that the connection between Go High Level and Pabbly Connect is active and ready to capture appointment details automatically.


5. Sending Appointment Data to Microsoft Excel

With the connection established, the next step is to send the appointment data to Microsoft Excel. In Pabbly Connect, add a new action step and select Microsoft Excel. The action event will be ‘Add Row to Worksheet’. This will allow you to create a new record in Excel every time an appointment is booked.

Connect your Microsoft Excel account by allowing necessary permissions. Then select the workbook and worksheet where you want to store the appointment details. Map the fields such as customer name, email, phone number, and appointment date from the previous steps.

Once all details are mapped, click on ‘Save and Send Test Request’. This will test the connection and add a new row in your Excel sheet. Refresh your Excel sheet to confirm that the appointment details have been added successfully. This completes the automation process using Pabbly Connect.


Conclusion

In this tutorial, we demonstrated how to automate the process of adding appointment details from Go High Level to Microsoft Excel using Pabbly Connect. By following these steps, you can streamline your workflow and ensure that all appointment records are accurately captured without manual effort.

Ensure you check out Pabbly Connect to create business automation workflows and reduce manual tasks. Pabbly Connect currently offer integration with 2,000+ applications.