Automate WhatsApp Messages with India M Integration

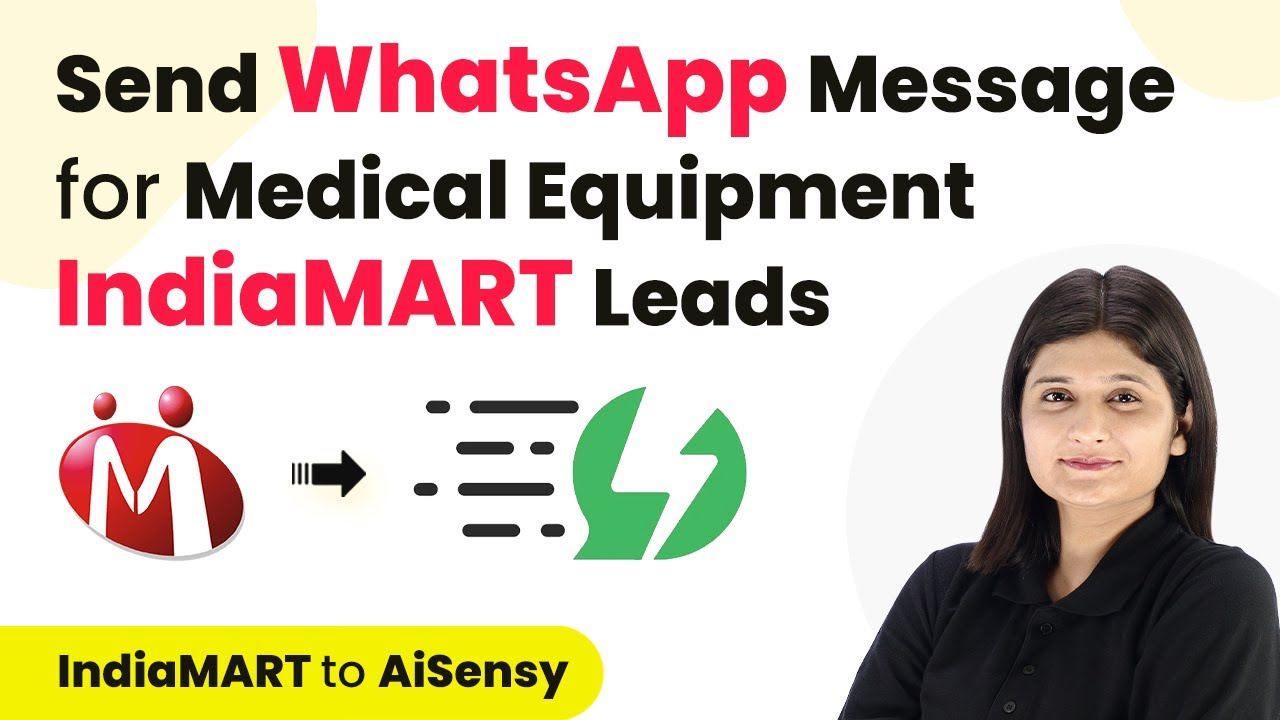
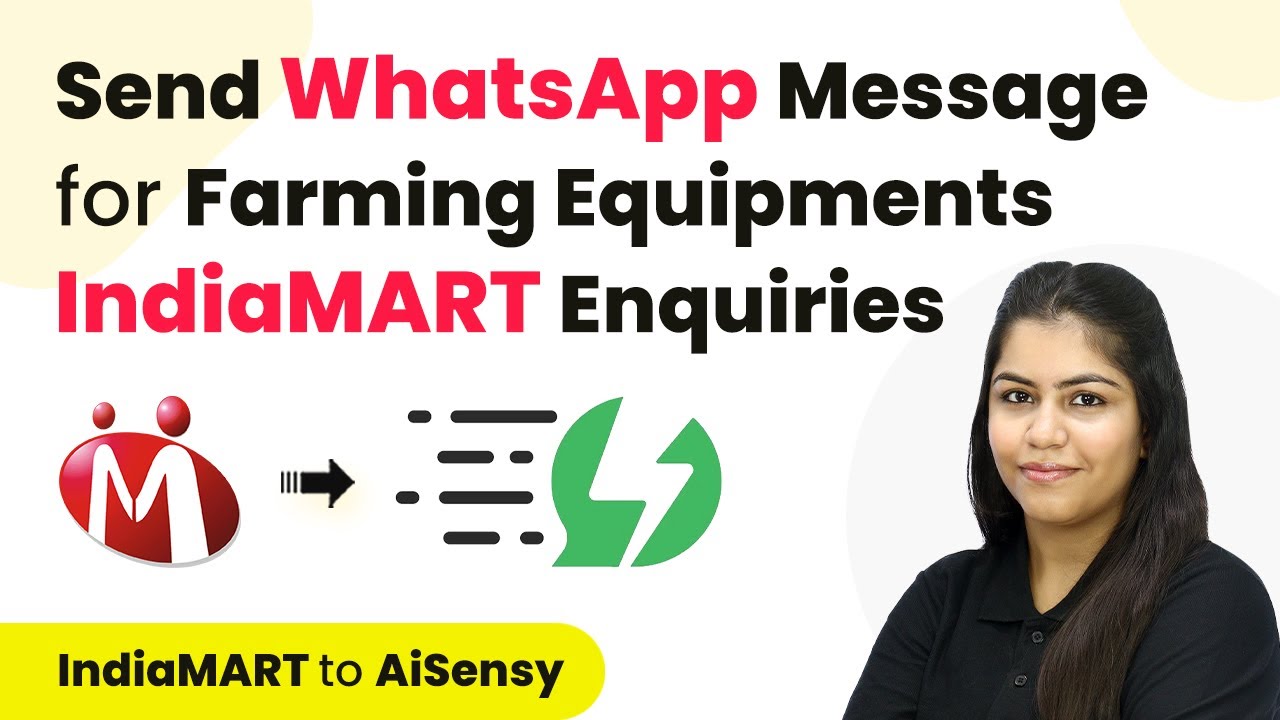
Learn how to automate WhatsApp messages using India M and P Connect Now for seamless communication with inquiries. Step-by-step guide included. Master proven automation processes with practical implementation examples and strategic recommendations you can apply immediately in your workflow. with Pabbly Connect.

Watch Step By Step Video Tutorial Below


1. Setting Up Integration with India M

To automate WhatsApp messages, the first step is integrating India M with P Connect Now. This allows the automation of responses to inquiries received through India M. Start by logging into your P Connect account.

Once logged in, click on the Create Workflow button to initiate your automation process. This will prompt you to name your workflow, which should reflect the objective of sending automated WhatsApp messages to inquiries from India M.


2. Defining the Trigger Event in India M

In this section, we will define the trigger event for our workflow. The trigger will be set to activate whenever a new inquiry is received through India M. To do this, select India M as your trigger application.

  • Search for India M in the trigger application list.
  • Choose New Leads as the trigger event.
  • Copy the webhook URL provided for further integration.

After copying the webhook URL, navigate to your India M account. In the Lead Manager section, you will need to set up a push API integration using the webhook URL to connect with P Connect Now.


3. Configuring API Integration in India M

Now, we will configure the API integration in India M. In the Lead Manager, click on the Import/Export Leads option. Here, select the push API option to create the integration.

Fill in the required details for the push API integration, including the platform name and the webhook listener URL you copied earlier. After entering the details, click on Save Details to finalize the integration.

Once saved, generate an OTP to confirm the connection between India M and P Connect Now. This step is crucial for ensuring secure communication between the two applications.


4. Sending WhatsApp Messages Using AI Sensei

After successfully setting up the trigger, the next step is to send WhatsApp messages using AI Sensei. In your P Connect workflow, select AI Sensei as the action application.

  • Choose Send Template Message as the action event.
  • Connect AI Sensei with your P Connect account using the API key.
  • Map the mobile number from the inquiry response to send the message correctly.

Ensure that your WhatsApp template message is approved by AI Sensei before sending. This template will include personalized details, such as the name of the inquiry sender.


5. Testing the Automation Process

To ensure everything is set up correctly, you will need to test the automation process. Generate a test inquiry in India M to see if the WhatsApp message is sent successfully. This step confirms that all integrations are functioning as intended.

After generating the test inquiry, check your WhatsApp to verify if the message was received. The message should reflect the template created in AI Sensei, personalized with the sender’s name.

This testing phase is essential for confirming that every new inquiry through India M triggers an automatic WhatsApp response, thus streamlining your communication process.


Conclusion

By following this guide, you can effectively automate WhatsApp messages with India M and P Connect Now. This integration enhances your responsiveness to inquiries and can significantly improve customer engagement.

Thanks for following along with this tutorial! Remember to subscribe to the channel for more helpful content like this.

If you found this guide useful, please consider giving it a thumbs up and sharing it with others who might benefit from it.

Integrating Simply with The Happening Using Pabbly Connect: A Comprehensive Guide

Learn how to automate tasks by integrating Simply with The Happening Using Pabbly Connect. Follow this step-by-step tutorial for seamless project management. Implement the precise methodologies leading organizations use to automate repetitive tasks, illustrated with practical examples designed for immediate application. with Pabbly Connect.

Watch Step By Step Video Tutorial Below


1. Overview of Simply and The Happening Integration

Integrating Simply with The Happening allows for streamlined project management. This integration enables efficient task automation, enhancing productivity within teams. using Pabbly Connect

By connecting Simply with The Happening, users can automate notifications and task assignments. This integration is particularly beneficial for teams using project management tools like Slack and Google Sheets.


2. Setting Up Simply with The Happening on Make

To begin integrating Simply with The Happening Using Pabbly Connect, first log into your Make account. From the dashboard, click on ‘Create a New Scenario’ to start the integration process. using Pabbly Connect

Next, you will need to set up the connection between Simply and The Happening. Follow these steps:

  • Select Simply as your first application.
  • Choose the trigger event from Simply, such as ‘New Task Created.’
  • Connect your Simply account by following the authentication prompts.

After establishing the connection, you will set The Happening as the action application. This allows you to automate responses based on the triggers from Simply.


3. Configuring Triggers and Actions

Once you have connected Simply and The Happening, it’s time to configure the triggers and actions. Triggers are events that start the workflow, while actions are the responses to those triggers. using Pabbly Connect

For this integration, select the following:

  • Trigger: New Task Created in Simply.
  • Action: Send Notification to The Happening.

Ensure that you map the necessary fields correctly. For instance, map the task title and description from Simply to the notification fields in The Happening.


4. Testing Your Integration

After configuring the triggers and actions, it’s crucial to test your integration. This ensures that tasks created in Simply trigger the expected notifications in The Happening. using Pabbly Connect

To test:

Create a new task in Simply. Check if a notification is sent in The Happening.

If the notification appears as expected, your integration is successful. If not, revisit your configuration settings to ensure everything is mapped correctly.


5. Automating Further with Other Applications

Beyond Simply and The Happening, you can enhance your workflow by integrating additional applications like Google Sheets, Slack, and Discord. This allows for comprehensive task management across platforms. using Pabbly Connect

For example, you might want to log tasks into Google Sheets for tracking or send alerts to a Slack channel. To do this, simply add additional actions in your Make scenario:

Add Google Sheets as an action to log task details. Integrate Slack to notify team members about new tasks.

By leveraging these integrations, you can create a robust project management system that keeps everyone informed and engaged.


Conclusion

Integrating Simply with The Happening Using Pabbly Connect streamlines project management and enhances team collaboration. This tutorial provides a clear pathway to automate task notifications and improve efficiency.

Thanks for following along with this tutorial! Remember to subscribe to the channel for more helpful content like this.

If you found this guide useful, please consider giving it a thumbs up and sharing it with others who might benefit from it.

Integrate WhatsApp Messaging with Pabbly Connect: A Step-by-Step Guide

Learn how to use Pabbly Connect to automate WhatsApp messages for inquiries from India Mart. Follow this detailed guide for seamless integration. Build sophisticated automated workflows in less time than you think. This guide translates complex integrations into straightforward steps for immediate implementation.

Watch Step By Step Video Tutorial Below


1. Accessing Pabbly Connect for Automation

To start using Pabbly Connect for automation, visit the Pabbly Connect website. This platform allows you to integrate various applications effortlessly. You can sign in or create a new account on the top right corner of the page. using Pabbly Connect

Once logged in, navigate to the Pabbly Connect dashboard. Here, you can manage your workflows. To create a new workflow, select the option to create a workflow and name it appropriately, such as ‘Send Automated WhatsApp Messages for Healthcare Inquiries’.


2. Setting Up the Trigger with India Mart

In this section, you will set up the trigger application, which is India Mart. In Pabbly Connect, select India Mart as your trigger app and choose the event ‘New Leads’ to initiate the automation. using Pabbly Connect

After selecting the trigger, Pabbly Connect will provide you with a webhook URL. This URL is essential for connecting India Mart to Pabbly Connect. Follow these steps to set up the webhook:

  • Navigate to your India Mart account and go to the Lead Manager.
  • Click on the three dots and select ‘Import/Export Leads’.
  • Choose ‘Push API’ and enter the webhook URL provided by Pabbly Connect.

After saving these details, generate an OTP and submit it to complete the connection. This process ensures that inquiries from India Mart will trigger the automation in Pabbly Connect.


3. Creating the Action to Send WhatsApp Messages

Now that the trigger is set up, it’s time to create the action step. In Pabbly Connect, select WhatsApp by AI Sensi as your action application. The action event should be set to ‘Send Template Message’. using Pabbly Connect

To connect WhatsApp with Pabbly Connect, you will need an API key from your AI Sensi account. Follow these steps to retrieve your API key:

  • Log in to your AI Sensi account and navigate to the Manage section.
  • Click on ‘API Key’ and generate a new key.
  • Copy the API key and paste it in Pabbly Connect to establish the connection.

Once connected, you will need to fill in the campaign details and map the parameters from the inquiry received from India Mart. This ensures that the WhatsApp message is personalized for each lead.


4. Testing the Integration for Successful Messaging

After setting up both the trigger and action, it’s crucial to test the integration. Submit an inquiry through your India Mart profile to check if the automation works correctly. Make sure to enter a query related to your products. using Pabbly Connect

Once the inquiry is submitted, return to Pabbly Connect to see if the response has been received. If successful, you will see the details of the inquiry, including a unique query ID and the message content. This confirms that Pabbly Connect has successfully integrated India Mart with WhatsApp.

Next, check your WhatsApp to verify that the automated message has been sent. You should receive a message thanking you for your inquiry, which includes the necessary details about your products.


Conclusion

In this tutorial, we explored how to automate WhatsApp messaging using Pabbly Connect with India Mart inquiries. By following these steps, you can streamline your customer communication effectively. Pabbly Connect simplifies the process of integrating different applications, making automation accessible to everyone.

Ensure you check out Pabbly Connect to create business automation workflows and reduce manual tasks. Pabbly Connect currently offer integration with 2,000+ applications.

Automate Facebook News Feed with Pabbly Connect and Perplexity AI

Learn how to automate your Facebook news feed using Pabbly Connect and Perplexity AI for seamless updates. Follow this step-by-step tutorial to integrate RSS feeds effortlessly.

Watch Step By Step Video Tutorial Below


1. Accessing Pabbly Connect for Integration

To begin automating your Facebook news feed, first access Pabbly Connect. This platform allows you to connect various applications seamlessly. Start by visiting the Pabbly Connect website and either sign in or create a new account.

Once logged in, you will be directed to the dashboard. Here, you can see all available applications. The primary objective is to create a workflow that integrates RSS feeds with Perplexity AI and Facebook. This setup will enable automatic posting of news summaries to your Facebook page.


2. Creating a Workflow in Pabbly Connect

To create an automated news feed, you need to set up a new workflow in Pabbly Connect. Click on the ‘Create Workflow’ button located at the top right corner of the dashboard. Name your workflow appropriately, such as ‘Automated News Feed on Facebook using Perplexity AI’.

  • Click on the ‘Create’ button to initiate your workflow.
  • Select the trigger application as ‘RSS by Pabbly’.
  • Choose the trigger event as ‘New Item in Feed’.

After selecting the trigger, you will need to connect your RSS feed URL. This will allow Pabbly Connect to fetch the latest news items automatically whenever they are published.


3. Connecting RSS Feed to Pabbly Connect

In this step, you will connect your RSS feed to Pabbly Connect. After selecting your trigger event, click on the ‘Connect’ button. You will be prompted to enter the feed URL, which you can obtain from your preferred news site, such as The Hindu.

  • Enter the feed URL for the sports news section.
  • Select the filter type (default is recommended).
  • Click on ‘Save and Send Test Request’ to verify the connection.

Upon successful connection, Pabbly Connect will fetch the latest news items from the RSS feed, allowing you to automate the subsequent steps of generating summaries and posting them on Facebook.


4. Generating Summaries with Perplexity AI

After successfully connecting your RSS feed, the next step is to generate summaries of the news articles using Perplexity AI through Pabbly Connect. Select Perplexity AI as the action application and choose the action event as ‘Create Chat Completion’.

To connect Perplexity AI, click on the ‘Connect’ button and enter your API key. You can find this key in your Perplexity account settings under the API section. After entering the key, select the model and set the role to ‘user’. In the content user field, provide a prompt for generating a summary.

Prompt: ‘Generate a short summary for the news link provided.’ Map the news link dynamically using data mapping from the RSS feed response.

Once you’ve configured the summary generation, click ‘Save and Send Test Request’. Upon success, you will receive a summary that can be posted on Facebook.


5. Posting Summaries on Facebook

The final step is to post the generated summary on your Facebook page using Pabbly Connect. Select Facebook Pages as the action application and choose the action event as ‘Create Page Photo Post’ if you have a media URL; otherwise, select ‘Create Page Post’.

Connect your Facebook account to Pabbly Connect and select the page where you want to post the summary. Map the media content URL and the summary generated from the previous step into the appropriate fields.

Map the photo URL from the RSS feed response. Map the summary generated from Perplexity AI.

After filling in all necessary fields, click on ‘Save and Send Test Request’. You will receive a confirmation that the post has been created successfully on your Facebook page, completing the automation process.


Conclusion

In this tutorial, we explored how to automate your Facebook news feed using Pabbly Connect and Perplexity AI. By integrating these applications, you can effortlessly keep your followers updated with the latest sports news without manual posting. This automation not only saves time but also enhances engagement on your Facebook page.

Ensure you check out Pabbly Connect to create business automation workflows and reduce manual tasks. Pabbly Connect currently offer integration with 2,000+ applications.

Automate Social Media Posting with Pabbly Connect and Notion

Learn how to automate social media posts from Notion to Facebook and X Channel using Pabbly Connect. Step-by-step tutorial included. Revolutionize your productivity approach with just a few strategic clicks. Uncover professional methods for connecting applications and creating workflows that reclaim hours of your week.

Watch Step By Step Video Tutorial Below


1. Accessing Pabbly Connect for Automation

To automate social media posts from Notion, you first need to access Pabbly Connect. Begin by typing ‘Pabbly.com/connect’ in your browser. Once on the homepage, you will see options to sign in or sign up for free.

If you are a new user, click on the ‘Sign up for free’ button to create an account. This grants you 100 free tasks monthly to explore the features of Pabbly Connect. Existing users can simply log in to their accounts.


2. Creating a Workflow in Pabbly Connect

After signing in, navigate to the dashboard of Pabbly Connect. Here, you can create a new workflow by clicking on the ‘Create Workflow’ option. A dialog box will prompt you to name your workflow, such as ‘Scheduled Social Media Post from Notion Database with Images’.

  • Name your workflow appropriately.
  • Select the appropriate folder for organization.
  • Click ‘Create’ to save the workflow.

Once the workflow is created, you will see two main sections: Trigger and Action. The Trigger indicates when an event occurs, while Action specifies what should happen as a result. In this case, the Trigger will be a new entry in the Notion database.


3. Setting Up the Trigger with Notion

To set up the Trigger, select Notion as the application. Next, choose the trigger event, which will be ‘New Database Item’. This event captures when a new item is added to your Notion database.

To establish the connection between Pabbly Connect and Notion, click on ‘Connect’. This will prompt you to log into your Notion account and authorize Pabbly Connect to access your database. Select the relevant database where your social media post details are stored.

  • Ensure you are logged into your Notion account.
  • Select the database ID from the dropdown.
  • Click ‘Save and Send Test Request’ to capture the latest data.

By doing this, Pabbly Connect will begin monitoring your Notion database for new entries, allowing for seamless automation of social media posts.


4. Configuring Facebook and X Channel Actions

After setting up the Trigger, the next step is to configure actions for Facebook and X Channel (formerly Twitter). Start by selecting Facebook Pages as the action application. Choose the action event as ‘Create Page Photo Post’.

Connect your Facebook account by clicking on ‘Connect’ and authorizing Pabbly Connect to access your Facebook page. Select the page where you want to post the content, and map the image URL and post description from the previous steps.

Map the image URL from the Notion database. Include the title and caption in the post description. Click ‘Save and Send Test Request’ to verify the action.

Once completed, you will see a confirmation that the post has been created successfully on your Facebook page. This confirms that the connection through Pabbly Connect is working effectively.


5. Finalizing the Integration with X Channel

To finalize the integration, repeat the action setup for X Channel. Select X Channel as your action application and choose ‘Create Tweet’ as the action event. Similar to Facebook, you will need to authorize Pabbly Connect to access your X Channel account.

Input the message you want to tweet, mapping the title and including a call to action with the image URL. Click ‘Save and Send Test Request’ to create your tweet. You will receive a confirmation that the tweet has been successfully posted.

Map the title and image URL in the tweet message. Verify the successful posting of the tweet. Ensure that both social media platforms are now integrated.

With this final step, Pabbly Connect ensures that all new entries in your Notion database are automatically posted to both Facebook and X Channel, streamlining your social media management.


Conclusion

In this tutorial, we demonstrated how to use Pabbly Connect to automate social media posting from Notion to Facebook and X Channel. This integration simplifies the process and saves time, allowing you to focus on your business.

Ensure you check out Pabbly Connect to create business automation workflows and reduce manual tasks. Pabbly Connect currently offer integration with 2,000+ applications.

Integrating BigMarker with Pabbly Connect: A Step-by-Step Guide

Learn how to integrate BigMarker with Pabbly Connect through webhooks for seamless webinar management. Follow our detailed tutorial for step-by-step guidance. Build sophisticated automated workflows in less time than you think. This guide translates complex integrations into straightforward steps for immediate implementation.

Watch Step By Step Video Tutorial Below


1. Setting Up Pabbly Connect for BigMarker Integration

To start integrating BigMarker with Pabbly Connect, first log in to your Pabbly Connect account. Pabbly Connect serves as the central platform for automating workflows between BigMarker and other applications. using Pabbly Connect

Once logged in, create a new workflow. Select BigMarker as the trigger application and choose the event type that you want to automate. Here, we will select ‘New Registration’ as the trigger event, which allows Pabbly Connect to capture new participant registrations.


2. Configuring the Webhook in BigMarker

After setting up Pabbly Connect, the next step is to configure the webhook in BigMarker. This is crucial as it establishes the connection between BigMarker and Pabbly Connect. Copy the webhook URL provided by Pabbly Connect. using Pabbly Connect

  • Log in to your BigMarker account.
  • Navigate to ‘My Webinar’ and select the webinar you want to integrate.
  • Go to the ‘Integrations’ tab and scroll down to find ‘Webhooks.’
  • Enable the outgoing webhook option and paste the copied URL into the outgoing URL field.
  • Click on the save button to update the webhook settings.

After saving, your BigMarker webinar is now connected to Pabbly Connect. This allows Pabbly Connect to automatically capture registration responses from BigMarker.


3. Testing the Integration Between BigMarker and Pabbly Connect

To ensure that the integration works, create a test registration for your webinar. This step is essential to verify that Pabbly Connect captures the registration data correctly. using Pabbly Connect

Open the landing page of your webinar in an incognito window and fill in the registration form with dummy details. After submitting the form, return to your Pabbly Connect workflow to check if the registration data is captured successfully.

  • Enter a dummy name and email address for registration.
  • Submit the registration form.
  • Check the Pabbly Connect workflow for captured data.

If the registration data appears in your Pabbly Connect workflow, the integration is successful. This confirms that BigMarker is now effectively connected to Pabbly Connect.


4. Conclusion: Seamless Integration with Pabbly Connect

In this tutorial, we explored how to integrate BigMarker with Pabbly Connect using webhooks. The step-by-step process demonstrated how to set up the connection and test it effectively.

Ensure you check out Pabbly Connect to create business automation workflows and reduce manual tasks. Pabbly Connect currently offer integration with 2,000+ applications.

Pabbly Connect serves as a powerful tool for automating workflows between BigMarker and other applications. By following these steps, you can streamline your webinar management process.


This tutorial on Pabbly Connect and BigMarker integration provides you with the knowledge to automate participant registrations effortlessly. Enjoy the benefits of seamless webinar management with Pabbly Connect.

Integrating Shopper and Google Sheets with Pabbly Connect: A Step-by-Step Guide

Learn how to automate ticket creation in Shopper from Google Sheets using Pabbly Connect. This detailed guide walks you through the integration process step by step.

Watch Step By Step Video Tutorial Below


1. Accessing Pabbly Connect for Integration

To start the integration process, access Pabbly Connect by visiting the official website. If you are a new user, you can sign up for a free account, which allows you to explore its features with 300 tasks per month. For existing users, simply sign in to your account.

Once logged in, you will be directed to the dashboard of Pabbly Connect. Here, you can view all the applications available for integration. To create a new workflow, click on the ‘Create Workflow’ button located in the top right corner of the dashboard.


2. Creating a Workflow in Pabbly Connect

After clicking on the ‘Create Workflow’ button, a dialog box will appear prompting you to name your workflow. For this integration, name it ‘Create Repair Shopper Ticket from Google Sheets’. You can also choose a folder to organize your workflows. using Pabbly Connect

  • Name your workflow appropriately.
  • Select a folder for better organization.
  • Click the ‘Create’ button to proceed.

Upon creating the workflow, you will see two main components: Trigger and Action. The Trigger is what starts the automation, while the Action is what happens as a result. In this case, we will set Google Sheets as the Trigger application to capture new data entries.


3. Setting Up Google Sheets as a Trigger

To set up the Trigger, select Google Sheets from the list of applications in Pabbly Connect. Choose the trigger event as ‘New or Updated Spreadsheet Row’. This ensures that every time a new row is added or updated in your Google Sheets, the workflow will be triggered automatically.

After selecting the trigger event, you will be provided with a webhook URL. Copy this URL as it will be used to connect your Google Sheets with Pabbly Connect. Open your Google Sheets, go to Extensions, and select Add-ons to install the Pabbly Connect Webhooks add-on.

  • Install the Pabbly Connect Webhooks add-on.
  • Refresh your Google Sheets to see the new add-on.
  • Set the webhook URL and trigger column in the add-on settings.

After completing these steps, you will have successfully set up the Google Sheets Trigger in Pabbly Connect.


4. Searching for Existing Customers in Pabbly Connect

Once the Trigger is set up, the next step is to configure the Action. Select Repair Shopper as your action application. The action event should be ‘Search a Customer’. This allows Pabbly Connect to look for existing customers based on the data received from Google Sheets.

To establish a connection with Repair Shopper, click on ‘Connect’ and select ‘Add New Connection’. Enter your API token and subdomain from your Repair Shopper account. This step is crucial for enabling Pabbly Connect to access your Repair Shopper data.

Generate an API token from your Repair Shopper profile. Enter the token and subdomain in Pabbly Connect. Save the connection to proceed.

After successfully connecting, map the customer email from the Google Sheets data to search for the existing customer in Repair Shopper. This step ensures that only valid customers will have tickets created for their requests.


5. Creating Tickets in Repair Shopper

With the customer search configured, the final action is to create a ticket in Repair Shopper. Select ‘Create a Ticket’ as the action event. This action will occur only if the previous filter confirms that the customer exists.

Connect to Repair Shopper using the existing connection you previously set up. Then, map the necessary fields such as customer ID, issue subject, and description from the Google Sheets data. This ensures that the ticket is created with accurate information directly from the spreadsheet.

Map the customer ID and issue details from Google Sheets. Review all mapped fields for accuracy. Click ‘Save and Send Test Request’ to create the ticket.

Once the ticket is created successfully, you can check your Repair Shopper account to verify that the new ticket reflects the information from Google Sheets. This completes the integration process using Pabbly Connect.


Conclusion

In this tutorial, we explored how to integrate Shopper and Google Sheets using Pabbly Connect. By automating ticket creation, you can streamline your workflow and enhance efficiency in managing customer requests. Follow these steps to set up your integration easily and effectively.

Ensure you check out Pabbly Connect to create business automation workflows and reduce manual tasks. Pabbly Connect currently offer integration with 2,000+ applications.

Integrating WhatsApp with Pabbly Connect for Automated Messaging

Learn how to integrate WhatsApp with Pabbly Connect to automate messages for agriculture inquiries. Follow this detailed tutorial for step-by-step guidance. Follow this definitive guide to creating powerful automated workflows with straightforward, efficiency-focused solutions that save valuable time.

Watch Step By Step Video Tutorial Below


1. Accessing Pabbly Connect for Integration

To start integrating WhatsApp with Pabbly Connect, open your browser and navigate to Pabbly Connect by searching for Pabbly.com/connect. Here, you will find options to sign in or sign up for free. New users can create an account to get started.

Once logged in, you will access the dashboard featuring various Pabbly applications. For this integration, click on Pabbly Connect to initiate the process. Then, select the ‘Create Workflow’ button to begin setting up your automation.


2. Setting Up the Workflow in Pabbly Connect

After clicking ‘Create Workflow’, name your workflow, such as ‘Send Automated WhatsApp Message for Agriculture Products’. Select a folder to save your workflow, then click on the ‘Create’ button. This opens the workflow window where you will define the trigger and action for your integration.

  • Choose a trigger application, which in this case will be IndiaM.
  • Select the trigger event as ‘New Lead’ to start the workflow upon receiving a new inquiry.
  • Copy the Webhook URL provided by Pabbly Connect for later use.

Once these steps are completed, you are ready to connect your IndiaM account with Pabbly Connect. This will allow the workflow to trigger whenever a new lead is generated.


3. Connecting IndiaM to Pabbly Connect

Log into your IndiaM account and navigate to the Lead Manager section. Here, select ‘Import/Export Leads’ and then click on ‘Push API’. In the options, select ‘Other’ as the source, and enter ‘Pabbly Connect’ as the CRM platform name.

  • Paste the copied Webhook URL into the Webhook Listener URL field.
  • Select a reason for sending leads to another application.
  • Click on ‘Generate OTP’ and enter the OTP to finalize the connection.

After submitting, you will see a confirmation that your IndiaM account is connected to Pabbly Connect. This step is crucial for ensuring that leads are captured effectively and sent to the next step in your workflow.


4. Sending WhatsApp Messages Using AI Sensei

With the IndiaM connection established, the next step is to configure the action application. Select ‘AI Sensei’ as your action application to send WhatsApp messages. Choose the action event as ‘Send Template Message’ and click on ‘Connect’.

When prompted, either select an existing connection or create a new one by entering your API key from your AI Sensei account. This allows Pabbly Connect to communicate with AI Sensei for sending messages.

Enter the campaign name, such as ‘IndiaM Inquiries’. Map the mobile number and name from the previous step’s response. Ensure to fill in any template parameters as required.

Once these mappings are done, click on ‘Save and Send Request’. This will trigger the WhatsApp message to be sent to the lead’s number, effectively automating your response process.


5. Testing and Finalizing the Integration

To test the integration, submit a dummy inquiry through your IndiaM account. Ensure that the details match the fields you have set up in Pabbly Connect. After submission, check if the WhatsApp message is received.

Upon successful testing, you will see a confirmation message in your WhatsApp. This indicates that the workflow has been successfully set up and is functioning as intended. You can now automate responses to all new inquiries, saving you time and improving customer engagement.

In summary, this integration allows you to automate WhatsApp messaging for inquiries received through IndiaM, using Pabbly Connect as the central platform. By following these steps, you can ensure timely communication with potential clients, enhancing your business efficiency.

Conclusion

This guide summarizes the key points and helps you understand the essential features and benefits of using this tool.

Ensure you check out Pabbly Connect to create business automation workflows and reduce manual tasks. Pabbly Connect currently offer integration with 2,000+ applications.


In conclusion, using Pabbly Connect to integrate WhatsApp with IndiaM streamlines your communication process for agriculture inquiries. This automation not only saves time but also ensures that potential clients receive immediate responses, improving your chances of conversion.

Automate SEO with Pabbly Connect and Perplexity AI

Learn how to automate SEO for your WordPress blogs using Pabbly Connect and Perplexity AI with this detailed step-by-step tutorial. Develop expertise in application integration and learn how to design streamlined automation workflows using proven, simplified approaches.

Watch Step By Step Video Tutorial Below


1. Accessing Pabbly Connect for SEO Automation

To start automating SEO for your WordPress blogs, you need to access Pabbly Connect. Open your browser and search for Pabbly Connect to reach its landing page. If you don’t have an account, click on the ‘Sign Up for Free’ button, which takes only a couple of minutes to set up.

Once you’re signed in, click on the ‘Access Now’ button under Pabbly Connect to enter the dashboard. Here, you can create workflows that will automate various tasks, including SEO content generation for your blogs. This platform is essential for connecting Google Sheets, Perplexity AI, and WordPress seamlessly.


2. Creating a Workflow in Pabbly Connect

In this section, you will create a workflow in Pabbly Connect to automate the SEO process. Click on the ‘Create Workflow’ button and name your workflow, for example, ‘Generate Number One Ranking Blogs with Perplexity AI and Pabbly Connect’. This name will help you identify the workflow later.

  • Choose Google Sheets as the trigger application.
  • Select ‘New or Updated Spreadsheet Row’ as the trigger event.
  • Connect Google Sheets to Pabbly Connect using the provided webhook URL.

After setting up the trigger, you will receive a response in Pabbly Connect, confirming that your Google Sheets is linked correctly. This step is crucial for automating the process of pulling blog topics into your SEO workflow.


3. Setting Up Perplexity AI Integration

Now that you have set up the trigger, the next step is to integrate Perplexity AI using Pabbly Connect. Add a new action step in your workflow and select Perplexity AI as the action application. You will need to create a connection by entering your API key from your Perplexity AI account.

In the action event, select ‘Create Chat Completion’. Here, you will provide a prompt that instructs Perplexity AI to generate SEO-friendly keywords based on the blog topic received from Google Sheets. This integration is vital for ensuring your blog content is optimized for search engines.

  • Enter the model type from Perplexity AI, such as the Lama 3.1 model.
  • Provide the user role and the prompt for generating keywords.
  • Map the blog topic from Google Sheets into your prompt.

Once you have completed these steps, test the integration to ensure that the keywords are generated correctly. This automated process will save you significant time on SEO research.


4. Creating a New Blog Post in WordPress

After generating the SEO content, the next step is to create a new blog post on WordPress using Pabbly Connect. Add another action step in your workflow and select WordPress as the action application. Choose ‘Create Post’ as the action event.

For this step, you need to connect your WordPress account by entering the base URL, username, and password. Make sure that the WordPress REST API authentication plugin is installed and active on your site. This connection allows Pabbly Connect to publish the blog directly to your WordPress site.

Map the post title and content generated from Perplexity AI. Set the post type to ‘Post’ for a new blog entry. Click on ‘Save and Send Test’ to publish your new blog post.

Once the test is successful, your blog post will be created on your WordPress site, complete with SEO-optimized content generated from Perplexity AI.


5. Conclusion: Automate Your SEO Process with Pabbly Connect

In conclusion, using Pabbly Connect to automate your SEO process is a game-changer for content creators. By integrating Google Sheets, Perplexity AI, and WordPress, you can streamline the entire process from topic generation to blog publication. This automation not only saves time but ensures your content is optimized for search engines.

Ensure you check out Pabbly Connect to create business automation workflows and reduce manual tasks. Pabbly Connect currently offer integration with 2,000+ applications.

Check out Pabbly Connect – Automate your business workflows effortlessly! Sign Up Free – Start your journey with ease! 10,000+ Video Tutorials – Learn step by step! Join Pabbly Facebook Group – Connect with 21,000+ like minded people!

With Pabbly Connect, every time you add a new topic in Google Sheets, the entire SEO workflow is triggered automatically, generating keywords, titles, and content ready for publication. This powerful integration helps you create high-ranking blogs efficiently, enhancing your content marketing strategy.

Integrate Shopify Abandoned Cart Recovery with WhatsApp Using Pabbly Connect

Learn how to automate Shopify abandoned cart recovery messages via WhatsApp using Pabbly Connect in this step-by-step tutorial. Discover hidden automation capabilities within your existing tools. This guide shows you how to connect your essential applications and permanently eliminate redundant manual processes.

Watch Step By Step Video Tutorial Below


1. Accessing Pabbly Connect for Integration

To begin, you need to access Pabbly Connect. Open your browser and search for Pabbly Connect’s landing page. If you are a new user, click on ‘Sign up for free’ to get started. Existing users should select ‘Sign in’ to access their accounts.

Once logged in, you will see various Pabbly applications. Click on ‘Access Now’ for Pabbly Connect to reach your dashboard. From here, you can create your workflow, which will automate the process of sending WhatsApp messages for abandoned carts in Shopify.


2. Creating Your Workflow in Pabbly Connect

In your Pabbly Connect dashboard, click on the ‘Create Workflow’ button. You will be prompted to enter a name for your workflow. For this tutorial, name it ‘Send Shopify Abandoned Recovery Cart Messages via WhatsApp’ and choose a folder to save it in. using Pabbly Connect

  • Click on ‘Create’ to open the workflow window.
  • This window allows you to set up triggers and actions for your automation.

In the workflow window, you will need to select your trigger application. For this integration, choose Shopify as the trigger application. Set the trigger event to ‘New Abandoned Checkout’ to ensure your workflow activates whenever a cart is abandoned.


3. Connecting Shopify to Pabbly Connect

After selecting Shopify, click on ‘Connect’ to establish a connection. You will be asked to add a new connection or select an existing one. If this is your first time, choose ‘Add a New Connection’ and enter your Shopify API access token and subdomain. using Pabbly Connect

  • Log into your Shopify account and navigate to the ‘Apps’ section.
  • Create a new app to obtain your API access token.
  • Ensure you have the necessary permissions set for the app.

Once you have your API token and subdomain, paste them into the respective fields in Pabbly Connect. After saving, your Shopify account will be successfully connected, allowing you to capture abandoned cart data directly into your workflow.


4. Sending WhatsApp Messages Using Pabbly Connect

With Shopify connected, you can now set up the action to send WhatsApp messages. Select Vati as your action application and choose the action event ‘Send Template Message’. Click on ‘Connect’ to establish a connection with your Vati account. using Pabbly Connect

Enter the API endpoint and access token from your Vati account. Map the WhatsApp number from the Shopify response to ensure dynamic messaging. Select the template you wish to use for the message.

Ensure that your template includes dynamic fields like customer names to personalize each message. After setting up the parameters, click on ‘Save and Send Test Request’ to verify that the WhatsApp message is sent correctly to the customer.


5. Finalizing Your Pabbly Connect Workflow

After successfully sending a test message, review your workflow settings in Pabbly Connect. This includes ensuring that the trigger checks for new abandoned carts every 10 minutes, which is the standard polling interval for Shopify.

Once everything is set, your workflow is now operational. Whenever a customer abandons their cart in Shopify, Pabbly Connect will automatically send a WhatsApp message reminding them to complete their purchase. This integration not only saves time but also helps in recovering lost sales effectively.


Conclusion

In this tutorial, we demonstrated how to use Pabbly Connect to automate the sending of WhatsApp messages for Shopify abandoned carts. By following the steps outlined, you can enhance your customer engagement and improve conversion rates effortlessly.

Ensure you check out Pabbly Connect to create business automation workflows and reduce manual tasks. Pabbly Connect currently offer integration with 2,000+ applications.