Automate Sharing YouTube Videos on Discord and Reddit with Pabbly Connect

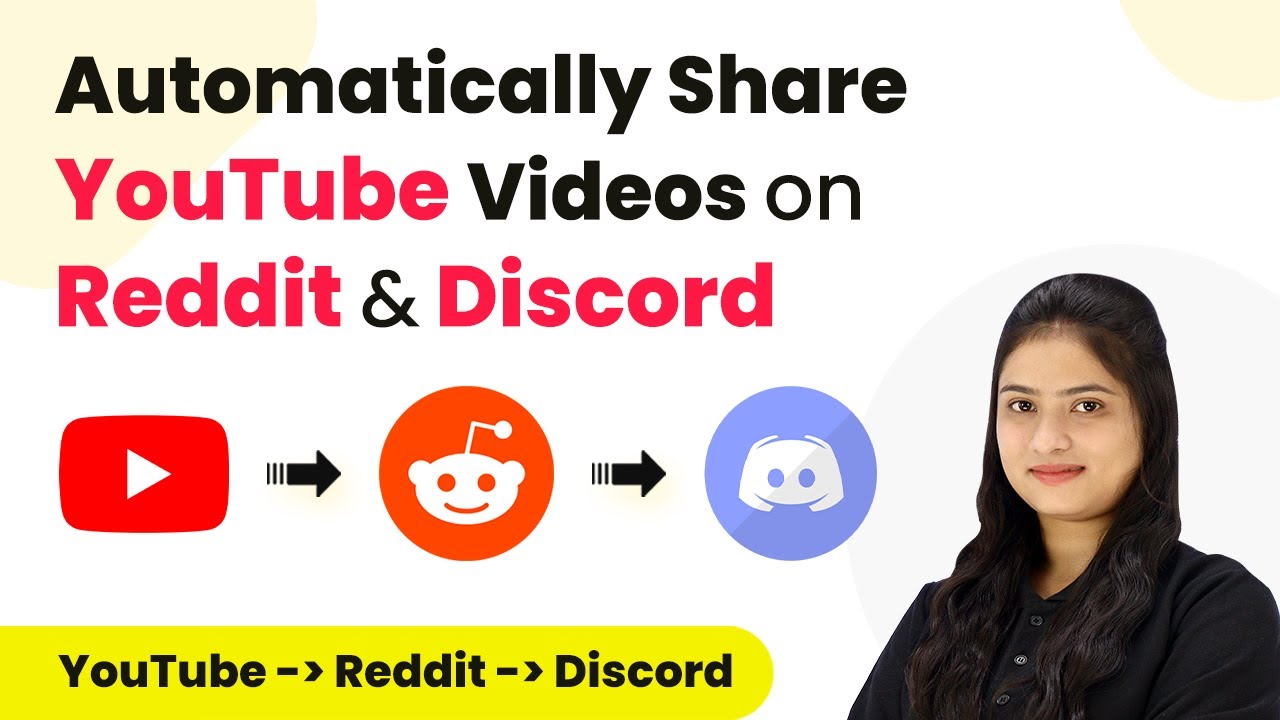
Learn how to automate sharing new YouTube videos on Discord and Reddit using Pabbly Connect. Step-by-step guide for seamless integration. Implement the precise methodologies leading organizations use to automate repetitive tasks, illustrated with practical examples designed for immediate application.

Watch Step By Step Video Tutorial Below


1. Accessing Pabbly Connect for Automation

To begin automating the sharing of new YouTube videos, first access Pabbly Connect by visiting the official website. If you are new, click on the ‘Sign Up for Free’ button to create an account, which offers 100 free tasks monthly.

For existing users, simply click on the ‘Sign In’ button. Once logged in, navigate to the dashboard where you can create a new workflow. This is essential for setting up the integration between YouTube, Discord, and Reddit using Pabbly Connect.


2. Creating a New Workflow in Pabbly Connect

In this section, we will create a workflow in Pabbly Connect that connects YouTube with Discord and Reddit. Click on the ‘Create Workflow’ button. A dialog box will appear asking for a workflow name.

  • Name the workflow something descriptive, like ‘Automatically Share New YouTube Video on Reddit and Discord’.
  • Select a folder to save your workflow.
  • Click ‘Create’ to finalize the setup.

After creating the workflow, you will see two sections: Trigger and Action. Here, you will define the events that start the automation and the actions that follow using Pabbly Connect.


3. Setting Up the Trigger with YouTube

The first step in your workflow is to set up the trigger application, which will be YouTube. Select YouTube as your trigger application and choose the event ‘New Video in Channel with Video URL’. This event will activate whenever a new video is uploaded.

Next, click on ‘Connect’ to build a connection with your YouTube account. If you have an existing connection, select it; otherwise, create a new one. Once connected, select your channel ID and click on ‘Save and Send Test Request’. This allows Pabbly Connect to capture the latest video details.


4. Sharing the Video on Reddit

Now that we have our trigger set, it’s time to share the video on Reddit. In the Action step, select Reddit as the action application and choose ‘Submit a Link Post’ as the action event. This will allow you to post the video link to your subreddit.

  • Connect to your Reddit account, either by selecting an existing connection or creating a new one.
  • Fill in the title of your post, using dynamic fields to map the title from the YouTube response.
  • Enter the subreddit name where you want to post your video.

Finally, click on ‘Save and Send Test Request’ to publish the post. Check your Reddit community to confirm that the video has been shared successfully through Pabbly Connect.


5. Sharing the Video on Discord

The last step is to set up sharing on Discord. In the next action step, select Discord and choose ‘Send Channel Message HTML’ as the action event. This allows you to send formatted messages to your Discord channel.

Input the webhook URL from your Discord server settings to establish the connection. Enter the message you wish to send, including the video title and URL. Use HTML tags to format the message properly.

After setting up your message, click on ‘Save and Send Test Request’. Verify that the message appears in your Discord channel. Now, whenever you upload a new video to YouTube, it will be automatically shared on both Reddit and Discord using Pabbly Connect.


Conclusion

In conclusion, using Pabbly Connect allows you to automate the sharing of new YouTube videos on Discord and Reddit seamlessly. By following these steps, you can enhance your community engagement and ensure your content reaches a wider audience effortlessly.

Ensure you check out Pabbly Connect to create business automation workflows and reduce manual tasks. Pabbly Connect currently offer integration with 2,000+ applications.

Integrating JotForm with Zoho Books Using Pabbly Connect

Learn how to automate contact creation in Zoho Books from JotForm submissions using Pabbly Connect. Step-by-step guide for seamless integration. Implement the precise methodologies leading organizations use to automate repetitive tasks, illustrated with practical examples designed for immediate application.

Watch Step By Step Video Tutorial Below


1. Accessing Pabbly Connect for Integration

To start integrating JotForm with Zoho Books using Pabbly Connect, visit the Pabbly Connect website. You can access it by typing Pabbly.com/connect in your browser. Once there, sign in to your account.

For new users, signing up is free and provides 100 tasks monthly. After logging in, navigate to the Pabbly Connect dashboard, where you can manage your workflows easily.


2. Creating a Workflow in Pabbly Connect

In the Pabbly Connect dashboard, create a new workflow to automate the process of adding contacts to Zoho Books from JotForm submissions. Click on ‘Create Workflow’ and give it a name, such as ‘Create Contact in Zoho Books from JotForm Submission’.

  • Click on ‘Create’ to start the workflow.
  • Select JotForm as the trigger application.
  • Choose ‘New Response’ as the trigger event.

This setup tells Pabbly Connect to start the workflow when a new response is received in JotForm. This is the first step in the integration process.


3. Connecting JotForm to Pabbly Connect

To connect JotForm to Pabbly Connect, you will receive a webhook URL from Pabbly. Copy this URL and go to your JotForm account. Edit the form you want to connect and navigate to the ‘Settings’ tab.

Under ‘Integrations’, select ‘Webhooks’ and paste the copied URL. Click on ‘Complete Integration’ to finalize the connection. This step ensures that JotForm sends data to Pabbly Connect whenever a form is submitted.


4. Setting Up Zoho Books Action in Pabbly Connect

After setting up JotForm, the next step is to configure Zoho Books as the action application in Pabbly Connect. Choose Zoho Books and select ‘Create Contact’ as the action event. Click on ‘Connect’ to establish a connection with your Zoho Books account.

You will need to enter your Zoho Books domain name, which is typically in the format of books.zoho.com. After entering the domain, click ‘Save’ and grant permission to connect. This step allows Pabbly Connect to create contacts in your Zoho Books account based on JotForm submissions.

  • Select your organization from Zoho Books.
  • Map fields from JotForm to Zoho Books, such as first name, last name, email, and city.

Once all necessary fields are mapped, click ‘Save and Send Test Request’ to check if the contact is created successfully in Zoho Books.


5. Testing the Integration

After completing the setup, it’s crucial to test the integration between JotForm and Zoho Books via Pabbly Connect. Fill out the JotForm with dummy details and submit it. This action should trigger the workflow you created.

Go back to your Zoho Books account and refresh the page. You should see the new contact added with the details you submitted through JotForm. This confirms that the integration is working correctly.

If the contact appears in Zoho Books, the integration is successful. You can now automate the process of adding contacts from JotForm submissions to Zoho Books, saving you time and effort.


Conclusion

In this tutorial, we explored how to integrate JotForm with Zoho Books using Pabbly Connect. By following these steps, you can automate the creation of contacts in Zoho Books, streamlining your workflow and enhancing efficiency.

Ensure you check out Pabbly Connect to create business automation workflows and reduce manual tasks. Pabbly Connect currently offer integration with 2,000+ applications.

Integrating Google Sheets with Mailer Cloud Using Pabbly Connect: A Step-by-Step Guide

Learn how to integrate Google Sheets with Mailer Cloud using Pabbly Connect for seamless automation and lead management. Follow our detailed tutorial for step-by-step instructions.

Watch Step By Step Video Tutorial Below


1. Accessing Pabbly Connect for Integration

To start integrating Google Sheets with Mailer Cloud, first access Pabbly Connect. This platform allows you to automate workflows seamlessly. You can visit the Pabbly Connect homepage by searching for the URL Pabbly.com/connect.

Once on the homepage, you will see options to sign in or sign up. If you are a new user, click on ‘Sign Up Free’ to get 300 tasks every month. Existing users can simply sign in to access their dashboard.


2. Creating Your Workflow in Pabbly Connect

After signing in to Pabbly Connect, the next step is to create a workflow. Click on the ‘Create Workflow’ button located at the top right corner of the dashboard. You will then be prompted to name your workflow. Let’s name it ‘Create Mailer Cloud Contact from New Google Sheets Row’.

  • Choose the folder where you want to save your workflow.
  • Click the ‘Create’ button to finalize the workflow setup.

Now that your workflow is created, you will see two essential components: Trigger and Action. The Trigger indicates when an event occurs, while Action specifies what should happen as a result.


3. Setting Up Google Sheets as the Trigger

In this section, you will set Google Sheets as the trigger application within Pabbly Connect. Select Google Sheets from the trigger options and choose the event as ‘New or Updated Spreadsheet Row’. This setup ensures that every time a new row is added, it triggers the workflow.

After selecting your trigger event, you will receive a webhook URL. Copy this URL as it will be used to connect Google Sheets with Pabbly Connect. Next, go to your Google Sheets account and open the relevant spreadsheet.

  • Click on ‘Extensions’ in Google Sheets.
  • Select ‘Add-ons’ and then ‘Get Add-ons’.
  • Search for the Pabbly Connect Webhooks add-on and install it.

After installation, refresh the Google Sheets page. Then, navigate back to ‘Extensions’, select ‘Pabbly Connect Webhooks’, and click on ‘Initial Setup’. Here, you will enter the webhook URL and specify the trigger column, which will be the last column in your data.


4. Adding Contacts to Mailer Cloud via Pabbly Connect

Now that your Google Sheets trigger is set up, it’s time to configure the action to add contacts to Mailer Cloud. In Pabbly Connect, select Mailer Cloud as your action application and choose ‘Add Contact to a List’ as the action event.

To connect Mailer Cloud with Pabbly Connect, you will need to enter your API key. To find this, log in to your Mailer Cloud account, go to your profile, and find the API keys section under account settings. Generate a new API key and copy it back to Pabbly Connect.

Select the contact list where new leads should be added. Map the necessary fields such as email, first name, last name, and phone number using the data from the trigger step.

After mapping these details, click ‘Save and Send Test Request’ to finalize the setup. If successful, you will see a confirmation message indicating that a new contact has been created in Mailer Cloud.


5. Testing the Integration

With the setup complete, it’s time to test the integration between Google Sheets and Mailer Cloud using Pabbly Connect. Add a new row in your Google Sheets with dummy lead data, ensuring that all required fields are filled in appropriately.

After entering the data, check your Mailer Cloud account to verify if the new contact has been added successfully. You should see the contact details reflecting the information you entered in Google Sheets.

This testing phase confirms that your automation works as intended, allowing you to manage leads efficiently without manual data entry. With Pabbly Connect, you can streamline your workflow, saving time and enhancing productivity.


Conclusion

In this tutorial, we demonstrated how to integrate Google Sheets with Mailer Cloud using Pabbly Connect. By setting up triggers and actions, you can automate the process of adding new leads, ensuring efficient lead management without manual effort. This integration enhances your workflow and saves time, allowing you to focus on growing your business.

Ensure you check out Pabbly Connect to create business automation workflows and reduce manual tasks. Pabbly Connect currently offer integration with 2,000+ applications.

Automate Mailer Light with Pabbly Connect: A Step-by-Step Guide

Learn how to automate Mailer Light using Pabbly Connect in this detailed tutorial. Streamline your email marketing with seamless integrations and no coding required. Learn to create powerful connections between your critical applications without requiring specialized programming knowledge or extensive technical background.

Watch Step By Step Video Tutorial Below


1. Accessing Pabbly Connect for Mailer Light Integration

To automate Mailer Light using Pabbly Connect, start by accessing the platform. Go to the URL Pabbly.com/connect in your browser. You will see options to sign in or sign up for free.

If you’re a new user, click on ‘Sign Up for Free’ to create an account. After signing up, you’ll receive 100 free tasks every month to explore Pabbly Connect. Existing users should click on ‘Sign In’ to log into their accounts.


2. Creating a Workflow in Pabbly Connect

Once logged in, navigate to the dashboard of Pabbly Connect. Here, you can create a new workflow by clicking on the ‘Create Workflow’ option. A dialog box will prompt you to name your workflow.

For this integration, name your workflow ‘Automate Mailer Light’ and select a folder to save it in. After selecting the folder, click on ‘Create’. You will be presented with two windows: Trigger and Action.

  • Select Mailer Light as the Trigger application.
  • Choose the trigger event, for example, ‘Subscriber Added’.
  • Click on ‘Connect’ to build the connection.

After setting up the trigger, you can proceed to configure the action step in your workflow.


3. Setting Up Mailer Light as a Trigger

In the Trigger section of Pabbly Connect, select Mailer Light as the application. Choose the trigger event, such as ‘Subscriber Removed from Group’. Click on ‘Connect’ to establish the connection.

You will need to provide the API key from your Mailer Light account. To get the API key, navigate to the Integrations section in Mailer Light, and generate a new API token. Copy this token and paste it into the Pabbly Connect connection field.

  • Generate a new API token in Mailer Light under the Integrations section.
  • Paste the API token into Pabbly Connect.
  • Click on ‘Save’ to finalize the connection.

After saving, click on ‘Save and Send Test Request’ to ensure that the connection is successful. You will receive a response confirming the setup.


4. Adding Action Steps with Pabbly Connect

After successfully setting up Mailer Light as a trigger, you can now add action steps. For instance, you can send new subscriber details to Google Sheets or notify your team on Google Chat. using Pabbly Connect

To add Google Sheets, select it as the action application. Choose the action event, such as ‘Create New Row’. Connect Google Sheets using the same API key method as before, ensuring you have the correct permissions set.

Select Google Sheets as the action application. Choose the action event like ‘Create New Row’. Map the necessary fields from Mailer Light to Google Sheets.

Once the action is configured, you can test the entire workflow. When a subscriber is removed from Mailer Light, their details will automatically be sent to Google Sheets.


5. Conclusion: Automating Mailer Light with Pabbly Connect

In this tutorial, we explored how to automate Mailer Light using Pabbly Connect. You learned how to set up triggers and actions efficiently without any coding skills. This automation can significantly streamline your email marketing efforts.

Ensure you check out Pabbly Connect to create business automation workflows and reduce manual tasks. Pabbly Connect currently offer integration with 2,000+ applications.

By integrating Mailer Light with other applications like Google Sheets and Google Chat through Pabbly Connect, you can enhance productivity and maintain accurate records. Start automating your email marketing today for better engagement and efficiency!


Integrating Clavio with Instam Mojo Using Pabbly Connect

Learn how to integrate Clavio with Instam Mojo using Pabbly Connect to automate failed payment recovery. Step-by-step tutorial included. Master proven automation processes with practical implementation examples and strategic recommendations you can apply immediately in your workflow.

Watch Step By Step Video Tutorial Below


1. Accessing Pabbly Connect for Integration

To start the integration process, access Pabbly Connect by searching for it in your browser. Once on the landing page, you will see options to sign in or sign up for free. If you are a new user, click on ‘Sign Up for Free’ to create an account. Existing users can simply click on ‘Sign In’ to access their dashboard.

After signing in, you will be directed to the dashboard where you can find various applications offered by Pabbly Connect. Click on the ‘Access Now’ button to open your Pabbly Connect account. This step is crucial as it sets the foundation for automating failed payment recovery from Instam Mojo.


2. Creating a Workflow in Pabbly Connect

Once you are in your Pabbly Connect dashboard, click on the ‘Create Workflow’ button. This action will prompt you to name your workflow and select a folder for saving it. Name your workflow something descriptive, like ‘Clavio Subscriber on Failed Instam Mojo Payment’ and choose a folder named ‘Automations’.

  • Click on ‘Create’ to proceed to the workflow setup.
  • Define your trigger application as Instam Mojo.
  • Select the trigger event as ‘Failed Payment’.

After defining the trigger, Pabbly Connect will generate a webhook URL. This URL is essential for linking your Instam Mojo account with the workflow. Copy this URL as you will need to paste it into your Instam Mojo settings to establish the connection.


3. Configuring Instam Mojo with Pabbly Connect

Log into your Instam Mojo account to create the necessary configuration. Navigate to the page settings of the product for which you want to automate payment recovery. Click on the three dots next to your product, select ‘Edit Page’, and then go to ‘Page Settings’.

  • Enable the webhook by switching it on.
  • Paste the copied webhook URL from Pabbly Connect.
  • Select ‘Failed Payments’ as the information to be sent.

Save these settings and return to your Pabbly Connect workflow. The connection between Instam Mojo and Pabbly Connect is now established, and you will see a message indicating that it is waiting for a webhook response.


4. Testing the Webhook Response

To test the webhook response, you need to simulate a failed payment in Instam Mojo. Go to the product page and initiate a payment using dummy card details that will fail. For instance, enter a dummy card number, expiry date, and CVV.

Once the payment fails, check your Pabbly Connect workflow to see if it has captured the response. You should find the payment status indicating failure along with the details you entered during the test. This confirms that your webhook is working correctly and that the integration is functional.


5. Creating a Clavio Subscriber from Failed Payments

Now that the webhook is successfully capturing failed payment details, the next step is to create a subscriber in Clavio. In your Pabbly Connect workflow, select Clavio as the action application and choose the action event as ‘Create Profile’.

Connect your Clavio account to Pabbly Connect by selecting ‘Add a New Connection’ and granting the necessary permissions. Map the fields from the webhook response to the corresponding fields in Clavio, such as email, first name, and last name. This mapping ensures that the subscriber’s information is dynamically updated with each new failed payment.

Finally, add another action step to add the created profile to a specific list in Clavio. Select the list for failed Instam Mojo payments and map the profile ID. This completes the workflow, allowing you to automatically create and manage subscribers from failed payments.


Conclusion

This tutorial demonstrated how to integrate Clavio with Instam Mojo using Pabbly Connect to automate the recovery of failed payments. By following these steps, you can efficiently create targeted email marketing campaigns to re-engage customers and reduce lost sales opportunities.

Ensure you check out Pabbly Connect to create business automation workflows and reduce manual tasks. Pabbly Connect currently offer integration with 2,000+ applications.

Automate Subscriber Management with Pabbly Connect: Integrating Typeform and Flodesk

Learn how to automate adding subscribers to Flodesk segments based on Typeform responses using Pabbly Connect. Step-by-step tutorial included. Eliminate manual repetitive tasks from your workflow. Discover proven automation methods with intuitive steps designed for efficiency-minded professionals.

Watch Step By Step Video Tutorial Below


1. Accessing Pabbly Connect for Integration

To start integrating Typeform and Flodesk, you first need to access Pabbly Connect. Open your browser and type in the URL for Pabbly Connect. Once on the homepage, you will see options to sign in or sign up for free.

If you are a new user, click on the ‘Sign Up for Free’ button. This will allow you to create an account in just two minutes, giving you access to 100 free tasks every month. If you already have an account, click on ‘Sign In’ to log in.


2. Creating a Workflow in Pabbly Connect

After signing in to Pabbly Connect, you will be directed to the dashboard where you can create a new workflow. Click on the ‘Create Workflow’ button. A dialog box will appear, prompting you to name your workflow.

  • Name your workflow, for example, ‘Add Subscriber in Flodesk Segment Based on Typeform Responses’.
  • Select a folder to save your workflow.
  • Click on ‘Create’ to proceed.

This will take you to the workflow setup area where you can define your trigger and actions. Remember, the trigger will initiate the workflow, and you can add multiple actions based on that trigger.


3. Setting Up the Trigger with Typeform

In this step, you will set up Typeform as the trigger application in Pabbly Connect. Select Typeform from the list of applications and choose the trigger event as ‘New Entry Beta’. This means the workflow will be triggered whenever a new form entry is submitted.

Click on ‘Connect’ to establish the connection between Typeform and Pabbly Connect. You will need to log into your Typeform account and grant permissions. Once connected, select the specific form you want to use, such as the ‘Course Registration Form’.


4. Configuring the Action with Flodesk

Now, you will configure the action step to add subscribers to Flodesk based on the responses from Typeform. Choose Flodesk as the action application in Pabbly Connect and select the action event as ‘Create or Update Subscriber’.

  • Map the email field from the Typeform response.
  • Fill in the subscriber’s first name and last name using the mapped data.
  • Click on ‘Save and Send Test Request’ to verify the connection.

This action will ensure that every time a new student submits the Typeform, their details will be added to your Flodesk account as a subscriber.


5. Routing Subscribers to Different Segments

To ensure subscribers are added to the correct segments based on their course selection, you will set up a router in Pabbly Connect. After the action step, select ‘Router’ as your action application. This allows you to create different paths in your workflow.

Set conditions for each route based on the course selected in the Typeform response. For example, if the selected course is ‘Java for Professionals’, route the subscriber to the Java segment. If it is ‘Advanced PHP’, route them to the PHP segment. Click on ‘Save and Send Test Request’ to confirm the setup.


Conclusion

This tutorial demonstrated how to automate subscriber management in Flodesk using Typeform responses through Pabbly Connect. By following these steps, you can efficiently manage your email marketing segments without coding skills, enhancing your workflow automation.

Ensure you check out Pabbly Connect to create business automation workflows and reduce manual tasks. Pabbly Connect currently offer integration with 2,000+ applications.

Automate Instagram Posts with Pabbly Connect and Google Sheets

Learn how to automate Instagram posts using Pabbly Connect, Google Sheets, Canva, and Dropbox. Follow this detailed tutorial for seamless integration. Follow this definitive guide to creating powerful automated workflows with straightforward, efficiency-focused solutions that save valuable time.

Watch Step By Step Video Tutorial Below


1. Setting Up Pabbly Connect for Automation

To start automating Instagram posts using Pabbly Connect, you first need to access the platform. After logging into your Pabbly Connect account, you can create a new workflow. This workflow will integrate various applications like Google Sheets, Canva, and Dropbox to streamline your posting process.

Begin by selecting the trigger application. In this case, you will choose ‘Scheduled by Pabbly’ to initiate the automation daily. This ensures that your Instagram posts are created and published at a specific time each day. You can customize the schedule according to your preferences.


2. Fetching Data from Google Sheets

After setting up the trigger, the next step in Pabbly Connect is to fetch data from Google Sheets. You will use the ‘Lookup Spreadsheet Row’ action to retrieve the specific quote and author for the day. This step is essential for dynamically creating your Instagram post.

  • Select the Google Sheets file containing your data.
  • Specify the row based on the current date to get the correct quote and author.
  • Map the retrieved data to be used in the next steps of the workflow.

This integration allows you to automate the process of posting by ensuring that the content is pulled directly from your Google Sheets each day. With this setup, you can manage your content efficiently without any manual input.


3. Creating the Instagram Post in Canva

Once you have the quote and author from Google Sheets, the next step in Pabbly Connect is to create the Instagram post using Canva. You will select Canva as your action application and choose the ‘Create Design’ action event. This will allow you to use a pre-designed template for your posts.

Make sure you have a dynamic template ready in Canva, where you can map the quote and author fields. After selecting the template, you will input the title of the post using the quote retrieved earlier. This integration allows you to generate visually appealing posts automatically.


4. Downloading the Image and Uploading to Dropbox

After creating the post in Canva, the next action in your Pabbly Connect workflow is to download the image. You will use the ‘Download Design as Image’ action to get the image file of your newly created post. Specify the design ID received from the previous step to ensure you download the correct image.

  • Set the export quality of the image.
  • Choose the desired size for your Instagram post.
  • Map the job ID to track the download process.

Once the image is downloaded, you will then upload it to your Dropbox account using the ‘Upload File’ action. This step serves as a backup and ensures your images are stored safely.


5. Posting the Image on Instagram

The final step in your Pabbly Connect automation is to post the image on Instagram. You will select Instagram for Business as your action application and use the ‘Create Post’ action event. Here, you will map the image URL from Dropbox and include the quote and author in the caption.

After successfully posting on Instagram, you can optionally update your Google Sheets to reflect the status of the post. This can include marking it as published and adding the image URL for future reference. This completes the automation process, allowing you to manage your Instagram content seamlessly.


Conclusion

In this tutorial, we explored how to automate Instagram posts using Pabbly Connect, Google Sheets, Canva, and Dropbox. By following the steps outlined, you can streamline your content creation and posting process without any manual effort. This integration not only saves time but also ensures consistency in your posting schedule.

Ensure you check out Pabbly Connect to create business automation workflows and reduce manual tasks. Pabbly Connect currently offer integration with 2,000+ applications.

Integrate Flexi Funnels with Pabbly Connect: A Step-by-Step Guide

Learn how to integrate Flexi Funnels with Pabbly Connect for seamless lead management and email marketing. Follow our detailed tutorial to automate your workflows. Navigate the automation landscape confidently with clear, structured guidance suitable for professionals regardless of prior technical experience.

Watch Step By Step Video Tutorial Below


1. Accessing Pabbly Connect for Integration

To begin the integration process, you need to access Pabbly Connect. Start by visiting the Pabbly website and signing in to your account. If you’re new, you can sign up for free to get started.

Once logged in, navigate to your dashboard where you’ll see various Pabbly applications. Click on the option labeled ‘Access Now’ under Pabbly Connect. This will take you to the workflow creation area where you can set up your integrations.


2. Creating a New Workflow in Pabbly Connect

Now that you are in Pabbly Connect, the next step is to create a new workflow. Click on the ‘Create Workflow’ button. You will be prompted to name your workflow and select a folder for it. using Pabbly Connect

  • Name your workflow appropriately, such as ‘Flexi Funnels to Mend Integration.’
  • Choose a folder for better organization, like ‘Automations.’

After naming and selecting a folder, click on ‘Create’. This takes you to the workflow window where you can set triggers and actions for your integration.


3. Setting Up Flexi Funnels as the Trigger

In the workflow window, the first step is to set up your trigger application, which in this case is Flexi Funnels. Search for Flexi Funnels in the trigger application field. using Pabbly Connect

Select ‘New Form Submission’ as the trigger event. Upon selection, Pabbly Connect will generate a webhook URL. Copy this URL as it will be used to connect Flexi Funnels with Pabbly Connect.

Next, log into your Flexi Funnels account. Navigate to the project settings where you want to set up the integration. Select the form element and access the settings for it. Click on the ‘Connect Webhook’ button and paste the copied URL to establish the connection.


4. Setting Up Mend as the Action in Pabbly Connect

After configuring Flexi Funnels, it’s time to set up the action application, which is Mend. In the action application field, search for Mend and select it. using Pabbly Connect

  • Choose ‘Add New Subscriber’ as the action event.
  • Click on ‘Connect’ to link your Mend account with Pabbly Connect.

You will be prompted to enter your Mend API key. To find this, go to your Mend account settings and generate a new API key if you haven’t done so already. Copy this key and paste it back in Pabbly Connect to complete the connection.


5. Testing the Integration Workflow

Once the connections are established, it’s essential to test the workflow to ensure everything functions correctly. Go back to Flexi Funnels and perform a test submission using the form you connected.

After submitting the test data, return to Pabbly Connect to verify that the webhook has received the response. You should see the data captured from your test submission, confirming that the integration is working as intended.

Finally, check your Mend account to see if the new subscriber has been added with the details from the test submission. This confirms that the integration between Flexi Funnels and Mend through Pabbly Connect is successfully set up.


Conclusion

This tutorial covered how to integrate Flexi Funnels with Mend using Pabbly Connect. By following these steps, you can automate your lead management and ensure timely communication with potential clients. Automating these processes can significantly enhance your marketing efforts and improve conversion rates.

Ensure you check out Pabbly Connect to create business automation workflows and reduce manual tasks. Pabbly Connect currently offer integration with 2,000+ applications.

Integrate SMS Alerts with Pabbly Connect: A Step-by-Step Tutorial

Learn how to seamlessly integrate SMS alerts and webinar registrations using Pabbly Connect. Follow this detailed tutorial to automate your processes effectively. Discover hidden automation capabilities within your existing tools. This guide shows you how to connect your essential applications and permanently eliminate redundant manual processes.

Watch Step By Step Video Tutorial Below


1. Accessing Pabbly Connect to Start Integration

To begin integrating SMS alerts with Pabbly Connect, first, access the platform. Pabbly Connect is essential for automating your workflows efficiently. Sign in to your existing account or create a new one to get started. using Pabbly Connect

After logging in, you will see the Pabbly Connect dashboard. Here, you can create workflows that connect various applications. This is where the integration with SMS and other applications will take place, making it a crucial step in the process.


2. Creating a Workflow in Pabbly Connect

Creating a workflow is the next step in using Pabbly Connect. This workflow will automate the process of adding webinar registrants and sending SMS alerts. Click on the ‘Create Workflow’ button located in the top right corner of your dashboard to initiate this process. using Pabbly Connect

  • Enter a name for your workflow, such as ‘Add Webinar Registrant & Send SMS’.
  • Select a folder where you want to save this workflow.
  • Click ‘Create’ to finalize your workflow setup.

Once the workflow is created, you will see trigger and action windows. Pabbly Connect allows you to set up a trigger that initiates actions based on specific events, making it a powerful tool for automation.


3. Setting Up Trigger with Pabbly Connect

The trigger setup is crucial for your workflow in Pabbly Connect. Choose ‘Webhook by Pabbly’ as your trigger application. This will allow you to capture data from form submissions automatically. using Pabbly Connect

  • Select ‘Catch Webhook’ as the trigger event.
  • Copy the unique webhook URL provided by Pabbly Connect.
  • Integrate this URL into your form builder application to establish a connection.

This setup ensures that whenever a new form submission occurs, Pabbly Connect captures the response, allowing you to proceed to the next steps in your automation.


4. Integrating Action Steps with Pabbly Connect

After setting up the trigger, the next step is to integrate action steps using Pabbly Connect. First, select ‘Webinar Kit’ as the action application. This will enable you to add registrants from your form submissions directly to your webinar. using Pabbly Connect

Choose ‘New Webinar Registration’ as the action event. Connect your Webinar Kit account to Pabbly Connect using the provided API token. Map the required fields, such as email and name, from the webhook response to the registration form.

This integration allows you to manage your webinar registrations efficiently, ensuring that all participants are added automatically as they submit their details.


5. Sending SMS Alerts via Pabbly Connect

Finally, to enhance participant engagement, set up SMS alerts using Pabbly Connect. Select ‘Twilio’ as the action application for sending SMS messages to registrants. using Pabbly Connect

Choose ‘Send SMS Message’ as the action event. Connect your Twilio account by entering the Account SID and Auth Token. Compose the SMS body, including personalized greetings and details about the webinar.

This step ensures that all registrants receive timely notifications, enhancing their experience and keeping them informed about the webinar details.


Conclusion

In this tutorial, we explored how to integrate SMS alerts and webinar registrations using Pabbly Connect. By following these steps, you can automate your processes and enhance participant engagement effectively.

Ensure you check out Pabbly Connect to create business automation workflows and reduce manual tasks. Pabbly Connect currently offer integration with 2,000+ applications.

Integrating Google Sheets with Salesmate Using Pabbly Connect

Learn how to automate contact creation in Salesmate from Google Sheets using Pabbly Connect. Step-by-step tutorial on setting up the integration. Implement the precise methodologies leading organizations use to automate repetitive tasks, illustrated with practical examples designed for immediate application.

Watch Step By Step Video Tutorial Below


1. Accessing Pabbly Connect for Integration

To start integrating Google Sheets with Salesmate, first access Pabbly Connect by visiting the official website. You can sign up for a free account or log in if you are an existing user. This platform allows you to automate tasks without needing any coding skills.

After logging in, navigate to the Pabbly Connect dashboard. Here, you can create workflows that connect various applications. Click on the option to create a new workflow and name it appropriately, such as ‘Create Salesmate Contact from New Google Sheets Row.’ This will be the foundation for your automation process.


2. Setting Up Google Sheets as the Trigger

In this section, you will set Google Sheets as the trigger application in your Pabbly Connect workflow. This means that whenever a new row is added to your Google Sheets, it will trigger an action in Salesmate. Select Google Sheets as the trigger application and choose the event as ‘New or Updated Spreadsheet Row.’

  • Select Google Sheets as the trigger application.
  • Choose the event as ‘New or Updated Spreadsheet Row.’
  • Copy the webhook URL provided by Pabbly Connect.

Next, go to your Google Sheets and set up the connection by navigating to Extensions > Add-ons > Get Add-ons. Search for ‘Pabbly Connect Webhooks’ and install it. After installation, go back to Extensions and select Pabbly Connect Webhooks to configure the webhook URL and trigger column.


3. Configuring the Webhook in Google Sheets

After setting up the Google Sheets trigger, you must configure the webhook to send data to Pabbly Connect. In the Pabbly Connect Webhooks settings, paste the previously copied webhook URL. Specify the trigger column, which is the column that will indicate when new data is added.

  • Paste the webhook URL in the setup.
  • Set the trigger column to the final data column (e.g., Column D).

Once configured, click on ‘Submit’ to finalize the setup. Now, whenever you add a new entry in the specified column of Google Sheets, it will automatically send the data to Pabbly Connect.


4. Setting Up Salesmate as the Action

Now that Google Sheets is configured as the trigger, it’s time to set up Salesmate as the action application in your Pabbly Connect workflow. Select Salesmate and choose the action event as ‘Create Contact.’ This will allow you to automatically create a new contact in Salesmate whenever a new row is added in Google Sheets.

To connect Salesmate with Pabbly Connect, you will need to enter specific details such as your Salesmate hostname and session token. These details can be found in your Salesmate account under the profile settings. Ensure you enter them correctly to establish the connection.


5. Testing the Integration

With both applications configured, it’s time to test the integration between Google Sheets and Salesmate using Pabbly Connect. Add a new row in your Google Sheets with the required details such as first name, last name, phone number, and email address. Once you enter the data, it should automatically trigger the workflow.

Check your Salesmate account to confirm that the new contact has been created successfully. This will validate that your automation is working as intended. If everything is set up correctly, you will see the new contact reflecting in your Salesmate account, confirming the successful integration.


Conclusion

In this tutorial, you learned how to integrate Google Sheets with Salesmate using Pabbly Connect. This automation allows for seamless contact creation without manual input. By following the steps outlined, you can efficiently manage customer information and streamline your sales process.

Ensure you check out Pabbly Connect to create business automation workflows and reduce manual tasks. Pabbly Connect currently offer integration with 2,000+ applications.