How to Send Automated WhatsApp Messages Using Pabbly Connect

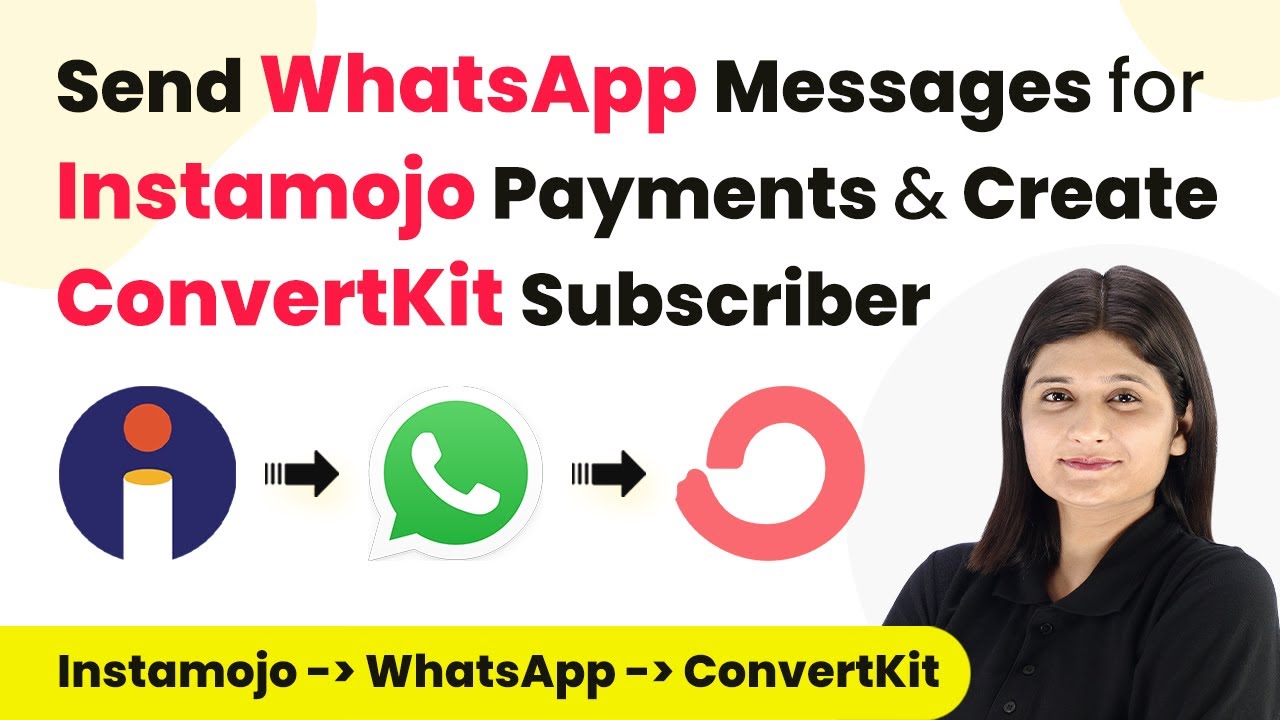
Learn how to automate WhatsApp messages using Pabbly Connect with Instamojo payments and ConvertKit in this step-by-step tutorial. Build sophisticated automated workflows in less time than you think. This guide translates complex integrations into straightforward steps for immediate implementation.

Watch Step By Step Video Tutorial Below


1. Accessing Pabbly Connect for Integration

To start automating WhatsApp messages, you first need to access Pabbly Connect. Simply type ‘Pabbly.com/connect’ in your browser to reach the landing page. If you are a new user, click on ‘Sign Up for Free’ to create an account and receive 100 tasks free monthly.

After signing in, navigate to the dashboard and select Pabbly Connect. This is where you can create your workflows to integrate various applications like WhatsApp, Instamojo, and ConvertKit seamlessly.


2. Creating a New Workflow in Pabbly Connect

Once you are in Pabbly Connect, click on ‘Create Workflow’ to begin setting up your automation. You will be prompted to name your workflow, such as ‘Send Automated WhatsApp Message for Instamojo Payment and Create ConvertKit Subscribers’. Select the folder where you want to save this workflow.

  • Name your workflow appropriately for easy identification.
  • Choose a folder to keep your workflows organized.

After naming your workflow, you will see two boxes appear: one for the trigger and one for the action. The trigger will be set to Instamojo when a successful payment is made, which will initiate the workflow.


3. Setting Up the Trigger with Instamojo

The next step is to set up the trigger in Pabbly Connect. Select ‘Instamojo V2’ as your trigger application and choose ‘Successful Payment’ as the trigger event. This means that every time a payment is processed, the workflow will be triggered automatically.

To connect Instamojo with Pabbly Connect, you will be provided with a webhook URL. Copy this URL and navigate to your Instamojo dashboard. Here, go to the product settings for the course you are selling and paste the webhook URL under the Advanced settings section.


4. Configuring the Action to Send WhatsApp Messages

After setting up the trigger, the next action is to send a WhatsApp message using Pabbly Connect. Select ‘Wati’ as your action application and choose ‘Send Template Message’ as the action event. You will need to connect your Wati account by entering the API endpoint and access token.

  • Enter your WhatsApp number and select the template you created earlier.
  • Fill in the broadcast name and any custom parameters required for your template message.

Once everything is configured, click ‘Save and Send Test Request’. Check your WhatsApp to confirm that the message has been sent successfully, indicating that the integration is functioning properly.


5. Adding Subscribers to ConvertKit

The final integration step involves adding subscribers to ConvertKit through Pabbly Connect. Select ConvertKit as your next action application and choose ‘Add Subscriber to a Sequence’ as the action event. Connect your ConvertKit account by entering your API key and secret.

Map the necessary fields such as email address, first name, and last name from the Instamojo response to ensure that the subscriber information is dynamic and updated with every new payment. Once you have mapped the fields correctly, click on ‘Save and Send Test Request’ to create the subscriber.

Check your ConvertKit dashboard to verify that the subscriber has been added successfully, completing the automation process between Instamojo, WhatsApp, and ConvertKit using Pabbly Connect.


Conclusion

In this tutorial, we demonstrated how to use Pabbly Connect to automate WhatsApp messages and add subscribers to ConvertKit upon receiving payments through Instamojo. By following these steps, you can streamline your communication and enhance customer engagement effectively.

Ensure you check out Pabbly Connect to create business automation workflows and reduce manual tasks. Pabbly Connect currently offer integration with 2,000+ applications.

Integrating Microsoft with Facebook: A Comprehensive Guide

Learn how to seamlessly integrate Microsoft with Facebook using Pabbly Connect. Follow our step-by-step tutorial for effective automation. Navigate the automation landscape confidently with clear, structured guidance suitable for professionals regardless of prior technical experience.

Watch Step By Step Video Tutorial Below


1. Setting Up Pabbly for Microsoft and Facebook Integration

To begin the integration process between Pabbly Connect, Microsoft, and Facebook, you first need to log in to your Pabbly account. If you are a new user, you can sign up for free, which allows you to access 100 tasks monthly.

Once logged in, navigate to the dashboard where you can see all the applications. Click on Pabbly Connect to access your workflows. This is where you will set up the connection between Microsoft and Facebook.


2. Creating a Workflow for Microsoft and Facebook Integration

In this step, you will create a workflow that automatically forwards leads from Facebook to Microsoft. Start by selecting the option to create a new workflow. You will be prompted to choose a trigger application. using Pabbly Connect

  • Select Facebook as your trigger application.
  • Choose the trigger event, which is ‘New Lead’ from Facebook.
  • Connect your Facebook account by authorizing Pabbly to access it.

After setting up the trigger, you will need to specify the Facebook page and form that you want to monitor for new leads. This setup ensures that every time a new lead is generated, it triggers the workflow.


3. Configuring Microsoft as the Action Application

After setting up the trigger with Facebook, the next step is to configure Microsoft as the action application. Here, you will specify what happens when a new lead is received from Facebook. using Pabbly Connect

Select Microsoft 365 as the action application and choose the action event, which is to send an email. Connect your Microsoft account to Pabbly by authorizing it. Once connected, you will need to fill in the details for the email that will be sent.

  • Set the subject of the email to ‘New Lead Received’.
  • In the body of the email, include details like name, email, and phone number of the lead.
  • Make sure to map the fields from Facebook to the corresponding fields in Microsoft.

This configuration allows you to receive immediate notifications via email whenever a new lead is generated on Facebook.


4. Testing the Microsoft and Facebook Integration

After configuring both applications, the next step is to test the integration to ensure everything works seamlessly. Begin by submitting a test lead through your Facebook form.

Once the test lead is submitted, return to Pabbly Connect and check the workflow. You should see the new lead being captured successfully. This confirms that the integration between Pabbly Connect, Microsoft, and Facebook is functioning correctly.


5. Finalizing the Workflow for Microsoft and Facebook

With successful testing, you can proceed to finalize the workflow. Ensure that all configurations are saved correctly. This includes the trigger from Facebook and the action to send an email through Microsoft.

Once everything is confirmed, activate the workflow. This will make the integration live, and you will start receiving emails in Microsoft for every new lead generated on Facebook.

By following these steps, you have successfully integrated Microsoft with Facebook using Pabbly Connect. This automation saves time and ensures that no lead is missed.


Conclusion

This tutorial has guided you through the process of integrating Microsoft with Facebook using Pabbly Connect. By automating lead forwarding, you can enhance your workflow and ensure timely follow-ups.

Thanks for following along with this tutorial! Remember to subscribe to the channel for more helpful content like this.

If you found this guide useful, please consider giving it a thumbs up and sharing it with others who might benefit from it.

Automate YouTube Video Notifications in Google Chat Using Pabbly Connect

Learn how to automatically track new YouTube videos in Google Chat using Pabbly Connect. Step-by-step tutorial for seamless integration. Revolutionize your productivity approach with just a few strategic clicks. Uncover professional methods for connecting applications and creating workflows that reclaim hours of your week.

Watch Step By Step Video Tutorial Below


1. Accessing Pabbly Connect for YouTube and Google Chat Automation

To automate notifications for new YouTube videos in Google Chat, you first need to access Pabbly Connect. This platform enables seamless integration between various applications, including YouTube and Google Chat.

Begin by visiting the Pabbly Connect website. If you are a new user, you can sign up for free and get 100 tasks every month. Existing users should simply log in to their Pabbly Connect account to start creating automations.


2. Creating a Workflow in Pabbly Connect

Once logged in, you will see the Pabbly Connect dashboard. To create a new workflow, click the ‘Create Workflow’ button located in the top right corner. This action opens a dialog box where you can name your workflow. using Pabbly Connect

  • Name your workflow as ‘Automatically Track New YouTube Videos in Google Chat.’
  • Select a folder to save your workflow, such as ‘YouTube Automations.’

After naming your workflow and selecting the appropriate folder, click ‘Create’ to finalize the setup. This action will lead you to the workflow interface with trigger and action windows ready for configuration.


3. Setting Up the YouTube Trigger in Pabbly Connect

The next step involves setting up the trigger for your automation. In the trigger application section, select ‘YouTube’ as the application. The goal here is to capture new video uploads on your channel.

Choose the trigger event as ‘New Video in Channel’ and click the ‘Connect’ button. A new window will appear, prompting you to authorize your YouTube account with Pabbly Connect. Click ‘Allow’ to give the necessary permissions.

  • Select your YouTube channel ID from the provided dropdown.
  • Click ‘Save and Send Test Request’ to check if the trigger captures the latest video.

If the setup is successful, you will receive a response containing the video details. This confirms that YouTube is now successfully connected to Pabbly Connect.


4. Configuring Google Chat Action in Pabbly Connect

After setting up the trigger, the next step is to configure the action for Google Chat. In the action application section, select ‘Google Chat’ and choose the action event as ‘Create Message’. This setup will send notifications about new videos to your Google Chat space.

Click the ‘Connect’ button, and you will be prompted to enter the chat webhook URL. To obtain this URL, navigate to your Google Chat space and set up a new webhook.

Create a new webhook in your Google Chat space and copy the generated URL. Prepare a message for your team, including dynamic data from the previous YouTube trigger.

Once you have filled in the message template with the necessary details and the chat webhook URL, click ‘Save and Send Test Request’ to check if the notification is sent successfully. This confirms that your action is set up correctly within Pabbly Connect.


5. Conclusion: Automating YouTube Notifications with Pabbly Connect

In this tutorial, we learned how to automate notifications for new YouTube videos in Google Chat using Pabbly Connect. By following the steps outlined, you can ensure your team is always informed about new content.

Ensure you check out Pabbly Connect to create business automation workflows and reduce manual tasks. Pabbly Connect currently offer integration with 2,000+ applications.

Check out Pabbly Connect – Automate your business workflows effortlessly! Sign Up Free – Start your journey with ease! 10,000+ Video Tutorials – Learn step by step! Join Pabbly Facebook Group – Connect with 21,000+ like minded people!

This integration not only saves time but also enhances team collaboration and feedback on newly published videos. With Pabbly Connect, managing your notifications has never been easier.


By leveraging the power of Pabbly Connect, you can create efficient workflows that streamline communication and keep your team aligned with your content strategy.

Automate Instagram Reels Uploads from Google Drive Using Pabbly Connect

Learn how to automate Instagram Reels uploads from Google Drive using Pabbly Connect. This step-by-step guide covers all integration details. Discover hidden automation capabilities within your existing tools. This guide shows you how to connect your essential applications and permanently eliminate redundant manual processes.

Watch Step By Step Video Tutorial Below


1. Accessing Pabbly Connect for Instagram Reels Automation

To automate Instagram Reels uploads from Google Drive, you first need to access Pabbly Connect. Start by visiting the Pabbly Connect homepage by entering the URL in your browser.

Once there, you can either sign in if you are an existing user or click on ‘Sign Up for Free’ to create a new account. After signing up, you will receive 100 free tasks every month to explore the platform and test various automations.


2. Creating a New Workflow in Pabbly Connect

After logging into Pabbly Connect, navigate to the dashboard where you can create a new workflow. Click on the ‘Create Workflow’ button to begin setting up your automation.

  • Name your workflow something descriptive, such as ‘Post Instagram Reels from Google Drive Automatically.’
  • Select a folder to save your workflow, for example, ‘Social Media Automations.’

After naming your workflow and selecting the appropriate folder, click on ‘Create’ to proceed. This will open a new screen with two key sections: Trigger and Action, which are essential for setting up your automation.


3. Setting Up the Trigger with Google Drive

In this step, you will set up the trigger for your workflow using Pabbly Connect and Google Drive. Choose Google Drive as your trigger application, and select the event as ‘New File in Specific Folder.’ This means the workflow will trigger whenever a new video is uploaded to the designated folder in Google Drive.

Next, connect your Google Drive account by clicking on ‘Connect’ and selecting ‘Add New Connection.’ After signing in with your Google account and granting permissions, specify the folder where you will upload your videos. For this example, select the ‘Instagram Reels’ folder.


4. Action Setup for Instagram Reels Creation

Now that the trigger is set, it’s time to configure the action step in Pabbly Connect. Choose Instagram for Business as your action application and select ‘Create Reel Video’ as the action event. This step is crucial as it will create a reel using the video uploaded to Google Drive.

Connect to your Instagram account, and then map the video URL received from the Google Drive trigger to the URL field in the Instagram action. This mapping ensures that every time a new video is uploaded, the correct URL is used to create the reel.

  • Input the caption for the reel, which can be dynamically generated from the video title.
  • If necessary, configure additional settings like thumbnail offsets or cover images.

Once all parameters are set, click on ‘Save and Send Test Request’ to ensure the reel is created successfully. This step confirms that the integration between Pabbly Connect and Instagram is functioning as expected.


5. Finalizing the Integration and Publishing the Reel

After creating the reel, you need to publish it on Instagram. Since publishing a reel is a two-step process, first, add a delay step in Pabbly Connect to allow time for the reel to be prepared for uploading. Select ‘Delay’ as your action application and set it to wait for 5 minutes.

Finally, add another action step to publish the video on Instagram by selecting ‘Publish Video’ as the action event. Map the video ID received from the previous step to the appropriate field. After this, click ‘Save and Send Test Request’ to complete the process. Your reel should now be successfully posted on Instagram.


Conclusion

Using Pabbly Connect, you can automate the process of uploading Instagram Reels from Google Drive effortlessly. This integration saves time and ensures your content is shared consistently on social media.

Ensure you check out Pabbly Connect to create business automation workflows and reduce manual tasks. Pabbly Connect currently offer integration with 2,000+ applications.

Automate Google Docs with Microsoft Excel Using Pabbly Connect

Learn how to automate the creation of Google Docs from Microsoft Excel using Pabbly Connect. Step-by-step guide to streamline your document generation process. Learn to create powerful connections between your critical applications without requiring specialized programming knowledge or extensive technical background.

Watch Step By Step Video Tutorial Below


1. Accessing Pabbly Connect for Automation

To start automating Google Docs with Microsoft Excel, first access Pabbly Connect. Visit the Pabbly Connect website and sign in to your account. If you are a new user, you can sign up for free, which includes 100 tasks each month.

Once signed in, the Pabbly Connect dashboard will appear. From here, you can create a new workflow to automate the process of generating documents. Click on the ‘Create Workflow’ button to begin your automation.


2. Creating a Workflow in Pabbly Connect

In this step, you will create a workflow named ‘Autofill Google Docs Template from Microsoft Excel’ using Pabbly Connect. After clicking on ‘Create Workflow’, a dialog box will prompt you to name your workflow and choose a folder to save it in. Select the desired folder, such as ‘Microsoft Excel Automations’.

  • Name your workflow appropriately.
  • Choose the folder for organization.

After naming and selecting the folder, click on ‘Create’. You will then see two sections labeled ‘Trigger’ and ‘Action’. The trigger is what initiates the workflow, while the action is what happens as a result. In this case, the trigger will be a new entry in Microsoft Excel.


3. Setting Up the Trigger with Microsoft Excel

To set up the trigger, select Microsoft Excel as the trigger application in Pabbly Connect. The event will be set to ‘New Row in Worksheet’. This means that every time a new participant’s details are added to your Excel sheet, the automation will trigger.

Click on the ‘Connect’ button to link Microsoft Excel with Pabbly Connect. You will need to authorize the connection by clicking on ‘Add New Connection’ and following the prompts to grant access. Once authorized, select the workbook and worksheet where your participant data is stored.

  • Select the workbook named ‘Participants Details’.
  • Choose the worksheet titled ‘Sheet1’.

After selecting the workbook and worksheet, click on ‘Save and Send Test Request’ to capture the participant details. This confirms that your Microsoft Excel is successfully connected to Pabbly Connect.


4. Setting Up the Action Step with Google Docs

Now, you will configure the action step to create a document in Google Docs using Pabbly Connect. Select Google Docs as the action application and choose the action event ‘Create Document from Template’. This allows you to use a predefined Google Docs template for generating letters of participation.

Next, click on the ‘Connect’ button to link Google Docs with Pabbly Connect. Authorize the connection by clicking on ‘Sign in with Google’ and granting the necessary permissions. After authorization, select the template document you created earlier for the letters of participation.

Choose the ‘Letter of Participation Template’ as your document template. Map the participant’s details to the template variables.

Fill in the required fields such as the document name, event date, competition name, and participant contributions. After completing the mapping, click ‘Save and Send Test Request’ to create the document. This will generate a personalized letter for each participant based on the data entered in Microsoft Excel.


5. Conclusion: Automating Document Creation with Pabbly Connect

By following these steps, you can effectively automate the creation of Google Docs from Microsoft Excel using Pabbly Connect. This integration not only saves time but also ensures accuracy in the documents generated for each participant.

Ensure you check out Pabbly Connect to create business automation workflows and reduce manual tasks. Pabbly Connect currently offer integration with 2,000+ applications.

Check out Pabbly Connect – Automate your business workflows effortlessly! Sign Up Free – Start your journey with ease! 10,000+ Video Tutorials – Learn step by step! Join Pabbly Facebook Group – Connect with 21,000+ like minded people!

With the automation in place, every new entry in your Microsoft Excel sheet will trigger the creation of a personalized letter in Google Docs, streamlining your workflow as an event organizer. Embrace the power of automation with Pabbly Connect to enhance your productivity.

Integrate Google Ads with Slack and Google Sheets Using Pabbly Connect

Learn how to integrate Google Ads with Slack and Google Sheets using Pabbly Connect for automated lead notifications and data tracking. Discover how to seamlessly connect your essential tools through accessible instructions that make powerful automation available to professionals at every skill level.

Watch Step By Step Video Tutorial Below


1. Accessing Pabbly Connect to Create Automations

To start integrating Google Ads with Slack and Google Sheets, first access Pabbly Connect. This platform allows you to automate workflows efficiently.

Visit the Pabbly Connect website and sign in to your account. If you are a new user, you can sign up for free to get started. Once signed in, navigate to the dashboard where you can create a new workflow.


2. Creating a Workflow in Pabbly Connect

Creating a workflow in Pabbly Connect is essential for this automation. Click on the ‘Create Workflow’ button in the top right corner of the dashboard.

  • Name your workflow, for example, ‘Notify Team on Slack for New Google Ads Leads’.
  • Select a folder to save your workflow, such as ‘Google Ads Automations’.
  • Click ‘Create’ to finalize the workflow creation.

After creating the workflow, you will see two main sections: Trigger and Action. The trigger initiates the workflow whenever a new lead is generated from Google Ads.


3. Setting Up the Trigger with Google Ads

To set up the trigger in Pabbly Connect, select Google Ads as the trigger application. Choose the event as ‘New Lead Form Entry’.

Pabbly Connect provides you with a webhook URL that you need to copy and paste into your Google Ads lead form settings. This will connect your Google Ads account with Pabbly Connect.

  • Open your Google Ads campaign and navigate to the lead form settings.
  • Paste the webhook URL in the lead delivery option under webhook integration.
  • Send test data to verify the connection.

After sending test data, check your Pabbly Connect workflow to confirm that the test response is received, indicating that the connection is successful.


4. Notifying Your Team on Slack

Once the trigger is set up, the next step is to notify your team via Slack using Pabbly Connect. Select Slack as your action application and choose the action event as ‘Send Channel Message’.

Connect your Slack account to Pabbly Connect by following the authorization prompts. Select the channel where you want to send the notifications, such as ‘Google Ads Leads’.

Write a message template that includes lead details like name, email, and phone number. Map the data from the trigger step to dynamically insert lead information. Click ‘Save and Send Test Request’ to check if the message is sent successfully.

Upon successful execution, your team will receive the notification in the designated Slack channel whenever a new lead is generated.


5. Logging Leads in Google Sheets

The final step is to log the lead information into Google Sheets using Pabbly Connect. Add another action step in your workflow and select Google Sheets as the application.

Choose the action event ‘Add New Row’ to insert lead details into your spreadsheet. Connect your Google Sheets account and select the appropriate spreadsheet and sheet where you want to store the data.

Map the fields for first name, last name, email, and phone number from the trigger data. Click ‘Save and Send Test Request’ to verify if the data is added correctly. Check your Google Sheets to confirm that the lead data has been logged.

With this setup, every new lead generated from Google Ads will automatically be logged in Google Sheets, allowing for efficient tracking and management.


Conclusion

This tutorial demonstrated how to integrate Google Ads with Slack and Google Sheets using Pabbly Connect. By automating lead notifications and data logging, you can streamline your workflow and enhance your team’s responsiveness.

Ensure you check out Pabbly Connect to create business automation workflows and reduce manual tasks. Pabbly Connect currently offer integration with 2,000+ applications.

Automate Proposal Creation with Pabbly Connect and ConvertBox

Learn how to automate proposal creation using Pabbly Connect and ConvertBox. This step-by-step tutorial guides you through the integration process. Discover hidden automation capabilities within your existing tools. This guide shows you how to connect your essential applications and permanently eliminate redundant manual processes.

Watch Step By Step Video Tutorial Below


1. Accessing Pabbly Connect for Integration

To start integrating ConvertBox with Pluto using Pabbly Connect, you first need to access the platform. Open your browser and search for Pabbly Connect. You will land on a page with options to sign in or sign up for free.

If you are new to Pabbly Connect, click on the ‘Sign up for free’ button, which takes only two minutes. You will receive 100 tasks free every month. If you already have an account, simply sign in to access the dashboard.


2. Creating a New Workflow in Pabbly Connect

Once logged in, you will see various applications. Click on ‘Access Now’ under Pabbly Connect to enter the dashboard. Here, you need to create a new workflow by clicking on the ‘Create Workflow’ button. using Pabbly Connect

  • Name your workflow based on your objective, e.g., ‘Create Pluto Proposal on ConvertBox Form Submission’.
  • Click on ‘Create’ to proceed to the workflow interface.

In this interface, you will see two boxes labeled Trigger and Action. The Trigger is the first step that gets executed when an event occurs, while Action follows the Trigger. You can set up one Trigger and multiple Actions in your workflow.


3. Setting Up Trigger with ConvertBox

For this integration, your Trigger application will be ConvertBox. Search for ConvertBox in the Trigger application field and select it. Next, you will need to set the Trigger event to ‘New Lead Submission’.

After selecting the Trigger event, you will be provided with a webhook URL. This URL acts as a bridge between ConvertBox and Pabbly Connect. Copy this webhook URL to connect the applications.

  • Go to your ConvertBox account and locate the form you want to connect.
  • Edit the form settings and select the action to go to the next step.
  • Add a new integration and select the webhook option, pasting the URL you copied earlier.

After adding the integration, save your settings. Your ConvertBox form is now connected to Pabbly Connect, ready to send data when a new lead submits their information.


4. Creating a Person in Pluto Using Pabbly Connect

Now that your Trigger is set up, it’s time to create a person in Pluto using the details from the ConvertBox form submission. In Pabbly Connect, add an Action step and select Pluto as the application.

Choose the action event as ‘Create Person’ and connect Pluto with Pabbly Connect. You will need to provide your Client ID, Client Secret, and Business Identifier from your Pluto account.

Copy your Business Identifier from the URL of your Pluto dashboard. Get your Client ID and Client Secret from the API manager in Pluto. Fill in all required details in Pabbly Connect to create a new person.

After mapping the lead details from ConvertBox into the fields for the new person, save your settings. This will ensure that every time a new lead submits their information, a new person is created in Pluto automatically.


5. Creating a Proposal in Pluto via Pabbly Connect

With the person created in Pluto, the next step is to generate a proposal for them. In your workflow, add another Action step and select Pluto again, this time choosing ‘Create Proposal’ as the action event. using Pabbly Connect

Connect this action to Pluto using the existing connection. You will need to map the details for the proposal, including the proposal name and the template you want to use.

Select the proposal template you created earlier. Map the person ID of the newly created person to ensure the proposal is linked to the correct lead. Save your settings and send a test to confirm the proposal creation.

Once you receive a positive response from Pabbly Connect, your integration is complete. Every time a lead submits a form in ConvertBox, a new proposal will automatically be generated in Pluto, streamlining your workflow.


Conclusion

This tutorial demonstrated how to automate the proposal creation process using Pabbly Connect with ConvertBox and Pluto. By following these steps, you can enhance your client onboarding process and improve your business efficiency.

Ensure you check out Pabbly Connect to create business automation workflows and reduce manual tasks. Pabbly Connect currently offer integration with 2,000+ applications.

How to Automatically Create Jira Issues from Microsoft Outlook Using Pabbly Connect

Learn how to automate Jira issue creation from Microsoft Outlook using Pabbly Connect. This tutorial provides step-by-step instructions for seamless integration. This comprehensive guide reveals exactly how to connect your applications and automate repetitive tasks — accessible for professionals of all technical backgrounds.

Watch Step By Step Video Tutorial Below


1. Accessing Pabbly Connect for Integration

To begin the integration process, you need to access Pabbly Connect. Start by visiting the official Pabbly website and logging in to your account. If you are a new user, you can sign up for free and get access to 300 tasks every month.

Once logged in, you will see the dashboard where all your applications are listed. Here, you can create a new workflow that will connect Microsoft Outlook with Jira through Pabbly Connect. This setup will automate the creation of Jira issues from emails received in Outlook.


2. Creating a Workflow in Pabbly Connect

In the Pabbly Connect dashboard, you will need to create a new workflow. Click on the ‘Create Workflow’ button located at the top right corner. Name your workflow something like ‘Automatically Create Jira Issues from Microsoft Outlook’ and select a folder for organization.

  • Click on the ‘Create’ button to finalize your workflow creation.
  • Understand that each workflow consists of triggers and actions.
  • The trigger will initiate the automation when a new email is received.

After creating the workflow, you will set up the trigger that will listen for new emails in Microsoft Outlook using Pabbly Connect. This is crucial for the automation to work effectively.


3. Setting Up the Trigger for Microsoft Outlook

Now, you will select Microsoft Office 365 as your trigger application in Pabbly Connect. Choose the trigger event as ‘New Mail’; this ensures that every time you receive an email in Outlook, it will trigger the workflow.

To connect your Microsoft Office 365 account, click on the ‘Connect’ button and follow the prompts to authorize Pabbly Connect. Once connected, you can test the trigger by sending a test email to your Outlook account.

  • Ensure you have the right permissions set in your Outlook account.
  • Check for successful connection status in Pabbly Connect.

After setting the trigger, you will receive a response that confirms the email has been captured, allowing you to proceed to the next step in the integration.


4. Filtering Emails in Pabbly Connect

Next, you will add a filter to ensure that only relevant emails create Jira issues. Use the ‘Filter by P’ feature in Pabbly Connect. This configuration will allow you to specify that you only want to create issues for emails containing specific keywords, such as ‘issue’ in the subject line.

To set this up, select the filter type as ‘Contains’ and enter the keyword ‘issue’. This way, only emails that meet this criterion will trigger the next action of creating a Jira issue.

Define the filter conditions clearly for accurate automation. You can add multiple conditions if needed.

Once the filter is set, test it to ensure that it correctly identifies emails that require issue creation in Jira.


5. Creating Jira Issues from Filtered Emails

After filtering, the next step is to set up the action in Pabbly Connect to create a new Jira issue. Select Jira Software as your action application and choose the action event as ‘Create Issue’. This will allow you to generate a Jira issue whenever a filtered email is detected.

Connect your Jira account by clicking on the ‘Connect’ button, and authorize Pabbly Connect to access your Jira account. After a successful connection, you will need to fill in the details for the issue, such as the project, issue type, summary, and description, which can be dynamically mapped from the email data.

Select the appropriate project in Jira. Map the email subject to the issue summary and email body to the issue description.

Once all fields are filled, click on the ‘Save and Send Test Request’ button to create the issue. Check your Jira account to confirm that the issue has been created successfully, completing the integration process through Pabbly Connect.


Conclusion

This tutorial demonstrated how to automate the creation of Jira issues from Microsoft Outlook using Pabbly Connect. By following the steps outlined, you can streamline your workflow and ensure that no important issues are missed, enhancing your team’s productivity.

Ensure you check out Pabbly Connect to create business automation workflows and reduce manual tasks. Pabbly Connect currently offer integration with 2,000+ applications.

Automate WhatsApp Messages on Google Form Submission Using Pabbly Connect

Learn how to automate WhatsApp messages triggered by Google Form submissions using Pabbly Connect. Step-by-step guide to enhance communication. Eliminate manual repetitive tasks from your workflow. Discover proven automation methods with intuitive steps designed for efficiency-minded professionals.

Watch Step By Step Video Tutorial Below


1. Accessing Pabbly Connect for Automation

To automate WhatsApp messages using Pabbly Connect, start by accessing the Pabbly Connect platform. Simply visit the Pabbly website and sign in to your account. If you are a new user, you can sign up for free and receive 100 tasks monthly.

Once logged in, navigate to the Pabbly Connect dashboard. Click on the ‘Create Workflow’ button to initiate the setup. Name your workflow, for example, ‘Send WhatsApp Message on Google Form Submission’, and select the folder where you wish to save it. This sets the stage for automating your messaging process.


2. Setting Up Google Forms as a Trigger in Pabbly Connect

In this section, we will configure Google Forms as the trigger application in Pabbly Connect. Click on the trigger application field and search for ‘Google Forms’. Select it, and then choose the trigger event as ‘New Response Received’. This event will activate the workflow whenever a new form submission occurs.

  • Select Google Forms as the trigger application.
  • Choose ‘New Response Received’ as the trigger event.
  • Copy the provided webhook URL for later use.

After selecting the trigger, you will receive a webhook URL. Copy this URL, as it will be used to connect your Google Forms with Pabbly Connect. This integration allows for seamless data transfer between the two applications, ensuring that every submission is captured efficiently.


3. Linking Google Forms to Pabbly Connect

Next, we will link Google Forms to Pabbly Connect using the webhook URL. Open your Google Forms and navigate to the ‘Responses’ tab. Click on the ‘View in Sheets’ option to access the linked Google Sheets.

  • Go to Extensions > Add-ons > Get Add-ons.
  • Search for ‘Pabbly Connect Webhooks’ and install it.
  • Refresh the spreadsheet after installation.

After refreshing, go back to Extensions and select ‘Pabbly Connect Webhooks’ followed by ‘Initial Setup’. Paste the copied webhook URL into the designated field and specify the trigger column, which is typically the final data column. Click on ‘Submit’ to complete the setup. This step ensures that every response in your Google Form is sent to Pabbly Connect.


4. Sending WhatsApp Messages Using AI Sensei

Now that we have set up our trigger, we will configure the action to send WhatsApp messages using AI Sensei through Pabbly Connect. Click on ‘Add Action Step’ and search for ‘AI Sensei’. Choose the action event as ‘Send Template Message’.

To connect your WhatsApp account, you need to provide an API key from your AI Sensei account. Navigate to your AI Sensei account, go to the ‘Manage’ section, and generate the API key. Copy this key and paste it into the Pabbly Connect action setup.

Enter the API key obtained from AI Sensei. Map the recipient’s mobile number and name from the Google Forms response. Customize the message template using dynamic parameters.

Once everything is configured, click on ‘Save and Send Test Request’ to send a test message. This will allow you to verify that your integration is working correctly, ensuring that WhatsApp messages are sent automatically to registrants.


5. Testing and Verifying the Integration

After setting up the action step, it’s essential to test and verify the entire integration process using Pabbly Connect. Go back to your Google Form and submit a test response. This will trigger the workflow and send the data to Pabbly Connect.

Check your Pabbly Connect dashboard to see if the response has been captured successfully. If everything is set up correctly, you should see the details from the test submission. Make sure to check your WhatsApp for the automated message.

Submit a test response in Google Forms. Verify the response in Pabbly Connect. Check WhatsApp for the received message.

By following these steps, you can ensure that your integration between Google Forms and WhatsApp via Pabbly Connect is functioning smoothly. This automation not only enhances communication but also improves the overall experience for your event attendees.


Conclusion

This tutorial demonstrated how to automate WhatsApp messages triggered by Google Form submissions using Pabbly Connect. By following the steps outlined, you can streamline communication and enhance the registration experience for your attendees.

Ensure you check out Pabbly Connect to create business automation workflows and reduce manual tasks. Pabbly Connect currently offer integration with 2,000+ applications.

Integrating Webflow with Google Contacts Using Pabbly Connect

Learn how to integrate Webflow with Google Contacts using Pabbly Connect. Step-by-step guide for seamless automation. Follow this definitive guide to creating powerful automated workflows with straightforward, efficiency-focused solutions that save valuable time.

Watch Step By Step Video Tutorial Below


Setting Up Webflow Webhook with Pabbly Connect

To start using Pabbly Connect for integrating Webflow with Google Contacts, you first need to set up a webhook in Webflow. This webhook will act as a bridge to send data from Webflow to Pabbly Connect.

Begin by logging into your Webflow account and selecting the project you want to connect. Click on the settings option, then navigate to the ‘Apps and Integrations’ section. Here, you will find the option for webhooks. Click on the ‘Add Webhook’ button to proceed.


Configuring Trigger Event in Pabbly Connect

In this step, you will configure the trigger event in Pabbly Connect to listen for new form submissions. Select Webflow as your trigger application and choose the trigger event as ‘New Form Submission’. This will allow Pabbly Connect to capture responses from your Webflow form.

Once you select the trigger event, Pabbly Connect will provide you with a webhook URL. Copy this URL as it will be used in Webflow to send data to Pabbly Connect.

  • Select Webflow as the trigger application.
  • Choose ‘New Form Submission’ as the trigger event.
  • Copy the webhook URL provided by Pabbly Connect.

With the webhook URL copied, you can now proceed to set it up in Webflow.


Adding Webhook URL in Webflow

Now that you have the webhook URL, go back to your Webflow account. Under the ‘Apps and Integrations’ settings, scroll down to the webhook section and click on ‘Add Webhook’. In the dialog box that appears, select the trigger type as ‘Form Submission’ and paste the webhook URL you copied from Pabbly Connect.

Ensure you select the API version as API V1 to match the settings in Pabbly Connect. After entering the necessary details, click on the ‘Add Webhook’ button to save your settings.


Publishing Your Webflow Site

After successfully adding the webhook, you need to publish your Webflow site. Click on the ‘Publish’ button to make your changes live. This allows the webhook to start listening for new form submissions on your site.

Once published, you can test the integration by submitting a dummy form on your Webflow site. This will send a test submission to Pabbly Connect, allowing you to verify the connection.

  • Click on the ‘Publish’ button in Webflow.
  • Submit a test response using the form on your website.
  • Check Pabbly Connect for the received response.

This step ensures that your Webflow site is correctly sending data to Pabbly Connect.


Conclusion

In this tutorial, we demonstrated how to integrate Webflow with Google Contacts using Pabbly Connect. By setting up a webhook, configuring a trigger, and publishing your site, you can automate form submissions seamlessly. This integration enhances your workflow and improves data management.

Ensure you check out Pabbly Connect to create business automation workflows and reduce manual tasks. Pabbly Connect currently offer integration with 2,000+ applications.