Automate License Key Delivery on Shopify Using Pabbly Connect

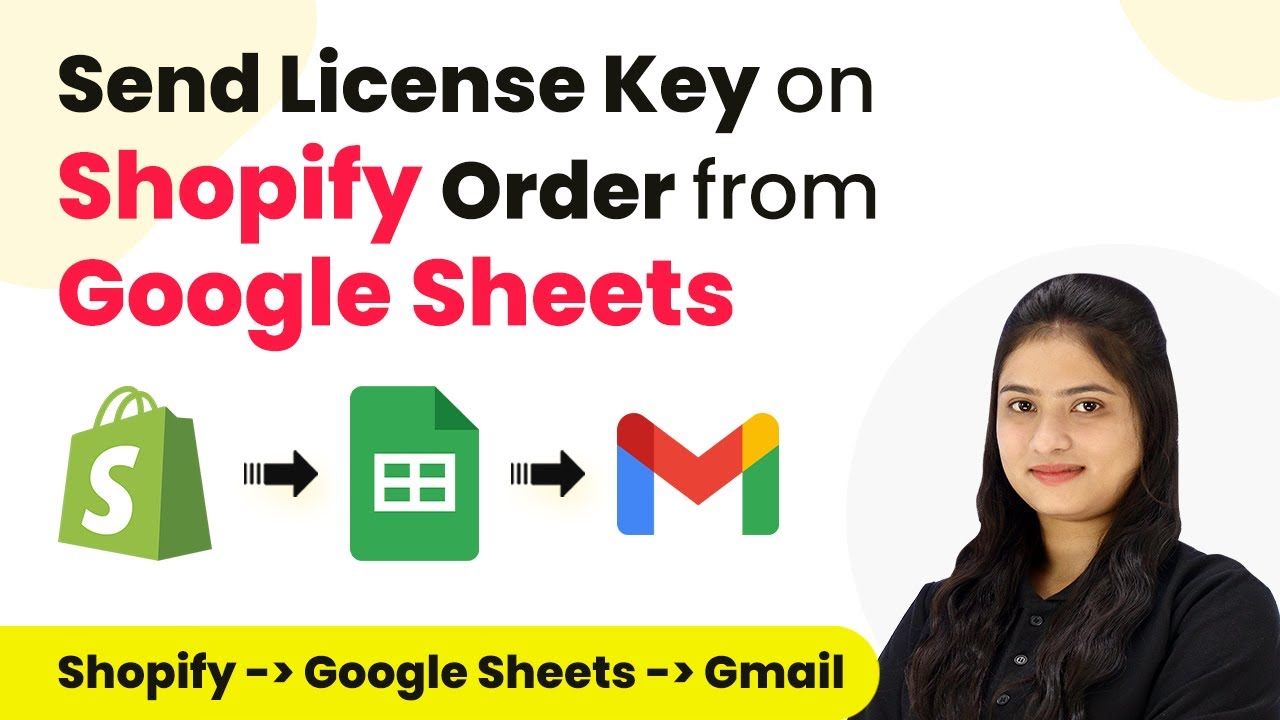
Learn how to automate license key delivery on Shopify using Pabbly Connect with Google Sheets and Gmail. Step-by-step tutorial included. Explore efficient methods for automating routine tasks with clear, concise instructions suited for both newcomers and experienced professionals.

Watch Step By Step Video Tutorial Below


1. Accessing Pabbly Connect for Integration

To automate the delivery of license keys on Shopify using Pabbly Connect, first, access the platform by visiting the Pabbly Connect website. Existing users can sign in, while new users should create a free account to explore the features available.

Once logged in, navigate to the dashboard where you can create a new workflow. This is the starting point for integrating Shopify, Google Sheets, and Gmail through Pabbly Connect.


2. Creating a Workflow in Pabbly Connect

After accessing your Pabbly Connect dashboard, the next step is to create a new workflow. Click on the ‘Create Workflow’ button, and name your workflow something like ‘Send License Key on Shopify Order from Google Sheets.’ This will help you identify it later.

  • Click on ‘Create’ to open a new blank workflow.
  • Select Shopify as the trigger application.
  • Choose the event ‘New Order’ to capture new orders in Shopify.

With the trigger set, you can now connect Pabbly Connect with Shopify to capture order details automatically whenever a customer makes a purchase.


3. Setting Up Shopify Webhook in Pabbly Connect

To enable Pabbly Connect to receive data from Shopify, you need to set up a webhook. Copy the webhook URL provided by Pabbly Connect and log in to your Shopify account. Navigate to Settings > Notifications and create a new webhook.

  • Select ‘Order Creation’ as the event for the webhook.
  • Paste the copied webhook URL from Pabbly Connect.
  • Save the webhook settings to establish the connection.

Once the webhook is set up, Pabbly Connect will be able to receive order data from Shopify, allowing the automation process to begin.


4. Using Google Sheets to Manage License Keys

With the webhook established, the next step is to integrate Google Sheets to manage your license keys. In Pabbly Connect, add an action step to look up the license key from your Google Sheets. This will allow you to retrieve the appropriate key for the customer based on their order.

Select Google Sheets as the action application. Use the ‘Lookup Spreadsheet Row’ action event. Map the necessary fields to pull the correct license key based on order details.

This integration allows Pabbly Connect to fetch the license key directly from Google Sheets, ensuring that the correct key is sent to the customer after their purchase.


5. Sending License Key via Gmail

The final step in this automation process is to send the license key to the customer using Gmail. In Pabbly Connect, add another action step to send an email. Configure the email settings to personalize the message, including the license key retrieved from Google Sheets.

Make sure to map the recipient’s email address from the Shopify order details, and include a personalized message that thanks the customer for their purchase. This ensures a seamless experience for the customer as they receive their license key immediately.

By integrating Gmail with Pabbly Connect, the entire process of sending license keys becomes automated, saving you time and ensuring customer satisfaction.


Conclusion

In this tutorial, we explored how to automate the delivery of license keys on Shopify using Pabbly Connect, Google Sheets, and Gmail. This integration not only streamlines the process but also enhances customer experience by providing immediate access to purchased software.

Ensure you check out Pabbly Connect to create business automation workflows and reduce manual tasks. Pabbly Connect currently offer integration with 2,000+ applications.

Integrating Agriculture Products with Google Sheets Using Pabbly Connect

Learn how to integrate agriculture inquiries with Google Sheets using Pabbly Connect. Follow this step-by-step tutorial for seamless automation. Develop expertise in application integration and learn how to design streamlined automation workflows using proven, simplified approaches.

Watch Step By Step Video Tutorial Below


1. Accessing Pabbly Connect for Integration

To start the integration process, you need to access Pabbly Connect. First, open your web browser and go to the Pabbly Connect landing page. Here, you will find options to sign up or sign in. If you are a new user, click on ‘Sign up for free’ to create an account. Existing users can directly sign in.

Once logged in, you will see various applications offered by Pabbly. Click on ‘Access Now’ under Pabbly Connect to enter your dashboard. From here, you can create a new workflow that connects your agriculture inquiries from IndiaMART to Google Sheets.


2. Creating a Workflow in Pabbly Connect

After accessing your Pabbly Connect dashboard, click on the ‘Create Workflow’ button. You will need to name your workflow and select a folder for saving it. For this tutorial, name it ‘Agriculture Products and Farming Inquiries in Google Sheets’ and save it in the ‘Automations’ folder. using Pabbly Connect

  • Click on ‘Create’ to open the workflow window.
  • Select the trigger application as IndiaMART.
  • Choose the trigger event as ‘New Leads’.

After setting up the trigger, Pabbly Connect will provide you with a webhook URL. This URL is crucial as it will connect your IndiaMART account with Pabbly Connect. Copy this URL for later use in the IndiaMART settings.


3. Configuring IndiaMART for Webhook Integration

Log in to your IndiaMART account and navigate to the Lead Manager section. Here, you will find the option for ‘Push API’ under Export Leads. Click on it to set up the connection with Pabbly Connect. using Pabbly Connect

  • Select ‘Other’ as the source.
  • Enter ‘Pabbly Connect’ as the CRM platform name.
  • Paste the webhook URL you copied earlier.

After entering these details, click on ‘Save Details’. You will need to generate an OTP to complete the setup. Once you enter the OTP and submit, your IndiaMART account will be successfully connected to Pabbly Connect, allowing it to receive new lead inquiries automatically.


4. Testing the Webhook Connection

To ensure the webhook is working correctly, perform a test submission in IndiaMART. Create a dummy inquiry by clicking on ‘Contact Supplier’ and filling out the required fields. This will simulate a real inquiry and help you verify the connection. using Pabbly Connect

Once the test submission is complete, go back to Pabbly Connect’s workflow. You should see the webhook response indicating that the inquiry details have been captured. This confirmation shows that your setup is functioning correctly.

After verifying the webhook, you can proceed to set up the action step in Pabbly Connect, which will send the inquiry details to Google Sheets.


5. Adding Inquiry Details to Google Sheets

Now, select Google Sheets as the action application in Pabbly Connect. Choose the action event as ‘Add New Row’. If you haven’t already connected your Google Sheets account, click on ‘Add a New Connection’ and authorize Pabbly Connect to access your Google Sheets. using Pabbly Connect

Select the spreadsheet where you want to store the inquiry details. Map the fields such as name, email, phone number, and query from the webhook response to the corresponding columns in your Google Sheets. This mapping ensures that every new inquiry is recorded accurately.

Finally, click on ‘Save and Send Test Request’ to confirm that the details are being added to your Google Sheets. Upon successful completion, you will see the inquiry details reflected in your spreadsheet, confirming that the integration is working seamlessly.


Conclusion

In this tutorial, we explored how to use Pabbly Connect to automate the process of adding agriculture inquiries to Google Sheets. By following these steps, you can streamline your lead management effectively and save valuable time.

Ensure you check out Pabbly Connect to create business automation workflows and reduce manual tasks. Pabbly Connect currently offer integration with 2,000+ applications.

Integrating Mailchimp with Airtable Using Pabbly Connect: A Step-by-Step Guide

Learn how to integrate Mailchimp with Airtable using Pabbly Connect in this detailed tutorial. Follow specific steps to automate your workflows effectively. Streamline your workflow, save valuable time, and eliminate repetitive tasks through powerful automation capabilities.

Watch Step By Step Video Tutorial Below


Setting Up Pabbly Connect for Integration

To start integrating Mailchimp with Airtable, first, set up Pabbly Connect. This automation software connects various applications seamlessly. Begin by signing into your Pabbly Connect account.

Once logged in, navigate to the dashboard where you can create a new workflow. Click on the ‘Create Workflow’ button located at the top right corner of the screen. You will be prompted to name your workflow, which in this case would be ‘Create Mailchimp Subscriber from Webhook Response and Add Details in Airtable’.


Connecting Your Applications Using Webhook

To connect your website form to Pabbly Connect, you will use a Webhook integration. This allows real-time data transfer from your website to Pabbly Connect. Select the Webhook application as your trigger.

After selecting Webhook, you will receive a unique URL. Copy this URL and head to your website form settings. Paste the URL into the form’s webhook field to ensure that every submission sends data to Pabbly Connect.

  • Select Webhook as the trigger application.
  • Copy the provided Webhook URL.
  • Paste the URL into your website form settings.

Once this is done, test the integration by submitting a dummy entry through your form. Check Pabbly Connect to see if the response is received successfully, indicating that the connection is working.


Adding Mailchimp as an Action Step

Now that your Webhook is set up, it’s time to add Mailchimp as an action step in your workflow. Select Mailchimp from the action application options and choose the action event as ‘Add New Member’. This allows you to add new subscribers automatically to your Mailchimp list. using Pabbly Connect

Next, connect your Mailchimp account by clicking on the ‘Connect’ button. You will need to provide your API key and data center information. This information can be found in your Mailchimp account settings under Extras > API Keys.

  • Select Mailchimp as the action application.
  • Choose ‘Add New Member’ as the action event.
  • Enter your Mailchimp API key and data center.

After connecting, map the fields from your Webhook response to the appropriate fields in Mailchimp. This includes email address, first name, and last name, ensuring that each new subscriber entry is complete.


Integrating Airtable for Record Creation

To complete the workflow, you will now integrate Airtable. Select Airtable as your next action application. Choose the action event as ‘Create Record’. This will allow you to store the submitted form data in your Airtable base. using Pabbly Connect

Connect your Airtable account by providing the API key. You can find this in your Airtable account settings. After connecting, select the base and table where you want to store the data. Map the fields from the Mailchimp action to your Airtable fields, ensuring all necessary data is recorded.

Select Airtable as the action application. Choose ‘Create Record’ as the action event. Map the fields from Mailchimp to Airtable.

Once you have mapped all necessary fields, save the workflow. This completes the integration, and now every time a form is submitted, the data will automatically be sent to Mailchimp and Airtable.


Testing the Integration for Success

After setting up the entire workflow, it’s crucial to test the integration. Submit another test entry through your website form to ensure that the data flows correctly into both Mailchimp and Airtable. Check both applications to confirm that the new subscriber has been added and the record is created.

If everything is functioning as expected, you will see the new subscriber in Mailchimp and the corresponding record in Airtable. This indicates that the integration using Pabbly Connect is successful and working efficiently.

By following these steps, you can automate the process of adding subscribers and managing data seamlessly between Mailchimp and Airtable, saving time and reducing manual errors.

Conclusion

This guide summarizes the key points and helps you understand the essential features and benefits of using this tool.

Thanks for following along with this tutorial! Remember to subscribe to the channel for more helpful content like this.

If you found this guide useful, please consider giving it a thumbs up and sharing it with others who might benefit from it.


In this tutorial, we explored how to integrate Mailchimp with Airtable using Pabbly Connect. By automating your workflows, you can efficiently manage your subscriber data and improve your business processes.

Automating Zoho Desk with Simply Integration: A Step-by-Step Guide

Learn how to automate Zoho Desk using Simply integration for improved customer support. Follow this detailed guide for seamless automation. Transform complex automation concepts into accessible, actionable steps that eliminate unnecessary manual work while maximizing existing application capabilities. with Pabbly Connect.

Watch Step By Step Video Tutorial Below


1. Introduction to Zoho Desk and Simply Integration

Simply integration with Zoho Desk allows you to automate tasks effectively. By connecting these two powerful applications, you can streamline your customer support processes. using Pabbly Connect

Zoho Desk is a cloud-based customer support software that helps manage interactions efficiently. With Simply, you can automate repetitive tasks, enhancing productivity and response times.


2. Creating a Workflow in Simply for Zoho Desk

To create a workflow in Simply for Zoho Desk, start by logging into your Simply account. Click on the ‘Create Workflow’ option to begin the automation setup. using Pabbly Connect

  • Click on the ‘Create Workflow’ button.
  • Enter a name for your workflow, such as ‘Automate Zoho Desk Tasks’.
  • Select a folder to save your workflow.

After saving, you will see options for triggers and actions. Choose Zoho Desk as your trigger application to start the workflow.


3. Setting Up the Trigger in Simply for Zoho Desk

Setting up the trigger is crucial for your Simply integration with Zoho Desk. The trigger initiates the workflow based on specific events in Zoho Desk. using Pabbly Connect

Select the event that will trigger the workflow, such as ‘New Ticket Created’. This means whenever a new ticket is added in Zoho Desk, the workflow will activate.

  • Choose ‘New Ticket Created’ as your trigger event.
  • Connect to your Zoho Desk account by entering your domain name.
  • Grant Simply permission to access your Zoho Desk data.

Once connected, you can set additional parameters for the trigger to specify which tickets to monitor.


4. Setting Up Actions in Simply for Zoho Desk

After configuring the trigger, the next step is to set up actions in Simply for Zoho Desk. Actions define what happens when the trigger event occurs. using Pabbly Connect

Select Zoho Desk as the action application and choose the action event, such as ‘Create New Ticket’. This action will create a new ticket based on the data from the trigger.

Choose ‘Create New Ticket’ as your action event. Map the fields from the trigger to the corresponding fields in Zoho Desk. Test the action to ensure it works as expected.

By completing this step, you ensure that any new ticket created in Zoho Desk is captured and processed effectively.


5. Conclusion: Streamlining Customer Support with Simply and Zoho Desk

Integrating Simply with Zoho Desk enhances your customer support capabilities. By automating ticket management, you can improve response times and efficiency.

Thanks for following along with this tutorial! Remember to subscribe to the channel for more helpful content like this.

If you found this guide useful, please consider giving it a thumbs up and sharing it with others who might benefit from it.

This detailed guide has shown you how to set up triggers and actions in Simply for Zoho Desk. Implementing this integration will save time and reduce manual efforts in your support processes.


In conclusion, integrating Simply with Zoho Desk allows for effective automation of customer support tasks. This setup streamlines workflows and enhances productivity in managing customer interactions.

Integrating Industrial Inquiries with Google Sheets Using Pabbly Connect

Learn how to automate the integration of industrial inquiries from Indiamart to Google Sheets using Pabbly Connect. Step-by-step guide included. Eliminate manual repetitive tasks from your workflow. Discover proven automation methods with intuitive steps designed for efficiency-minded professionals.

Watch Step By Step Video Tutorial Below


1. Accessing Pabbly Connect for Automation

To begin automating the integration of industrial inquiries, access Pabbly Connect by navigating to its official website. Here, you will find options to sign in or sign up. If you’re a new user, click on ‘Sign Up Free’ to create an account and receive 100 tasks every month.

Once you have logged in to Pabbly Connect, you will see the dashboard displaying various applications available for integration. This is where you can set up your automation workflows to connect Indiamart with Google Sheets seamlessly.


2. Creating a Workflow in Pabbly Connect

After accessing Pabbly Connect, the next step is to create a workflow. Click on the ‘Create Workflow’ button located at the top right corner of the dashboard. In the dialog box that appears, name your workflow, for example, ‘Add Manufacturing Facilities and Industrial Plants Business Inquiries in Google Sheets’.

  • Select your desired folder for organizing workflows.
  • Create a new folder if necessary by following the instructions provided in the ‘Learn More’ link.

Now that the workflow is created, you will set up the trigger and action steps. The trigger will be the event that initiates the automation whenever a new inquiry is received in Indiamart.


3. Setting Up Trigger and Action in Pabbly Connect

The next step involves setting up the trigger in Pabbly Connect. Select Indiamart as your trigger application and choose the trigger event as ‘New Leads’. This means that every time a new lead is generated in your Indiamart account, it will trigger the workflow.

After selecting the trigger event, you will be provided with a webhook URL. Copy this URL as you will need it to connect your Indiamart account to Pabbly Connect. Log into your Indiamart account, navigate to the Lead Manager, and select ‘Import or Export Leads’ to enter the webhook URL and set up the integration.


4. Testing the Integration and Adding to Google Sheets

Once the webhook is set up in Indiamart, return to Pabbly Connect and perform a test submission to ensure that the integration works correctly. This involves generating a test lead in Indiamart, which will send a response back to Pabbly Connect.

  • Check for a successful response indicating that the lead details are captured.
  • Confirm that the details such as name, email, and query are correctly received.

Now, set up the action step in Pabbly Connect by selecting Google Sheets as the action application. Choose the action event as ‘Add a New Row’ to ensure that every new lead is added to your specified Google Sheet.


5. Finalizing the Automation Process

In the final steps, connect your Google Sheets account to Pabbly Connect by clicking ‘Sign in with Google’. Select the appropriate spreadsheet where you want to add the new leads and map the necessary fields such as name, email, phone number, and query.

After mapping the fields, test the automation to ensure that all lead details are correctly added to the Google Sheet. Once confirmed, you will see a new row populated with the lead information, ensuring that your inquiries are organized efficiently.

Conclusion

This guide summarizes the key points and helps you understand the essential features and benefits of using this tool.

Ensure you check out Pabbly Connect to create business automation workflows and reduce manual tasks. Pabbly Connect currently offer integration with 2,000+ applications.


In conclusion, using Pabbly Connect allows you to automate the process of integrating industrial inquiries from Indiamart to Google Sheets, enhancing your data management and response efficiency.

Integrating Trigger with P Connect Now Using Pabbly Connect: A Step-by-Step Guide

Learn how to integrate Trigger with P Connect Now Using Pabbly Connect for automated replies to Google Business Profile reviews. Follow our detailed tutorial for seamless automation. with Pabbly Connect.

Watch Step By Step Video Tutorial Below


1. Setting Up Trigger with Google Business Profile

The integration begins with setting up the Trigger application to monitor new reviews on your Google Business Profile. This is essential for automating replies efficiently. To start, log into your P Connect Now account and navigate to the dashboard.

Once there, create a new workflow by clicking on the ‘Create Workflow’ button. Name your workflow something descriptive, like ‘Auto Reply to Google Business Profile Reviews via Perplexity AI.’ This makes it clear what the workflow will accomplish.


2. Configuring P Connect Now for Automation

To effectively use P Connect Now for automation, you need to establish a connection with Google Business Profile. Click on the ‘Access Now’ button to proceed. In the workflow setup, select Google Business Profile as your trigger application and choose the event ‘New Review’.

  • Click on ‘Connect’ to initiate the connection.
  • Select your Google account and allow necessary permissions.
  • Choose the specific location associated with your business profile.

After setting up the trigger, you can proceed to receive notifications for any new reviews. This automation ensures timely responses to customer feedback, enhancing your online reputation.


3. Generating AI Replies with Perplexity AI

Next, you’ll integrate Perplexity AI to generate automated replies to the reviews received. In your P Connect Now workflow, add a new action step by selecting Perplexity AI. Choose the action event labeled ‘Create Chat Completion’ to generate responses based on customer reviews.

To link Perplexity AI with P Connect Now, you need to provide an API token. Log into your Perplexity AI account, navigate to settings, and generate a new API key. Copy this key and return to P Connect Now to paste it into the token field.

  • Select the model you wish to use, such as ‘Lama 3.1 Sona large 128k online model’.
  • Set the role to User to define how the AI should respond.
  • Map the review content from Google Business Profile into the prompt for generating replies.

After configuring these settings, click on ‘Save and Send Test’. This will test the connection and generate a reply based on the latest review.


4. Posting Replies on Google Business Profile

The final step involves posting the replies generated by Perplexity AI back to your Google Business Profile. Add another action step in your workflow and select Google Business Profile again. This time, set the action event to ‘Create Reply’. using Pabbly Connect

Connect this action to your existing Google Business Profile connection. You will need to map the review ID and the generated reply from Perplexity AI. This ensures that the correct response is linked to the appropriate review.

Map the review ID from the previous step to ensure the reply matches the correct review. Insert the generated reply content into the appropriate field. Click ‘Save and Send Test’ to finalize the posting process.

Once you have completed these steps, your automated replies will be posted directly to your Google Business Profile, streamlining your customer interaction process.


5. Conclusion: Streamlining Your Business with Automation

By integrating Trigger with P Connect Now and utilizing tools like Perplexity AI, businesses can automate their responses to Google Business Profile reviews efficiently. This integration not only saves time but also ensures that customer feedback is addressed promptly.

Thanks for following along with this tutorial! Remember to subscribe to the channel for more helpful content like this.

If you found this guide useful, please consider giving it a thumbs up and sharing it with others who might benefit from it.

With this setup, you can maintain a positive online reputation and enhance customer satisfaction through timely and personalized responses. Automating your review replies is a smart strategy for any business looking to improve its customer engagement.


Integrating Simply and The Happening with PAB Connect: A Step-by-Step Guide

Learn how to automate tasks using Simply and The Happening with PAB Connect. This detailed tutorial covers integration steps for seamless workflow management. Eliminate manual repetitive tasks from your workflow. Discover proven automation methods with intuitive steps designed for efficiency-minded professionals. with Pabbly Connect.

Watch Step By Step Video Tutorial Below


1. Setting Up PAB Connect for Simply and The Happening

Simply integration with The Happening starts with setting up PAB Connect. This platform allows you to automate tasks without coding. First, visit the PAB Connect homepage and either sign in or create a new account.

After logging in, you will be directed to the dashboard. Here, you can create a new workflow by clicking on the ‘Create Workflow’ button. You’ll need to name your workflow and select a folder to organize it. For example, name it ‘Automate Simply and The Happening’ and choose an appropriate folder.


2. Choosing the Trigger Application: Simply

In this step, we will select Simply as the trigger application. The trigger is what starts the automation process. Click on the trigger option and select Simply from the list of applications. using Pabbly Connect

  • Select the trigger event that will initiate the workflow.
  • For instance, you can choose an event like ‘New Task Created’ in Simply.
  • Once selected, proceed to configure the connection.

After configuring the trigger, you can see a webhook URL generated by PAB Connect. This URL is crucial as it will be used to connect Simply with The Happening. Copy this URL for the next steps.


3. Configuring The Happening with PAB Connect

Now that you have the webhook URL from PAB Connect, navigate to The Happening. Here, you will need to set up a webhook to link it with Simply. Go to your project’s settings and find the webhooks section.

Create a new webhook by pasting the copied URL into the appropriate field. Name the webhook accordingly, such as ‘Simply to The Happening Integration’. Ensure that the webhook is enabled and select the events that should trigger this webhook.


4. Testing the Integration Between Simply and The Happening

After setting up the webhook, it’s time to test the integration. Go back to Simply and create a new task. Ensure that the task meets the criteria set in the webhook configuration. using Pabbly Connect

  • Check if the task details are sent to The Happening.
  • Look for a confirmation in PAB Connect that the task has been received.
  • If successful, you will see the task reflected in The Happening.

This confirms that the integration is functioning as intended. If any issues arise, revisit the webhook settings and ensure all configurations are correct.


5. Enhancing Your Workflow with Additional Applications

Once Simply and The Happening are integrated, you can further enhance your workflow by connecting more applications like Google Sheets, Microsoft Excel, or Slack. This can streamline your task management process even more. using Pabbly Connect

In PAB Connect, you can add additional actions after the initial trigger. For instance, if a task is created in Simply, you can set an action to log this task in Google Sheets or notify your team via Slack.

To do this, simply select the action application from the list, choose the event you want to occur, and map the necessary fields from Simply to the action application. This creates a seamless flow of information across your tools.

Conclusion

This guide summarizes the key points and helps you understand the essential features and benefits of using this tool.

Thanks for following along with this tutorial! Remember to subscribe to the channel for more helpful content like this.

If you found this guide useful, please consider giving it a thumbs up and sharing it with others who might benefit from it.


By following these steps, you can effectively automate tasks using Simply and The Happening with PAB Connect. This integration not only saves time but also enhances productivity across your projects.

In conclusion, integrating Simply and The Happening using PAB Connect allows for efficient task automation. This tutorial has provided step-by-step instructions to help you set up these integrations effectively, ensuring a smoother workflow across your applications.

Integrating India M with AI Sensei for Automated WhatsApp Messaging

Learn how to integrate India M with AI Sensei using P Connect to automate WhatsApp messaging for industrial supplies inquiries. Step-by-step tutorial included. Revolutionize your productivity approach with just a few strategic clicks. Uncover professional methods for connecting applications and creating workflows that reclaim hours of your week. with Pabbly Connect.

Watch Step By Step Video Tutorial Below


1. Setting Up Integration with India M

Integrating India M is crucial for sending automated WhatsApp messages to inquiries. To do this, we will use P Connect to connect India M with AI Sensei. This integration allows for seamless communication with potential customers. using Pabbly Connect

First, log into your P Connect account. If you don’t have an account, sign up for free. Once logged in, navigate to the dashboard and click on the ‘Create Workflow’ button. Name your workflow something descriptive like ‘WhatsApp Message for India M Inquiries’ and select the folder where you want to save it.


2. Establishing Trigger and Action for the Workflow

In this section, we will set up the trigger and action for our workflow. The trigger will be based on new inquiries received through India M, while the action will send a WhatsApp message using AI Sensei. using Pabbly Connect

  • Select ‘India M’ as the trigger application.
  • Choose ‘New Leads’ as the trigger event.
  • Connect India M with P Connect using the provided webhook URL.

After setting the trigger, proceed to set the action. Search for ‘AI Sensei’ and select it as your action application. Choose the action event as ‘Send Template Message’ to automate the WhatsApp messaging process.


3. Configuring API and Message Template for WhatsApp

To send messages via WhatsApp, you need to configure the API key from AI Sensei. Log into your AI Sensei account and navigate to the ‘Manage’ section to find your API key. Copy this key and return to P Connect to paste it into the action setup. using Pabbly Connect

Next, create a message template in AI Sensei. This template will be used for the automated messages sent out. Ensure that the template is approved by AI Sensei before integrating it into your workflow. You can customize the message to include details relevant to your inquiries.

  • Create a new campaign in AI Sensei and link your message template.
  • Set the campaign status to live to start sending messages.

After setting up the message template, return to P Connect and ensure that all necessary parameters are mapped correctly. This includes the sender’s name and phone number, which will personalize the messages.


4. Testing the WhatsApp Integration

Once everything is configured, it’s time to test the integration. Create a test inquiry in India M to simulate receiving a new lead. This will trigger the workflow and send a WhatsApp message automatically. using Pabbly Connect

Check the responses in P Connect to confirm that the test inquiry details have been received successfully. You should see a confirmation that the data was sent to AI Sensei and that the message was dispatched via WhatsApp.

To verify the message delivery, check your WhatsApp account for the automated message. It should reflect the template you created, thanking the sender for their inquiry and providing relevant information.


5. Conclusion

In this tutorial, we successfully integrated India M with AI Sensei using P Connect to automate WhatsApp messaging for inquiries. This process streamlines communication and enhances customer engagement.

Thanks for following along with this tutorial! Remember to subscribe to the channel for more helpful content like this.

If you found this guide useful, please consider giving it a thumbs up and sharing it with others who might benefit from it.

By following the steps outlined, you can set up a similar workflow to ensure timely responses to inquiries received through India M, thus improving your industrial supplies and machinery business operations.

Integrating So This with Roots Using Pabbly Connect: A Step-by-Step Guide

Learn how to integrate So This with Roots Using Pabbly Connect in this detailed tutorial. Follow the exact steps to automate your processes efficiently. Navigate the automation landscape confidently with clear, structured guidance suitable for professionals regardless of prior technical experience. with Pabbly Connect.

Watch Step By Step Video Tutorial Below


1. Setting Up So This and Roots Integration

To begin integrating So This with Roots, you first need to establish a connection between these applications. This process starts by signing into your So This account and navigating to the integration section. Here, you will find options to connect various applications, including Roots. using Pabbly Connect

Once you are in the integration settings, you need to select Roots as the application to connect. Ensure you have the necessary permissions in Roots to allow this integration. This is crucial for the automation to work seamlessly.


2. Using Pabbly Connect for Automation

Now that you have connected So This with Roots, it’s time to automate your workflow Using Pabbly Connect. Within Make, you will create a scenario that defines how data flows between So This and Roots. Start by selecting the trigger event in So This that will initiate the automation. using Pabbly Connect

  • Choose the trigger event from So This.
  • Set up the action step in Roots that responds to the trigger.
  • Map the necessary fields between So This and Roots.

This mapping ensures that the correct data is sent to the right fields in Roots whenever the trigger event occurs in So This.


3. Testing the Integration

After setting up the automation in Make, it is essential to test the integration to ensure everything works correctly. You can do this by triggering an event in So This and checking if the corresponding action occurs in Roots. This step is crucial to verify the accuracy of the data transfer. using Pabbly Connect

During the test, make sure to monitor the data flow and check for any errors. If the data appears in Roots as expected, then your integration is successful. If there are issues, revisit your settings in both So This and Make to troubleshoot.


4. Finalizing the Workflow

Once the testing phase is complete, you can finalize your workflow. This involves saving all your settings in Make and ensuring that the integration is active. You may also want to set up notifications for any errors that may occur in the future. using Pabbly Connect

Finally, document your workflow for future reference. This documentation will help you or your team understand the integration process and make adjustments if necessary. Keeping a record of your settings and configurations is essential for troubleshooting.


Conclusion

In this tutorial, we explored the integration of So This with Roots Using Pabbly Connect. We covered the essential steps to set up, automate, test, and finalize your workflow, ensuring a smooth data transfer process. This integration allows for efficient management of your applications, streamlining your operations effectively.

Thanks for following along with this tutorial! Remember to subscribe to the channel for more helpful content like this.

If you found this guide useful, please consider giving it a thumbs up and sharing it with others who might benefit from it.

Integrating Keep Contacts with Landing Form Submissions Using Pabbly Connect

Learn how to automate Keep contact creation from Landing form submissions using Pabbly Connect in this step-by-step tutorial. Explore efficient methods for automating routine tasks with clear, concise instructions suited for both newcomers and experienced professionals.

Watch Step By Step Video Tutorial Below


1. Accessing Pabbly Connect for Integration

To start using Pabbly Connect, first navigate to the Pabbly website and sign in to your account. If you are a new user, you can sign up for free, which grants you 100 tasks monthly.

Once logged in, you will see the dashboard displaying various Pabbly applications. Click on the ‘Pabbly Connect’ option to access the integration dashboard, where you can manage your workflows effectively.


2. Creating a New Workflow in Pabbly Connect

In this step, you will create a new workflow in Pabbly Connect. Click on the ‘Create Workflow’ button and name your workflow, for example, ‘Keep Contact on Lending Form Submission.’ Select the appropriate folder for organization.

  • Click on ‘Create’ to initiate the workflow.
  • You will see two boxes: one for Trigger and another for Action.
  • Set up your trigger application as ‘Landing G’ and action application as ‘Keep’.

This setup allows you to automate the process of creating a contact in Keep whenever a form submission occurs in Landing G.


3. Setting Up Trigger and Action in Pabbly Connect

To configure your trigger, select ‘Landing G’ as the application and choose ‘New Lead’ as the trigger event. This event will initiate the workflow when a new form submission is made.

Next, connect your Landing G account with Pabbly Connect by providing the Webhook URL generated by Pabbly. Go to your Landing G account, edit the form settings, and paste the Webhook URL into the integrations section. Set the request method to POST.


4. Testing the Webhook Connection

After setting up the Webhook URL in Landing G, you need to perform a test submission to ensure the connection works properly. Fill in the form with dummy details and submit it.

Return to Pabbly Connect and check for the webhook response. If successful, you will see the submitted data reflected in the Pabbly dashboard. This indicates that Landing G is now successfully integrated with Pabbly Connect.


5. Creating a Contact in Keep Using Pabbly Connect

With the trigger set up and tested, the next step is to configure the action to create a contact in Keep. Select ‘Keep’ as your action application and choose ‘Create or Update Contact’ as the action event.

Map the fields from the webhook response to the corresponding fields in Keep. For example, use the email address from the form submission for the contact’s email. Use the Text Formatter feature by Pabbly Connect to separate the first and last names if required. Finally, save and send a test request to create the contact.


Conclusion

Using Pabbly Connect, we successfully integrated Landing G with Keep to automate contact creation from form submissions. This setup enhances efficiency and ensures that every lead is captured seamlessly.

Ensure you check out Pabbly Connect to create business automation workflows and reduce manual tasks. Pabbly Connect currently offer integration with 2,000+ applications.