Automate LinkedIn Posts with Pabbly Connect and Airtable

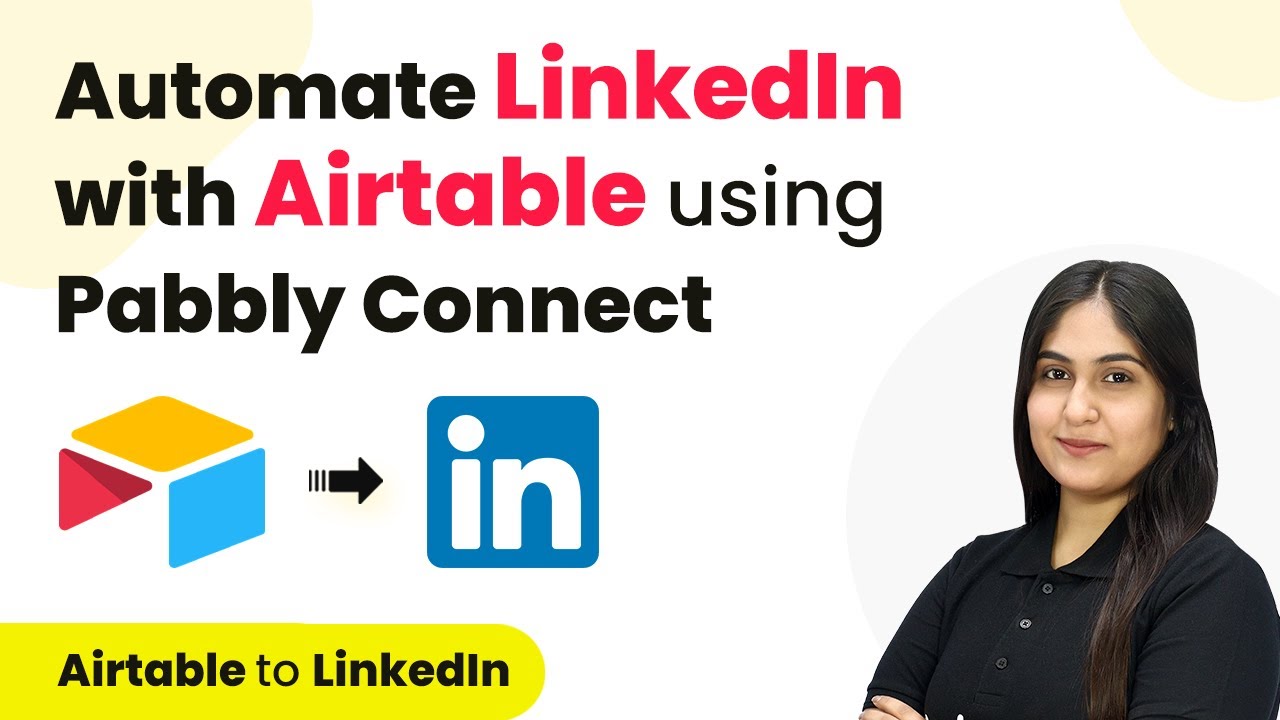
Learn how to automate LinkedIn posts using Pabbly Connect and Airtable with this step-by-step tutorial. Streamline your workflow effortlessly! Revolutionize your productivity approach with just a few strategic clicks. Uncover professional methods for connecting applications and creating workflows that reclaim hours of your week.

Watch Step By Step Video Tutorial Below


1. Accessing Pabbly Connect for Integration

To begin automating LinkedIn posts, you first need to access Pabbly Connect. This platform allows seamless integration between different applications, including Airtable and LinkedIn.

Visit the Pabbly Connect homepage by entering the URL in your browser. You’ll see options to sign up or sign in. If you are a new user, click on ‘Sign Up Free’ to get started. Existing users can simply click on ‘Sign In’ to access their accounts.


2. Creating a New Workflow in Pabbly Connect

Once signed in to Pabbly Connect, you will land on the dashboard where you can create a new workflow. Click on the ‘Create Workflow’ button located at the top right corner of the screen.

  • Enter a name for your workflow, such as ‘Automate LinkedIn with Airtable’.
  • Select a folder for your workflow, or create a new one if necessary.
  • Click on the ‘Create’ button to finalize your workflow setup.

After creating your workflow, the next step is to set up a trigger. This trigger will initiate the automation whenever a new record is added in Airtable.


3. Setting Up the Trigger with Airtable

In this step, you will set up the trigger in Pabbly Connect using Airtable. Choose Airtable as your trigger application and select the trigger event as ‘New Record’.

To connect your Airtable account, click on ‘Connect’ and select ‘Add New Connection’. You will be prompted to grant access to your Airtable account. Make sure to select the correct base and table where your LinkedIn post details will be stored.

  • Select the base named ‘Social Media Post’.
  • Choose the table named ‘LinkedIn Post’.

After granting access, you will receive a confirmation that your Airtable is successfully connected to Pabbly Connect. Now, you can proceed to add a new record in Airtable to test the trigger.


4. Setting Up the Action Step with LinkedIn

Next, you will set up the action step in Pabbly Connect using LinkedIn. Select LinkedIn as your action application and choose the action event as ‘Share a Text with Image’.

To connect your LinkedIn account, click on ‘Connect’ and follow the prompts to authorize Pabbly Connect. Once connected, you will need to fill in the required fields, including the author name and the content to be posted.

Map the image URL and text content from the trigger step. Set visibility to ‘Pabbly’ or as desired.

After filling in all required information, click on ‘Save and Send Test Request’ to verify that your LinkedIn post is created successfully. You should see a confirmation message indicating that the post was shared on LinkedIn.


5. Testing the Automation

To ensure everything is working correctly, you will now test the automation set up in Pabbly Connect. Go back to your Airtable account and add a new record with the content and image you want to share.

Once the new record is added, wait for Pabbly Connect to check for updates. Remember that Airtable has a polling interval of 10 minutes for new records, so your LinkedIn post will appear shortly after.

After waiting, refresh your LinkedIn account to see the new post. If everything is set up correctly, you should see the new content and image shared from your Airtable record.

Conclusion

This guide summarizes the key points and helps you understand the essential features and benefits of using this tool.

Ensure you check out Pabbly Connect to create business automation workflows and reduce manual tasks. Pabbly Connect currently offer integration with 2,000+ applications.


In this tutorial, we successfully demonstrated how to automate LinkedIn posts using Pabbly Connect and Airtable. This integration streamlines your workflow, ensuring that your LinkedIn profile remains active with fresh content effortlessly.

How to Create Trello Cards from Received Emails Using Pabbly Connect

Learn how to automate Trello card creation from received emails using Pabbly Connect in this step-by-step tutorial. Explore systematic approaches to creating efficient automation solutions that convert technical concepts into practical, implementable instructions.

Watch Step By Step Video Tutorial Below


1. Accessing Pabbly Connect for Email to Trello Integration

In this section, we will explore how to access Pabbly Connect to set up an integration that creates Trello cards from received emails. Start by navigating to the Pabbly Connect landing page by searching for Pabbly.com/connect in your browser.

Upon reaching the landing page, you will see options to either sign in or sign up for free. If you are a new user, click on ‘Sign up for free’ to get started. Existing users should click on ‘Sign in’ to access their accounts. Once logged in, select the option to access Pabbly Connect from the dashboard.


2. Creating a Workflow in Pabbly Connect

To initiate the workflow, click on the ‘Create Workflow’ button. You will then be prompted to name your workflow and select a folder for organization. Name your workflow something descriptive, like ‘Trello Card Creation from Gmail’ and choose a suitable folder.

  • Click on ‘Create’ to proceed.
  • This opens the workflow window where you can set triggers and actions.

In this window, you will need to define a trigger, which will be the event that starts the workflow. For this integration, select ‘Email Parser’ as the trigger application and choose ‘New Email’ as the trigger event. This setup allows Pabbly Connect to capture incoming email details automatically.


3. Setting Up Email Forwarding for Gmail

Next, we need to set up email forwarding from Gmail to Pabbly Connect. Go to your Gmail settings and navigate to the ‘Forwarding and POP/IMAP’ tab. Here, you will add the forwarding email address that Pabbly Connect provides.

  • Click on ‘Add a forwarding address’ and paste the email copied from your Pabbly workflow.
  • Follow the verification steps to confirm the forwarding address.

Once verified, return to Pabbly Connect and click on ‘Capture Response’ to ensure that your workflow is receiving the emails correctly. This is crucial as it allows Pabbly to process the emails and create Trello cards based on their content.


4. Adding Filter Conditions in Pabbly Connect

Now that you have set up email forwarding, it’s time to add filter conditions to your workflow. This step ensures that only relevant emails trigger card creation in Trello. In Pabbly Connect, add a new action step and select ‘Filter’ as the application.

Set the filter condition to check if the email subject contains keywords like ‘request’, ‘inquiry’, or ‘query’. If the condition is met, the workflow will proceed to create a Trello card.

After setting the filter, save the conditions and proceed to the next action step, where you will select Trello as the application to create a new card. This is where Pabbly Connect really shines, allowing you to automate your workflow seamlessly.


5. Creating Trello Cards Using Pabbly Connect

The final step in this automation is to create Trello cards based on the emails received. In your workflow, select Trello as the action application and choose ‘Create Card’ as the action event. You will need to connect your Trello account to Pabbly Connect by entering your API key and token.

Once connected, specify the board and list where the new cards should be created. Map the card name to the email subject and the description to the email body. This dynamic mapping ensures that every new card reflects the details of the incoming email accurately.

After completing the setup, test the workflow by sending a new email. If everything is set up correctly, a new Trello card will be created automatically, showcasing the power of Pabbly Connect in streamlining your email management process.


Conclusion

In this tutorial, we explored how to use Pabbly Connect to automate the creation of Trello cards from received emails. By following the step-by-step process, you can enhance your workflow efficiency and ensure that all inquiries are systematically addressed. Start using Pabbly Connect to transform your email management today!

Ensure you check out Pabbly Connect to create business automation workflows and reduce manual tasks. Pabbly Connect currently offer integration with 2,000+ applications.

Automate Lead Management with Pabbly Connect: A Step-by-Step Guide

Learn how to automate lead management using Pabbly Connect with Elementor, Google Sheets, Salesforce, and Slack. Streamline your workflow effectively! Learn to create powerful connections between your critical applications without requiring specialized programming knowledge or extensive technical background.

Watch Step By Step Video Tutorial Below


1. Accessing Pabbly Connect for Lead Management

To start automating lead management, first, access Pabbly Connect by visiting its official website. If you are new, you can sign up for free and enjoy 100 free tasks each month. For existing users, simply sign in to your account.

Once logged in, navigate to the dashboard where you will see various Pabbly applications. Click on Pabbly Connect to begin creating your automation workflow. This platform will facilitate the integration of Elementor, Google Sheets, Salesforce, and Slack seamlessly.


2. Creating a Workflow in Pabbly Connect

To create a workflow, click on the ‘Create Workflow’ button located at the top right corner of the dashboard. A dialog box will appear prompting you to name your workflow. Enter ‘Automatically Manage New Leads with Pabbly Connect’ as the workflow name. using Pabbly Connect

  • Select a folder to save your workflow.
  • Click ‘Create’ to finalize the setup.

After creating the workflow, you will see two main sections: Trigger and Action. The trigger is the event that starts your automation, while actions are the subsequent tasks that occur in response to the trigger. In this case, the trigger will be a new form submission from Elementor.


3. Setting Up the Trigger with Elementor

For the trigger application, select Elementor and choose the event as ‘New Form Submission.’ This means that whenever a new lead fills out the form on your website, Pabbly Connect will capture this data automatically.

After selecting the trigger, Pabbly Connect will provide you with a unique webhook URL. Copy this URL as you will need it to connect Elementor to Pabbly Connect. Next, go to your Elementor form, click on the form field, and navigate to ‘Actions After Submit.’ Here, add a new action and select ‘Webhook.’ Paste the copied URL into the provided field and save your changes.


4. Adding Actions: Google Sheets, Salesforce, and Slack

Now that your trigger is set up, it’s time to add actions. First, select Google Sheets as the action application and choose ‘Add New Row’ as the action event. Click on ‘Connect’ to link Google Sheets with Pabbly Connect. Authorize your Google account and select the spreadsheet where you want to store lead details.

  • Map the fields: First Name, Last Name, Email, and Phone Number.
  • Click ‘Save and Send Test Request’ to verify the connection.

Next, add another action step for Salesforce. Select Salesforce as the action application and choose ‘Create Contact’ as the action event. Similar to Google Sheets, connect your Salesforce account and map the necessary fields for the new contact. Finally, add one more action for Slack to send a notification about the new lead.


5. Testing and Verifying the Integration

After setting up your actions, it’s crucial to test the entire workflow. Go back to your Elementor form and fill it out to generate a test lead. Once you submit the form, Pabbly Connect should capture the lead details and create a new row in Google Sheets, a contact in Salesforce, and send a notification in Slack.

Check each application to ensure that the data has been recorded correctly. In Google Sheets, you should see the new lead details, in Salesforce, a new contact should be created, and on your Slack channel, there should be a notification alerting your team about the new lead.


Conclusion

By following this guide, you can effectively automate lead management using Pabbly Connect, Elementor, Google Sheets, Salesforce, and Slack. This integration streamlines your workflow and ensures timely responses to potential customers.

Ensure you check out Pabbly Connect to create business automation workflows and reduce manual tasks. Pabbly Connect currently offer integration with 2,000+ applications.

Integrating Facebook Lead Ads with Go High Level and Outlook Using Pabbly Connect

Learn how to integrate Facebook Lead Ads with Go High Level and Outlook using Pabbly Connect in this detailed step-by-step tutorial. This comprehensive guide reveals exactly how to connect your applications and automate repetitive tasks — accessible for professionals of all technical backgrounds.

Watch Step By Step Video Tutorial Below


1. Accessing Pabbly Connect for Integration

To start integrating Facebook Lead Ads with Go High Level and Outlook, you must first access Pabbly Connect. This powerful integration platform allows you to automate tasks between different applications seamlessly. Begin by visiting the Pabbly Connect website and signing in or creating an account.

After logging in, you will see the Pabbly Connect dashboard. From here, you can create a new workflow to connect your applications. Click on the ‘Create Workflow’ button located at the top right corner to begin setting up your integration.


2. Creating a Workflow in Pabbly Connect

In this section, we will create a workflow that connects Facebook Lead Ads to Go High Level and Outlook. Start by naming your workflow appropriately, such as ‘Facebook Lead Ads to Go High Level and Send Mail via Outlook’. Select a folder for your workflow, which helps in organizing your tasks within Pabbly Connect.

  • Click on the ‘Create’ button to proceed.
  • Define the trigger as Facebook Lead Ads by selecting it from the app list.
  • Choose the trigger event as ‘New Lead Instant’.

After setting the trigger, you will need to connect your Facebook account to Pabbly Connect. Follow the prompts to authorize the connection. Once connected, select the Facebook page and lead form you wish to use for the integration.


3. Setting Up Facebook Lead Ads Trigger

Once your workflow is created, it’s time to set up the Facebook Lead Ads trigger. This trigger will capture new leads generated through your Facebook ads. In Pabbly Connect, select your Facebook page and the specific lead form you are using.

To test the integration, you will need to generate a test lead. Navigate to the Meta for Developers site and use the Lead Ads Testing Tool to submit a dummy lead. After submitting, return to Pabbly Connect to confirm that the new lead data has been captured successfully.

  • Enter dummy details such as name and email in the lead form.
  • Click on ‘Continue’ and then submit the form.
  • Check Pabbly Connect for the new lead response.

After confirming the lead data is received, you can proceed to set up the action steps for your workflow.


4. Adding Go High Level Action in Pabbly Connect

The next step involves adding an action to create a new contact in Go High Level. In Pabbly Connect, select the action application as ‘Lead Connector V2’ instead of searching for Go High Level directly. This allows you to create a new contact based on the lead information captured earlier.

Choose the action event as ‘Create a Contact’. You will need to connect your Go High Level account to Pabbly Connect. Follow the prompts to authorize the connection and select the appropriate sub-account where the contact will be created.

Map the lead data from the Facebook trigger to the fields in Go High Level. Ensure all required fields such as first name, last name, and email are filled correctly. Save and test the action to confirm successful contact creation.

After successfully creating the contact, you can move on to the final action step of sending an email via Outlook.


5. Sending Email via Outlook Using Pabbly Connect

In the last step, you will set up an action to send a confirmation email to the new lead. Select Microsoft Office 365 as the action application in Pabbly Connect. Choose the action event as ‘Send Mail’ to configure the email settings.

Connect your Microsoft Office 365 account to Pabbly Connect and provide the necessary permissions. Fill in the email subject and body, using dynamic fields to personalize the email with the lead’s first name and other details.

Set the email subject to something engaging, like ‘Thank You for Your Interest’. Personalize the email body with lead details and a call to action. Save and test the email action to ensure it is sent correctly.

After testing, your integration should be complete, allowing leads from Facebook to be added to Go High Level and receive follow-up emails via Outlook automatically.


Conclusion

This tutorial demonstrated how to integrate Facebook Lead Ads with Go High Level and Outlook using Pabbly Connect. By following these steps, you can automate your lead management process, ensuring timely communication with potential clients.

Ensure you check out Pabbly Connect to create business automation workflows and reduce manual tasks. Pabbly Connect currently offer integration with 2,000+ applications.

How to Send Signature Requests Using Pabbly Connect: A Step-by-Step Guide

Learn how to automate signature requests using Pabbly Connect with Instamojo and Digisigner. This tutorial provides detailed steps to streamline your business processes. Discover how to seamlessly connect your essential tools through accessible instructions that make powerful automation available to professionals at every skill level.

Watch Step By Step Video Tutorial Below


1. Accessing Pabbly Connect for Integration

To begin the integration process, the first step is accessing Pabbly Connect. Open your web browser and search for Pabbly Connect to reach its landing page. If you don’t have an account, click on the ‘Sign Up for Free’ button, which takes only a couple of minutes and provides you with 100 free tasks each month.

After signing up or logging in, you will be directed to the dashboard. Here, you can see various applications that Pabbly Connect supports. Click on the ‘Create Workflow’ button to start setting up your integration. This is where you will connect Instamojo and Digisigner using Pabbly Connect.


2. Creating a Workflow in Pabbly Connect

Once you are in the dashboard of Pabbly Connect, the next step is creating a new workflow. Click on ‘Create Workflow’ and name it according to your objective, such as ‘Send Signature Requests Using Digisigner on Instamojo Sale.’ After naming, click on ‘Create’ to proceed to the workflow setup.

In this workflow, you will set up a trigger and an action. The trigger indicates when the workflow should start, while the action defines what happens next. In this case, the trigger will be a new sale in Instamojo. Here’s how to set it up:

  • Select ‘Instamojo V1’ as the trigger application.
  • Choose ‘New Sale’ as the trigger event.
  • Click on ‘Save’ to set your trigger.

Now, you will connect Instamojo to Pabbly Connect using a webhook URL.


3. Connecting Instamojo to Pabbly Connect

To connect Instamojo with Pabbly Connect, you need to copy the webhook URL generated in the previous step. Go to your Instamojo account, select the product for which you want to add the webhook, and navigate to the advanced settings.

In the advanced settings, locate the webhook URL field and paste the copied webhook URL. After pasting, click on ‘Save’ to update the settings. Now, whenever a sale is made, the details will be sent to Pabbly Connect automatically.

Next, make a test sale in Instamojo to verify that the webhook is functioning correctly. Once the sale is made, return to Pabbly Connect to check if the response has been received, confirming the connection is successful.


4. Setting Up the Action Step with Digisigner

After confirming the webhook connection, the next step is to set up the action in Pabbly Connect. The action will be to send a signature request through Digisigner once a new sale is confirmed. To do this, select ‘Digisigner’ as your action application.

Set the action event to ‘Send Signature Request’ and connect your Digisigner account to Pabbly Connect. You will need to provide your API key from your Digisigner account settings. Once connected, you will set up the details for the signature request, including the document ID and email subject.

  • Input the document ID for the non-disclosure agreement.
  • Set the email subject and message body for the signature request.
  • Map the customer’s name and email from the Instamojo sale response.

>After filling out the necessary information, click on ‘Send Test’ to verify that the signature request is sent successfully.


5. Verifying the Signature Request in Gmail

Once the test is complete, check your Gmail account to verify that the signature request has been sent. You should receive an email from Digisigner containing the details of the non-disclosure agreement. This confirms that the integration between Instamojo and Digisigner via Pabbly Connect is working as intended.

Open the email to ensure that it includes the correct message and attachment. The email should greet the customer by name and provide instructions for signing the document. This automated process significantly speeds up the transaction flow, ensuring that necessary agreements are signed promptly.

In summary, you have successfully set up a workflow using Pabbly Connect that automates the process of sending signature requests upon receiving a new sale in Instamojo. This integration not only saves time but also enhances your business efficiency.


Conclusion

In this tutorial, we demonstrated how to automate signature requests using Pabbly Connect with Instamojo and Digisigner. By following these steps, you can streamline your business processes and enhance customer experience. Using Pabbly Connect allows you to efficiently manage signature requests, ensuring timely agreements for your services.

Ensure you check out Pabbly Connect to create business automation workflows and reduce manual tasks. Pabbly Connect currently offer integration with 2,000+ applications.

Automate Your Leads: Integrating Flexi Funnels with ConvertKit Using Pabbly Connect

Learn how to automate lead generation by integrating Flexi Funnels with ConvertKit using Pabbly Connect. Step-by-step guide for seamless automation. Explore systematic approaches to creating efficient automation solutions that convert technical concepts into practical, implementable instructions.

Watch Step By Step Video Tutorial Below


1. Accessing Pabbly Connect for Integration

To start the integration process, access Pabbly Connect by visiting the official website. Here, you can sign in if you already have an account or sign up for free if you’re a new user. Upon signing up, you receive 100 free tasks every month to explore the platform’s capabilities.

After logging in, navigate to the dashboard where you can create new workflows. Click on the ‘Create Workflow’ button to initiate the integration process. This will allow you to connect Flexi Funnels and ConvertKit seamlessly through Pabbly Connect.


2. Creating a Workflow in Pabbly Connect

In this section, you will create a workflow to automate the process of adding subscribers to ConvertKit from Flexi Funnels. Start by naming your workflow, such as ‘Create ConvertKit Subscriber on Flexi Funnels Form Submission.’ Then, select the appropriate folder to save your workflow.

  • Select a trigger application: Flexi Funnels.
  • Choose the trigger event: New Form Submission.
  • Copy the provided Webhook URL to connect to Flexi Funnels.

Once you have set up the trigger, you are ready to configure the action step that will automatically add the new lead as a subscriber in ConvertKit using Pabbly Connect.


3. Configuring Flexi Funnels for Automation

Next, log in to your Flexi Funnels account and select the project where your form is located. Navigate to the project settings and edit the form you want to connect with Pabbly Connect. Here, you will set up the Webhook URL that you copied earlier.

To do this, access the settings for your form fields, select the gear icon, and choose the Webhook option. Enter a name for the Webhook (e.g., New Leads) and paste the copied URL. Save your settings and publish the form to make it live.

Now, every time a user submits the form, their details will be sent to Pabbly Connect. This ensures that all lead information is captured and ready for the next step in the integration process.


4. Setting Up ConvertKit Integration in Pabbly Connect

After configuring Flexi Funnels, return to Pabbly Connect to set up the action step. Select ConvertKit as your action application and choose the action event ‘Add Subscriber to a Form.’ This will allow you to automatically add leads as subscribers in your email marketing platform.

To create the connection, you will need to provide your ConvertKit API key and secret. Access your ConvertKit account, navigate to account settings, and find the API key and secret in the advanced options. Copy these details back to Pabbly Connect and save the connection.

Next, map the fields from the Flexi Funnels response to ConvertKit, ensuring that the first name, last name, email, and phone number are correctly assigned. This mapping allows for dynamic data transfer, making sure that each new lead is added to ConvertKit with their specific details.


5. Testing and Completing the Integration

With everything set up, it’s time to test the integration. Go back to your Flexi Funnels form and submit a test entry with dummy lead details. After submission, Pabbly Connect will capture the response and display it on your dashboard.

Check if the lead information appears correctly in Pabbly Connect. If successful, you will see the details you entered during the test submission. This confirms that the connection between Flexi Funnels and ConvertKit is working as intended.

Finally, check your ConvertKit account to see if the new subscriber has been added with the correct information. This completes the integration process, allowing you to automate your lead generation workflow effortlessly.


Conclusion

Integrating Flexi Funnels with ConvertKit using Pabbly Connect streamlines your lead generation process. This automation ensures that every lead captured is promptly added as a subscriber, enhancing your email marketing efforts without manual intervention.

Ensure you check out Pabbly Connect to create business automation workflows and reduce manual tasks. Pabbly Connect currently offer integration with 2,000+ applications.

Integrating Page with Old Street Using Pabbly Connect: A Step-by-Step Tutorial

Learn how to integrate Page with Old Street Using Pabbly Connect. Follow this detailed tutorial for seamless automation and subscriber management. Discover how to seamlessly connect your essential tools through accessible instructions that make powerful automation available to professionals at every skill level. with Pabbly Connect.

Watch Step By Step Video Tutorial Below


1. Setting Up Integration with Page

To start the integration with Page, you first need to access your dashboard. This will allow you to create a new workflow that connects Page with other applications. Begin by logging into your account and navigating to the workflow section.

Once you are in the dashboard, click on ‘Create Workflow’. Here, you can name your workflow and select the relevant applications for integration. Make sure to choose Page as your trigger application, which will initiate the workflow whenever a new action occurs.


2. Connecting Old Street with Make

Next, you will connect Old Street Using Pabbly Connect. This involves selecting Old Street as the action application in your workflow. The action event will be set to create a new subscriber in the system.

  • Choose Old Street from the list of applications.
  • Select the action event to create a new subscriber.
  • Connect to Make by providing the necessary permissions.

After connecting, ensure that you map the necessary fields such as email, name, and other relevant data. This mapping is crucial for the automation to function properly.


3. Using Pradesh for Data Management

In this step, we will utilize Pradesh for managing the data collected from Page. This integration allows you to segment your subscribers effectively based on their inputs.

To do this, navigate to the settings in your Pradesh account. Here, you can create segments for various types of subscribers that come through Page. This will help in organizing your leads based on their geographic or demographic information.


4. Finalizing Integration with Box

Now, we will finalize the integration using Box. This step is essential for storing and managing the data collected from Old Street. Make sure to set Box as your final action application in the workflow.

Connect Box with Make by providing the necessary credentials. Once connected, you can define the specific folders where data from Old Street will be stored. This ensures that all information is organized and easily accessible.


5. Testing the Integration

After setting up all connections, it’s time to test the integration. You can do this by submitting a test form through Page. Ensure that all data flows correctly to Old Street and is stored in Box.

Monitor the subscriber creation in Old Street and check Box for the stored data. This step is crucial to ensure that your workflow is functioning as expected. If any issues arise, revisit the mapping and connections to troubleshoot.

Conclusion

This guide summarizes the key points and helps you understand the essential features and benefits of using this tool.

Thanks for following along with this tutorial! Remember to subscribe to the channel for more helpful content like this.

If you found this guide useful, please consider giving it a thumbs up and sharing it with others who might benefit from it.


In conclusion, integrating Page with Old Street using Make provides a seamless way to manage subscribers and automate workflows. This tutorial has guided you through the necessary steps to set up and test your integration effectively.

Integrating Google with Pabbly Connect: A Step-by-Step Guide

Learn how to integrate Google with Pabbly Connect through this detailed tutorial, showcasing step-by-step processes and specific UI elements. Explore efficient methods for automating routine tasks with clear, concise instructions suited for both newcomers and experienced professionals.

Watch Step By Step Video Tutorial Below


1. Setting Up Google Integration with Pabbly Connect

Google integration is essential for automating workflows. In this section, we will create a Google integration using Pabbly Connect. First, sign in to your Pabbly account by clicking on the ‘Sign In’ option at the top right corner of the screen.

Once logged in, navigate to the Pabbly Connect dashboard. Click on the ‘+’ icon to create a new workflow. You will be prompted to name your workflow. Let’s name it ‘Google Contact Creation’. After naming, click on the ‘Create’ button to proceed.


2. Defining Triggers in Google for Pabbly Connect

Defining triggers in Google is the next step in using Pabbly Connect effectively. A trigger event is an action that starts the workflow. Here, we will set the trigger to be a new row added in Google Sheets.

  • Open your Google Sheets and create a new spreadsheet for customer details.
  • Add columns for First Name, Last Name, Phone Number, and Email Address.
  • In Pabbly Connect, select Google Sheets as the trigger application.

After selecting Google Sheets, choose the trigger event as ‘New Row’. This means every time a new row is added, the workflow will initiate. Click ‘Save and Send Test Request’ to ensure the connection is working.


3. Action Steps in Google through Pabbly Connect

Once the trigger is set, the next step is defining the action in Google. In this case, we will create a contact in Google Contacts when a new row is added in Google Sheets using Pabbly Connect.

Choose Google Contacts as the action application. Click on ‘Create Contact’ as the action event. You will need to connect your Google account by clicking on ‘Sign In with Google’. Authorize Pabbly to access your Google account.

  • Map the fields from Google Sheets to Google Contacts.
  • For example, map First Name to First Name, Last Name to Last Name, and Email to Email Address.
  • Once mapping is complete, click on ‘Save and Send Test Request’ to test the connection.

Check your Google Contacts to ensure the new contact has been created successfully. This verifies that the integration between Google Sheets and Google Contacts is functioning properly.


4. Testing the Google Integration Workflow

Testing the Google integration is crucial to ensure everything works as expected. With Pabbly Connect, you can easily test the entire workflow. Start by adding a new row to your Google Sheets.

Enter sample details into the designated columns. For instance, add a first name, last name, phone number, and email address. After entering the details, check Pabbly Connect to see if the workflow was triggered.

Look for the response in Pabbly Connect’s dashboard. If the data appears correctly, your Google integration is successful. If not, review the mapping and settings to troubleshoot any issues.


Conclusion

In conclusion, integrating Google with Pabbly Connect allows for seamless automation of workflows. By following these steps, you can efficiently manage customer data and streamline your processes. This integration enhances productivity and ensures accurate data handling.

Thanks for following along with this tutorial! Remember to subscribe to the channel for more helpful content like this.

If you found this guide useful, please consider giving it a thumbs up and sharing it with others who might benefit from it.

Integrating Facebook Leads with Pabbly Connect: A Step-by-Step Guide

Learn how to integrate Facebook Leads with Pabbly Connect and automate your lead management process with Google Sheets and Clavio in this detailed tutorial. Build sophisticated automated workflows in less time than you think. This guide translates complex integrations into straightforward steps for immediate implementation.

Watch Step By Step Video Tutorial Below


1. Accessing Pabbly Connect for Integration

To start integrating Facebook Leads with Pabbly Connect, first, access the platform. Navigate to the Pabbly Connect website and either sign in or create a new account. This is essential for setting up your automation and integrations.

Once logged in, you will see various applications offered by Pabbly. Click on the Pabbly Connect option to proceed. This will direct you to the dashboard where you can create a new workflow for your integration.


2. Creating a Workflow in Pabbly Connect

Next, you need to create a new workflow in Pabbly Connect. Click on the Create Workflow button. You will be prompted to name your workflow based on your integration goal, such as ‘Facebook Leads to Clavio Subscriber and Google Sheets’.

  • Name your workflow clearly.
  • Select the folder where you want to save your workflow.
  • Click on the Create button to proceed.

After creating the workflow, you will see two main sections: Trigger and Action. The trigger initiates the workflow, while actions are the subsequent steps that follow. In this case, your trigger will be a new lead from Facebook Lead Ads.


3. Setting Up Trigger and Action in Pabbly Connect

In the trigger section, search for Facebook Lead Ads as your trigger application. Select the trigger event as New Lead Instant. This event will trigger the workflow whenever a new lead is captured via Facebook.

Next, you need to connect your Facebook account with Pabbly Connect. Click on the Connect button, and follow the prompts to authorize Pabbly Connect to access your Facebook Lead Ads. Ensure that you select the correct page and lead form associated with your ad campaign.

  • Select your Facebook page from the dropdown.
  • Choose the lead generation form you are using.
  • Click on Save and Send Test Request to confirm the connection.

After setting up the trigger, you will need to create an action step to add the lead as a subscriber in Clavio. Search for Clavio as your action application and select the action event as Create Profile.


4. Adding Subscriber Details in Clavio through Pabbly Connect

In the action setup for Clavio, connect your Clavio account with Pabbly Connect. You will need to authorize the connection by clicking on Add New Connection. Follow the prompts to allow access to your Clavio account.

Once connected, fill in the necessary fields to create a new subscriber profile using the lead details received from Facebook. Use the mapping feature to automatically pull in the lead’s first name, last name, email, and phone number from the previous step.

Map the first name, last name, email, and phone number from the Facebook lead response. Select the appropriate list in Clavio where the subscriber should be added. Click on Save and Send Test Request to create the subscriber.

This step ensures that your leads are effectively managed in Clavio, allowing for targeted marketing efforts based on the city of interest.


5. Logging Leads in Google Sheets Using Pabbly Connect

Finally, to log the lead details in Google Sheets, add another action step in your workflow. Search for Google Sheets as the action application and select the event Add New Row.

Connect your Google Sheets account with Pabbly Connect by authorizing access. Once connected, select the spreadsheet where you want to log the lead details. Map the fields such as first name, last name, email, phone number, and city to the corresponding columns in your Google Sheet.

Select the spreadsheet and sheet where you want to add the lead details. Map the lead details to the appropriate columns. Click on Save and Send Test Request to confirm the setup.

With this final step, every new lead captured through Facebook will automatically be logged in your Google Sheets, streamlining your lead management process.


Conclusion

In this tutorial, we demonstrated how to integrate Facebook Leads with Pabbly Connect, allowing you to automatically create subscribers in Clavio and log lead details in Google Sheets. This automation enhances your lead management and marketing efforts significantly.

Ensure you check out Pabbly Connect to create business automation workflows and reduce manual tasks. Pabbly Connect currently offer integration with 2,000+ applications.

Integrating SMS and WhatsApp with Pabbly Connect: A Step-by-Step Guide

Learn how to seamlessly integrate SMS and WhatsApp Cloud API using Pabbly Connect for your webinar registrations with this detailed tutorial. Revolutionize your productivity approach with just a few strategic clicks. Uncover professional methods for connecting applications and creating workflows that reclaim hours of your week.

Watch Step By Step Video Tutorial Below


1. Accessing Pabbly Connect for Integration

To begin integrating SMS and WhatsApp Cloud API, first access Pabbly Connect. This platform allows you to connect various applications seamlessly. Start by visiting the Pabbly Connect website and signing in or creating a new account.

Once logged in, you will be directed to the dashboard where you can create workflows. Click on the ‘Create Workflow’ button and give your workflow a name, such as ‘Add Webinar Kit Registrant from Elementor Form Submission’. This sets the stage for integrating your applications.


2. Creating a Workflow in Pabbly Connect

In this section, we’ll create a workflow to automate the process of adding webinar registrants. After naming your workflow, you need to define a trigger. For this integration, select Elementor as your trigger application, specifically the ‘New Form Submission’ event. using Pabbly Connect

  • Select ‘New Form Submission’ as the trigger event.
  • Copy the provided Webhook URL from Pabbly Connect.
  • Paste the Webhook URL into your Elementor form settings.

After setting up the Webhook, you need to test the connection. Submit a test form entry in Elementor to ensure Pabbly Connect captures the data correctly. This step is crucial for the integration to function properly.


3. Integrating Webinar Kit with Pabbly Connect

Now that you have set the trigger, it’s time to integrate Webinar Kit. Select Webinar Kit as your action application in the workflow. Choose the action event as ‘New Webinar Registration’ to add the registrant automatically. using Pabbly Connect

When connecting to Webinar Kit, you will be prompted to enter an API key. This key can be found in your Webinar Kit account settings under API access. After entering the API key, select the webinar ID corresponding to your event, ensuring that the correct webinar is associated with the registration.

  • Map the registrant’s email, first name, and last name from the trigger data.
  • Set the webinar presentation date in ISO 8601 format.

Once all fields are mapped, save the action step. This integration will ensure every new registrant from your Elementor form is added to your Webinar Kit automatically.


4. Sending Notifications via SMS and WhatsApp

After successfully adding registrants to Webinar Kit, the next step is to notify them via SMS and WhatsApp. For SMS, integrate Twilio as your next action application. Select ‘Send SMS Message’ as the action event.

To configure this action, you will need your Twilio account SID and authorization token. Enter these credentials to connect Twilio with Pabbly Connect. Then, customize the SMS body to include the registrant’s name and webinar details, ensuring personalized communication.

Map the recipient’s phone number from the trigger data. Include a friendly message confirming their registration.

This setup allows registrants to receive immediate SMS notifications, enhancing their experience and engagement.


5. Finalizing Email Notifications with Gmail

Finally, integrate Gmail to send email confirmations to your registrants. Choose Gmail as your last action application and select ‘Send Email V2’ as the action event. Connect your Gmail account to Pabbly Connect by allowing necessary permissions.

In this action, map the recipient’s email address and customize the email subject and body. Make sure to include dynamic fields such as the registrant’s name to personalize the email. This ensures that each registrant receives a tailored confirmation of their registration.

Set the email subject as ‘Your Webinar Registration is Confirmed’. Write a friendly email body thanking them for registering.

After configuring the email action, save your workflow. This finalizes the integration, ensuring that every registrant receives SMS, WhatsApp, and email notifications seamlessly through Pabbly Connect.


Conclusion

In this tutorial, we explored how to integrate SMS and WhatsApp Cloud API using Pabbly Connect. By automating the registration process for webinars, you enhance communication with your audience. This integration not only saves time but also ensures that registrants receive timely notifications across multiple channels.

Ensure you check out Pabbly Connect to create business automation workflows and reduce manual tasks. Pabbly Connect currently offer integration with 2,000+ applications.