Automate Facebook Comment Replies Using Pabbly Connect and Google Gemini

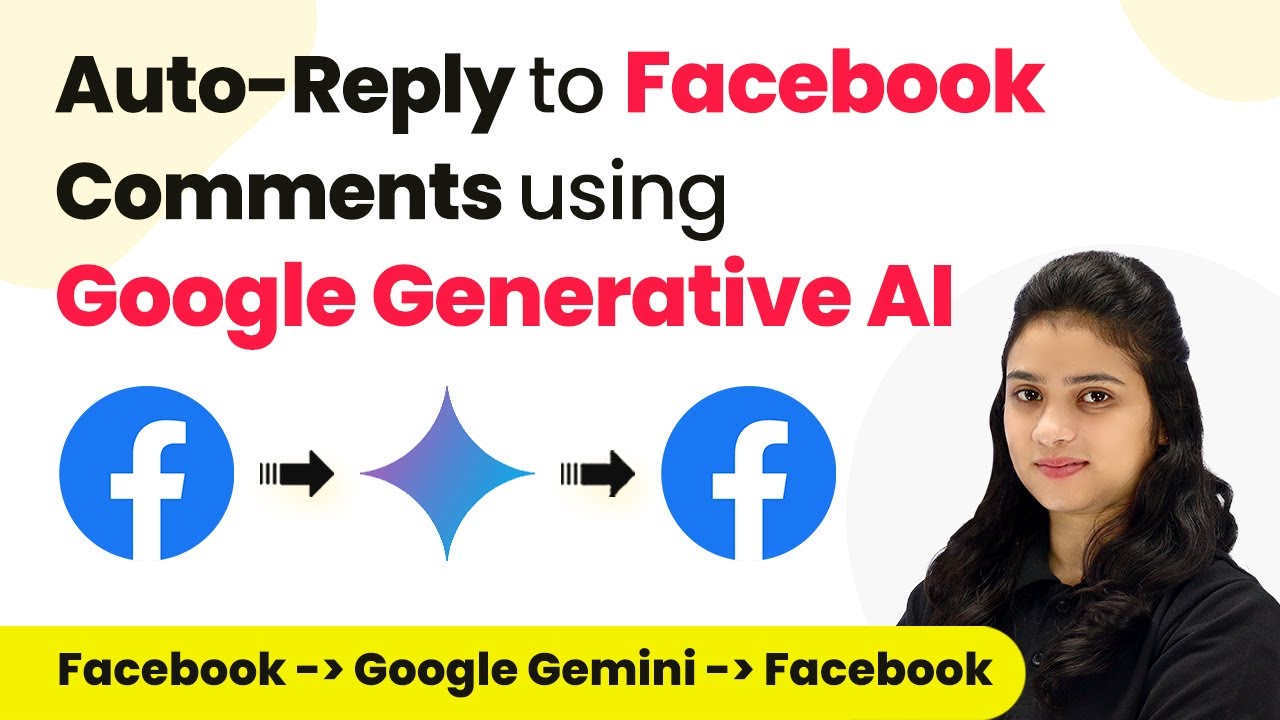
Learn how to automate Facebook comment replies with Pabbly Connect and Google Gemini. Follow this step-by-step tutorial for seamless integration. Revolutionize your productivity approach with just a few strategic clicks. Uncover professional methods for connecting applications and creating workflows that reclaim hours of your week.

Watch Step By Step Video Tutorial Below


1. Accessing Pabbly Connect for Automation

To automate Facebook comment replies, you need to access Pabbly Connect. Start by navigating to the Pabbly Connect homepage in your browser.

Once on the homepage, you will see options to sign in or sign up for free. If you are a new user, click on the ‘Sign up for free’ button to create an account and receive 100 free tasks each month. Existing users can simply sign in.


2. Creating a New Workflow in Pabbly Connect

After signing in, you will be taken to the dashboard of Pabbly Connect. Here, you can create a new workflow for automating Facebook comment replies.

Click on the ‘Create Workflow’ button. A dialog box will appear asking for a name for your workflow. Enter ‘Automatically Reply to Facebook Comments Using Google Generative AI’ and select a folder to save it in, such as ‘Social Media Automation’.

  • Click on the ‘Create’ button to save your workflow.
  • You will see two windows: Trigger and Action.
  • Understand that the trigger initiates the workflow, while actions are the responses.

This setup allows you to define how Pabbly Connect will respond to new comments on your Facebook page.


3. Setting Up Trigger and Action in Pabbly Connect

In this step, you will set up the trigger and action for your workflow using Pabbly Connect. The trigger will be ‘New Comment’ from Facebook Pages, while the action will be generating replies using Google Gemini.

Select Facebook Pages as your trigger application and choose ‘New Comment’ as the trigger event. After connecting to your Facebook account, select your page, such as ‘Natural Glow Skincare’. Click on ‘Save and Test Request’ to capture responses from new comments.

  • Ensure your Facebook account is logged in to connect seamlessly.
  • You will see a prompt indicating that Pabbly Connect is waiting for a webhook response.
  • Post a comment on your Facebook page to test the integration.

This step confirms that Pabbly Connect is capturing comments correctly, setting the stage for automated replies.


4. Generating Replies with Google Gemini

Next, you will set up Google Gemini as the action in your Pabbly Connect workflow. Select Google Gemini as your action application and choose ‘Generate Content’ as the action event.

To connect Google Gemini, you need to enter your API token. Click on the link to Google AI Studio to generate a new API key, then copy it back into Pabbly Connect.

Select the model you want to use, such as Gemini 1.5 Pro. Input the text command for generating replies, including specific details about your salon and offers. Map the comment received from the previous step to generate dynamic replies.

This integration allows Pabbly Connect to automate the reply generation process, making your responses timely and relevant.


5. Delaying and Posting Replies Automatically

To make your replies appear more natural, you can delay them before posting. In this final step, use the ‘Delay’ action in Pabbly Connect to set a time delay for your replies.

Choose the ‘Delay for’ option and set the delay to 5 minutes. This way, replies will be generated immediately but posted after a short wait, enhancing the authenticity of your responses.

After the delay, add another action step to reply to comments on Facebook. Select the Facebook Comments application and choose ‘Reply Comment on Page Post’ as the action event. Map the necessary fields like post ID and comment ID to ensure the correct replies are posted.

This final setup allows Pabbly Connect to manage the timing of your replies, ensuring they are both automated and contextually appropriate.


Conclusion

In this tutorial, we explored how to automate Facebook comment replies using Pabbly Connect and Google Gemini. By setting up triggers, actions, and delays, you can efficiently engage with your audience while saving time.

Ensure you check out Pabbly Connect to create business automation workflows and reduce manual tasks. Pabbly Connect currently offer integration with 2,000+ applications.

With Pabbly Connect, you can streamline your social media interactions, ensuring timely and relevant responses to customer inquiries.

How to Automate Email Notifications with Pabbly Connect and Google Sheets

Learn how to automate email notifications using Pabbly Connect with Google Sheets and Gmail. Step-by-step tutorial to streamline your workflow. Navigate the automation landscape confidently with clear, structured guidance suitable for professionals regardless of prior technical experience.

Watch Step By Step Video Tutorial Below


1. Accessing Pabbly Connect for Automation

To start automating email notifications, you need to access Pabbly Connect. Begin by visiting the Pabbly website and logging into your account. If you are a new user, you can sign up for a free account, which offers 100 tasks every month.

Once logged in, navigate to the Pabbly Connect dashboard. Here, you will find the option to create a new workflow. This is where you will set up the automation that connects Google Sheets with Gmail for sending email notifications.


2. Creating a New Workflow in Pabbly Connect

In this section, you will create a new workflow in Pabbly Connect. Click on the ‘Create Workflow’ button, and you will be prompted to name your workflow. For instance, you can name it ‘Send Emails on Status Update in Google Sheets’.

  • Click on the ‘Create’ button to proceed.
  • You will now see a window with options for setting triggers and actions.
  • Select Google Sheets as your trigger application.

Next, choose the trigger event as ‘New or Updated Spreadsheet Row’. This means that whenever a row in your Google Sheet is updated, it will trigger the workflow. After selecting the trigger, Pabbly Connect will provide you with a webhook URL that you will use to connect Google Sheets to this workflow.


3. Connecting Google Sheets to Pabbly Connect

To establish a connection between Google Sheets and Pabbly Connect, you need to copy the webhook URL provided earlier. Open your Google Sheets document and navigate to the ‘Extensions’ menu. From there, select ‘Add-ons’ and then ‘Get Add-ons’.

Search for ‘Pabbly Connect Webhooks’ in the add-ons store. If you haven’t installed it yet, click on ‘Install’. After installation, refresh your Google Sheet. Once refreshed, go back to ‘Extensions’ and select ‘Pabbly Connect Webhooks’ followed by ‘Initial Setup’.

  • Paste the webhook URL into the designated field.
  • Set the trigger column to the final data column in your sheet.

After configuring the setup, click on ‘Submit’. You should see a confirmation message indicating that the connection has been successfully established between Google Sheets and Pabbly Connect.


4. Testing the Automation with Pabbly Connect

With the connection established, it’s time to test the automation. Make a change to the status of a task in your Google Sheet. For example, change the status from ‘Not Started’ to ‘In Progress’. Before making this change, ensure that you enable the ‘Send on Event’ option in the Pabbly Connect Webhooks add-on.

Once you change the status, Pabbly Connect will capture this change and trigger the workflow. You can check back in your Pabbly Connect dashboard to see if the response has been successfully captured. The data from the updated row will be displayed in the workflow.

Verify that the trigger data includes all the relevant details from Google Sheets. Ensure that the status update is reflected correctly in the Pabbly Connect workflow.

Once confirmed, you are ready to set up the action that will send the email notification to your client.


5. Sending Email Notifications via Pabbly Connect

To send email notifications, select Gmail as your action application in Pabbly Connect. Choose the action event as ‘Send Email V2’. Click on ‘Connect’ to proceed. If you haven’t connected your Gmail account yet, select ‘Add New Connection’ and follow the prompts to authorize Pabbly Connect to access your Gmail.

After connecting, you will need to map the recipient’s email address from the trigger data. This ensures that the email is sent to the correct client based on the data in your Google Sheet. Fill in the other fields such as sender’s name, subject, and email content. For example, you can set the subject as ‘Important Update on Your Task’ and customize the email body to include task details.

Map the client’s name and task details dynamically from the trigger response. Preview the email content to ensure accuracy before sending.

Once all fields are filled out, click on ‘Save and Send Test Request’. You should receive a confirmation that the email was successfully sent. Check your Gmail to verify that the email notification was received, confirming that the workflow is functioning as intended.


Conclusion

This tutorial demonstrated how to automate email notifications using Pabbly Connect with Google Sheets and Gmail. By setting up a workflow, you can ensure that your clients are always updated on their task statuses, enhancing transparency and efficiency in your business operations.

Ensure you check out Pabbly Connect to create business automation workflows and reduce manual tasks. Pabbly Connect currently offer integration with 2,000+ applications.

Integrating Email with Go High Level Using Pabbly Connect

Learn how to integrate Gmail with Go High Level using Pabbly Connect to create contacts from received emails effortlessly. Revolutionize your productivity approach with just a few strategic clicks. Uncover professional methods for connecting applications and creating workflows that reclaim hours of your week.

Watch Step By Step Video Tutorial Below


1. Accessing Pabbly Connect for Integration

To start using Pabbly Connect, open your browser and navigate to the Pabbly website. You will see options to sign in or sign up. If you are a new user, click on the ‘Sign up for free’ option to get started.

As an existing user, click on ‘Sign in’. Once logged in, you will have access to various Pabbly applications. Click on ‘Access Now’ under Pabbly Connect to begin setting up the integration between your email and Go High Level.


2. Creating a New Workflow in Pabbly Connect

In Pabbly Connect, the next step is to create a workflow. Click on the ‘Create Workflow’ button. You will be prompted to name your workflow and select a folder to save it in. Name your workflow something descriptive, like ‘Create Go High Level Contact from Emails’.

  • Click on the ‘Create’ button.
  • This opens the workflow window where you will set up the trigger and actions.

In this window, you will define a trigger and corresponding actions for your workflow. Remember, the trigger is the command that starts the workflow, while actions are what follows the command.


3. Setting Up the Trigger with Email Parser

For the trigger in Pabbly Connect, select the ‘Email Parser’ application. This will allow you to extract details from incoming emails. Choose the trigger event as ‘New Email’, which will activate whenever a new email is received.

Copy the provided email address from Pabbly Connect and head to your Gmail account. In Gmail settings, go to ‘Forwarding and POP/IMAP’ and add the copied email address as a forwarding address.


4. Verifying the Forwarding Connection

After adding the forwarding address in Gmail, you will need to verify it. Check your Pabbly Connect workflow for a confirmation email and click on the provided link to confirm the forwarding setup.

Once verified, return to your Gmail settings page and refresh it. Ensure that the forwarding address is listed and select the option to forward a copy of incoming mail to the Pabbly email address.

  • Save the changes in Gmail settings.
  • Return to Pabbly Connect and click on ‘Recapture Response’ to test the connection.

This sets up the connection between your Gmail and Pabbly Connect, allowing you to capture email data for your workflow.


5. Adding Action to Create Contacts in Go High Level

Now that your trigger is set, it’s time to add an action step in Pabbly Connect. Select ‘Lead Connector V2’ as the action application to create a contact in Go High Level. Choose the action event as ‘Create Contact’.

Map the necessary fields such as full name and email from the previous steps. You can specify a tag like ‘Email Inquiry’ to categorize these contacts. Once you have mapped the fields, click on ‘Save and Send Test Request’ to create a new contact.

Check your Go High Level account to confirm the new contact has been created. Ensure the contact appears with the correct details and tags.

This action completes the workflow setup in Pabbly Connect, ensuring all inquiries from emails are systematically recorded in Go High Level.


Conclusion

Using Pabbly Connect, you can efficiently integrate Gmail with Go High Level to create contacts from incoming emails. This automation streamlines lead management and improves response times, enhancing your overall efficiency.

Ensure you check out Pabbly Connect to create business automation workflows and reduce manual tasks. Pabbly Connect currently offer integration with 2,000+ applications.

Integrate Google Contacts with AI Table Using Pabbly Connect

Learn how to integrate Google Contacts with AI Table using Pabbly Connect for seamless automation in managing client information. Learn to create powerful connections between your critical applications without requiring specialized programming knowledge or extensive technical background.

Watch Step By Step Video Tutorial Below


1. Accessing Pabbly Connect for Integration

To start using Pabbly Connect, first, visit the Pabbly Connect homepage. You can sign up for a free account or log in if you already have one. This platform is designed to facilitate the integration of various applications seamlessly, including Google Contacts and AI Table.

Once you are logged in, you will see the dashboard where you can create workflows. Pabbly Connect allows you to set up triggers and actions, making your automation process efficient. Click on the ‘Create Workflow’ button to begin your integration process.


2. Creating a Workflow in Pabbly Connect

After accessing Pabbly Connect, the next step is to create a new workflow to connect Google Contacts with AI Table. In the dialog box that appears, you will need to name your workflow. For this example, name it ‘Create or Update AI Table Record for Google Contacts’ and select a folder for organization. using Pabbly Connect

  • Name your workflow appropriately.
  • Select a folder to save your workflow.
  • Click on the ‘Create’ button to proceed.

Once the workflow is created, you will see two main components: the trigger and the action. The trigger is what initiates the workflow, while the action is what happens as a result. In this case, we will set Google Contacts as the trigger.


3. Setting Up Google Contacts as Trigger

To set Google Contacts as the trigger in Pabbly Connect, select it from the list of applications. Choose the trigger event as ‘New or Updated Contact’. This means that every time a new contact is added or an existing contact is updated in Google Contacts, the workflow will be triggered automatically.

After selecting the trigger event, click on ‘Connect’ to establish a connection with Google Contacts. If it’s your first time, you will need to add a new connection. Click on ‘Sign in with Google’ and authorize Pabbly Connect to access your Google Contacts. Ensure you select the correct Google account and allow the necessary permissions.


4. Creating Action in AI Table Using Pabbly Connect

Now that you have set up Google Contacts as the trigger, the next step is to define the action in AI Table. Select AI Table as the action application and choose the action event as ‘Create a Record’. This action will allow you to create a new record in your AI Table account whenever a new contact is added in Google Contacts. using Pabbly Connect

  • Select AI Table as the action application.
  • Choose ‘Create a Record’ as the action event.
  • Connect your AI Table account using the API token.

Once connected, you will need to specify the details of the record to be created. Map the fields from Google Contacts to the corresponding fields in AI Table, such as full name, email, and phone number. This mapping ensures that the correct data is transferred automatically.


5. Testing the Integration Between Google Contacts and AI Table

After setting up the workflow, it’s essential to test the integration to ensure it functions correctly. Start by creating a new contact in your Google Contacts account. Make sure to fill in the necessary details like first name, last name, email, and phone number, then save the contact. using Pabbly Connect

Once the contact is saved, return to Pabbly Connect and check if the new record appears in your AI Table account. Remember that Google Contacts uses a polling mechanism, so it may take a few minutes for the new record to show up. Refresh your AI Table to verify the successful creation of the record.


Conclusion

In this tutorial, we demonstrated how to integrate Google Contacts with AI Table using Pabbly Connect. By following the steps outlined, you can automate the process of managing client information efficiently. This integration helps streamline your workflow and ensures that your data remains accurate and up to date.

Ensure you check out Pabbly Connect to create business automation workflows and reduce manual tasks. Pabbly Connect currently offer integration with 2,000+ applications.

Integrate Google Sheets with Mailer Cloud Using Pabbly Connect: A Step-by-Step Guide

Learn how to seamlessly integrate Google Sheets with Mailer Cloud using Pabbly Connect for efficient lead management. Follow our detailed tutorial for automation. Master proven automation processes with practical implementation examples and strategic recommendations you can apply immediately in your workflow.

Watch Step By Step Video Tutorial Below


1. Accessing Pabbly Connect for Integration

To start integrating Google Sheets with Mailer Cloud, you first need to access Pabbly Connect. This platform allows you to automate tasks between different applications seamlessly.

Visit the Pabbly Connect homepage and choose to sign up for a free account. Once you have logged in, you will see the dashboard where you can create workflows to manage your automation tasks.


2. Creating a Workflow in Pabbly Connect

After logging into Pabbly Connect, the next step is to create a new workflow. Click on the ‘Create Workflow’ button located at the top right corner of the dashboard. You will be prompted to name your workflow.

  • Choose a descriptive name for your workflow, such as ‘Create Mailer Cloud Contact from Google Sheets’.
  • Select a folder to organize your workflows, such as ‘Google Sheets’.
  • Click on the ‘Create’ button to finalize your workflow setup.

Once your workflow is created, you will see the trigger and action settings. This is where you will define how the automation works.


3. Setting Up the Trigger with Google Sheets

The first step in your workflow is to set up the trigger application, which in this case is Google Sheets. Select Google Sheets as your trigger app and choose the event as ‘New or Updated Spreadsheet Row’. using Pabbly Connect

After selecting the trigger event, you will receive a webhook URL. This URL is crucial as it allows Pabbly Connect to receive data from your Google Sheets whenever a new row is added. Copy this URL for the next steps.


4. Connecting Google Sheets to Pabbly Connect

Now, head over to your Google Sheets account. You need to install the Pabbly Connect Webhooks add-on. Click on ‘Extensions’, then ‘Add-ons’, and search for ‘Pabbly Connect Webhooks’ to install it. using Pabbly Connect

  • After installation, refresh your Google Sheets page.
  • Go back to ‘Extensions’, find ‘Pabbly Connect Webhooks’, and select ‘Initial Setup’.
  • Paste the copied webhook URL into the designated field and set your trigger column (e.g., column G).

Once done, click on ‘Submit’ to finalize the setup. You will see a confirmation message indicating that the setup was successful.


5. Setting the Action Step to Mailer Cloud

With the trigger set, the next step is to define the action in your workflow. Select Mailer Cloud as your action application and choose the event ‘Add Contact to a List’.

To connect Mailer Cloud with Pabbly Connect, you will need to enter your API key. Log into your Mailer Cloud account, navigate to your profile settings, and generate a new API key under the integrations section.

Once you have the API key, paste it into Pabbly Connect and select the contact list where you want new leads to be added. Map the relevant fields from Google Sheets to Mailer Cloud, ensuring that all necessary information is included for each new contact.


Conclusion

In this tutorial, we explored how to integrate Google Sheets with Mailer Cloud using Pabbly Connect. This automation streamlines the process of managing leads, allowing you to focus on growing your business efficiently. With just a few steps, you can ensure that new leads are automatically added to your Mailer Cloud contact list, enhancing your email marketing efforts.

Ensure you check out Pabbly Connect to create business automation workflows and reduce manual tasks. Pabbly Connect currently offer integration with 2,000+ applications.

Automate Freshdesk CRM Contacts from Google Sheets Using Pabbly Connect

Learn how to automate the creation of Freshdesk CRM contacts from Google Sheets using Pabbly Connect. Step-by-step guide for seamless integration. Navigate the automation landscape confidently with clear, structured guidance suitable for professionals regardless of prior technical experience.

Watch Step By Step Video Tutorial Below


1. Accessing Pabbly Connect for Automation

To start the integration process, you must first access Pabbly Connect. Begin by visiting the Pabbly Connect website and signing into your account. If you are a new user, you can sign up for free and receive 100 tasks monthly.

Once logged in, navigate to the dashboard where you can view all your workflows. Click on the Pabbly Connect option to enter the integration interface. This is where you will create a new workflow to connect Google Sheets and Freshdesk CRM.


2. Creating a New Workflow in Pabbly Connect

In Pabbly Connect, you can create a new workflow by clicking on the ‘Create Workflow’ button. Name your workflow, for example, ‘Create Freshdesk CRM Contact from Google Sheets.’ Choose a folder to save it, such as ‘Google Sheets Automations,’ and click on create.

  • Name your workflow appropriately.
  • Select the desired folder for organization.
  • Click on create to proceed.

After creating the workflow, you will see two boxes: one for the trigger and one for the action. Set Google Sheets as the trigger application, and select ‘New or Updated Spreadsheet Row’ as the trigger event. This setup ensures that any new row added in Google Sheets will initiate the workflow.


3. Connecting Google Sheets with Pabbly Connect

To connect Google Sheets with Pabbly Connect, you will receive a webhook URL. This URL acts as a bridge between your Google Sheets and Pabbly Connect. Go to your Google Sheets, click on ‘Extensions,’ then ‘Add-ons,’ and install the Pabbly Connect Webhooks add-on if you haven’t already.

After installation, refresh your Google Sheets, then navigate to ‘Extensions,’ select ‘Pabbly Connect Webhooks,’ and click on ‘Initial Setup.’ Here, you will paste the webhook URL provided by Pabbly Connect and specify the trigger column, which is usually the last column where data will be entered.


4. Testing the Connection and Mapping Data

To test the connection, add a new row in your Google Sheets with customer details, such as first name, last name, phone number, and email address. Once you input the data, go back to Pabbly Connect to check for a webhook response. If successful, you will see the data captured from Google Sheets.

Next, set up the action in Pabbly Connect by selecting Freshdesk as the action application and ‘Create Contact’ as the action event. You will need to connect your Freshdesk account by entering your API key, password, and subdomain. This is crucial for Pabbly Connect to create contacts in Freshdesk automatically.

  • Enter the Freshdesk API key and password.
  • Provide the Freshdesk subdomain without HTTPS.
  • Click on Save to establish the connection.

After successfully connecting Freshdesk, map the fields from the Google Sheets response to the Freshdesk contact fields. This mapping ensures that the data entered in Google Sheets is accurately reflected in Freshdesk CRM.


5. Finalizing the Integration and Confirmation

Once mapping is complete, click on ‘Save and Send Test Request’ in Pabbly Connect to finalize the integration. Check your Freshdesk account to confirm that the contact has been created with the details you entered in Google Sheets.

To verify the automation, add another set of customer details in Google Sheets. Refresh your Freshdesk account to see if the new contact appears. This confirms that the integration is working as intended, allowing you to automate the process of creating contacts in Freshdesk from Google Sheets.


Conclusion

In this tutorial, we demonstrated how to use Pabbly Connect to automate the creation of Freshdesk CRM contacts from Google Sheets. By following the steps outlined, you can streamline your workflow and improve efficiency in managing customer data.

Ensure you check out Pabbly Connect to create business automation workflows and reduce manual tasks. Pabbly Connect currently offer integration with 2,000+ applications.

Automate Zoho CRM Contacts from Google Sheets Using Pabbly Connect

Learn how to automate the creation of Zoho CRM contacts from Google Sheets using Pabbly Connect. This step-by-step guide covers the entire integration process. Discover how to seamlessly connect your essential tools through accessible instructions that make powerful automation available to professionals at every skill level.

Watch Step By Step Video Tutorial Below


1. Accessing Pabbly Connect for Integration

To start automating the creation of Zoho CRM contacts from Google Sheets, first access Pabbly Connect. This platform simplifies the integration between various applications without any coding required. Visit the Pabbly Connect website by typing ‘Pabbly.com/connect’ in your browser.

Once on the site, you can sign in if you’re an existing user or sign up for free if you’re new. Signing up gives you access to 100 free tasks each month, allowing you to explore the features of Pabbly Connect effectively.


2. Creating a New Workflow in Pabbly Connect

After logging into Pabbly Connect, navigate to the dashboard. Here, you can create a new workflow that will automate the process of adding contacts to Zoho CRM from Google Sheets. Click on the ‘Create Workflow’ button and name your workflow appropriately.

  • Select a folder to save your workflow.
  • Define the trigger application as Google Sheets.
  • Set the trigger event to ‘New or Updated Spreadsheet Row’.

This setup will initiate the workflow whenever a new row is added to your Google Sheets, allowing Pabbly Connect to automatically create a contact in Zoho CRM.


3. Connecting Google Sheets to Pabbly Connect

To connect Google Sheets with Pabbly Connect, you will need a webhook URL. This URL acts as a bridge between the two applications. After defining your trigger, Pabbly Connect will provide you with a webhook URL that you need to paste into Google Sheets.

In Google Sheets, go to ‘Extensions’, then ‘Add-ons’, and click on ‘Get Add-ons’ to install the Pabbly Connect Webhooks add-on. Once installed, refresh your Google Sheets, navigate back to ‘Extensions’, select ‘Pabbly Connect Webhooks’, and click on ‘Initial Setup’. Enter the webhook URL and specify the trigger column (for example, column D) where data will be entered.


4. Setting Up Zoho CRM as Action Application in Pabbly Connect

Now that Google Sheets is connected, the next step is to set Zoho CRM as the action application within Pabbly Connect. Choose ‘Zoho CRM’ as your action application and select ‘Create Contact’ as the action event. If you don’t have an existing connection, you will need to create a new one by entering your Zoho domain.

After entering the domain, grant Pabbly Connect the necessary permissions to access your Zoho account. Once connected, map the fields from your Google Sheets response to the corresponding fields in Zoho CRM, such as first name, last name, phone number, and email address. This mapping ensures that the data is accurately transferred from Google Sheets to Zoho CRM.


5. Testing the Integration Between Google Sheets and Zoho CRM

With everything set up, it’s time to test the integration. Go back to your Google Sheets and enter a new row of data that includes the customer details. After entering the data, Pabbly Connect should receive the response from Google Sheets, indicating that the data has been captured successfully.

  • Check the webhook response in Pabbly Connect to confirm the data was received.
  • Verify the contact creation in your Zoho CRM dashboard.

After confirming that the contact has been created in Zoho CRM, you can conclude that the automation is working perfectly. Every time a new row is added in Google Sheets, a corresponding contact will be created in Zoho CRM through Pabbly Connect.


Conclusion

Using Pabbly Connect, you can automate the creation of Zoho CRM contacts from Google Sheets effortlessly. This integration saves time and eliminates manual data entry, ensuring that your customer details are always up-to-date in your CRM.

Ensure you check out Pabbly Connect to create business automation workflows and reduce manual tasks. Pabbly Connect currently offer integration with 2,000+ applications.

Integrating Google Sheets with Runo Using Pabbly Connect: A Step-by-Step Guide

Learn how to automate lead allocation from Google Sheets to Runo using Pabbly Connect. This detailed tutorial covers every step of the integration process. Learn to create powerful connections between your critical applications without requiring specialized programming knowledge or extensive technical background.

Watch Step By Step Video Tutorial Below


1. Setting Up Pabbly Connect for Google Sheets and Runo Integration

To start using Pabbly Connect for integrating Google Sheets with Runo, first, access the Pabbly Connect website. You can sign up for a new account or log in if you already have one. This platform is essential for automating the process of lead allocation from your Google Sheets to the Runo application.

After signing in, you will be directed to the dashboard. Here, you can create a new workflow by clicking on the ‘Create Workflow’ button. Name your workflow according to your objective, such as ‘Runo Allocation from Google Sheets’. This naming helps in easily identifying the workflow later.


2. Configuring the Trigger in Pabbly Connect

In this section, we will set up the trigger in Pabbly Connect. The trigger will detect when a new row is added to your Google Sheets. To do this, select Google Sheets as your trigger application and choose the event as ‘New or Updated Spreadsheet Row’. This setup ensures that any new lead added to your sheet will initiate the workflow.

  • Search for ‘Google Sheets’ in the trigger application.
  • Select the trigger event as ‘New or Updated Spreadsheet Row’.
  • Connect your Google Sheets account to Pabbly Connect using the provided webhook URL.

After setting up the trigger, you will need to copy the webhook URL provided by Pabbly Connect. This URL acts as a bridge to connect your Google Sheets with the Pabbly Connect workflow. Paste this URL into your Google Sheets extension settings to enable communication between the two applications.


3. Configuring Google Sheets to Work with Pabbly Connect

Now that we have set up the trigger in Pabbly Connect, it is time to configure Google Sheets. Open your Google Sheets and navigate to the Extensions menu. Here, you will need to install the Pabbly Connect vBooks extension if you haven’t done so already. This extension allows you to send data from your Google Sheets to Pabbly Connect seamlessly.

After installing the extension, refresh your Google Sheets. Go back to the Extensions menu, find the Pabbly Connect vBooks option, and select ‘Initial Setup’. In this setup, you will paste the webhook URL you copied earlier and specify the trigger column where the new lead details will be entered.

  • Paste the webhook URL in the Initial Setup of the Pabbly Connect vBooks.
  • Specify the trigger column where lead details will be added (e.g., Column G).
  • Test the setup by sending test data to Pabbly Connect.

Once the setup is complete, you can test it by adding a new lead in your Google Sheets. This will automatically send the data to Pabbly Connect, confirming that the connection is working properly.


4. Setting Up the Action in Pabbly Connect for Runo

After configuring Google Sheets, it is time to set up the action in Pabbly Connect. The action will allocate the lead in Runo based on the information received from Google Sheets. To do this, select Runo as your action application and choose the event as ‘Create Allocation’. This action will ensure that the lead is assigned to the correct team member automatically.

To connect Runo with Pabbly Connect, you will need an API key from your Runo account. Navigate to the Runo admin portal, go to API configuration, and create a new API key. Copy this key and paste it into Pabbly Connect when prompted. This step is crucial for enabling communication between Runo and Pabbly Connect.

Select Runo as the action application in Pabbly Connect. Choose ‘Create Allocation’ as the action event. Paste the Runo API key into Pabbly Connect to establish the connection.

Once the action is configured, map the lead details from Google Sheets to the corresponding fields in Runo. This mapping process ensures that all necessary information about the lead is sent to Runo for allocation.


5. Testing the Integration Between Google Sheets and Runo

With everything set up, it’s time to test the integration using Pabbly Connect. Add a new lead entry in your Google Sheets, including all relevant details such as name, phone number, and email. As soon as you add this information, Pabbly Connect will capture the data and allocate it to the correct team member in Runo.

To verify that the integration works successfully, go back to your Runo application and check the allocations section. You should see the newly allocated lead with all the details you entered in Google Sheets. This confirms that the automation is functioning correctly and that leads are being allocated as intended.

Add a new lead in Google Sheets and fill out all required fields. Check the allocations in Runo to see if the lead is assigned correctly. Repeat the process to ensure consistent performance.

This integration between Google Sheets and Runo using Pabbly Connect not only saves time but also reduces the risk of errors in lead allocation, allowing your team to focus on what they do best.


Conclusion

In conclusion, using Pabbly Connect to integrate Google Sheets with Runo streamlines the lead allocation process. By following the steps outlined in this tutorial, you can automate data transfer and ensure efficient management of leads, enhancing your team’s productivity.

Ensure you check out Pabbly Connect to create business automation workflows and reduce manual tasks. Pabbly Connect currently offer integration with 2,000+ applications.

Automate Sharing Google Business Profile Reviews on Facebook with Pabbly Connect

Learn how to automate sharing Google Business Profile reviews on Facebook using Pabbly Connect. Step-by-step tutorial for seamless integration. Transform complex automation concepts into accessible, actionable steps that eliminate unnecessary manual work while maximizing existing application capabilities.

Watch Step By Step Video Tutorial Below


1. Accessing Pabbly Connect for Automation

To automate sharing Google Business Profile reviews on Facebook, you need to access Pabbly Connect. Open your browser and search for Pabbly Connect. If you do not have an account, click on the ‘Sign up for free’ button to create one. This process takes only a couple of minutes and provides you with 100 free tasks monthly.

Once your account is set up, sign in to your Pabbly Connect dashboard. You’ll see various applications available for integration. Click on the ‘Accel Now’ button under Pabbly Connect to proceed to the workflow creation section.


2. Creating a New Workflow in Pabbly Connect

In the Pabbly Connect dashboard, you will create a new workflow to connect Google Business Profile with Facebook. Click on the ‘Create Workflow’ button. A window will pop up where you can name your workflow. Name it something descriptive like ‘Share Google Business Profile Reviews on Facebook’. using Pabbly Connect

Next, select the folder where you want to save this workflow. Choose the appropriate folder from the list. After selecting the folder, click on the ‘Create’ button to proceed. This action will take you to the main workflow interface, where you will define the trigger and action steps.

  • Name your workflow clearly for easy identification.
  • Select the correct folder to keep your workflows organized.
  • Click ‘Create’ to set up your workflow.

Now, you will see two boxes labeled ‘Trigger’ and ‘Action’. The trigger is the event that starts the workflow, while the action is what happens after the trigger. You will set up Google Business Profile as your trigger application.


3. Setting Up the Trigger in Pabbly Connect

To set up the trigger in Pabbly Connect, search for the Google Business Profile application in the trigger box. Select it, and then choose the trigger event as ‘New Review’. This event will activate the workflow whenever a new review is posted on your Google Business Profile.

Next, you need to connect your Google Business Profile to Pabbly Connect. Click on the ‘Connect’ button and then select ‘Add New Connection’. Sign in with your Google account to grant access to Pabbly Connect. After connecting, select your account and the specific location for which you want to receive reviews.

  • Choose ‘New Review’ as the trigger event for your workflow.
  • Connect your Google Business Profile by signing in with your Google account.
  • Select the correct account and location from your Google Business Profile.

Now that the trigger is set up, you can proceed to test the connection to ensure everything is working correctly. This step ensures that Pabbly Connect is receiving the review data from your Google Business Profile.


4. Adding Action Steps in Pabbly Connect

After successfully setting up the trigger, it’s time to add action steps in Pabbly Connect. The first action step is to filter the reviews based on their star ratings. Click on the action application and select ‘Filter by P’. This filter will ensure that only positive reviews (greater than three stars) are shared on Facebook.

For the action event, choose ‘Filter Values’. You will need to connect this filter to Pabbly Connect. Set the condition by selecting the star rating label and specifying that it should be greater than three. This setup will allow only positive reviews to proceed to the next action step.

Select ‘Filter by P’ as your action application. Set the condition to filter reviews based on star ratings. Ensure only reviews greater than three stars are passed on.

After setting up the filter, click on the ‘Save and Test’ button to confirm that the filtering process works correctly. If successful, you can proceed to set up the final action step, which is to post the review on your Facebook page.


5. Posting Reviews on Facebook Using Pabbly Connect

To complete the workflow, you need to add the final action step to post the reviews on Facebook. Select Facebook Pages as your action application. Choose ‘Create Page Post’ as the action event. Connect your Facebook account to Pabbly Connect by clicking on ‘Connect’ and following the prompts to authorize access.

Once connected, select the Facebook page where you want to post the reviews. In the message box, create a post that includes the review details. Use mapping to insert the review text and the customer’s name dynamically. This way, every time a new review is received, the post will automatically include the latest review information.

Select ‘Create Page Post’ as the action event for posting on Facebook. Map the review details dynamically into your Facebook post message. Test the setup to ensure the post appears correctly on your Facebook page.

Finally, click on ‘Save and Test’ to confirm the setup. You can now check your Facebook page to see the new post featuring the review from your Google Business Profile. This automation will keep your social media content fresh and engaging without any manual effort.


Conclusion

In this tutorial, you learned how to automate the process of sharing Google Business Profile reviews on Facebook using Pabbly Connect. By following the steps outlined, you can effortlessly enhance your online presence and build customer trust through positive feedback.

Ensure you check out Pabbly Connect to create business automation workflows and reduce manual tasks. Pabbly Connect currently offer integration with 2,000+ applications.

Automate Subtitle Generation with Pabbly Connect and Google Drive

Learn how to automate subtitle generation using Pabbly Connect, Google Drive, and Salid API for seamless video content creation. Develop expertise in application integration and learn how to design streamlined automation workflows using proven, simplified approaches.

Watch Step By Step Video Tutorial Below


1. Accessing Pabbly Connect for Automation

To automate subtitle generation, you first need to access Pabbly Connect. This integration platform allows seamless automation between various applications, including Google Drive and Salid API.

Begin by signing up for a free account on Pabbly Connect. After creating your account, you will reach the dashboard where you can create a new workflow. This is where the automation magic begins.


2. Creating a Workflow in Pabbly Connect

Creating a workflow in Pabbly Connect is straightforward. Click on the ‘Create Workflow’ button and name your workflow, such as ‘Google Drive to Salid API to Google Docs’.

  • Select the folder in your Pabbly Connect account for the automation.
  • Click on ‘Create’ to open your automation workflow.
  • You will see two windows: Trigger and Action.

In the Trigger window, you will connect your Google Drive folder where you will upload video files. This connection allows Pabbly Connect to capture new files automatically.


3. Setting Up Google Drive Trigger in Pabbly Connect

For the trigger, search for Google Drive in the Pabbly Connect app options. Choose the trigger event as ‘New File in Specific Folder’. This captures every new video uploaded to the designated folder.

Connect your Google Drive account by clicking on ‘Sign in with Google’. Select your account, and allow Pabbly Connect to access your files. After connecting, choose the folder where you will upload your videos.

  • Click ‘Save and Send Test Request’ to confirm the connection.
  • Check the response to ensure the file details are received correctly.

This step ensures that Pabbly Connect can monitor your Google Drive folder for new uploads, initiating the automation process.


4. Sending the File to Salid API Using Pabbly Connect

Once the trigger is set, the next step is to send the uploaded video file to the Salid transcription API. In the action step, select Salid API and choose the action event as ‘Create AI Transcription’.

Connect your Salid API account by entering your API key and organization name. This connection allows Pabbly Connect to send the video file for transcription.

Map the video file URL from the Google Drive trigger response. Set the language code, and choose the output format (SRT).

This integration allows Pabbly Connect to process the video file, generating subtitles automatically without manual intervention.


5. Creating a Google Docs Document with Subtitles

After receiving the transcription from Salid API, the final step is to create a new document in Google Docs. In the action step, select Google Docs and choose the action event as ‘Create Document from Template’.

Connect your Google Docs account and select the template document you created for subtitles. Map the necessary fields such as file name, file URL, and subtitles into the document.

Enter the name for the new document. Select the folder in Google Drive where the new document will be saved.

This final integration step demonstrates how Pabbly Connect automates the entire process, from uploading a video to generating a fully formatted document with subtitles in Google Docs.


Conclusion

This tutorial demonstrates how to automate subtitle generation using Pabbly Connect, Google Drive, and Salid API. By following these steps, you can streamline your video content creation process effectively.

Ensure you check out Pabbly Connect to create business automation workflows and reduce manual tasks. Pabbly Connect currently offer integration with 2,000+ applications.