Automate LinkedIn Posts with Pabbly Connect: A Step-by-Step Guide

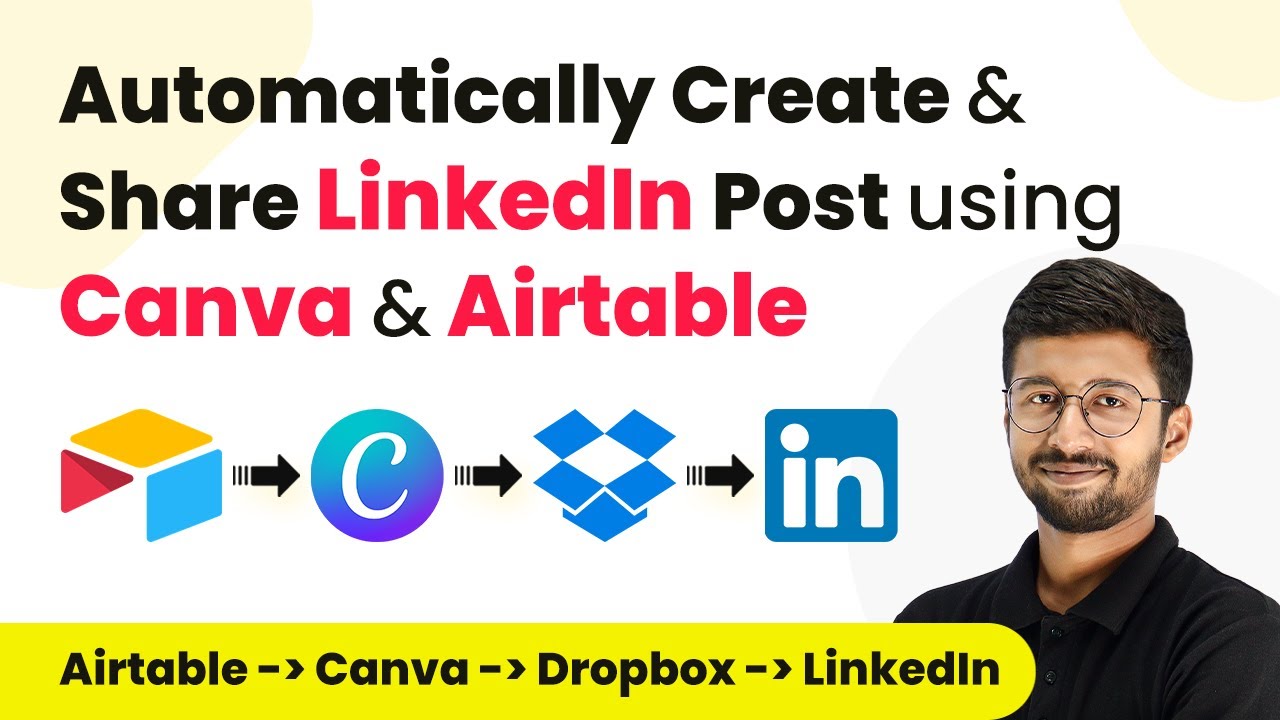
Learn how to automate LinkedIn posts using Pabbly Connect, Canva, and Dropbox. Follow our detailed step-by-step tutorial for seamless integration. Master proven automation processes with practical implementation examples and strategic recommendations you can apply immediately in your workflow.

Watch Step By Step Video Tutorial Below


1. Accessing Pabbly Connect for Automation

To begin automating your LinkedIn posts, you need to access Pabbly Connect. Start by opening your web browser and navigating to the Pabbly Connect website. If you don’t have an account, click on the ‘Sign Up Free’ button to create one. This process is quick and allows you to set up your automation workflows.

After signing up, log into your account to access the Pabbly Connect dashboard. Here, you can create a new workflow that integrates various applications such as Canva, Dropbox, and LinkedIn. To create a new workflow, click on the ‘Create Workflow’ button and name it according to your preference, for example, ‘Airtable to Canva to Dropbox to LinkedIn’.


2. Setting Up the Trigger with Airtable

In this section, you will set up the trigger to capture new records from Airtable using Pabbly Connect. Start by selecting Airtable as the app in the trigger window. Choose the event ‘New Record’ from the dropdown menu. This setup ensures that every time a new record is added in Airtable, it will trigger the workflow.

  • Select your Airtable account and connect it to Pabbly Connect.
  • Choose the base where your LinkedIn post details are stored.
  • Select the specific table that contains your LinkedIn post content.

Once you have configured these settings, click on ‘Save and Send Test Request’. This action will allow Pabbly Connect to fetch the latest record from Airtable, which includes the quote, author name, and publish date. Ensure that the ‘Created’ field is set to capture the record’s creation time, as it is crucial for the automation process.


3. Integrating Canva for Post Creation

Next, you will integrate Canva to create the graphic post using the data retrieved from Airtable through Pabbly Connect. In the action step, select Canva and then choose ‘Create Design Autofill Job’ as the action event. This process allows you to use a pre-designed template in Canva for your LinkedIn post.

To connect your Canva account, you will need the Client ID and Client Secret from the Canva developer portal. After entering these details in Pabbly Connect, select the template you created for LinkedIn posts. Make sure to set the text fields in the Canva template to dynamically pull data from Airtable, such as the quote and author name.

  • Map the quote and author fields from Airtable to the corresponding text areas in your Canva template.
  • Click ‘Save and Send Test Request’ to create the design in Canva.

After successfully creating the design, you will receive a design URL, which you can use in the next steps to download the image and share it on LinkedIn.


4. Saving the Post to Dropbox

After creating your post in Canva, it’s time to save it to Dropbox using Pabbly Connect. In the next action step, select Canva again, but this time choose ‘Download Design as Image’. Connect your Canva account if prompted, and map the design ID you received from the previous step.

Set the desired image quality and dimensions, then click ‘Save and Send Test Request’. This will initiate the download process for your Canva design. Since downloading may take a moment, you will need to add a delay action to give Canva enough time to complete the export.

Add a delay of 1 minute to allow the export to complete. Once the delay is set, add another action step to get the export link.

After the delay, use the ‘Get Export Link’ action in Canva to retrieve the URL of the downloaded image. This URL will be used to upload the image to your Dropbox account in the next step.


5. Posting the Image to LinkedIn

Finally, you will publish the image on LinkedIn using Pabbly Connect. In the last action step, select LinkedIn and choose ‘Share Text with Image’ as the action event. Connect your LinkedIn account and fill in the required fields, including the image URL from Dropbox and the caption stored in Airtable.

Ensure that the visibility settings for your post are set to Pabbly, then click ‘Save and Send Test Request’. This action will publish your LinkedIn post automatically at the scheduled time based on the publish date you entered in Airtable.

With this final step, you have successfully automated the process of creating and sharing LinkedIn posts using Pabbly Connect, Canva, and Dropbox. The entire workflow ensures that your posts are created and shared at the designated times without manual intervention.


Conclusion

This tutorial outlined how to automate LinkedIn posts using Pabbly Connect, integrating Airtable, Canva, and Dropbox. By following these steps, you can streamline your social media strategy effectively and efficiently.

Ensure you check out Pabbly Connect to create business automation workflows and reduce manual tasks. Pabbly Connect currently offer integration with 2,000+ applications.

Integrating Channel, Google, and More with Pabbly Connect: A Step-by-Step Guide

Learn how to integrate Channel, Google, Google Sheets, Box, Facebook, and YouTube using Pabbly Connect with this detailed tutorial. Explore efficient methods for automating routine tasks with clear, concise instructions suited for both newcomers and experienced professionals.

Watch Step By Step Video Tutorial Below


1. Accessing Pabbly Connect for Integrations

To start integrating applications like Channel and Google, you first need to access Pabbly Connect. This platform allows you to create automated workflows easily. Begin by signing into your Pabbly Connect account or creating a new account if you haven’t already.

Once logged in, you can explore various workflows available. For instance, you can check the video descriptions for workflow links. These links facilitate cloning workflows directly into your dashboard, allowing for seamless integration.


2. Cloning Workflows from Video Descriptions

After accessing Pabbly Connect, the next step is to clone workflows provided in video descriptions. Navigate to the video you want to follow and scroll down to find the workflow link in the description box.

  • Click on the workflow link to open it.
  • Select ‘Try Now’ to add the workflow to your Pabbly Connect dashboard.
  • Rename the workflow as needed to keep your projects organized.

This cloning process makes it easy to implement automation strategies without starting from scratch. After cloning, you can customize the workflow according to your specific needs.


3. Setting Up Your Workflow in Pabbly Connect

Now that you have cloned the workflow, it’s time to set it up. Open the workflow in your dashboard and rename it to reflect its purpose, like ‘Automatically Add Facebook Ads Comments to Google Sheets’. This helps in identifying the workflow later. using Pabbly Connect

Next, activate your workflow by clicking the switch to turn it on. This step is crucial as it allows the workflow to start running and responding to triggers. For this example, you will connect Facebook as the trigger application.

  • Select the Facebook Pages trigger from the options available.
  • Connect your Facebook account by selecting an existing connection or adding a new one.
  • Once connected, confirm the connection and save it.

After setting up your trigger, you can proceed to connect Google Sheets as the action application, which will receive data from Facebook.


4. Connecting Google Sheets to Pabbly Connect

In this section, you will connect Google Sheets to your workflow in Pabbly Connect. This is essential for logging data from your Facebook page. Choose Google Sheets as your action application after setting up your trigger.

When prompted, link your Google Sheets account to Pabbly Connect. You will need to select the specific spreadsheet where data will be stored. The fields from your spreadsheet will automatically populate based on the columns you have set up.

Map the fields from your Facebook trigger to the corresponding columns in Google Sheets. Ensure that the mapping is correct to capture all necessary data. Test the connection to verify that data flows correctly from Facebook to Google Sheets.

By mapping these fields, you ensure that every new comment on your Facebook ads is logged into your Google Sheets automatically, streamlining your data management process.


5. Finalizing Your Workflow Setup

After connecting both Facebook and Google Sheets in Pabbly Connect, finalize your workflow to ensure it runs smoothly. Return to your dashboard to review the setup. Make any necessary adjustments to the workflow settings.

It’s important to test your workflow by making a test submission on your connected Facebook page. This will help you confirm that the data is captured correctly in Google Sheets. Once everything is verified, your workflow is ready to automate your tasks.

By following these steps, you can effectively use Pabbly Connect to integrate Channel, Google, Google Sheets, Box, Facebook, and YouTube, enhancing your productivity and workflow efficiency.


Conclusion

In conclusion, using Pabbly Connect to integrate Channel, Google, and other applications streamlines your workflow. By following the steps outlined, you can automate data collection and enhance efficiency in your processes.

Ensure you check out Pabbly Connect to create business automation workflows and reduce manual tasks. Pabbly Connect currently offer integration with 2,000+ applications.

Automate Google Sheets with Pabbly Connect: Create Contacts in Loris

Learn how to automate Google Sheets and Loris contact creation using Pabbly Connect in this step-by-step tutorial. This comprehensive guide reveals exactly how to connect your applications and automate repetitive tasks — accessible for professionals of all technical backgrounds.

Watch Step By Step Video Tutorial Below


Accessing Pabbly Connect for Automation

To start automating contacts in Loris from Google Sheets, first access Pabbly Connect. Open your browser and navigate to the Pabbly Connect website. You can sign in or sign up for free, which gives you 100 tasks monthly.

After logging in, you’ll see the dashboard displaying various Pabbly applications. Click on Pabbly Connect to access the workflows. Here, you can create a new workflow by clicking on the ‘Create Workflow’ button.


Creating the Workflow in Pabbly Connect

Once you’re in Pabbly Connect, you’ll be prompted to name your workflow. For this tutorial, name it ‘Create Loris Contact from Google Sheets Row’ and select a folder to save it in. Click on ‘Create’ to proceed.

Next, you’ll see two boxes labeled ‘Trigger’ and ‘Action’. The trigger is the event that starts the automation, and for this task, select Google Sheets as your trigger application. Choose the event ‘New or Updated Spreadsheet Row’ to ensure that the workflow activates whenever a new row is added.


Connecting Google Sheets to Pabbly Connect

To connect Google Sheets with Pabbly Connect, you’ll need to set up a webhook URL. This URL acts as a bridge between the two applications. First, log into your Google Sheets and create a new spreadsheet for customer details.

  • Navigate to Extensions > Add-ons > Get Add-ons.
  • Search for ‘Pabbly Webhooks’ and install it.
  • Refresh your Google Sheets after installation.

After refreshing, go to Extensions > Pabbly Webhooks > Initial Setup. Paste the webhook URL from Pabbly Connect into the designated field and set the trigger column, which is the last column in your Google Sheets table.


Setting Up the Action in Pabbly Connect

Now that Google Sheets is connected, the next step is configuring the action in Pabbly Connect. For the action application, select Loris and choose the event ‘Create Contact’. Click on ‘Connect’ to establish a connection.

If you have an existing connection, select it. Otherwise, create a new connection by entering your API key and organization ID from your Loris account. Make sure to map the fields from your Google Sheets response to the corresponding fields in Loris.


Testing the Integration

After mapping the fields, click on ‘Save and Send Test Request’ in Pabbly Connect. This action will send the data from Google Sheets to Loris, creating a new contact. Check your Loris account to verify that the contact has been successfully created.

To ensure the automation works seamlessly, add another row in your Google Sheets. As soon as you enter the data, a new contact should be created in Loris automatically. This confirms that Pabbly Connect is functioning correctly and integrating both applications effectively.


Conclusion

This tutorial demonstrated how to automate the creation of contacts in Loris from new rows in Google Sheets using Pabbly Connect. This powerful integration can save time and streamline your workflow, allowing you to focus on more important tasks.

Ensure you check out Pabbly Connect to create business automation workflows and reduce manual tasks. Pabbly Connect currently offer integration with 2,000+ applications.

Integrate JotForm with WhatsApp and Notion Using Pabbly Connect

Learn how to automate WhatsApp messages and add details to Notion with JotForm submissions using Pabbly Connect in this step-by-step tutorial. This comprehensive guide reveals exactly how to connect your applications and automate repetitive tasks — accessible for professionals of all technical backgrounds.

Watch Step By Step Video Tutorial Below


1. Accessing Pabbly Connect for Integration

To begin using Pabbly Connect, navigate to the Pabbly Connect website. You can do this by typing ‘Pabbly Connect’ into your browser. Once there, you will need to sign in or create a new account.

If you’re a new user, select ‘Sign Up for Free’ to get started with 100 free tasks monthly. Existing users should click on ‘Sign In’. After logging in, you will see the dashboard where you can access all your workflows and applications.


2. Creating a New Workflow in Pabbly Connect

In this section, you will create a new workflow to send WhatsApp messages and add details to Notion upon receiving a JotForm submission using Pabbly Connect.

  • Click on ‘Create Workflow’.
  • Name your workflow (e.g., ‘Send WhatsApp Message on New JotForm Submission’).
  • Select the folder where you want to save this workflow.

After naming your workflow, you will see two boxes: one for the trigger and one for the action. The trigger application will be JotForm, and the trigger event will be ‘New Response’.


3. Setting Up JotForm as a Trigger in Pabbly Connect

Once you have created your workflow in Pabbly Connect, the next step is to set up JotForm as the trigger application. This involves connecting JotForm to Pabbly Connect using a webhook URL.

To do this, go to your JotForm account, select the form you want to use, and click on ‘Edit Form’. Then, go to ‘Settings’ and select ‘Integrations’. Click on ‘Webhooks’ and paste the webhook URL provided by Pabbly Connect. After that, complete the integration.


4. Sending WhatsApp Messages Using Pabbly Connect

In this section, you will configure the action application to send WhatsApp messages upon receiving a new JotForm submission. The action application will be WhatsApp Cloud API, and the action event will be ‘Send Template Message’. using Pabbly Connect

Connect to WhatsApp Cloud API by entering your temporary access token, phone number ID, and WhatsApp Business account ID. You can find these details in the Meta for Developers dashboard. After entering these details, select your message template and map the recipient’s mobile number.

  • Select the template you created for WhatsApp messages.
  • Map the mobile number from the JotForm submission.
  • Customize the message body using mapped variables.

After setting this up, you can test the WhatsApp message to ensure it is sent correctly.


5. Adding Customer Details to Notion Using Pabbly Connect

Now that you have successfully set up WhatsApp messaging, the next step is to add the customer details to Notion using Pabbly Connect. The action application for this step will be Notion, and the action event will be ‘Create Database Item’.

Connect to Notion by selecting the database where you want to store customer contact details. Use the mapping feature to enter the data from the JotForm submission, such as first name, last name, email, phone number, and city.

After mapping the required fields, click on ‘Save and Send Test Request’ to ensure that the details are added to your Notion database successfully. You can verify this by checking your Notion account to see if the new contact appears as expected.


Conclusion

This tutorial demonstrated how to use Pabbly Connect to automate sending WhatsApp messages and adding customer details to Notion from JotForm submissions. By following these steps, you can streamline your workflow efficiently.

Ensure you check out Pabbly Connect to create business automation workflows and reduce manual tasks. Pabbly Connect currently offer integration with 2,000+ applications.

Integrating Instagram Lead Ads with QuickBooks Online Using Pabbly Connect

Learn how to integrate Instagram Lead Ads with QuickBooks Online using Pabbly Connect to automate customer creation efficiently. Discover how to seamlessly connect your essential tools through accessible instructions that make powerful automation available to professionals at every skill level.

Watch Step By Step Video Tutorial Below


1. Accessing Pabbly Connect for Integration

To start integrating Instagram Lead Ads with QuickBooks Online, you first need to access Pabbly Connect. This platform allows you to automate workflows seamlessly.

Visit the Pabbly Connect homepage and sign in or sign up if you are a new user. Once logged in, you will see the dashboard where you can create workflows. This is the central hub for all your integrations.


2. Creating a Workflow in Pabbly Connect

Creating a workflow in Pabbly Connect is essential for connecting your applications. Click on the ‘Create Workflow’ button on the top right corner of the dashboard.

  • Name your workflow, for example, ‘Create QuickBooks Online Customer from Instagram Lead Ads’.
  • Select a folder to save your workflow.
  • Click on the ‘Create’ button to finalize the workflow setup.

After creating the workflow, you will see the trigger and action setup options. This is where the automation process begins.


3. Setting Up the Trigger with Instagram Lead Ads

In this section, we will set up the trigger using Instagram Lead Ads in Pabbly Connect. Select Instagram Lead Ads as your trigger application.

Choose the trigger event as ‘New Lead Instant’. This ensures that every time a new lead is generated through your Instagram ad, the system captures this event. You will need to connect your Instagram account to Pabbly Connect, which can be done by selecting ‘Add New Connection’ and authorizing the connection.

  • Select your Facebook page linked to your Instagram account.
  • Choose the lead generation form you are using.

Once the connection is established, you can test the trigger to ensure it captures lead data correctly. This step is crucial for the automation to function as intended.


4. Action Step to Create Customer in QuickBooks Online

Now, let’s set up the action step in Pabbly Connect to create a customer in QuickBooks Online. Select QuickBooks Online as your action application.

Choose the action event as ‘Create Customer’. This action will automatically create a new customer profile in your QuickBooks account whenever a new lead is captured from Instagram. Connect your QuickBooks account by selecting ‘Add New Connection’ and authorizing the connection.

Map the lead’s first name, last name, email, and phone number from the trigger data. Leave optional fields blank if not needed.

After mapping the data, click on ‘Save and Send Test Request’ to confirm that the customer has been created successfully in QuickBooks Online. This completes the action setup.


5. Testing the Integration for Success

To ensure everything is working correctly, you need to test the integration set up in Pabbly Connect. Generate a new test lead in your Instagram Lead Ads.

Go to the lead testing tool and select your Facebook page and lead form. Enter the test data and submit the form. After the submission, check your QuickBooks account to see if the new customer has been created.

Refresh your QuickBooks account to see the new customer entry. Verify that all lead details are accurately reflected in QuickBooks.

This testing phase confirms that the integration between Instagram Lead Ads and QuickBooks Online via Pabbly Connect is successful and ready for real-time use.


Conclusion

In this tutorial, we explored how to integrate Instagram Lead Ads with QuickBooks Online using Pabbly Connect. This automation streamlines customer creation and enhances your business efficiency.

Ensure you check out Pabbly Connect to create business automation workflows and reduce manual tasks. Pabbly Connect currently offer integration with 2,000+ applications.

Integrating LinkedIn Leads with QuickBooks Using P Connect Now

Learn how to automate the creation of QuickBooks Online customers from LinkedIn leads using P Connect Now in this detailed tutorial. Learn to create powerful connections between your critical applications without requiring specialized programming knowledge or extensive technical background. with Pabbly Connect.

Watch Step By Step Video Tutorial Below


1. Setting Up Trigger Integration with LinkedIn Leads

To start the integration process, we will use P Connect Now to set up our trigger for LinkedIn leads. This trigger will activate whenever a new lead is generated through LinkedIn lead ads. By capturing lead details automatically, we can streamline our workflow.

First, log into your P Connect Now account. If you don’t have an account, you can sign up for free. Once logged in, click on the ‘Create Workflow’ button. You will name your workflow, for instance, ‘Create QuickBooks Online Customer from LinkedIn Leads.’ After naming, click on ‘Create’ to proceed.


2. Selecting the Trigger Application: LinkedIn Lead Generation Forms

In this step, we will configure the trigger application. The primary application we are using is LinkedIn. Here, we will select the LinkedIn lead generation forms as our trigger application. This will ensure that every new lead captured through LinkedIn will initiate our workflow.

  • Search for ‘LinkedIn’ in the trigger application section.
  • Select ‘LinkedIn Lead Generation Forms’ as the trigger application.
  • Choose ‘New Lead Generation Form Response’ as the trigger event.

After selecting the trigger application and event, click on ‘Connect’ to establish a connection between P Connect Now and your LinkedIn account. You will need to authorize this connection, allowing P Connect Now to access your LinkedIn lead data.


3. Creating a New Customer in QuickBooks Online

Now that we have our trigger set up, the next step is to configure the action that will occur when the trigger is activated. For this, we will use QuickBooks Online as our action application. The action we want is to create a new customer using the lead details.

To do this, search for ‘QuickBooks’ in the action application section of P Connect Now. Select ‘QuickBooks Online’ and then choose ‘Create a Customer’ as the action event. After that, click on ‘Connect’ to link your QuickBooks account with P Connect Now.

Once connected, you will need to map the fields from your LinkedIn lead generation form to the corresponding fields in QuickBooks. This mapping ensures that the correct lead information is entered into QuickBooks. For example, map the first name, last name, email, and company name as follows:

  • Map the first name from LinkedIn lead to the QuickBooks customer first name field.
  • Map the last name to the QuickBooks customer last name field.
  • Map the email address and phone number accordingly.

After mapping the fields, click on ‘Save and Send Test’ to verify that the customer is created successfully in QuickBooks with the lead details.


4. Verifying Customer Creation in QuickBooks

After executing the test, you need to verify that the customer has been created in QuickBooks. Navigate to your QuickBooks Online account and check the customers list. You should see the new customer entry with the details you mapped from your LinkedIn lead.

To ensure everything is working correctly, you can create a test lead in LinkedIn and check if it reflects in QuickBooks. This verification step is crucial to confirm that the integration is functioning as expected. If you see the customer listed, it means the automation is working perfectly.

In summary, by using P Connect Now, you have successfully created an automation that connects LinkedIn lead ads with QuickBooks. This integration simplifies the process of managing leads and enhances your B2B operations.


5. Conclusion

In conclusion, integrating LinkedIn leads with QuickBooks using P Connect Now allows for seamless customer creation and management. This automation saves time and reduces errors in data entry, enhancing your business efficiency.

Thanks for following along with this tutorial! Remember to subscribe to the channel for more helpful content like this.

If you found this guide useful, please consider giving it a thumbs up and sharing it with others who might benefit from it.

By following the steps outlined, you can easily set up this integration and streamline your sales processes. With the power of P Connect Now, managing leads from LinkedIn becomes effortless, enabling you to focus on growing your business.


Automate Facebook Pages with Pabbly Connect: A Step-by-Step Guide

Learn how to automate Facebook pages using Pabbly Connect for efficient social media management. This tutorial covers every step in detail. Discover how to seamlessly connect your essential tools through accessible instructions that make powerful automation available to professionals at every skill level.

Watch Step By Step Video Tutorial Below


1. Accessing Pabbly Connect for Facebook Automation

To start automating Facebook pages, first access Pabbly Connect by visiting the URL Pabbly.com/connect in your browser. Here, you will see options to either sign in or sign up for a free account. If you are an existing user, simply click on the ‘Sign In’ button to log in.

If you are new, click on ‘Sign Up for Free’ to create your account. After signing up, you will receive 100 free tasks every month to explore the features of Pabbly Connect. This access allows you to easily set up automations for your Facebook page management.


2. Creating Automations with Pabbly Connect

Once logged into Pabbly Connect, navigate to the dashboard where you can see all your workflows. To create a new automation, click on the ‘Create Workflow’ option. A dialog box will appear asking for a name for your workflow; enter a descriptive name like ‘Automate Facebook Pages Using Pabbly Connect’.

  • Select a folder to save your workflow.
  • Click on ‘Create’ to proceed to the next step.
  • You will see two main sections: Trigger and Action.

In the trigger section, you will select Facebook Pages as your trigger application. This allows Pabbly Connect to listen for specific events on your Facebook page, such as new comments or posts. This step is crucial for setting up effective automations.


3. Setting Up the Trigger for Facebook Pages

In this step, we will configure the trigger for our Facebook Pages automation. Select Facebook Pages as the trigger application and choose the trigger event, such as ‘New Comment’. This event will initiate the workflow whenever a new comment is made on your Facebook post.

Click on the ‘Connect’ button to establish a connection between Pabbly Connect and your Facebook account. You can either add a new connection or select an existing one. After successful connection, select the specific Facebook page you want to monitor for comments.

  • Ensure you are logged into your Facebook account.
  • Turn on the toggle to capture responses.

After setting this up, click on ‘Save and Send Test Request’ to confirm that the connection is working. Now, any new comments made on your Facebook posts will be captured by Pabbly Connect automatically.


4. Setting Up the Action to Transfer Data

Next, we will configure the action step in Pabbly Connect. Here, we will select Google Sheets as the action application to store the comments received from Facebook Pages. This allows for easy tracking and management of customer interactions.

Choose the action event, such as ‘Create Spreadsheet Row’, which will add a new row in your Google Sheet for each comment received. Click ‘Connect’ to link Pabbly Connect with your Google Sheets account.

Select the specific Google Sheet where you want to save the data. Map the relevant fields from the Facebook comment data to your Google Sheet.

Once everything is set up, click on ‘Save and Send Test Request’ to verify that the data transfer is successful. This integration streamlines the process of managing comments and enhances your overall workflow.


5. Conclusion: Automating Facebook Pages with Pabbly Connect

In this tutorial, we explored how to automate Facebook Pages using Pabbly Connect. By setting up triggers and actions, we can efficiently manage comments and posts, saving time and improving engagement.

Ensure you check out Pabbly Connect to create business automation workflows and reduce manual tasks. Pabbly Connect currently offer integration with 2,000+ applications.

Check out Pabbly Connect – Automate your business workflows effortlessly! Sign Up Free – Start your journey with ease! 10,000+ Video Tutorials – Learn step by step! Join Pabbly Facebook Group – Connect with 21,000+ like minded people!

Utilizing Pabbly Connect for these automations not only enhances productivity but also supports business growth. This integration allows you to focus on strategic activities while Pabbly Connect manages the repetitive tasks involved in social media management.


In summary, automating your Facebook page management with Pabbly Connect can significantly improve your efficiency and customer engagement. Start implementing these steps today for a more streamlined social media strategy.

Integrating Eventbrite with Pabbly Connect: A Step-by-Step Guide

Learn how to integrate Eventbrite with Pabbly Connect to automate event management and attendee tracking seamlessly. Follow our detailed tutorial for step-by-step instructions. Follow this definitive guide to creating powerful automated workflows with straightforward, efficiency-focused solutions that save valuable time.

Watch Step By Step Video Tutorial Below


1. Accessing Pabbly Connect for Integration

To start integrating Eventbrite with Pabbly Connect, first, access Pabbly Connect. Open a new tab in your browser and search for Pabbly Connect. This platform serves as the integration hub, allowing you to connect various applications seamlessly. using Pabbly Connect

Once on the Pabbly Connect landing page, you have the option to either sign in or sign up for free. If you don’t have an account, click on the ‘Sign Up for Free’ button, which takes only two minutes. After signing in, navigate to the dashboard to begin creating your workflow.


2. Creating a Workflow in Pabbly Connect

In the Pabbly Connect dashboard, the next step is to create a new workflow. Click on the ‘Create Workflow’ button, and name your workflow based on your objective, such as ‘Setup Webhook inside Eventbrite’. This naming will help you identify the workflow easily in the future. using Pabbly Connect

After naming your workflow, click on the ‘Create’ button. You will be directed to a new window where you will see two boxes labeled ‘Trigger’ and ‘Action’. The trigger box is where you will set up Eventbrite as the trigger application, while the action box will follow the trigger.

  • Click on the trigger application and search for Eventbrite.
  • Select Eventbrite as your trigger application.
  • Choose the trigger event as ‘New Order for All Events’.

By selecting these options, you are setting up Pabbly Connect to receive notifications whenever a new attendee registers for any of your events on Eventbrite.


3. Setting Up the Webhook in Eventbrite

After configuring the trigger in Pabbly Connect, it’s time to set up the webhook in Eventbrite. This is crucial as it allows Eventbrite to communicate with Pabbly Connect. To do this, log into your Eventbrite account and navigate to your profile. using Pabbly Connect

From your profile, go to ‘Account Settings’ and find the ‘Developer Links’ section. Here, you will see the option for ‘Webhooks’. Click on ‘Add Webhook’ and paste the webhook URL provided by Pabbly Connect into the ‘Payload URL’ field.

  • Select ‘All Events’ to ensure you receive notifications for every event.
  • Set the action to ‘Order Placed’.
  • Finally, click on the ‘Add Webhook’ button to save your settings.

This setup ensures that every new registration on Eventbrite triggers a response in Pabbly Connect, allowing you to manage attendee information effectively.


4. Testing the Integration with a New Order

With the webhook successfully set up, it’s time to test the integration by placing a new order in Eventbrite. Navigate to your event ticket page and reserve a spot by clicking on the ‘Reserve a Spot’ button. Fill in the required details for the attendee, such as first name, last name, and email address. using Pabbly Connect

After completing the registration process, return to Pabbly Connect. Here, you should see that the system is waiting for a response from the webhook. Once the new order is placed, Pabbly Connect will receive the attendee’s information automatically.

Check for the received response in Pabbly Connect, which will include details like the webhook ID and user ID. Use the order ID provided in the response to retrieve further details about the registrant. You can now manage this data in your CRM or other applications.

This testing phase ensures that your integration works smoothly and that you can automate processes effectively using Pabbly Connect.


5. Conclusion

In this tutorial, we explored how to integrate Eventbrite with Pabbly Connect to automate event management processes. By setting up a webhook in Eventbrite and configuring Pabbly Connect, you can streamline attendee tracking and automate communications.

Ensure you check out Pabbly Connect to create business automation workflows and reduce manual tasks. Pabbly Connect currently offer integration with 2,000+ applications.

This integration allows you to focus on creating memorable events while automating tedious tasks, ensuring that your systems stay synchronized without manual intervention.

Integrating WhatsApp with Pabbly Connect: A Step-by-Step Guide

Learn how to integrate WhatsApp with Pabbly Connect using webhooks for real-time communication. Follow our detailed tutorial for seamless automation. Revolutionize your productivity approach with just a few strategic clicks. Uncover professional methods for connecting applications and creating workflows that reclaim hours of your week.

Watch Step By Step Video Tutorial Below


1. Accessing Pabbly Connect for WhatsApp Integration

To integrate WhatsApp with Pabbly Connect, start by accessing the Pabbly Connect platform. You can do this by searching for Pabbly Connect in your browser and visiting the official site. Once there, you have the option to sign in or sign up for a free account. using Pabbly Connect

If you don’t have an account, click on the ‘Sign Up for Free’ button. This process is quick and provides you with 100 free tasks every month. After signing in, click on the ‘Access Now’ button under Pabbly Connect to enter the dashboard.


2. Creating a Workflow in Pabbly Connect

In this section, you will learn how to create a workflow that connects WhatsApp with Pabbly Connect. Start by clicking on the ‘Create Workflow’ button in your dashboard. Name your workflow based on your objective, such as ‘Setting Up Webhook Inside WATI’. using Pabbly Connect

  • Click on ‘Create’ to proceed to the workflow setup.
  • You will see two boxes labeled Trigger and Action.
  • Select WATI as your trigger application.

After selecting WATI, you will need to configure the webhook as your trigger event. This setup enables Pabbly Connect to capture incoming messages from WhatsApp automatically.


3. Setting Up Webhook Inside WATI

Next, you will set up the webhook inside WATI to facilitate the integration. Copy the webhook URL provided by Pabbly Connect and log into your WATI account. Navigate to the Webhooks section in your WATI dashboard. using Pabbly Connect

  • Click on the ‘Add Webhook’ button.
  • Paste the copied webhook URL into the URL field.
  • Enable the status by selecting the ‘Enabled’ option.

After pasting the URL, you can choose the events you want to trigger the webhook. For this integration, select the ‘Message Received’ event. Finally, click ‘Save’ to confirm your webhook settings.


4. Capturing Incoming Messages in Pabbly Connect

Now that you have set up the webhook in WATI, it’s time to capture incoming messages in Pabbly Connect. After saving your webhook, Pabbly Connect will be waiting for a response from WATI. To test this, send a message to your WhatsApp number linked with WATI. using Pabbly Connect

Once you send a message, Pabbly Connect will receive the incoming message data. You should see the message content, sender details, and event type captured in your Pabbly Connect dashboard. This confirms that your integration is working correctly.

By following these steps, you can ensure that Pabbly Connect captures all incoming messages from WhatsApp, allowing for automated responses and workflows based on customer interactions.


5. Conclusion: Automating WhatsApp Responses with Pabbly Connect

In this tutorial, we explored how to integrate WhatsApp with Pabbly Connect using webhooks. By setting up a webhook inside WATI and configuring Pabbly Connect, businesses can automate responses to incoming messages effectively. This integration allows for real-time communication and enhances customer engagement.

Ensure you check out Pabbly Connect to create business automation workflows and reduce manual tasks. Pabbly Connect currently offer integration with 2,000+ applications.

Utilizing Pabbly Connect for this process not only streamlines workflows but also ensures timely responses to customer inquiries, making it a valuable tool for businesses relying on WhatsApp for communication.

Automate Instagram Posts with Pabbly Connect: A Step-by-Step Guide

Learn how to automate Instagram posts using Pabbly Connect, Google Sheets, Canva, Dropbox, and more. Follow our detailed tutorial for seamless integration. Follow this definitive guide to creating powerful automated workflows with straightforward, efficiency-focused solutions that save valuable time.

Watch Step By Step Video Tutorial Below


1. Setting Up Pabbly Connect for Automation

To automate Instagram posts, start by accessing Pabbly Connect. This integration platform allows you to connect various applications seamlessly. First, create an account on Pabbly Connect and log in to your dashboard.

Once logged in, you can initiate a new workflow. Select the ‘Create Workflow’ option and name it appropriately. This workflow will be the foundation for automating your Instagram posts using Google Sheets, Canva, and Dropbox.


2. Triggering the Workflow with Scheduled Events

The first step in our automation process is to set a trigger using Pabbly Connect. For this, we will use the ‘Scheduled by Pabbly’ trigger to execute the workflow daily at a specific time. This is crucial for posting Instagram content consistently.

  • Select ‘Scheduled by Pabbly’ as your trigger.
  • Set the frequency to daily and choose the time for execution.

After setting the trigger, you can customize the schedule frequency based on your requirements. This flexibility allows you to control when the automation runs, ensuring your Instagram posts are timely and relevant.


3. Formatting Date and Retrieving Data from Google Sheets

Next, we will format the date using the Pabbly Connect DateTime format module. This step is essential for fetching the correct data from Google Sheets. You will need to get today’s date to match it with your scheduled posts.

Once the date is formatted, the next action involves using the ‘Lookup Spreadsheet Row’ feature to retrieve the corresponding quote and author name for the current date. Here’s how:

  • Select your Google Sheets account.
  • Map the formatted date to find the relevant row.

After executing this step, Pabbly Connect will return the quote and author name from your Google Sheets, which will be used to create the Instagram post.


4. Creating Instagram Post Using Canva

Now that we have the content, we will use Pabbly Connect to create a dynamic Instagram post using Canva. Select Canva as the action app and choose the ‘Create Design’ action event. This allows you to utilize a template designed for your Instagram posts.

To set this up, you will need to:

Select a pre-made brand template from your Canva account. Map the quote and author name to the respective fields in the template.

Once the design is created, Pabbly Connect will provide a success response, confirming that the post has been generated successfully. You can preview the design using the provided link.


5. Downloading the Image and Sharing on Instagram

After creating the post, the next step is to download the image from Canva. Use the ‘Download Design as Image’ action event in Pabbly Connect. Here, you will need to input the design ID received from the previous step.

To complete the automation, follow these steps:

Set the export quality and size for the image. After downloading, upload the image to your Dropbox account for backup.

Finally, use the ‘Instagram for Business’ action event in Pabbly Connect to create a new post on your Instagram account. Map the caption to include the quote and author name. After executing this step, your Instagram post will be live, completing the automation process.


Conclusion

Using Pabbly Connect, you can automate the process of creating and posting Instagram content from Google Sheets effortlessly. This integration saves time and ensures consistent posting without manual effort, enhancing your social media strategy.

Ensure you check out Pabbly Connect to create business automation workflows and reduce manual tasks. Pabbly Connect currently offer integration with 2,000+ applications.