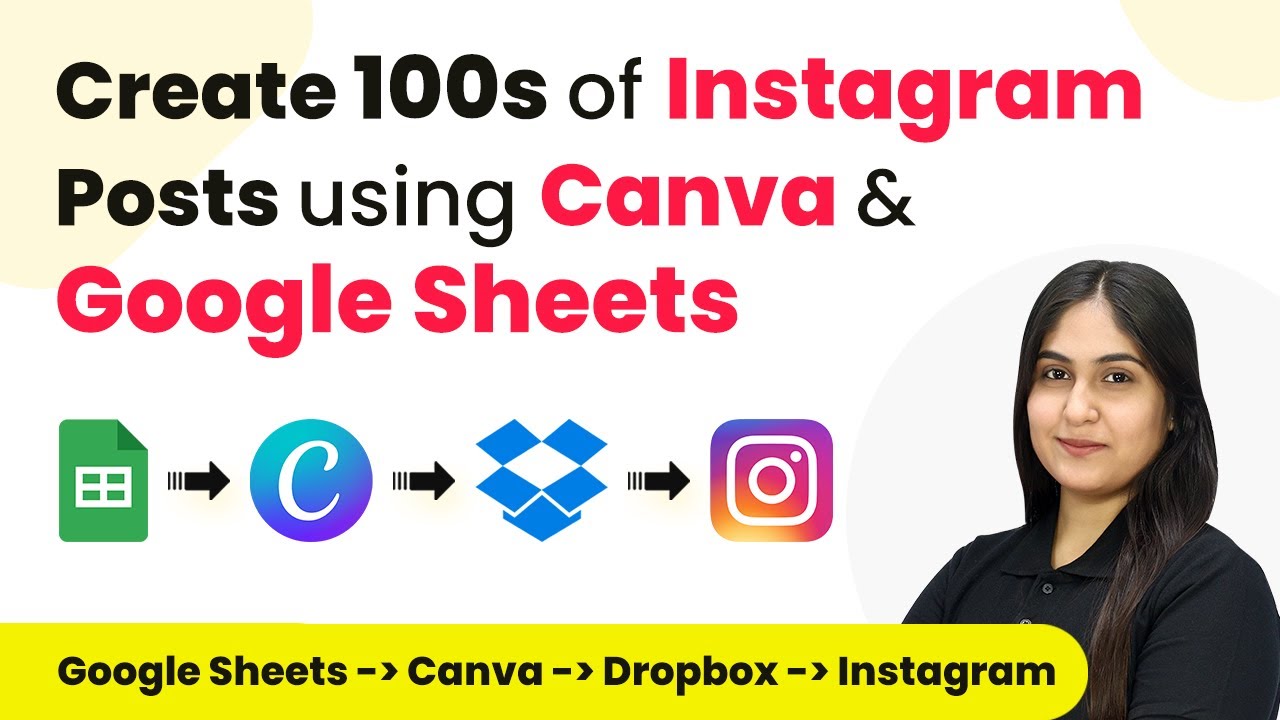
Automate Instagram Posts with Pabbly Connect, Canva, and Google Sheets

Learn how to automate Instagram posts using Pabbly Connect, Canva, and Google Sheets with this step-by-step tutorial. Explore efficient methods for automating routine tasks with clear, concise instructions suited for both newcomers and experienced professionals.

Watch Step By Step Video Tutorial Below


1. Setting Up Pabbly Connect for Automation

To automate Instagram posts, the first step is to set up Pabbly Connect. This integration platform allows you to connect various applications seamlessly. Start by visiting the Pabbly Connect homepage and sign up for a free account if you are a new user, or log in if you already have an account.

Once logged in, you will be directed to the dashboard. Here, click on the ‘Create Workflow’ button to initiate your automation process. Name your workflow appropriately, such as ‘Automatically Create Instagram Posts Using Canva and Google Sheets’. Choose a folder for organization, and then click on the ‘Create’ button to proceed.


2. Scheduling Automation with Pabbly Connect

In this section, we will set a schedule for the automation workflow using Pabbly Connect. To do this, select the ‘Schedule by Pabbly’ trigger. This feature allows you to run your workflow at a specific time every day. Set the frequency to ‘Every Day’ and choose the time you want the automation to run.

  • Select the frequency as ‘Every Day’.
  • Choose the specific time for the automation to trigger.
  • Click ‘Save’ to finalize the schedule.

After saving, you will receive a confirmation message indicating that the workflow is set to run daily at the chosen time. This ensures that your Instagram posts are created automatically each day without manual intervention.


3. Retrieving Data from Google Sheets with Pabbly Connect

Next, we will retrieve the inspirational quotes and author names from Google Sheets using Pabbly Connect. For this, select the action application as Google Sheets and choose the action event ‘Lookup Spreadsheet Row V2’. This will allow you to search for the quote based on the current date.

You’ll need to connect your Google Sheets account to Pabbly Connect. Once connected, specify the spreadsheet and the sheet where your data is stored. Use the current date obtained from the previous step as the lookup value to find the corresponding quote and author.

  • Select your spreadsheet named ‘Instagram Post’.
  • Map the current date to the lookup value field.
  • Choose the columns containing the quote and author.

After setting this up, Pabbly Connect will retrieve the relevant quote and author name from your Google Sheets, which will be used in the next steps to create the Instagram post.


4. Creating Posts Using Canva through Pabbly Connect

Now that we have the quote and author, we will create a new post in Canva using Pabbly Connect. Select Canva as your action application and choose the action event ‘Create Design Autofill Job’. This allows you to create a design using a pre-defined template that includes dynamic fields for the quote and author.

Connect your Canva account to Pabbly Connect. You will need to provide your client ID and secret from the Canva developer portal to establish this connection. After successfully connecting, select the brand template ID you created for Instagram posts.

Map the quote and author variables to the template fields. Publish your template as a brand template in Canva. Click ‘Save’ to create the design.

This step allows Pabbly Connect to create a new post design in Canva automatically, which can then be downloaded as a JPG file for posting on Instagram.


5. Uploading to Dropbox and Posting on Instagram via Pabbly Connect

After creating the post in Canva, the next step is to download the design and upload it to Dropbox using Pabbly Connect. Select Dropbox as your action application and choose the action event ‘Upload a File’. Connect your Dropbox account to Pabbly Connect and specify the file URL for the image you created in Canva.

Once uploaded, you will receive a Pabbly link to the image. This link can then be used to post on Instagram. Select Instagram as your action application and choose the action event ‘Publish Photo’. Connect your Instagram account and map the photo URL from Dropbox along with the caption that includes the quote and author.

Map the Dropbox file URL to the photo URL field in Instagram. Create a caption that includes the quote and author name. Click ‘Save’ to publish the post on Instagram.

This final step ensures that your inspirational quote is posted on Instagram automatically, saving you time and effort in managing your social media content.


Conclusion

Using Pabbly Connect, you can automate the process of creating and posting Instagram content effortlessly. This tutorial detailed how to integrate Google Sheets and Canva to streamline your social media posts, saving you valuable time every day.

Ensure you check out Pabbly Connect to create business automation workflows and reduce manual tasks. Pabbly Connect currently offer integration with 2,000+ applications.

Automate Salesmate Contacts Using Pabbly Connect and Google Sheets

Learn how to automate creating Salesmate contacts from Google Sheets using Pabbly Connect. Step-by-step guide with detailed instructions. Explore efficient methods for automating routine tasks with clear, concise instructions suited for both newcomers and experienced professionals.

Watch Step By Step Video Tutorial Below


1. Accessing Pabbly Connect for Integration

To begin, access Pabbly Connect by navigating to its official site. This platform is essential for creating automated workflows between applications like Google Sheets and Salesmate.

On the Pabbly Connect landing page, you can either sign in or sign up for a free account. Existing users should click on the ‘Sign In’ button, while new users can sign up to receive 100 free tasks monthly.


2. Creating a Workflow in Pabbly Connect

After logging into Pabbly Connect, you will see an option to create a new workflow. Click on ‘Create Workflow’ to initiate the process of integrating Google Sheets with Salesmate.

  • Enter a name for your workflow, such as ‘Create Salesmate Contact from New Google Sheet Tables Row’.
  • Select the folder where you want to save this workflow.
  • Click on ‘Create’ to proceed.

Once created, you will see two boxes: one for the trigger and one for the action. The trigger will be Google Sheets, and the action will be Salesmate, allowing for seamless automation.


3. Setting Up Google Sheets as a Trigger

In this step, you will configure Google Sheets as the trigger application in Pabbly Connect. Set the trigger event to ‘New or Updated Spreadsheet Row’. This means that whenever a new row is added to your Google Sheets, it will trigger the workflow.

To connect Google Sheets with Pabbly Connect, you will need a webhook URL. This URL acts as a bridge between the two applications. Follow these steps:

  • Go to your Google Sheets and click on ‘Extensions’.
  • Select ‘Add-ons’ and then ‘Get add-ons’.
  • Search for ‘Pabbly Connect Webhooks’ and install it.

After installation, refresh Google Sheets and configure the webhook URL in the Pabbly Connect settings. This will ensure that data from Google Sheets is sent to Pabbly Connect whenever a new row is added.


4. Configuring Salesmate as the Action Application

Next, you will set Salesmate as the action application in Pabbly Connect. Choose ‘Create Contact’ as the action event. This means that every time a new row is added in Google Sheets, a contact will be created in Salesmate automatically.

To configure this, connect your Salesmate account by entering the required details such as hostname, session token, and account URL. After entering these details, click on ‘Save’. This establishes a connection between Pabbly Connect and Salesmate.

Now, you need to map the fields from Google Sheets to Salesmate. This involves selecting the data from the previous response in Pabbly Connect to ensure that the correct data is sent to Salesmate when a new row is added. For example, map the first name, last name, phone number, and email address fields accordingly.


5. Testing the Integration

After setting up the integration between Google Sheets and Salesmate through Pabbly Connect, it is crucial to test the workflow. Enter a new row in your Google Sheets with dummy data, such as a first name, last name, phone number, and email address.

Once the data is entered, check Pabbly Connect to see if the webhook response is received. If successful, you will see the data captured from Google Sheets. Then, log into your Salesmate account to verify that the contact has been created successfully.

This testing phase ensures that your automation is working correctly. Repeat the process by adding different entries in Google Sheets, and confirm that they appear in Salesmate as new contacts. This confirms the effectiveness of your integration using Pabbly Connect.


Conclusion

Using Pabbly Connect, you can automate the creation of Salesmate contacts from new entries in Google Sheets. This integration streamlines your workflow, saving time and reducing manual errors. With these detailed steps, you can set up your automation effectively.

Ensure you check out Pabbly Connect to create business automation workflows and reduce manual tasks. Pabbly Connect currently offer integration with 2,000+ applications.

Integrating Google Sheets with Pluto Using Pabbly Connect: A Step-by-Step Guide

Learn how to automate lead management by integrating Google Sheets with Pluto using Pabbly Connect. Follow this detailed tutorial for seamless automation. Develop expertise in application integration and learn how to design streamlined automation workflows using proven, simplified approaches.

Watch Step By Step Video Tutorial Below


Accessing Pabbly Connect for Integration

To start integrating Google Sheets with Pluto, first access Pabbly Connect. This powerful integration platform allows seamless automation between various applications. If you’re a new user, you can sign up for free and receive 100 tasks each month.

After signing in to your Pabbly Connect account, you will see the dashboard where you can create your workflows. Click on the ‘Create Workflow’ button in the top right corner to begin setting up your integration.


Setting Up Google Sheets as Trigger in Pabbly Connect

In this step, we will set Google Sheets as the trigger application in Pabbly Connect. Select Google Sheets from the trigger application options. The trigger event should be set to ‘New or Updated Spreadsheet Row’ to capture any new lead data entered in your spreadsheet.

Upon selection, Pabbly Connect will generate a webhook URL. This URL is crucial for connecting your Google Sheets to Pluto. Copy the webhook URL and proceed to your Google Sheets to set it up.


Linking Google Sheets to Pabbly Connect

To link Google Sheets to Pabbly Connect, open your Google Sheets document. Click on the ‘Extensions’ menu, then select ‘Add-ons’ and click on ‘Get add-ons’. Search for ‘Pabbly Connect Webhooks’ and install it if you haven’t done so already.

  • Click on ‘Extensions’ again and select ‘Pabbly Connect Webhooks’.
  • Choose ‘Initial Setup’ and paste the webhook URL you copied earlier.
  • Set the trigger column, which should be the final data column where new entries will be added.

After completing these steps, click on the ‘Submit’ button to confirm your setup. This will allow Pabbly Connect to capture responses from your Google Sheets whenever new data is entered.


Testing the Integration with Pabbly Connect

Now that we have set up the trigger, it’s time to test the integration. Enter a new lead’s details in your Google Sheets, including first name, last name, email, phone number, and country code. Once the details are filled in, Pabbly Connect will automatically capture this data.

To verify, head back to your Pabbly Connect workflow and check if it shows the captured response. If the details appear correctly, it confirms that Google Sheets is successfully connected to Pabbly Connect.


Creating a Person in Pluto Using Pabbly Connect

With the trigger set up, now we will configure the action step to create a person in Pluto. Select Pluto as the action application in Pabbly Connect and choose the action event as ‘Create a Person’. Connect your Pluto account by entering the required credentials including client ID and secret.

Map the data from the previous step to the respective fields for first name, last name, email, and phone number. This mapping ensures that whenever new data is captured from Google Sheets, it will automatically populate in Pluto, creating a new person entry.

  • Fill in the required details and click ‘Save and Send Test Request’.
  • Check your Pluto account to confirm the new person has been created successfully.

Once confirmed, you have successfully automated the process of adding new leads from Google Sheets to Pluto using Pabbly Connect.


Conclusion

This tutorial demonstrated how to automate lead management by integrating Google Sheets with Pluto using Pabbly Connect. By following these steps, you can streamline your workflow and enhance your business efficiency.

Ensure you check out Pabbly Connect to create business automation workflows and reduce manual tasks. Pabbly Connect currently offer integration with 2,000+ applications.

Automate Task Management with Pabbly Connect: A Step-by-Step Guide

Learn how to automate task management using Pabbly Connect with Simply, URL, and other applications. Follow our detailed guide for seamless integration. Learn to create powerful connections between your critical applications without requiring specialized programming knowledge or extensive technical background.

Watch Step By Step Video Tutorial Below


1. Accessing Pabbly Connect for Automation

To start automating your tasks, access Pabbly Connect by visiting its homepage. Here, you can sign in or create a new account. If you’re a new user, click on the ‘Sign Up for Free’ button to create an account, which allows you to explore the tool with 100 free tasks monthly.

After signing in, navigate to the dashboard of Pabbly Connect. This is where you can manage your workflows. Click on the ‘Create Workflow’ option to begin setting up your automation.


2. Creating a Workflow in Pabbly Connect

Once you click on ‘Create Workflow’, a dialog box will appear asking for a name for your workflow. Enter a descriptive name, such as ‘Automate Task Management’. You can also select a folder to organize your workflow.

  • Enter a descriptive name for your workflow.
  • Choose a folder to save your workflow.
  • Click on ‘Create’ to finalize the setup.

After saving, you will see two sections: Trigger and Action. The Trigger defines what event will start your workflow, while the Action defines what will happen in response. This is where Pabbly Connect excels, allowing you to automate tasks seamlessly between applications.


3. Setting Up Triggers in Pabbly Connect

To set up a trigger, select your trigger application, such as Simply or Todoist. Choose a trigger event, like ‘New Task’ or ‘Task Completed’. This event will initiate the workflow whenever it occurs.

  • Select the trigger application (e.g., Simply).
  • Choose the specific trigger event.
  • Follow the instructions to connect your accounts.

After setting up the trigger, Pabbly Connect will provide a webhook URL. This URL will be used to connect your trigger application to the workflow. Follow the instructions to complete the integration, ensuring that you receive the necessary data to proceed.


4. Configuring Actions in Pabbly Connect

Next, you will configure the action that occurs when the trigger is activated. Select the action application, such as Google Sheets or Slack, and choose the action event, like ‘Create Task’ or ‘Send Message’. This action will execute based on the trigger you set up earlier.

Select the action application (e.g., Google Sheets). Choose the specific action event. Map the required fields using data from the trigger.

By mapping the fields, Pabbly Connect allows you to dynamically send data from your trigger to your action application, automating the process without manual intervention. Ensure that all required fields are filled out to complete the setup.


5. Testing and Activating Your Workflow

After configuring your trigger and action, it’s essential to test your workflow. Click on the ‘Save and Send Test Request’ button to verify that the integration works as expected. This will help you ensure that data flows correctly between your applications.

Once the test is successful, activate your workflow. Pabbly Connect will now automatically handle the tasks as per your setup, allowing you to focus on more critical aspects of your work while it manages the repetitive tasks for you.


Conclusion

In this guide, we explored how to automate task management using Pabbly Connect with Simply, URL, and other applications. By following these steps, you can enhance productivity and streamline your workflow effortlessly.

Ensure you check out Pabbly Connect to create business automation workflows and reduce manual tasks. Pabbly Connect currently offer integration with 2,000+ applications.

Automate Your Tasks with Pabbly Connect: A Complete Guide

Learn how to automate your tasks using Pabbly Connect with Simply, URL, and more. Follow this step-by-step guide for seamless integration. Navigate the automation landscape confidently with clear, structured guidance suitable for professionals regardless of prior technical experience.

Watch Step By Step Video Tutorial Below


1. Accessing Pabbly Connect for Task Automation

To begin automating tasks using Pabbly Connect, first, navigate to the Pabbly Connect homepage by typing the URL Pabbly.com/connect. This platform allows you to integrate various applications seamlessly, enhancing productivity.

Once on the homepage, you will see options to sign in or sign up. If you’re a new user, click on ‘Sign up for free’ to create an account. After account creation, you can explore the features of Pabbly Connect with 100 free tasks each month.


2. Creating a Workflow in Pabbly Connect

After signing in, go to the dashboard of Pabbly Connect. Here, you can manage your workflows effectively. To create a new workflow, click on the ‘Create Workflow’ button.

  • Enter a name for your workflow, such as ‘Automate Tasks with Pabbly Connect’.
  • Select a folder to organize your workflow.
  • Click on ‘Create’ to finalize the setup.

After creating your workflow, you will see two sections: Trigger and Action. The Trigger is the event that starts the workflow, while the Action is what happens in response. This setup is crucial for automating tasks effectively using Pabbly Connect.


3. Setting Up Triggers with Pabbly Connect

In this section, we will set up a trigger using Pabbly Connect to automate tasks in Todoist. Select Todoist as your trigger application.

Choose a trigger event such as ‘Task Completed’. You will receive a webhook URL that you need to copy. This URL acts as a bridge between Todoist and Pabbly Connect, allowing data transfer when tasks are completed.

  • Log into your Todoist account.
  • Create a new app in the Todoist App Management console.
  • Paste the copied webhook URL and activate it.

Once the trigger is set up, every time a task is completed in Todoist, the response will be captured by Pabbly Connect, enabling you to automate further actions.


4. Setting Up Actions with Pabbly Connect

Now, let’s focus on setting up actions in Pabbly Connect. For this example, we will integrate Google Sheets to log completed tasks from Todoist.

In the Action section, select Google Sheets as your action application. Choose the action event, such as ‘Create Spreadsheet Row’. This action will log the details of completed tasks automatically.

Connect your Google Sheets account to Pabbly Connect. Map the fields from the Todoist response to the Google Sheets columns. Test the action to ensure the task details are logged correctly.

This integration allows you to keep track of your task management efficiently, as every completed task in Todoist gets recorded in Google Sheets automatically through Pabbly Connect.


5. Testing Your Integration with Pabbly Connect

After setting up your triggers and actions, it’s essential to test the integration. Go back to your Todoist account and complete a task.

Check Pabbly Connect to see if the response is captured correctly. You should see all the relevant task details, confirming that the integration is working as intended.

Verify that the task details appear in Google Sheets. Ensure that all fields are mapped correctly. Adjust any settings if necessary for optimal performance.

With successful testing, you can now enjoy the benefits of automated task management using Pabbly Connect, saving time and enhancing productivity.


Conclusion

In this guide, we explored how to automate tasks using Pabbly Connect with applications like Simply, URL, and others. By following the steps outlined, you can streamline your task management processes effectively.

Ensure you check out Pabbly Connect to create business automation workflows and reduce manual tasks. Pabbly Connect currently offer integration with 2,000+ applications.

Integrate SMS Alerts and Webinar Registrants with Pabbly Connect

Learn how to automate webinar registrations and send SMS alerts using Pabbly Connect. This step-by-step guide covers all necessary integrations. Master proven automation processes with practical implementation examples and strategic recommendations you can apply immediately in your workflow.

Watch Step By Step Video Tutorial Below


Accessing Pabbly Connect for Integration

To begin integrating SMS alerts and webinar registrations, first access Pabbly Connect. Sign in to your account or create a new one to start automating your tasks. After logging in, you’ll see the Pabbly Connect dashboard, where you can initiate your workflow.

Click on the ‘Create Workflow’ button located at the top right corner. A dialog box will prompt you to name your workflow. For this integration, name it ‘Add Webinar Kit Registrant via Webhook, Create Active Campaign Contact, and Send SMS Alert’. Select a folder to save your workflow and then click ‘Create’ to proceed.


Setting Up the Trigger in Pabbly Connect

In this section, you will set up the trigger for your workflow using Pabbly Connect. The trigger will be set to capture the form submissions from your webinar registration form. Select ‘Webhook by Pabbly’ as your trigger application.

Next, choose the trigger event as ‘Catch Webhook’. Pabbly Connect will generate a unique webhook URL. Copy this URL, as it will be used to connect your form application with Pabbly Connect. Go to the form application where you created your registration form and locate the integration settings.

  • Access the integration settings of your form application.
  • Paste the copied webhook URL into the designated field.
  • Save the changes to establish the connection.

After saving, you can perform a test submission of the form to ensure that the webhook is capturing the data correctly in Pabbly Connect. This confirms that the trigger setup is successful.


Setting Up Actions in Pabbly Connect

Once the trigger is set up, the next step involves configuring actions in Pabbly Connect. The first action will be to add the registrant to your Webinar Kit account. Select ‘Webinar Kit’ as your action application and choose the action event as ‘New Webinar Registration’.

Connect your Webinar Kit account by clicking on the ‘Connect’ button. You will need to provide the API token from your Webinar Kit account to establish this connection. After connecting, select the specific webinar you want to register participants for from the dropdown menu.

  • Map the email address, first name, and last name fields from the previous webhook response.
  • Ensure the data is dynamically mapped to update with each new registration.
  • Save the action setup to finalize this step.

Finally, test this action by submitting a new form entry and checking your Webinar Kit account for the new registration. This confirms that the action setup is working correctly within Pabbly Connect.


Sending SMS Alerts with Pabbly Connect

After successfully adding the registrant to your Webinar Kit, the next action is to send an SMS alert using Pabbly Connect. Select ‘Twilio’ as your action application, and choose the action event ‘Send SMS Message’.

Connect your Twilio account by entering the Account SID and Authorization Token. These credentials can be found in your Twilio account dashboard. After connecting, you will need to specify the SMS body, sender number, and recipient number.

Craft the SMS message to include the registrant’s name and webinar details. Map the recipient number from the webhook response to ensure the message is sent to the right person. Click ‘Save and Send Test Request’ to verify that the SMS is sent successfully.

Check your mobile device for the SMS to confirm that the message was dispatched properly, showcasing how effectively Pabbly Connect automates your workflow.


Conclusion

By using Pabbly Connect, you can seamlessly integrate SMS alerts and webinar registrations. This tutorial demonstrated how to automate the process of adding registrants to your Webinar Kit and sending them SMS updates. With Pabbly Connect, you can enhance participant engagement and streamline your workflow effectively.

Ensure you check out Pabbly Connect to create business automation workflows and reduce manual tasks. Pabbly Connect currently offer integration with 2,000+ applications.

Automate PDF Creation with Pabbly Connect: A Step-by-Step Guide

Learn how to automate PDF generation from Typeform responses using Pabbly Connect, integrating PDF Monkey for seamless document creation. Master proven automation processes with practical implementation examples and strategic recommendations you can apply immediately in your workflow.

Watch Step By Step Video Tutorial Below


1. Accessing Pabbly Connect for Integration

To start integrating Typeform with PDF Monkey, you first need to access Pabbly Connect. Open your browser and navigate to the Pabbly Connect website. If you don’t have an account, click on the ‘Sign Up for Free’ button to create one. This process is quick and allows you to access 100 tasks free every month.

Once signed in, you will be directed to the Pabbly Connect dashboard. Here, you can create a new workflow by clicking the ‘Create Workflow’ button. This is where you will set up the integration to automate the PDF generation process for Typeform responses.


2. Setting Up Trigger with Typeform in Pabbly Connect

The first step in your workflow is to set up a trigger using Pabbly Connect. Click on ‘Create Workflow’ and name it according to your objective, such as ‘Generate PDF of Typeform Responses’. You will then see options for trigger and action applications.

  • Search for Typeform as your trigger application.
  • Select the trigger event as ‘New Entry’.
  • Connect your Typeform account with Pabbly Connect.

After connecting, select the specific form you want to use. In this case, it’s the employee data form. Click ‘Save and Send Test Request’ to proceed. This will prepare your workflow to receive data from Typeform submissions.


3. Creating a Form Submission in Typeform

To test the integration, create a form submission in Typeform. Open your employee data form and fill in the required details, such as name, email, department, and address. This step is crucial as it generates the data that Pabbly Connect will use to create the PDF document.

Once you submit the form, go back to Pabbly Connect. You should see the response from your Typeform submission, which includes all the details you entered. This confirms that the trigger is set up correctly and that data is flowing into Pabbly Connect.


4. Setting Up Action with PDF Monkey in Pabbly Connect

Next, you need to set up the action step in your workflow to create a PDF document using PDF Monkey. In Pabbly Connect, search for PDF Monkey and select it as your action application. Choose ‘Generate Document’ as your action event.

  • Connect your PDF Monkey account using your API token.
  • Enter the template ID for the NDA document you created in PDF Monkey.
  • Map the employee details from the Typeform response to the PDF fields.

Once all fields are mapped correctly, click ‘Save and Send Test Request’. This action will generate your PDF document based on the data received from Typeform, completing the automation process.


5. Verifying PDF Creation in PDF Monkey

After setting up the action, it’s time to verify that the PDF document has been created successfully. Go to your PDF Monkey account and check the documents section. You should see the newly created NDA document with the name formatted according to the employee’s details.

This verification step confirms that Pabbly Connect has successfully integrated Typeform and PDF Monkey, automating the generation of NDAs for new employees. You can repeat the process with additional submissions to ensure everything works seamlessly.


Conclusion

In this tutorial, we explored how to automate PDF creation using Pabbly Connect, integrating Typeform and PDF Monkey. By following these steps, you can streamline document generation for new employee onboarding efficiently.

Ensure you check out Pabbly Connect to create business automation workflows and reduce manual tasks. Pabbly Connect currently offer integration with 2,000+ applications.

Automate Subscriber Management with Pabbly Connect: A Step-by-Step Guide

Learn how to automate subscriber management using Pabbly Connect with Typeform and Flodesk. This guide walks you through the integration process step-by-step. Implement the precise methodologies leading organizations use to automate repetitive tasks, illustrated with practical examples designed for immediate application.

Watch Step By Step Video Tutorial Below


1. Accessing Pabbly Connect for Integration

To start integrating applications like Typeform and Flodesk, you first need to access Pabbly Connect. Go to the Pabbly Connect homepage by typing the URL in your browser. You will see options to sign in or sign up for free.

If you are a new user, click on the ‘Sign up for free’ button to create an account. This process only takes a couple of minutes and provides you with 100 free tasks every month to explore the platform. Existing users can simply log in to their accounts.


2. Creating a Workflow in Pabbly Connect

Once logged in, you will be directed to the dashboard of Pabbly Connect. Here, you can create a new workflow by clicking on the ‘Create Workflow’ option. You will need to name your workflow, such as ‘Add Subscriber in Flodesk Segment Based on Typeform Responses’.

  • Click ‘Create’ to initiate the workflow setup.
  • Select Typeform as your trigger application.
  • Choose ‘New Entry’ as the trigger event.

After selecting the trigger, connect your Typeform account to Pabbly Connect by clicking on ‘Connect’. You will need to authorize Pabbly Connect to access your Typeform data, ensuring a seamless integration process.


3. Setting Up Trigger and Action Steps

In this step, you will set the trigger event to capture responses from your Typeform. Once you’ve connected your Typeform account, select the specific form you created for course registration. Click on ‘Save and Send Test Request’ to ensure that Pabbly Connect captures the data correctly.

Next, set the action application to Flodesk. Choose the action event as ‘Create or Update Subscriber’. You will need to connect your Flodesk account to Pabbly Connect in a similar manner. This action ensures that whenever a new form is submitted, the subscriber is automatically added to your Flodesk account.


4. Using Router in Pabbly Connect for Conditional Actions

To handle different segments based on user responses, utilize the Router feature in Pabbly Connect. After setting your trigger, add a router by selecting it as the next action. This allows you to create multiple routes for different courses.

For example, if a student selects ‘Java for Professionals’, create a route that adds them to the corresponding segment in Flodesk. Similarly, create another route for ‘Advanced PHP’. Each route will have its own conditions based on the user’s selection from the Typeform response.

  • Set conditions for each route based on course selection.
  • Map the corresponding data fields from Typeform to Flodesk.
  • Test each route to ensure proper functionality.

This setup allows Pabbly Connect to dynamically manage subscribers based on their course interests, ensuring they receive tailored communications.


5. Testing and Finalizing Your Workflow

After setting up your workflow with triggers and actions, it’s crucial to test the entire process. Submit a test entry through your Typeform and ensure that the correct data is captured in Pabbly Connect. Check if the subscriber is added to the right segment in Flodesk based on their course selection.

Once you confirm that everything works smoothly, finalize your workflow by saving it. You can also rename the routes for better clarity, such as naming them after the respective courses. This will make it easier to manage your automation in the future.

Now, your subscriber management process is fully automated! Whenever someone submits the Typeform, Pabbly Connect will handle the rest, ensuring they are placed in the appropriate Flodesk segments without any manual intervention.


Conclusion

This tutorial detailed how to automate subscriber management using Pabbly Connect with Typeform and Flodesk. By following these steps, you can streamline your workflow and ensure personalized communication with your subscribers.

Ensure you check out Pabbly Connect to create business automation workflows and reduce manual tasks. Pabbly Connect currently offer integration with 2,000+ applications.

Integrating Google Sheets with ActiveTrail Using Pabbly Connect: A Step-by-Step Guide

Learn how to seamlessly integrate Google Sheets with ActiveTrail using Pabbly Connect. Follow this detailed tutorial for automation and efficiency. Discover how to seamlessly connect your essential tools through accessible instructions that make powerful automation available to professionals at every skill level.

Watch Step By Step Video Tutorial Below


1. Accessing Pabbly Connect for Integrations

To begin integrating Google Sheets with ActiveTrail, first access Pabbly Connect at the official website. This platform allows you to connect various applications seamlessly, automating processes efficiently.

Once on the homepage, you will find options to sign in or sign up. If you are a new user, click on ‘Sign Up Free’ to create an account and receive 300 tasks every month to explore the software. Existing users should click ‘Sign In’ to access their dashboard.


2. Creating a Workflow in Pabbly Connect

After signing in, you will land on the Pabbly Connect dashboard. Here, you need to create a new workflow that will facilitate the integration between Google Sheets and ActiveTrail using Pabbly Connect.

Click on the ‘Create Workflow’ button, which is located at the top right corner. A dialog box will appear, prompting you to name your workflow. Enter a descriptive name like ‘Create ActiveTrail Contact from New Google Sheets Rows’ and select your folder, such as ‘Google Sheets’.

  • Click on the ‘Create’ button to finalize your workflow.
  • Understand that your workflow will consist of triggers and actions.
  • The trigger will be when a new row is added in Google Sheets.

With your workflow created, you are ready to set up the trigger for your automation.


3. Setting Up Google Sheets Trigger in Pabbly Connect

To set up the trigger, select Google Sheets as your trigger application within Pabbly Connect. This will ensure that whenever a new row is added, it triggers the automation.

Choose the trigger event as ‘New or Updated Spreadsheet Row’. After selecting this, you will receive a webhook URL from Pabbly Connect. This URL is crucial for connecting Google Sheets to the platform.

  • Copy the webhook URL provided by Pabbly Connect.
  • Open your Google Sheets and go to Extensions > Add-ons > Get Add-ons.
  • Search for the Pabbly Connect Webhooks add-on and install it.

After installation, refresh your Google Sheets, and set up the webhook URL in the add-on under Extensions > Pabbly Connect Webhooks > Initial Setup.


4. Configuring ActiveTrail Action in Pabbly Connect

With your trigger set, the next step is to configure the action to create a contact in ActiveTrail. Select ActiveTrail as your action application in Pabbly Connect.

Choose the action event as ‘Create a Contact’. To establish a connection, click on ‘Connect’ and then select ‘Add New Connection’. You will need to enter your ActiveTrail API key, which you can generate from your ActiveTrail account under Integrations > API Keys.

Enter the API key you generated and click Save. Map the fields from Google Sheets to the corresponding fields in ActiveTrail. Ensure all required fields are filled out correctly before proceeding.

After mapping, click on ‘Save and Send Test Request’ to verify that the contact is created successfully in ActiveTrail.


5. Testing the Integration with Pabbly Connect

To ensure everything is functioning correctly, it’s time to test your integration. Go back to your Google Sheets and add a new row with test data, such as a name, email, and other relevant details.

Once you enter the new data, Pabbly Connect will capture this and trigger the action you set up. Refresh your ActiveTrail account to see if the new contact appears.

Add dummy data for testing, ensuring it follows the same structure as previous entries. Check for successful creation of the contact in ActiveTrail. Repeat this process to confirm reliability of the automation.

If the test is successful, your integration is complete, and you can now automate the process of adding new leads from Google Sheets to ActiveTrail using Pabbly Connect.


Conclusion

This tutorial demonstrated how to integrate Google Sheets with ActiveTrail using Pabbly Connect. By setting up triggers and actions, you can automate contact creation, saving time and enhancing lead management.

Ensure you check out Pabbly Connect to create business automation workflows and reduce manual tasks. Pabbly Connect currently offer integration with 2,000+ applications.

Integrating JotForm and Zoho Books Using Pabbly Connect: A Step-by-Step Guide

Learn how to automate contact creation in Zoho Books from JotForm submissions using Pabbly Connect. Follow our detailed guide for seamless integration. Explore efficient methods for automating routine tasks with clear, concise instructions suited for both newcomers and experienced professionals.

Watch Step By Step Video Tutorial Below


Accessing Pabbly Connect for Integration

To start integrating JotForm and Zoho Books, you need to access Pabbly Connect. Simply visit the Pabbly website and sign in to your account. If you are a new user, you can sign up for free and receive 100 tasks monthly.

Once signed in, navigate to the Pabbly Connect dashboard. Here, you can create new workflows. Click on the ‘Create Workflow’ button, name your workflow (e.g., ‘Create Contact in Zoho Books from JotForm Submission’), and select the appropriate folder to save it. This setup is crucial for automating your contact creation process.


Setting Up JotForm as the Trigger in Pabbly Connect

In this step, you will configure JotForm as the trigger application in Pabbly Connect. Choose JotForm from the list of applications and select the trigger event as ‘New Response’. This means that whenever a new form submission occurs, the workflow will be triggered.

Next, you will need to connect JotForm with Pabbly Connect. A webhook URL will be provided by Pabbly Connect. Follow these steps to set up the webhook:

  • Open your JotForm account and navigate to the form you want to integrate.
  • Go to the ‘Settings’ tab, then select ‘Integrations’.
  • Choose ‘Webhooks’ and paste the webhook URL from Pabbly Connect.

After completing these steps, your JotForm will be connected to Pabbly Connect, and you will be ready to test the integration.


Testing the JotForm Integration with Pabbly Connect

Now that you have set up the trigger, it’s time to test the integration between JotForm and Pabbly Connect. Go back to your JotForm and submit a test response. Ensure that you fill in the required fields such as first name, last name, email address, phone number, and city.

Once you submit the form, return to the Pabbly Connect dashboard. You should see the response data captured in the workflow. This confirms that your JotForm is successfully sending data to Pabbly Connect. If the data appears correctly, you can proceed to the next step of creating a contact in Zoho Books.


Setting Up Zoho Books as the Action in Pabbly Connect

The next step is to set Zoho Books as the action application in Pabbly Connect. Select Zoho Books from the application list and choose the action event as ‘Create Contact’. This action will create a new contact in Zoho Books whenever a form submission occurs in JotForm.

To connect Zoho Books with Pabbly Connect, you will need to provide your Zoho Books account domain. Ensure that you enter the correct domain name (e.g., books.zoho.com). After entering the domain, click on ‘Save’ and authorize the connection. This step is essential for allowing Pabbly Connect to access your Zoho Books account.

  • Select the organization from your Zoho Books account.
  • Map the fields from the JotForm response to the corresponding fields in Zoho Books.
  • Click on ‘Save and Send Test Request’ to check if the contact is created successfully.

After completing these steps, you can verify if the contact has been created in Zoho Books.


Verifying Contact Creation in Zoho Books

Once you have set up the action step, it’s crucial to verify that the contact has been created in Zoho Books through Pabbly Connect. Navigate to your Zoho Books account, go to the ‘Sales’ section, and click on ‘Customers’. Here, you should see the newly created contact with the details you submitted in JotForm.

If the contact appears as expected, it confirms that your integration is working flawlessly. You can repeat the process by submitting additional test responses in JotForm to ensure that every submission results in a new contact being created in Zoho Books. This automation saves you time and reduces manual data entry.


Conclusion

In this tutorial, we demonstrated how to integrate JotForm and Zoho Books using Pabbly Connect. This automation allows you to create contacts automatically in Zoho Books from JotForm submissions, streamlining your workflow and enhancing productivity. Follow these steps to set up your integration efficiently.

Ensure you check out Pabbly Connect to create business automation workflows and reduce manual tasks. Pabbly Connect currently offer integration with 2,000+ applications.