Integrate SMS with Wix Using Pabbly Connect: A Step-by-Step Tutorial

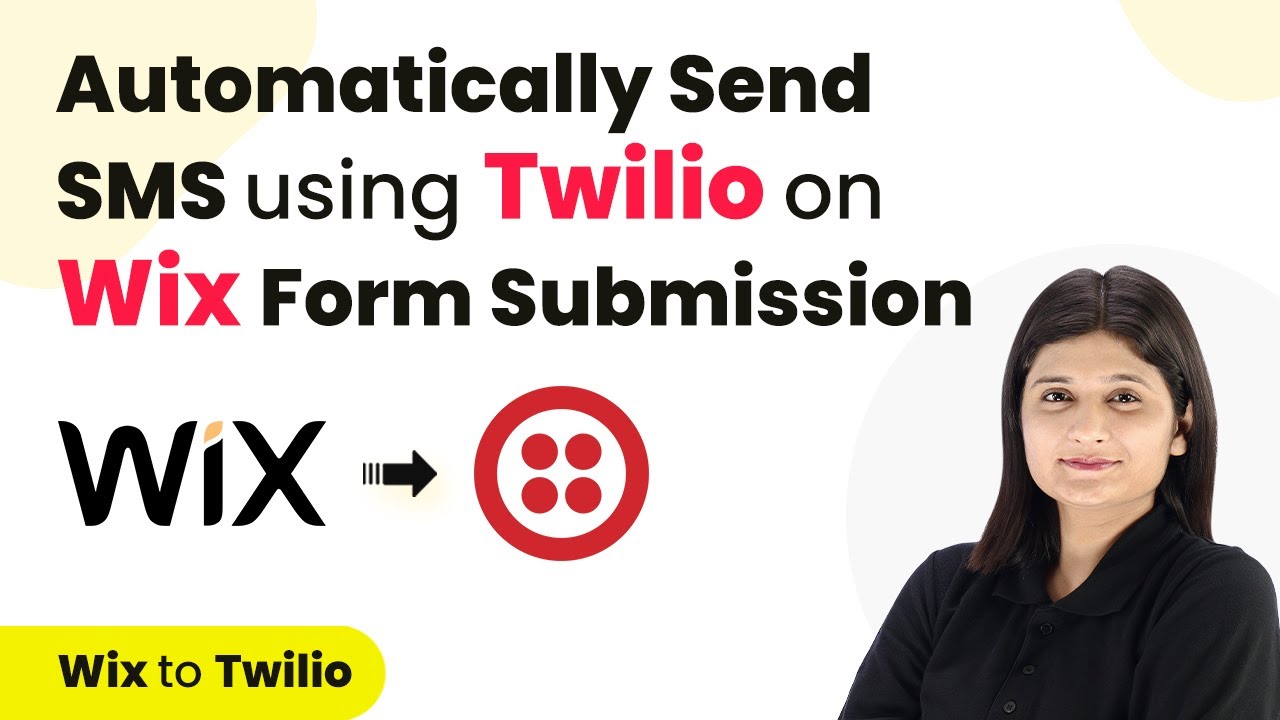
Learn how to integrate SMS with Wix Using Pabbly Connect for automated SMS notifications upon form submissions. Follow this detailed tutorial for seamless integration. Transform complex automation concepts into accessible, actionable steps that eliminate unnecessary manual work while maximizing existing application capabilities. with Pabbly Connect.

Watch Step By Step Video Tutorial Below


1. Setting Up SMS Integration with Wix

Integrating SMS with Wix starts with creating a seamless connection. This integration allows you to send SMS notifications automatically when a form is submitted on your Wix site. using Pabbly Connect

To begin, you need to access your Wix account and navigate to the automation settings. Here’s how you can set it up:

  • Log into your Wix account.
  • Go to the Automations section.
  • Click on ‘New Automation’ and select ‘Start from Scratch.’

After these steps, you’ll be ready to create a trigger that will initiate the SMS sending process whenever a form is submitted on Wix.


2. Creating a Trigger for Wix Form Submission

The next step in integrating SMS with Wix is creating a trigger for form submissions. This trigger will activate the SMS sending process through Make. using Pabbly Connect

To set up the trigger, follow these instructions:

  • Select ‘Wix Forms’ as your trigger application.
  • Choose ‘Form Submitted’ as the trigger event.
  • If applicable, select a specific form to monitor.

Once your trigger is set, you will need to connect it with the Make platform using a webhook URL that will be generated in the next steps.


3. Connecting Wix to Make via Webhook

To connect Wix to Make, you need to set up a webhook that will allow data to flow between the two applications. This step is crucial for sending SMS notifications effectively. using Pabbly Connect

Here’s how to establish the connection:

Copy the webhook URL provided by Make. In Wix, select ‘Send via Webhook’ as your action. Paste the copied webhook URL into the designated field.

After completing these steps, activate the automation in Wix, ensuring that the webhook is now listening for any form submissions.


4. Sending SMS Using Pabbly Connect

Now that the Wix form is connected to Make, the next step is to configure the SMS sending action. This is where you will specify the content of the SMS and the recipient’s number. using Pabbly Connect

To set up the SMS sending action, follow these steps:

Select ‘Twilio’ as your action application. Choose ‘Send SMS Message’ as the action event. Map the recipient’s phone number from the Wix form submission.

After entering the SMS content and mapping the recipient’s number, save the action. This ensures that every time a form is submitted, an SMS will be sent automatically.


5. Testing the SMS Integration

After completing the setup, it’s essential to test the SMS integration to ensure everything is working correctly. This step verifies that the SMS notifications are sent as expected upon form submission. using Pabbly Connect

To test your integration, follow these steps:

Submit a test form on your Wix site. Check your phone for the SMS notification. Ensure the message content is correct and the recipient number is accurate.

Once you confirm that the SMS is sent successfully, your integration is complete, and you can now automate SMS notifications for all form submissions on your Wix site.


Conclusion

This tutorial has guided you through the process of integrating SMS with Wix Using Pabbly Connect. By following these steps, you can automate SMS notifications effectively, enhancing customer communication and engagement.

Thanks for following along with this tutorial! Remember to subscribe to the channel for more helpful content like this.

If you found this guide useful, please consider giving it a thumbs up and sharing it with others who might benefit from it.

Automate Zoho Marketing Subscribers from Google Sheets Using Pabbly Connect

Learn how to automate the process of adding subscribers to Zoho Marketing from Google Sheets using Pabbly Connect with this detailed step-by-step tutorial. Explore systematic approaches to creating efficient automation solutions that convert technical concepts into practical, implementable instructions.

Watch Step By Step Video Tutorial Below


1. Accessing Pabbly Connect for Automation

To start automating the process of creating Zoho marketing subscribers from Google Sheets, you need to access Pabbly Connect. Begin by opening your browser and searching for Pabbly Connect, which is a powerful tool for integration and automation.

If you already have an account, simply sign in. Otherwise, click on the ‘Sign Up for Free’ button to create a new account. This process takes only a couple of minutes, and you will receive 100 tasks free every month. Once logged in, you will be directed to the Pabbly Connect dashboard.


2. Creating a New Workflow in Pabbly Connect

Now that you are on the Pabbly Connect dashboard, the next step is to create a new workflow. Click on the ‘Create Workflow’ button. A window will pop up asking you to name your workflow. Name it something descriptive, like ‘Create Zoho Marketing Subscriber from Google Sheets’. using Pabbly Connect

  • Name your workflow based on your objective.
  • Select the folder where you want to save your workflow.
  • Click on ‘Create’ to proceed.

This will take you to the main workflow setup page where you will see two boxes labeled ‘Trigger’ and ‘Action’. The ‘Trigger’ is the event that starts the workflow, while the ‘Action’ is what happens as a result of that trigger.


3. Setting Up Google Sheets as the Trigger

Next, you will need to set up Google Sheets as the trigger application. In the trigger section, search for and select Google Sheets. Then, choose the trigger event as ‘New or Updated Spreadsheet Row’. This means the workflow will activate whenever a new row is added or an existing row is updated.

Now, you need to connect Google Sheets with Pabbly Connect. To do this, you will be provided with a webhook URL. Copy this URL, then go to your Google Sheets document where you want to keep track of your leads.

  • Go to Extensions in Google Sheets and select Pabbly Connect Webhook.
  • Click on Initial Setup to connect your sheet with Pabbly Connect.
  • Paste the webhook URL and specify your trigger column.

After pasting the URL, select the final data column (which will be used as the trigger) and click ‘Send Test’. This will ensure that your setup is correctly configured.


4. Configuring Zoho Marketing as the Action

With the trigger set, the next step is to configure Zoho Marketing as the action application in your workflow. In the action section, search for Zoho Marketing and select it. Then, choose the action event as ‘Subscribe Lead’. This action will add a new subscriber to your Zoho Marketing account whenever a new lead is added in Google Sheets.

To connect Zoho Marketing with Pabbly Connect, you will need to enter your domain. This is typically your Zoho Marketing URL. After entering the domain, click ‘Save’ and allow access to your Zoho Marketing account.

Select the list in Zoho Marketing where you want to add your leads. Map the lead details from Google Sheets to the appropriate fields in Zoho Marketing. Test the connection to ensure everything is working correctly.

Once all details are mapped and tested, your workflow is ready to create subscribers in Zoho Marketing automatically from Google Sheets.


5. Finalizing and Testing the Workflow

Now that you have set up the entire workflow, it’s time to finalize and test it. Make sure to save your workflow and enable the option to send events whenever a new lead is added. This will ensure that your automation works seamlessly.

To test the integration, add a new lead in your Google Sheets document. Once you fill in the details, check your Zoho Marketing account to see if the new subscriber has been created. You should also receive a confirmation email for the new subscriber, confirming their subscription.

With Pabbly Connect, you have successfully automated the process of adding new subscribers to Zoho Marketing from Google Sheets. This not only saves time but also reduces the risk of errors in your email marketing efforts.


Conclusion

In this tutorial, we explored how to automate the addition of subscribers to Zoho Marketing from Google Sheets using Pabbly Connect. By following the detailed steps, you can ensure your email marketing list remains up-to-date and efficiently manage your marketing campaigns.

Ensure you check out Pabbly Connect to create business automation workflows and reduce manual tasks. Pabbly Connect currently offer integration with 2,000+ applications.

Integrating Automation with CRM: A Step-by-Step Guide to Using Pabbly Connect with Runo and LinkedIn

Learn how to automate lead allocation from LinkedIn to Runo CRM Using Pabbly Connect. This detailed tutorial covers all steps and integrations for efficient lead management. with Pabbly Connect.

Watch Step By Step Video Tutorial Below


1. Setting Up Automation with CRM: Connecting LinkedIn and Runo

Automation is essential for managing leads efficiently. In this section, we will explore how to connect LinkedIn leads to Runo Using Pabbly Connect. This integration allows for automatic lead allocation, ensuring that new leads are promptly assigned to the appropriate team member. using Pabbly Connect

To begin, navigate to the Make platform. Here, you will create a new workflow that connects LinkedIn lead generation forms with Runo CRM. This process eliminates the need for manual data entry, saving time and reducing errors.


2. Creating a Workflow in Make for Lead Allocation

Creating a workflow in Make is crucial for automating the lead allocation process. First, log into your Make account and click on the ‘Create Workflow’ button. You will be prompted to name your workflow; a suitable name could be ‘Runo Allocation from LinkedIn Leads’. using Pabbly Connect

Once named, you will see two main sections: Trigger and Action. The trigger will be set to ‘LinkedIn Lead Generation Forms’. After selecting this, you will need to choose the event as ‘New Lead Generation Form Response’. This step is vital as it determines when your workflow will activate.

  • Select ‘LinkedIn Lead Generation Forms’ as the trigger application.
  • Choose the event ‘New Lead Generation Form Response’.
  • Click on ‘Connect’ to establish a connection with your LinkedIn account.

After setting up the trigger, you will be able to test the connection. This ensures that your workflow will activate whenever a new lead is generated from LinkedIn, making the process seamless.


3. Mapping Lead Data to Runo for Allocation

Mapping lead data is a crucial step in the automation process. After successfully connecting LinkedIn to Make, the next step is to allocate the lead information to Runo. You will need to set Runo as the action application and select ‘Create Allocation’ as the action event. using Pabbly Connect

To connect Runo to Make, you will require an API key from your Runo account. Log into Runo, navigate to the admin panel, and generate a new API key. This key will allow Make to communicate with Runo and create allocations based on the data received from LinkedIn.

  • Log into Runo and access the admin panel.
  • Generate a new API key under API configuration.
  • Copy the API key and paste it into Make to establish the connection.

Once the API key is set, you can map the lead details received from LinkedIn to the corresponding fields in Runo. This mapping ensures that every new lead is automatically assigned to the right team member.


4. Testing the Integration for Successful Lead Allocation

Testing the integration is essential to ensure that the workflow functions as intended. After mapping the lead data, you need to run a test to confirm that the lead information is correctly sent to Runo. This step verifies that your automation is working properly. using Pabbly Connect

To test, submit a sample lead through your LinkedIn lead generation form. After submission, return to Make and check the response received from LinkedIn. If everything is set up correctly, you should see the lead’s information populated, ready for allocation.

After confirming the successful receipt of lead data, finalize the workflow by saving the configuration. This will activate the automation, allowing new leads from LinkedIn to be allocated automatically in Runo.


5. Finalizing the Automation and Using It Effectively

Finalizing the automation is the last step in this integration process. After testing and confirming that the workflow operates correctly, you can now use this automation to manage your leads effectively. With every new lead generated from LinkedIn, Runo will automatically receive the updated information. using Pabbly Connect

This integration not only saves time but also enhances the efficiency of your sales process. By automating lead allocation, your sales team can respond faster, increasing the likelihood of converting leads into customers. This streamlined approach to lead management is crucial for businesses relying on LinkedIn for lead generation.

In conclusion, integrating Automation with CRM Using Pabbly Connect, LinkedIn, and Runo allows for efficient lead management. By following the steps outlined in this tutorial, you can ensure that your sales team is always ready to act on new opportunities.

Conclusion

This guide summarizes the key points and helps you understand the essential features and benefits of using this tool.

Thanks for following along with this tutorial! Remember to subscribe to the channel for more helpful content like this.

If you found this guide useful, please consider giving it a thumbs up and sharing it with others who might benefit from it.


Integrating Google Sheets with Zoho Sheet Using Pabbly Connect: A Step-by-Step Guide

Learn how to integrate Google Sheets with Zoho Sheet seamlessly using Pabbly Connect. Follow this detailed tutorial for automated data management. Master proven automation processes with practical implementation examples and strategic recommendations you can apply immediately in your workflow.

Watch Step By Step Video Tutorial Below


1. Accessing Pabbly Connect for Integration

To begin integrating Google Sheets with Zoho Sheet, you need to access Pabbly Connect. Start by visiting the Pabbly Connect website where you can either sign up for a new account or log in if you are an existing user.

Once logged in, you will see the dashboard with various Pabbly applications. Click on the ‘Access Now’ button under Pabbly Connect to start setting up your workflow.


2. Creating a Workflow in Pabbly Connect

In this section, we will create a workflow in Pabbly Connect that connects Google Sheets with Zoho Sheet. Click on the ‘Create Workflow’ button located at the top right corner of the dashboard.

  • Enter a name for your workflow, such as ‘Connect Google Sheets with Zoho Sheet’.
  • Select a folder to save your workflow, for instance, ‘Google Sheets Automations’.
  • Click on the ‘Create’ button to finalize the workflow setup.

After creating the workflow, you will see two sections: Trigger and Action. The trigger defines when the automation starts, and the action defines what happens next.


3. Setting Up the Trigger with Google Sheets

To set up the trigger, select Google Sheets as the trigger application in Pabbly Connect. Choose the event as ‘New or Updated Spreadsheet Row’. This means that whenever a new lead is entered in Google Sheets, it will trigger the automation.

Pabbly Connect will provide you with a unique webhook URL. Copy this URL as you will need it to connect Google Sheets to Pabbly Connect.

  • Open your Google Sheets and click on ‘Extensions’.
  • Navigate to ‘Add-ons’ and then click on ‘Get Add-ons’.
  • Search for ‘Pabbly Connect Webhooks’ and install it if not already done.

After installation, go back to ‘Extensions’, select ‘Pabbly Connect Webhooks’, and click on ‘Initial Setup’. Paste the webhook URL and set the trigger column to the column where lead data will be entered.


4. Setting Up the Action with Zoho Sheet

Now that the trigger is set, it’s time to configure the action. Select Zoho Sheet as the action application in Pabbly Connect and choose ‘Create Row’ as the action event. This allows you to create a new record in Zoho Sheet when a new lead is added to Google Sheets.

To connect Zoho Sheet with Pabbly Connect, click on the ‘Connect’ button. You will be prompted to enter your Zoho domain, which can be found in the URL of your Zoho Sheet.

Enter the Zoho domain and click ‘Save’. Authorize Pabbly Connect to access your Zoho Sheet. Select the workbook and worksheet where you want the data to be saved.

After mapping the required fields from Google Sheets to Zoho Sheet, click on the ‘Save and Send Test Request’ button to test the connection. If successful, you will see a confirmation message.


5. Final Testing of the Integration

To ensure that your integration between Google Sheets and Zoho Sheet via Pabbly Connect is working correctly, enter a new lead’s details into your Google Sheet. This should trigger the automation.

Check your Zoho Sheet to confirm that the new lead details have been successfully created. You should see the first name, last name, email, and phone number accurately reflected in Zoho Sheet.

This process demonstrates how Pabbly Connect effectively automates data entry between Google Sheets and Zoho Sheet, saving time and reducing manual errors. You can repeat this process for any new leads added to your Google Sheets.


Conclusion

In this tutorial, we explored how to integrate Google Sheets with Zoho Sheet using Pabbly Connect. This automation streamlines data management, ensuring that your sales team always has the most up-to-date information for analysis and decision-making.

Ensure you check out Pabbly Connect to create business automation workflows and reduce manual tasks. Pabbly Connect currently offer integration with 2,000+ applications.

Integrate WP Funnels with Google Chat Using Pabbly Connect

Learn how to integrate WP Funnels with Google Chat using Pabbly Connect to automate your workflows effectively. Follow this detailed step-by-step tutorial. Explore systematic approaches to creating efficient automation solutions that convert technical concepts into practical, implementable instructions.

Watch Step By Step Video Tutorial Below


1. Setting Up Pabbly Connect for WP Funnels Integration

To start integrating WP Funnels with Google Chat, you need to set up Pabbly Connect. This platform acts as the bridge to automate your workflows. First, access your Pabbly Connect account and navigate to the dashboard.

Once you are on the dashboard, click on the ‘Create Workflow’ button. This will allow you to set up the trigger and action for your integration. In this case, your trigger will be WP Funnels and the action will be Google Chat.


2. Selecting Trigger Event in Pabbly Connect

After creating the workflow in Pabbly Connect, the next step is to select the trigger application. Choose WP Funnels as your trigger application. You will then need to specify the event that will initiate the workflow.

  • Select ‘After Opt-in Form Submit’ as the trigger event.
  • Copy the webhook URL provided by Pabbly Connect.
  • Follow the instructions to set up the connection.

With the trigger event selected, you will now be able to capture data from WP Funnels whenever a user submits the opt-in form. This data will be sent to Pabbly Connect automatically.


3. Configuring WP Funnels to Work with Pabbly Connect

Next, you need to configure WP Funnels to ensure it works seamlessly with Pabbly Connect. First, go to your WordPress dashboard and navigate to the WP Funnels plugin.

In the plugin settings, enable the Pabbly Connect integration. You will then need to create a new funnel or select an existing one. After selecting the funnel, go to the integration settings and paste the webhook URL you copied earlier from Pabbly Connect.

  • Name your integration (e.g., ‘New Submission’).
  • Select the event as ‘After Opt-in Form Submit’.
  • Save the settings to finalize the integration.

Now that WP Funnels is configured, it will send data to Pabbly Connect every time the opt-in form is submitted, ensuring a smooth data flow.


4. Testing the Integration Between WP Funnels and Google Chat

With both WP Funnels and Pabbly Connect configured, it’s time to test the integration. Go back to your WP Funnels form and submit a test entry. This will trigger the workflow you set up earlier.

Once the form is submitted, return to Pabbly Connect and check for the webhook response. You should see the details you entered in the form captured in the Pabbly Connect dashboard, confirming that the integration is successful.

After confirming the data has been captured, you can proceed to set up the action application, which in this case will be Google Chat. This will allow you to send notifications to your team automatically.


5. Setting Up Google Chat as the Action in Pabbly Connect

The final step is to configure Google Chat as the action application in Pabbly Connect. After the successful test, go back to your Pabbly Connect workflow and select Google Chat as the action application.

Choose the action event that you want to perform, such as sending a message to a specific chat space. Fill in the required fields with the data captured from the opt-in form, including user details like name and email.

Select the chat space where the message will be sent. Customize the message format as needed. Save the action settings to complete the setup.

Now, every time a user submits the opt-in form in WP Funnels, a message will be sent to your Google Chat space automatically, streamlining your workflow and improving communication.


Conclusion

This tutorial has shown you how to integrate WP Funnels with Google Chat using Pabbly Connect. By following these steps, you can automate your workflows and improve your team’s efficiency. With Pabbly Connect, you can easily connect multiple applications without any coding skills, making it a powerful tool for your business.

Ensure you check out Pabbly Connect to create business automation workflows and reduce manual tasks. Pabbly Connect currently offer integration with 2,000+ applications.

Integrating Google with Pabbly Connect: A Step-by-Step Guide

Learn how to seamlessly integrate Google with Pabbly Connect to automate your workflows and create leads effectively. Follow our detailed tutorial for step-by-step instructions. Follow this definitive guide to creating powerful automated workflows with straightforward, efficiency-focused solutions that save valuable time.

Watch Step By Step Video Tutorial Below


1. Setting Up Pabbly Connect for Google Integration

To begin integrating Google with Pabbly Connect, you first need to access Pabbly Connect. This is a no-code automation tool that allows you to create workflows between various applications including Google.

Start by signing into your Pabbly account. If you do not have an account, you can sign up for free. Once logged in, navigate to the Pabbly Connect dashboard where you can see all your workflows.


2. Creating a Workflow with Google Sheets

To create a workflow that involves Google, select Google Sheets as your trigger application. This will allow you to automate tasks based on new entries in your Google Sheets. using Pabbly Connect

  • Select the specific Google Sheets file you want to connect.
  • Choose the trigger event, such as ‘New Row’ which activates when a new row is added.
  • Map the fields from your Google Sheets to the fields in Pabbly Connect.

After setting the trigger, proceed to connect your Google account by following the prompts. Ensure that you grant the necessary permissions for Pabbly Connect to access your Google data.


3. Configuring Webhook for Google Integration

Next, you need to configure the webhook to send data from Google Sheets to Pabbly Connect. This is crucial for the automation process. using Pabbly Connect

In your Pabbly Connect dashboard, click on ‘Add a New Connection’ and select Webhook. Copy the generated URL and go back to Google Sheets to set it up in the Extensions menu.

  • Click on Extensions, then on Add-ons, and select Get Add-ons.
  • Search for Pabbly Connect and install it.
  • Once installed, configure the webhook by pasting the copied URL.

Make sure to set the trigger column correctly so that every time a new entry is made, the data is sent to Pabbly Connect through the webhook.


4. Testing Your Google Integration

After setting up the integration, it’s important to test the workflow. This ensures that data flows correctly from Google Sheets to Pabbly Connect. using Pabbly Connect

Add a new row in your Google Sheets with dummy data. This should trigger the webhook and send the data to Pabbly Connect. You can check the Pabbly Connect dashboard to see if the data has been received successfully.

If everything works as expected, you will see the new lead created in Pabbly Connect. This confirms that the integration between Google Sheets and Pabbly Connect is functioning correctly.


Conclusion

Integrating Google with Pabbly Connect allows for seamless automation of workflows. By following these steps, you can easily create leads from Google Sheets entries, enhancing your productivity and efficiency.

Thanks for following along with this tutorial! Remember to subscribe to the channel for more helpful content like this.

If you found this guide useful, please consider giving it a thumbs up and sharing it with others who might benefit from it.

Utilizing Pabbly Connect with Google opens up numerous possibilities for automating your tasks, ensuring you never miss a lead again.

Integrating Go High Level with ConvertKit Using Pabbly Connect

Learn how to automate your email marketing by integrating Go High Level with ConvertKit using Pabbly Connect in this detailed tutorial. Develop expertise in application integration and learn how to design streamlined automation workflows using proven, simplified approaches.

Watch Step By Step Video Tutorial Below


1. Accessing Pabbly Connect to Start Integration

To begin integrating Go High Level with ConvertKit, you need to access Pabbly Connect. First, open your browser and search for Pabbly Connect. Once on the landing page, you have two options: sign in or sign up for free if you are a new user.

If you choose to sign up, it only takes a couple of minutes. You will receive 100 free tasks each month. If you already have an account, simply sign in and navigate to the Pabbly Connect dashboard where you can create a new workflow.


2. Creating a New Workflow in Pabbly Connect

Once you are in the Pabbly Connect dashboard, the next step is to create a new workflow. Click on the ‘Create Workflow’ button, which will prompt you to name your workflow. For this integration, you might name it ‘Create ConvertKit Subscriber on Go High Level Form Submission’. using Pabbly Connect

  • Click on the ‘Create’ button after naming your workflow.
  • Select the folder where you want to save your workflow.
  • You will see two boxes for Trigger and Action.

In this window, you will set up the trigger for your workflow. The trigger application will be Lead Connector V2, which connects with Go High Level forms. This setup is essential for automatically creating subscribers in ConvertKit when a form is submitted.


3. Setting Up the Trigger in Pabbly Connect

To set up the trigger, search for and select Lead Connector V2. You will then need to specify the trigger event, which is ‘Form Submitted’. This event will initiate the workflow when a form is submitted on Go High Level.

Next, you will need to copy the Webhook URL provided by Pabbly Connect. This URL acts as a bridge between Lead Connector V2 and Pabbly Connect. After copying the URL, navigate to your Go High Level account to set up the connection.

  • Select the sub-account in Go High Level where you want to create the workflow.
  • Go to Automation and create a new workflow.
  • Add the trigger as ‘Form Submitted’ and save it.

With this setup, every time a form is submitted in Go High Level, it will trigger the action in Pabbly Connect.


4. Adding the Action Step in Pabbly Connect

After setting up the trigger, it’s time to add the action step. The action application will be ConvertKit, where you will create a new subscriber. Select ‘Add Subscriber to a Sequence’ as the action event.

To connect ConvertKit with Pabbly Connect, you will need to provide your API key and API secret. Log into your ConvertKit account and navigate to Account Settings to retrieve these details. Once you have copied the API key and secret, paste them into Pabbly Connect and save the connection.

Select the sequence ID in ConvertKit where you want to add the subscriber. Map the fields from the Go High Level form submission to the ConvertKit fields. Ensure that all required fields like first name, last name, and email are correctly mapped.

This mapping allows you to automatically add subscribers to your ConvertKit list as new leads come in through your Go High Level forms.


5. Testing the Integration and Finalizing

With the workflow set up, it’s crucial to test the integration. Go back to your Go High Level form and submit a test entry. For example, fill in the name ‘John Doe’ and an email address like ‘[email protected]’.

After submission, return to Pabbly Connect to see if the webhook response has been received. If successful, you should see the details of the form submission. This confirms that the integration is working as intended, and the subscriber is added to ConvertKit.

Repeat the test with another lead, for example, ‘Michael Caris’. Check ConvertKit to ensure that this new subscriber is also added correctly. This process shows how Pabbly Connect automates the addition of subscribers based on form submissions, enhancing your email marketing strategy.


Conclusion

In this tutorial, we explored how to use Pabbly Connect to integrate Go High Level with ConvertKit, automating the process of adding new subscribers. By following these steps, you can streamline your email marketing efforts effectively.

Ensure you check out Pabbly Connect to create business automation workflows and reduce manual tasks. Pabbly Connect currently offer integration with 2,000+ applications.

Automate Dynamic PDF Creation with Pabbly Connect: A Step-by-Step Guide

Learn how to automate the creation of dynamic PDFs using Pabbly Connect, Google Docs, and Notion. Streamline your workflow today! Revolutionize your productivity approach with just a few strategic clicks. Uncover professional methods for connecting applications and creating workflows that reclaim hours of your week.

Watch Step By Step Video Tutorial Below


1. Accessing Pabbly Connect for Automation

To begin automating dynamic PDFs, you need to access Pabbly Connect. This platform simplifies the integration of various applications like Notion and Google Docs.

First, visit the Pabbly Connect website and sign in. If you’re a new user, you can sign up for free and get 300 tasks every month to explore the software. Once logged in, you will see the dashboard where you can create workflows.


2. Creating a Workflow in Pabbly Connect

In this section, you will create a workflow to automate the PDF creation process. Using Pabbly Connect, click on the ‘Create Workflow’ button located at the top right corner of the dashboard.

  • Name your workflow, for example, ‘Automatically Create Dynamic PDFs Using Notion and Google Docs.’
  • Select a folder where your workflow will be saved.
  • Click on the create button to finalize your workflow setup.

After creating a workflow, you will see the trigger and action setup options. This is where you will define how the automation will work.


3. Setting Up the Trigger with Notion

Next, you will set up Notion as the trigger application in Pabbly Connect. This means that every time a new entry is added in Notion, the workflow will be activated.

Select Notion as the trigger application and choose the event as ‘New Database Item.’ This action will capture new entries from your Notion database.

  • Connect your Notion account by clicking on ‘Connect’ and then ‘Add New Connection.’
  • Select the pages you want to connect and allow access.
  • Select your database named ‘New Employees Details.’

Once the trigger is set, any new employee details added to Notion will trigger the workflow, allowing for automated PDF creation.


4. Creating a Document in Google Docs

Now that the trigger is set, you will create a document in Google Docs using the details from Notion. This step is crucial for generating a personalized welcome letter.

In Pabbly Connect, select Google Docs as your action application and choose the event as ‘Create Document from Template.’ This allows you to use a pre-defined template for your welcome letters.

Connect your Google Docs account by clicking ‘Connect’ and then ‘Add New Connection.’ Select your welcome letter template from Google Docs. Map the employee’s name, joining date, and job title into the respective fields.

After setting up this action, every new entry in Notion will automatically create a personalized welcome letter in Google Docs.


5. Uploading the PDF to Google Drive

Finally, you will upload the generated PDF to Google Drive. This step ensures that your welcome letters are easily accessible.

In Pabbly Connect, add another action step and select Google Drive. Choose the action event as ‘Upload File.’ This will allow you to upload the PDF file created in the previous step.

Connect Google Drive by clicking ‘Connect’ and selecting your existing connection. Map the PDF URL you received from the Google Docs response. Specify the folder ID where the PDF should be uploaded.

Once this step is completed, your automated process will be fully functional, allowing for seamless creation and storage of welcome letters for new employees.


Conclusion

By following these steps, you can automate the creation of dynamic PDFs using Pabbly Connect with Notion and Google Docs. This integration saves time and ensures consistency in your welcome letters.

Ensure you check out Pabbly Connect to create business automation workflows and reduce manual tasks. Pabbly Connect currently offer integration with 2,000+ applications.

Integrating Webflow with Google Contacts Using Pabbly Connect

Learn how to integrate Webflow with Google Contacts using Pabbly Connect through webhooks. Step-by-step guide on setting up the connection for seamless automation. Master proven automation processes with practical implementation examples and strategic recommendations you can apply immediately in your workflow.

Watch Step By Step Video Tutorial Below


1. Setting Up Webflow Webhook with Pabbly Connect

To integrate Webflow with Google Contacts, we need to set up a webhook using Pabbly Connect. First, log into your Pabbly Connect account and select Webflow as the trigger application. This is crucial for capturing form submissions from your Webflow website.

After selecting Webflow, choose the trigger event as ‘New Form Submission.’ This allows you to capture data whenever a new form is filled out on your website. You will then receive a webhook URL from Pabbly Connect that will be used to connect to your Webflow account.


2. Connecting Webflow to Pabbly Connect

Next, we will connect Webflow to Pabbly Connect. Log into your Webflow account and navigate to your project settings. Here, you will find the option for ‘Apps and Integrations’ on the left sidebar.

  • Click on ‘Add Webhook’ to create a new webhook.
  • Select the trigger type as ‘Form Submission’ since we are capturing form responses.
  • Paste the webhook URL from Pabbly Connect into the designated field.

After saving the webhook, ensure that you publish your site to activate the connection. This step is essential for Pabbly Connect to start receiving data from your Webflow forms.


3. Testing the Integration with Pabbly Connect

Now that the webhook is set up, it’s time to test the integration. Go back to your Webflow site and fill out the form with dummy data. This will simulate a real form submission, allowing Pabbly Connect to capture the response.

Once you submit the form, return to Pabbly Connect to check if the data has been received. You should see the details like first name, last name, email, and phone number captured successfully.


4. Setting Up Google Contacts Action in Pabbly Connect

After testing the integration, the next step is to set up Google Contacts as the action application in Pabbly Connect. This means that every time there is a new form submission, a new contact will be created automatically in Google Contacts.

In Pabbly Connect, select Google Contacts as the action application and choose the action event as ‘Create Contact.’ You will need to map the fields from the Webflow form to the corresponding fields in Google Contacts to ensure the data flows correctly.

  • Map the first name from Webflow to the first name field in Google Contacts.
  • Map the last name accordingly.
  • Ensure the email and phone number fields are also mapped correctly.

Once the mapping is complete, save the action step. This setup ensures that every new form submission creates a new contact in your Google Contacts account seamlessly through Pabbly Connect.


5. Finalizing the Integration and Publishing

Finally, after setting up the action for Google Contacts, it’s time to finalize and publish your integration in Pabbly Connect. Check all the steps to ensure everything is configured correctly.

Once confirmed, click on the ‘Publish’ button in Pabbly Connect to activate the integration. This will allow the automation to run live, ensuring that each new form submission on your Webflow site is captured and sent to Google Contacts automatically.

With this setup, you have successfully integrated Webflow with Google Contacts using Pabbly Connect. Now, every time a user submits a form on your website, their information will be automatically added to your Google Contacts, streamlining your workflow and enhancing productivity.


Conclusion

In this tutorial, we explored how to integrate Webflow with Google Contacts using Pabbly Connect. By setting up webhooks and automating the contact creation process, you can enhance your business efficiency and ensure seamless data management.

Ensure you check out Pabbly Connect to create business automation workflows and reduce manual tasks. Pabbly Connect currently offer integration with 2,000+ applications.

Automate Proposal Creation with Pabbly Connect and ConvertBox

Learn how to automate proposal creation using Pabbly Connect and ConvertBox for seamless integration and improved efficiency. Discover hidden automation capabilities within your existing tools. This guide shows you how to connect your essential applications and permanently eliminate redundant manual processes.

Watch Step By Step Video Tutorial Below


1. Accessing Pabbly Connect for Integration

To start the integration process, we need to access Pabbly Connect. This platform allows for seamless automation between different applications, specifically ConvertBox and Pluto in this case. Open your browser and search for Pabbly Connect to reach its landing page.

Once on the landing page, you will see options to sign in or sign up. If you don’t have an account, click on the ‘Sign Up for Free’ button. This process is quick and grants you access to 100 free tasks each month. If you already have an account, simply sign in to access the dashboard.


2. Creating a Workflow in Pabbly Connect

After logging into Pabbly Connect, the next step is to create a new workflow. Click on the ‘Create Workflow’ button. A pop-up window will appear, prompting you to name your workflow. Name it something descriptive, like ‘Create Pluto Proposal on ConvertBox Form Submission.’ Click ‘Create’ to proceed.

  • Select ConvertBox as the trigger application.
  • Choose ‘New Lead Submission’ as the trigger event.
  • Copy the provided webhook URL for connecting ConvertBox.

Now, you have set up the trigger event that will initiate the workflow whenever a new lead submits a form through ConvertBox. This is a crucial step for the automation process.


3. Linking ConvertBox with Pabbly Connect

To link ConvertBox with Pabbly Connect, navigate to your ConvertBox account. Here, locate the form you created and click on ‘Edit.’ In the form settings, find the ‘Actions’ section and select ‘Go to Next Step’ as your action.

  • Add a new integration by clicking on the ‘Add Integration’ button.
  • Select ‘Webhook’ as your integration type.
  • Paste the webhook URL copied from Pabbly Connect.

After pasting the URL, click on the ‘Add Integration’ button to finalize the connection. This integration allows ConvertBox to send lead details directly to Pabbly Connect whenever a new form submission occurs.


4. Creating a Person in Pluto via Pabbly Connect

Now that ConvertBox is integrated with Pabbly Connect, the next step is to create a new person in Pluto using the lead details received. In your Pabbly Connect workflow, add an action step by selecting Pluto as the action application.

Choose ‘Create Person’ as the action event. You will need to connect Pluto with Pabbly Connect by providing your client ID, client secret, and business identifier. These details can be found in your Pluto dashboard. Once you have filled in all the necessary details, click ‘Save’ to establish the connection.

With this setup, every time a new lead submits a form through ConvertBox, Pabbly Connect will automatically create a corresponding person entry in your Pluto account, streamlining your lead management process.


5. Creating a Proposal in Pluto Using Pabbly Connect

The final step in this automation process is to create a proposal in Pluto for the newly created person. In Pabbly Connect, add another action step and select Pluto as the application again. This time, choose ‘Create Proposal’ as the action event. using Pabbly Connect

Map the required fields such as proposal name and template from the lead details captured from ConvertBox. Make sure to toggle on the mapping feature to ensure that the data is dynamically replaced with the new lead information each time a form is submitted.

Once you have completed the mapping, click ‘Save’ and send a test to verify that the proposal has been created successfully in Pluto. This automation ensures that every new lead receives a tailored proposal without manual intervention, enhancing your workflow efficiency.


Conclusion

In this tutorial, we explored how to automate the creation of proposals using Pabbly Connect and ConvertBox. By following the steps outlined, you can streamline your lead management process and ensure timely responses to potential clients. Automating these tasks not only saves time but also enhances your business efficiency.

Ensure you check out Pabbly Connect to create business automation workflows and reduce manual tasks. Pabbly Connect currently offer integration with 2,000+ applications.