Integrating Instagram Lead Ads with Keep and Microsoft Teams Using Pabbly Connect

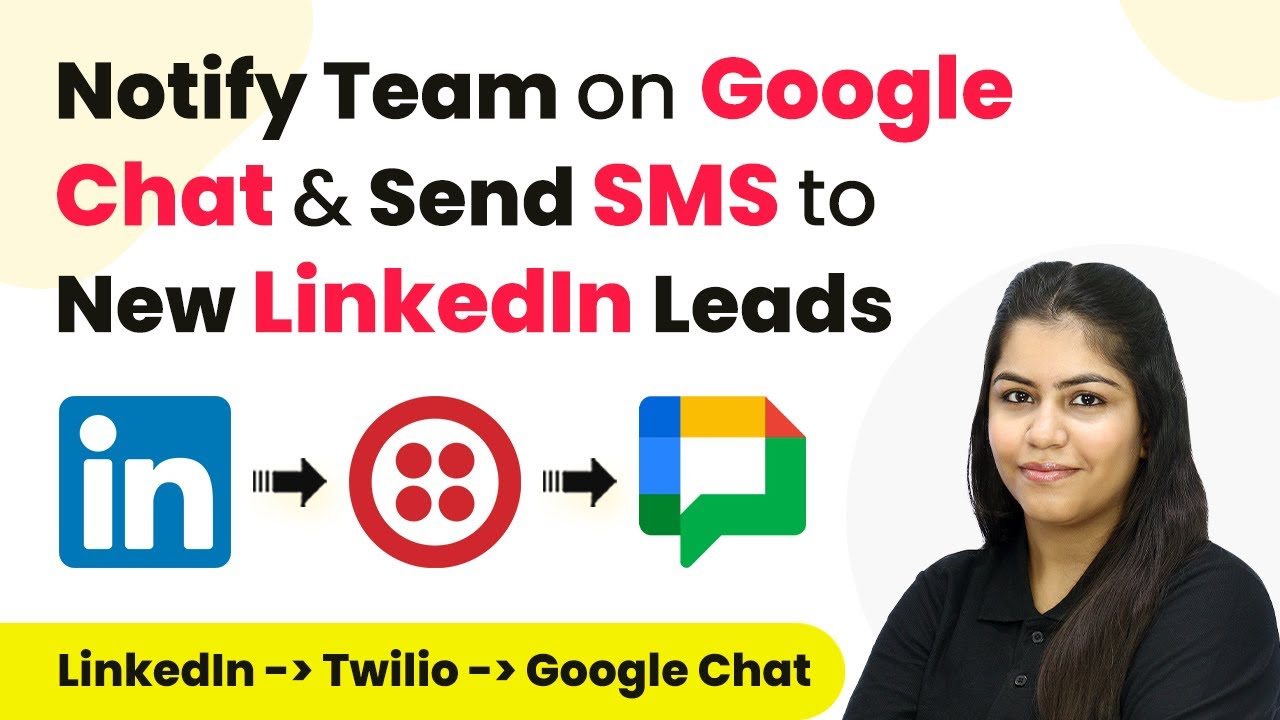
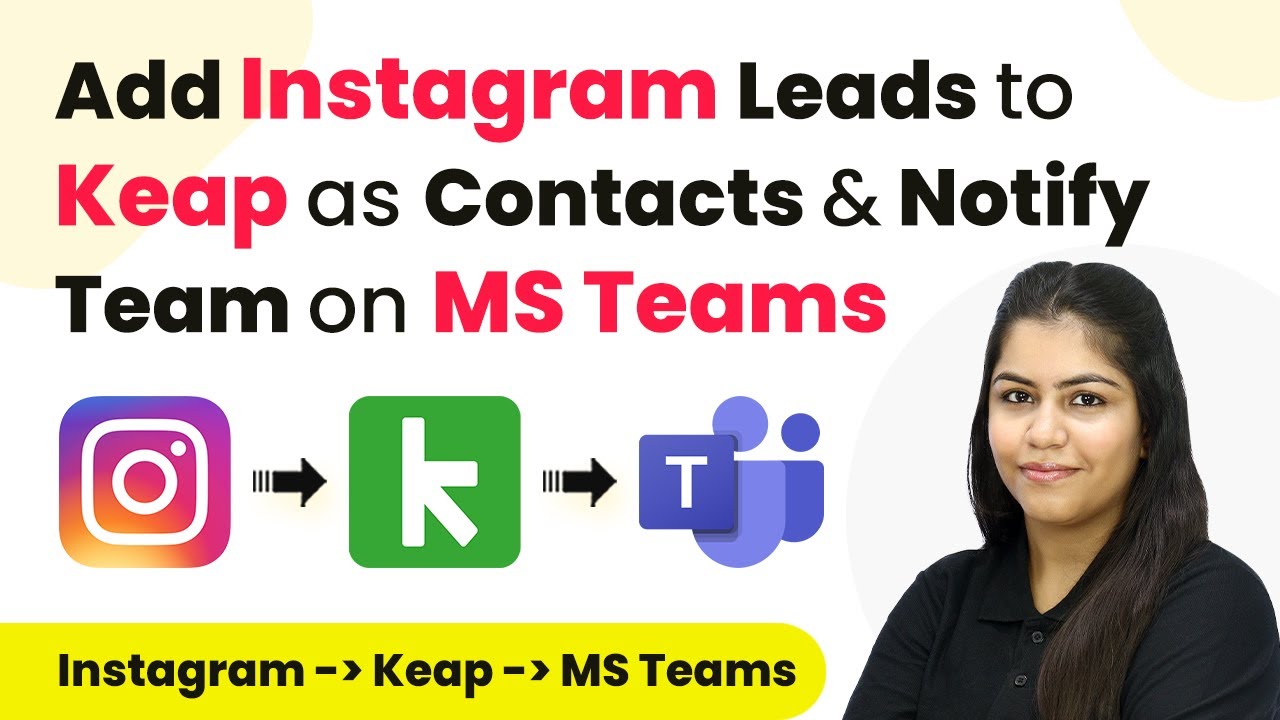
Learn how to use Pabbly Connect to automate lead management by integrating Instagram Lead Ads with Keep and Microsoft Teams. Step-by-step tutorial included. Develop expertise in application integration and learn how to design streamlined automation workflows using proven, simplified approaches.

Watch Step By Step Video Tutorial Below


1. Accessing Pabbly Connect for Integration

To start integrating Instagram Lead Ads with Keep and Microsoft Teams, first access Pabbly Connect. Open your browser and navigate to Pabbly’s official website. If you are a new user, click on ‘Sign up for free’ to create an account and receive 100 tasks free every month.

For existing users, click on ‘Sign In’. Once logged in, you will see various Pabbly applications. Click on ‘Access Now’ for Pabbly Connect to reach your dashboard. From here, you can create a new workflow for your integration.


2. Creating a Workflow in Pabbly Connect

In your Pabbly Connect dashboard, click on the ‘Create Workflow’ button. You will be prompted to name your workflow. Enter a name like ‘Instagram Leads to Keep and Microsoft Teams Notification’ and select a folder to save it in.

  • Click on ‘Create’ to proceed.
  • This will open the main automation window where you can set triggers and actions.

In this window, you will select the trigger application. For this integration, choose ‘Instagram Lead Ads’ as the trigger application. This ensures that whenever a new lead is generated, your workflow will be activated automatically.


3. Setting Up the Trigger for Instagram Lead Ads

After selecting Instagram Lead Ads as your trigger application in Pabbly Connect, you need to specify the trigger event. Choose ‘New Lead Instant’ to capture leads as soon as they are submitted. Click on ‘Connect’ to establish a connection.

If you have previously connected your Instagram account, select the existing connection. Otherwise, choose ‘Add a New Connection’. You will need to log into your Facebook account that is linked to your Instagram to complete this step.

  • Select your Facebook page associated with Instagram.
  • Choose the lead form you want to use for capturing leads.

Once you have selected the appropriate page and lead form, click on ‘Save and Send Test Request’. This will set up your trigger for the workflow.


4. Action Steps: Creating Contacts in Keep

With the trigger set, the next step is to create a new contact in Keep using the lead details captured by Pabbly Connect. Search for and select ‘Keep’ as your action application. Choose the action event as ‘Create or Update Contact’ and click on ‘Connect’.

Similar to the trigger setup, if you have an existing connection, select it. If not, create a new connection by allowing the necessary permissions. Once connected, map the lead details from the Instagram trigger to the corresponding fields in Keep.

Map the first name, last name, and email address from the Instagram lead details. Ensure all required fields are filled appropriately.

After mapping, click on ‘Save and Send Test Request’ to verify that a new contact is created in your Keep account.


5. Notifying the Team on Microsoft Teams

Finally, you want to notify your team on Microsoft Teams about the new lead. In Pabbly Connect, add another action step and select ‘Microsoft Teams’ as the application. Choose the action event as ‘Send Message in Channel’ and click on ‘Connect’.

Once connected, select the appropriate team and channel where you want to send the notification. Craft your message, including details about the new lead, such as their name and contact information. Use the mapping feature to insert dynamic lead data into your message.

Ensure the message clearly states the new lead’s details. Click ‘Save and Send Test Request’ to send the message.

Check your Microsoft Teams channel to confirm the message was sent successfully, completing the integration process.


Conclusion

This tutorial demonstrates how to effectively use Pabbly Connect to automate the integration of Instagram Lead Ads with Keep and Microsoft Teams. By following these steps, you can streamline lead management and enhance team communication, ultimately improving your business’s efficiency.

Ensure you check out Pabbly Connect to create business automation workflows and reduce manual tasks. Pabbly Connect currently offer integration with 2,000+ applications.

Integrating WooCommerce with Bravoo Contacts Using Pabbly Connect

Learn how to integrate WooCommerce with Bravoo contacts using Pabbly Connect. This step-by-step guide covers the entire process for seamless automation. Develop expertise in application integration and learn how to design streamlined automation workflows using proven, simplified approaches.

Watch Step By Step Video Tutorial Below


1. Accessing Pabbly Connect for Integration

To start integrating WooCommerce with Bravoo contacts, first access Pabbly Connect. Open your browser and type in ‘Pabbly.com/connect’ to reach the Pabbly Connect homepage. If you are an existing user, click on ‘Sign In’, or if you are new, select ‘Sign Up for Free’ to create an account and receive 100 free tasks monthly.

Once logged in, navigate to your dashboard. Here, locate and click on Pabbly Connect to access the integration workflow area. You can create a new workflow by clicking on the ‘Create Workflow’ button. Name your workflow appropriately, such as ‘Creating Bravoo Contact from WooCommerce Order’, and select the desired folder for organization.


2. Setting Up Trigger in WooCommerce

In this step, we will set WooCommerce as the trigger application in Pabbly Connect. Select WooCommerce and choose the trigger event as ‘New Order Created’. This setup will initiate the workflow whenever a new order is placed in your WooCommerce store.

  • Select ‘WooCommerce’ as the trigger application.
  • Choose ‘New Order Created’ as the trigger event.
  • Copy the provided webhook URL for integration.

Next, go to your WooCommerce dashboard. Click on ‘Settings’ from the WooCommerce menu, then navigate to the ‘Advanced’ tab. Here, select ‘Webhooks’ and edit the ‘New Order Created’ webhook. Paste the copied webhook URL into the delivery URL field and save the changes. This connection allows Pabbly Connect to receive data from WooCommerce whenever a new order is placed.


3. Testing WooCommerce Integration with Pabbly Connect

Now that the trigger is set, it’s time to test the integration between WooCommerce and Pabbly Connect. To do this, create a test order. Go back to your WooCommerce store, select a product, and proceed to checkout. Fill in the customer details, such as name, address, and email, and complete the order.

  • Choose a product and add it to your cart.
  • Fill in customer details like name and address.
  • Complete the checkout process to place the order.

After placing the order, return to Pabbly Connect and click on ‘Recapture Webhook Response’. This action will fetch the latest order data from WooCommerce. Verify that the response includes the correct order details, confirming that the integration is functioning properly.


4. Setting Up Bravoo Action in Pabbly Connect

With the WooCommerce trigger successfully set up, the next step is configuring the action in Pabbly Connect. Select Bravoo as the action application and choose ‘Create or Update Contact’ as the action event. This setup will create a new contact in Bravoo whenever a new WooCommerce order is placed.

To connect to Bravoo, click on ‘Add New Connection’ and enter your API key. You can generate this key from your Bravoo account under the SMTP and API settings. After pasting the API key, enter your domain, which typically looks like ‘app.bravoo.com’, and save the connection.


5. Mapping Data to Create Contacts in Bravoo

Now that the action is set, we need to map the data from WooCommerce to Bravoo. In Pabbly Connect, fill in the required fields for creating a contact. Use the mapping feature to pull data from the WooCommerce order response, such as the email address, first name, and last name of the customer.

For instance, map the email field to the customer’s email, the first name to their first name, and the last name to their last name. Ensure that you select the appropriate list in Bravoo where the contact will be stored. After mapping the fields, click on ‘Save and Send Test Request’ to create the contact in Bravoo.

Finally, check your Bravoo account under the contacts section to confirm that the new contact has been created successfully. This confirms that the integration between WooCommerce and Bravoo via Pabbly Connect is working seamlessly.


Conclusion

In this tutorial, we successfully integrated WooCommerce with Bravoo contacts using Pabbly Connect. By following the steps outlined, you can automate the contact creation process, making your workflow more efficient and streamlined. This integration not only saves time but also enhances your customer management capabilities.

Ensure you check out Pabbly Connect to create business automation workflows and reduce manual tasks. Pabbly Connect currently offer integration with 2,000+ applications.

Integrating Rocket.Chat with Pabbly Connect: A Step-by-Step Guide

Learn how to integrate Rocket.Chat with Pabbly Connect using webhooks for seamless automation. Follow this detailed tutorial for step-by-step instructions. This comprehensive guide reveals exactly how to connect your applications and automate repetitive tasks — accessible for professionals of all technical backgrounds.

Watch Step By Step Video Tutorial Below


1. Setting Up Webhooks in Rocket.Chat with Pabbly Connect

In this section, we will explore how to set up webhooks in Rocket.Chat using Pabbly Connect. Webhooks act as a bridge between Rocket.Chat and Pabbly Connect, allowing data to flow seamlessly between the two platforms. First, log into your Rocket.Chat account to begin the integration process.

After logging in, navigate to the Administration section on the left sidebar. Here, you will find the Integrations option. Click on it to access the integrations dashboard, which is crucial for connecting Rocket.Chat with Pabbly Connect.


2. Creating a New Integration in Rocket.Chat

Next, we will create a new integration in Rocket.Chat that will send data to Pabbly Connect. Click on the ‘New Integration’ button within the Integrations section. Here, you will need to configure the integration settings to ensure that events from Rocket.Chat trigger actions in Pabbly Connect.

  • Select the event trigger, such as ‘Room Created’ to receive notifications for new channels.
  • Enter a name for the integration, for example, ‘New Channel Notification’.
  • Paste the webhook URL provided by Pabbly Connect into the URL field.

Once you have filled in all necessary fields, save the integration. This step is crucial as it enables the webhook to send data to Pabbly Connect whenever a new channel is created in Rocket.Chat.


3. Testing the Integration with Pabbly Connect

After setting up the integration, it’s essential to test whether it works correctly. Go back to Pabbly Connect and check if the webhook is waiting for a response. To do this, create a new channel in your Rocket.Chat account.

Once you create a new channel, return to Pabbly Connect to see if it has received the webhook response. The response should include details such as the username, room ID, and other relevant data, confirming that the integration is successful.


4. Automating Further Actions with Pabbly Connect

With the integration established, you can now automate further actions in Pabbly Connect. For instance, you can set up actions to notify your team via Gmail or Slack whenever a new channel is created in Rocket.Chat. This is where the true power of Pabbly Connect shines.

To set up these actions, simply select the desired application in Pabbly Connect and configure the action settings. You can choose to send emails, post messages, or perform other automated tasks based on the trigger from Rocket.Chat.


Conclusion

In this tutorial, we explored how to integrate Rocket.Chat with Pabbly Connect using webhooks. By following these steps, you can automate notifications and streamline communication within your team. This integration not only enhances productivity but also keeps everyone informed in real time.

Ensure you check out Pabbly Connect to create business automation workflows and reduce manual tasks. Pabbly Connect currently offer integration with 2,000+ applications.

Integrating WhatsApp with Facebook Leads Using Pabbly Connect

Learn how to seamlessly integrate WhatsApp with Facebook leads using Pabbly Connect for automated messaging and team notifications. Revolutionize your productivity approach with just a few strategic clicks. Uncover professional methods for connecting applications and creating workflows that reclaim hours of your week.

Watch Step By Step Video Tutorial Below


1. Accessing Pabbly Connect for Integration

To start integrating WhatsApp with Facebook Leads, first, access Pabbly Connect by visiting the official website. You can sign up for a free account, which gives you access to 300 tasks each month. If you’re an existing user, simply sign in to your account.

Once signed in, you will be directed to the dashboard of Pabbly Connect. From here, you can create a new workflow that will automate sending WhatsApp messages to leads collected from Facebook ads. This process enhances customer engagement and streamlines communication.


2. Creating a Workflow in Pabbly Connect

To create a workflow in Pabbly Connect, click on the ‘Create Workflow’ button located at the top right corner of the dashboard. You will then be prompted to name your workflow. For this integration, name it ‘Send WhatsApp Message to Facebook Leads and Notify Team on Slack.’ You can also select a folder for better organization.

  • Click on ‘Create’ to finalize your workflow.
  • Select your trigger application as Facebook Lead Ads.
  • Choose the trigger event as ‘New Lead Instant’.

After setting the trigger, you can connect your Facebook account to Pabbly Connect. This allows the platform to capture lead details whenever someone submits their information through your Facebook lead ad.


3. Setting Up Facebook Lead Ads in Pabbly Connect

In this step, you will configure the Facebook Lead Ads trigger within your workflow on Pabbly Connect. After selecting your Facebook account, choose the specific page and lead form you want to connect. For instance, if your page is named ‘Natural Glow Skin Care,’ select it from the dropdown.

Next, you will need to test the connection by generating a test lead. This is done through the Meta for Developers Lead Testing Tool. Here’s how to do it:

  • Select your page and lead form in the testing tool.
  • Submit a test lead with dummy data.
  • Return to Pabbly Connect to confirm that the lead details have been captured.

Once the test lead is successfully received, you can move on to the action steps of your workflow.


4. Sending WhatsApp Messages with WhatsApp Cloud API

For the next action in your workflow, select the WhatsApp Cloud API as your action application in Pabbly Connect. Choose the action event as ‘Send Template Message’. This allows you to send a personalized message to the lead that just filled out the form.

To connect your WhatsApp Cloud API with Pabbly Connect, you’ll need to enter your access token, phone number ID, and WhatsApp business account ID. Make sure these details are accurate to ensure successful message delivery. After entering the required information, select your message template that contains the discount offer or any other relevant information.

Map the recipient’s mobile number to dynamically insert the lead’s phone number. Use variables in your message template to personalize the message for each lead. Test the WhatsApp message to ensure it is sent correctly.

Once the WhatsApp message is sent successfully, you can proceed to notify your team on Slack about the new lead.


5. Notifying Your Team on Slack

To complete your workflow, add another action step to send a message to your Slack channel using Pabbly Connect. Select Slack as the action application and choose the action event as ‘Send Channel Message.’ This will notify your team whenever a new lead is captured.

Connect your Slack account to Pabbly Connect by entering the required token type. You can specify which channel to send the message to, such as ‘Natural Glow Skin Care.’ Customize the message to include lead details like name, email, and phone number.

Map the lead’s information within the message for personalization. Test the Slack message to confirm it is sent correctly.

After testing, you will have successfully set up your automation workflow, allowing you to communicate effectively with leads and keep your team informed.


Conclusion

This tutorial demonstrated how to integrate WhatsApp with Facebook leads using Pabbly Connect. By automating messages to leads and notifying your team on Slack, you can enhance communication and improve customer engagement.

Ensure you check out Pabbly Connect to create business automation workflows and reduce manual tasks. Pabbly Connect currently offer integration with 2,000+ applications.

Automate Your Email Marketing with Pabbly Connect: A Step-by-Step Guide

Learn how to automate your email marketing campaigns using Pabbly Connect with Simply, The Happening, Mailchimp, and more in this detailed tutorial. Explore systematic approaches to creating efficient automation solutions that convert technical concepts into practical, implementable instructions.

Watch Step By Step Video Tutorial Below


1. Setting Up Pabbly Connect for Email Automation

To automate your email marketing using Pabbly Connect, start by logging into your Pabbly Connect account. Once logged in, you will see two main sections: triggers and actions. The trigger is what initiates the workflow, while the action is the response that follows. In this case, we will be integrating Mailchimp with Pabbly Connect to streamline our email marketing efforts.

Using Pabbly Connect, you can easily connect Mailchimp with various applications. This integration allows you to automate tasks such as syncing subscriber data, sending targeted emails, and managing contact lists without manual intervention. Here’s how to get started:

  • Log into your Pabbly Connect account.
  • Navigate to the triggers section to set up Mailchimp as your trigger application.
  • Select the trigger event that will start your automation.

By following these steps, you will successfully set up Pabbly Connect to automate your email marketing tasks.


2. Creating a Mailchimp Trigger in Pabbly Connect

To create a trigger in Pabbly Connect, select Mailchimp as your trigger application. You will then choose the specific trigger event, such as ‘New Subscriber’. This event will activate the workflow each time a new subscriber is added to your Mailchimp account.

After selecting the trigger event, you will receive a webhook URL from Pabbly Connect. This URL acts as a bridge between Mailchimp and Pabbly Connect, allowing data to flow seamlessly. Follow these steps to complete the setup:

  • Copy the webhook URL provided by Pabbly Connect.
  • Log into your Mailchimp account and navigate to the audience settings.
  • Paste the webhook URL into the Mailchimp settings to create a new webhook.

Once the webhook is set up, Pabbly Connect will begin capturing subscriber data automatically whenever a new subscriber joins your Mailchimp list.


3. Testing the Integration Between Mailchimp and Pabbly Connect

After setting up the webhook, it’s essential to test the integration to ensure everything is functioning correctly. You can do this by adding a new subscriber to your Mailchimp list. This action will trigger the webhook and send the subscriber details to Pabbly Connect.

To test the integration, follow these steps:

Create a new subscriber in Mailchimp using a test email address. Return to Pabbly Connect and click on ‘Recapture Webhook Response’. Verify that the new subscriber’s details appear in Pabbly Connect.

This test confirms that the integration is working, allowing you to automate your email marketing processes efficiently.


4. Adding Action Steps in Pabbly Connect

Once your Mailchimp trigger is successfully set up and tested, you can add action steps in Pabbly Connect. For example, you might want to add the subscriber details to Google Sheets or send a WhatsApp message. This step enhances your email marketing automation by integrating additional applications.

To add an action in Pabbly Connect, follow these steps:

Select the application you want to integrate as an action (e.g., Google Sheets). Choose the action event, such as ‘Add Row’. Map the fields from the Mailchimp subscriber data to the Google Sheets columns.

This process allows you to manage your subscriber information effectively across platforms, making your marketing efforts more efficient.


5. Conclusion: Streamlining Email Marketing with Pabbly Connect

In conclusion, Pabbly Connect is an invaluable tool for automating your email marketing campaigns. By integrating Mailchimp with other applications like Google Sheets and WhatsApp, you can enhance your marketing workflows significantly. This automation saves time and reduces manual tasks, allowing you to focus on growing your business.

Ensure you check out Pabbly Connect to create business automation workflows and reduce manual tasks. Pabbly Connect currently offer integration with 2,000+ applications.

With the steps outlined in this tutorial, you can easily set up and configure Pabbly Connect to streamline your email marketing efforts. Start automating today and experience the benefits of efficient email management.


Integrating Jotform with Zoho Marketing Using Pabbly Connect: A Step-by-Step Guide

Learn how to seamlessly integrate Jotform with Zoho Marketing using Pabbly Connect for automated customer data management. Discover how to seamlessly connect your essential tools through accessible instructions that make powerful automation available to professionals at every skill level.

Watch Step By Step Video Tutorial Below


1. Accessing Pabbly Connect for Jotform and Zoho Integration

To begin integrating Jotform with Zoho Marketing, first access Pabbly Connect. This platform allows you to automate processes efficiently. Start by visiting the Pabbly Connect website and signing into your account. If you are a new user, you can sign up for free and receive 100 free tasks every month.

Once logged in, you will see the Pabbly Connect dashboard. Here, click on the ‘Access Now’ button for Pabbly Connect. This will take you to the workflow creation area where you can set up your automation between Jotform and Zoho Marketing.


2. Creating a Workflow in Pabbly Connect

After accessing Pabbly Connect, the next step is to create a workflow. Click on the ‘Create Workflow’ button located in the top right corner of the dashboard. A dialog box will appear asking for the workflow name and folder selection.

  • Name your workflow as ‘Create Zoho Marketing Subscriber on Jotform Submission’.
  • Select the folder where you want to save this workflow, such as ‘Jotform Automations’.

After naming your workflow and selecting a folder, click on the ‘Create’ button. This will establish the foundation for your automation process, which consists of a trigger and an action.


3. Setting Up the Trigger in Pabbly Connect

Now, it’s time to set up the trigger in Pabbly Connect. Select Jotform as your trigger application. The trigger event should be set to ‘New Response’. This means that whenever a new form submission occurs in Jotform, it will trigger the workflow.

Upon selecting the trigger application and event, Pabbly Connect will provide you with a unique webhook URL. Copy this URL as you will need it to connect your Jotform to Pabbly Connect. Navigate to your Jotform account, open the form you created, and go to the settings.

  • Click on the ‘Settings’ button in Jotform.
  • Select ‘Integrations’ from the left panel.
  • Search for ‘Webhooks’ and click on it.

Paste the copied webhook URL into the field provided and click on the ‘Complete Integration’ button. This will establish the connection between Jotform and Pabbly Connect.


4. Testing the Integration with Jotform

With the webhook successfully added, it’s time to test the integration. In Pabbly Connect, you will see a message indicating that it is waiting for a webhook response. To test, publish your Jotform and fill it out with dummy data.

For example, input the following details:

First Name: Smart Last Name: Demo Email: [email protected] City: Indore State: Madhya Pradesh

After filling out the form, click on the submit button. Return to Pabbly Connect and check if the response from Jotform has been captured successfully. This confirms that the trigger is working correctly.


5. Setting Up the Action Step in Zoho Marketing

Now that the trigger is set, it’s time to configure the action step in Pabbly Connect. Select Zoho Marketing as the action application and choose the action event as ‘Subscribe Lead’. This will allow you to add the Jotform submitter as a subscriber in your Zoho Marketing account.

Click on the ‘Connect’ button and choose to add a new connection. Enter your Zoho domain, which you can find in the URL of your Zoho account. After pasting your domain, click on the ‘Save’ button and authorize the connection.

Select the list key you want to add the subscriber to, such as ‘Inova Tech’. Map the subscriber’s email, first name, last name, and phone number from the previous response captured from Jotform.

After mapping the required fields, click on the ‘Save and Send Test Request’ button. You should receive a confirmation message indicating that a confirmation email has been sent to the new subscriber.


Conclusion

In this tutorial, we successfully integrated Jotform with Zoho Marketing using Pabbly Connect. This automation allows you to effortlessly manage customer data by adding new subscribers directly to your marketing list upon form submission. With Pabbly Connect, you can streamline your workflows and enhance your customer engagement.

Ensure you check out Pabbly Connect to create business automation workflows and reduce manual tasks. Pabbly Connect currently offer integration with 2,000+ applications.

Automate Document Sending with Pabbly Connect: Google Forms and Flexi Sign Integration

Learn how to automate the document sending process using Pabbly Connect, Google Forms, and Flexi Sign for efficient e-signature requests. Revolutionize your productivity approach with just a few strategic clicks. Uncover professional methods for connecting applications and creating workflows that reclaim hours of your week.

Watch Step By Step Video Tutorial Below


1. Accessing Pabbly Connect for Integration

To automate the document sending process, first, access Pabbly Connect by visiting its website. You can sign in if you are an existing user or click on ‘Sign Up for Free’ to create a new account. New users receive 100 free tasks each month, which is great for testing automation.

Once logged in, navigate to the dashboard. Here, you can manage all your workflows. To create a new workflow, click on the ‘Create Workflow’ button. You will be prompted to name your workflow, such as ‘Automatically Create and Send Flexi Sign Document on Google Form Submission.’ After naming, select a folder to organize your workflow.


2. Setting Up Google Forms as a Trigger in Pabbly Connect

Now, set up the trigger for your workflow using Google Forms. In Pabbly Connect, select Google Forms as your trigger application. Choose the trigger event as ‘New Response Received’. This event will initiate the workflow whenever a new form submission occurs.

  • Select Google Forms as the trigger application.
  • Choose the trigger event: New Response Received.
  • Copy the webhook URL provided by Pabbly Connect.

After copying the webhook URL, go to your Google Form and navigate to the responses section. Click on ‘View in Sheets’ to link your form to a Google Sheet. This is where all responses will be recorded. You can create a new spreadsheet or use an existing one. Ensure that your form captures all necessary fields like name, email, and response agreement for document sending.


3. Connecting Google Sheets to Pabbly Connect

With your Google Sheet set up, you need to connect it back to Pabbly Connect. In Google Sheets, go to the Extensions menu and select ‘Add-ons’. Search for and install the Pabbly Connect Webhooks add-on. Once installed, refresh your spreadsheet to access the add-on features.

  • Open Extensions > Add-ons > Pabbly Connect Webhooks.
  • Select ‘Initial Setup’ from the add-on menu.
  • Paste the copied webhook URL and set the trigger column (e.g., F).

After completing the initial setup, test the connection by submitting a dummy response through your Google Form. This will ensure that data is captured in the Google Sheet and sent to Pabbly Connect successfully. Check for a successful response in your Pabbly Connect dashboard.


4. Filtering Responses in Pabbly Connect

Next, you will need to set up a filter condition in Pabbly Connect. This ensures that documents are only sent to clients who agree to receive them. Add a filter action step after your Google Sheets trigger.

Set the filter value to check if the response to the question ‘Do you agree to receive the document via email for electronic signature?’ is equal to ‘Yes’. Only if this condition is met will the workflow continue. If the response is ‘No’, the workflow will stop here.

Add a filter step after the Google Sheets trigger. Select the label from the previous response. Set filter type to ‘Equal to’ and value to ‘Yes’.

By applying this filter, you ensure that only relevant submissions trigger the next action, which is sending the document for e-signature. Test this filter to confirm that it works correctly before proceeding.


5. Sending Documents for E-Signature Using Flexi Sign

Finally, set up the action step to send the document using Flexi Sign. In Pabbly Connect, select Flexi Sign as your action application. Choose the action event ‘Create Document’ to initiate the document sending process.

To connect your Flexi Sign account, you will need an API key. Log into your Flexi Sign account, navigate to the integrations section, and copy your API key. Paste this key into the appropriate field in Pabbly Connect to establish the connection.

Select Flexi Sign as the action application. Choose the template ID for the document. Map the client’s name and email for personalized messages.

Once all details are mapped, send a test request to ensure the document is sent successfully. Check the recipient’s email to confirm receipt of the document for e-signature. This completes the automation process, allowing you to efficiently send proposals to clients based on their form submissions.


Conclusion

In this tutorial, we demonstrated how to automate sending documents using Pabbly Connect, Google Forms, and Flexi Sign. This integration streamlines the e-signature process, ensuring timely responses to client proposals while eliminating manual tasks.

Ensure you check out Pabbly Connect to create business automation workflows and reduce manual tasks. Pabbly Connect currently offer integration with 2,000+ applications.

Integrating Insta Mojo with Pabbly Connect for Email Marketing and Google Sheets

Learn how to integrate Insta Mojo with Pabbly Connect to automate email marketing and Google Sheets updates for payments. Step-by-step guide included. Navigate the automation landscape confidently with clear, structured guidance suitable for professionals regardless of prior technical experience.

Watch Step By Step Video Tutorial Below


1. Accessing Pabbly Connect for Integration

To begin the integration process, access Pabbly Connect by visiting the official website. If you’re a new user, you can sign up for a free account that allows 100 tasks each month. Existing users can simply log in to their account.

Once logged in, you’ll see the dashboard where you can start creating workflows. Click on the ‘Create Workflow’ button to initiate the integration process. This is where you will set up the automation to connect Insta Mojo, Pabbly Email Marketing, and Google Sheets.


2. Creating a Workflow in Pabbly Connect

In Pabbly Connect, after clicking on the ‘Create Workflow’ button, you need to name your workflow. For example, name it ‘Create P Email Marketing Subscriber on Insta Mojo Payment and Add Details in Google Sheets’. Select a specific folder where you want to save this workflow.

  • Name your workflow appropriately.
  • Select a folder from your Pabbly Connect account.
  • Click on ‘Create’ to finalize the setup.

After creating the workflow, you will see two sections: Trigger and Action. The Trigger section captures when a new payment is made, while the Action section defines what happens next, such as adding a subscriber to your email list and recording the payment in Google Sheets.


3. Setting Up the Trigger with Insta Mojo

For the trigger, select ‘Insta Mojo V1’ as the application and ‘New Sale’ as the trigger event. This will allow Pabbly Connect to capture payment details whenever a customer makes a purchase through Insta Mojo.

After selecting the trigger event, Pabbly Connect will generate a unique webhook URL. Copy this URL and paste it into your Insta Mojo account under the settings for the specific payment page you want to connect.

  • Navigate to your Insta Mojo account.
  • Find the settings for your payment page and paste the webhook URL.
  • Select ‘Successful Payments’ as the information to send.

After saving the settings in Insta Mojo, make a test payment to ensure that Pabbly Connect captures the payment details correctly. You should see a successful response in your workflow indicating the payment was captured.


4. Configuring Actions in Pabbly Connect

Once the trigger is set, it’s time to configure the actions. First, select ‘P Email Marketing’ as the action application and choose ‘Add Subscriber’ as the action event. This means that every time a payment is made, the customer will be added as a subscriber to your email list.

To connect your P Email Marketing account, you will need an API token. Click on the link provided in Pabbly Connect to generate this token and paste it into the connection settings. After connecting, select the list where you want to add the new subscriber.

Select the email marketing list to add subscribers. Map the customer’s email and name from the previous step. Test the action to ensure it works correctly.

After successfully adding the subscriber, you can proceed to the next action of logging the payment details in Google Sheets.


5. Logging Payment Details in Google Sheets

For the final action, select ‘Google Sheets’ as the application and choose ‘Add New Row’ as the action event. This integration will log all payment details into your designated Google Sheets file.

Connect your Google Sheets account by signing in and granting permissions. Select the spreadsheet you created for tracking payments and specify the sheet where the data should be recorded. Map all relevant fields such as payment ID, customer name, email, and amount.

Select the correct spreadsheet and sheet. Map all required fields from the payment response. Test the action to ensure data is logged correctly.

After completing these steps, you should see all payment details reflected in your Google Sheets, confirming that the integration works seamlessly with Pabbly Connect.


Conclusion

In this tutorial, we explored how to use Pabbly Connect to integrate Insta Mojo with P Email Marketing and Google Sheets. By automating these processes, you can efficiently manage customer subscriptions and payment records without manual effort. This integration enhances your workflow and ensures your records are always up-to-date.

Ensure you check out Pabbly Connect to create business automation workflows and reduce manual tasks. Pabbly Connect currently offer integration with 2,000+ applications.

Integrating Google Sheets with Omnisend Using Pabbly Connect

Learn how to integrate Google Sheets with Omnisend using Pabbly Connect to automate subscriber creation effortlessly. Build sophisticated automated workflows in less time than you think. This guide translates complex integrations into straightforward steps for immediate implementation.

Watch Step By Step Video Tutorial Below


1. Setting Up Pabbly Connect for Google Sheets and Omnisend Integration

To integrate Google Sheets and Omnisend, we first need to set up Pabbly Connect. Start by opening your browser and searching for Pabbly Connect. You can either sign in if you have an account or click on ‘Sign Up for Free’ if you don’t. This process is quick and grants you 100 free tasks every month.

Once logged in, you will be directed to the Pabbly Connect dashboard. Here, click on the ‘Create Workflow’ button to initiate a new project. Name your workflow something descriptive, such as ‘Create Omnisend Subscriber from New Google Sheets Row,’ and select the appropriate folder for organization.


2. Configuring the Trigger in Pabbly Connect Using Google Sheets

The next step involves configuring the trigger in Pabbly Connect. In your workflow, you will see two main sections: Trigger and Action. For the trigger application, search and select ‘Google Sheets.’ Next, choose the trigger event as ‘New or Updated Spreadsheet Row.’ This means that whenever a new row is added or updated in your Google Sheets, it will trigger the workflow.

  • Select Google Sheets as the trigger application.
  • Choose the trigger event: New or Updated Spreadsheet Row.
  • Connect Google Sheets with Pabbly Connect using the provided webhook URL.

After selecting the trigger event, copy the webhook URL provided by Pabbly Connect. You will use this URL to connect your Google Sheets with Pabbly Connect. Go to your Google Sheets, navigate to ‘Extensions,’ and select the Pabbly Connect add-on to set it up.


3. Setting Up Google Sheets to Work with Pabbly Connect

Now, let’s set up Google Sheets to send data to Pabbly Connect. In your Google Sheets, ensure that you have a table with columns for first name, last name, email, phone number, and city. After ensuring the necessary columns are present, go to ‘Extensions’ and find the Pabbly Connect add-on. If it’s not installed, you can get it from the Google Workspace Marketplace.

Once installed, refresh your Google Sheets. Then, go back to the Pabbly Connect add-on and select ‘Initial Setup.’ Paste the webhook URL you copied earlier and specify the trigger column (e.g., column E). This column will be monitored for changes, and any new data entered will trigger the workflow.

  • Open Extensions > Pabbly Connect > Initial Setup.
  • Paste the webhook URL into the setup.
  • Specify the trigger column (e.g., E for final data).

After completing the setup, send a test to ensure that Pabbly Connect receives the data correctly. Once the test is successful, click on ‘Submit’ to finalize the connection.


4. Creating the Action in Pabbly Connect to Add Subscribers to Omnisend

With the trigger configured, the next step is to create the action in Pabbly Connect. Search for and select ‘Omnisend’ as your action application. Choose the action event as ‘Create Subscriber.’ This action will take the data from your Google Sheets and create a new subscriber in Omnisend.

To connect Omnisend with Pabbly Connect, you will need to provide your API key. Log into your Omnisend account, navigate to your profile settings, and find the API keys section. Create a new API key and copy it back to Pabbly Connect.

Select Omnisend as the action application. Choose ‘Create Subscriber’ as the action event. Connect using your API key from Omnisend.

Once connected, map the fields from Google Sheets to the corresponding fields in Omnisend. This includes mapping the first name, last name, email, phone number, and city. After mapping, click on ‘Save and Send Test’ to ensure the subscriber is created successfully in Omnisend.


5. Finalizing the Integration and Testing the Workflow

After setting up both the trigger and action, it’s time to finalize the integration in Pabbly Connect. Ensure that all mappings are correct, and test the workflow by adding a new row in your Google Sheets. For instance, enter a new lead’s details such as first name, last name, email, phone number, and city.

Once you add this new row, Pabbly Connect will automatically trigger the workflow, sending the data to Omnisend to create a new subscriber. You can verify this by checking your Omnisend account under the audience section to see if the new subscriber has been added successfully.

With this setup, every time you add a new lead in Google Sheets, it will automatically create a new subscriber in Omnisend. This integration saves time and ensures your email list is always up-to-date.


Conclusion

By following this tutorial, you can easily integrate Google Sheets with Omnisend using Pabbly Connect. This automation allows you to create new subscribers effortlessly, ensuring your email marketing efforts remain efficient and effective.

Ensure you check out Pabbly Connect to create business automation workflows and reduce manual tasks. Pabbly Connect currently offer integration with 2,000+ applications.

Integrating LinkedIn Leads with Pabbly Connect for SMS and Google Chat Notifications

Learn how to use Pabbly Connect to automate SMS and Google Chat notifications for LinkedIn leads with this step-by-step tutorial. Navigate the automation landscape confidently with clear, structured guidance suitable for professionals regardless of prior technical experience.

Watch Step By Step Video Tutorial Below


1. Accessing Pabbly Connect for Automation

To begin automating SMS notifications and Google Chat alerts for LinkedIn leads, you first need to access Pabbly Connect. Simply visit the Pabbly website and either sign in or create a new account.

Upon logging in, navigate to the dashboard where you will see various Pabbly applications. Click on ‘Access Now’ for Pabbly Connect to start creating your workflow.


2. Creating Your Workflow in Pabbly Connect

Once in Pabbly Connect, click on the ‘Create Workflow’ button. You will be prompted to name your workflow and select a folder to save it in. For this tutorial, name it ‘Send SMS to LinkedIn Leads and Notify Team on Google Chat’.

  • Click on ‘Create’ to proceed.
  • This opens the workflow window where you can set up the trigger and action.

In this window, you will define the trigger application as LinkedIn Lead Gen Forms. Select ‘New Lead Gen Form Response’ as the trigger event to initiate the workflow when a new lead is submitted.


3. Setting Up the Trigger with LinkedIn Lead Gen Forms

After selecting LinkedIn Lead Gen Forms as your trigger application, click on the ‘Connect’ button. If you have not previously connected your LinkedIn account, you will need to add a new connection.

  • Choose the lead form you want to connect to.
  • Click on ‘Save and Send Test Request’ to fetch the latest response from LinkedIn.

Remember, LinkedIn Lead Gen Forms operate on a polling basis, meaning they check for new data every 10 minutes. This setup ensures that every new lead captured in LinkedIn triggers the subsequent actions in Pabbly Connect.


4. Sending SMS Notifications via Pabbly Connect

For the SMS notification, the action application will be Twilio. Select Twilio and choose ‘Send SMS Message’ as the action event. Click on ‘Connect’ to link your Twilio account to Pabbly Connect.

Input your Twilio Account SID and Auth Token to establish the connection. Compose your SMS message, personalizing it by mapping the lead’s name from the trigger step.

After setting up the SMS content, click on ‘Save and Send Test Request’. This will send a test SMS to the lead’s phone number, ensuring the integration works smoothly through Pabbly Connect.


5. Notifying Google Chat with New Leads

Next, add another action step to notify your team on Google Chat. Select Google Chat as the action application and choose ‘Create Message’ as the action event. You will need to connect your Google account to Pabbly Connect by providing the Google Chat webhook URL.

Follow the steps to create a webhook in Google Chat. Map the lead’s details in the message format you desire.

Once your message is composed, click ‘Save and Send Test Request’. This will send a notification to your Google Chat, confirming that the integration is functional via Pabbly Connect.


Conclusion

Using Pabbly Connect, you can seamlessly automate SMS notifications and Google Chat alerts for new LinkedIn leads. This integration not only enhances communication but also improves lead engagement effectively.

Ensure you check out Pabbly Connect to create business automation workflows and reduce manual tasks. Pabbly Connect currently offer integration with 2,000+ applications.