Automate Notifications with LinkedIn, WhatsApp, and Slack Using Pabbly Connect

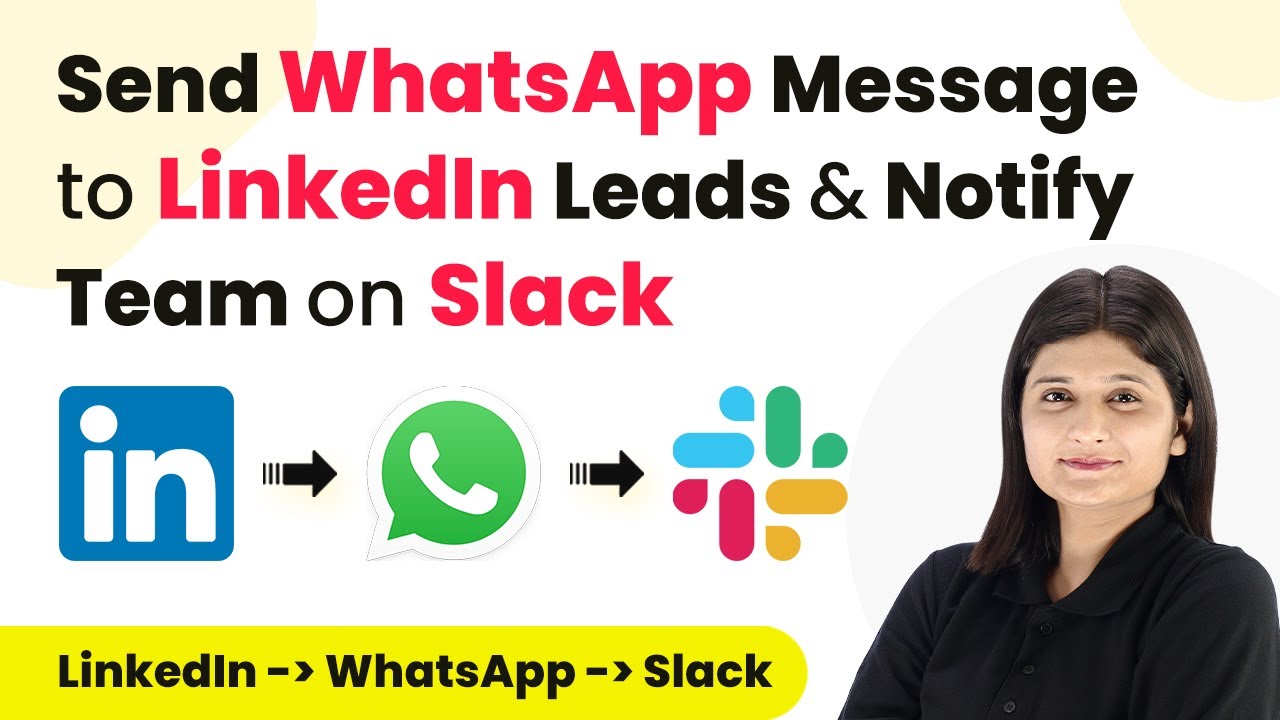
Learn how to automate notifications from LinkedIn leads to WhatsApp and Slack using Pabbly Connect in this step-by-step tutorial. Streamline your workflow, save valuable time, and eliminate repetitive tasks through powerful automation capabilities.

Watch Step By Step Video Tutorial Below


Creating a Workflow to Send WhatsApp Messages and Notify Slack

In this section, we will create a workflow using Pabbly Connect to send WhatsApp messages and notify Slack whenever a new lead is generated from LinkedIn. First, sign in to your Pabbly Connect account and navigate to the dashboard.

Click on the ‘Create Workflow’ button to start building your automation process. You’ll need to enter a name for your workflow, such as ‘Send WhatsApp and Notify Team on Slack’, and select the folder where you want to save this workflow.


Setting Up the Trigger for LinkedIn Leads

Now that we have our workflow created, it’s time to set up the trigger. The trigger will be an event that starts the automation process. For this workflow, we will select LinkedIn as our trigger application.

Select the trigger event as ‘New Lead Generation Form Response’ from LinkedIn. This means that whenever a new lead is generated through LinkedIn, it will trigger the actions defined in our workflow.

  • Choose your LinkedIn account.
  • Select the lead generation form you want to connect.
  • Test the trigger to ensure it’s working properly.

Once you have completed these steps, you will need to save the trigger. This will allow Pabbly Connect to capture the lead information whenever a new lead is submitted through LinkedIn.


Sending WhatsApp Messages Using Pabbly Connect

Next, we will configure the action to send a WhatsApp message using Pabbly Connect. For this, select WhatsApp as your action application. Then, choose the action event as ‘Send Template Message’.

After selecting the action event, you will need to connect your WhatsApp account. Enter the required details such as your phone number ID and the access token generated from the WhatsApp developer portal.

  • Copy your phone number ID from the Meta for Developers dashboard.
  • Generate a permanent access token for WhatsApp.
  • Create a message template for the WhatsApp message.

Once all the details are filled in, you can test the action to see if the WhatsApp message is sent successfully. This will ensure that your automation is functioning correctly.


Notifying the Team on Slack

In this final step, we will set up the notification to your team on Slack. Select Slack as your next action application in Pabbly Connect. The action event you need to choose here is ‘Send Channel Message’.

Connect your Slack account, and you will be prompted to enter the channel name where you want to send the message. Make sure to give the necessary permissions for Pabbly Connect to send messages to your Slack channel.

Choose the Slack channel for notifications. Map the fields from LinkedIn to Slack, such as lead name and email address. Test the action to confirm the message is sent.

After testing, save your workflow in Pabbly Connect. Your automation is now complete, and you will receive WhatsApp messages and Slack notifications for new LinkedIn leads.


Conclusion

This tutorial demonstrated how to automate notifications from LinkedIn leads to WhatsApp and Slack using Pabbly Connect. By following these steps, you can streamline your lead management process effectively.

Thanks for following along with this tutorial! Remember to subscribe to the channel for more helpful content like this.

If you found this guide useful, please consider giving it a thumbs up and sharing it with others who might benefit from it.

Integrating Mixmax with Pabbly Connect: A Step-by-Step Guide

Learn how to integrate Mixmax with Pabbly Connect for seamless email automation. Follow our detailed tutorial to set up webhooks and enhance your productivity. Learn to create powerful connections between your critical applications without requiring specialized programming knowledge or extensive technical background.

Watch Step By Step Video Tutorial Below


1. Setting Up Pabbly Connect for Mixmax Integration

To start using Pabbly Connect, first, log in to your Pabbly Connect account. This platform will act as the central hub for integrating your Mixmax account with other applications like WhatsApp and Salesforce. With Pabbly Connect, you can automate tasks and streamline workflows effectively.

After logging in, navigate to the dashboard and create a new workflow. Select Mixmax as your trigger application. This setup allows you to capture events from Mixmax, such as new meeting confirmations, and send that information to other platforms.


2. Connecting Mixmax to Pabbly Connect via Webhook

To connect Mixmax with Pabbly Connect, you need to set up a webhook. This webhook will serve as a bridge to send data from Mixmax to Pabbly Connect upon specific events. Start by selecting ‘Meeting Invitation Confirmed’ as your trigger event in Mixmax.

  • Select ‘Mixmax’ as the trigger application.
  • Choose ‘Meeting Invitation Confirmed’ as the trigger event.
  • Copy the webhook URL provided by Pabbly Connect.

Once you have the webhook URL, log into your Mixmax account, navigate to the rules section, and create a new rule named ‘New Meeting’. Set the trigger to ‘Meeting Confirmed’ and paste the copied webhook URL into the appropriate field. This action completes the connection between Mixmax and Pabbly Connect.


3. Testing the Integration between Mixmax and Pabbly Connect

After setting up the webhook, it’s essential to test the integration to ensure that everything is functioning properly. To do this, go back to your Mixmax account and book a new meeting. This should trigger the webhook you just set up in Pabbly Connect. using Pabbly Connect

When you book the meeting, make sure to fill in all required fields such as your name, email, and phone number. Once the meeting is booked, head back to your Pabbly Connect dashboard to check for the webhook response.

  • Fill in the meeting details accurately.
  • Confirm the meeting to trigger the webhook.
  • Check Pabbly Connect for the received data.

Upon receiving the webhook response, you should see all relevant meeting details captured in Pabbly Connect. This indicates that the integration is successful and ready for further actions.


4. Next Steps: Automating Actions with Pabbly Connect

Now that you have successfully integrated Mixmax with Pabbly Connect, you can automate further actions based on the captured data. For example, you can send a WhatsApp message with the meeting details or log the information in Salesforce.

To set this up, select your desired action application in Pabbly Connect. For instance, if you choose WhatsApp, you can configure the message content to include the meeting details captured from Mixmax. This will enhance your workflow by providing instant notifications.


Conclusion

Integrating Mixmax with Pabbly Connect allows you to automate your email workflows efficiently. By following the steps outlined in this tutorial, you can set up webhooks and enhance your productivity across various applications. Start leveraging Pabbly Connect today for seamless integrations.

Ensure you check out Pabbly Connect to create business automation workflows and reduce manual tasks. Pabbly Connect currently offer integration with 2,000+ applications.

Integrate Pluto with Slack Using Pabbly Connect: A Step-by-Step Guide

Learn how to integrate Pluto with Slack using Pabbly Connect. Follow this detailed tutorial for seamless automation between your applications. Implement the precise methodologies leading organizations use to automate repetitive tasks, illustrated with practical examples designed for immediate application.

Watch Step By Step Video Tutorial Below


1. Setting Up Webhook in Pluto with Pabbly Connect

To integrate Pluto with Slack using Pabbly Connect, the first step is to set up a webhook in your Pluto account. This webhook will act as a bridge that allows data to be sent from Pluto to Pabbly Connect whenever a new task is created.

Start by logging into your Pluto account and navigating to the settings option located at the bottom right corner. From there, select the API Manager and click on the ‘Create a Connection’ button. You will need to name your connection (e.g., ‘New Task’) and select the latest API version (1.10). After this, paste the webhook URL provided by Pabbly Connect into the designated field.


2. Configuring the Webhook Settings in Pluto

After pasting the webhook URL in your Pluto settings, you need to configure the webhook to ensure it triggers on specific events. This is crucial for the integration to work seamlessly with Pabbly Connect.

  • Turn on the switch to allow Pluto to send responses to the webhook URL.
  • Select the specific event you want to track, such as ‘Task Create’.
  • Deselect any other events to avoid unnecessary triggers.

Once you have configured these settings, click the ‘Create’ button. You will now have a functional webhook in your Pluto account that communicates with Pabbly Connect.


3. Creating a Task in Pluto to Test the Webhook

With the webhook set up, the next step is to create a test task in your Pluto account. This action will trigger the webhook and send data to Pabbly Connect.

Go to the ‘Task’ section in your Pluto account and click on the ‘Add’ button to create a new task. Fill in the necessary details such as the project name, task title (e.g., ‘Design an Ad Post for Instagram’), and description. After entering all the required information, click the ‘Create Task’ button.


4. Checking the Webhook Response in Pabbly Connect

After creating the task, return to Pabbly Connect to check if the webhook received the task data successfully. You should see a response indicating that the task was created, along with details such as task ID and description.

This response confirms that the integration is working correctly. You can now proceed to set up further actions in Pabbly Connect to send notifications to your Slack channel whenever a new task is created in Pluto.


Conclusion

In this tutorial, we explored how to integrate Pluto with Slack using Pabbly Connect. By setting up a webhook in Pluto and configuring it to trigger on specific events, you can automate task notifications seamlessly. This integration allows for improved communication and efficiency in your workflow.

Ensure you check out Pabbly Connect to create business automation workflows and reduce manual tasks. Pabbly Connect currently offer integration with 2,000+ applications.

Integrating Trigger with India M Using Pabbly Connect: A Step-by-Step Guide

Learn how to seamlessly integrate Trigger with India M Using Pabbly Connect to automate lead management in Microsoft Excel. Follow our detailed tutorial for effective automation. with Pabbly Connect.

Watch Step By Step Video Tutorial Below


1. Setting Up Trigger with India M

To set up the integration, we first need to establish a connection with Trigger as our primary application. This is crucial to ensure that every new lead generated through India M is captured accurately. The process begins by logging into your P Connect account where you will create a new workflow.

After logging in, click on the ‘Create Workflow’ button. You will name your workflow based on its objective, such as ‘Add India M Leads to Microsoft Excel Automatically’. Select the appropriate folder for your workflow and proceed to set up the trigger event.


2. Connecting India M with P Connect

Next, we will connect India M as the trigger application in our workflow. To do this, search for India M and select it as your trigger application. The trigger event will be set to ‘New Leads’, which indicates that any new lead generated will initiate the workflow.

  • Select the option for New Leads as your trigger event.
  • Copy the provided VAB URL, which will serve as a bridge between India M and P Connect.
  • Navigate to your India M account and access the Lead Manager section.

In the Lead Manager, click on the three-dot button to access the ‘Import/Export Leads’ option. Here, you will select the ‘Push API’ option to create a new integration. Enter the necessary details, including your CRM platform name as P Connect and paste the VAB URL you copied earlier.


3. Testing the Integration with Test Data

Once you have set up the connection, it’s essential to test the integration to ensure everything is functioning correctly. To do this, generate a test lead in your India M account. This will send a test data response to P Connect, allowing you to verify the workflow. using Pabbly Connect

Click on the ‘Test Your Webhook Listener’ button in P Connect to initiate the test. After sending the test data, you should receive a response that includes all details of the test lead, confirming that the integration is working as expected.

  • Check the response in P Connect to ensure all lead details are captured.
  • Verify that the test lead data matches what you entered in India M.

Upon successful verification, you can proceed to set up the action that will add these lead details to your Microsoft Excel sheet.


4. Adding Leads to Microsoft Excel Automatically

To finalize the workflow, we need to set up the action step where the lead details will be added to Microsoft Excel. Search for Microsoft Excel within P Connect and select it as your action application. The action event will be set to ‘Add Row to Worksheet’.

Connect your Microsoft Excel account to P Connect by clicking on ‘Add New Connection’ and granting the necessary permissions. Once connected, select the specific workbook where you want to store the lead details.

Choose the workbook that contains your lead data columns. Map the lead details from India M to the corresponding columns in Excel.

After mapping the necessary fields such as lead name, email address, and state, click on ‘Save and Send Test Request’ to ensure that the data is being correctly added to your Excel sheet.


5. Conclusion

In conclusion, automating the integration of Trigger with India M using P Connect allows you to manage leads efficiently. By following the steps outlined, you can ensure that every new lead is automatically captured in your Microsoft Excel database, streamlining your sales process.

Thanks for following along with this tutorial! Remember to subscribe to the channel for more helpful content like this.

If you found this guide useful, please consider giving it a thumbs up and sharing it with others who might benefit from it.

This setup not only saves time but also reduces manual errors, allowing your sales team to focus on converting leads into customers. Implement this automation for a more effective lead management system.


Automate Asset Uploads to Canva Using Pabbly Connect

Learn how to integrate Just, Automation, and Canva using Pabbly Connect to automate asset uploads seamlessly. Follow this step-by-step guide for effective automation. Discover hidden automation capabilities within your existing tools. This guide shows you how to connect your essential applications and permanently eliminate redundant manual processes.

Watch Step By Step Video Tutorial Below


1. Accessing Pabbly Connect for Automation

To start automating asset uploads in Canva, access Pabbly Connect. This platform allows seamless integration between various applications like Just, Automation, and Canva.

To create an account, visit the Pabbly Connect website and sign up for free. Once registered, you can create automation workflows that connect your data sources with Canva.


2. Creating a Workflow in Pabbly Connect

After accessing Pabbly Connect, creating a workflow is the next step. Click on the ‘Create Workflow’ button, name your workflow, and select the appropriate folder for organization.

Once inside the workflow, you’ll see two windows: the trigger window and the action window. This setup allows you to define what event will trigger the automation and what actions will follow.

  • Click on ‘Create Workflow’.
  • Name your workflow (e.g., ‘Upload Assets to Canva’).
  • Select a folder for the workflow.

This workflow will automate the process of uploading images from a table to Canva, enhancing efficiency and saving time.


3. Setting Up the Trigger in Pabbly Connect

To set up the trigger in Pabbly Connect, first search for ‘A Table’ in the trigger app selection. Choose the trigger event as ‘New Record’ to initiate the process when a new image is added.

Connect your A Table account by clicking on ‘Add New Connection’. After granting access, select the base and table where your images are stored. This step ensures that every time a new record is added, it will trigger the workflow.

  • Select ‘A Table’ as the app.
  • Choose ‘New Record’ as the trigger event.
  • Connect your A Table account and select the appropriate base and table.

After setting this up, test the trigger to ensure it captures the latest record correctly, which is crucial for the automation to work.


4. Uploading Assets to Canva Using Pabbly Connect

With the trigger set, the next step involves uploading the image to Canva using Pabbly Connect. Search for ‘Canva’ in the action app section and select the action event as ‘Upload Asset’.

Connect your Canva account and input the required fields: file name and file URL. Use the mapping feature to pull the correct data from the previous trigger step, ensuring the right image and filename are uploaded to Canva.

Select ‘Canva’ as the action app. Choose ‘Upload Asset’ as the action event. Map the fields for file name and file URL from the trigger step.

After completing this step, send a test request to confirm the image uploads successfully to your Canva account.


5. Updating the Record in A Table

After uploading the asset to Canva, the final step is to update the corresponding record in A Table using Pabbly Connect. Add another action step and select ‘A Table’ once more, this time choosing ‘Update Record’ as the action event.

Select the same base and table, then map the design ID received from the Canva upload action back to the A Table record. This ensures that the unique design ID is saved alongside the original image record.

Select ‘A Table’ as the action app. Choose ‘Update Record’ as the action event. Map the design ID to the corresponding record.

After saving this step, your automation is complete. Test it by adding a new image record in A Table and check if it uploads to Canva and updates the A Table record with the design ID.


Conclusion

In this tutorial, we explored how to use Pabbly Connect to automate the process of uploading assets to Canva from A Table. By following these steps, you can streamline your workflow and enhance productivity.

Ensure you check out Pabbly Connect to create business automation workflows and reduce manual tasks. Pabbly Connect currently offer integration with 2,000+ applications.

Utilizing Pabbly Connect not only simplifies the integration process but also ensures that your data is always up-to-date across platforms. Start automating your tasks today with Pabbly Connect!

Integrating Webinar Kit with Active Campaign and WhatsApp Using Pabbly Connect

Learn how to automate registrations from Webinar Kit to Active Campaign and send WhatsApp messages using Pabbly Connect with this detailed tutorial. Transform complex automation concepts into accessible, actionable steps that eliminate unnecessary manual work while maximizing existing application capabilities.

Watch Step By Step Video Tutorial Below


1. Accessing Pabbly Connect for Automation

To start the integration process, the first step is to access Pabbly Connect. Open your browser and search for Pabbly Connect. You will reach the landing page where you can either sign in or sign up for free. By signing up, you can enjoy 100 free tasks every month, which is perfect for testing your automation workflows.

Once signed in, you will find an intuitive dashboard. Click on the ‘Create Workflow’ button to begin setting up your automation. This is where you will create the workflow that connects Webinar Kit, Active Campaign, and WhatsApp Cloud API seamlessly through Pabbly Connect.


2. Setting Up the Trigger in Pabbly Connect

In this step, you will set up the trigger that initiates your automation. The trigger application is Webinar Kit, which captures new registrations. In Pabbly Connect, select Webinar Kit as your trigger application and choose the event ‘New Webinar Registration’ as the trigger event.

  • Select the trigger application: Webinar Kit
  • Choose the trigger event: New Webinar Registration
  • Copy the webhook URL provided by Pabbly Connect

Next, you need to connect Webinar Kit with Pabbly Connect using the copied webhook URL. This URL acts as a bridge between the two applications, ensuring that every new registration is captured and sent to Pabbly Connect for further processing.


3. Configuring Active Campaign in Pabbly Connect

After setting up the trigger, the next step is to configure Active Campaign as your action application. In Pabbly Connect, search for Active Campaign and select it as your action application. The action event will be ‘Create or Update Contact’ which allows you to add new registrants to your email list.

To connect Active Campaign with Pabbly Connect, you will need to provide your API key and URL. Follow these steps:

  • Log in to your Active Campaign account
  • Navigate to Settings > Developer to find your API key and URL
  • Paste the API key and URL into Pabbly Connect

After connecting, you will map the registrant’s details from Webinar Kit to the corresponding fields in Active Campaign, ensuring that all information is accurately recorded.


4. Sending WhatsApp Messages through Pabbly Connect

Once the contact is created in Active Campaign, the final action is to send a confirmation message via WhatsApp. In Pabbly Connect, select WhatsApp Cloud API as your action application and choose the event ‘Send Template Message’. This will allow you to send personalized messages to your registrants.

To set up the WhatsApp message, you will need to connect your WhatsApp Cloud API account to Pabbly Connect. For this, provide your access token, phone number ID, and WhatsApp business account ID. These details can be obtained from your WhatsApp Cloud API account.

Create a template message in WhatsApp Cloud API Select the created template in Pabbly Connect Map the recipient’s phone number and other variables into the message

This setup ensures that every registrant receives a timely confirmation message, enhancing their experience and improving engagement.


5. Conclusion: Streamlining Your Webinar Registrations with Pabbly Connect

In this tutorial, we have demonstrated how to integrate Webinar Kit with Active Campaign and WhatsApp using Pabbly Connect. By following the steps outlined, you can automate the registration process and ensure that your registrants receive confirmation messages seamlessly. This not only saves time but also enhances communication with your audience.

Ensure you check out Pabbly Connect to create business automation workflows and reduce manual tasks. Pabbly Connect currently offer integration with 2,000+ applications.

Pabbly Connect serves as a powerful tool for automating workflows between various applications, ensuring that you can manage your webinar registrations efficiently. With Pabbly Connect, you can streamline your operations and focus on delivering great webinars.


Integrate Dropbox with Google Docs Using Pabbly Connect for Automatic Subtitle Generation

Learn how to automate subtitle generation by integrating Dropbox with Google Docs using Pabbly Connect. This step-by-step guide covers everything you need to know. Navigate the automation landscape confidently with clear, structured guidance suitable for professionals regardless of prior technical experience.

Watch Step By Step Video Tutorial Below


1. Setting Up Pabbly Connect for Subtitle Automation

To automate subtitle generation, we will use Pabbly Connect to integrate Dropbox and Google Docs. Begin by signing up for a free account on Pabbly Connect. Once registered, navigate to the dashboard where you can create a new workflow.

Click on the ‘Create Workflow’ button and name your workflow, for instance, ‘Dropbox to Google Docs Subtitle Automation’. This sets the foundation for your integration process.


2. Connecting Dropbox to Pabbly Connect

In this step, we will connect our Dropbox account to Pabbly Connect. This connection allows Pabbly to access files uploaded to Dropbox. Select Dropbox as the app in the trigger step.

  • Choose ‘New File’ as the trigger event.
  • Click on ‘Connect’ and select ‘Add New Connection’.
  • Authorize Pabbly to access your Dropbox account.
  • Specify the folder path where new videos will be uploaded.

Once connected, test the connection by uploading a video file to the specified Dropbox folder. Pabbly Connect will detect the new file, marking the successful setup of the trigger.


3. Using Salid Transcription API with Pabbly Connect

The next step involves sending the video file to the Salid Transcription API for subtitle generation. In the action step of Pabbly Connect, select Salid Transcription API as the app.

Choose the action event as ‘Create AI Transcription’. You will need to connect your Salid account by entering the API key and organization name. After making the connection, map the video file URL from the Dropbox trigger to the ‘Direct Pabbly URL’ field in the Salid action.

  • Specify the language code (e.g., ‘en’ for English).
  • Select SRT format for subtitles.
  • Optionally, set a webhook URL for further automation.

After configuring these settings, click ‘Save and Send Test Request’ to verify that the video file is successfully sent to Salid for transcription.


4. Retrieving Transcription and Adding to Google Docs

Once the subtitles are generated, the next step is to retrieve them and add them to a Google Docs template using Pabbly Connect. First, add a delay action to allow time for the transcription to complete.

After the delay, add another action step to retrieve the transcription using Salid Transcription API. Select ‘Get AI Transcription by Job ID’ as the action event. Map the Job ID from the previous step to get the transcription details.

Check the response for the transcription output text and SRT content. Ensure the subtitles are formatted correctly for Google Docs.

With the transcription retrieved, you can now move to the final step of creating a new document in Google Docs.


5. Creating a Google Docs Document with Subtitles

To create a new Google Docs document, select Google Docs in the action step of Pabbly Connect. Choose the action event ‘Create Document from Template’ and connect your Google Docs account.

Select the template you created for subtitles, and map the necessary fields such as file name, file URL, and the generated subtitles. Click ‘Save and Send Test Request’ to create the document.

Verify that the new document appears in your specified Google Drive folder. Check that all mapped fields are correctly populated with the respective data.

With this, your automation is complete, and any new video uploaded to Dropbox will automatically generate subtitles and create a Google Docs document.


Conclusion

In summary, using Pabbly Connect to automate subtitle generation from Dropbox to Google Docs streamlines your workflow. This integration saves time and ensures subtitles are generated efficiently for your video content.

Ensure you check out Pabbly Connect to create business automation workflows and reduce manual tasks. Pabbly Connect currently offer integration with 2,000+ applications.

Integrating Microsoft with Facebook: A Step-by-Step Guide

Learn how to integrate Microsoft with Facebook seamlessly using Pabbly Connect. This guide provides detailed steps for automation. Explore systematic approaches to creating efficient automation solutions that convert technical concepts into practical, implementable instructions.

Watch Step By Step Video Tutorial Below


1. Setting Up Pabbly Connect for Microsoft and Facebook Integration

The first step in integrating Pabbly Connect with Microsoft and Facebook is to access Pabbly Connect. You need to sign in to your Pabbly account. Once logged in, navigate to the Pabbly Connect dashboard to create a new workflow.

To create a workflow, click on the ‘Create New Workflow’ button. This will prompt you to name your workflow. Choose a name that reflects the purpose of the integration, such as ‘Microsoft and Facebook Leads Forwarding’.


2. Creating a Trigger for Microsoft Leads

In this section, we will set up a trigger for Microsoft that initiates the integration process. The trigger will be based on new leads generated from Microsoft. To do this, select Microsoft as the trigger application. using Pabbly Connect

Next, you need to select the trigger event. Click on the dropdown and choose ‘New Lead’. After that, connect your Microsoft account by clicking ‘Connect’. Make sure to authorize Pabbly Connect to access your Microsoft data.

  • Select Microsoft as the trigger application.
  • Choose ‘New Lead’ as the trigger event.
  • Connect your Microsoft account for authorization.

After successfully connecting, test the trigger to ensure it captures new leads accurately. This step is crucial for the automation to function correctly.


3. Setting Up Facebook Action for Forwarding Leads

Now that the trigger is set up in Pabbly Connect, the next step is to configure the action to forward leads to Facebook. Select Facebook as your action application.

Choose the action event you want to perform. In this case, select ‘Create Lead’. You will need to connect your Facebook account to Pabbly Connect by clicking on the ‘Connect’ button and following the authorization steps.

  • Select Facebook as the action application.
  • Choose ‘Create Lead’ as the action event.
  • Connect your Facebook account for authorization.

Once connected, you will need to map the fields from Microsoft to Facebook. This ensures that the lead information is transferred correctly between the two applications.


4. Testing the Integration Between Microsoft and Facebook

The final step is to test the integration between Pabbly Connect, Microsoft, and Facebook. This is essential to ensure that the data flow works as expected. Click on the ‘Test Integration’ button to initiate the test.

During the test, submit a sample lead through Microsoft. Check if the lead appears in Facebook as expected. If everything is set up correctly, you should see the lead data transferred seamlessly from Microsoft to Facebook.

In case of any issues, review the mapping fields and connection settings. Ensure that all required fields are correctly filled and that both applications are authorized properly. Testing is crucial for a successful automation setup.


5. Finalizing and Saving the Workflow

After successful testing, you can finalize your workflow in Pabbly Connect. Click on the ‘Save’ button to ensure all your settings are stored. You can also set the workflow to be active, allowing it to run automatically whenever a new lead is generated in Microsoft.

Remember to monitor the workflow periodically to ensure it operates smoothly. You can also make adjustments as needed based on your requirements. This integration will save you time and streamline your lead management process between Microsoft and Facebook.

Conclusion

This guide summarizes the key points and helps you understand the essential features and benefits of using this tool.

Thanks for following along with this tutorial! Remember to subscribe to the channel for more helpful content like this.

If you found this guide useful, please consider giving it a thumbs up and sharing it with others who might benefit from it.


In summary, integrating Microsoft with Facebook using Pabbly Connect allows for seamless lead management. By following these steps, you can automate the process and enhance your workflow efficiency.

Automating Lead Management: Integrating IndiaMART with Zoho CRM Using Pabbly Connect

Learn how to automate lead management by integrating IndiaMART with Zoho CRM using Pabbly Connect. Follow this detailed step-by-step tutorial for seamless automation. Streamline your workflow, save valuable time, and eliminate repetitive tasks through powerful automation capabilities.

Watch Step By Step Video Tutorial Below


Setting Up Pabbly Connect for Automation

To automate the process of adding leads from IndiaMART to Zoho CRM, we first need to set up Pabbly Connect. Start by signing in to your Pabbly account. If you are new, you can create a free account which gives you access to 100 tasks monthly.

After logging in, navigate to the Pabbly Connect dashboard. Here, you can access all your workflows. Click on the ‘Create Workflow’ button to start building your automation process.


Creating the Trigger from IndiaMART

The next step involves creating a trigger that will listen for new leads from IndiaMART. Select IndiaMART as your trigger application. Choose the event as ‘New Lead’ which will activate the workflow whenever a new lead is generated.

To connect IndiaMART with Pabbly Connect, you need to provide a Webhook URL. This URL acts as a bridge between IndiaMART and Pabbly Connect. Follow these steps:

  • Log in to your IndiaMART account.
  • Navigate to the Leads Manager section.
  • Select Import/Export and then click on Push API.
  • Paste the Webhook URL provided by Pabbly Connect.

After setting up the Webhook URL, save the changes in IndiaMART. Now, every time a new lead is generated, it will trigger the workflow in Pabbly Connect.


Configuring Action in Zoho CRM

Once the trigger is set up, the next step is to configure the action in Zoho CRM. Select Zoho CRM as your action application. The action event you will choose is ‘Create Contact’. This allows you to add the new lead as a contact in your Zoho CRM.

To establish the connection, enter your Zoho CRM domain. Authorize the connection by logging into your Zoho account and granting the necessary permissions to Pabbly Connect. Once authorized, proceed to map the fields from the IndiaMART lead to the corresponding fields in Zoho CRM.

  • Map the first name from IndiaMART to the first name field in Zoho.
  • Map the last name if available, otherwise input a default value.
  • Continue mapping the email, phone number, and any other relevant fields.

After mapping all necessary fields, save the configuration. This setup ensures that every new lead from IndiaMART is automatically added as a contact in Zoho CRM.


Testing the Integration

With the trigger and action configured, it’s essential to test the integration to confirm everything is working correctly. Go back to your IndiaMART account and generate a test lead. This will initiate the trigger in Pabbly Connect.

Check the Pabbly Connect dashboard to see if the test lead data has been captured successfully. If the data appears as expected, proceed to verify the newly created contact in your Zoho CRM account.

To ensure the integration is fully functional, refresh the contacts page in Zoho CRM. If you see the new contact details reflecting there, the integration is successful. You can now automate your lead management process seamlessly.


Conclusion

In this tutorial, we successfully integrated IndiaMART with Zoho CRM using Pabbly Connect. This automation allows you to manage leads efficiently without manual intervention, enhancing your sales process significantly.

Thanks for following along with this tutorial! Remember to subscribe to the channel for more helpful content like this.

If you found this guide useful, please consider giving it a thumbs up and sharing it with others who might benefit from it.

By following these steps, you can streamline your workflow and ensure that every lead is promptly captured in your CRM, improving your overall productivity and response time.

Integrating Marketing with CRM Using Pabbly Connect: A Step-by-Step Guide

Learn how to integrate Marketing with CRM Using Pabbly Connect in this detailed tutorial, covering Facebook lead ads, Gmail, and more. Discover hidden automation capabilities within your existing tools. This guide shows you how to connect your essential applications and permanently eliminate redundant manual processes. with Pabbly Connect.

Watch Step By Step Video Tutorial Below


1. Setting Up Facebook Lead Ads for Marketing

To initiate the integration, the primary application is Marketing, specifically through Facebook Lead Ads. This setup allows you to capture potential leads directly from your Facebook advertisements. using Pabbly Connect

First, ensure you have created a Facebook page for your marketing agency. In this case, the page is named ‘Digital Dynamics.’ When users fill out their contact information through the Facebook lead ad, these details will be captured automatically.


2. Connecting Pabbly Connect to Facebook Lead Ads

The next step involves using Pabbly Connect to link your Facebook Lead Ads with your CRM. Start by logging into your Pabbly Connect account and clicking on the ‘Create Workflow’ button.

  • Select your desired workflow name, such as ‘Create No CRM Lead from Facebook Lead Ads.’
  • Choose the folder where you want to save this workflow.
  • Click on the ‘Create’ button to finalize your workflow setup.

Once the workflow is created, you need to set the trigger application as Facebook Lead Ads. This ensures that whenever a new lead is generated, it will initiate the workflow.


3. Creating a New Lead in No CRM

After setting up the trigger, the next application to focus on is CRM, specifically No CRM. In this step, you will configure the action to create a new lead in your No CRM account. using Pabbly Connect

Choose the action event as ‘Create Lead’ in your No CRM setup. Connect your No CRM account by entering the required API key and account name. This information is vital for the integration to work seamlessly.

  • Enter the API key generated from your No CRM account.
  • Map the lead’s details such as first name, last name, email, and phone number from the Facebook lead ad response.

After entering the necessary details and mapping them correctly, click on ‘Save and Send Test Request’ to ensure that the lead is created successfully in No CRM.


4. Sending a Welcome Email via Gmail

With the lead created in No CRM, the next action is to send a welcome email using Gmail. This step is crucial for engaging with your new leads promptly. using Pabbly Connect

Select Gmail as your action application and choose the action event as ‘Send Email.’ Connect your Gmail account by granting the necessary permissions to Pabbly Connect.

Map the recipient email address to the lead’s email captured from Facebook. Enter the email subject, such as ‘Welcome! Let’s Discuss Your Marketing Needs.’ Compose the email content to thank the lead and provide further engagement options.

Finally, click on ‘Save and Send Test Request’ to confirm that the email is sent successfully to the new lead.


5. Testing the Integration with a Real-Time Example

To ensure that the entire setup works correctly, it’s essential to test the integration. Start by generating a test lead in your Facebook Lead Ads. using Pabbly Connect

Delete any previous test leads and create a new one by filling in dummy data. After submitting the test lead, check your No CRM account to see if the lead appears. Ensure that the email is also sent to the new lead’s inbox.

Verify that the new lead is created in No CRM with accurate details. Check the lead’s email for the welcome message sent from Gmail.

Once confirmed, you can be assured that your integration between Marketing, CRM, and Gmail is functioning as intended, allowing for efficient lead management.


Conclusion

This tutorial covered how to integrate Marketing with CRM Using Pabbly Connect, focusing on Facebook Lead Ads, No CRM, and Gmail. By automating these processes, you can efficiently manage leads and enhance your marketing efforts.

Thanks for following along with this tutorial! Remember to subscribe to the channel for more helpful content like this.

If you found this guide useful, please consider giving it a thumbs up and sharing it with others who might benefit from it.