Integrating Indiamart and Google Sheets Using Pabbly Connect

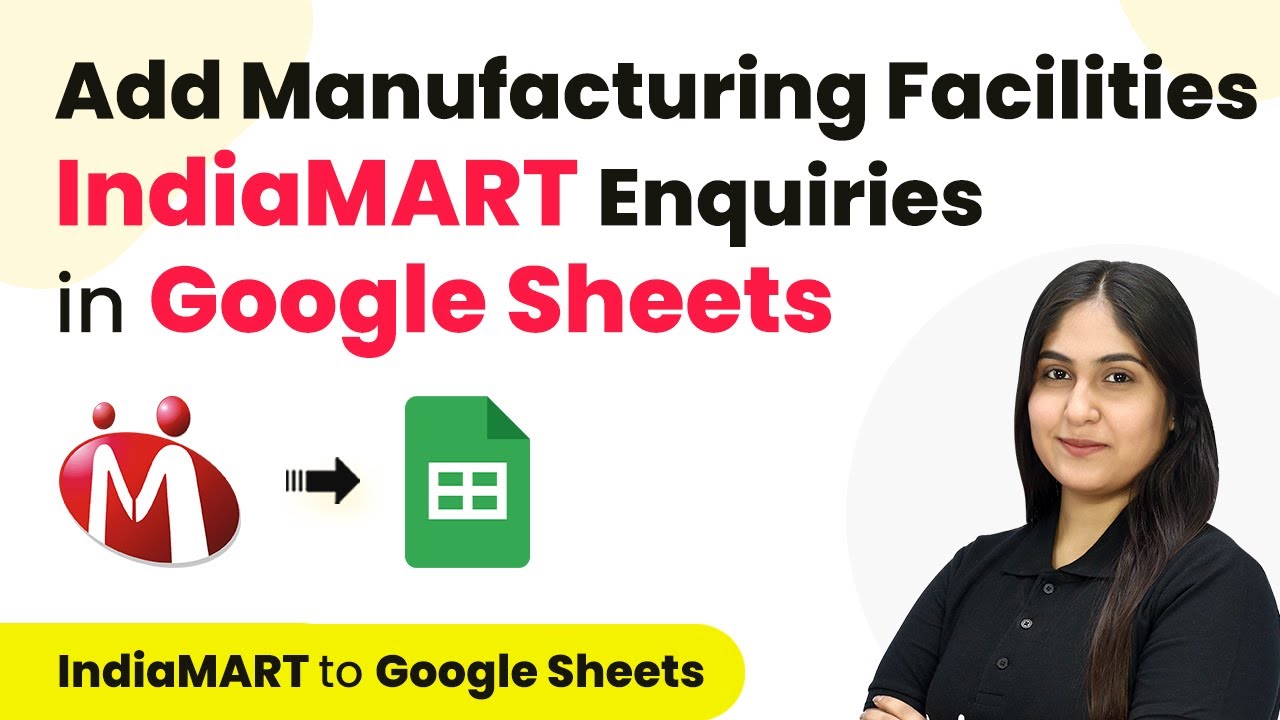
Learn how to integrate Indiamart with Google Sheets using Pabbly Connect to automate your business inquiries effectively. Navigate the automation landscape confidently with clear, structured guidance suitable for professionals regardless of prior technical experience.

Watch Step By Step Video Tutorial Below


1. Accessing Pabbly Connect for Integration

To start integrating Indiamart with Google Sheets, you first need to access Pabbly Connect. Simply go to the Pabbly Connect homepage by entering the URL in your browser.

Once on the homepage, you will see options for signing in or signing up. If you are a new user, click on ‘Sign Up Free’ to create your account. Existing users should click on ‘Sign In’. After logging in, you will be directed to the dashboard where you can create your automation workflows.


2. Creating a Workflow in Pabbly Connect

Creating a workflow is essential for automating the data transfer between Indiamart and Google Sheets using Pabbly Connect. Click on the ‘Create Workflow’ button located in the top right corner of your dashboard.

  • Enter a name for your workflow, such as ‘Add Manufacturing Facilities and Industrial Plants Business Inquiries in Google Sheets.’
  • Select a folder for your workflow, or create a new one by following the instructions provided.
  • Click on the ‘Create’ button to finalize your workflow setup.

This workflow will help you automate the process of adding new inquiries from Indiamart to Google Sheets, ensuring that your data management is efficient and organized.


3. Setting Up Trigger and Action Steps

In Pabbly Connect, the automation process consists of triggers and actions. For this integration, select Indiamart as your trigger application and choose the trigger event as ‘New Leads.’ This means that whenever a new inquiry is received, it will trigger the workflow.

After selecting the trigger, you will be provided with a webhook URL. Copy this URL as it will be used to connect your Indiamart account with Pabbly Connect.

  • Log in to your Indiamart account and navigate to the Lead Manager.
  • Select ‘Import or Export Leads’ and then click on ‘Push API.’
  • Paste the copied webhook URL in the required field and save your settings.

This setup ensures that every time a new lead is generated in Indiamart, it will automatically send the data to Pabbly Connect.


4. Mapping Data to Google Sheets

Once you have set up the trigger, the next step is to map the data to Google Sheets in your workflow using Pabbly Connect. Select Google Sheets as your action application and choose the action event as ‘Add a New Row.’

To connect Google Sheets, click on ‘Connect’ and select your Google account. After granting access, choose the specific spreadsheet where you want to store the inquiries. You will need to map the fields such as name, email, phone number, and query from the Indiamart response to the corresponding columns in your Google Sheet.

Select the spreadsheet titled ‘Manufacturing Facilities and Industrial Plants Business Inquiries.’ Map the data fields from the Indiamart inquiry to the correct columns in Google Sheets. Save and send a test request to ensure everything is working correctly.

By doing this, you ensure that all incoming inquiries are automatically recorded in your Google Sheets, streamlining your data management process with Pabbly Connect.


5. Finalizing the Integration Process

After successfully mapping the data, it’s time to finalize your integration process using Pabbly Connect. You can conduct a test submission to verify that the integration works as expected. This involves generating a test lead in Indiamart to see if the information reflects correctly in Google Sheets.

Once you confirm that the data is being transferred correctly, you can activate your workflow. This means that every new inquiry received in Indiamart will automatically populate in Google Sheets without any manual input.

With Pabbly Connect, you can easily manage your business inquiries and ensure that no lead is missed, enhancing your operational efficiency.


Conclusion

In this tutorial, we explored how to integrate Indiamart with Google Sheets using Pabbly Connect. By automating the transfer of inquiries, you can streamline your processes and improve data management for your manufacturing business.

Ensure you check out Pabbly Connect to create business automation workflows and reduce manual tasks. Pabbly Connect currently offer integration with 2,000+ applications.

Integrating Go High Level Contacts with Google Sheets Using Pabbly Connect

Learn how to integrate Go High Level contacts into Google Sheets using Pabbly Connect. Follow our step-by-step guide for seamless automation! Revolutionize your productivity approach with just a few strategic clicks. Uncover professional methods for connecting applications and creating workflows that reclaim hours of your week.

Watch Step By Step Video Tutorial Below


1. Accessing Pabbly Connect for Integration

To start integrating Go High Level with Google Sheets, first access Pabbly Connect. Open your web browser and navigate to the Pabbly website.

Once there, you will see options to sign in or sign up. If you are an existing user, click on the ‘Sign In’ button. New users can click on ‘Sign Up for Free’ to create an account and receive 100 tasks free each month.


2. Creating a Workflow in Pabbly Connect

After signing into Pabbly Connect, you will be directed to your dashboard. Click on the ‘Create Workflow’ button to initiate your automation process.

  • Enter a workflow name, e.g., ‘Add Go High Level Contact to Google Sheets’.
  • Select a folder to save your workflow, like ‘Automations’.
  • Click on ‘Create’ to open the workflow window.

This window is crucial as it contains the trigger and action settings for your automation.


3. Setting Up the Trigger Application in Pabbly Connect

In the workflow window, you need to select a trigger application. For this integration, choose ‘Lead Connector V2’ as your trigger application, which corresponds to Go High Level.

Next, select the trigger event. Choose ‘Contact Created’ to ensure that the workflow starts when a new contact is added. Copy the webhook URL provided by Pabbly Connect for the next steps.

  • Log into your Go High Level account.
  • Navigate to Automations and create a new workflow.
  • Select ‘Contact Created’ as the trigger for this new workflow.

Ensure you save and publish this workflow to activate the connection with Pabbly Connect.


4. Adding an Action Step to Send Data to Google Sheets

After setting the trigger, the next step is to add an action. In the action application, search for and select ‘Google Sheets’ in Pabbly Connect.

Choose the action event as ‘Add New Row’. You will then need to connect your Google account. If prompted, sign in and grant the necessary permissions for Pabbly Connect to access your Google Sheets.

Select the spreadsheet where you want to save the data. Map the fields from the trigger response to the corresponding columns in Google Sheets. Click on ‘Save and Send Test Request’ to verify the integration works.

Once the test is successful, you can check your Google Sheets to confirm that the new contact details have been added correctly.


5. Testing and Verifying the Integration

To ensure everything is set up correctly, perform a test submission through your Go High Level contact form. This will create a new contact and trigger the workflow in Pabbly Connect.

After submitting the form, check both your Go High Level account and Google Sheets to verify that the new contact has been added successfully. You should see all the details you entered reflected in your Google Sheets.

Confirm that the contact appears in Go High Level. Check Google Sheets for the new row containing the contact’s details. If successful, your integration is complete!

This confirms that Pabbly Connect has successfully automated the process of adding new contacts from Go High Level into Google Sheets, streamlining your workflow.


Conclusion

In this tutorial, we explored how to use Pabbly Connect to integrate Go High Level contacts into Google Sheets. By following these steps, you can automate data entry and enhance your business efficiency.

Ensure you check out Pabbly Connect to create business automation workflows and reduce manual tasks. Pabbly Connect currently offer integration with 2,000+ applications.

How to Integrate The Happening, PAB, and Other Applications Using Pabbly Connect

Learn how to automate tasks and integrate The Happening, PAB, WhatsApp, and more using Pabbly Connect in this detailed tutorial. Eliminate manual repetitive tasks from your workflow. Discover proven automation methods with intuitive steps designed for efficiency-minded professionals.

Watch Step By Step Video Tutorial Below


1. Accessing Pabbly Connect for Integration

To begin integrating applications like The Happening and PAB, first, access Pabbly Connect by navigating to the official website. You can sign in or create a new account by clicking on the ‘Sign Up for Free’ button, which grants you access to 100 free tasks monthly.

Once logged in, you will land on the dashboard of Pabbly Connect. From here, you can manage your workflows and create new automations. Click on the ‘Create Workflow’ option to start setting up your integration.


2. Creating a New Workflow in Pabbly Connect

In this section, we will create a new workflow in Pabbly Connect. After clicking ‘Create Workflow’, a dialog box will appear asking for a workflow name. Enter a descriptive name like ‘Automate Keep Using Pabbly Connect’ and select a folder to save it.

  • Choose a relevant name for your workflow.
  • Select a folder for better organization.
  • Click ‘Create’ to save your workflow.

Once the workflow is created, you will see two key windows: Trigger and Action. The Trigger specifies the event that starts the workflow, while the Action defines the response to that trigger. Understanding these components is essential for setting up your automation effectively.


3. Setting Up Trigger and Action in Pabbly Connect

Now, let’s set up the Trigger in Pabbly Connect. Select ‘Keep’ as your trigger application and choose the event ‘New Contact Added’. This will trigger the workflow every time a new contact is added to your Keep account.

Next, click on the ‘Connect’ button to establish a connection between Keep and Pabbly Connect. You will need to log in to your Keep account and authorize the connection. Once authorized, click on ‘Save and Send Test Request’ to capture the response.

  • Select ‘Keep’ as the trigger application.
  • Choose ‘New Contact Added’ as the trigger event.
  • Authorize the connection and test the trigger.

After testing, you will receive a response confirming that the connection is successful. This response will include the contact ID, which will be used in the next steps to retrieve contact details.


4. Retrieving Contact Details Using Pabbly Connect

After successfully capturing the contact ID, we need to retrieve the full details of the new contact. In this step, select ‘Keep’ again as your action application and choose ‘Retrieve Contact’ as the action event. This allows you to fetch the contact details using the previously captured contact ID. using Pabbly Connect

Click on ‘Connect’ to use the existing connection. You will then need to map the contact ID received from the trigger step. This mapping ensures that each new response dynamically updates the relevant information.

Select ‘Keep’ as the action application. Choose ‘Retrieve Contact’ as the action event. Map the contact ID from the trigger step.

Once you have mapped the contact ID, click ‘Save and Send Test Request’ again. This will return all the details of the contact, confirming that the integration is functioning correctly.


5. Creating a Contact in Keep from Facebook Lead Ads

In this final section, we will set up another integration scenario using Pabbly Connect. This time, we will connect Facebook Lead Ads to Keep. Start by selecting ‘Facebook Lead Ads’ as your trigger application and configure it to trigger when a new lead is generated.

Next, set Keep as your action application and choose ‘Create or Update Contact’ as the action event. Follow the same connection steps as before, authorizing Pabbly Connect to access your Keep account.

Select ‘Facebook Lead Ads’ as the trigger application. Choose ‘Create or Update Contact’ as the action event. Map the lead details to the corresponding fields in Keep.

After mapping the lead details, click ‘Save and Send Test Request’. Once the response confirms that the contact was created successfully, refresh your Keep account to verify that the new contact appears.


Conclusion

This tutorial illustrated how to use Pabbly Connect to integrate various applications, including The Happening, PAB, and others. By following the outlined steps, you can automate your workflows and enhance productivity without any coding skills.

Ensure you check out Pabbly Connect to create business automation workflows and reduce manual tasks. Pabbly Connect currently offer integration with 2,000+ applications.

Integrate WhatsApp and Facebook with Google Business Profile Using Pabbly Connect

Learn how to automate WhatsApp alerts and Facebook posts for Google Business Profile reviews using Pabbly Connect in this step-by-step tutorial. Eliminate manual repetitive tasks from your workflow. Discover proven automation methods with intuitive steps designed for efficiency-minded professionals.

Watch Step By Step Video Tutorial Below


1. Accessing Pabbly Connect for Integration

To begin the integration process using Pabbly Connect, open your browser and search for Pabbly Connect. This platform is essential for connecting various applications, including WhatsApp and Google Business Profile.

Once on the Pabbly Connect landing page, you will see options to sign in or sign up. If you are a new user, click on ‘Sign up for free’ to create an account and gain access to 100 tasks free every month. If you are an existing user, simply click on ‘Sign in’ and access your dashboard.


2. Creating a New Workflow in Pabbly Connect

After signing in, navigate to your dashboard and click on the button labeled ‘Create Workflow’. Enter a suitable name for your workflow, such as ‘Google Business Profile Hack: WhatsApp Alert for Reviews’. This name helps you identify the workflow later. using Pabbly Connect

  • Click on ‘Create’ to open the workflow window.
  • Select Google Business Profile as your trigger application.
  • Choose ‘New Review’ as the trigger event.

By selecting Google Business Profile, you ensure that the workflow triggers whenever a new review is posted. This setup is crucial for notifying your team via WhatsApp and creating Facebook posts automatically.


3. Connecting Google Business Profile to Pabbly Connect

To connect your Google Business Profile to Pabbly Connect, click on ‘Connect’ after selecting your trigger event. You will be prompted to either select an existing connection or add a new one. If this is your first time, choose ‘Add a New Connection’ and sign in with your Google account.

Once signed in, grant the necessary permissions for Pabbly Connect to access your Google Business Profile. After the connection is established, select the location associated with your business. Finally, click on ‘Save and Send Test Request’ to capture the latest review data.


4. Sending WhatsApp Alerts Using Pabbly Connect

After setting up the Google Business Profile connection, the next step is to send WhatsApp alerts. For this, select your action application as Vati or WhatsApp Cloud API. Choose ‘Send Template Message’ as your action event. using Pabbly Connect

  • Connect your Vati account by entering the API endpoint and access token.
  • Enter the WhatsApp number to which alerts will be sent.
  • Map the custom parameters for name, rating, and review content from the previous response.

This mapping ensures that each WhatsApp message sent contains the relevant review details, making it dynamic and informative for your team.


5. Creating Facebook Posts from Positive Reviews

To enhance customer engagement, you can automate Facebook posts based on review ratings. After sending the WhatsApp message, add a filter condition to check if the rating is 4 or above. This ensures that only positive reviews trigger a Facebook post.

Next, select Facebook Pages as your action application and choose ‘Create Page Post’. Connect your Facebook account and select the page where the post will be published. Map the reviewer’s name and comment into the post message, ensuring that it reflects the customer’s feedback accurately.

By completing this setup in Pabbly Connect, you automate the process of notifying your team on WhatsApp and sharing positive reviews on Facebook, enhancing customer interaction and store reputation.


Conclusion

Integrating WhatsApp and Facebook with Google Business Profile using Pabbly Connect enhances customer engagement and streamlines communication. This automation allows you to receive alerts for new reviews and promote positive feedback effortlessly.

Ensure you check out Pabbly Connect to create business automation workflows and reduce manual tasks. Pabbly Connect currently offer integration with 2,000+ applications.

Automate Emails Using Google and Pabbly Connect

Learn how to send automated emails from Google using Pabbly Connect in this step-by-step tutorial. Perfect for event organizers! Discover hidden automation capabilities within your existing tools. This guide shows you how to connect your essential applications and permanently eliminate redundant manual processes.

Watch Step By Step Video Tutorial Below


1. Setting Up Pabbly Connect with Google

To automate emails using Google, you first need to set up Pabbly Connect. Start by visiting the Pabbly Connect website and signing in to your account. If you don’t have an account, you can sign up for free, which includes 100 tasks monthly.

Once logged in, navigate to the Pabbly Connect dashboard. Here, you can create a new workflow by clicking on the ‘Create Workflow’ button. Enter a name for your workflow, such as ‘Automated Emails from Google’. Select the folder where you want to save this workflow.


2. Choosing Trigger and Action Applications

In this step, you will select your trigger and action applications for the workflow. For the trigger application, choose Google. This will initiate the automation when a specific event occurs, such as adding participants to your list.

  • Select ‘Schedule’ as your trigger event.
  • Set the frequency for the email sending, e.g., daily or weekly.
  • Choose the specific date and time for sending the emails.

After configuring the trigger, it’s time to select your action application. For this, you will use the SMTP by Pabbly Connect. This application will handle the email sending process. Ensure that you have the correct SMTP settings ready to proceed.


3. Configuring Google Sheets for Email Recipients

Now, you will need to configure your Google Sheets to store participant information. Open your Google Sheets where you have the participant data. Ensure you have columns for recipient emails, names, and any other relevant information.

In Google, select the range of cells that contain the email addresses. This is crucial for mapping the data correctly in Pabbly Connect. You’ll be able to pull this data into your workflow, making it easy to send personalized emails to each participant.


4. Sending Personalized Emails Using Pabbly Connect

Once you have set up your Google Sheets, it’s time to send personalized emails. In the action step of Pabbly Connect, configure the email settings. Here, you will map the fields from your Google Sheets to the email fields in the SMTP settings.

  • Map the recipient email field to the ‘To’ section.
  • Use the participant name for the email greeting.
  • Customize the email subject and body as needed.

After mapping all necessary fields, save your workflow. You can test the setup to ensure that emails are sent correctly to all participants. Check your inbox to confirm receipt of the email.


5. Finalizing Your Workflow and Testing

To finalize your workflow, review all settings and ensure everything is configured correctly in Pabbly Connect. Make sure your Google Sheets are accurately linked and that the email settings are correct.

Once you are satisfied with the setup, run a test to verify that the automated emails are sent as expected. Monitor the responses to ensure that participants receive their confirmation emails without issues. This step is crucial for ensuring your workflow runs smoothly.


Conclusion

In this tutorial, you learned how to automate emails from Google using Pabbly Connect. By following these steps, you can efficiently manage event participant communication and ensure timely follow-ups.

Thanks for following along with this tutorial! Remember to subscribe to the channel for more helpful content like this.

If you found this guide useful, please consider giving it a thumbs up and sharing it with others who might benefit from it.

Automate WordPress Posts Scheduling Using Pabbly Connect

Learn how to automate scheduling WordPress posts using Pabbly Connect with Google Sheets for efficient content management every Sunday. Implement the precise methodologies leading organizations use to automate repetitive tasks, illustrated with practical examples designed for immediate application.

Watch Step By Step Video Tutorial Below


1. Accessing Pabbly Connect for WordPress Integration

To automate scheduling WordPress posts, the first step is to access Pabbly Connect. Open your browser and search for Pabbly Connect. This powerful integration tool allows you to connect various applications seamlessly.

If you don’t have an account, click on the ‘Sign Up for Free’ button. This process takes only a couple of minutes and provides you with 100 free tasks every month. Once you have an account, log in and navigate to the dashboard to begin creating your workflow.


2. Creating a Workflow in Pabbly Connect

After logging into Pabbly Connect, the next step is to create a new workflow. Click on the ‘Create Workflow’ button and name it appropriately, such as ‘Schedule WordPress Posts’. Choose the folder where you want to save this workflow.

  • Select your folder for saving the workflow.
  • Click on ‘Create’ to proceed to the next step.
  • You will see two boxes: Trigger and Action.

In this step, you will set up the trigger. The trigger will be the event that starts your workflow. Select ‘Schedule by Pabbly’ as the trigger application and choose the event that schedules your workflow for every Sunday.


3. Setting Up Google Sheets for Post Details

Once the trigger is set, the next step involves using Google Sheets to fetch your post details. In Pabbly Connect, select Google Sheets as your action application. Choose the ‘Get Row’ action event to retrieve the details from your spreadsheet.

To connect Google Sheets with Pabbly Connect, click on ‘Connect’ and authorize access to your Google account. After connecting, select the specific spreadsheet containing your post data. Set the row range starting from A2 to capture the necessary details for your posts.

  • Select the correct spreadsheet where your post details are stored.
  • Ensure you specify the range correctly to include all relevant rows.

This setup ensures that every time the workflow runs, it captures the details of the next post from your Google Sheets.


4. Finalizing WordPress Integration in Pabbly Connect

After setting up Google Sheets, the final step is to connect your WordPress account with Pabbly Connect. Select WordPress as your action application and choose the ‘Create Post’ action event. This allows you to publish new posts automatically based on the data fetched from Google Sheets.

To connect WordPress, enter your base URL, username, and password. The base URL is typically the path to your WordPress site. After entering the required credentials, click on ‘Save’ to establish the connection.

Input your base URL correctly to ensure a successful connection. Map the post title and content from the Google Sheets response to create your posts dynamically.

This integration will allow Pabbly Connect to automatically create new posts on your WordPress site every Sunday, streamlining your content management process.


5. Conclusion: Automate Your WordPress Posting with Pabbly Connect

In conclusion, using Pabbly Connect to automate scheduling WordPress posts can significantly enhance your content management efficiency. By integrating Google Sheets and WordPress, you can ensure that your posts are published automatically without manual intervention.

Ensure you check out Pabbly Connect to create business automation workflows and reduce manual tasks. Pabbly Connect currently offer integration with 2,000+ applications.

This tutorial demonstrated how to set up the workflow step-by-step, from accessing Pabbly Connect to creating posts based on your Google Sheets data. Automate your WordPress posting today and save time while ensuring consistent content delivery every Sunday!

Integrating Google with Facebook: A Step-by-Step Guide

Learn how to seamlessly integrate Google with Facebook using Pabbly Connect. This guide provides detailed steps for automation without coding skills. Discover how to seamlessly connect your essential tools through accessible instructions that make powerful automation available to professionals at every skill level.

Watch Step By Step Video Tutorial Below


1. Setting Up Google and Facebook Integration

To start the Google and Facebook integration, first, log into your Pabbly Connect account. If you’re a new user, sign up for free to get started. This platform allows you to automate workflows between Google and Facebook without any coding skills.

Once logged in, navigate to the Pabbly Connect dashboard. Here, you will see options to create a new workflow that connects Google with Facebook. Choose the trigger application as Facebook to kickstart the automation process.


2. Selecting Trigger Event on Facebook

The next step in the Google and Facebook integration is to select a trigger event. Click on the Facebook icon and choose the trigger event as ‘New Lead Instant’. This event will activate whenever a new lead is generated on Facebook. using Pabbly Connect

  • Click on the ‘Connect’ button to establish a connection.
  • If you already have a connection, select it; otherwise, create a new connection.
  • Enter the required details in the popup, including page and lead form.

After entering the details, click on the ‘Connect’ button to finalize the trigger setup. Now, your Facebook integration is ready to capture leads automatically.


3. Testing the Facebook Trigger

After setting up the trigger, it’s crucial to test if the integration works correctly. Go to your Facebook page and fill out the lead form with dummy data. Once submitted, return to Pabbly Connect to check if the data has been captured successfully.

You should see the captured lead data displayed in Pabbly Connect. This confirms that your integration between Google and Facebook is functioning as expected. Ensure that the first name, last name, email, and phone number are all captured accurately.


4. Connecting Google to Capture Leads

Now that your Facebook trigger is set up, the next step is to connect Google to capture the leads. In Pabbly Connect, select Google as the action application. You will need to choose the action event, which is to create a subscriber in MailerLite.

  • Click on the ‘Connect’ button to link your MailerLite account.
  • Generate an API token from your MailerLite account and paste it into Pabbly Connect.
  • Map the fields from Facebook to MailerLite correctly.

Once the fields are mapped, save the connection. Your Google and Facebook integration is now complete, and leads from Facebook will automatically be added to your MailerLite account.


5. Finalizing Your Integration Workflow

The last step in the Google and Facebook integration is to finalize your workflow. Go back to Pabbly Connect and ensure all connections are properly established. Review the mapped fields to confirm accuracy.

Once everything looks good, click on the ‘Save’ button to activate your workflow. Your integration is now live, and you can start receiving leads from Facebook directly into Google services.

Conclusion

This guide summarizes the key points and helps you understand the essential features and benefits of using this tool.

Thanks for following along with this tutorial! Remember to subscribe to the channel for more helpful content like this.

If you found this guide useful, please consider giving it a thumbs up and sharing it with others who might benefit from it.


In conclusion, integrating Google with Facebook using Pabbly Connect allows for seamless automation of lead capture. This step-by-step guide ensures that you can set up the integration easily without any coding knowledge.

Integrate Automation with Pabbly Connect: A Step-by-Step Guide

Learn how to integrate Automation, The Happening, and Simply using Pabbly Connect. Follow this detailed tutorial for seamless connections. Explore systematic approaches to creating efficient automation solutions that convert technical concepts into practical, implementable instructions.

Watch Step By Step Video Tutorial Below


1. Setting Up Pabbly Connect for Integration

To initiate the integration process, start by accessing Pabbly Connect. This platform allows you to create connections between various applications such as Automation, The Happening, and Simply. Begin by logging into your Pabbly Connect account.

Once logged in, you will navigate to the dashboard where you can set up your first workflow. Click on the ‘Create Workflow’ button and name your workflow to identify its purpose easily. This step is crucial as it sets the stage for the automation process.


2. Integrating Cal.com with Pabbly Connect

The next step involves integrating Cal.com with Pabbly Connect. Cal.com is an open-source scheduling platform that simplifies booking meetings. To do this, select Cal.com as your trigger application in Pabbly Connect.

  • Select ‘Trigger’ from the options in Pabbly Connect.
  • Choose ‘Cal.com’ as your trigger application.
  • Select the trigger event, such as ‘Booking Created’.

After selecting the trigger event, Pabbly Connect will provide a webhook URL. This URL will be used to capture responses from Cal.com whenever a booking is made. Copy this URL for the next steps.


3. Setting Up Webhook in Cal.com

Now that you have the webhook URL, it’s time to set it up in Cal.com. Log into your Cal.com account and navigate to the settings option on the left sidebar. Here, you will find the ‘Developer’ section where you can add a new webhook.

  • Click on ‘New Webhook’ in Cal.com.
  • Paste the copied webhook URL into the ‘Subscriber URL’ field.
  • Select the trigger event, ensuring it matches the one set in Pabbly Connect.

Once you have configured the webhook, click on the ‘Create Webhook’ button to finalize the setup. This will enable Cal.com to send data to Pabbly Connect whenever a booking occurs.


4. Testing the Integration

After setting up the webhook, it’s essential to test the integration. Head back to your Cal.com Pabbly booking page and create a new booking. Ensure that the details entered reflect accurately in Pabbly Connect.

Upon completing a booking, return to Pabbly Connect. You should see the captured response from Cal.com, which includes all relevant details such as the client’s name, email, and booking time. This confirms that the integration is successful.


5. Sending Notifications Using Pabbly Connect

With the integration in place, you can now set up actions to send notifications. Choose an action application such as WhatsApp Now or Google Sheets to relay booking confirmations. using Pabbly Connect

In this section, configure the action by selecting the appropriate application and defining what data to send. For example, you can send a WhatsApp message to the client confirming their appointment.

Select ‘WhatsApp Now’ as your action application. Map the fields from the trigger data to the message template. Test the action to ensure messages are sent correctly.

Once configured, every new booking in Cal.com will trigger an automatic message sent via WhatsApp, enhancing communication with your clients.


Conclusion

In this tutorial, we explored how to integrate Automation, The Happening, and Simply using Pabbly Connect. By following the steps outlined, you can automate your booking confirmations and streamline your workflow effectively.

Ensure you check out Pabbly Connect to create business automation workflows and reduce manual tasks. Pabbly Connect currently offer integration with 2,000+ applications.

Integrate Google Business Profile with Slack and Google Sheets Using Pabbly Connect

Learn how to integrate Google Business Profile with Slack and Google Sheets using Pabbly Connect in this detailed step-by-step tutorial. Explore efficient methods for automating routine tasks with clear, concise instructions suited for both newcomers and experienced professionals.

Watch Step By Step Video Tutorial Below


1. Accessing Pabbly Connect for Integration

To begin the integration process using Pabbly Connect, you need to access the Pabbly Connect platform. Open your browser and navigate to the Pabbly website. You will see options to sign in or sign up for free if you are a new user.

Once signed in, you will be directed to the Pabbly Connect dashboard. Here, you can start creating your workflow by clicking on the ‘Create Workflow’ button. You will need to name your workflow, for instance, ‘Notify Team on Slack for New Google Business Profile Review and Add Review in Google Sheets.’ After naming, click on ‘Create’ to proceed.


2. Setting Up the Trigger with Google Business Profile

The first step in your workflow is to set up the trigger using Pabbly Connect. For this integration, select ‘Google Business Profile’ as your trigger application. This means that whenever a new review is received, it will trigger the workflow.

Next, choose the trigger event as ‘New Review.’ After selecting this, click on the ‘Connect’ button. If you haven’t connected your Google Business Profile before, you will need to add a new connection. Click on ‘Add a New Connection,’ then sign in with your Google account and grant the necessary permissions.

  • Select your Google account for connection
  • Choose the location name associated with your business
  • Click on ‘Save and Send Test Request’ to capture the latest review

After completing these steps, Pabbly Connect will capture the details of the new review, which will be essential for the next steps in your workflow.


3. Adding Review Data to Google Sheets

Once the trigger is set, the next task is to add the captured review data into Google Sheets using Pabbly Connect. Select ‘Google Sheets’ as your action application. Choose the action event as ‘Add New Row’ and click on connect.

Again, if you are connecting for the first time, follow the same connection steps as before. After connecting, select the spreadsheet where you want the review data to be stored. Ensure that the sheet contains the columns for customer name, rating, and review text.

  • Map the customer name from the trigger response
  • Map the rating and review text correspondingly
  • Click on ‘Save and Send Test Request’ to ensure data is added

After mapping these details, Pabbly Connect will automatically add new reviews to your Google Sheets, keeping your data organized and up to date.


4. Notifying Your Team on Slack

The final step of the workflow is to notify your team on Slack whenever a new review is added. For this, select ‘Slack’ as the action application and choose the action event as ‘Send Channel Message.’ Again, click on connect and follow the connection process.

After connecting, choose the channel where you want to send the notification. Customize the message to include details about the new review, such as customer name, rating, and review text. This will help your team stay informed about customer feedback.

Map the customer name, rating, and review text to the message Add a customizable message to alert the team Click on ‘Save and Send Test Request’ to send the notification

With this setup, Pabbly Connect will ensure that your team is promptly notified on Slack, allowing for quick responses to customer reviews.


5. Summary of the Integration Process

In summary, we have successfully integrated Google Business Profile, Google Sheets, and Slack using Pabbly Connect. The workflow allows for automatic notifications to your Slack team and organized storage of reviews in Google Sheets.

This integration not only streamlines the process of managing customer feedback but also enhances team communication. The steps included setting up the trigger with Google Business Profile, adding data to Google Sheets, and notifying your team on Slack.

By using Pabbly Connect, you can automate these tasks without any coding knowledge, making it an essential tool for your business operations.


Conclusion

This tutorial has demonstrated how to effectively use Pabbly Connect to integrate Google Business Profile with Slack and Google Sheets. By following these steps, you can ensure timely notifications and organized data management, significantly improving your customer feedback process.

Ensure you check out Pabbly Connect to create business automation workflows and reduce manual tasks. Pabbly Connect currently offer integration with 2,000+ applications.

Automate WhatsApp Messages for Canceled Shopify Orders Using Pabbly Connect

Learn how to automate WhatsApp messages for canceled Shopify orders using Pabbly Connect. Step-by-step guide to streamline your customer communication. Implement the precise methodologies leading organizations use to automate repetitive tasks, illustrated with practical examples designed for immediate application.

Watch Step By Step Video Tutorial Below


1. Accessing Pabbly Connect for Integration

To automate WhatsApp messages for canceled Shopify orders, you first need to access Pabbly Connect. Simply go to the Pabbly website and log in or sign up if you are a new user.

After signing in, you will see the dashboard where you can access various applications. Click on the Pabbly Connect option to start creating your workflow.


2. Creating a Workflow in Pabbly Connect

Once you are in Pabbly Connect, the next step is to create a new workflow. Click on the ‘Create Workflow’ button located in the top right corner. You will be prompted to name your workflow.

  • Name your workflow: Automatically send WhatsApp messages for canceled Shopify orders.
  • Select a folder for organization, such as ‘Automation’.
  • Click on the ‘Create’ button to finalize your workflow.

This creates a new workflow where you will define triggers and actions for your automation process.


3. Setting Up the Trigger with Shopify

In your newly created workflow, the first step is to set up a trigger. Select Shopify as your trigger application. This will allow Pabbly Connect to listen for events in your Shopify account.

Choose the trigger event as ‘Order Canceled’. This means that whenever an order is canceled in Shopify, Pabbly Connect will initiate the workflow. You will receive a webhook URL that you need to copy and paste into your Shopify account.


4. Connecting Shopify to Pabbly Connect

To connect your Shopify account to Pabbly Connect, go to your Shopify settings. Under the settings menu, select Notifications and find the Webhooks section. Click on ‘Create Webhook’.

  • Select the event as ‘Order Canceled’.
  • Paste the webhook URL you copied from Pabbly Connect.
  • Choose JSON as the format and save the webhook.

This step successfully links your Shopify account to Pabbly Connect, enabling it to receive cancellation notifications.


5. Sending WhatsApp Messages with WTI

After setting up the trigger, the next step is to configure the action. Select WTI as the action application in Pabbly Connect. This allows you to send WhatsApp messages based on the trigger event.

Choose the action event as ‘Test Send Template Message’. You will need to connect your WTI account by providing the API endpoint and access token. Once connected, fill in the WhatsApp number field dynamically using the customer’s phone number from the trigger.

Select the WhatsApp template you created for cancellations. Enter a broadcast name, such as ‘Order Canceled’. Provide any custom parameters needed for the template.

Finally, click on ‘Save and Send Test Request’ to send a WhatsApp message to the customer. This completes the integration process using Pabbly Connect.


Conclusion

In this tutorial, we demonstrated how to automate WhatsApp messages for canceled Shopify orders using Pabbly Connect. This integration not only enhances customer communication but also helps recover lost sales efficiently.

Ensure you check out Pabbly Connect to create business automation workflows and reduce manual tasks. Pabbly Connect currently offer integration with 2,000+ applications.