Integrating Google with WooCommerce Using Pabbly Connect

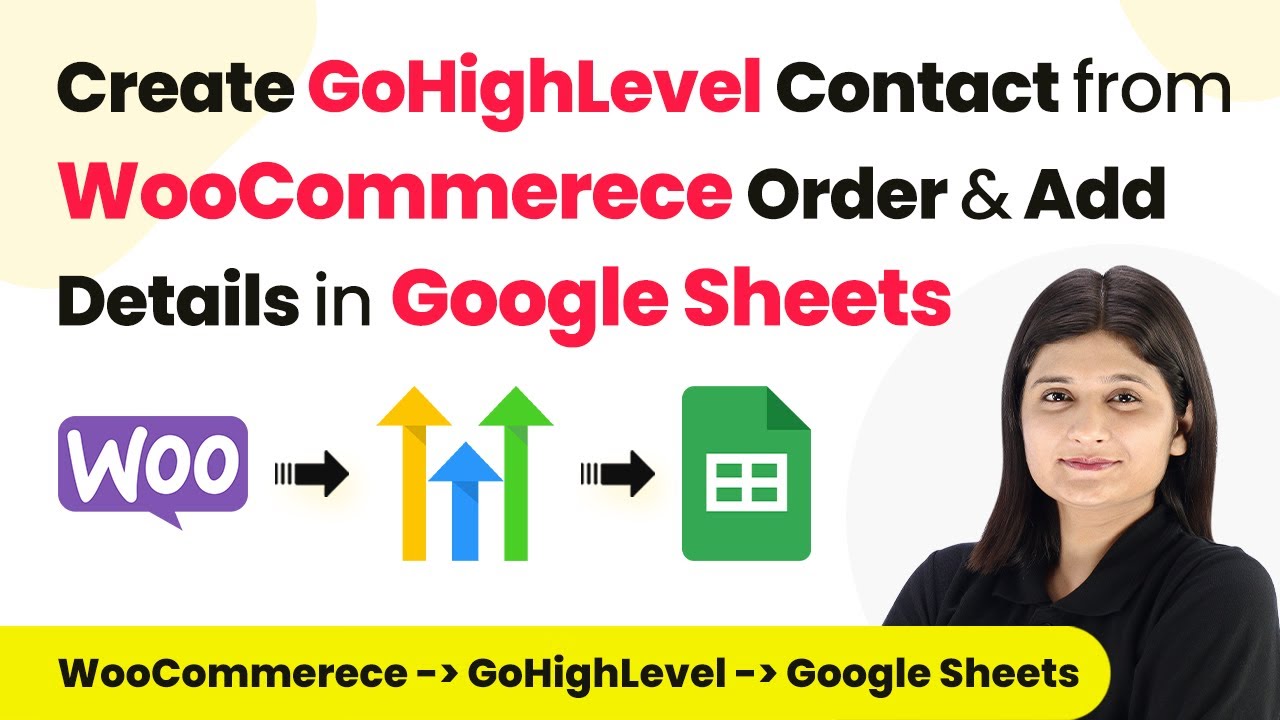
Learn how to integrate Google with WooCommerce to automate order management using Pabbly Connect. Step-by-step guide for seamless connections. Develop expertise in application integration and learn how to design streamlined automation workflows using proven, simplified approaches.

Watch Step By Step Video Tutorial Below


1. Setting Up Google Integration with Pabbly Connect

Google integration begins with Pabbly Connect. This process allows you to automate workflows between Google and WooCommerce effectively. First, you need to sign into your Pabbly account. using Pabbly Connect

Once logged in, navigate to the Pabbly Connect dashboard. Here, you will create a new workflow by clicking on the ‘Create New Workflow’ button. Select WooCommerce as your trigger application and Google as your action application.


2. Configuring WooCommerce as the Trigger Application

To configure WooCommerce as the trigger application, select ‘WooCommerce’ from the list. You will be prompted to choose a trigger event. For this workflow, select ‘New Order Created’ as the trigger event. using Pabbly Connect

  • Choose ‘New Order Created’ from the trigger events.
  • Connect your WooCommerce account by providing the required API credentials.
  • Test the connection to ensure it’s working properly.

After setting up the trigger, you can move on to configuring the action part of your workflow. This step is crucial for ensuring that data flows seamlessly from WooCommerce to Google.


3. Setting Up Google as the Action Application

Now, it’s time to set up Google as the action application. Select ‘Google’ from the application list and choose the action event you want to perform. For this integration, select ‘Create Contact’ as the action event. using Pabbly Connect

To proceed, you will need to connect your Google account. Ensure that you authorize Pabbly Connect to access your Google account by clicking on the ‘Connect’ button. Once authorized, fill in the required fields for the new contact:

  • Enter the first name and last name of the customer.
  • Provide the email address and phone number.
  • Map the WooCommerce order details to the corresponding Google contact fields.

After filling in the necessary information, click on the ‘Save and Send Test Request’ button to test the integration. This will create a new contact in your Google account based on the WooCommerce order details.


4. Testing the Integration Between WooCommerce and Google

Once the setup is complete, it’s essential to test the integration. Go back to your WooCommerce store and create a test order. Ensure that all required fields are filled accurately for testing. using Pabbly Connect

After placing the test order, return to Pabbly Connect to check if the new contact has been created in Google. You should see a successful response indicating that the data has been transferred correctly.

To verify, log into your Google account and check your contacts. The new contact should appear with all the details you mapped from the WooCommerce order. This confirms that the integration is working smoothly and automating your workflow effectively.


5. Finalizing Your Google and WooCommerce Integration

After successful testing, finalize your integration by saving your workflow in Pabbly Connect. Make sure to name your workflow appropriately for easy identification later. using Pabbly Connect

Additionally, you can explore more features within Pabbly Connect to further enhance your automation process. Consider adding more actions or triggers as per your business needs.

This integration allows you to efficiently manage new orders by automatically creating contacts in Google, saving you time and reducing manual entry errors.

Conclusion

This guide summarizes the key points and helps you understand the essential features and benefits of using this tool.

Thanks for following along with this tutorial! Remember to subscribe to the channel for more helpful content like this.

If you found this guide useful, please consider giving it a thumbs up and sharing it with others who might benefit from it.


In conclusion, integrating Google with WooCommerce using Pabbly Connect streamlines your order management process. By following the steps outlined, you can automate the creation of new contacts in Google effortlessly, enhancing your operational efficiency.

How to Integrate Repair Shopper with Google Sheets Using Pabbly Connect

Learn how to seamlessly integrate Repair Shopper with Google Sheets using Pabbly Connect for efficient ticket management and automation. Build sophisticated automated workflows in less time than you think. This guide translates complex integrations into straightforward steps for immediate implementation.

Watch Step By Step Video Tutorial Below


1. Accessing Pabbly Connect for Integration

To integrate Repair Shopper with Google Sheets, you first need to access Pabbly Connect. Start by visiting the Pabbly website and signing in to your account. If you are a new user, you can sign up for a free account, which allows you to explore its features.

After signing in, you will see a dashboard with various Pabbly applications. Click on the Pabbly Connect option to proceed with creating your integration workflow. This platform is designed to facilitate connections between different applications without needing programming skills.


2. Creating a Workflow in Pabbly Connect

Once you are in Pabbly Connect, click on the ‘Create Workflow’ button. You will need to name your workflow, for example, ‘Integrate Repair Shopper with Google Sheets’. Choose a folder for organization, like ‘Automations’.

  • Click on ‘Create’ to establish your new workflow.
  • You will see the workflow window where you can set up triggers and actions.

In this window, the trigger is the event that starts the workflow. For your integration, select Repair Shopper as the trigger application and choose the event as ‘Ticket Resolved’. This setup ensures that every time a ticket is resolved in Repair Shopper, the workflow will trigger automatically via Pabbly Connect.


3. Setting Up the Webhook in Repair Shopper

After selecting the trigger event, Pabbly Connect will provide you with a webhook URL. Copy this URL as it will be used to connect Repair Shopper to your workflow. Next, log into your Repair Shopper account.

  • Navigate to the admin section and select ‘Notification Center’.
  • Click on ‘Add Notification Set’ and paste the copied webhook URL.
  • Ensure to check the box for the ‘Ticket Was Resolved’ event.

Once you have completed these steps, click on ‘Create Notification Set’. This process successfully connects Repair Shopper with Pabbly Connect, allowing the workflow to receive data when tickets are resolved.


4. Adding Google Sheets as an Action in Pabbly Connect

With the webhook set up, return to Pabbly Connect to add Google Sheets as the action application. Search for Google Sheets and select it. The action event should be set to ‘Add New Row’. This step defines what happens when a ticket is resolved.

Connect your Google Sheets account by selecting ‘Sign in with Google’. Choose the spreadsheet where you want to log resolved tickets.

Map the ticket details from the previous step into the corresponding columns in Google Sheets. This mapping ensures that each resolved ticket’s information is accurately recorded, making it easy to track and manage tickets through Pabbly Connect.


5. Testing and Verifying the Integration

To complete the integration, you need to test the workflow. Go back to your Repair Shopper account and resolve a ticket. This action should trigger the webhook you created earlier via Pabbly Connect.

After resolving the ticket, check your Google Sheets to verify that the ticket details have been logged correctly. You should see the customer name, priority, ticket number, subject, and description populated in the respective columns. If everything is set up correctly, your integration is successful, and you can now manage resolved tickets efficiently.


Conclusion

Integrating Repair Shopper with Google Sheets using Pabbly Connect allows for seamless ticket management. This automation enhances record-keeping and reporting efficiency, saving you time and effort in manual data entry.

Ensure you check out Pabbly Connect to create business automation workflows and reduce manual tasks. Pabbly Connect currently offer integration with 2,000+ applications.

Integrating Pabbly with Rocklet Using Pabbly Connect: A Step-by-Step Guide

Learn how to set up webhooks in Rocklet using Pabbly Connect. This tutorial guides you through the integration process step-by-step, capturing responses effectively. Revolutionize your productivity approach with just a few strategic clicks. Uncover professional methods for connecting applications and creating workflows that reclaim hours of your week.

Watch Step By Step Video Tutorial Below


1. Setting Up Pabbly Connect for Rocklet Integration

To set up webhooks inside Rocklet using Pabbly Connect, you first need to access the Pabbly Connect platform. Start by logging into your Pabbly Connect account and creating a new workflow. This workflow will facilitate the integration between Rocklet and Pabbly.

In the workflow, you will notice two main sections: Trigger and Action. The Trigger is where you specify what event will initiate the integration, while the Action is where you define what happens as a result of that trigger. In this case, we will be using Rocklet as the trigger application.


2. Selecting the Trigger Event in Pabbly Connect

Once you have created your workflow, the next step is to select Rocklet as the trigger application in Pabbly Connect. This is crucial because it allows Pabbly Connect to listen for specific events that occur in your Rocklet account.

  • Choose ‘Contact Created’ as the trigger event.
  • Pabbly Connect provides multiple trigger events, select the one that suits your needs.
  • Once selected, Pabbly Connect generates a unique webhook URL for you.

After selecting the trigger event, copy the webhook URL provided by Pabbly Connect. This URL will be used to connect Rocklet to Pabbly Connect, enabling automatic response capturing when a new contact is created.


3. Configuring the Webhook in Rocklet

Now that you have your webhook URL, the next step is to configure it in your Rocklet account. Log into your Rocklet dashboard and navigate to the settings section. Here, you will find the option to manage webhooks.

Follow these steps to configure the webhook:

  • Click on the profile icon and select ‘Settings’.
  • Navigate to the ‘Webhooks’ section and click on the ‘Add’ button.
  • Paste the copied webhook URL into the URL field.
  • Select ‘Contact Created’ as the event type.

Make sure to enable the webhook by toggling the active button and then click on the save button. This will successfully link Rocklet with Pabbly Connect, allowing it to capture responses when a new contact is added.


4. Testing the Webhook Connection in Pabbly Connect

After configuring the webhook in Rocklet, it’s important to test the connection to ensure everything is working correctly. Go back to your Pabbly Connect workflow and check if it is waiting for a webhook response.

To test the connection, create a new contact in Rocklet. Fill in the required details such as first name, last name, email, and phone number, and then save the contact. This action should trigger the webhook and send the data to Pabbly Connect.

Once the contact is created, return to your Pabbly Connect workflow. You should see that the webhook has captured the response containing the contact’s details, such as name, email, and phone number. This confirms that Rocklet is successfully integrated with Pabbly Connect.


5. Conclusion: Successful Integration of Rocklet with Pabbly Connect

In this tutorial, we successfully integrated Rocklet with Pabbly Connect by setting up a webhook that captures contact creation events. By following the specific steps outlined, you can automate your workflows efficiently.

Ensure you check out Pabbly Connect to create business automation workflows and reduce manual tasks. Pabbly Connect currently offer integration with 2,000+ applications.

Utilizing Pabbly Connect allows for seamless integration with various applications, enhancing your operational efficiency. By automating the process of capturing new contacts, you can focus more on growing your business.

For more integrations and automation possibilities, explore what Pabbly Connect can do for you!

Seamless Integration of Razorpay and Keep with Pabbly Connect

Learn how to integrate Razorpay and Keep using Pabbly Connect for efficient payment processing and contact management. Follow this definitive guide to creating powerful automated workflows with straightforward, efficiency-focused solutions that save valuable time.

Watch Step By Step Video Tutorial Below


1. Accessing Pabbly Connect for Integration

To begin the integration process, access Pabbly Connect by visiting its official website. You will find options to sign in or sign up for free, which allows you to explore the software with 300 tasks per month.

Once signed in, you will be directed to the dashboard of Pabbly Connect. This dashboard is where you create workflows that connect various applications, such as Razorpay and Keep. To start, click on the ‘Create Workflow’ button located in the top right corner of the screen.


2. Creating a Workflow in Pabbly Connect

Creating a workflow in Pabbly Connect is essential for integrating Razorpay with Keep. In the workflow dialog box, name your workflow, for example, ‘Create Keep Contact on Razorpay Payment.’ You can also select a folder for better organization.

  • Enter a descriptive name for your workflow.
  • Choose a folder for organizing your workflows.
  • Click the ‘Create’ button to finalize your workflow setup.

After creating the workflow, you will see two main components: Trigger and Action. The Trigger is the event that starts the workflow, and the Action is what happens as a result. In this case, the trigger will be a new payment captured in Razorpay.


3. Setting Up Trigger in Pabbly Connect

In the Trigger step of Pabbly Connect, select Razorpay as your application. Choose the trigger event as ‘Payment Captured’ to capture payments made through Razorpay. This step is crucial as it initiates the workflow whenever a payment is received.

Once the trigger event is selected, Pabbly Connect will provide a webhook URL. This URL needs to be configured in your Razorpay account. Copy this webhook URL to connect Razorpay with Pabbly Connect.

  • Log into your Razorpay account.
  • Navigate to Account Settings and then to Webhooks.
  • Paste the copied webhook URL and select the event ‘Payment Captured’.

After setting up the webhook, you will receive a confirmation that the webhook has been saved successfully. This means that Razorpay is now connected to Pabbly Connect.


4. Filtering Payments in Pabbly Connect

To ensure that only specific payments trigger the creation of contacts in Keep, you will need to set up a filter in Pabbly Connect. This filter will check if the payment is for the Automation and AI course.

In the Action step, select ‘Filter by Pabbly’ and configure it to check for the product name in the payment details. Set the condition to ensure that the payment matches the course name.

Select the label for the product name from the Razorpay trigger response. Set the filter type to ‘Equal to’ and enter the course name.

Once the filter is set up, save the settings. This ensures that only payments for the specified course will create new contacts in Keep through Pabbly Connect.


5. Creating Contacts in Keep via Pabbly Connect

After setting up the filter, the final action in your Pabbly Connect workflow is to create a new contact in Keep. Choose Keep as your action application and select the action event as ‘Create or Update a Contact’.

To connect Keep with Pabbly Connect, click on ‘Connect’ and authorize the connection. Once connected, map the fields from the Razorpay payment details to the corresponding fields in Keep, such as email, first name, last name, and phone number.

Map the customer’s email address from the Razorpay response. Fill in the first name and last name fields with the mapped data.

After mapping all necessary fields, save the settings. You will receive a confirmation that a new contact has been successfully created in Keep. This completes the integration process, allowing you to manage your student contacts efficiently using Pabbly Connect.


Conclusion

In this tutorial, we explored how to integrate Razorpay and Keep using Pabbly Connect. This integration automates the process of creating contacts for new payments, ensuring efficient management of student information. With Pabbly Connect, you can streamline your workflows and enhance your business operations.

Ensure you check out Pabbly Connect to create business automation workflows and reduce manual tasks. Pabbly Connect currently offer integration with 2,000+ applications.

How to Send License Keys Automatically Using Pabbly Connect

Learn how to automate the process of sending license keys from Google Sheets after a Thrive Cart sale using Pabbly Connect in this detailed tutorial.

Watch Step By Step Video Tutorial Below


1. Accessing Pabbly Connect for Automation

To start automating the process of sending license keys, you first need to access Pabbly Connect. Simply go to the Pabbly website and log in to your account. If you are a new user, you can sign up for a free account to explore the features offered by Pabbly Connect.

Once you are logged in, navigate to the Pabbly Connect dashboard. Here, you will find the option to create a new workflow. Click on the ‘Create Workflow’ button and name your workflow appropriately, such as ‘Send License Key on Thrive Cart Sale from Google Sheets’. This sets the stage for your automation process.


2. Setting Up the Trigger in Pabbly Connect

In this section, you will configure the trigger application using Pabbly Connect. For our automation, select Thrive Cart as the trigger application. This means that every time a product is purchased, it will trigger the workflow.

  • Select ‘Thrive Cart’ as the trigger application.
  • Choose ‘Product Purchase’ as the trigger event.
  • Connect your Thrive Cart account by entering the API key.

After setting the trigger, proceed to test the connection to ensure it captures data correctly. This step is crucial as it lays the foundation for the subsequent actions in your workflow.


3. Configuring Action Steps with Google Sheets

Next, you will set up the action application using Pabbly Connect to fetch the license keys from Google Sheets. Select Google Sheets as the action application to retrieve the unique license key for the purchased product.

For this, choose the action event as ‘Lookup Spreadsheet Row’. This allows you to search for the license key associated with the customer’s email address. Follow these steps:

  • Connect your Google Sheets account.
  • Select the spreadsheet containing your license keys.
  • Map the lookup value to the email address from the trigger step.

By configuring these actions, you enable Pabbly Connect to dynamically retrieve the correct license key based on the customer’s purchase, streamlining the entire process.


4. Sending License Keys via Gmail

Now that you have the license key, it’s time to send it to the customer using Gmail through Pabbly Connect. Select Gmail as the action application and choose ‘Send Email V2’ as the action event.

In this step, map the recipient’s email address from the previous step, and customize the email content. Here’s how to do it:

Map the recipient email to the email captured from the Thrive Cart purchase. Set the email subject to something like ‘Your License Key for Pap Audio Extractor’. Include the license key in the email body.

Once you’ve set up the email details, test the action to ensure that the email is sent successfully to the customer. This integration allows for immediate delivery of the license key, enhancing customer satisfaction.


5. Updating Google Sheets Status

The final step in this workflow involves updating the Google Sheets status to reflect that the license key has been sent. Using Pabbly Connect, select Google Sheets again as the action application and choose ‘Update Row’ as the action event.

Here, you will need to map the row index of the license key that was sent. Additionally, update the status to ‘Linked’ and add the customer’s email address. Follow these steps:

Select the same spreadsheet used earlier. Map the row index dynamically from the previous lookup step. Update the status to ‘Linked’ and add the customer email.

After testing this action, you will see that the Google Sheets is updated automatically, ensuring all records are accurate and up-to-date. This finalizes your automated workflow using Pabbly Connect.


Conclusion

In this tutorial, you learned how to automate the sending of license keys using Pabbly Connect, Thrive Cart, and Google Sheets. By following these steps, you can streamline your sales process and ensure customers receive their keys instantly, enhancing their overall experience.

Ensure you check out Pabbly Connect to create business automation workflows and reduce manual tasks. Pabbly Connect currently offer integration with 2,000+ applications.

Integrating Google with Pabbly: A Step-by-Step Guide

Learn how to integrate Google with Pabbly for seamless automation in managing your business. Follow our detailed guide for step-by-step instructions. Explore efficient methods for automating routine tasks with clear, concise instructions suited for both newcomers and experienced professionals. with Pabbly Connect.

Watch Step By Step Video Tutorial Below


1. Setting Up Google Integration with Pabbly

Google integration with Pabbly is essential for automating customer management. Start by navigating to the Pabbly Connect dashboard after signing in to your Pabbly account. using Pabbly Connect

Once logged in, you will see the option to create a new workflow. This is where you will set up the connection between Google and Pabbly. Ensure you have your Google account ready for integration.


2. Creating a New Workflow for Google Integration

To create a new workflow, click on the ‘Create New Workflow’ button in your Pabbly Connect dashboard. This action will prompt you to set up a trigger and an action. using Pabbly Connect

  • Select ‘Repair Shopper’ as your trigger application.
  • Choose the event ‘New Customer Created’.
  • Click on ‘Save’ to proceed.

After saving, you will be directed to set up the action step. Here, select Google as your action application, and choose the event that corresponds to your needs, such as creating a contact.


3. Connecting Google and Repair Shopper

To connect Google and Repair Shopper, you need to provide a webhook URL. This URL acts as a bridge between the two applications. using Pabbly Connect

In your Repair Shopper account, navigate to the admin section and find the notifications settings. Here, you will create a new notification set. Name it appropriately, such as ‘New Customer Notification’.

  • Paste the webhook URL from Pabbly into the notification settings.
  • Select the event for customer creation.
  • Save the settings to activate the connection.

Once this is set, any new customer created in Repair Shopper will trigger the integration with Google automatically.


4. Testing the Google Integration

Testing the Google integration is crucial to ensure everything is functioning correctly. Start by creating a dummy customer in Repair Shopper. using Pabbly Connect

After creating the customer, return to Pabbly Connect and perform a test submission. This will help verify that the data is being sent to Google as expected.

Check the response from Google to confirm the integration. Ensure the new customer appears in your Google contacts. If successful, proceed to finalize the workflow.

Testing helps ensure that future customer data will be captured and stored correctly in Google.


5. Finalizing Your Google Integration with Pabbly

Once you have tested the integration successfully, it is time to finalize it. Click on the ‘Save’ button in your Pabbly Connect workflow to ensure all settings are stored. using Pabbly Connect

Now your Google integration is complete, and any new customer created in Repair Shopper will automatically be added to your Google contacts. This automation saves time and reduces manual entry errors.

Conclusion

This guide summarizes the key points and helps you understand the essential features and benefits of using this tool.

Thanks for following along with this tutorial! Remember to subscribe to the channel for more helpful content like this.

If you found this guide useful, please consider giving it a thumbs up and sharing it with others who might benefit from it.


In conclusion, integrating Google with Pabbly allows for efficient customer management. By following the steps outlined in this tutorial, you can automate your workflow and enhance productivity.

Automate License Key Delivery with Pabbly Connect: A Step-by-Step Guide

Learn how to automate license key delivery from Google Sheets to Shopify using Pabbly Connect in this detailed tutorial. Develop expertise in application integration and learn how to design streamlined automation workflows using proven, simplified approaches.

Watch Step By Step Video Tutorial Below


1. Accessing Pabbly Connect for Integration

To start automating license key delivery, access Pabbly Connect by visiting the official website. You can sign up for a free account or log in if you are an existing user. Once logged in, you will be directed to the dashboard where all your workflows are displayed.

After logging in, click on the ‘Create Workflow’ option to begin. You will be prompted to name your workflow. For this tutorial, name it ‘Send License Key on Shopify Order from Google Sheets’ and select the appropriate folder for organization.


2. Setting Up Trigger with Shopify in Pabbly Connect

In this step, we will set up the trigger in Pabbly Connect to capture new orders from Shopify. Select Shopify as the trigger application and choose the trigger event as ‘New Order.’ This event will initiate the workflow whenever a new order is placed.

  • Select ‘New Order’ as the trigger event.
  • Copy the provided webhook URL.
  • Log into your Shopify account and navigate to Settings > Notifications.
  • Create a new webhook using the copied URL.

Once the webhook is created in Shopify, Pabbly Connect will be ready to receive data from Shopify whenever a customer places an order.


3. Filtering Orders for Specific Products

Next, we need to filter the orders to ensure that only the correct product triggers the license key delivery. In Pabbly Connect, add a filter step after the Shopify trigger. This filter will check if the purchased product is the software requiring a license key.

  • Select ‘Filter’ as the action application.
  • Set the condition to check if the product name equals ‘PAB Audio Extractor.’
  • If true, proceed to the next action; otherwise, stop the workflow.

This filtering ensures that only relevant orders prompt the delivery of license keys, maintaining the integrity of your workflow in Pabbly Connect.


4. Sending License Key via Gmail

After filtering, the next action is to send the license key to the customer via Gmail. In Pabbly Connect, select Gmail as the action application and choose the ‘Send Email’ event. This will allow you to send personalized emails to customers with their license keys.

Map the recipient’s email address from the Shopify order response. Set the email subject and content, including the mapped license key. Test the email to ensure it is sent correctly.

By utilizing Pabbly Connect, you can automate the entire email sending process, ensuring customers receive their license keys immediately after purchase.


5. Updating Google Sheets with License Key Status

The final step in our automation workflow is to update Google Sheets with the status of the license keys. In Pabbly Connect, add Google Sheets as the action application and select the ‘Update Row’ event. This will allow you to mark the license key as linked and update the customer’s email address.

Select the spreadsheet containing the license keys. Map the row index of the license key that was sent. Update the status to ‘Linked’ and add the customer’s email address.

This ensures that your records in Google Sheets remain accurate and up-to-date, all facilitated through Pabbly Connect.


Conclusion

In this tutorial, we demonstrated how to automate the delivery of license keys from Google Sheets to Shopify using Pabbly Connect. By setting up triggers, filters, and actions, you can streamline the entire process without any coding. This integration not only saves time but also enhances customer satisfaction by ensuring timely delivery of software licenses.

Ensure you check out Pabbly Connect to create business automation workflows and reduce manual tasks. Pabbly Connect currently offer integration with 2,000+ applications.

Automating India Mart Inquiries to Google Sheets with Pabbly Connect

Learn how to automate inquiries from India Mart to Google Sheets using Pabbly Connect. Step-by-step guide for seamless integration. Revolutionize your productivity approach with just a few strategic clicks. Uncover professional methods for connecting applications and creating workflows that reclaim hours of your week.

Watch Step By Step Video Tutorial Below


1. Accessing Pabbly Connect for Automation

To automate inquiries from India Mart to Google Sheets, the first step is accessing Pabbly Connect. You can do this by opening your web browser and searching for Pabbly Connect. Once on the landing page, you can choose to sign up for free if you don’t have an account, which allows you 100 tasks every month.

If you already have an account, simply sign in. After logging in, you will be directed to the dashboard where you can start creating your workflow. This is where the integration process begins, allowing you to connect India Mart with Google Sheets seamlessly.


2. Creating a Workflow in Pabbly Connect

In this section, we will create a new workflow using Pabbly Connect. Start by clicking on the ‘Create Workflow’ button on your dashboard. A pop-up will appear where you can name your workflow, such as ‘Add India Mart Inquiries to Google Sheets’. Select the appropriate folder to save this workflow.

  • Click on ‘Create’ to proceed.
  • You will see two boxes for Trigger and Action.
  • Set up your Trigger and Action according to your needs.

After creating the workflow, you will be taken to the main workflow window. Here, you will set your trigger application, which will be India Mart, and the action application, which will be Google Sheets. This setup is crucial for automating the inquiry process effectively.


3. Setting Up Trigger with India Mart

Now, it’s time to set up the trigger in Pabbly Connect. Search for India Mart as your trigger application and select it. Choose the event ‘New Leads’ as your trigger event. This step is essential because it defines when the automation will start.

Next, you will need to connect India Mart with Pabbly Connect. Copy the VAB URL provided by Pabbly Connect, which serves as a bridge between India Mart and Pabbly Connect. Go to your India Mart account, navigate to the Lead Manager, and select the option to create a Push API integration.

  • Select ‘Other’ as your source since the platform is not listed.
  • Paste the copied VAB URL into the Webhook Listener URL field.
  • Save the details and generate the OTP to finalize the integration.

Once you have completed these steps, your India Mart account will be successfully connected to Pabbly Connect, allowing you to receive inquiries automatically.


4. Setting Up Action with Google Sheets

After setting up the trigger, the next step is to configure the action in Pabbly Connect. Search for Google Sheets as your action application and select it. You will need to choose the action event ‘Add New Row’ to ensure that new inquiries are recorded in your Google Sheets.

Connect Google Sheets to Pabbly Connect by clicking on ‘Add New Connection’ and signing in with your Google account. Allow the necessary permissions for Pabbly Connect to access your Google Sheets. Once connected, select the specific spreadsheet where you want to add the inquiry details.

Map the fields from the inquiry data to the corresponding columns in Google Sheets. Ensure that each field is correctly matched to capture all relevant inquiry details. Save and test the action to confirm that the integration works correctly.

After mapping all the necessary fields, you will be able to automatically add new inquiries from India Mart into your Google Sheets without any manual effort.


5. Testing and Verifying the Integration

The final step is to test the integration between India Mart and Google Sheets using Pabbly Connect. To do this, create a test inquiry in your India Mart account. This will help you verify if the data is being sent correctly to Pabbly Connect.

Once the test inquiry is created, go back to Pabbly Connect and check if the webhook response has been received. If you see the test data in the response, it indicates that the integration is functioning as expected. You can then proceed to check your Google Sheets to confirm that the new row with inquiry details has been added.

Ensure that all details such as sender name, email, phone number, and inquiry message are accurately reflected. If everything is correct, your integration is successfully set up! You can now manage inquiries efficiently without manual entry.

With the successful setup of this automation, you can now keep track of all inquiries from India Mart in your Google Sheets, streamlining your workflow and improving efficiency in your pharmaceuticals and medical products business.


Conclusion

In this tutorial, we demonstrated how to automate inquiries from India Mart to Google Sheets using Pabbly Connect. By following the steps outlined, you can ensure that all new inquiries are recorded efficiently, allowing for better management and tracking of leads. Automating this process saves time and reduces the risk of manual errors, enhancing your business operations.

Ensure you check out Pabbly Connect to create business automation workflows and reduce manual tasks. Pabbly Connect currently offer integration with 2,000+ applications.

Integrate Shopper with Google Sheets Using Pabbly Connect

Learn how to integrate Shopper with Google Sheets using Pabbly Connect to automate ticket creation efficiently. Explore systematic approaches to creating efficient automation solutions that convert technical concepts into practical, implementable instructions.

Watch Step By Step Video Tutorial Below


1. Introduction to Pabbly Connect for Automating Shopper Tickets

In this tutorial, we will explore how to use Pabbly Connect to integrate Shopper with Google Sheets. This integration automates the process of creating repair tickets whenever new data is added to Google Sheets. By leveraging Pabbly Connect, we can streamline our workflow and enhance efficiency.

As a software repair service owner, managing customer requests can be time-consuming. Automating ticket creation ensures that customer details are captured accurately and promptly. This integration allows for faster responses and keeps your operations organized.


2. Setting Up Pabbly Connect and Creating a Workflow

To begin, access Pabbly Connect by visiting its homepage. Sign in if you are an existing user or sign up for a free account if you are new. Once logged in, navigate to the dashboard and click on the ‘Create Workflow’ button to initiate your automation.

  • Click on ‘Create Workflow’ in the top right corner.
  • Name your workflow as ‘Create Repair Shopper Ticket from Google Sheets’.
  • Select a folder for your workflow, such as ‘Automations’.

After naming your workflow, you will see two main components: Trigger and Action. The Trigger will be set to Google Sheets, which will initiate the workflow when new data is added.


3. Configuring Google Sheets as the Trigger Application

In this section, we will configure Google Sheets as the trigger application in Pabbly Connect. Select Google Sheets as your trigger application and choose the trigger event as ‘New or Updated Spreadsheet Row’. This allows Pabbly Connect to capture any new entries made in your Google Sheets.

Upon selecting the trigger event, you will receive a webhook URL. This URL will be used to connect Google Sheets to Pabbly Connect. To do this, follow these steps:

  • Copy the webhook URL provided in Pabbly Connect.
  • Open Google Sheets and go to Extensions > Add-ons > Get Add-ons.
  • Search for ‘Pabbly Connect Webhooks’ and install the add-on.

After installation, refresh your Google Sheets. Then, under Extensions, select ‘Pabbly Connect Webhooks’ and choose ‘Initial Setup’. Paste the webhook URL and set the trigger column to the last column (e.g., Column G) where data will be added.


4. Connecting Repair Shopper in Pabbly Connect

Now that we have configured Google Sheets, the next step is to set up Repair Shopper as the action application in Pabbly Connect. In this step, we will search for existing customers based on the data received from Google Sheets. Select Repair Shopper as your action application and choose the action event as ‘Search a Customer’.

To connect Repair Shopper with Pabbly Connect, click on ‘Connect’ and then select ‘Add New Connection’. You will need to provide an API token and subdomain for your Repair Shopper account. Follow these steps:

Log into your Repair Shopper account and navigate to your profile settings. Generate a new API token with the required permissions. Copy the API token and enter it into Pabbly Connect, along with your subdomain.

After entering the details, save the connection. You can now map the customer email from the Google Sheets trigger response to search for existing customers in Repair Shopper.


5. Creating a Ticket in Repair Shopper

After successfully searching for the customer, the final step is to create a new ticket in Repair Shopper using Pabbly Connect. Add another action step and select Repair Shopper again, this time choosing ‘Create a Ticket’ as the action event.

Connect to Repair Shopper using the existing connection you created earlier. You will need to map the customer ID and other ticket details from the previous steps. Ensure the following fields are mapped:

Customer ID from the search response. Subject and description from the Google Sheets trigger. Priority and other relevant details.

Once all required fields are filled, click on ‘Save and Send Test Request’. If successful, you will see a confirmation that a new ticket has been created in Repair Shopper. Check your Repair Shopper account to verify the new ticket’s creation.


Conclusion

This tutorial illustrated how to use Pabbly Connect to automate ticket creation in Repair Shopper from Google Sheets. By following these steps, you can efficiently manage customer requests and streamline your repair service operations.

Ensure you check out Pabbly Connect to create business automation workflows and reduce manual tasks. Pabbly Connect currently offer integration with 2,000+ applications.

How to Automate WhatsApp Messages with Pabbly Connect

Learn how to automate WhatsApp messages using Pabbly Connect by integrating it with IndiaMART for efficient inquiries handling. Streamline your workflow, save valuable time, and eliminate repetitive tasks through powerful automation capabilities.

Watch Step By Step Video Tutorial Below


Creating Your Pabbly Connect Account

To start using Pabbly Connect, you need to create an account. Visit the Pabbly website and click on the ‘Sign Up for Free’ option. This will allow you to access 100 tasks free every month, which is perfect for beginners.

Once you have signed up, log in to your account. You will be directed to the Pabbly Connect dashboard where you can manage all your workflows. Here, you can see various Pabbly applications available for you to explore.


Setting Up Your Workflow in Pabbly Connect

After logging in, the next step is to create a new workflow. Click on the ‘Create Workflow’ button. You will need to name your workflow, for example, ‘Send WhatsApp Messages for Inquiries.’ Choose a folder to save this workflow for better organization. using Pabbly Connect

Now, you will set the trigger and action for your workflow. The trigger is the event that starts the automation. In this case, select IndiaMART as your trigger application. Choose the ‘New Inquiry’ event, which will trigger the workflow whenever a new inquiry is received.

  • Select the trigger application: IndiaMART
  • Choose the event: New Inquiry
  • Connect your IndiaMART account to Pabbly Connect

After setting the trigger, you will need to test the connection to ensure everything is working correctly. Once confirmed, you can proceed to set up the action step.


Integrating WhatsApp with Pabbly Connect

For the action step, select WhatsApp as the application where you want to send messages. Choose the action event as ‘Send Message.’ This allows you to send automated WhatsApp messages to users who submit inquiries. using Pabbly Connect

Next, you need to connect your WhatsApp account. To do this, you will be required to generate an API key from your WhatsApp account. Log in to your WhatsApp account, navigate to the ‘Manage’ section, and click on ‘API Key’ to create a new API key.

  • Log in to your WhatsApp account
  • Navigate to the Manage section
  • Click on API Key to generate it

Copy the API key and paste it into Pabbly Connect to establish the connection. Once connected, you can customize your message template for the WhatsApp notification.


Testing Your Workflow

With your workflow set up, it’s time to test it. Go back to your Pabbly Connect dashboard and navigate to the workflow you created. Click on the ‘Test Workflow’ button to initiate a test inquiry from IndiaMART. using Pabbly Connect

After submitting a test inquiry, check your WhatsApp account for the automated message. You should receive a message confirming the receipt of your inquiry, which indicates that the integration is successful.

Make sure to review the message content to ensure it meets your requirements. If any adjustments are needed, you can go back to the workflow settings and modify the message template accordingly.


Conclusion

Automating WhatsApp messages using Pabbly Connect streamlines your inquiry handling process effectively. By integrating IndiaMART and WhatsApp, you can ensure prompt responses to customer inquiries, enhancing your business efficiency.

Thanks for following along with this tutorial! Remember to subscribe to the channel for more helpful content like this.

If you found this guide useful, please consider giving it a thumbs up and sharing it with others who might benefit from it.