Automate SMS Marketing with Pabbly Connect: A Step-by-Step Guide

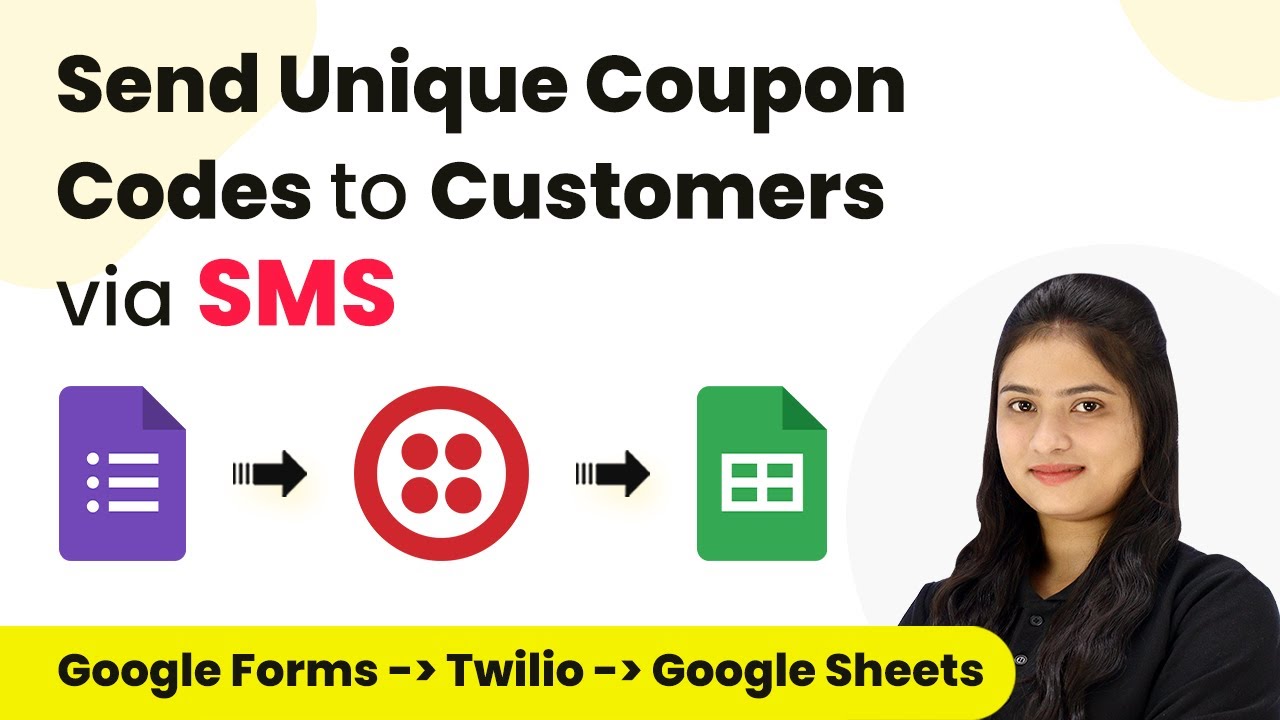
Learn how to automate SMS marketing with unique promo codes using Pabbly Connect, Google Forms, and Twilio. Follow this detailed tutorial for seamless integration. Transform complex automation concepts into accessible, actionable steps that eliminate unnecessary manual work while maximizing existing application capabilities.

Watch Step By Step Video Tutorial Below


1. Setting Up Pabbly Connect for SMS Automation

To begin automating SMS marketing with unique promo codes, you first need to access Pabbly Connect. This platform allows you to integrate various applications, including Google Forms and Twilio, without any coding skills. Start by visiting the Pabbly Connect homepage and signing in or creating a new account.

Once logged in, you will be directed to the dashboard where you can create a new workflow. Click on the ‘Create Workflow’ button and give your workflow a name, such as ‘Send Unique Coupon Codes to Customers Via SMS’. This sets the foundation for your automation process.


2. Creating the Trigger with Google Forms

In this section, you will set up the trigger to initiate the SMS sending process. The trigger application will be Google Forms, which captures client details when they submit the form. Select Google Forms as your trigger application in Pabbly Connect.

  • Choose the trigger event as ‘New Response Received’.
  • You will need to set up a webhook URL provided by Pabbly Connect.
  • Link your Google Form to a Google Sheet for data capture.

By linking the Google Form to a Google Sheet, you ensure that every submission is recorded. This integration allows Pabbly Connect to capture the form responses automatically, which will be used later for sending SMS through Twilio.


3. Configuring Twilio for SMS Sending

Next, you will set up Twilio within Pabbly Connect to send SMS messages to your clients. After the trigger is created, add Twilio as the action application. Select the action event as ‘Send SMS’.

To establish the connection, you will need your Twilio account SID and authorization token. These can be found in your Twilio account dashboard. Enter these credentials in Pabbly Connect to authenticate the connection.

  • Map the recipient’s phone number from the Google Form response.
  • Compose a personalized SMS message including the unique coupon code.
  • Test the SMS sending to ensure everything is functioning correctly.

This setup allows Pabbly Connect to send customized promotional messages, enhancing client engagement and marketing effectiveness.


4. Adding a Delay Before Sending SMS

To ensure that the SMS is not sent immediately upon form submission, you will implement a delay feature in Pabbly Connect. This can be done by adding a delay action step in your workflow. Choose the delay application and select the action event as ‘Add Time Delay’.

Specify the duration of the delay, such as 5 minutes, before the SMS is sent. This feature is crucial for timing your marketing messages effectively, allowing clients to receive their unique coupon codes at the right moment.

Select the delay unit (e.g., minutes). Input the number of minutes to delay the workflow.

By incorporating this delay, Pabbly Connect enhances the automation process, ensuring that your SMS marketing is both timely and effective.


5. Updating Google Sheets with Coupon Codes

The final step in your automation process is updating the Google Sheets with the unique coupon codes sent to clients. Add another action step in Pabbly Connect and select Google Sheets as the action application.

Choose the action event as ‘Update Cell Value’. Here, you will specify the spreadsheet and the range where the coupon code should be updated. Map the row index dynamically to ensure that the correct row is updated with the coupon code.

Specify the column for coupon codes (e.g., Column G). Map the coupon code value dynamically based on the previous response.

This integration ensures that all client interactions are recorded efficiently, allowing for better tracking and engagement in future marketing efforts. With Pabbly Connect, your SMS marketing automation is now complete!


Conclusion

In this tutorial, we explored how to automate SMS marketing using Pabbly Connect, Google Forms, and Twilio. By following these steps, you can efficiently send unique promo codes to clients while keeping track of their information in Google Sheets. This seamless integration enhances your marketing strategy and saves you valuable time.

Ensure you check out Pabbly Connect to create business automation workflows and reduce manual tasks. Pabbly Connect currently offer integration with 2,000+ applications.

Automate Follow-Up Emails to Google Ads Leads with Pabbly Connect

Learn how to automate follow-up emails to Google Ads leads using Pabbly Connect. This step-by-step guide walks you through the integration process with Google Sheets and Gmail.

Watch Step By Step Video Tutorial Below


1. Accessing Pabbly Connect for Email Automation

To start automating follow-up emails to Google Ads leads, you need to access Pabbly Connect. This platform allows seamless integration between various applications like Google Sheets and Gmail.

Visit the Pabbly Connect website, where you can sign up for a new account or log in if you’re an existing user. Once logged in, you will be directed to the dashboard, where you can create your workflow.


2. Creating a Workflow in Pabbly Connect

In this section, we will create a workflow to automate follow-up emails. Start by clicking on the ‘Create Workflow’ button in Pabbly Connect. Name your workflow something like ‘Send Automated Follow-Up Emails to Google Ads Leads’.

Next, you can organize your workflow by selecting a folder. You can create new folders if necessary. After naming your workflow, proceed to set up the trigger and action steps required for your automation.

  • Click on ‘Create’ to initiate your workflow.
  • Define the trigger as ‘Schedule by Pabbly’ to automate daily checks.
  • Set the trigger time to 10:00 AM to check for leads daily.

With this setup, your workflow is ready to monitor leads who haven’t responded to your initial emails.


3. Setting Up Trigger and Action Steps in Pabbly Connect

After creating your workflow in Pabbly Connect, you need to set up the trigger and action steps. The trigger is set to run every day at 10:00 AM, which will check your Google Sheets for leads marked as ‘not replied’.

For the action step, select Google Sheets and choose the action event ‘Lookup Spreadsheet Rows V2’. This will allow you to search for leads who have not replied. Connect your Google Sheets account by signing in and granting the necessary permissions.

  • Select the spreadsheet containing your leads, named ‘Google Ads Leads’.
  • Specify the lookup value as ‘not replied’ to filter the leads.
  • Set the lookup column to column D where the status is recorded.

This setup ensures that every day, your workflow will identify leads who haven’t responded, allowing you to follow up effectively.


4. Sending Follow-Up Emails via Gmail with Pabbly Connect

Once you have identified the leads who haven’t replied, the next step is to send follow-up emails using Gmail. In this step, select Gmail as your action application in Pabbly Connect.

Choose the action event ‘Send Email V1’. After connecting your Gmail account, you will need to fill in the email details, including recipient email addresses, subject, and body content. You can map the recipient’s email from the previous steps to personalize the follow-up.

Set the email subject to something engaging like ‘Just Checking In’. Craft a follow-up message that encourages replies and offers assistance. Leave optional fields like CC and BCC blank unless needed.

After saving your email configuration, your automation is complete, and follow-up emails will be sent to all identified leads automatically.


5. Conclusion: Automate Your Follow-Ups with Pabbly Connect

In this tutorial, we explored how to use Pabbly Connect to automate follow-up emails for Google Ads leads effectively. By integrating Google Sheets and Gmail, you can ensure timely communication with potential customers.

Ensure you check out Pabbly Connect to create business automation workflows and reduce manual tasks. Pabbly Connect currently offer integration with 2,000+ applications.

Check out Pabbly Connect – Automate your business workflows effortlessly! Sign Up Free – Start your journey with ease! 10,000+ Video Tutorials – Learn step by step! Join Pabbly Facebook Group – Connect with 21,000+ like minded people!

This automation not only saves time but also increases your chances of converting leads into paying customers. Start using Pabbly Connect today to streamline your follow-up process and enhance your overall productivity.


Automate Website Scraping Using Pabbly Connect: A Step-by-Step Guide

Learn how to automate website scraping and update Airtable records using Pabbly Connect with Fire Craw. Follow this detailed tutorial for seamless integration. Navigate the automation landscape confidently with clear, structured guidance suitable for professionals regardless of prior technical experience.

Watch Step By Step Video Tutorial Below


1. Setting Up Pabbly Connect for Website Scraping

To automate website scraping using Pabbly Connect, first, access the platform by searching for Pabbly Connect in your browser. This will take you to the landing page where you can sign up for free or log in if you already have an account.

Once you are logged in, you will be directed to the dashboard. Here, you will need to create a new workflow. Click on the ‘Create Workflow’ button, name your workflow, and select the appropriate folder to save it. This sets the stage for integrating Airtable and Fire Craw through Pabbly Connect.


2. Creating a Trigger Event in Pabbly Connect

In this step, you will set up the trigger event that activates the scraping process. Search for Airtable as your trigger application in Pabbly Connect. Select the trigger event as ‘New Record’ to capture each time a new website URL is added.

  • Select Airtable as the trigger application.
  • Choose ‘New Record’ as the trigger event.
  • Connect your Airtable account to Pabbly Connect.
  • Select your base and table where the URLs are stored.

After connecting, ensure you have a column named ‘Created’ in your Airtable setup to track when records are added. This setup will allow Pabbly Connect to monitor new entries effectively.


3. Setting Up Fire Craw as an Action in Pabbly Connect

Next, you will configure Fire Craw as the action application in Pabbly Connect. Search for Fire Craw and select it as your action application. Choose the action event as ‘Add a Scrape’ to initiate data scraping based on the new record from Airtable.

To connect Fire Craw with Pabbly Connect, you will need an API key from your Fire Craw account. Log into Fire Craw, navigate to the dashboard, and copy your API key. Paste this key into the connection setup in Pabbly Connect.

Once connected, you will map the website URL obtained from the Airtable response into the Fire Craw setup to specify which URL to scrape. This integration allows Pabbly Connect to facilitate seamless data retrieval from the specified websites.


4. Formatting Data for Airtable Using Pabbly Connect

After scraping data from the website, you may receive it in a format that needs adjustment before updating Airtable. For this, you will use the ‘Text Formatter by P’ action in Pabbly Connect. Start by adding a new action step and selecting Text Formatter.

  • Select ‘Text Parser’ as the action event.
  • Map the scraped data to extract links and markdown.
  • Use the appropriate text match options to format the data.

This step is crucial as it prepares the scraped content for structured storage in Airtable. With Pabbly Connect, you can automate this formatting process, ensuring that the data is ready for the next step.


5. Updating Airtable Records with Scraped Data

Finally, you will update your Airtable records with the newly scraped and formatted data. Add another action step in Pabbly Connect and select Airtable again as the action application. Choose ‘Update Record’ as the action event to modify existing entries in your Airtable.

Map the record ID from the trigger response to ensure you update the correct entry. Next, map the formatted links and markdown data into their respective columns in Airtable. This completes the automation workflow, allowing for real-time updates as new records are added.

Once you save and test this action, the updated record will reflect the new data scraped from the specified website. This entire process showcases how Pabbly Connect seamlessly integrates Airtable and Fire Craw for efficient data management.


Conclusion

In this tutorial, we explored how to automate website scraping and update Airtable records using Pabbly Connect. By following the detailed steps, you can effectively streamline your data collection and management processes.

Ensure you check out Pabbly Connect to create business automation workflows and reduce manual tasks. Pabbly Connect currently offer integration with 2,000+ applications.

Automate Email Invitations Using Pabbly Connect with Google Sheets and Gmail

Learn how to automate sending email invitations using Pabbly Connect to integrate Google Sheets and Gmail seamlessly. Navigate the automation landscape confidently with clear, structured guidance suitable for professionals regardless of prior technical experience.

Watch Step By Step Video Tutorial Below


1. Accessing Pabbly Connect for Automation

To start automating email invitations, access Pabbly Connect by visiting its official website. Simply type Pabbly.com/connect in your browser to reach the landing page.

Once on the site, sign in using your existing account or create a new one by clicking on ‘Sign up for free.’ This will grant you 100 free tasks monthly. After logging in, navigate to the dashboard and click on ‘Pabbly Connect’ to begin creating your automation workflow.


2. Creating a Workflow in Pabbly Connect

In this section, you will learn to create a workflow in Pabbly Connect that integrates Google Sheets and Gmail. Click on ‘Create Workflow’ and name it, for example, ‘Send Invitations via Email Automatically.’ Select a folder to save your workflow.

  • Choose a name for the workflow.
  • Select the appropriate folder.
  • Click on ‘Create’ to finalize your workflow.

After creating the workflow, you will see two boxes: one for the trigger and another for the action. The trigger will be Google Sheets, and the action will be Gmail, allowing you to send invitations automatically.


3. Setting Up Google Sheets as Trigger

Next, set Google Sheets as the trigger application in Pabbly Connect. Select ‘New or Updated Spreadsheet Row’ as your trigger event. This event will initiate the workflow whenever a new row is added or updated in your Google Sheets.

To connect Google Sheets with Pabbly Connect, you will receive a webhook URL. This URL acts as a bridge for data transfer. Copy this URL and head to your Google Sheets.

  • Click on ‘Extensions’ and select ‘Add-ons.’
  • Search for ‘Pabbly Connect Webhooks’ and install it.
  • Go to ‘Pabbly Connect Webhooks’ and click on ‘Initial Setup.’

In the setup box, paste the webhook URL, specify the trigger column (e.g., Column D), and click ‘Submit’ to finalize the connection. Test the setup to ensure data is being sent successfully.


4. Configuring Email Invitations in Gmail

Now that Google Sheets is set up, proceed to configure Gmail as the action application in Pabbly Connect. Select ‘Send Email V1’ as your action event. Click on ‘Connect’ to establish a connection with your Gmail account.

Authorize Pabbly Connect to access your Gmail account by granting the necessary permissions. After successful authorization, map the recipient email address from the previous response (from Google Sheets) to ensure personalized invitations.

Enter the recipient’s email address using the mapping feature. Fill in the sender’s name and email subject. Draft the email content, including event details.

Make sure to click on ‘Save and Send Test Request’ to confirm that the email is sent successfully. Check your email to verify the invitation was received correctly.


5. Finalizing the Automation Process

With the Gmail integration complete, your automation setup in Pabbly Connect is almost finished. Ensure that you have set the Google Sheets extension to send data on event, so every new entry triggers the email invitation.

By following these steps, you have successfully automated the process of sending email invitations using Pabbly Connect. This integration allows you to efficiently manage invitations for events and ensures that all employees receive timely notifications.

In summary, this tutorial demonstrated how to set up an automated email invitation system using Google Sheets and Gmail through Pabbly Connect. You can now manage your invitations effortlessly and personalize each message.


Conclusion

In this tutorial, we explored how to use Pabbly Connect to automate sending email invitations via Gmail using data from Google Sheets. This integration streamlines your workflow and enhances communication efficiency.

Ensure you check out Pabbly Connect to create business automation workflows and reduce manual tasks. Pabbly Connect currently offer integration with 2,000+ applications.

Integrate WhatsApp and Gmail with Pabbly Connect for Automated Invoicing

Learn how to automate invoice sharing via WhatsApp and Gmail using Pabbly Connect. Step-by-step guide to streamline your billing process. This comprehensive guide reveals exactly how to connect your applications and automate repetitive tasks — accessible for professionals of all technical backgrounds.

Watch Step By Step Video Tutorial Below


Accessing Pabbly Connect for Integration

To begin the integration process, access Pabbly Connect by visiting the official website. Once there, you can either sign in if you’re an existing user or sign up for free if you’re new. Signing up provides you with 100 free tasks each month, which is great for testing your automations.

After logging in, navigate to the dashboard where you will find various Pabbly applications. Click on Pabbly Connect to start creating your workflow. This platform is essential for connecting your applications seamlessly.


Creating a Workflow in Pabbly Connect

Once you’re in Pabbly Connect, click on the ‘Create Workflow’ button. You will be prompted to name your workflow; for this example, name it ‘Share P Subscription Billing Invoices via WhatsApp and Email.’ Select a folder to save your workflow for better organization.

After naming your workflow, the next step is to define the trigger. Here, you will select ‘P Subscription Billing’ as your trigger application. The trigger event will be set to ‘New Invoice Created’. This setting ensures that every time a new invoice is generated, your workflow will activate automatically.


Setting Up the Webhook with P Subscription Billing

To link Pabbly Connect with your P Subscription Billing account, you need to set up a webhook. Copy the webhook URL provided by Pabbly Connect and navigate to your P Subscription Billing account settings. Under the settings menu, find the ‘Webhooks’ section to paste the URL.

When adding the webhook, provide a name, select the product (e.g., Advanced Java Programming), and choose the plan (Java Mastery Half-Year Plan). Finally, select the ‘Create Invoice’ event and save your changes. This connection allows Pabbly Connect to receive real-time updates about new invoices.


Sending WhatsApp Messages and Emails via Pabbly Connect

For the action step, you will select the ‘AI Sensei’ application for sending WhatsApp messages. Choose the action event as ‘Send Template Message’. Here, you will need to connect your AI Sensei account by entering the API key, which can be obtained from your AI Sensei account settings. using Pabbly Connect

  • Map the parameters such as customer name, amount, and invoice link from the previous step.
  • Ensure all template parameters are filled correctly for dynamic messaging.
  • Click on ‘Save and Send Test Request’ to verify the message is sent successfully.

After sending the WhatsApp message, the next action is to set up an email notification using Gmail. Select Gmail as your action application and choose ‘Send Email V2’. Connect your Gmail account and map the recipient’s email address to ensure the invoice reaches the correct customer.


Testing Your Integration with Pabbly Connect

After completing the setup, it’s crucial to test the integration. Perform a test submission in your P Subscription Billing account to generate a new invoice. This action should trigger the workflow in Pabbly Connect, sending both a WhatsApp message and an email to the customer.

Check your WhatsApp and email to confirm that the messages contain the correct details such as the customer name, amount, and invoice link. If everything is set up correctly, you should receive both notifications promptly, showcasing the power of automation through Pabbly Connect.


Conclusion

By following this tutorial, you have successfully integrated WhatsApp and Gmail for automated invoice sharing using Pabbly Connect. This process streamlines your billing operations, ensuring customers receive timely notifications about their subscriptions.

Ensure you check out Pabbly Connect to create business automation workflows and reduce manual tasks. Pabbly Connect currently offer integration with 2,000+ applications.

Integrate Indiamart Inquiries to Microsoft Excel Using Pabbly Connect

Learn how to integrate Indiamart inquiries into Microsoft Excel using Pabbly Connect with this step-by-step tutorial. Master proven automation processes with practical implementation examples and strategic recommendations you can apply immediately in your workflow.

Watch Step By Step Video Tutorial Below


1. Accessing Pabbly Connect for Integration

To start integrating Indiamart inquiries with Microsoft Excel, you need to access Pabbly Connect. First, visit the Pabbly Connect website and sign in to your account. If you’re a new user, you can sign up for free and receive 100 tasks every month.

Once signed in, you will see the ‘All P Apps’ window. Here, select Pabbly Connect by clicking on ‘Access Now’. This will take you to the Pabbly Connect dashboard, where you can create a new workflow for your automation.


2. Creating a Workflow in Pabbly Connect

Creating a workflow is essential for setting up your automation. In Pabbly Connect, click on the ‘Create Workflow’ button located in the top right corner. A dialog box will appear asking for a workflow name and folder selection.

  • Name your workflow: ADD Web Design and Development Solutions for Indiamart Inquiries to Excel.
  • Select the folder: Choose ‘Indiamart Automations’ from the dropdown.

After naming your workflow and selecting the folder, click on ‘Create’. This will set up your workflow in Pabbly Connect. You will see two sections: Trigger and Action, which are vital for your automation process.


3. Setting Up the Trigger in Pabbly Connect

The next step is to configure the trigger in your workflow. For the trigger application, select ‘Indiamart’ as you want to capture new leads. Under the trigger event, choose ‘New Leads’. This means that every time a new lead is generated, Pabbly Connect will capture this information.

Once you select the trigger, Pabbly Connect will provide you with a unique webhook URL. Copy this URL, as you will need it to connect Indiamart to Pabbly Connect. Log into your Indiamart account and navigate to the Lead Manager option.

  • Click on ‘Menu’ and select ‘Import and Export Leads’.
  • Choose the ‘Push API’ option and set the source as ‘Other’.
  • Enter ‘Pabbly Connect’ as the platform name and paste the copied webhook URL.

After saving the details, generate an OTP to complete the connection. Once the webhook URL is successfully added to your Indiamart account, return to your workflow in Pabbly Connect to check for a webhook response.


4. Testing the Connection Between Indiamart and Pabbly Connect

With the webhook URL successfully added, it’s time to test the connection. Generate a test lead in your Indiamart account to see if Pabbly Connect captures the response. Search for a dummy product and click on the ‘Contact Supplier’ button. Fill out the inquiry message and submit it.

Once the inquiry is submitted, go back to your Pabbly Connect workflow. You should see that it is now waiting for a webhook response. If the connection is successful, Pabbly Connect will capture the details of the test lead, including the query ID, name, email, phone number, and other relevant information.

Verify that the captured response includes all necessary details to ensure that Indiamart is successfully connected to Pabbly Connect. This confirms that the trigger setup is complete.


5. Adding New Leads to Microsoft Excel via Pabbly Connect

Now, it’s time to set up the action step in your workflow. For the action application, select ‘Microsoft Excel’ to create a record of new leads. Choose the action event as ‘Add Row to Worksheet’ to ensure that every new lead is recorded in your Excel sheet.

Click on the ‘Connect’ button to authorize Pabbly Connect to access your Microsoft Excel account. After authorization, select the workbook where you want to store the lead details. In this case, choose the workbook named ‘Indiamart Lead Details’.

Select the worksheet: Choose ‘Sheet1’ where the lead details will be added. Map the fields: Ensure that the fields in Pabbly Connect align with your Excel columns such as Query ID, Name, Email, Phone Number, etc.

After mapping all required fields, click on ‘Save and Send Test Request’. If the test is successful, check your Microsoft Excel worksheet to confirm that the lead details have been recorded correctly. This indicates that the integration between Indiamart and Microsoft Excel through Pabbly Connect is functioning as intended.


Conclusion

This tutorial demonstrated how to automate the process of adding Indiamart inquiries to Microsoft Excel using Pabbly Connect. By following these steps, you can streamline your workflow, reduce manual data entry, and enhance your business efficiency.

Ensure you check out Pabbly Connect to create business automation workflows and reduce manual tasks. Pabbly Connect currently offer integration with 2,000+ applications.

Automate WhatsApp Messages for Industrial Machinery Inquiries Using Pabbly Connect

Learn how to automate WhatsApp messages for industrial machinery inquiries using Pabbly Connect. Step-by-step guide for seamless integration. Discover hidden automation capabilities within your existing tools. This guide shows you how to connect your essential applications and permanently eliminate redundant manual processes.

Watch Step By Step Video Tutorial Below


1. Accessing Pabbly Connect to Set Up Automation

To start automating WhatsApp messages for industrial machinery inquiries, access Pabbly Connect by visiting their website. Sign in to your existing account or create a new one for free, which gives you 100 free tasks every month.

Once logged in, you will see the Pabbly Connect dashboard. Click on the ‘Access Now’ button to enter the main interface where you can create your automation workflow. This is where the integration process begins.


2. Creating a Workflow in Pabbly Connect

In Pabbly Connect, the next step is to create a workflow for sending automated WhatsApp messages. Click on the top right corner button labeled ‘Create Workflow’. A dialog box will appear asking for a workflow name and folder selection.

  • Name the workflow: ‘Send Automated WhatsApp Message for Industrial Machinery Inquiries’.
  • Select a folder where you want to save this workflow.
  • Click ‘Create’ to finalize the workflow setup.

After creating the workflow, you will see two main sections: Trigger and Action. The trigger defines when the automation kicks in, while the action specifies what happens next. This setup is crucial for the automation process.


3. Setting Up the Trigger in Pabbly Connect

For the trigger application, select ‘India M’ in Pabbly Connect. This application is essential as it captures inquiries for your industrial machinery business. Choose the trigger event as ‘New Leads’ to ensure that every new inquiry is captured automatically.

Once you select the trigger application and event, Pabbly Connect generates a unique webhook URL. This URL is critical for linking India M to Pabbly Connect. Copy this URL and proceed to connect it with your India M account.

  • Log into your India M account.
  • Navigate to the Lead Manager option on the left panel.
  • Click on ‘Import/Export Leads’ and then select ‘Push API’ to integrate.

After entering the webhook URL in India M, your setup is nearly complete. Now, generate a test lead to confirm that Pabbly Connect successfully captures the inquiry.


4. Configuring the Action Step in Pabbly Connect

After successfully setting up the trigger, the next step is to configure the action in Pabbly Connect. Select ‘WhatsApp by AI Sensei’ as the action application. This application will send the WhatsApp message to your potential clients based on the inquiries captured.

Choose the action event as ‘Send Message’. You will need to connect your WhatsApp by AI Sensei account to Pabbly Connect by providing the API key. This key is crucial for establishing a secure connection between the two applications.

Log into your WhatsApp by AI Sensei account. Navigate to the Manage section to find your API key. Copy the API key and paste it into Pabbly Connect.

Once the connection is established, fill in the required fields, including the campaign name and the message template you created for your inquiries. This setup ensures that every inquiry receives a personalized WhatsApp message.


5. Testing the Automation with Pabbly Connect

With both the trigger and action steps configured in Pabbly Connect, it’s time to test the automation. Generate a test lead in your India M account to see if the integration works as intended. This step is crucial to confirm that inquiries are being captured and messages sent.

After generating the test lead, return to your Pabbly Connect workflow. You should see the captured response from the inquiry, which indicates that the connection is successful. Check your WhatsApp to verify that the message has been sent to the new lead.

Ensure that the inquiry details reflect correctly in Pabbly Connect. Verify that the WhatsApp message contains the correct lead information. Adjust any settings if the message does not appear as expected.

Once confirmed, your automation is now fully operational. You can efficiently manage inquiries and respond promptly through WhatsApp, enhancing customer service and engagement.


Conclusion

In this tutorial, we explored how to automate WhatsApp messages for industrial machinery inquiries using Pabbly Connect. This integration streamlines communication and enhances responsiveness, allowing you to manage leads effectively.

Ensure you check out Pabbly Connect to create business automation workflows and reduce manual tasks. Pabbly Connect currently offer integration with 2,000+ applications.

Automate Web Scraping to Google Sheets with Pabbly Connect

Learn how to automate web scraping from various websites to Google Sheets using Pabbly Connect in this step-by-step tutorial. Explore systematic approaches to creating efficient automation solutions that convert technical concepts into practical, implementable instructions.

Watch Step By Step Video Tutorial Below


1. Understanding Web Scraping with Pabbly Connect

Web scraping is the process of extracting data from websites for various business needs. In this tutorial, we will use Pabbly Connect to automate the scraping of content from multiple websites into Google Sheets.

This automation eliminates the need for manual data entry, allowing users to gather information efficiently. With Pabbly Connect, you can easily connect different applications without coding skills.


2. Setting Up Pabbly Connect for Automation

To begin, access Pabbly Connect by visiting its website. If you are a new user, you can sign up for a free account, which provides 100 free tasks every month. Existing users can log in directly.

After logging in, you will see the dashboard where you can create new workflows. Click on the ‘Create Workflow’ button to start setting up the automation.

  • Choose a name for your workflow.
  • Select a folder to save your workflow.
  • Click ‘Create’ to proceed.

Once the workflow is created, you will set up the trigger and action steps. The trigger will monitor Google Sheets for new URLs, while the action will use Firecrawl to scrape data from those URLs.


3. Configuring Google Sheets as a Trigger in Pabbly Connect

In the workflow setup, select Google Sheets as the trigger application. The trigger event should be set to ‘New or Updated Spreadsheet Row’. This means that every time a new URL is added to your Google Sheets, the workflow will initiate.

To establish this connection, you will need to set up a webhook URL provided by Pabbly Connect. This URL acts as a bridge between Google Sheets and Pabbly Connect.

  • Copy the webhook URL from Pabbly Connect.
  • Open Google Sheets and navigate to Extensions > Add-ons > Get Add-ons.
  • Search for ‘Pabbly Connect Webhooks’ and install it.

Once installed, you will need to set up the initial configuration in Google Sheets by entering the webhook URL and specifying the trigger column. This allows Pabbly Connect to capture data whenever a new row is added.


4. Scraping Data Using Firecrawl via Pabbly Connect

Next, set up the action step in your workflow by selecting Firecrawl as the action application. Choose the action event as ‘Add a Scrape’. This action will fetch data from the specified URLs in Google Sheets.

To create a connection between Firecrawl and Pabbly Connect, you will need an API key from your Firecrawl account. After logging into Firecrawl, navigate to the API section to copy your API key.

Paste the API key into Pabbly Connect. Map the URL field from the previous response to dynamically fetch the content. Select the format for the data you wish to scrape (e.g., markdown, HTML).

Once the configuration is complete, test the action to ensure that data is being scraped correctly from the specified websites.


5. Updating Google Sheets with Scraped Data

After successfully scraping data, the next step is to update Google Sheets with the scraped content. Add another action step in your workflow and select Google Sheets again as the application. using Pabbly Connect

For the action event, choose ‘Update Row’. This allows you to fill in the scraped content links and markdown text directly into your Google Sheets.

Select the specific spreadsheet and sheet name. Map the row index dynamically to update the correct row. Fill in the content link and markdown text fields with the scraped data.

This setup ensures that every time a new URL is added to Google Sheets, the corresponding content will be scraped and updated automatically, providing a seamless workflow.


Conclusion

In this tutorial, we explored how to automate web scraping to Google Sheets using Pabbly Connect. By integrating Google Sheets and Firecrawl through Pabbly Connect, you can efficiently gather and organize data from various websites without manual effort. This automation streamlines your data collection process, making it faster and more reliable.

Ensure you check out Pabbly Connect to create business automation workflows and reduce manual tasks. Pabbly Connect currently offer integration with 2,000+ applications.

Integrating Brilliant Directories with Go High Level Using Pabbly Connect

Learn how to integrate Brilliant Directories with Go High Level using Pabbly Connect. Step-by-step tutorial on automating contact creation from form submissions. This comprehensive guide reveals exactly how to connect your applications and automate repetitive tasks — accessible for professionals of all technical backgrounds.

Watch Step By Step Video Tutorial Below


1. Accessing Pabbly Connect for Integration

To start integrating Brilliant Directories with Go High Level, you need to access Pabbly Connect. This platform allows you to automate tasks between various applications seamlessly. Begin by visiting the Pabbly Connect homepage and either signing in or signing up for a free account.

Once logged in, you will see the Pabbly Connect dashboard. Here, you can create workflows that enable the integration between your applications. This step is essential for automating the contact creation process for every new form submission.


2. Creating a Workflow in Pabbly Connect

The next step is to create a workflow in Pabbly Connect. Click on the ‘Create Workflow’ button found at the top right corner of the dashboard. You will be prompted to name your workflow. For this integration, name it ‘Create Go High Level Contact on Brilliant Directories Form Submission’.

  • Select the folder for your workflow, e.g., ‘Automations’.
  • Click on the ‘Create’ button to finalize your workflow creation.

With the workflow created, you can now set up a trigger that will initiate the process whenever a new lead is submitted through your Brilliant Directories form.


3. Setting Up the Trigger in Pabbly Connect

In this step, you will configure the trigger in Pabbly Connect. Select ‘Brilliant Directories’ as your trigger application and choose ‘Custom Webhook’ as the trigger event. This allows you to connect your Brilliant Directories form to Pabbly Connect effectively.

After selecting the trigger event, you will receive a webhook URL. Copy this URL, as it will be used to connect your Brilliant Directories account. Navigate to your Brilliant Directories account and go to the Developer Hub to create a new webhook using this URL.


4. Configuring Go High Level Integration in Pabbly Connect

After setting up your trigger, it’s time to configure the action in Pabbly Connect. Select ‘Lead Connector V2’ as your action application. This application is crucial for creating contacts in your Go High Level account.

Choose ‘Create a Contact’ as the action event. You will then need to connect your Go High Level account with Pabbly Connect by clicking on the ‘Connect’ button. Ensure you are logged in to your Go High Level account to facilitate this connection.

  • Map the fields from the Brilliant Directories submission to the corresponding fields in Go High Level.
  • Enter required details such as full name, email, and phone number.

Once the mapping is complete, click on the ‘Save and Send Test Request’ button to test the integration. This will send a test contact to your Go High Level account.


5. Testing the Integration

To ensure that your integration works correctly, perform a test submission on your Brilliant Directories form. Enter dummy data and submit the form. This action should trigger the workflow you set up in Pabbly Connect.

After submitting the form, check your Go High Level account to confirm that the new contact has been created successfully. If everything is set up correctly, you will see the new contact reflecting in your account.

This testing phase is crucial to verify that your automation is functioning as intended. If you encounter any issues, review the previous steps to ensure everything is correctly configured.


Conclusion

In this tutorial, we explored how to integrate Brilliant Directories with Go High Level using Pabbly Connect. By following the steps outlined, you can automate the creation of contacts based on form submissions, streamlining your lead management process effectively.

Ensure you check out Pabbly Connect to create business automation workflows and reduce manual tasks. Pabbly Connect currently offer integration with 2,000+ applications.

Integrating Lead Gen App with Pabbly Connect: A Step-by-Step Guide

Learn how to seamlessly integrate Lead Gen App with Google Sheets using Pabbly Connect. Follow our step-by-step guide for efficient automation. Discover how to seamlessly connect your essential tools through accessible instructions that make powerful automation available to professionals at every skill level.

Watch Step By Step Video Tutorial Below


1. Introduction to Pabbly Connect for Automation

Pabbly Connect is an automation tool that allows users to integrate various applications seamlessly. In this tutorial, we will explore how to use Pabbly Connect to connect the Lead Gen App with Google Sheets to automate lead management.

The Lead Gen App helps businesses create forms to collect leads efficiently. By integrating this app with Pabbly Connect, you can ensure that every new lead captured in the form is automatically added to your Google Sheets, saving you time and effort.


2. Setting Up the Trigger in Pabbly Connect

To begin the integration, we need to set up our trigger in Pabbly Connect. This will allow us to capture new leads from the Lead Gen App. Start by selecting the Lead Gen App as your trigger application.

Next, choose the trigger event as ‘New Lead’. This event will activate whenever a new lead is submitted through the form created in the Lead Gen App. Follow these steps:

  • Select ‘Lead Gen App’ as the trigger application.
  • Choose ‘New Lead’ as the trigger event.
  • Copy the provided webhook URL for the next step.

Once you have copied the webhook URL, you will use it to connect the Lead Gen App with Pabbly Connect. This connection allows Pabbly Connect to receive the lead data automatically.


3. Configuring the Lead Gen App with Webhooks

Now, navigate to your Lead Gen App dashboard to configure the webhook. In the Lead Gen App, go to the forms section and select the form you created. Under the integrations tab, you will set up the webhook to connect with Pabbly Connect.

Follow these steps to configure the webhook:

  • Click on ‘Add Integration’ in the integrations section.
  • Select ‘Webhooks’ as the integration type.
  • Enter the copied webhook URL and title it ‘New Lead’.
  • Set the method to ‘POST’ and click ‘Create Webhook’.

After setting up the webhook, your Lead Gen App is now connected to Pabbly Connect. This setup will allow the app to send lead data to Pabbly Connect whenever a new lead is submitted.


4. Testing the Integration with Pabbly Connect

Next, we need to test the integration to ensure everything is functioning correctly. To do this, submit a test lead through the form you created in the Lead Gen App. This action will trigger the webhook, sending the data to Pabbly Connect.

Enter some dummy data in the form fields, such as:

First Name: Test Last Name: User Email: [email protected] Phone: 1234567890

After submitting the form, return to your Pabbly Connect dashboard. You should see a response indicating that the lead data has been successfully received. This confirms that the integration is working as intended.


5. Finalizing the Integration with Google Sheets

Now that we have confirmed the trigger is working, the next step is to set up the action in Pabbly Connect to send the lead data to Google Sheets. This will allow you to keep all your leads organized.

In Pabbly Connect, select Google Sheets as your action application. Then, choose ‘Add Row’ as your action event. Follow these steps to complete the configuration:

Connect your Google Sheets account to Pabbly Connect. Select the Google Sheet where you want the leads to be added. Map the fields from the Lead Gen App to the corresponding columns in Google Sheets.

After mapping the fields, your integration is complete. Now, every time a new lead is submitted through the Lead Gen App, it will automatically be added to your Google Sheets, thanks to Pabbly Connect.


Conclusion

In this tutorial, we demonstrated how to integrate the Lead Gen App with Google Sheets using Pabbly Connect. By following these steps, you can automate lead management efficiently and keep your data organized. This integration saves time and ensures that no lead is missed.

Ensure you check out Pabbly Connect to create business automation workflows and reduce manual tasks. Pabbly Connect currently offer integration with 2,000+ applications.