Integrate Facebook Leads with Google Sheets and WhatsApp Using Pabbly Connect

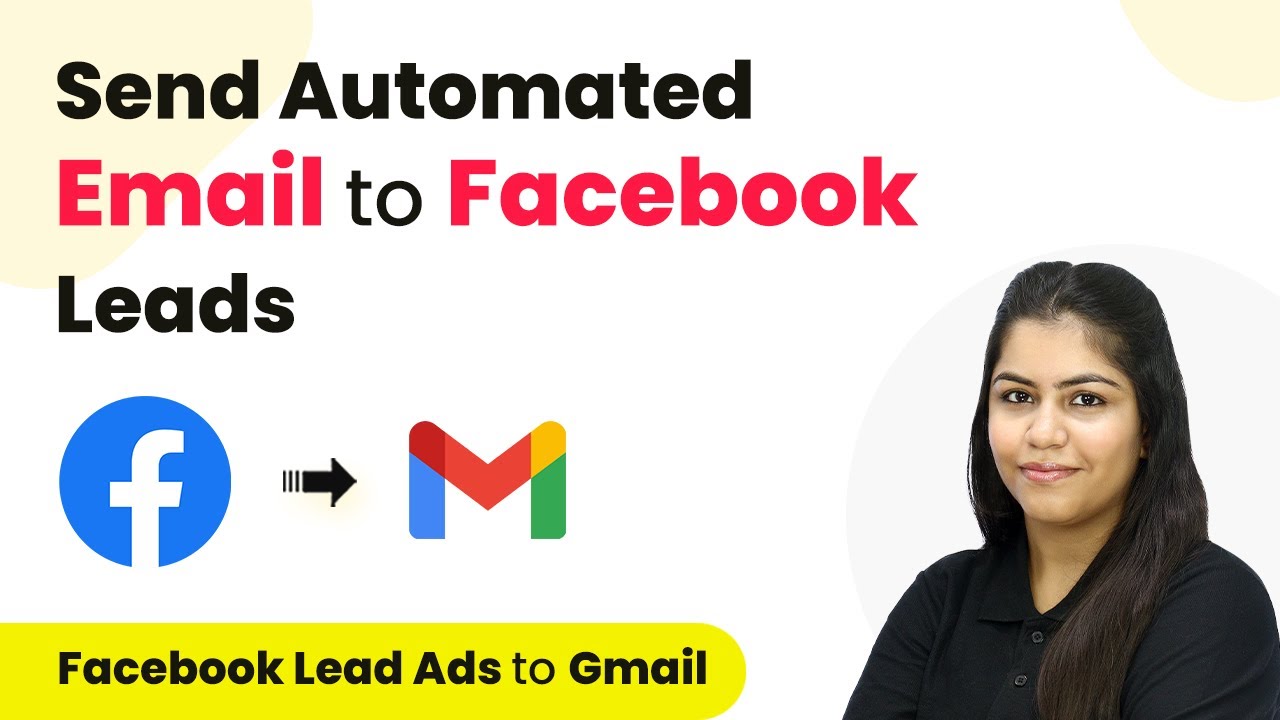
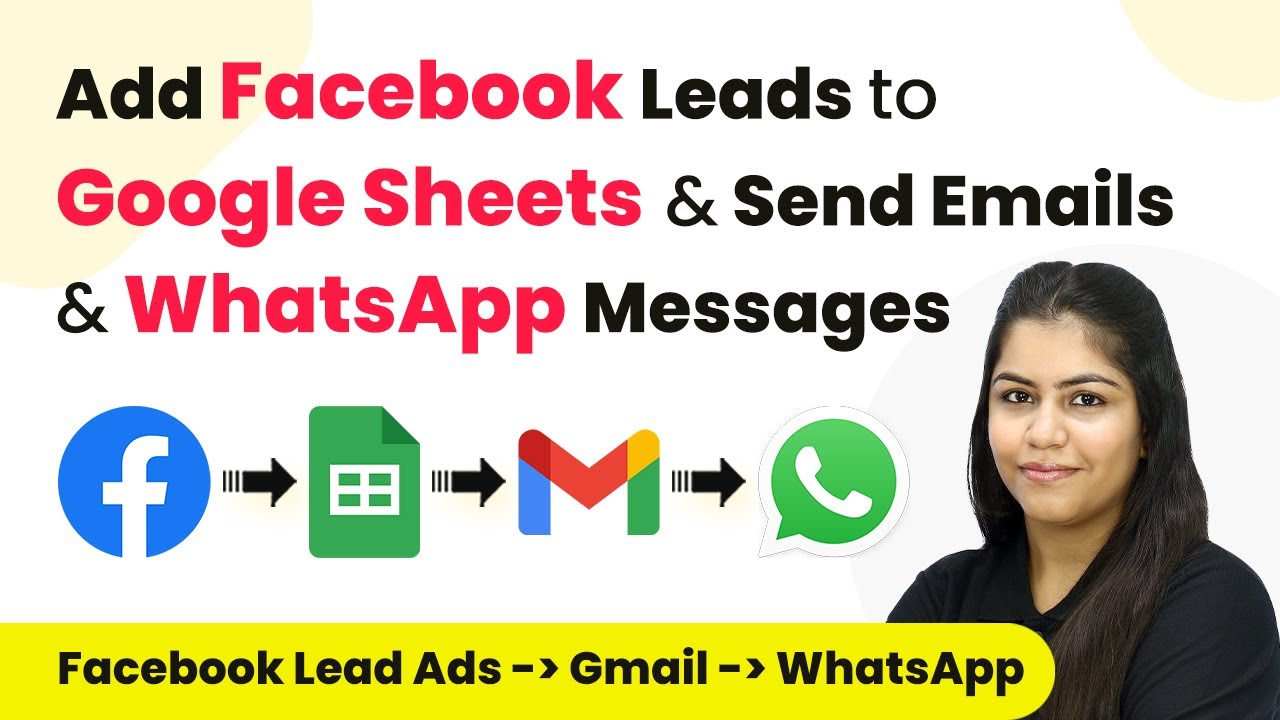
Learn how to automate the integration of Facebook leads with Google Sheets and WhatsApp using Pabbly Connect. Step-by-step tutorial included. Eliminate manual repetitive tasks from your workflow. Discover proven automation methods with intuitive steps designed for efficiency-minded professionals.

Watch Step By Step Video Tutorial Below


Accessing Pabbly Connect for Integration

To start integrating Facebook leads with Google Sheets and WhatsApp, we will use Pabbly Connect. First, open your browser and navigate to the Pabbly website. You will find options to sign in or sign up for free. If you are a new user, click on ‘Sign Up for Free’ to get started.

After signing in, you will see various Pabbly applications. Click on ‘Access Now’ under Pabbly Connect. This will take you to your dashboard where you can create a new workflow. Click on the ‘Create Workflow’ button to begin setting up your integration.


Setting Up Facebook Lead Ads in Pabbly Connect

In this step, we will set up Facebook Lead Ads as the trigger in Pabbly Connect. To do this, select Facebook Lead Ads as your trigger application. For the trigger event, choose ‘New Lead Instant’ and click on ‘Connect’ to link your Facebook account.

  • Select your Facebook account.
  • Choose the Facebook page linked to your leads.
  • Select the specific lead generation form you want to use.

Once you have made these selections, click on ‘Save and Send Test Request’. This will allow you to test if your Facebook Lead Ads are correctly integrated with Pabbly Connect. If successful, you will see a confirmation of the captured lead data.


Adding Leads to Google Sheets via Pabbly Connect

Next, we will add the captured leads to Google Sheets using Pabbly Connect. Choose Google Sheets as your action application and select ‘Add New Row’ as the action event. Click on ‘Connect’ to link your Google Sheets account.

After connecting, select the specific spreadsheet and sheet where you want to add the lead information. You will need to map the lead details such as name, email, and phone number from the previous step. This mapping is crucial as it ensures that the data from Facebook Lead Ads is dynamically inserted into Google Sheets.

  • Map the name, email, and phone number fields accordingly.
  • Ensure the current date is also added to the sheet.

Once everything is set up, click on ‘Save and Send Test Request’. This should result in the lead details being successfully added to your specified Google Sheets.


Sending Emails and WhatsApp Messages

In this section, we will set up automated email and WhatsApp messages using Pabbly Connect. Begin by selecting Gmail as your next action application. Choose ‘Send Email’ as the action event and connect your Gmail account.

Fill in the recipient’s email address using the mapped email from the lead data. You can personalize the email content using the lead’s name to make it more engaging. For example, the email subject can be ‘Welcome, {Name}!’ and the body can include a personalized message.

Map the recipient’s email address from the lead data. Set the email subject and content as per your requirements.

After setting up the email, proceed to add another action step for WhatsApp. Select ‘WhatsApp Cloud API’ and choose ‘Send Template Message’ for the action event. Connect your WhatsApp account and specify the template name and message content, ensuring to include the lead’s name for personalization.


Conclusion

In this tutorial, we successfully integrated Facebook leads with Google Sheets and automated emails and WhatsApp messages using Pabbly Connect. This seamless integration allows businesses to efficiently manage leads and enhance communication with potential clients. By following these steps, you can easily set up similar workflows for your business needs.

Ensure you check out Pabbly Connect to create business automation workflows and reduce manual tasks. Pabbly Connect currently offer integration with 2,000+ applications.

Integrating Jotform with Crisp Call Using Pabbly Connect

Learn how to seamlessly integrate Jotform with Crisp Call using Pabbly Connect. Follow this detailed step-by-step tutorial for automation success. Streamline your workflow, save valuable time, and eliminate repetitive tasks through powerful automation capabilities.

Watch Step By Step Video Tutorial Below


Setting Up Pabbly Connect for Integration

To integrate Jotform with Crisp Call, start by accessing Pabbly Connect. This automation software allows you to create workflows between different applications.

After signing in, navigate to the dashboard. Click on the ‘Create Workflow’ button located in the top right corner. In the dialog box, name your workflow something like ‘Create Crisp Call Contact on Jotform Submission’ and choose an appropriate folder for organization.


Selecting Jotform as Trigger Application

In the newly created workflow, select Jotform as your trigger application. The trigger event should be set to ‘New Response’ to capture submissions from your form. This means every time a new response is recorded, it will activate your workflow.

Once you’ve selected Jotform, you will receive a webhook URL. This URL is crucial as it connects Jotform to Pabbly Connect. Copy this URL and head over to your Jotform account to set it up.

  • Log in to your Jotform account.
  • Select the form you want to integrate.
  • Go to Settings > Integrations.
  • Choose Webhooks and paste the copied URL.

After setting up the webhook, make sure to test the integration by submitting a test response in Jotform. This will confirm that Pabbly Connect is receiving the data correctly.


Configuring Crisp Call as Action Application

Now that Jotform is set as your trigger, it’s time to add Crisp Call as the action application. Select Crisp Call and choose the action event as ‘Add a Contact’. This action will create a new contact in Crisp Call whenever a new response is captured from Jotform.

Next, you need to authenticate your Crisp Call account within Pabbly Connect. This involves entering your API key and secret key, which you can find in your Crisp Call account settings under Developer.

  • Navigate to Settings in Crisp Call.
  • Select Developer and copy your API key and secret key.
  • Return to Pabbly Connect and paste the keys in the respective fields.

After entering the API details, click on ‘Save’ to establish the connection between Pabbly Connect and Crisp Call.


Mapping Data Fields for Crisp Call

With Crisp Call configured, the next step is to map the data fields from Jotform to Crisp Call. This ensures that the information collected from the form is accurately transferred to the new contact in Crisp Call. using Pabbly Connect

In the mapping section, you will see fields like Name, Phone Number, and Email. Select the corresponding fields from the Jotform response to ensure the data is correctly aligned. For instance, match the first name and last name fields from Jotform to the contact’s name in Crisp Call.

Map the First Name from Jotform to First Name in Crisp Call. Map the Last Name accordingly. Ensure the Phone Number and Email are also mapped correctly.

After mapping all required fields, click on ‘Save and Send Test Request’ to verify that the data is being sent correctly to Crisp Call.


Testing and Verifying the Integration

Finally, to ensure everything is working correctly, conduct a test submission in Jotform. This will trigger the workflow and create a new contact in Crisp Call based on the submitted information.

After completing the test submission, check your Crisp Call account to verify that the new contact has been created successfully with all the mapped details. This confirms that your integration between Jotform and Crisp Call using Pabbly Connect is functioning as intended.

To summarize, the integration process involves creating a workflow in Pabbly Connect, setting Jotform as the trigger, configuring Crisp Call as the action, mapping the data fields, and testing the entire setup to ensure accuracy.

Conclusion

This guide summarizes the key points and helps you understand the essential features and benefits of using this tool.

Thanks for following along with this tutorial! Remember to subscribe to the channel for more helpful content like this.

If you found this guide useful, please consider giving it a thumbs up and sharing it with others who might benefit from it.


In conclusion, integrating Jotform with Crisp Call using Pabbly Connect streamlines your contact management process. By following these detailed steps, you can automate the creation of contacts, saving you time and effort.

How to Send Payment Reminders on WhatsApp with Pabbly Connect: A Step-by-Step Guide

Learn how to automate sending payment reminders on WhatsApp using Pabbly Connect. This detailed tutorial covers everything you need to know to set up your workflow.

Watch Step By Step Video Tutorial Below


1. Setting Up Pabbly Connect for Payment Reminders

To send payment reminders on WhatsApp, we will use Pabbly Connect as the integration platform. First, open your browser and search for Pabbly Connect. You’ll find options to sign in or sign up for free. If you don’t have an account, click on ‘Sign up for free’ to create one.

Once logged in, you will see various applications offered by Pabbly. Click on the ‘Access Now’ button under Pabbly Connect to enter the dashboard. Here, you can create a new workflow by clicking on ‘Create Workflow’. Name your workflow something descriptive, like ‘Send Payment Reminders on WhatsApp’. After naming it, click on ‘Create’ to proceed.


2. Configuring the Trigger in Pabbly Connect

In this section, we will configure the trigger for our workflow in Pabbly Connect. The trigger is what starts the workflow, and for our case, we will use ‘Schedule by Pabbly’. Click on the trigger box and select ‘Schedule by Pabbly’. This will allow us to set a daily reminder.

  • Select the frequency as ‘Every Day’.
  • Set the time for the workflow to execute (e.g., 12:00 PM).

After setting these parameters, click on ‘Save’. Your trigger is now successfully configured to run every day at the specified time. This means that every day, Pabbly Connect will check for payment statuses in your Google Sheet and prepare to send reminders.


3. Connecting Google Sheets to Pabbly Connect

Now that we have our trigger set up, we will connect Google Sheets to Pabbly Connect to access payment details. In the action step, select Google Sheets as the application. Choose the action event as ‘Look Up Spreadsheet Row V2’. This action will fetch the relevant payment data from your Google Sheet.

Click on ‘Connect’ and select ‘Add New Connection’. Sign in to your Google account and grant the necessary permissions. Once connected, select the spreadsheet that contains the payment reminders. For our example, we will use the spreadsheet titled ‘Payment Reminders’. Now, set the lookup value to ‘Due’, which refers to the payment status.


4. Iterating Over Payment Data with Pabbly Connect

In this step, we will use Pabbly Connect to iterate over the payment data retrieved from Google Sheets. After fetching the data, we will add an action step by selecting ‘Iterator by Pabbly’. This will allow us to process each customer’s data individually.

Select the array from the previous step to iterate through the customer payment details. By doing this, we ensure that each customer with a due payment gets their reminder. Click on ‘Save and Send Test Request’ to confirm that the data is being processed correctly.

Once you receive the response, you will see the customer’s details, including their WhatsApp number and the amount due. This information is crucial for sending the payment reminders. Make sure all details are accurate before proceeding to the next step.


5. Sending WhatsApp Messages Using Pabbly Connect

Finally, we will set up the action to send payment reminders via WhatsApp using the WhatsApp Cloud API. In the action step, select ‘WhatsApp Cloud API’ as the application and choose ‘Send Template Message’ as the action event. This will enable you to send a pre-defined message to each customer. using Pabbly Connect

  • Connect to WhatsApp Cloud API by entering your access token, phone number ID, and WhatsApp business account ID.
  • Select the message template you created for payment reminders.
  • Map the recipient’s phone number and the variables in the message (customer name, amount, product name).

After mapping all necessary fields, click on ‘Save and Send Test’. If everything is set up correctly, you will see a confirmation message indicating that the payment reminder was sent successfully via WhatsApp.


Conclusion

By following these steps, you can automate sending payment reminders on WhatsApp using Pabbly Connect. This integration ensures that your customers receive timely reminders, enhancing your payment collection process. Automating this task saves you time and improves customer engagement.

Ensure you check out Pabbly Connect to create business automation workflows and reduce manual tasks. Pabbly Connect currently offer integration with 2,000+ applications.

How to Send Slack Notifications for Received KrispCall SMS Using Pabbly Connect

Learn how to automate Slack notifications for received KrispCall SMS using Pabbly Connect. Step-by-step tutorial for seamless integration. Discover hidden automation capabilities within your existing tools. This guide shows you how to connect your essential applications and permanently eliminate redundant manual processes.

Watch Step By Step Video Tutorial Below


1. Accessing Pabbly Connect for SMS Automation

To automate the process of sending Slack notifications for received KrispCall SMS, you need to access Pabbly Connect. Start by visiting the Pabbly Connect website and signing in or signing up for a free account.

Once logged in, you will be directed to your dashboard. Here, you can create a new workflow by clicking on the ‘Create Workflow’ button. This is where you will set up the integration between KrispCall and Slack.


2. Creating a New Workflow in Pabbly Connect

In the Pabbly Connect dashboard, click on the ‘Create Workflow’ button. Name your workflow something descriptive, like ‘Send Slack Notification for Received KrispCall SMS’. You can also choose a folder to save your workflow. using Pabbly Connect

  • Click on ‘Create’ to proceed.
  • Select ‘KrispCall’ as your trigger application.
  • Choose ‘New SMS’ as the trigger event.

After setting the trigger, you will need to set the action application. Select Slack and the action event as ‘Send Channel Message’. This establishes the connection needed for the automation.


3. Connecting KrispCall to Pabbly Connect

To connect KrispCall with Pabbly Connect, you will need your API key and secret. Go to your KrispCall account settings, navigate to the developer section, and copy both keys.

Return to Pabbly Connect, click on ‘Connect’, and paste the API key and secret key into the respective fields. After entering the keys, click on ‘Save’ to establish the connection. This allows Pabbly Connect to capture new SMS data in real-time.


4. Sending Notifications to Slack

After setting up the connection with KrispCall, it’s time to configure the Slack integration. Click on ‘Connect’ for Slack and select the bot token type. After saving, grant the necessary permissions for your workspace. using Pabbly Connect

  • Choose the Slack channel where notifications will be sent.
  • Frame the message to be sent, including the inquirer’s phone number and message content.

Utilizing mapping, insert the dynamic data from the SMS response into your message. Click ‘Save and Send Request’ to send the message to Slack, confirming the successful integration.


5. Testing and Confirming the Integration

To ensure everything is working correctly, send a test SMS through KrispCall. This SMS should trigger the workflow in Pabbly Connect, capturing the details of the message.

Once the SMS is received, check your Slack channel for the notification. The message should include the inquirer’s phone number and any additional details you’ve mapped. This confirms that the integration is functioning as intended.


Conclusion

Using Pabbly Connect, you can seamlessly automate Slack notifications for received KrispCall SMS. This integration enhances communication and ensures your team is promptly informed of new inquiries.

Ensure you check out Pabbly Connect to create business automation workflows and reduce manual tasks. Pabbly Connect currently offer integration with 2,000+ applications.

How to Send Automated Emails to Facebook Leads Using Pabbly Connect

Learn how to automate emails to Facebook leads using Pabbly Connect. Step-by-step tutorial for car insurance leads email marketing automation. Build sophisticated automated workflows in less time than you think. This guide translates complex integrations into straightforward steps for immediate implementation.

Watch Step By Step Video Tutorial Below


Accessing Pabbly Connect for Facebook Leads Automation

To start automating emails for your car insurance Facebook leads, first access Pabbly Connect. This platform allows you to connect various applications seamlessly. You can easily sign up for free or log in if you are an existing user.

Once logged in, navigate to the dashboard where you can access all Pabbly applications. Click on the option to create a new workflow. This workflow will serve as the backbone of your email automation process.


Creating a Workflow for Facebook Leads in Pabbly Connect

In this section, you will create a workflow specifically for sending automated emails to Facebook leads. Start by naming your workflow appropriately, such as ‘Automated Email for Car Insurance Facebook Leads’. This makes it easy to identify later. using Pabbly Connect

Next, you will set up the trigger for your workflow. Choose Facebook Lead Ads as the trigger application. The trigger event should be set to ‘New Lead Instant’ to ensure that your workflow is activated immediately upon receiving a new lead.

  • Select Facebook Lead Ads as the trigger application.
  • Set the trigger event to New Lead Instant.
  • Connect your Facebook account to Pabbly Connect.

After establishing the connection, select your Facebook page and lead form. This is crucial as it determines which leads will trigger the email automation. Save your settings to proceed to the next step.


Testing the Trigger Integration with Pabbly Connect

To ensure everything is set up correctly, you need to test the trigger integration. Use the Meta for Developers tool to simulate a lead submission. This will confirm that Pabbly Connect captures the lead data accurately. using Pabbly Connect

Fill out the required fields such as first name, last name, email, phone number, city, and state. Once submitted, Pabbly Connect will capture this data, allowing you to see if your workflow is functioning properly.

  • Open the Meta for Developers tool.
  • Select your Facebook page and lead form.
  • Submit test lead data to verify the connection.

Once you submit the test lead, return to your Pabbly Connect dashboard to check if the lead data has been captured. This step is crucial to confirm that your trigger is working as intended.


Setting Up the Email Action in Pabbly Connect

Now that your trigger is working, it’s time to set up the action that sends an email via Gmail. In Pabbly Connect, select Gmail as your action application. The action event should be set to ‘Send Email’ to automate the email process effectively. using Pabbly Connect

Connect your Gmail account to Pabbly Connect. Ensure to grant all necessary permissions so that Pabbly Connect can send emails on your behalf. Once connected, you will need to map the email recipient field to the email captured from the Facebook lead submission.

Select Gmail as the action application. Set the action event to Send Email. Map the email recipient field to the lead’s email.

Customize your email content to include personalized greetings using the lead’s name. This personal touch increases engagement and response rates. Once everything is set, save your action settings to complete the workflow.


Verifying Email Delivery Through Pabbly Connect

After setting up the email action, it’s essential to verify that emails are being sent correctly. You can do this by submitting another test lead through the Meta for Developers tool. This will trigger the email action you just configured. using Pabbly Connect

Check your Gmail inbox to see if the email was received. The email should be personalized with the lead’s name and contain the content you specified in the action setup. This confirms that your workflow is functioning correctly and that Pabbly Connect is successfully automating the email process.

By following these steps, you ensure that every new lead from Facebook receives a timely and personalized email, helping you maintain connections and potentially convert leads into customers.


Conclusion

In this tutorial, we explored how to use Pabbly Connect to automate email responses for Facebook leads. By setting up triggers and actions, you can effectively manage your car insurance leads and enhance your marketing automation efforts.

Ensure you check out Pabbly Connect to create business automation workflows and reduce manual tasks. Pabbly Connect currently offer integration with 2,000+ applications.

How to Automatically Add Google Forms Responses in Google Drive Using Pabbly Connect

Learn how to use Pabbly Connect to automatically add Google Forms responses to Google Drive with a step-by-step tutorial. Discover seamless integration now! Master proven automation processes with practical implementation examples and strategic recommendations you can apply immediately in your workflow.

Watch Step By Step Video Tutorial Below


1. Accessing Pabbly Connect for Integration

To start the process of automatically adding Google Forms responses in Google Drive, you first need to access Pabbly Connect. Open your web browser and navigate to the Pabbly Connect website. If you are a new user, click on the ‘Sign up for free’ button to create an account, which allows you to utilize 100 tasks for free every month.

After signing up, you will be directed to the Pabbly Connect dashboard. Here, you can create your workflow by clicking on the ‘Create Workflow’ button. This initiates the setup process for connecting Google Forms with Google Drive through Pabbly Connect.


2. Creating a Workflow in Pabbly Connect

Once you’re in the Pabbly Connect dashboard, you can create a new workflow. Name your workflow something descriptive, like ‘Automatically Add Google Forms Response in Google Drive’. Select the appropriate folder for saving this workflow, such as ‘Google Forms to Google Drive Automation’.

  • Click on ‘Create’ to proceed.
  • Set up the trigger by selecting Google Forms as your trigger application.
  • Choose the trigger event ‘New Response Received’.

After setting up the trigger, you will need to define the action. In this case, the action application will be Google Drive, and the action event will be ‘Create a Subfolder’. This configuration allows Pabbly Connect to automate the process of creating a folder in Google Drive upon receiving a new Google Forms response.


3. Linking Google Forms to Google Sheets

To effectively utilize Pabbly Connect, you must link your Google Form to Google Sheets. Go to your Google Form, navigate to the ‘Responses’ tab, and click on the green Sheets icon to create a new Google Sheet for storing responses. This sheet will be where all new form submissions are recorded.

Next, you need to install the Pabbly Connect Webhooks add-on in Google Sheets. To do this, go to the Extensions menu, select ‘Add-ons’, and search for Pabbly Connect Webhooks. After installation, go back to the Extensions menu, select Pabbly Connect Webhooks, and then click on ‘Initial Setup’.

  • Paste the webhook URL provided by Pabbly Connect.
  • Set the trigger column to the final data column (usually column G).

By completing these steps, you ensure that every new form submission will trigger the webhook, sending data to Pabbly Connect for further processing.


4. Testing the Integration with Pabbly Connect

With your Google Form and Google Sheets linked, it’s time to test the integration. Fill out the Google Form with dummy data, including an attachment, and submit it. This action should automatically add a new row in your Google Sheet with the form responses.

Now, go back to Pabbly Connect. You should see that it is waiting for a webhook response. Refresh your Google Sheet to ensure the new submission is recorded. Once the data appears in the sheet, Pabbly Connect will capture the response, confirming that your integration is working correctly.


5. Creating Subfolders in Google Drive

After successfully testing the integration, the next step is to configure Pabbly Connect to create a subfolder in Google Drive. Go to your Google Drive account and define the folder where you want the subfolder to be created. In Pabbly Connect, set the action event to ‘Create a Subfolder’ and select the parent folder.

Map the subfolder name to a unique identifier, such as the email address of the form respondent. This mapping allows Pabbly Connect to dynamically create a folder based on the user’s input. After saving the configuration, you can test this step to ensure that a subfolder is created successfully in your Google Drive.

Verify that the subfolder is created with the correct name. Check that the attachment from the form submission is stored in this new subfolder.

Completing these steps ensures that every time a new Google Form submission occurs, a corresponding subfolder is created in Google Drive, effectively organizing your responses.


Conclusion

By following this tutorial, you have learned how to use Pabbly Connect to automatically add Google Forms responses to Google Drive. This integration streamlines your workflow and enhances organization. With every new submission, a dedicated subfolder is created, making data management effortless.

Ensure you check out Pabbly Connect to create business automation workflows and reduce manual tasks. Pabbly Connect currently offer integration with 2,000+ applications.

Integrate URL, Insight, and Pabbly Connect: A Step-by-Step Guide

Learn how to integrate URL, Insight, and Pabbly Connect with this detailed tutorial. Follow the exact steps to set up your automation seamlessly. Implement the precise methodologies leading organizations use to automate repetitive tasks, illustrated with practical examples designed for immediate application.

Watch Step By Step Video Tutorial Below


Setting Up Pabbly Connect for URL and Insight Integration

To begin integrating URL, Insight, and Pabbly Connect, first access your Pabbly Connect dashboard. Here, you will set up a webhook that acts as a bridge between your database and Pabbly Connect. This setup allows data to be sent to Pabbly Connect whenever a new record is added in your database. using Pabbly Connect

Once you are in your Pabbly Connect dashboard, navigate to the trigger section. Search for the database application and select the trigger event as ‘New Record’. This event will initiate the connection whenever a new record is created in your database.


Configuring the Webhook in Your Database

Next, you need to configure the webhook in your database application. This involves going into the edit mode of your app within the database and accessing the automation section. Here, you will find the option to set up outgoing webhooks, which is essential for connecting with Pabbly Connect.

To add a new webhook, follow these steps:

  • Navigate to the automation section of your database app.
  • Select ‘Outgoing Webhooks’ and click on ‘Add New Webhook’.
  • Enter a name for the webhook and choose the relevant data table.
  • Paste the webhook URL from Pabbly Connect into the designated field.

After saving these settings, your webhook will be successfully configured, allowing data to flow from your database to Pabbly Connect.


Testing the Integration with Pabbly Connect

Once the webhook is set up, it’s crucial to test the integration to ensure everything is working correctly. To do this, create a new record in your database. This action should trigger the webhook, sending the new record’s data to Pabbly Connect.

To conduct a test submission, follow these steps:

  • Click on ‘Add New Record’ in your database app.
  • Fill in the required fields such as first name, last name, email, and phone number.
  • Save the new record.

After saving, return to Pabbly Connect to check if the response has been received. You should see the details of the new record, confirming that the integration is functioning correctly.


Setting Up Actions in Pabbly Connect

After successfully testing the webhook, you can proceed to set up actions in Pabbly Connect. This allows you to determine where the data from your new records will be sent. You can choose from various applications to send this data based on your requirements.

To set up actions, navigate to the action window in Pabbly Connect and select the desired application. From there, you can configure how the data should be processed or stored. This flexibility allows you to create comprehensive automations tailored to your workflow.


Conclusion

In this tutorial, we explored how to integrate URL, Insight, and Pabbly Connect effectively. By following the step-by-step process, you can automate data transfers seamlessly between your applications. Utilizing Pabbly Connect allows for efficient management of your workflows and enhances productivity.

Ensure you check out Pabbly Connect to create business automation workflows and reduce manual tasks. Pabbly Connect currently offer integration with 2,000+ applications.

How to Set Up Webhook Inside Mautic with Pabbly Connect: A Step-by-Step Guide

Learn how to set up a webhook inside Mautic using Pabbly Connect to automate data transfer to various applications like Google Sheets, WhatsApp, and more.

Watch Step By Step Video Tutorial Below


1. Introduction to Pabbly Connect and Webhooks

In this section, we will discuss how to set up a webhook inside Mautic using Pabbly Connect. Webhooks act as a bridge between applications, allowing for seamless data transfer when specific events occur. By utilizing Pabbly Connect, you can automate processes, ensuring that data captured in Mautic can be sent to various applications automatically.

Understanding the workflow is crucial. In this case, when a form is submitted in Mautic, we want to capture that data and send it to another application, such as Google Sheets. This integration enables efficient data management and communication across platforms, making Pabbly Connect an essential tool for marketers.


2. Setting Up the Webhook in Mautic

To begin setting up the webhook, navigate to your Mautic account. First, we will create a new webhook that connects to Pabbly Connect. Start by accessing the settings section in Mautic. Under settings, look for the webhooks option.

  • Click on the plus sign to add a new webhook.
  • Name your webhook appropriately, e.g., ‘Form Submission’.
  • Paste the webhook URL provided by Pabbly Connect in the designated field.

After entering the webhook URL, select the events that will trigger this webhook. Choose the ‘form submit’ event, as this will ensure that data is sent to Pabbly Connect whenever a form is submitted in Mautic. Once completed, save the webhook settings to finalize the setup.


3. Testing the Webhook Connection

Now that we have set up the webhook, it’s time to test the connection to ensure everything is functioning correctly through Pabbly Connect. Go back to Pabbly Connect and check if it is waiting for a webhook response. You will need to submit a form in Mautic to generate a test response.

Fill out the form with necessary details such as first name, last name, email, and phone number. After submitting the form, return to Pabbly Connect to see if the response has been captured. You should see the data displayed, including timestamps and the details you entered.


4. Automating Data Transfer with Pabbly Connect

Once the webhook is successfully tested, you can automate the data transfer to applications like Google Sheets, WhatsApp, and more. In Pabbly Connect, you can add action steps that specify where the data should go after being captured from Mautic.

  • Add Google Sheets to create a record of form submissions.
  • Integrate WhatsApp to send notifications automatically.
  • Utilize Slack or Discord for team communication.

By setting these actions, you ensure that every form submission in Mautic triggers necessary follow-up actions in your chosen applications. This level of automation streamlines your workflow and enhances productivity using Pabbly Connect.


5. Conclusion

Setting up a webhook inside Mautic with Pabbly Connect allows for efficient data transfer across applications. By following the steps outlined, you can automate your marketing processes and improve data management. This integration enhances your workflow and ensures timely communication without manual intervention.

Ensure you check out Pabbly Connect to create business automation workflows and reduce manual tasks. Pabbly Connect currently offer integration with 2,000+ applications.

In summary, using Pabbly Connect to set up webhooks in Mautic is a powerful way to streamline your marketing automation efforts. Automating data transfer not only saves time but also ensures accuracy in your data handling.

Integrating PAB with Word Using Pabbly Connect: A Step-by-Step Guide

Learn how to integrate PAB with Word Using Pabbly Connect, Salesforce, Facebook, and more in this detailed tutorial. Follow our step-by-step guide for seamless automation. Discover how to seamlessly connect your essential tools through accessible instructions that make powerful automation available to professionals at every skill level. with Pabbly Connect.

Watch Step By Step Video Tutorial Below


1. Setting Up PAB and Word Integration

The integration of PAB with Word begins with establishing a link between these applications. First, you will need to log into your PAB account. Once logged in, navigate to the dashboard. Here, you can create a new workflow that connects PAB with Word.

To initiate this process, click on the ‘Create Workflow’ button located at the top right corner. You will then be prompted to name your workflow, such as ‘PAB and Word Integration Workflow’. After naming, select the appropriate folder for organization, and click on ‘Create’ to proceed.


2. Configuring Facebook Lead Ads as a Trigger

In this section, we will configure Facebook Lead Ads as the trigger for our automation. The first step is to select Facebook Lead Ads as your trigger application. Choose the event labeled ‘New Lead Instant’ to ensure that whenever a new lead is generated, PAB captures the response instantly.

  • Select ‘Connect’ to establish a new connection with Facebook.
  • Choose ‘Add New Connection’ if you haven’t connected your Facebook account yet.
  • Authorize PAB by clicking on ‘Connect with Facebook Lead Ads’.

After successful authorization, select your Facebook page where the leads are being generated. Next, choose the lead form you created, ensuring that it corresponds with your advertising campaign. This setup will allow PAB to capture leads directly from your Facebook ads.


3. Testing the Integration with Salesforce

Once your trigger is set up, it’s time to configure the action application, which in this case is Salesforce. You will select Salesforce as your action application and the event ‘Create a Lead’. This step is crucial as it ensures that every new lead captured from Facebook is automatically created in your Salesforce account.

To connect Salesforce, click ‘Connect’ again and choose ‘Add New Connection’. You will need to authorize PAB to access your Salesforce account. Once connected, you will map the fields from the Facebook lead to the corresponding fields in Salesforce.

  • Map the first name and last name from the lead details.
  • Include the company name, phone number, and email in the mapping process.
  • Select the lead source as ‘Web’ and set the status as ‘Open’.

After mapping all necessary fields, click on ‘Save and Send Test Request’ to verify that the integration works smoothly. You can check your Salesforce account to confirm that the lead was successfully created.


4. Finalizing and Testing the Automation

With the integration set up, it is essential to test the entire automation process. Start by generating a test lead through your Facebook lead ad. You will need to delete any previous test leads to create a new one. Navigate to the leads testing tool within Facebook and select your page and form to proceed.

Fill out the test lead form with dummy data and submit it. After submission, return to your PAB dashboard to see if the lead information has been captured successfully. If all goes well, you should see the test lead reflected in your Salesforce account.

Repeat this process with different test leads to ensure that the automation reliably captures leads from Facebook and creates them in Salesforce. This step is crucial for confirming the functionality of your integration.


Conclusion

Integrating PAB with Word, Facebook, and Salesforce allows for seamless lead management. By following the steps outlined in this tutorial, you can automate the process of capturing leads and saving them directly into your Salesforce account, enhancing your workflow efficiency.

Thanks for following along with this tutorial! Remember to subscribe to the channel for more helpful content like this.

If you found this guide useful, please consider giving it a thumbs up and sharing it with others who might benefit from it.

Integrating Simply CRM with Pabbly Connect: A Step-by-Step Guide

Learn how to integrate Simply CRM with Pabbly Connect for seamless automation. Follow this detailed tutorial to set up email parsing with Gmail and HubSpot.

Watch Step By Step Video Tutorial Below


1. Setting Up Pabbly Connect for Email Parsing

To integrate Simply CRM with Pabbly Connect, we first need to set up Pabbly Connect for email parsing. This process involves capturing emails from your Gmail account and sending them to Pabbly Connect. By using the email parser feature, you can set up a webhook that acts as a bridge between Gmail and Pabbly Connect. using Pabbly Connect

Start by accessing your Pabbly Connect dashboard. Here, you will create a new workflow. Select the email parser as your trigger application, which allows Pabbly Connect to capture incoming emails. This setup is essential for automating the transfer of leads from Gmail to your CRM.


2. Configuring Gmail Settings to Forward Emails

Next, we need to configure your Gmail settings to forward emails to Pabbly Connect. This step is crucial for ensuring that the emails you receive are sent to Pabbly Connect automatically. In your Gmail settings, navigate to the ‘Forwarding and POP/IMAP’ tab. using Pabbly Connect

  • Click on ‘Add a forwarding address’ and paste the email hook provided by Pabbly Connect.
  • Confirm the forwarding address by clicking the confirmation link sent to the email hook.
  • Once confirmed, return to your Gmail settings and enable forwarding.

After completing these steps, any new email sent to your Gmail account will be forwarded to Pabbly Connect through the webhook. This connectivity allows Pabbly Connect to process the email data and facilitate the integration with Simply CRM.


3. Testing Email Forwarding with Pabbly Connect

After setting up the email forwarding, it’s time to test if the integration works correctly. Send a test email to your Gmail account with specific content that you would expect from incoming leads. For instance, use a subject line like ‘New Lead Alert’ to simulate a lead notification. using Pabbly Connect

Once you’ve sent the test email, go back to Pabbly Connect and check for incoming data. You should see the email captured in Pabbly Connect, confirming that the forwarding setup is functioning correctly. This verification step is essential to ensure that the integration is active and ready to process real leads.

  • Monitor the response in Pabbly Connect to confirm that the email content is accurately captured.
  • If the email appears, the connection between Gmail and Pabbly Connect is successful.

This successful test means that you can now automate the addition of leads to Simply CRM using Pabbly Connect.


4. Adding Leads to Simply CRM via Pabbly Connect

With the email parsing successfully set up, the next step is to configure Pabbly Connect to add leads to Simply CRM automatically. In your Pabbly Connect workflow, select Simply CRM as the action application. This selection allows Pabbly Connect to send the captured email data to your CRM. using Pabbly Connect

Map the fields from the email content to the appropriate fields in Simply CRM. For example, if your email contains the lead’s name, email, and phone number, ensure these fields are correctly aligned in Pabbly Connect to match the corresponding fields in Simply CRM.

Once the mapping is complete, test the integration by sending another lead email. Verify that the lead data appears in Simply CRM as expected. This step confirms that Pabbly Connect is effectively transferring data from your email to your CRM, streamlining your lead management process.


5. Setting Filters for Workflow Optimization

To optimize your workflow, you can set filters in Pabbly Connect to ensure that only relevant emails trigger actions. This step is important to avoid cluttering your CRM with unnecessary emails. In your Pabbly Connect workflow, add a filter step after the email parser. using Pabbly Connect

Define the conditions for the filter based on the email subject or other criteria. For instance, you can set the filter to only proceed if the email subject contains ‘New Lead Alert’. This targeted approach ensures that only pertinent emails are processed and leads are added to Simply CRM.

Select the filter type and condition based on your email content. Test the filter by sending different emails to see if it correctly identifies relevant leads.

By implementing filters, you enhance the efficiency of your lead management process, allowing Pabbly Connect to handle only the most critical data.


Conclusion

Integrating Simply CRM with Pabbly Connect allows for seamless automation of lead management. By following these steps, you can efficiently capture emails from Gmail and automatically add leads to your CRM, optimizing your workflow and improving response times.

Ensure you check out Pabbly Connect to create business automation workflows and reduce manual tasks. Pabbly Connect currently offer integration with 2,000+ applications.