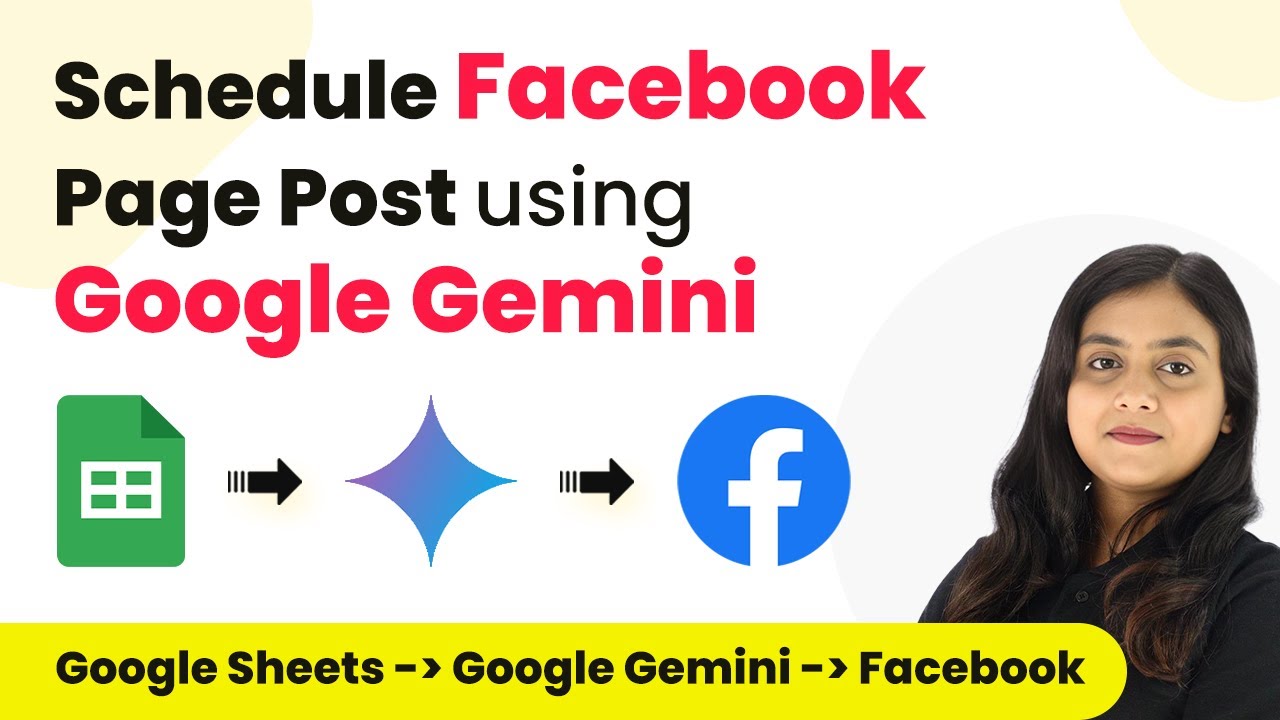
How to Schedule Facebook Page Posts Using Google Gemini with Pabbly Connect

Learn how to schedule Facebook page posts using Google Gemini with Pabbly Connect. This detailed tutorial covers step-by-step integration for seamless automation. Implement the precise methodologies leading organizations use to automate repetitive tasks, illustrated with practical examples designed for immediate application.

Watch Step By Step Video Tutorial Below


Accessing Pabbly Connect for Scheduling Facebook Posts

To schedule Facebook page posts using Google Gemini, first, we need to access Pabbly Connect. This integration platform simplifies the automation process without requiring any coding skills. Start by visiting the Pabbly Connect website and sign in to your account. If you’re new to Pabbly, you can sign up for free and get 100 tasks each month.

Once you are logged in, navigate to the Pabbly Connect dashboard. Here, you can create a new workflow that will connect Google Gemini and Facebook. This is essential for automating your posts based on the content generated from Google Gemini.


Creating a Workflow in Pabbly Connect

Creating a workflow in Pabbly Connect is the next step in scheduling your Facebook posts. Click on the ‘Create Workflow’ button located in the top right corner of the dashboard. A dialog box will appear, prompting you to name your workflow. For this tutorial, name it ‘How to Schedule Facebook Page Post using Google Gemini’.

  • Enter your workflow name.
  • Select a folder to save the workflow.
  • Click on the ‘Create’ button.

After creating the workflow, you will see two sections: Trigger and Action. The trigger is what starts the automation, and the action is what happens in response. In this case, we will set the trigger to schedule posts from Google Sheets.


Setting Up the Trigger in Pabbly Connect

In this section, we will set up the trigger in Pabbly Connect to schedule posts. Click on the arrow in the Trigger application section and select ‘Schedule by Pabbly’. This allows you to automate posting based on a specific schedule, such as daily or weekly.

Next, configure the trigger settings:

  • Set how often you want the workflow to run (e.g., every day).
  • Choose the time for the workflow to execute.

After setting these parameters, click the ‘Save’ button. This will ensure that your workflow runs at the specified time every day, checking for new content to post on your Facebook page.


Generating Content with Google Gemini

After the trigger is set, the next step is to generate content using Google Gemini through Pabbly Connect. Add a new action step and select ‘Google Gemini’ as the application. For the action event, choose ‘Generate Content’. This integration allows you to create engaging posts automatically.

To connect Google Gemini, you will need to enter your API key. Visit the Google AI Studio to generate this key, which allows Pabbly Connect to interact with Google Gemini. Once you have your API key, paste it into the connection settings in Pabbly Connect.

Click on ‘Add New Connection’. Enter your API key and click ‘Save’.

Now that Google Gemini is connected, you can specify the prompt for the content generation. Map the data from the previous steps to ensure that the content generated is relevant to your Facebook posts.


Posting to Facebook with Pabbly Connect

The final step in this automation process is to post the generated content to your Facebook page using Pabbly Connect. Add another action step and select ‘Facebook Pages’ as the application. Choose the action event ‘Create Page Post’ to share the content on your Facebook page.

Connect your Facebook account to Pabbly Connect by clicking on ‘Add New Connection’. Ensure that you log into your Facebook account beforehand. After successful authorization, select the Facebook page where you want to post the content.

Select the page you want to post on. Map the generated content to the message field.

After filling in all required fields, click the ‘Save and Send Test Request’ button. This will post the content to your Facebook page, completing the automation process.


Conclusion

In this tutorial, we learned how to schedule Facebook page posts using Google Gemini through Pabbly Connect. This integration not only saves time but also ensures high-quality content is shared regularly. By following these steps, you can automate your social media presence effectively.

Ensure you check out Pabbly Connect to create business automation workflows and reduce manual tasks. Pabbly Connect currently offer integration with 2,000+ applications.

Integrating Outgrow and Flodesk with Pabbly Connect for Your Fitness Business

Learn how to automate lead generation by integrating Outgrow and Flodesk using Pabbly Connect. This tutorial provides step-by-step instructions for seamless automation. Implement the precise methodologies leading organizations use to automate repetitive tasks, illustrated with practical examples designed for immediate application.

Watch Step By Step Video Tutorial Below


1. Accessing Pabbly Connect for Integration

To start integrating Outgrow and Flodesk, you first need to access Pabbly Connect. This platform allows you to automate tasks without coding. Simply visit the Pabbly Connect website and sign in or create a new account.

Once logged in, you will see the dashboard where you can create new workflows. This is essential for setting up your integration between Outgrow, which captures leads, and Flodesk, which manages your email marketing.


2. Creating a New Workflow in Pabbly Connect

After accessing Pabbly Connect, click on the ‘Create Workflow’ button. You will be prompted to name your workflow, for example, ‘Add Outgrow Leads to Flodesk as Subscribers’. Select a folder for organization, like ‘Automations for Lead Management’.

  • Click on ‘Create’ to initiate the workflow.
  • Understand the concepts of Trigger and Action in Pabbly Connect.
  • Set Outgrow as the Trigger and Flodesk as the Action.

This setup allows you to automate the process of adding new leads from Outgrow directly into Flodesk, streamlining your lead management.


3. Setting the Trigger with Outgrow

In this step, select Outgrow as your trigger application in Pabbly Connect. The trigger event will be ‘New Lead’, which activates the workflow whenever someone submits the Outgrow quiz.

You will receive a Webhook URL from Pabbly Connect. Copy this URL to integrate with your Outgrow account. This URL will facilitate the transfer of lead data from Outgrow to Pabbly Connect.

  • Navigate to your Outgrow quiz and go to the ‘Build’ section.
  • Select ‘Configure’ and then ‘Integrations’.
  • Paste the Webhook URL in the Webhook section.

After saving the configuration, you can test the connection by submitting a sample lead through your Outgrow quiz. This will ensure that the integration is working correctly.


4. Setting the Action with Flodesk

Next, you will set Flodesk as your action application in Pabbly Connect. The action event should be ‘Create or Update Subscriber’. This allows you to add the new leads captured from Outgrow directly into Flodesk as subscribers.

To do this, click on ‘Connect’ and authorize Pabbly Connect to access your Flodesk account. Once connected, you will need to map the fields from the Outgrow response, including the email and name of the lead.

Map the email field to the email received from Outgrow. Map the first and last name fields accordingly. Click ‘Save and Send Test Request’ to finalize the setup.

After completing these steps, check your Flodesk account to confirm that the new subscriber has been added successfully. This integration ensures that you can nurture leads effectively.


5. Testing the Integration Workflow

To ensure everything is functioning correctly, it’s important to test the entire workflow in Pabbly Connect. Submit a new lead through your Outgrow quiz and monitor the response in Pabbly Connect.

Once you submit the quiz, return to Pabbly Connect and check if the new lead details appear. This confirms that the data transfer from Outgrow to Flodesk is seamless and effective.

Submit a test lead with unique details. Check the response captured in Pabbly Connect. Verify the new subscriber in your Flodesk account.

Upon successful verification, you can confidently use this automation to manage your fitness business leads efficiently.


Conclusion

This tutorial demonstrated how to integrate Outgrow and Flodesk using Pabbly Connect to automate your lead management process. By following these steps, you can streamline your fitness business and enhance customer engagement effortlessly.

Ensure you check out Pabbly Connect to create business automation workflows and reduce manual tasks. Pabbly Connect currently offer integration with 2,000+ applications.

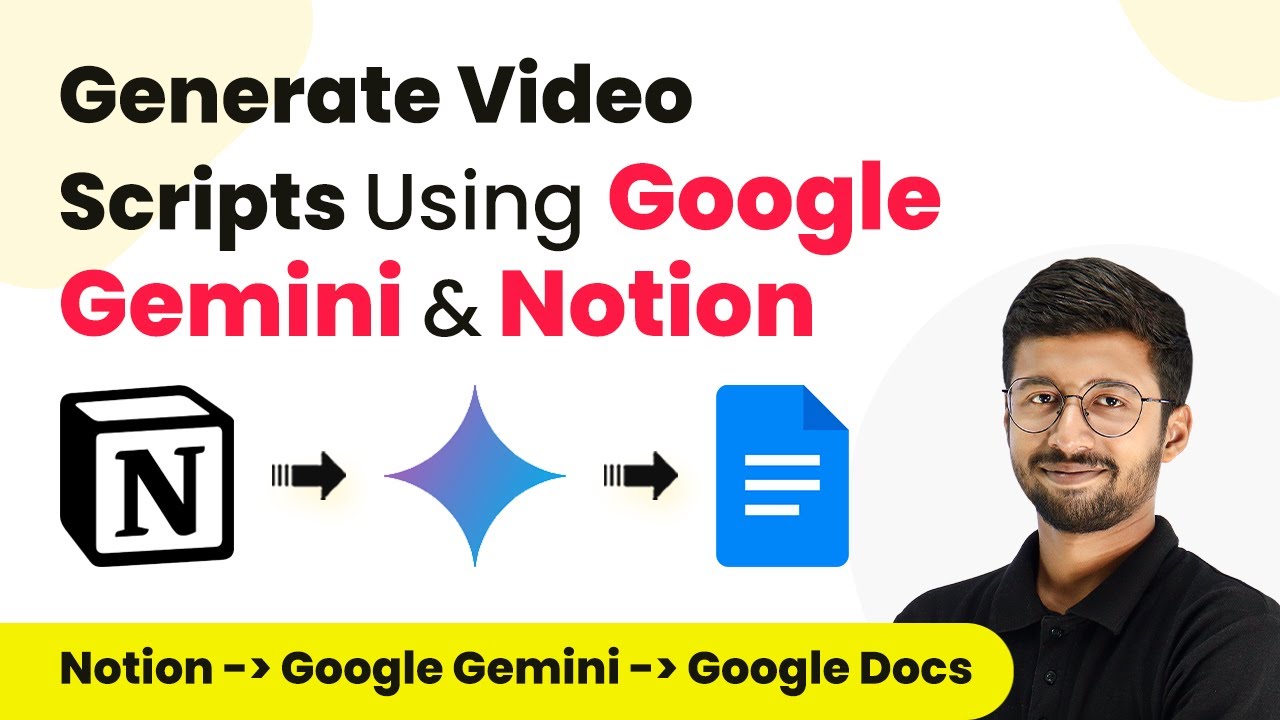
Generate Video Scripts Using Google Gemini from Notion with Pabbly Connect

Learn how to automate video script generation using Google Gemini from Notion and save it to Google Docs with Pabbly Connect in this step-by-step tutorial.

Watch Step By Step Video Tutorial Below


1. Accessing Pabbly Connect for Automation

To automate video script generation, first access Pabbly Connect. Visit the Pabbly Connect landing page by searching for ‘Pabbly.com/connect’ in your browser. Here, you can either sign up for a new account or log in to an existing one.

Once logged in, navigate to the dashboard. Click on the ‘Create Workflow’ button to start setting up your automation. Choose a suitable name for your workflow, such as ‘Notion to Google Docs Automation’. This setup will allow you to connect Notion, Google Gemini, and Google Docs through Pabbly Connect.


2. Setting Up Notion as a Trigger in Pabbly Connect

In this step, we will configure Notion as the trigger for our automation in Pabbly Connect. Select Notion from the app list and choose the trigger event as ‘New Database Item’. This means that the automation will activate whenever a new topic is added in Notion.

  • Select the Notion account to connect with Pabbly Connect.
  • Allow access to your Notion databases.
  • Choose the specific database that contains your video topics.

Once the connection is established, click on ‘Save and Send Test Request’. This action will confirm that Pabbly Connect is successfully receiving data from your Notion database.


3. Integrating Google Gemini for Script Generation

The next step is to connect Google Gemini through Pabbly Connect to generate the video script. In the action step, search for Google Generative AI and select it. Choose the action event as ‘Generate Content’ to enable script creation based on the topic and description received from Notion.

To connect Google Gemini, you will need to input the API key from your Google AI Studio. Follow these steps to obtain the API key:

  • Log into your Google AI Studio.
  • Create a new project if you haven’t done so already.
  • Generate a new API key for this project.

Once you have the API key, paste it into Pabbly Connect and map your prompt, which will include the topic and description from Notion. This will instruct Google Gemini to create the script based on the provided information.


4. Saving the Generated Script to Google Docs

After generating the video script with Google Gemini, the next step is to save this script in Google Docs using Pabbly Connect. In the action step, select Google Docs and choose the action event as ‘Create Document from Template’. This allows you to use a pre-existing template for your video scripts.

Connect your Google Docs account and select the template document you created earlier. Map the topic, description, and script generated by Google Gemini into the corresponding fields in the template. This ensures that all necessary information is included in the new document.

Select the folder in Google Drive where you want to save the document. Name the new document based on the video topic. Click ‘Save and Send Test Request’ to create the document.

Upon successful execution, you will find the new document in your specified Google Drive folder, containing the topic, description, and generated script.


5. Finalizing Automation Settings in Pabbly Connect

With the automation workflow set up, you can now finalize the settings in Pabbly Connect. Adjust the trigger time to determine how often Pabbly Connect checks for new items in your Notion database. The default is set to every 8 hours, but you can modify this to 90 minutes or any other interval that suits your needs.

After configuring the trigger time, ensure that everything is functioning as expected. You can test the workflow by adding a new topic in Notion and confirming that the script is generated and saved in Google Docs automatically.

This automation streamlines the video scripting process, allowing you to focus on content creation rather than manual scriptwriting. With Pabbly Connect, you can easily integrate multiple applications and improve your workflow efficiency.


Conclusion

In this tutorial, we explored how to automate video script generation using Pabbly Connect, Google Gemini, and Notion. This integration enhances productivity by streamlining the scriptwriting process, allowing you to focus on creating engaging video content.

Ensure you check out Pabbly Connect to create business automation workflows and reduce manual tasks. Pabbly Connect currently offer integration with 2,000+ applications.

How to Set Up Webhook Inside DoneDone Using Pabbly Connect

Learn how to set up a webhook inside DoneDone using Pabbly Connect to integrate various applications seamlessly. Follow this step-by-step tutorial for successful automation. Explore systematic approaches to creating efficient automation solutions that convert technical concepts into practical, implementable instructions.

Watch Step By Step Video Tutorial Below


1. Introduction to DoneDone and Pabbly Connect

In this section, we will introduce DoneDone and how it integrates with Pabbly Connect. DoneDone is a project management tool that simplifies team collaboration. By using Pabbly Connect, you can automate tasks and streamline communication between DoneDone and other applications.

Integrating DoneDone with Pabbly Connect allows you to send information based on specific events, like creating new tasks. This integration reduces manual data entry and enhances productivity across your team.


2. Setting Up Webhook Inside DoneDone

To set up a webhook inside DoneDone, start by accessing your Pabbly Connect account. Here, you will create a webhook URL that will serve as a bridge between DoneDone and other applications. This URL will be used to send task details whenever a new task is created.

  • Log in to your Pabbly Connect account.
  • Select DoneDone as your trigger application.
  • Choose the trigger event as ‘New Task’.

After selecting the trigger event, you will receive a webhook URL. Copy this URL as you will need it to configure the webhook in DoneDone.


3. Configuring DoneDone with Pabbly Connect

Now, log in to your DoneDone account to configure the webhook. Click on your profile icon and navigate to the Developer Center. Here, you will find options for API and Webhooks. Select ‘Configure Webhooks’ to proceed.

  • Click on the ‘Add’ button to create a new webhook.
  • Paste the webhook URL from Pabbly Connect in the endpoint URL field.
  • Enter a description, such as ‘New Task’.

Select the event you want to subscribe to, such as ‘Task Created’, and click on the ‘Create’ button. This completes the webhook setup in DoneDone using Pabbly Connect.


4. Testing the Connection with Pabbly Connect

Once the webhook is set up, it’s essential to test the connection to ensure everything is working properly. You can do this by creating a new task in DoneDone. This action will trigger the webhook and send the task details to Pabbly Connect.

To test the connection, follow these steps:

Go to your DoneDone account and click on ‘Tasks’. Select ‘New Task’ and fill in the required details. Click ‘Create Task’ to finalize.

After creating the task, return to Pabbly Connect and check if the webhook response has been received. This confirms that the integration is successful.


5. Conclusion

In conclusion, setting up a webhook inside DoneDone using Pabbly Connect is a straightforward process. By following the steps outlined, you can seamlessly integrate DoneDone with various applications, enhancing your team’s productivity and communication.

Ensure you check out Pabbly Connect to create business automation workflows and reduce manual tasks. Pabbly Connect currently offer integration with 2,000+ applications.

Utilizing Pabbly Connect for this integration allows for automatic updates and notifications, ensuring that your team stays informed about new tasks and project updates.


Automate Sharing Blogger Posts to Discord with Pabbly Connect

Learn how to use Pabbly Connect to automatically share your Blogger posts on Discord. Follow this detailed tutorial for seamless integration. Explore efficient methods for automating routine tasks with clear, concise instructions suited for both newcomers and experienced professionals.

Watch Step By Step Video Tutorial Below


Accessing Pabbly Connect for Discord Integration

To start integrating Blogger with Discord, you first need to access Pabbly Connect. Open your preferred web browser and navigate to the Pabbly Connect website. If you don’t have an account, click on the ‘Sign Up for Free’ button, which allows you to create an account in just a couple of minutes.

Once logged in, you will see a dashboard with various applications available. Click on the ‘Access Now’ button under Pabbly Connect to begin creating your workflow. This is the first step to automate sharing your Blogger posts on your Discord channel.


Creating a Workflow in Pabbly Connect

After accessing Pabbly Connect, the next step is to create a new workflow. Click on the ‘Create Workflow’ button. A pop-up window will appear, prompting you to name your workflow. For this integration, name it ‘Automatically Share Blogger Posts on Discord’.

Next, select a folder to save your workflow. Choose the folder related to Discord. After that, click on the ‘Create’ button to proceed. You will now see two main sections: Trigger and Action, which are essential for your workflow.

  • Click on the ‘Create Workflow’ button.
  • Name your workflow appropriately.
  • Select the folder for saving your workflow.

Once you have named your workflow and selected the folder, you will be ready to set up the trigger for your integration.


Setting Up the Trigger with Google Blogger

The next step is to configure the trigger for your workflow using Pabbly Connect. In the Trigger application section, search for and select ‘Google Blogger’ as your trigger application. Then, set the trigger event to ‘New Post Added’ which indicates that the workflow should activate whenever a new post is created in Blogger.

To connect Google Blogger to Pabbly Connect, click on the ‘Connect’ button and sign in with your Google account. Grant the necessary permissions by clicking on ‘Continue’. Once connected, select your Blog ID and set the status to ‘Only Live’ to ensure that only published posts trigger the workflow.

  • Search and select ‘Google Blogger’ as the trigger application.
  • Set the trigger event to ‘New Post Added’.
  • Connect your Google account and select the Blog ID.

After setting up the trigger, you are ready to create a new post in Google Blogger to test the integration.


Creating a New Post in Google Blogger

Now that the trigger is set up, it’s time to create a new post in your Google Blogger account. Click on the ‘New Post’ button and enter the title and content for your blog. For example, you can use the title ‘The Importance of Digital Detox: Reclaim Your Well-Being’ and add an image to enhance your blog.

Once you have added the content and image, click on the ‘Publish’ button and confirm the action. After publishing, return to Pabbly Connect and click on the ‘Save and Send Test’ button. This action will check if the integration works correctly and will fetch the details of the newly created post.

Click on ‘New Post’ in Blogger. Enter your blog title and content. Publish your post and test the integration in Pabbly Connect.

After successfully saving and sending the test, you will see the response containing the blog URL, title, and other details.


Setting Up the Action to Post on Discord

With the trigger successfully set up, it’s time to configure the action in Pabbly Connect. Search for and select ‘Discord’ as your action application. Choose the action event as ‘Send Channel Message’. This will allow you to send a message to your Discord channel whenever a new blog post is published.

To connect Discord with Pabbly Connect, click on the ‘Connect’ button. You will need to create a webhook URL in your Discord channel. Navigate to your Discord channel settings, click on ‘Edit Channel’, go to ‘Integrations’, and create a webhook. After creating the webhook, copy the URL and paste it into Pabbly Connect.

Select ‘Discord’ as the action application. Choose ‘Send Channel Message’ as the action event. Create a webhook in Discord and copy the URL.

Finally, customize your message with the title and URL of your blog, and click on ‘Save and Send Test’ to complete the process. You should see a confirmation that the message has been sent to your Discord channel.


Conclusion

In this tutorial, we demonstrated how to use Pabbly Connect to automate sharing your Blogger posts on Discord. By following these steps, you can easily connect Google Blogger and Discord without any coding skills. This integration helps keep your community updated with your latest blog posts effortlessly.

Ensure you check out Pabbly Connect to create business automation workflows and reduce manual tasks. Pabbly Connect currently offer integration with 2,000+ applications.

Automate Notion Database Updates to Google Sheets with Pabbly Connect

Learn how to automate updates from Notion to Google Sheets using Pabbly Connect for seamless order management in your e-commerce store. Learn to create powerful connections between your critical applications without requiring specialized programming knowledge or extensive technical background.

Watch Step By Step Video Tutorial Below


1. Setting Up Pabbly Connect for Notion and Google Sheets Integration

To automate the process of adding updated Notion database items into Google Sheets, begin by accessing Pabbly Connect. This platform allows you to create workflows that connect various applications without any coding skills.

Visit the Pabbly Connect homepage and sign in or create a free account. Once logged in, you can explore the dashboard where you can manage your workflows. This initial setup is crucial for integrating Notion and Google Sheets effectively.


2. Creating a New Workflow in Pabbly Connect

After signing into Pabbly Connect, click on the ‘Create Workflow’ button to begin. You will be prompted to name your workflow; for this example, name it ‘Add Updated Notion Database Items in Google Sheets’.

  • Provide a name for your workflow.
  • Select a folder to save your workflow.
  • Click on ‘Create’ to finalize.

Now, you will set up the trigger and action for your workflow. The trigger will be when an item is updated in Notion, and the action will be to add that information into Google Sheets.


3. Connecting Notion Database to Pabbly Connect

To establish a connection between Pabbly Connect and Notion, select Notion as your trigger application. Choose the trigger event as ‘Update Database Item’. This ensures that any updates in your Notion database will initiate the workflow.

Next, click on ‘Connect Now’ and authorize Pabbly Connect to access your Notion account. Select the relevant database page that contains your order details. This step is essential for ensuring that the correct data is pulled during each update.


4. Setting Up Google Sheets as the Action in Pabbly Connect

After connecting Notion, the next step is to set Google Sheets as the action application in Pabbly Connect. Select the action event as ‘Add New Row’. This will allow the workflow to add new entries to your Google Sheets whenever an order status is updated.

  • Choose the Google Sheets account you want to connect.
  • Select the specific spreadsheet and sheet where the data will be recorded.
  • Map the required fields from Notion to Google Sheets.

This mapping ensures that each new order detail is accurately recorded in the right columns of your Google Sheets.


5. Testing the Workflow in Pabbly Connect

Once the connections are established, it’s time to test your workflow in Pabbly Connect. Make a test update in your Notion database, changing the status of an order to ‘Delivered’. After making this change, return to Pabbly Connect and click on ‘Save and Send Test Request’.

If everything is set up correctly, you should see the updated order details reflected in your Google Sheets. This test confirms that the integration is working as intended, allowing your logistics and operations teams to access real-time order statuses.


Conclusion

This tutorial demonstrated how to automate the integration between Notion and Google Sheets using Pabbly Connect. By following these steps, you can streamline your order management process and ensure that your team has access to the latest information without manual input.

Ensure you check out Pabbly Connect to create business automation workflows and reduce manual tasks. Pabbly Connect currently offer integration with 2,000+ applications.

How to Integrate Canva with Pabbly Connect: A Step-by-Step Guide

Learn how to integrate Canva with Pabbly Connect effectively. This guide covers each step for seamless automation between Canva and other applications. Navigate the automation landscape confidently with clear, structured guidance suitable for professionals regardless of prior technical experience.

Watch Step By Step Video Tutorial Below


1. Accessing Pabbly Connect for Integration

To begin integrating Canva with other applications, you first need to access Pabbly Connect. This platform enables seamless automation and connection between various applications, including Canva.

Once you log in to your Pabbly Connect account, you can start creating workflows that automate tasks between Canva and other services. This process is straightforward and user-friendly, allowing you to set up integrations quickly.


2. Creating a Workflow in Pabbly Connect

After accessing Pabbly Connect, the next step is to create a new workflow. Click on the ‘Create Workflow’ button, and give your workflow a name that reflects its purpose, such as ‘Canva Integration’.

  • Select the action step for your workflow.
  • Search for ‘Canva’ in the app selection menu.
  • Choose the action event you want to automate, such as ‘Create Folder’.

Once you’ve set up your action step, click on the ‘Connect’ button to establish a connection between Pabbly Connect and Canva. This step is essential for enabling the automation process.


3. Connecting Canva to Pabbly Connect

To connect your Canva account to Pabbly Connect, you will need a Client ID and Client Secret. Click on the ‘Connect with Canva’ button, which opens a popup for entering these credentials.

  • Follow the instructions to obtain your Client ID and Client Secret from the Canva Developer Portal.
  • Ensure you enable multi-factor authentication on your Canva account for security.
  • Copy and paste the Client ID and Client Secret into the respective fields in Pabbly Connect.

After entering the credentials, click the ‘Allow’ button to grant access. This completes the connection between Canva and Pabbly Connect, enabling you to automate tasks effectively.


4. Testing the Integration between Canva and Pabbly Connect

With the connection established, it’s time to test your integration. In Pabbly Connect, make sure you’ve selected the action event you want to execute, such as creating a folder in Canva.

Enter the required details for the action, including the folder name and parent folder ID. After filling out the necessary fields, click on the ‘Save’ button and then select ‘Send Test Request’ to verify if everything is working correctly.

Check the response to ensure a new folder is created in your Canva account. Confirm that the folder appears under the specified parent folder in Canva.

If the test is successful, you will receive a positive response indicating that the integration works as intended. This step is crucial for ensuring that your automation setup is functioning correctly.


5. Conclusion on Integrating Canva with Pabbly Connect

In this tutorial, we explored how to integrate Canva with Pabbly Connect effectively. By following the outlined steps, you can seamlessly automate tasks between Canva and other applications.

Ensure you check out Pabbly Connect to create business automation workflows and reduce manual tasks. Pabbly Connect currently offer integration with 2,000+ applications.

Utilizing Pabbly Connect for these integrations opens up numerous possibilities for automating your workflow, enhancing productivity, and saving time. Start leveraging this powerful integration platform today!

Automated WhatsApp Confirmation and Reminder Messages with Pabbly Connect

Learn how to automate WhatsApp confirmation and reminder messages using Pabbly Connect with Calendly. Step-by-step guide for seamless integration. Navigate the automation landscape confidently with clear, structured guidance suitable for professionals regardless of prior technical experience.

Watch Step By Step Video Tutorial Below


1. Accessing Pabbly Connect for Automation

To begin automating WhatsApp confirmation and reminder messages, you first need to access Pabbly Connect. Start by visiting the Pabbly Connect website and logging into your account. If you are a new user, you can sign up for free and receive 100 free tasks each month.

Once logged in, you will see the Pabbly apps dashboard. Click on the ‘Access Now’ button under Pabbly Connect. This will take you to the dashboard where you can create your automation workflow.


2. Creating a Workflow in Pabbly Connect

After accessing Pabbly Connect, the next step is to create a new workflow. Click on the ‘Create Workflow’ button located at the top right corner. A dialog box will appear asking you to name your workflow. For this tutorial, name it ‘Automated WhatsApp Confirmation and Reminder Messages to Calendly Invitees’.

  • Select a folder to save your workflow.
  • Click on ‘Create’ to finalize your workflow.

Once your workflow is created, you will see two main sections: Trigger and Action. The trigger is the event that starts the workflow, while the action is what happens in response. In this case, the trigger will be when a new invite is created in Calendly.


3. Setting Up the Trigger in Pabbly Connect

To set up the trigger for your workflow in Pabbly Connect, click on the trigger application dropdown and select ‘Calendly’. For the trigger event, choose ‘Invite Created’. This means that whenever a new invite is created, the automation will be triggered.

Next, click on the ‘Connect’ button to link your Calendly account with Pabbly Connect. A new window will open where you can add a new connection. After authorizing, select the organization and user associated with your Calendly account. Finally, click on ‘Save and Send Test Request’ to confirm the connection.


4. Sending WhatsApp Messages Using Pabbly Connect

Once the trigger is set up, it’s time to add an action step to send WhatsApp messages. Select ‘WhatsApp Cloud API’ as the action application. For the action event, choose ‘Send Template Message’. This allows you to send messages to your invitees automatically. using Pabbly Connect

  • Map the recipient’s mobile number from the previous step.
  • Select the template you created for confirmation messages.

Fill in the required fields with the invitee’s details such as name, appointment date, and time. This ensures that each message is personalized and relevant to the invitee.


5. Adding Reminder Messages in Pabbly Connect

After sending the confirmation message, you can set up reminders for your invitees. To do this, add another action step in your workflow. Again, select ‘WhatsApp Cloud API’ as the action application and choose ‘Send Template Message’ for the action event.

Map the recipient’s mobile number and fill in the details for the reminder message. Ensure that the timing for the reminder is set to one hour before the scheduled appointment. This way, your clients will receive timely notifications about their upcoming sessions.

Finally, click on ‘Save’ to finalize your workflow. Now, every time a new invite is created in Calendly, the invitee will receive both a confirmation message and a reminder message automatically through WhatsApp, thanks to Pabbly Connect.


Conclusion

In this tutorial, we explored how to automate WhatsApp confirmation and reminder messages using Pabbly Connect with Calendly. This integration not only saves time but also enhances client engagement by ensuring timely communication. By following these steps, you can streamline your appointment management process effectively.

Ensure you check out Pabbly Connect to create business automation workflows and reduce manual tasks. Pabbly Connect currently offer integration with 2,000+ applications.

Integrate Instagram Lead Ads with Google Sheets Using Pabbly Connect

Learn how to seamlessly integrate Instagram Lead Ads with Google Sheets using Pabbly Connect in this step-by-step tutorial. Transform complex automation concepts into accessible, actionable steps that eliminate unnecessary manual work while maximizing existing application capabilities.

Watch Step By Step Video Tutorial Below


1. Accessing Pabbly Connect for Integration

To begin integrating Instagram Lead Ads with Google Sheets, you must first access Pabbly Connect. This platform allows you to automate various tasks without any coding knowledge. Start by navigating to the Pabbly Connect landing page.

Once there, you will see options to sign in or sign up. If you’re a new user, click on ‘Sign Up for Free’ to get started with 100 free tasks each month. Existing users can simply sign in to access their dashboard and begin the integration process.


2. Creating a Workflow in Pabbly Connect

After signing into Pabbly Connect, the next step is to create a new workflow. Click on the ‘Create Workflow’ button, where you will be prompted to name your workflow. For this integration, name it ‘Automatically Add Instagram Lead Ads to Google Sheets’ and choose the appropriate folder for saving the workflow.

  • Click on ‘Create’ to proceed to the workflow window.
  • This window will display both trigger and action options.
  • The trigger will be set to Instagram Lead Ads, which will initiate the workflow.

In this workflow, the trigger is the Commander, and the action follows this command. You can only have one Commander but multiple actions can follow.


3. Setting Up Instagram Lead Ads as Trigger

Now that your workflow is created, select Instagram Lead Ads as the trigger application. This means that every time a new lead is generated, it will trigger the workflow. Choose the trigger event as ‘New Lead Instant’ and click on ‘Connect’.

If you haven’t already connected your Instagram account, you will need to create a new connection. Follow the prompts to connect your Instagram Lead Ads account to Pabbly Connect. After successful connection, select your Facebook page associated with your Instagram account.

  • Choose the lead gen form you want to use for the integration.
  • Click on ‘Save and Send Test Request’ after selecting the appropriate form.
  • This will prepare Pabbly Connect to receive data from your lead form.

Once this is done, you will need to perform a test submission to ensure everything is working correctly.


4. Testing and Configuring Google Sheets Action

After setting up the trigger, the next step is to configure the action application, which in this case is Google Sheets. Search for Google Sheets in Pabbly Connect and select it as the action application. Choose ‘Add New Row’ as the action event.

Click on ‘Connect’ to link your Google Sheets account. If you haven’t connected it yet, you’ll need to create a new connection and authorize Pabbly Connect to access your Google Sheets. Select the spreadsheet and the specific sheet where you want the data to be added.

Map the fields from the Instagram lead form to the corresponding columns in Google Sheets. Ensure that each field is correctly mapped to allow dynamic data insertion. Click on ‘Save and Send Test Request’ to test the action.

By doing this, you can verify that the data from Instagram Lead Ads is correctly being added to your Google Sheets.


5. Verifying Integration Success

Once you’ve completed the setup and testing, it’s essential to verify the integration’s success. Open your Google Sheets to check if the lead information has been accurately added. You should see the first name, last name, email, phone number, gender, and city of the lead. using Pabbly Connect

To further confirm, perform a test submission using the Instagram Lead Ads testing tool. After submitting the test lead, check your Google Sheets again to see if the new lead appears. This will ensure that your workflow is functioning as intended.

Review the details added to ensure accuracy. If everything looks good, your integration is successful!

With this setup, every new lead from your Instagram ads will be automatically recorded in Google Sheets, streamlining your lead management process.


Conclusion

This tutorial has outlined how to integrate Instagram Lead Ads with Google Sheets using Pabbly Connect. By following these steps, you can automate lead management and ensure that all new leads are captured efficiently in your Google Sheets.

Ensure you check out Pabbly Connect to create business automation workflows and reduce manual tasks. Pabbly Connect currently offer integration with 2,000+ applications.

Integrating URL, Json, Box, Make with Pabbly Connect: A Step-by-Step Guide

Learn how to integrate URL, Json, Box, Make, and Pabbly Web using Pabbly Connect in this detailed tutorial. Follow the exact steps for seamless automation.

Watch Step By Step Video Tutorial Below


1. Setting Up Pabbly Connect for Integration

To begin integrating URL, Json, Box, Make, and Pabbly Web, first access Pabbly Connect. This platform is essential for creating workflows that automate data transfers between applications. Start by logging into your Pabbly Connect account and navigate to the dashboard.

Once on the dashboard, click on the ‘Create Workflow’ button. Here, you will set up a new workflow that will connect to your desired applications. Select ‘Webhook’ as your trigger app, as it will allow you to receive data from external sources.


2. Creating the Webhook URL in Pabbly Connect

In this step, you will create a webhook URL using Pabbly Connect. After selecting the Webhook trigger, choose the ‘Catch Webhook’ event. This action will generate a unique webhook URL for your workflow.

  • Select ‘Webhook’ as the trigger app.
  • Choose ‘Catch Webhook’ as the trigger event.
  • Copy the generated webhook URL for later use.

Now that you have your webhook URL, you can use it in your iPhone shortcuts to send data directly to Pabbly Connect. This integration is crucial for ensuring that your data flows seamlessly from your iPhone to your applications.


3. Setting Up the iPhone Shortcut to Send Data

Next, you will set up a shortcut on your iPhone that utilizes the webhook URL created in Pabbly Connect. Open the Shortcuts app on your iPhone and tap the plus button to create a new shortcut. In the search action, look for ‘Get Contents of URL’ and select it.

Paste the copied webhook URL into the URL field. Now, configure the method for the API call. Choose ‘POST’ to send data to the webhook. You can also set up the request body to send JSON data. This is where you will define what information is sent to Pabbly Connect.


4. Configuring the Data Sending Method

In this stage, you will configure how to send your data to the webhook URL using Pabbly Connect. After selecting the POST method, you will be prompted to set up the request body. Choose JSON as the format to send your data.

  • Select ‘JSON’ for the request body format.
  • Add fields as necessary; for example, a text input field.
  • Use ‘Ask for Input’ to gather user input for the JSON data.

This configuration allows you to dynamically send data from your iPhone to Pabbly Connect, making your automation process efficient and user-friendly.


5. Testing the Integration and Viewing Results

Finally, you will test the integration to ensure everything works correctly. Run the shortcut you created on your iPhone. It will prompt you for text input. After entering your text and allowing the necessary permissions, the data will be sent to the webhook URL.

Go back to your Pabbly Connect dashboard to check if the data was received successfully. You should see the text you entered displayed in the webhook response section. This confirms that your integration between your iPhone and Pabbly Connect is functioning as intended.


Conclusion

In this tutorial, we demonstrated how to integrate URL, Json, Box, Make, and Pabbly Web using Pabbly Connect. By following the steps outlined, you can automate data transfers seamlessly. This integration not only enhances your workflow but also saves valuable time.

Ensure you check out Pabbly Connect to create business automation workflows and reduce manual tasks. Pabbly Connect currently offer integration with 2,000+ applications.