Automate Your Learning Management System with Pabbly Connect

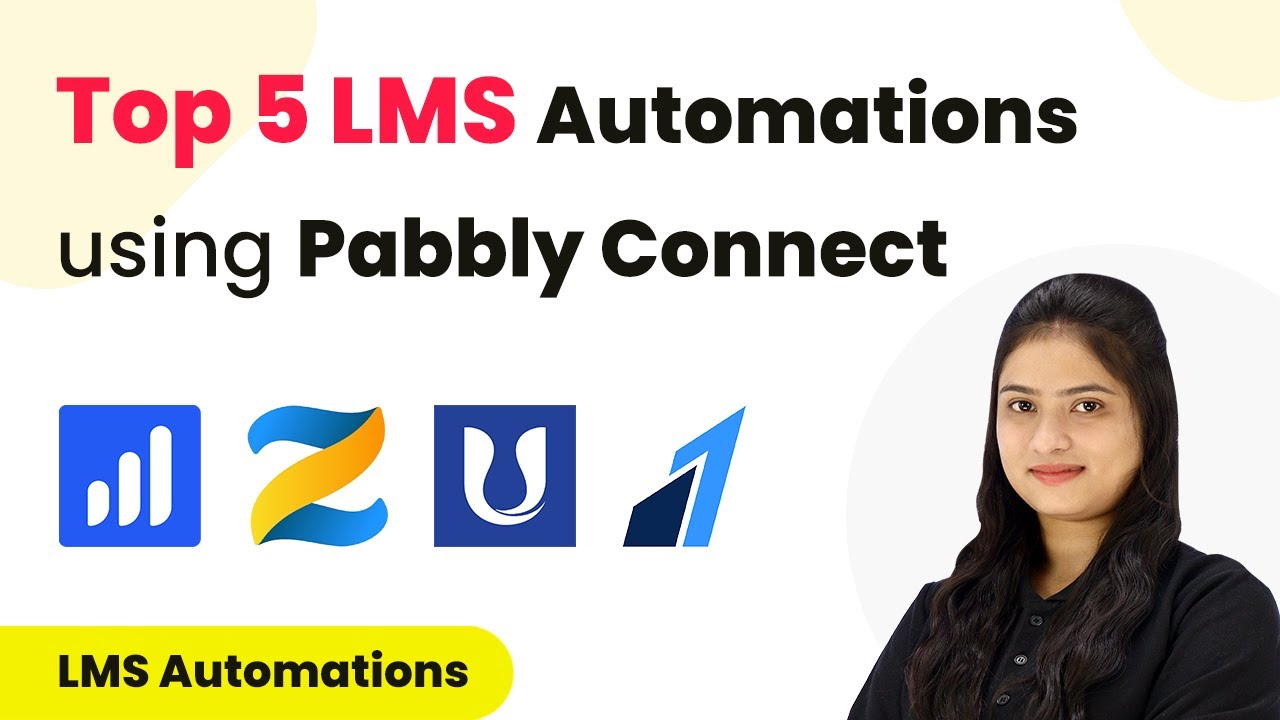
Learn how to automate your Learning Management System using Pabbly Connect for seamless integration with various applications like WhatsApp, Google Sheets, and more. Learn to create powerful connections between your critical applications without requiring specialized programming knowledge or extensive technical background.

Watch Step By Step Video Tutorial Below


1. Accessing Pabbly Connect for Automation

To begin automating your Learning Management System, first access Pabbly Connect by visiting its homepage at Pabbly.com/connect. Here, you can either sign in as an existing user or sign up for free if you’re new. Signing up allows you to create an account in just two minutes and receive 100 free tasks each month.

After signing in, you will be directed to the Pabbly Connect dashboard. This dashboard is where you can manage all your workflows. You can also create folders to organize your automations efficiently, especially for your learning management tasks.


2. Automating WhatsApp Notifications on Course Purchase

The first automation we will set up using Pabbly Connect is to send WhatsApp messages upon the successful purchase of an online course. Imagine running an online academy where prompt communication is crucial. Once a student purchases a course, it’s essential to acknowledge their purchase immediately.

  • Set up a trigger in Pabbly Connect for the course purchase event.
  • Connect to the WhatsApp API within Pabbly Connect.
  • Configure the message template to include purchase confirmation and course details.

By automating this process, you ensure that students receive immediate acknowledgment and necessary information, enhancing their experience right from the start.


3. Automating Student Unenrollment Upon Course Completion

Next, we will automate the unenrollment process for students who complete a course. Using Pabbly Connect with Google Sheets, you can efficiently manage student statuses. This automation is beneficial for administrators who need to keep track of enrollments without manual intervention.

To set this up, create a Google Sheet with student details and course statuses. When a student completes a course, simply update their status in the sheet. Pabbly Connect will monitor this change and automatically unenroll the student from the course in your LMS.

This not only saves time but also ensures accurate record-keeping. You can also use this method to unenroll students for other reasons, streamlining your administrative tasks significantly.


4. Adding Students to Courses via ThriveCart Payment

Another powerful automation is adding students to your courses when they make a payment through ThriveCart. Pabbly Connect allows you to create a seamless onboarding experience for new students. This integration ensures that students are enrolled in courses as soon as their payments are processed.

  • Set up a trigger for successful payments in ThriveCart.
  • Connect to your LMS through Pabbly Connect.
  • Enroll the student in the course and send a confirmation email.

By automating this process, you keep your students engaged and informed about their course access and updates, enhancing their overall learning experience.


5. Maintaining Student Records in Google Sheets

Finally, maintaining a comprehensive database of student enrollments is crucial for any online educational institution. Using Pabbly Connect, you can automate the process of adding enrolled students to Google Sheets. This allows you to track their performance and progress systematically.

Set up a workflow where every time a new student enrolls in your course, their details are automatically updated in your Google Sheet. This can be done by:

Creating a trigger in your LMS for new enrollments. Connecting your LMS to Google Sheets via Pabbly Connect. Automatically updating the student records in the sheet.

This automation ensures that you have an up-to-date record of all students, making it easier to analyze their progress and manage their educational journey effectively.


Conclusion

By leveraging Pabbly Connect, you can significantly enhance your Learning Management System workflows. Automating tasks such as sending notifications, managing enrollments, and maintaining records saves time and reduces administrative burdens. Implement these automations today to improve your educational processes and engage your students effectively.

Ensure you check out Pabbly Connect to create business automation workflows and reduce manual tasks. Pabbly Connect currently offer integration with 2,000+ applications.

How to Directly Upload Images from Dropbox to WooCommerce Using Pabbly Connect

Learn how to automate the process of uploading images from Dropbox to WooCommerce using Pabbly Connect. Step-by-step tutorial included. Discover hidden automation capabilities within your existing tools. This guide shows you how to connect your essential applications and permanently eliminate redundant manual processes.

Watch Step By Step Video Tutorial Below


1. Setting Up Pabbly Connect for Automation

To automate the process of uploading images from Dropbox to WooCommerce, we will use Pabbly Connect. This platform allows users to create workflows that connect various applications seamlessly. Start by accessing the Pabbly Connect homepage by typing the URL in your browser.

Once on the homepage, you will see options for signing in or signing up. If you are a new user, click on ‘Sign up for free’ to create an account and receive 100 free tasks monthly. If you already have an account, click on ‘Sign in’ to access your dashboard.


2. Creating a Workflow in Pabbly Connect

After signing in, navigate to the dashboard of Pabbly Connect. Here, you can create a new workflow by clicking the ‘Create Workflow’ button. A dialog box will appear, prompting you to name your workflow. Name it ‘Directly Upload Images from Dropbox to WooCommerce’ and choose a folder to save it.

  • Click on ‘Create’ to establish your workflow.
  • You will see two sections: Trigger and Action.
  • Select Dropbox as your trigger application.

By choosing Dropbox, you set the stage for your automation. The trigger event will be set to ‘New File’ which captures any new files uploaded to your chosen Dropbox folder.


3. Connecting Dropbox to Pabbly Connect

Now, you need to set up the connection between Pabbly Connect and Dropbox. Click on ‘Connect’ and choose to add a new connection. Log into your Dropbox account to authorize the connection. Once authorized, you will be asked to specify the folder path where new images will be uploaded.

To do this, go to your Dropbox account, find the folder you want to connect, and copy its path. Make sure to format it correctly by adding a slash before the folder name. This allows Pabbly Connect to monitor the folder for new uploads. Once done, click on ‘Save and send test request’ to confirm the connection.


4. Setting Up WooCommerce Integration

Next, you will integrate WooCommerce into your workflow using Pabbly Connect. Select WooCommerce as your action application and choose the action event ‘Create Product’. This action will automatically create a new product in your WooCommerce store whenever a new image is uploaded to Dropbox.

To establish this connection, you will need to provide the Consumer Key, Consumer Secret, and the WordPress URL. These can be obtained from your WooCommerce settings under the API section. Ensure that you click on ‘Add Key’ to generate the required keys with read and write permissions.


5. Finalizing the Automation Process

Once you have set up the WooCommerce connection, you will map the product details. Use the image URL received from Dropbox and format the product name accordingly to remove any file extensions. You can do this using the Text Formatter feature in Pabbly Connect.

After mapping all the necessary fields, click on ‘Save and send test request’. This will create a new product in your WooCommerce store with the image uploaded from Dropbox. You can verify by checking your WooCommerce product list to see if the new product appears with the correct details.


Conclusion

In this tutorial, we successfully demonstrated how to use Pabbly Connect to automate the process of uploading images from Dropbox to WooCommerce. By following the detailed steps, you can streamline your workflow and save time on manual uploads. This integration is perfect for online retailers looking to enhance their e-commerce operations.

Ensure you check out Pabbly Connect to create business automation workflows and reduce manual tasks. Pabbly Connect currently offer integration with 2,000+ applications.

How to Create & Send PDF Document from Google Sheets using Pabbly Connect and PDFMonkey

Learn how to automate PDF document creation and sending from Google Sheets using Pabbly Connect and PDFMonkey with this step-by-step tutorial. This comprehensive guide reveals exactly how to connect your applications and automate repetitive tasks — accessible for professionals of all technical backgrounds.

Watch Step By Step Video Tutorial Below


1. Setting Up Pabbly Connect for Automation

To start the process of creating and sending PDF documents from Google Sheets, we first need to set up Pabbly Connect. This platform acts as the central integration tool that connects Google Sheets with PDFMonkey and Gmail. Begin by navigating to the Pabbly Connect website and signing in or creating a new account if you don’t have one.

Once signed in, click on the ‘Create Workflow’ button. Name your workflow appropriately, such as ‘Create and Send PDF Document from Google Sheets using PDFMonkey’. Select the folder where you want to save this workflow, and click on ‘Create’ to proceed. This setup is crucial as it establishes the foundation for the automation process.


2. Configuring Google Sheets as the Trigger Application

The next step involves configuring Google Sheets as the trigger application in Pabbly Connect. This means that whenever a new row is added or updated in your Google Sheet, it will trigger the automation. To do this, search for Google Sheets in the trigger application options.

  • Select the trigger event as ‘New or Updated Spreadsheet Row’.
  • Connect your Google Sheets account to Pabbly Connect by following the prompts.
  • Copy the provided webhook URL, which will be used to link Google Sheets to Pabbly Connect.

After copying the webhook URL, navigate to your Google Sheets. Access the ‘Extensions’ menu, find the Pabbly Connect add-on, and set up the initial configuration. Paste the copied webhook URL into the designated field and specify the trigger column, which should be the final data column that indicates when to send data to Pabbly Connect.


3. Generating PDF Document Using PDFMonkey

With the Google Sheets trigger set up, the next step is to generate the PDF document using PDFMonkey through Pabbly Connect. In the actions section of your workflow, search for PDFMonkey as the action application. Select the action event ‘Generate Document’ to create the PDF certificate.

To connect PDFMonkey with Pabbly Connect, you need to provide an API token. Log into your PDFMonkey account, navigate to the API authentication section, and copy your API key. Paste this token back into Pabbly Connect to establish the connection.

  • Enter the template ID for the PDF document you want to generate.
  • Map the dynamic data fields from Google Sheets, such as participant names and course details, to the corresponding fields in your PDF template.
  • Test the request to ensure the document is generated successfully.

Once the document is generated, you will receive a response containing a preview URL and document ID. This response confirms that the PDF has been successfully created using the data from your Google Sheets.


4. Sending the PDF Document via Gmail

After generating the PDF document, the next step is to send it to the participant via email using Gmail, facilitated by Pabbly Connect. Add a new action step in your workflow and select Gmail as the action application. Choose the action event ‘Send Email’ to initiate the email sending process.

Connect your Gmail account to Pabbly Connect by granting the necessary permissions. In the email setup, you will need to map the recipient’s email address, which you can retrieve from the Google Sheets response. Additionally, specify the email subject and content, including the dynamic link to the generated PDF document.

Map the participant’s name and course details in the email body. Ensure the download URL for the PDF is correctly linked in the email content. Test the email function to confirm it sends successfully.

Once the email is sent, you will receive a confirmation response indicating that the PDF document has been successfully emailed to the participant.


5. Conclusion: Automating PDF Document Creation with Pabbly Connect

In this tutorial, we explored how to create and send PDF documents from Google Sheets using Pabbly Connect and PDFMonkey. By setting up a trigger in Google Sheets, generating a PDF certificate through PDFMonkey, and sending it via Gmail, we streamlined the entire process.

Ensure you check out Pabbly Connect to create business automation workflows and reduce manual tasks. Pabbly Connect currently offer integration with 2,000+ applications.

Check out Pabbly Connect – Automate your business workflows effortlessly! Sign Up Free – Start your journey with ease! 10,000+ Video Tutorials – Learn step by step! Join Pabbly Facebook Group – Connect with 21,000+ like minded people!

This automation not only saves time but also ensures accuracy in document generation and distribution. Utilizing Pabbly Connect as the central integration platform allows for seamless connections between these applications, enhancing overall productivity.

With this setup, you can easily manage participant certificates or any other document generation tasks efficiently. Follow these steps to automate your workflows and focus on more critical tasks.

Automate Customer Creation in Go High Level with Pabbly Connect

Learn how to automate customer creation in Go High Level using Pabbly Connect. Follow this step-by-step tutorial to streamline your online store processes. Streamline your workflow, save valuable time, and eliminate repetitive tasks through powerful automation capabilities.

Watch Step By Step Video Tutorial Below


Introduction to Automating Customer Creation with Pabbly Connect

In this tutorial, we will explore how to automate customer creation in Go High Level using Pabbly Connect. This integration helps streamline your online store processes and enhances customer management.

By integrating your online store with Pabbly Connect, you can automatically create new customer profiles whenever someone signs up. This saves time and ensures that no customer details are missed.


Setting Up Your Pabbly Connect Account

To start, you need to create an account on Pabbly Connect. Visit the Pabbly Connect homepage and click on the ‘Sign Up Free’ button. After signing up, you will have access to the dashboard.

Once logged in, you can create a new workflow. Click on the ‘Create Workflow’ button located at the top-right corner of the dashboard. Name your workflow something descriptive, like ‘Create Go High Level Contact for New Customer’.


Connecting Your Store and Go High Level

Now, let’s connect your online store to Pabbly Connect. First, select the trigger application, which in this case is your online store platform. Choose the event as ‘New Customer Sign Up’.

Next, you will need to set up the webhook URL provided by Pabbly Connect. Go to your store’s settings, find the notifications section, and paste the webhook URL here. This will allow your store to send customer data to Pabbly Connect whenever a new customer signs up.

  • Log in to your online store.
  • Navigate to the settings and find the notifications section.
  • Paste the webhook URL from Pabbly Connect.

After setting this up, test the connection by creating a dummy customer in your store. This will ensure that the data is being sent to Pabbly Connect correctly.


Creating a Contact in Go High Level

With the connection established, the next step is to configure the action in Pabbly Connect to create a new contact in Go High Level. Choose ‘Go High Level’ as your action application and select ‘Create Contact’ as the action event.

Now, you will need to map the fields from your store to Go High Level. For example, map the customer’s first name, last name, and email address. Ensure that all required fields in Go High Level are filled in correctly.

  • Select the action application as ‘Go High Level’.
  • Choose ‘Create Contact’ as the action event.
  • Map the required fields from your store to Go High Level.

Once the mapping is complete, save the workflow and test it by creating another dummy customer. This will confirm that the automation is functioning as intended.


Testing and Finalizing Your Workflow

Now that you have set up your workflow, it’s crucial to test it thoroughly. Create a new customer in your store and check if the contact is created in Go High Level. using Pabbly Connect

If everything works correctly, you will see the new customer details appear in your Go High Level account. This successful integration means your automation is set up properly and ready to go.

In case of any issues, review your webhook settings and field mappings to ensure everything is configured correctly. Once tested and confirmed, you can start using this workflow to streamline your customer management.

Conclusion

This guide summarizes the key points and helps you understand the essential features and benefits of using this tool.

Thanks for following along with this tutorial! Remember to subscribe to the channel for more helpful content like this.

If you found this guide useful, please consider giving it a thumbs up and sharing it with others who might benefit from it.


In conclusion, integrating Pabbly Connect with Go High Level allows you to automate customer creation seamlessly. By following these steps, you can enhance your online store’s efficiency and improve customer relationship management.

Integrating Facebook Lead Ads with Flodesk Using Pabbly Connect: A Step-by-Step Tutorial

Learn how to integrate Facebook Lead Ads with Flodesk using Pabbly Connect to automatically add leads as subscribers under different segments. Eliminate manual repetitive tasks from your workflow. Discover proven automation methods with intuitive steps designed for efficiency-minded professionals.

Watch Step By Step Video Tutorial Below


1. Accessing Pabbly Connect for Facebook Lead Ads Integration

To start the integration process, you need to access Pabbly Connect. First, visit the Pabbly Connect website and sign in to your account. If you are a new user, you can sign up for free and get 100 tasks every month.

Once logged in, you will see the ‘All Pabbly Apps’ window. Click on ‘Access Now’ under Pabbly Connect to enter the dashboard. Here, you can create workflows to automate the process of adding leads from Facebook Lead Ads to Flodesk as subscribers.


2. Creating a Workflow in Pabbly Connect

In the Pabbly Connect dashboard, click on the ‘Create Workflow’ button located at the top right corner. A dialog box will appear asking for a workflow name. Enter a descriptive name like ‘Add Facebook Lead Ads Leads as Subscribers in Flodesk Under Different Segments’. using Pabbly Connect

  • Select the appropriate folder for your workflow.
  • Click on the ‘Create’ button to finalize your workflow setup.

After creating the workflow, you will see two sections: Trigger and Action. The Trigger is an event that starts the workflow, while the Action is what happens as a result. In this case, the trigger will be a new lead from Facebook Lead Ads, and the action will be to add the lead as a subscriber in Flodesk.


3. Setting Up the Trigger: Facebook Lead Ads

To set up the trigger, click on the arrow in the Trigger section and select ‘Facebook Lead Ads’ as the trigger application. Choose ‘New Lead Instant’ as the trigger event. This setup allows Pabbly Connect to capture new leads generated from your Facebook ads.

Next, click on ‘Connect’ to link your Facebook Lead Ads account with Pabbly Connect. A new window will prompt you to add a new connection. Ensure you are logged into your Facebook account in a separate tab for a smooth connection process.

  • Select the Facebook page associated with your lead ads.
  • Choose the lead generation form you created for capturing leads.

Finally, click on the ‘Save and Send Test Request’ button. This action will wait for a webhook response, indicating that Pabbly Connect is ready to capture the new lead data.


4. Setting Up the Action: Adding Subscribers in Flodesk

After successfully setting up the trigger, it’s time to configure the action. In the Action section, select ‘Flodesk’ as the action application. Choose the action event as ‘Create/Update Subscriber’. This allows Pabbly Connect to add the new lead as a subscriber in your Flodesk account.

Click on ‘Connect’ to authorize your Flodesk account with Pabbly Connect. Once connected, you will need to map the fields required for creating a subscriber, such as the email, first name, and last name of the lead.

Map the email field with the lead’s email captured from Facebook. Do the same for first name and last name fields.

Once all fields are mapped, click on the ‘Save and Send Test Request’ button to create the subscriber in Flodesk. You will receive a confirmation response indicating that the subscriber has been successfully created.


5. Segmenting Subscribers Based on Lead Interests

The final step in this integration process is to segment the subscribers based on their interests, such as rental properties, commercial properties, or residential properties. This segmentation is crucial for targeting your email campaigns effectively. using Pabbly Connect

In Pabbly Connect, use the ‘Router’ feature to create conditions based on the property type selected by the lead. Set up filters for each segment, ensuring that leads are routed to the correct subscriber segment in Flodesk.

For commercial properties, set the filter condition to equal ‘commercial’. For rental properties, set the condition to equal ‘rental’. For residential properties, set the condition to equal ‘residential’.

After setting up the router conditions, map the subscriber email to the corresponding segments in Flodesk. This ensures that when a lead selects a property type, they are automatically added to the correct subscriber segment, enhancing your marketing strategies.


Conclusion

In this tutorial, we learned how to integrate Facebook Lead Ads with Flodesk using Pabbly Connect. By automating the process of adding leads as subscribers under different segments, you can save time and improve your marketing efforts significantly.

Ensure you check out Pabbly Connect to create business automation workflows and reduce manual tasks. Pabbly Connect currently offer integration with 2,000+ applications.

Utilizing Pabbly Connect for this integration not only streamlines your workflow but also enhances your ability to target leads effectively based on their interests, ultimately increasing your chances of conversion.

How to Set Up Webhook Inside Kommo Using Pabbly Connect

Learn how to set up a webhook inside Kommo using Pabbly Connect for seamless integration with Google and other applications. Explore efficient methods for automating routine tasks with clear, concise instructions suited for both newcomers and experienced professionals.

Watch Step By Step Video Tutorial Below


1. Setting Up Pabbly Connect for Webhook Integration

To set up a webhook inside Kommo, you need to start with Pabbly Connect. This platform allows you to automate workflows and integrate different applications seamlessly. First, log in to your Pabbly Connect account and navigate to the dashboard.

Once you are on the dashboard, click on the ‘Create Workflow’ button. This initiates the process of setting up your integration. You will be prompted to choose a trigger application, which in this case will be Kommo.


2. Selecting Kommo as the Trigger Application

After creating a workflow, you will need to select Kommo as your trigger application in Pabbly Connect. This allows Pabbly Connect to listen for specific events that occur in Kommo.

  • Search for ‘Kommo’ in the applications list.
  • Select ‘New Lead’ as the trigger event.
  • Click on the ‘Connect’ button to link your Kommo account.

Once you have set Kommo as your trigger application, you will receive a webhook URL from Pabbly Connect. This URL is essential for linking your Kommo account to the automation process.


3. Configuring the Webhook in Kommo

Next, you need to configure the webhook settings inside your Kommo account. Go to the settings section and find the integrations option. Here, you will set up the webhook using the URL provided by Pabbly Connect.

  • Click on ‘Integrations’ from the left sidebar.
  • Select ‘Webhooks’ from the integrations menu.
  • Click on ‘Add Webhook’ and paste the webhook URL from Pabbly Connect.

After entering the webhook URL, select the event type as ‘Incoming Lead Added’. This ensures that every time a new lead is generated in Kommo, the data will be sent to Pabbly Connect.


4. Testing the Connection Between Kommo and Pabbly Connect

With the webhook configured, it’s time to test the connection. Go back to Pabbly Connect and initiate a test submission. This will help you confirm that the webhook is functioning correctly.

To do this, create a test lead in Kommo by filling out the lead form. After submitting the form, return to Pabbly Connect to check if the data has been received successfully. You should see the details of the test lead captured in Pabbly Connect.


5. Finalizing Your Webhook Setup

Once you have confirmed that Pabbly Connect is receiving data from Kommo, you can finalize your webhook setup. This means that every new lead created in Kommo will automatically trigger actions in other applications connected via Pabbly Connect.

To complete the setup, click on the ‘Save’ button in Pabbly Connect. This ensures that your workflow is active and ready to process incoming leads from Kommo to your other applications seamlessly.


Conclusion

In this tutorial, we explored how to set up a webhook inside Kommo using Pabbly Connect. By following these steps, you can automate the transfer of lead data to various applications, enhancing your workflow efficiency.

Ensure you check out Pabbly Connect to create business automation workflows and reduce manual tasks. Pabbly Connect currently offer integration with 2,000+ applications.

How to Create Klenty Prospects from Jotform Submission Using Pabbly Connect

Learn how to automate the creation of Klenty prospects from Jotform submissions using Pabbly Connect. Follow our detailed step-by-step tutorial for seamless integration. Discover how to seamlessly connect your essential tools through accessible instructions that make powerful automation available to professionals at every skill level.

Watch Step By Step Video Tutorial Below


1. Accessing Pabbly Connect for Integration

To create Klenty prospects from Jotform submissions, first, you need to access Pabbly Connect. Open your browser and search for Pabbly Connect to reach its landing page. If you don’t have an account, click on the ‘Sign Up for Free’ button; it only takes two minutes to register and start using the platform.

Once logged in, you will see the dashboard of Pabbly Connect. Here, you can create a new workflow by clicking the ‘Create Workflow’ button. This will allow you to start setting up the integration process between Jotform and Klenty.


2. Setting Up the Trigger in Pabbly Connect

In the newly created workflow, you will set up the trigger, which is essential for capturing new submissions from Jotform. Select Jotform as the trigger application and choose the ‘New Response’ event as your trigger event. This setup ensures that every time a new form is submitted, Pabbly Connect will automatically initiate the workflow. using Pabbly Connect

  • Select Jotform as the trigger application.
  • Choose ‘New Response’ as the trigger event.
  • Connect Jotform with Pabbly Connect using the provided Webhook URL.

Once you have set the trigger, copy the Webhook URL provided by Pabbly Connect. This URL will be used to connect your Jotform to the Pabbly Connect workflow, allowing it to capture all new submissions automatically.


3. Integrating Jotform with Pabbly Connect

Now, navigate to your Jotform account and select the form you want to connect. Go to the ‘Settings’, then ‘Integrations’, and search for ‘Webhooks’. Here, you will add the Webhook URL you copied from Pabbly Connect.

After pasting the Webhook URL in Jotform, click on ‘Complete Integration’. This step ensures that every time there is a new submission, it will send the data to Pabbly Connect, which will then trigger the next action.


4. Creating a New Klenty Prospect

After successfully integrating Jotform with Pabbly Connect, it’s time to create a new prospect in Klenty. In your Pabbly Connect workflow, add an action step and select Klenty as the action application. Choose ‘Add Prospect’ as the action event to create a new prospect each time a form is submitted.

To connect Klenty with Pabbly Connect, you will need to provide your Klenty API key and username. Log into your Klenty account, navigate to ‘Settings’, and find the API key under ‘Integrations’. Copy this API key and paste it into Pabbly Connect.

  • Log into Klenty and navigate to ‘Settings’.
  • Copy your API key from the ‘Integrations’ section.
  • Paste the API key and your username in Pabbly Connect.

By mapping the fields from the Jotform response to Klenty, you can ensure that all necessary prospect details are captured accurately. This includes the first name, last name, email, phone number, and company name from the form submission.


5. Testing the Integration

After mapping the fields, it’s essential to test the integration to ensure everything works correctly. Submit a new entry in your Jotform with sample data, and check Pabbly Connect to see if it captures the response. If successful, you will receive a confirmation response indicating that a new prospect has been created in Klenty. using Pabbly Connect

To verify, log into your Klenty account and check the prospects section. You should see the new prospect created with the details from your Jotform submission. This automation allows your sales team to access new leads immediately, improving response time and efficiency.


Conclusion

In this tutorial, we demonstrated how to create Klenty prospects from Jotform submissions using Pabbly Connect. By automating this process, you can streamline your lead management and enhance your sales efficiency. Implementing this integration ensures that every new lead is captured accurately, allowing your sales team to act swiftly and effectively.

Ensure you check out Pabbly Connect to create business automation workflows and reduce manual tasks. Pabbly Connect currently offer integration with 2,000+ applications.

Automate Google Slides Presentations from Notion with Pabbly Connect

Learn how to automate Google Slides presentations from Notion database items using Pabbly Connect. Step-by-step guide for seamless integration. Follow this definitive guide to creating powerful automated workflows with straightforward, efficiency-focused solutions that save valuable time.

Watch Step By Step Video Tutorial Below


1. Introduction to Pabbly Connect for Automation

In this tutorial, we will discuss how to use Pabbly Connect to automate the creation of Google Slides presentations from Notion database items. This integration streamlines the process, saving time and ensuring accuracy in your presentations.

To start, you will need access to both Notion and Google Slides. The integration will allow you to pull data from your Notion database and use it to generate presentations automatically in Google Slides. This is particularly useful for team meetings and project updates.


2. Accessing Pabbly Connect and Creating a Workflow

To begin using Pabbly Connect, open your browser and navigate to the Pabbly Connect website. Once there, you can either sign in or create a new account. If you are new, click on the ‘Sign Up for Free’ button to get started.

  • Click on ‘Create Workflow’ once you are logged in.
  • Name your workflow based on your objective, such as ‘Create Google Slides from Notion Database Items’.
  • Select the appropriate folder to save your workflow.

After naming your workflow, you will see two main boxes: trigger and action. The trigger will be set up first, which will initiate the action of creating a Google Slides presentation.


3. Setting Up the Trigger in Notion

The next step involves setting up the trigger in your workflow using Pabbly Connect. Search for Notion in the trigger application and select it. The trigger event will be ‘New Database Item’.

After selecting the trigger event, you will need to connect your Notion account to Pabbly Connect. Click on ‘Connect’ and then ‘Add New Connection’. Follow the prompts to allow access to your Notion database.

Once connected, you will need to select the specific page or database you want to use for the trigger. Choose the relevant database, like ‘Team Updates’, and click on ‘Allow Access’. This sets up the trigger to listen for new items added to your Notion database.


4. Creating the Action in Google Slides

Now that your trigger is set, it’s time to create the action using Pabbly Connect. Search for Google Slides as your action application and select ‘Create Presentation from Template’ as the action event.

Connect your Google Slides account by clicking on ‘Connect’ and allowing access. After connecting, you will need to select the template presentation that will be used for creating new presentations. This template should have placeholders for the data you will pull from Notion.

Map the relevant fields from your Notion database to the template variables in Google Slides. This includes the title, agenda, and any other specific information you want to include in your presentation. By mapping these fields, you ensure that the data from Notion fills in the correct spots in your Google Slides template.


5. Testing and Verifying the Integration

With the trigger and action set up, it’s time to test your workflow in Pabbly Connect. Click on ‘Save and Send Test Request’ to verify that the integration works as expected.

If everything is set up correctly, you should receive a response showing the details of the new presentation created in Google Slides. Check your Google Drive to find the newly created presentation in the specified folder.

This automation significantly reduces the time spent on manual data entry and ensures that your presentations are always up to date with the latest information from your Notion database. Each time a new item is added to Notion, a corresponding presentation will be created automatically in Google Slides.


Conclusion

Using Pabbly Connect, you can seamlessly automate the creation of Google Slides presentations from Notion database items. This integration enhances efficiency and ensures that your presentations are always accurate and current. By following the steps outlined, you can set up this powerful automation for your own needs.

Ensure you check out Pabbly Connect to create business automation workflows and reduce manual tasks. Pabbly Connect currently offer integration with 2,000+ applications.

Automate WhatsApp Messages to Facebook Leads Using Pabbly Connect

Learn how to automate sending WhatsApp messages to Facebook leads for your paint store using Pabbly Connect. Step-by-step guide with detailed instructions. Navigate the automation landscape confidently with clear, structured guidance suitable for professionals regardless of prior technical experience.

Watch Step By Step Video Tutorial Below


1. Accessing Pabbly Connect for Integration

To start automating your WhatsApp messages to Facebook leads, you first need to access Pabbly Connect. Open your browser and enter Pabbly.com/connect to reach the Pabbly Connect landing page.

Once on the landing page, you will see options to either sign in or sign up for free. If you are a new user, click on ‘Sign up for free’ to create an account. Existing users can simply sign in by clicking on ‘Sign in’. After signing in, navigate to the Pabbly Connect dashboard.


2. Creating a Workflow in Pabbly Connect

In the Pabbly Connect dashboard, you will need to create a new workflow. Click on the ‘Create Workflow’ button to start. You will be prompted to name your workflow; for this example, name it ‘WhatsApp Marketing Automation for Your Paint Store’. using Pabbly Connect

  • Click on ‘Create’ to open the workflow window.
  • In this window, you will set up your trigger and action.
  • Select ‘Facebook Lead Ads’ as your trigger application.

After selecting ‘Facebook Lead Ads’, choose the trigger event as ‘New Lead Instant’. Click on ‘Connect’ to link your Facebook account. If this is your first connection, select ‘Add New Connection’ and follow the prompts to authenticate your account.


3. Configuring Facebook Lead Ads in Pabbly Connect

Once connected, you will need to select the Facebook page and lead form associated with your paint store. Choose your page, for instance, ‘Color Splash Paints’, and select the lead form you created earlier. using Pabbly Connect

Next, click on ‘Save and Send Test Request’. This will prompt you to perform a test submission to capture the webhook response. Open a new tab and search for the Meta for Developers site to use their lead ads testing tool.

  • Select your page and form in the lead ads testing tool.
  • Fill in the details for a dummy lead and submit.
  • Return to Pabbly Connect to check if the response was captured.

Refresh the fields in Pabbly Connect to ensure you have the latest data from your test submission. This step confirms that the trigger is working correctly.


4. Setting Up WhatsApp Cloud API in Pabbly Connect

For the action step, select ‘WhatsApp Cloud API’ as your application. Choose the action event ‘Send Template Message’. Click on ‘Connect’ to link your WhatsApp Cloud API account. using Pabbly Connect

If you have not connected your WhatsApp account yet, you will need to create an API setup to obtain your token, phone number ID, and WhatsApp business account ID. Follow the instructions provided in the Pabbly Connect interface to create this setup.

Copy the temporary access token from your WhatsApp API setup. Paste the token and other required details into Pabbly Connect. Click ‘Save’ to establish the connection.

Once connected, you will need to specify the template name for the WhatsApp message you wish to send. Make sure to map the recipient’s mobile number from the previous step to ensure the message is sent to the correct lead.


5. Testing the Workflow for Success

After setting everything up, it’s time to test your workflow. Click on ‘Save and Send Test Request’ to check if the WhatsApp message is sent successfully. Make sure to replace any dummy phone numbers with real ones for the test. using Pabbly Connect

Once the test is complete, open your WhatsApp to verify if the message has been received. You should see the message formatted as per your template, personalized with the lead’s name.

To ensure everything is functioning correctly, perform another test by submitting a new lead through the Facebook lead ads testing tool. This will allow you to confirm that the entire workflow is operational and that Pabbly Connect is effectively automating your WhatsApp messages.


Conclusion

Using Pabbly Connect, you can easily automate sending WhatsApp messages to your Facebook leads, enhancing your marketing efforts. This integration ensures timely communication with potential customers, improving conversion rates.

Ensure you check out Pabbly Connect to create business automation workflows and reduce manual tasks. Pabbly Connect currently offer integration with 2,000+ applications.

How to Create Facebook Page Posts from Microsoft Excel Using Pabbly Connect

Learn how to automate Facebook page posts from Microsoft Excel using Pabbly Connect. Follow this detailed tutorial for seamless integration. Develop expertise in application integration and learn how to design streamlined automation workflows using proven, simplified approaches.

Watch Step By Step Video Tutorial Below


1. Accessing Pabbly Connect for Facebook Integration

To create Facebook page posts from Microsoft Excel, you first need to access Pabbly Connect. Start by navigating to the Pabbly Connect website and signing into your account. If you are a new user, you can sign up for free and receive 100 free tasks every month.

After logging in, you will see the dashboard where you can manage your integrations. Click on the ‘Access Now’ button under Pabbly Connect to begin the integration process. This platform serves as the central hub for automating tasks between Microsoft Excel and Facebook.


2. Creating a Workflow in Pabbly Connect

Next, you will create a workflow in Pabbly Connect. Click on the ‘Create Workflow’ button located at the top right corner of the dashboard. A dialog box will appear asking for a workflow name and folder selection.

  • Name your workflow: ‘How to Create Facebook Page Post from Microsoft Excel’.
  • Select a folder for organization, preferably ‘Microsoft Excel Automations’.

After entering the necessary details, click on the ‘Create’ button to finalize your workflow setup. This workflow will now serve as the basis for automating posts from Excel to Facebook using Pabbly Connect.


3. Setting Up Trigger and Action in Pabbly Connect

In this step, you will configure the trigger and action for your workflow. Click on the arrow in the trigger section and select ‘Microsoft Excel’ as your trigger application. The trigger event should be set to ‘New Row in Worksheet’. This means that every time a new row is added to your Excel sheet, it will trigger a post to Facebook.

Now, click on the ‘Connect’ button to establish a connection with Microsoft Excel. You will be prompted to authorize the connection. After granting permission, select the specific workbook and worksheet you created for your Facebook posts.

  • Workbook: ‘Facebook Page Content’.
  • Worksheet: ‘Content’.

After selecting the workbook and worksheet, click on the ‘Save and Send Test Request’ button to test the connection. Ensure that the last entry in your worksheet is captured correctly by Pabbly Connect.


4. Configuring Facebook Action in Pabbly Connect

Next, you will set the action to post on Facebook. Select ‘Facebook Pages’ as your action application and choose the action event as ‘Create a Page Post’. This will allow you to automate the posting of content directly from your Excel sheet to your Facebook page.

Click on the ‘Connect’ button and authorize Pabbly Connect to access your Facebook account. After successful authorization, select the specific Facebook page you want to post to. In this case, select your business page, such as ‘Easy Trade’.

For the message, map the title and content from the previous step. If needed, you can also include a link URL.

Once all fields are filled, click on the ‘Save and Send Test Request’ button. Check your Facebook page to confirm that the post has been created successfully using Pabbly Connect.


5. Conclusion: Automating Facebook Posts with Pabbly Connect

In conclusion, using Pabbly Connect to automate Facebook page posts from Microsoft Excel simplifies the posting process significantly. By following the steps outlined, you can ensure timely updates to your audience without manual effort.

Ensure you check out Pabbly Connect to create business automation workflows and reduce manual tasks. Pabbly Connect currently offer integration with 2,000+ applications.

This integration not only saves time but also enhances engagement with your followers. With Pabbly Connect, you can streamline your social media management and focus on creating valuable content for your audience.


By utilizing Pabbly Connect, you can easily automate tasks between multiple applications, making your workflow efficient and effective.