How to Create Todoist Tasks for New Files Added in a Specific Google Drive Folder Using Pabbly Connect

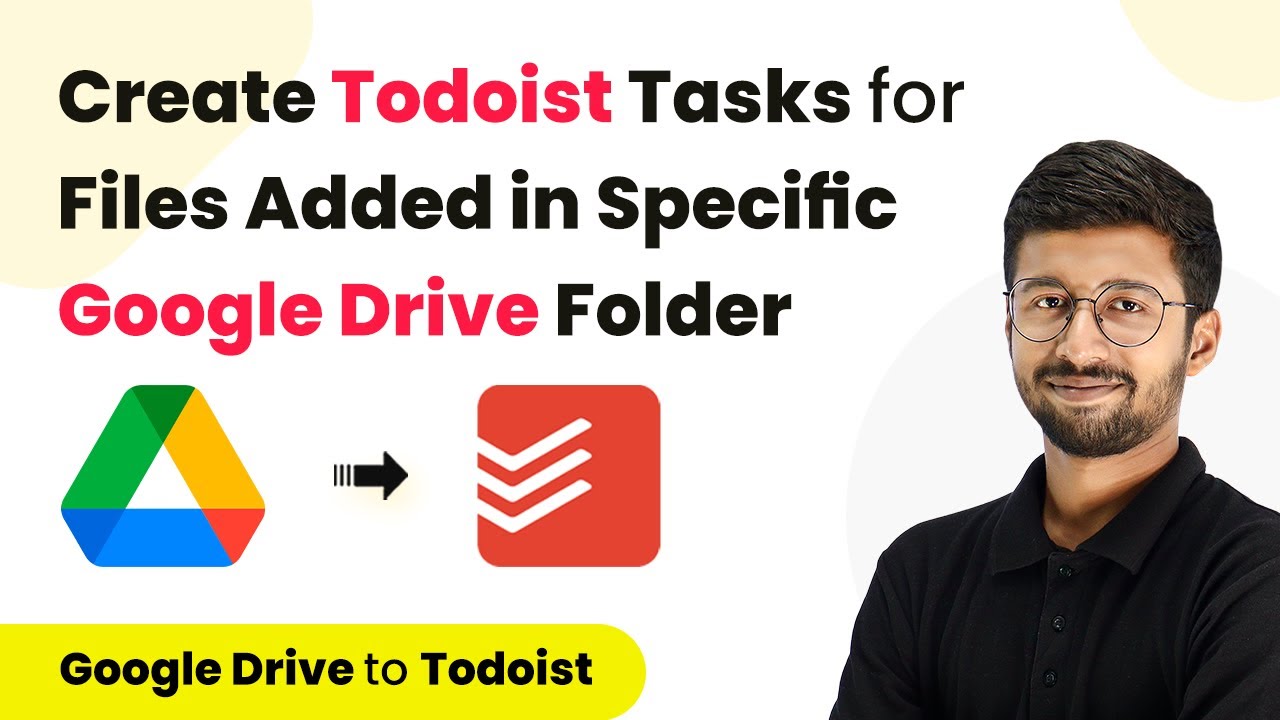
Learn how to automate task creation in Todoist for new files added to a specific Google Drive folder using Pabbly Connect. Step-by-step tutorial included. Follow this definitive guide to creating powerful automated workflows with straightforward, efficiency-focused solutions that save valuable time.

Watch Step By Step Video Tutorial Below


1. Setting Up Pabbly Connect for Google Drive and Todoist Integration

To begin, you need to set up Pabbly Connect to automate the task creation in Todoist for new files added to a specific Google Drive folder. First, sign up for a free account on the Pabbly Connect dashboard. Once logged in, click on the ‘Create Workflow’ button and name your workflow, for example, ‘Google Drive to Todoist.’ This workflow will connect Google Drive and Todoist through Pabbly Connect.

After naming your workflow, you will see two main sections: the trigger and action windows. In the trigger window, we will set up the connection to Google Drive. This connection enables Pabbly Connect to monitor a specific Google Drive folder for new files. The automation will trigger every time a new file is uploaded to this folder.


2. Connecting Google Drive to Pabbly Connect

In the trigger window, search for ‘Google Drive’ and select it. The next step is to choose the trigger event, which should be set to ‘New File in Specific Folder.’ This event will notify Pabbly Connect whenever a new file is uploaded to your chosen Google Drive folder.

  • Select ‘Add New Connection’ to connect your Google Drive account.
  • Click on the ‘Sign in with Google’ button and choose your Google account.
  • Authorize Pabbly Connect to access your Google Drive files.

Once connected, select the specific folder from which you want Pabbly Connect to monitor new files. After selecting the folder, click on the ‘Save and Send Test Request’ button. This action will retrieve the details of the most recently uploaded file in that folder, allowing you to confirm that the connection is working correctly.


3. Setting Up Todoist in Pabbly Connect

Now that Google Drive is connected, it’s time to set up Todoist in Pabbly Connect. In the action window, search for ‘Todoist’ and select it. The action event should be set to ‘Create a Task.’ This step is crucial, as it defines what happens when a new file is detected in your Google Drive folder.

Click on ‘Connect’ and select ‘Add New Connection’ to link your Todoist account with Pabbly Connect. You will need to enter your Todoist API token, which can be found in your Todoist account settings under the integrations section. Copy the token and paste it into Pabbly Connect.

  • Enter the task name in the content field, using the format ‘New File in Google Drive – [File Name].’
  • Map the file name from the Google Drive trigger response.
  • Add a description including file details and the upload date.

After setting up the task name and description, you can choose the project and section in Todoist where the task will be created. This ensures that the task is organized within your Todoist workflow, making it easy to manage.


4. Testing the Integration Between Google Drive and Todoist

After configuring both Google Drive and Todoist in Pabbly Connect, it’s essential to test the integration. Upload a new file to the designated Google Drive folder to initiate the trigger. Once the file is uploaded, return to Pabbly Connect and click on ‘Save and Send Test Request’ in the Todoist action section.

This action will send the task creation request to Todoist with the details of the newly uploaded file. Check your Todoist account to confirm that the task has been created successfully. The task should display the correct file name, upload date, and any additional details you included in the description.

To verify everything is working, you can upload multiple files to test the automation. Ensure that each new file generates a corresponding task in Todoist, demonstrating the seamless integration powered by Pabbly Connect.


5. Conclusion

In conclusion, using Pabbly Connect allows you to automate the creation of Todoist tasks for new files added to a specific Google Drive folder. This integration streamlines your workflow and ensures that you never miss important files. By following the steps outlined in this tutorial, you can easily set up this automation and enhance your productivity.

Ensure you check out Pabbly Connect to create business automation workflows and reduce manual tasks. Pabbly Connect currently offer integration with 2,000+ applications.

With Pabbly Connect, you can connect various applications and create automated workflows that save time and improve efficiency. Start automating your tasks today!

Automate Google Docs to PDF Conversion and Email with Pabbly Connect

Learn how to automate the conversion of Google Docs to PDF and send them via email using Pabbly Connect. Step-by-step guide included! Follow this definitive guide to creating powerful automated workflows with straightforward, efficiency-focused solutions that save valuable time.

Watch Step By Step Video Tutorial Below


1. Accessing Pabbly Connect for Automation

To start automating the conversion of Google Docs to PDF, you first need to access Pabbly Connect. This platform allows you to create workflows that connect various applications seamlessly. If you don’t have an account, you can sign up for a free trial in just a few minutes.

Once logged into Pabbly Connect, navigate to the dashboard. Click on the ‘Create Workflow’ button and give your automation a name, such as ‘Convert Google Docs to PDF and Send Email Attachment’. This sets the stage for the integration process.


2. Setting Up Trigger and Action in Pabbly Connect

In this step, you will configure the trigger and action for your workflow in Pabbly Connect. The trigger will be set to capture new data from Google Sheets, while the action will be to create a document in Google Docs.

  • Select Google Sheets as the trigger application.
  • Choose the trigger event as ‘New or Updated Spreadsheet Row’.
  • Copy the webhook URL provided by Pabbly Connect.
  • Go to your Google Sheet, install the Pabbly Connect Webhook add-on, and paste the URL in the initial setup.

After setting up the trigger, test it to ensure that data from your Google Sheets is being captured correctly by Pabbly Connect. This confirms that the integration is working as intended.


3. Creating Documents in Google Docs Using Pabbly Connect

Once the trigger is verified, the next step is to create a document in Google Docs using the data captured from Google Sheets. This is done by selecting Google Docs as the action application in Pabbly Connect.

To create a document:

  • Choose ‘Create Document from Template’ as the action event.
  • Connect your Google Docs account to Pabbly Connect.
  • Select the template you want to use for the certificates.
  • Map the data fields (like name and course) from Google Sheets to the document template.

After completing these steps, the document will be generated automatically based on the template you selected, utilizing the data provided from Google Sheets through Pabbly Connect.


4. Converting Document to PDF and Sending via Email

With the document created, the next step is to convert it to PDF format and send it via email. In Pabbly Connect, you will need to add another action for Google Drive.

Follow these steps to convert the document:

Select Google Drive as the application for the next action. Choose the action event as ‘Share a File’ to change the document’s permission. Map the document ID from the previous step to share it with anyone who has the link.

After sharing the file, you will receive a PDF link which can be used in the next action to send the email. This integration allows you to automate the entire process from document creation to sending the PDF via email using Pabbly Connect.


5. Finalizing the Email Sending Process with Pabbly Connect

The final step in this automation is to send the PDF document as an email attachment. You will use the Gmail application within Pabbly Connect to accomplish this.

Steps to send the email include:

Select Gmail as the application for the final action. Choose ‘Send Email’ as the action event. Map the recipient’s email address from Google Sheets. Add the subject and body of the email, including the PDF link as an attachment.

Once you have completed these steps and tested the workflow, every time new data is added to your Google Sheets, a PDF will be generated and sent automatically via email, showcasing the power of Pabbly Connect in automating repetitive tasks.


Conclusion

In summary, using Pabbly Connect to automate the conversion of Google Docs to PDF and sending them via email significantly streamlines your workflow. This step-by-step guide demonstrates how to efficiently set up this integration.

Ensure you check out Pabbly Connect to create business automation workflows and reduce manual tasks. Pabbly Connect currently offer integration with 2,000+ applications.

How to Create Google Tasks from Microsoft Outlook Email Using Pabbly Connect

Learn how to automate the creation of Google Tasks from Microsoft Outlook emails using Pabbly Connect. Step-by-step guide for seamless integration. Follow this definitive guide to creating powerful automated workflows with straightforward, efficiency-focused solutions that save valuable time.

Watch Step By Step Video Tutorial Below


1. Setting Up Pabbly Connect for Automation

To create Google Tasks from Microsoft Outlook emails, you will first need to set up Pabbly Connect. Start by logging into your Pabbly Connect account. If you don’t have an account yet, you can create a free one in just two minutes.

Once logged in, navigate to the dashboard and click on the ‘Create Workflow’ button. Here, you will name your workflow. For this tutorial, you can name it ‘Create Google Tasks from Microsoft Outlook Email’. After naming, click on the ‘Create’ button to proceed.


2. Choosing Applications in Pabbly Connect

In this step, you will select the applications for your automation. The first application you need to choose is Microsoft Office 365, which will be your trigger application. This means that whenever a new email is received in Outlook, it will trigger the automation. using Pabbly Connect

  • Select ‘Microsoft Office 365’ as the trigger application.
  • Choose ‘New Email’ as the trigger event.
  • Click on ‘Connect’ to establish a connection with your Microsoft account.

After connecting, Pabbly Connect will allow you to capture the details of the most recent email received in your Outlook account. This is essential for creating tasks in Google Tasks based on that email content.


3. Capturing Email Details in Pabbly Connect

Once you have set the trigger, the next step is to capture the details of the email. Click on the ‘Save and Send Test Request’ button. This action will retrieve the most recent email details, which will be used to create a task in Google Tasks. using Pabbly Connect

For example, if you receive an email stating, ‘Hello Mr Roy, your next meeting is with Mr ABC scheduled for 29th June,’ Pabbly Connect will capture this email’s subject and body content. This data will be crucial for the next steps.

  • Ensure that the email details include subject, body, and sender information.
  • These details will be mapped to create a task in Google Tasks.

With the email details captured, you are ready to apply a filter to determine which emails should create tasks.


4. Applying Filters for Important Emails

To ensure that only relevant emails create tasks in Google Tasks, you will apply a filter in Pabbly Connect. This filter will check the email subject and body for specific keywords.

For instance, you can set conditions to check if the subject contains words like ‘meeting,’ ‘presentation,’ or ‘schedule.’ This way, only emails that meet these criteria will trigger the creation of a task.

Select the ‘Filter’ option in Pabbly Connect. Set conditions based on keywords in the subject and body of the email. Ensure that the filter allows only relevant emails to proceed to the next step.

This filtering process is crucial to prevent unnecessary tasks from being created in Google Tasks.


5. Creating Tasks in Google Tasks with Pabbly Connect

After applying the filter, you will now connect to Google Tasks through Pabbly Connect. Select Google Tasks as the action application and choose the action event ‘Create Task.’ This will enable you to create a task based on the filtered email details.

When prompted, connect your Google account and select the specific task list where you want the new tasks to be created. You can then map the email subject to the task title and add any additional details as needed.

Map the subject of the email as the task title. Optionally add notes or a due date based on the email content. Click ‘Save and Send Test Request’ to create the task.

Once the task is created, you will see it reflected in your Google Tasks, confirming that the automation is working effectively.


Conclusion

Using Pabbly Connect, you can easily automate the process of creating Google Tasks from Microsoft Outlook emails. This integration saves time and ensures that you never miss important tasks again. Set up your automation today for a more efficient workflow.

Ensure you check out Pabbly Connect to create business automation workflows and reduce manual tasks. Pabbly Connect currently offer integration with 2,000+ applications.

Automate Email Notifications for Disqualified Candidates Using Pabbly Connect

Learn how to automate email notifications for disqualified candidates using Pabbly Connect with Gmail and Recruiter Flow in this detailed tutorial. Explore systematic approaches to creating efficient automation solutions that convert technical concepts into practical, implementable instructions.

Watch Step By Step Video Tutorial Below


1. Setting Up Pabbly Connect for Email Automation

To automate email notifications for disqualified candidates, you first need to access Pabbly Connect. Start by signing in to your Pabbly account and navigate to the dashboard.

Click on the big blue button labeled ‘Create Workflow’. In the dialog box that appears, name your workflow, such as ‘Send Email to Disqualified Candidates on Recruiter Flow’ and click on Create. This sets the stage for integrating Recruiter Flow with Gmail through Pabbly Connect.


2. Connecting Recruiter Flow to Pabbly Connect

The next step is to establish a connection between Recruiter Flow and Pabbly Connect. In your workflow, select Recruiter Flow as the trigger application and choose ‘Candidate Disqualified’ as the trigger event.

  • Select ‘Candidate Disqualified’ as the trigger event.
  • Click on ‘Connect’ and then ‘Add New Connection’.
  • You will need an API key from Recruiter Flow for this connection.

To obtain the API key, email the Recruiter Flow support team. Once you receive your API key, paste it into the designated field in Pabbly Connect and click on Save. This connects the two applications, allowing data transfer when a candidate is disqualified.


3. Sending Emails via Gmail Using Pabbly Connect

After connecting Recruiter Flow, the next step is to set up Gmail as the action application in Pabbly Connect. Choose Gmail and select ‘Send Mail’ as the action event.

Click on ‘Connect’ and then ‘Add New Connection’. Sign in with your Google account and allow the necessary permissions. Once connected, you will see fields for composing your email.

  • Map the recipient email address from the trigger response.
  • Fill in the sender’s name and email subject.
  • Compose the email body with personalized content.

This setup ensures that every time a candidate is disqualified, an email notification will be sent automatically through Gmail, utilizing the data retrieved by Pabbly Connect.


4. Testing the Integration Setup with Pabbly Connect

With your workflow configured, it’s crucial to test the integration. Disqualify a candidate in Recruiter Flow to trigger the workflow. Return to Pabbly Connect and click on ‘Save and Send Test Request’.

This action will fetch the details of the disqualified candidate, including their email address. You should see a response confirming that the email has been sent. Check your Gmail account to verify that the email notification was received.

Testing ensures that your automation works as intended. If everything is set up correctly, every disqualified candidate will receive a notification email automatically without manual intervention.


5. Finalizing Your Workflow in Pabbly Connect

Once testing is successful, your workflow is ready for use. You can now close the setup and monitor any disqualifications that occur in Recruiter Flow. Each disqualification will trigger the email notification process through Pabbly Connect.

Additionally, you can customize the email content further to ensure it meets your organization’s communication standards. This flexibility allows you to adapt the workflow as your needs change.

With this automated system in place, you can focus on other important tasks, knowing that disqualified candidates will be notified promptly through the integration of Recruiter Flow and Gmail via Pabbly Connect.


Conclusion

This tutorial demonstrated how to automate email notifications for disqualified candidates using Pabbly Connect with Gmail and Recruiter Flow. By following these steps, you can save time and streamline your recruitment process effectively.

Ensure you check out Pabbly Connect to create business automation workflows and reduce manual tasks. Pabbly Connect currently offer integration with 2,000+ applications.

Streamlining Inventory Management with CRM Integrations

Learn how to integrate Inventory with CRM, Google Sheets, HubSpot, and more for efficient data management and automation. Revolutionize your productivity approach with just a few strategic clicks. Uncover professional methods for connecting applications and creating workflows that reclaim hours of your week. with Pabbly Connect.

Watch Step By Step Video Tutorial Below


1. Google Sheets Integration with Inventory Management

Inventory management can be enhanced by using Google Sheets. This integration allows users to automate tasks and streamline data management processes effectively. By connecting your inventory system with Google Sheets, you can easily track stock levels and sales data. using Pabbly Connect

To set this up, follow these steps:

  • Open Google Sheets and create a new spreadsheet for inventory.
  • Use the Google Sheets API to connect to your Inventory application.
  • Set up triggers to update stock levels automatically.

This integration will help you maintain accurate inventory records without manual updates, ensuring efficiency in your operations.


2. CRM Integration for Enhanced Customer Management

Integrating your CRM with Inventory systems is crucial for managing customer data effectively. With the right setup, you can automate the process of updating customer information and track interactions seamlessly. This integration allows for better customer relationship management and data accuracy. using Pabbly Connect

To implement this integration, follow these steps:

  • Choose your CRM platform, such as HubSpot or Zoho CRM.
  • Connect your CRM with Google Sheets to automate data transfer.
  • Set up workflows to create or update customer records based on inventory changes.

This integration ensures that your customer data is always up to date, improving your sales and customer service efforts.


3. Automating Social Media Posts with Google Sheets

Using Google Sheets, you can automate social media posts to platforms like Facebook, Instagram, and Twitter. This integration helps manage your content more effectively and ensures that your messaging is consistent across all channels. using Pabbly Connect

To set this up, follow these steps:

Create a content calendar in Google Sheets. Integrate Google Sheets with your social media accounts. Schedule posts directly from your spreadsheet.

This automation saves time and helps maintain a consistent online presence.


4. Integrating Google Sheets with Task Management Applications

Integrating Google Sheets with task management applications like Asana can streamline your project management processes. This integration allows for automatic updates of tasks based on your inventory data, enhancing workflow efficiency. using Pabbly Connect

To implement this integration, follow these steps:

Set up a task list in Google Sheets. Connect Google Sheets with Asana. Create triggers to update tasks in Asana based on changes in your Google Sheets.

This integration helps ensure that your team stays informed about project statuses and inventory-related tasks.


5. E-commerce Integration for Inventory Management

For e-commerce businesses, integrating inventory management with Google Sheets is essential for tracking sales and stock levels. This integration can automate the process of updating inventory based on sales data. using Pabbly Connect

To set this up, follow these steps:

Connect your e-commerce platform with Google Sheets. Set up automatic updates to reflect sales in your inventory sheet. Monitor stock levels in real-time through Google Sheets.

This integration is crucial for maintaining accurate inventory records and ensuring timely stock replenishment.


Conclusion

Integrating Inventory with CRM, Google Sheets, and various applications enhances efficiency in data management. These integrations automate processes, ensuring accurate inventory tracking and improved customer relationship management. Embrace these tools for a streamlined operational workflow.

Thanks for following along with this tutorial! Remember to subscribe to the channel for more helpful content like this.

If you found this guide useful, please consider giving it a thumbs up and sharing it with others who might benefit from it.

Integrating WhatsApp with Google Sheets Using Pabbly Connect

Learn how to integrate WhatsApp with Google Sheets using Pabbly Connect for automated messaging. Step-by-step tutorial with detailed instructions. Discover how to seamlessly connect your essential tools through accessible instructions that make powerful automation available to professionals at every skill level.

Watch Step By Step Video Tutorial Below


1. Accessing Pabbly Connect for Integration

To start integrating WhatsApp with Google Sheets, we first need to access Pabbly Connect. Sign up for an account if you haven’t already, and you’ll be directed to the dashboard where you can create workflows.

Once logged in, click on the ‘Create Workflow’ button. This is where you’ll set up your automation to send WhatsApp messages every time a new row is added to your Google Sheets. This integration process will be completed in just a few minutes.


2. Setting Up Google Sheets as the Trigger

In this step, we will set Google Sheets as the trigger application in Pabbly Connect. Choose Google Sheets as your trigger app and select the event ‘New Spreadsheet Row’. This means that every time a new lead is added to your spreadsheet, the workflow will be triggered.

  • Select Google Sheets as the trigger application.
  • Choose ‘New Spreadsheet Row’ as the trigger event.
  • Copy the webhook URL provided by Pabbly Connect.

After copying the webhook URL, you need to go to your Google Sheets and set up the integration. This involves using the Pabbly Connect Webhooks add-on in Google Sheets to send data to Pabbly Connect.


3. Configuring Webhook in Google Sheets

Next, navigate to your Google Sheets, go to ‘Extensions’, then ‘Add-ons’, and select ‘Get Add-ons’. Search for the Pabbly Connect Webhooks add-on and install it. After installation, refresh your Google Sheets to see the new add-on. using Pabbly Connect

Once refreshed, go back to ‘Extensions’, select ‘Pabbly Connect Webhooks’, and click on ‘Initial Setup’. Paste the copied webhook URL into the designated field, and specify the trigger column where your data will be added (for example, column D).


4. Sending WhatsApp Messages via Pabbly Connect

Now it’s time to set WhatsApp as the action application in Pabbly Connect. Choose the action application ‘Interact’ and select the event ‘Send WhatsApp Template Message’. This step is crucial as it defines what action will occur when the trigger is activated.

To establish a connection, you’ll need to log in to your Interact account and obtain the secret key. Paste this key into Pabbly Connect to connect your WhatsApp account. After connecting, map the phone number and template code name to customize your message.

  • Map the phone number using the data received from Google Sheets.
  • Specify the template code name for the WhatsApp message.
  • Fill in any required body variables for the message.

Once everything is set up, click on ‘Save and Send Test Request’ to test the integration. If successful, you will receive a WhatsApp message confirming the setup.


5. Testing the Integration in Real Time

Finally, to ensure everything works seamlessly, add a new row in your Google Sheets with the required lead information. As soon as you hit enter, Pabbly Connect will trigger the workflow, sending a WhatsApp message to the specified number.

Check your WhatsApp to confirm that the message has been received. This real-time testing validates that the integration between Google Sheets and WhatsApp via Pabbly Connect is functioning correctly.

Remember, every time a new row is added, the same process will occur, automating your communication with leads efficiently.


Conclusion

In this tutorial, we explored how to integrate WhatsApp with Google Sheets using Pabbly Connect. This automation allows for efficient communication with new leads, ensuring timely responses and improved workflow management.

Ensure you check out Pabbly Connect to create business automation workflows and reduce manual tasks. Pabbly Connect currently offer integration with 2,000+ applications.

Automate Facebook Lead Ads with Pabbly Connect: A Step-by-Step Guide

Learn how to automate Facebook Lead Ads using Pabbly Connect to streamline your lead collection process. Follow this detailed tutorial for seamless integration. Build sophisticated automated workflows in less time than you think. This guide translates complex integrations into straightforward steps for immediate implementation.

Watch Step By Step Video Tutorial Below


1. Introduction to Pabbly Connect and Facebook Lead Ads

In this tutorial, we will explore how to use Pabbly Connect to automate Facebook Lead Ads. This integration allows you to efficiently collect leads from Facebook and manage them seamlessly. With over 2 billion users, Facebook is an essential platform for lead generation.

Using Pabbly Connect, you can set up various automations that facilitate the transfer of lead information from Facebook to other applications like Gmail, Google Sheets, and WhatsApp. This step-by-step guide will ensure you can implement these processes without any coding skills.


2. Setting Up Pabbly Connect for Facebook Lead Ads

To begin, access Pabbly Connect by navigating to Pabbly.com and signing in. If you don’t have an account, you can create one for free in just a few minutes. Once logged in, go to the dashboard and click on the ‘Create Workflow’ button.

Here are the steps to set up your workflow:

  • Click on ‘Create Workflow’.
  • Name your workflow (e.g., Facebook to Gmail).
  • Select Facebook Lead Ads as the trigger application.
  • Choose ‘New Lead’ as the trigger event.

After setting up the trigger, connect your Facebook account to Pabbly Connect. This allows the integration to pull lead information directly from your Facebook Lead Ads.


3. Collecting Lead Data from Facebook

Once you have connected Facebook Lead Ads to Pabbly Connect, the next step is to collect lead data. To do this, you will need to create a lead form on Facebook. When a user submits this form, their information will be sent to Pabbly Connect.

Follow these steps to collect lead data:

  • Navigate to your Facebook page and create a lead ad form.
  • Ensure the form captures essential details like name, email, and phone number.
  • Submit a test lead to see if Pabbly Connect captures the data correctly.

After submitting the test lead, return to Pabbly Connect and click on ‘Save and Send Test Request’ to fetch the lead data. This confirms that your integration is successfully capturing leads from Facebook.


4. Sending Lead Information to Gmail

Now that you have set up the lead collection, the next step is to send this information to Gmail. This ensures you receive immediate notifications every time a new lead is generated. In Pabbly Connect, you can set up an action to send an email notification.

To configure the email notification, follow these steps:

Select Gmail as the action application in Pabbly Connect. Choose ‘Send Email’ as the action event. Connect your Gmail account to Pabbly Connect. Map the lead data fields to the email content, including recipient name and email address.

Once the email action is configured, click on ‘Save and Send Test Request’ to ensure the email is sent correctly with the lead information.


5. Sending WhatsApp Messages to New Leads

In addition to email notifications, you can also send WhatsApp messages to new leads using Pabbly Connect. This is a great way to engage with your leads immediately after they submit their information.

To set up WhatsApp messaging, follow these steps:

Choose WhatsApp as the action application in Pabbly Connect. Select ‘Send Message’ as the action event. Connect your WhatsApp account to Pabbly Connect. Map the lead details to the WhatsApp message content.

After configuring the WhatsApp action, click on ‘Save and Send Test Request’ to verify that the message is sent to the new lead’s WhatsApp number. This completes the integration process.


Conclusion

This tutorial demonstrates how to use Pabbly Connect to automate Facebook Lead Ads effectively. By integrating Facebook with Gmail and WhatsApp, you can streamline your lead management process and enhance communication with potential customers. Automating these tasks saves time and ensures you never miss a lead notification.

Ensure you check out Pabbly Connect to create business automation workflows and reduce manual tasks. Pabbly Connect currently offer integration with 2,000+ applications.

Top 5 Facebook Group Automation: A Complete Guide with Pabbly Connect

Learn how to automate Facebook groups with Pabbly Connect. Step-by-step guide on integrating Facebook, Telegram, and Google Sheets for seamless automation. Master proven automation processes with practical implementation examples and strategic recommendations you can apply immediately in your workflow.

Watch Step By Step Video Tutorial Below


Introduction to Facebook Group Automation with Pabbly Connect

In this section, we will explore how to use Pabbly Connect for Facebook group automation. Facebook groups are a powerful tool for building online communities, and automating tasks can save time and enhance engagement. With Pabbly Connect, you can easily set up automations to streamline your workflow.

Automation possibilities include sharing posts across platforms, notifying members about new content, and managing responses. Here are some key benefits of using Pabbly Connect for Facebook group automation:

  • Save time by automating repetitive tasks.
  • Increase engagement by notifying members instantly.
  • Integrate with various applications for seamless workflows.

Overall, using Pabbly Connect for Facebook group automation enhances productivity and community interaction.


Integrating Facebook Group Posts to Telegram with Pabbly Connect

To automate the sharing of Facebook group posts to a Telegram channel, you will need to set up Pabbly Connect. Start by logging into Pabbly Connect and creating a new workflow. This workflow will have Facebook as the trigger application and Telegram as the action application.

Follow these steps to set up the integration:

  • Select Facebook as your trigger application.
  • Choose ‘New Post’ as the trigger event.
  • Connect your Facebook account to Pabbly Connect.
  • Select the Facebook group you want to monitor for new posts.

Once the trigger is set up, you will need to configure Telegram as the action application to send the post content to your Telegram channel. This is where Pabbly Connect shines by allowing seamless integration between Facebook and Telegram.


Automatically Posting YouTube Videos to Facebook Groups Using Pabbly Connect

Another powerful automation involves posting new YouTube videos to Facebook groups. By using Pabbly Connect, you can ensure that every time you upload a new video, a notification is sent to your Facebook group. Start by creating a new workflow in Pabbly Connect.

Here’s how to set it up:

Select YouTube as your trigger application. Choose ‘New Video in Channel’ as the trigger event. Connect your YouTube account to Pabbly Connect. Map the details to be sent to Facebook, including video title and URL.

After configuring the action for Facebook, your group will automatically receive a post every time you upload a new video, thanks to Pabbly Connect.


Using Google Sheets to Post to Multiple Facebook Groups with Pabbly Connect

To efficiently manage posts across multiple Facebook groups, you can use Google Sheets in conjunction with Pabbly Connect. This method allows you to create posts in a Google Sheet, which can then be automatically published to various Facebook groups.

Follow these steps to set up this integration:

Create a new Google Sheet with your post details. Set up Pabbly Connect to monitor the Google Sheet for new entries. Select Facebook as the action application and specify the group for each post.

This integration enables you to manage content efficiently, ensuring that every new entry in your Google Sheet is published to your selected Facebook groups automatically through Pabbly Connect.


Conclusion: Streamline Your Facebook Group Management with Pabbly Connect

In conclusion, using Pabbly Connect for Facebook group automation can significantly enhance your community management efforts. By integrating with Telegram, YouTube, and Google Sheets, you can automate notifications, video postings, and content management seamlessly. This not only saves time but also improves engagement within your groups.

Ensure you check out Pabbly Connect to create business automation workflows and reduce manual tasks. Pabbly Connect currently offer integration with 2,000+ applications.

Implementing these automations with Pabbly Connect allows you to focus on building your community while the integrations handle the repetitive tasks. Take advantage of these powerful tools to maximize your Facebook group’s potential today.

Top 5 Microsoft Office 365 Automations with Pabbly Connect: A Complete Guide

Learn to automate Microsoft Office 365 with Pabbly Connect. Discover step-by-step integrations with WhatsApp Cloud API, Google Sheets, and more. Transform complex automation concepts into accessible, actionable steps that eliminate unnecessary manual work while maximizing existing application capabilities.

Watch Step By Step Video Tutorial Below


1. Setting Up Pabbly Connect for Microsoft Office 365 Automation

To start automating Microsoft Office 365 applications, you need to access Pabbly Connect. First, visit the Pabbly Connect website and either sign in or create a new account. New users will receive 100 free tasks to explore the platform.

Once logged in, navigate to the dashboard and click on the ‘Create Workflow’ button. Here, you can name your workflow according to your automation needs, such as ‘Send Emails from Google Sheets to Outlook’.


2. Automating Email Notifications from Google Sheets to Microsoft Outlook

This automation allows you to send emails to multiple users whenever a new entry is added to your Google Sheets. The trigger application in this case is Google Sheets, while the action application is Microsoft Office 365. using Pabbly Connect

Follow these steps to set up the automation:

  • Select Google Sheets as the trigger application.
  • Choose the trigger event as ‘New or Updated Spreadsheet Row’.
  • Copy the generated webhook URL and set it up in your Google Sheets add-ons.
  • Configure the trigger column to monitor changes.

After completing these steps, you will be able to receive notifications in your Microsoft Outlook whenever a new entry is added to your Google Sheets.


3. Sending WhatsApp Notifications for New Outlook Emails

This integration allows you to receive WhatsApp notifications whenever you receive a new email in Microsoft Outlook. Here, Pabbly Connect serves as the bridge between Microsoft Office 365 and WhatsApp Cloud API.

To set this up, follow these steps:

  • Set Microsoft Office 365 as the trigger application and select ‘New Email’ as the trigger event.
  • Connect your Microsoft account to Pabbly Connect.
  • Choose WhatsApp Cloud API as the action application.
  • Map the necessary fields such as recipient number and message body.

Once configured, you will receive WhatsApp notifications for important emails, ensuring you never miss crucial updates.


4. Creating Trello Cards from New Outlook Emails

With this automation, any new email received in Microsoft Outlook can automatically create a card in Trello. This is particularly useful for tracking tasks and organizing emails. using Pabbly Connect

To set this up, proceed with the following steps:

Select Microsoft Office 365 as the trigger application and choose ‘New Email’ as the trigger event. Connect your Microsoft account to Pabbly Connect. Set Trello as the action application and select ‘Create Card’ as the action event. Map the email details to Trello card fields like title and description.

After completing this setup, every new email will automatically create a Trello card, streamlining your task management process.


5. Automating Email Notifications to Slack from Outlook

This automation sends email notifications to a specified Slack channel whenever a new email is received in Outlook. Utilizing Pabbly Connect, this integration simplifies team communications.

To implement this, follow these steps:

Choose Microsoft Office 365 as the trigger application and set ‘New Email’ as the trigger event. Connect your Microsoft account to Pabbly Connect. Select Slack as the action application and choose ‘Send Channel Message’. Map the email information into the Slack message format.

Once this automation is set, your team will receive real-time notifications of important emails directly in Slack, enhancing responsiveness and collaboration.


Conclusion

In this guide, we explored how to utilize Pabbly Connect for automating Microsoft Office 365 tasks. By integrating applications like WhatsApp Cloud API, Google Sheets, and Trello, you can significantly enhance your workflow efficiency. Start automating today to save time and improve productivity.

Ensure you check out Pabbly Connect to create business automation workflows and reduce manual tasks. Pabbly Connect currently offer integration with 2,000+ applications.

Automate Spreadsheet Applications with Pabbly Connect: A Step-by-Step Guide

Learn how to automate spreadsheet applications using Pabbly Connect. This detailed tutorial covers integration with Google Sheets, Mailchimp, and more. Learn to create powerful connections between your critical applications without requiring specialized programming knowledge or extensive technical background.

Watch Step By Step Video Tutorial Below


1. Introduction to Pabbly Connect for Spreadsheet Automation

Pabbly Connect is a powerful integration platform that allows you to automate spreadsheet applications seamlessly. By utilizing Pabbly Connect, you can connect various applications like Google Sheets and Excel to streamline your workflow.

This tutorial will guide you through the steps to automate your spreadsheets using Pabbly Connect. We will explore how to send data from your spreadsheet to other applications and vice versa.


2. Available Spreadsheet Applications in Pabbly Connect

Pabbly Connect supports multiple spreadsheet applications, including Google Sheets and Microsoft Excel. Additionally, you can connect with editable spreadsheets like Grist and Zoho Sheets.

  • Google Sheets
  • Microsoft Excel
  • Grist
  • Zoho Sheets

Using Pabbly Connect, you can automate tasks such as sending data from your spreadsheet to various applications like Mailchimp, HubSpot, and ActiveCampaign.


3. First Use Case: Sending Spreadsheet Data to Other Applications

The first use case involves sending data from your spreadsheet to another application using Pabbly Connect. For example, you can send data from Google Sheets to Mailchimp.

To set this up, first, connect your Google Sheets to Pabbly Connect. Once connected, select the action event, such as ‘Add New Member with Custom Field’ in Mailchimp. This allows you to send the spreadsheet data directly to your Mailchimp account.


4. Setting Up Mailchimp Integration in Pabbly Connect

To integrate Mailchimp with Pabbly Connect, you will need to create a new connection. This involves providing your Mailchimp API key and data center.

Here’s how to do it:

  • Log into your Mailchimp account and navigate to the API keys section.
  • Create a new API key and copy it.
  • Paste the API key and data center into Pabbly Connect.

After saving the connection, you can map the fields from your spreadsheet to Mailchimp, such as email address, name, and phone number, to automatically add new members to your list.


5. Second Use Case: Adding Data from Applications to Spreadsheets

The second use case focuses on how to add data from other applications into your spreadsheet using Pabbly Connect. For example, you can capture data from Jotform and add it to Google Sheets.

To set this up, first connect Jotform to Pabbly Connect and capture the form response data. Then, choose your target spreadsheet application, like Google Sheets, and set the action event to ‘Create Record’. This allows you to send the captured data into your spreadsheet.

After mapping the fields, such as first name, last name, email, and phone number, click on ‘Save and Send Test Request’. This will add the new data into your selected spreadsheet, automating the data entry process effectively.


Conclusion

In conclusion, using Pabbly Connect to automate spreadsheet applications can significantly enhance your workflow. By integrating various applications like Google Sheets and Mailchimp, you can streamline data management and improve efficiency.

Ensure you check out Pabbly Connect to create business automation workflows and reduce manual tasks. Pabbly Connect currently offer integration with 2,000+ applications.