Integrate iPhone Voice Notes to Google Sheets Using Pabbly Connect

Learn how to seamlessly integrate iPhone voice notes with Google Sheets in real-time using Pabbly Connect. Step-by-step tutorial included. Navigate the automation landscape confidently with clear, structured guidance suitable for professionals regardless of prior technical experience.

Watch Step By Step Video Tutorial Below


1. Setting Up Pabbly Connect for Voice Notes Integration

To integrate iPhone voice notes with Google Sheets, first, access Pabbly Connect. This platform allows seamless automation between applications. Begin by visiting the Pabbly Connect website and signing in or creating a free account.

After logging in, navigate to the dashboard to create a new workflow. Click on the ‘Create Workflow’ button and name it, for instance, ‘iPhone to Google Sheets’. This workflow will serve as the backbone for your automation, allowing voice notes to be captured and organized in Google Sheets.


2. Creating a Webhook in Pabbly Connect

The next step involves setting up a webhook in Pabbly Connect. This webhook will receive data from your iPhone. In the trigger section, select ‘Webhook by Pabbly’ and choose the ‘Catch Webhook’ event. Pabbly Connect will generate a unique webhook URL for you.

  • Select the trigger app as Webhook by Pabbly.
  • Choose the trigger event as ‘Catch Webhook’.
  • Copy the generated webhook URL for later use.

Once you have the webhook URL, you will integrate it into the shortcut on your iPhone. This will allow your dictated voice notes to be sent directly to Pabbly Connect for processing.


3. Setting Up the iPhone Shortcut

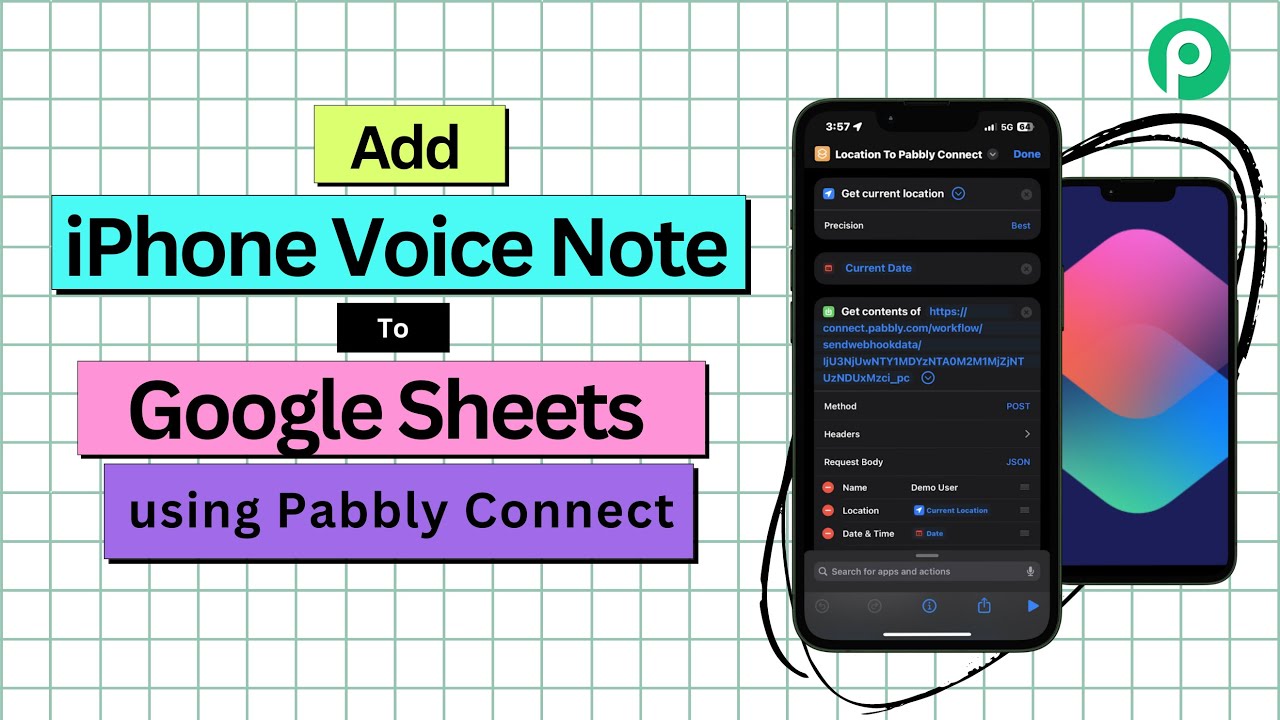
To dictate voice notes to Pabbly Connect, create a shortcut on your iPhone. Open the Shortcuts app and tap the plus icon to create a new shortcut. Add the ‘Dictate Text’ action, which will allow you to speak your notes directly into your iPhone.

After adding the dictate action, configure it to stop listening on tap. Next, add a ‘Get Contents of URL’ action to send the dictated text to the webhook URL you copied earlier from Pabbly Connect.

  • Paste the copied webhook URL into the URL field.
  • Change the method to POST.
  • Set the request body to JSON and add the dictated text variable.

Once your shortcut is set up, test it to ensure that your dictated text is being sent to Pabbly Connect successfully.


4. Integrating AI Tools with Pabbly Connect

After successfully capturing voice notes, the next step is to use AI tools like ChatGPT to extract relevant information from the text. In Pabbly Connect, add an action step by selecting ‘OpenAI’ and choose ‘ChatGPT’ as the action event.

Connect your OpenAI account by entering your API key. This key can be obtained from your OpenAI account settings. Once connected, you will configure the action to process the text received from your iPhone and extract details such as names, emails, and phone numbers.

Select the AI model you want to use for text extraction. Input a prompt that guides the AI on how to format the extracted data. Map the dictated text to the AI tool for processing.

This integration allows Pabbly Connect to utilize AI capabilities to intelligently parse the voice notes and prepare them for entry into Google Sheets.


5. Adding Data to Google Sheets via Pabbly Connect

The final step is to add the extracted data into Google Sheets. In Pabbly Connect, add another action step by selecting ‘Google Sheets’ and choosing the action event ‘Add New Row’. Connect your Google Sheets account to Pabbly Connect to enable data entry.

Once connected, select the specific spreadsheet and sheet where you want to store the data. Map the fields from the AI response to the corresponding columns in your Google Sheet, such as first name, last name, email, mobile number, and company name.

Choose the spreadsheet that will receive the data. Select the correct sheet within the spreadsheet. Map each response field to the appropriate column in Google Sheets.

After mapping the data, test the action to ensure that the information is being accurately added to Google Sheets, confirming that your automation is working seamlessly.


Conclusion

By following these steps, you can successfully integrate iPhone voice notes into Google Sheets using Pabbly Connect. This automation enables efficient data entry, saving time and improving accuracy in managing contact information.

Ensure you check out Pabbly Connect to create business automation workflows and reduce manual tasks. Pabbly Connect currently offer integration with 2,000+ applications.

How to Create GoHighLevel Contact from ClickUp Tasks Using Pabbly Connect

Learn how to integrate ClickUp and GoHighLevel using Pabbly Connect to automate contact creation from tasks. Step-by-step tutorial included. Navigate the automation landscape confidently with clear, structured guidance suitable for professionals regardless of prior technical experience.

Watch Step By Step Video Tutorial Below


1. Setting Up Pabbly Connect for ClickUp and GoHighLevel Integration

To create a GoHighLevel contact from ClickUp tasks, we will use Pabbly Connect. Start by visiting the Pabbly Connect homepage. If you are a new user, click on ‘Sign Up Free’ to get 300 tasks every month. Existing users should click on ‘Sign In’ to access their accounts.

After logging in, you will see the Pabbly Connect dashboard. Here, you can create a new workflow by clicking the ‘Create Workflow’ button at the top right corner. Name your workflow as ‘Create GoHighLevel Contact from ClickUp Task’ and select your folder for organization.


2. Defining Trigger and Action in Pabbly Connect

In this integration, the trigger application is ClickUp, and the action application is GoHighLevel. You need to select ClickUp as the trigger application and the event as ‘New Task’. This ensures that whenever a new task is created in ClickUp, Pabbly Connect will capture this event.

  • Choose ClickUp as the trigger application.
  • Select ‘New Task’ as the trigger event.
  • Connect your ClickUp account by adding a new connection and entering your API token.

After entering the API token, click ‘Save’. Now, you will need to select your workspace, space, folder, and list from ClickUp to ensure Pabbly Connect can access the correct data.


3. Creating a Task in ClickUp for Automation

Now that Pabbly Connect is set up, create a new task in ClickUp. This task will contain the lead details required for creating a contact in GoHighLevel. Click on the ‘Add Task’ button in ClickUp and fill in the task details such as the name, email, and phone number.

Once you have added the task details, go back to Pabbly Connect and click ‘Save and Send Test Request’. This will test the trigger and ensure that the task details are being sent correctly from ClickUp.


4. Setting Up Action for GoHighLevel in Pabbly Connect

After successfully setting up the trigger, it’s time to define the action. Select GoHighLevel as the action application and choose ‘Create Contact’ as the action event. This means whenever a new task is created in ClickUp, Pabbly Connect will automatically create a new contact in GoHighLevel.

To connect GoHighLevel with Pabbly Connect, click on ‘Connect’ and add a new connection. Ensure you are logged into your GoHighLevel account and select the appropriate agency. Once connected, map the fields such as first name, last name, email, and phone number based on the data received from the ClickUp task.

  • Map the lead name from the ClickUp task to the GoHighLevel contact fields.
  • Leave non-required fields blank if not needed.
  • Click ‘Save and Send Test Request’ to verify the action setup.

After successfully mapping the fields, refresh your GoHighLevel account to see the new contact created from the ClickUp task.


5. Testing the Integration Between ClickUp and GoHighLevel

To ensure everything is working correctly, create another new task in ClickUp with different lead details. After saving the task, go back to your GoHighLevel account and refresh the page. Since ClickUp uses a polling method, it may take some time for the new contact to appear.

Once the polling period has elapsed, check the GoHighLevel account again. You should see the new contact created from the task details entered in ClickUp. This confirms that Pabbly Connect has successfully automated the process of creating contacts from tasks.

With this integration, you can streamline your lead management process effectively. By utilizing Pabbly Connect, you can easily connect ClickUp and GoHighLevel, ensuring all your leads are captured efficiently.


Conclusion

In this tutorial, we explored how to create a GoHighLevel contact from ClickUp tasks using Pabbly Connect. By following these steps, you can automate your lead management process effectively and ensure no lead is missed.

Ensure you check out Pabbly Connect to create business automation workflows and reduce manual tasks. Pabbly Connect currently offer integration with 2,000+ applications.

How to Send Automated WhatsApp Messages to WebinarKit Registrants Using Pabbly Connect

Learn how to send automated WhatsApp messages to WebinarKit registrants using Pabbly Connect. Step-by-step tutorial with detailed instructions. Explore efficient methods for automating routine tasks with clear, concise instructions suited for both newcomers and experienced professionals.

Watch Step By Step Video Tutorial Below


1. Accessing Pabbly Connect for Integration

To send automated WhatsApp messages to WebinarKit registrants, start by accessing Pabbly Connect. Open your browser and navigate to the Pabbly website. You can sign up for free or log in if you are an existing user.

Once logged in, you will see the dashboard with various Pabbly applications. Click on the ‘Access Now’ button for Pabbly Connect to begin creating your automation workflow.


2. Creating a Workflow in Pabbly Connect

After accessing Pabbly Connect, click on the ‘Create Workflow’ button. You will be prompted to name your workflow. Name it ‘Send Automated WhatsApp Message to WebinarKit Registrants’ and select the folder where you want to save it.

  • Click on ‘Create’ to open the workflow window.
  • This window will allow you to set a trigger and an action.

In this window, select ‘WebinarKit’ as your trigger application. Choose the trigger event as ‘New Webinar Registration’. This ensures that every time a new registration occurs, the workflow will be activated through Pabbly Connect.


3. Setting Up Webhook in WebinarKit

To connect WebinarKit with Pabbly Connect, you will receive a webhook URL. Copy this URL and navigate to your WebinarKit account. Log in and go to the webinar you wish to integrate.

  • Click on ‘Edit Webinar’.
  • Navigate to the ‘Others’ section and select ‘Webhooks’.
  • Paste the copied webhook URL and click ‘Save’.

Once saved, this setup allows Pabbly Connect to receive data from WebinarKit whenever a new registrant signs up, completing the connection process.


4. Testing the Integration with Pabbly Connect

After setting up the webhook, perform a test registration to ensure everything is working correctly. Open the registration link for your webinar and fill in the details. Once submitted, Pabbly Connect will capture the response from WebinarKit.

Check your workflow in Pabbly Connect to verify that the registration details have been captured. You should see the first name, last name, email, and phone number of the registrant. This confirms that the trigger step is successful.


5. Sending WhatsApp Messages Using Pabbly Connect

Now that the trigger is set, it’s time to send a WhatsApp message. Add a new action step and select ‘WhatsApp Cloud API’ as your action application. For the action event, choose ‘Send Template Message’.

Connect your WhatsApp Cloud API account by entering the required details like token, phone number ID, and WhatsApp business account ID. Map the recipient’s mobile number from the captured data. Fill in the body fields with dynamic content, such as the registrant’s name and webinar date.

Once you have mapped all necessary fields, click on ‘Save and Send Test Request’. If successful, the registrant will receive a WhatsApp message confirming their registration, demonstrating the power of Pabbly Connect in automating communications.


Conclusion

This tutorial demonstrated how to send automated WhatsApp messages to WebinarKit registrants using Pabbly Connect. By following the steps outlined, you can easily set up this integration to enhance your communication with webinar attendees.

Ensure you check out Pabbly Connect to create business automation workflows and reduce manual tasks. Pabbly Connect currently offer integration with 2,000+ applications.

How to Add Received KrispCall SMS in Airtable Using Pabbly Connect

Learn how to automate adding received KrispCall SMS to Airtable using Pabbly Connect. Follow this step-by-step guide for seamless integration. Build sophisticated automated workflows in less time than you think. This guide translates complex integrations into straightforward steps for immediate implementation.

Watch Step By Step Video Tutorial Below


1. Setting Up Pabbly Connect for KrispCall and Airtable Integration

To start integrating KrispCall SMS with Airtable, you need to set up Pabbly Connect. This platform allows you to automate the process of adding SMS details to Airtable whenever you receive a new message. Begin by visiting the Pabbly Connect website and signing in or signing up for a free account.

Once you’re logged in, navigate to your dashboard. Here, click on the ‘Create Workflow’ button to initiate a new automation. Name your workflow appropriately, such as ‘Add Received KrispCall SMS to Airtable,’ and save it in a relevant folder. This setup is crucial for organizing your automations effectively.


2. Configuring Trigger and Action in Pabbly Connect

In this step, you’ll configure the trigger and action for your automation using Pabbly Connect. The trigger application will be KrispCall, and the action application will be Airtable. Search for KrispCall in the trigger window and select ‘New SMS or MMS’ as the trigger event. This ensures that the automation starts whenever a new SMS is received.

  • Select KrispCall as the trigger application.
  • Choose ‘New SMS or MMS’ as the trigger event.
  • Proceed to configure the action application, which is Airtable.

For the action, search for Airtable and select ‘Create New Record’ as the action event. This setup allows you to automatically create a new record in Airtable whenever a new SMS is received through KrispCall. After configuring both the trigger and action, click on the ‘Connect’ button to establish a connection between KrispCall and Pabbly Connect.


3. Connecting KrispCall to Pabbly Connect

To connect KrispCall with Pabbly Connect, you need to provide the API key and secret key from your KrispCall account. Go to your KrispCall dashboard, navigate to the settings, and then to the developer section to find these keys. Copy both keys and paste them into the respective fields in Pabbly Connect.

After entering the keys, click on ‘Save’ to establish the connection. Once the connection is successful, you can test it by sending a sample SMS to your registered KrispCall number. This test will help you verify that the integration is functioning correctly.


4. Adding SMS Details to Airtable

Now that you have successfully connected KrispCall to Pabbly Connect, it’s time to add the SMS details into Airtable. First, you need to connect your Airtable account by clicking on ‘Connect’ in the action section. Make sure you are logged into your Airtable account in another tab for seamless access.

  • Click on ‘Grant Access’ to allow Pabbly Connect to access your Airtable account.
  • Select the base name and table name where you want to add the SMS details.
  • Map the fields from the SMS details to the corresponding Airtable fields.

Mapping is crucial as it ensures that the correct data is inserted into the right fields. For instance, map the sender’s number, the SMS content, and the ID into their respective fields. Once you have completed the mapping, click on ‘Save and Send Test Request’ to verify that the SMS details are added correctly to Airtable.


5. Conclusion: Automate SMS to Airtable Using Pabbly Connect

By following these steps, you have successfully set up an automation using Pabbly Connect to add received KrispCall SMS into Airtable. This integration streamlines the process, allowing you to manage SMS communications efficiently. Whenever a new SMS is received, the details will automatically populate in your Airtable account, enhancing your workflow.

Ensure you check out Pabbly Connect to create business automation workflows and reduce manual tasks. Pabbly Connect currently offer integration with 2,000+ applications.

This automation not only saves time but also ensures that you never miss important messages. With Pabbly Connect, you can explore more integrations and automations to improve your productivity further.

How to Use Pabbly Connect for Invoice Automation with Xero

Learn how to automate invoice generation in Xero using Pabbly Connect with Shopify, WooCommerce, Google Sheets, and Stripe. Discover how to seamlessly connect your essential tools through accessible instructions that make powerful automation available to professionals at every skill level.

Watch Step By Step Video Tutorial Below


1. Accessing Pabbly Connect for Invoice Automation

To begin using Pabbly Connect for invoice automation with Xero, you first need to access the platform. Start by searching for ‘Pabbly Connect’ in your web browser. This will direct you to the Pabbly Connect landing page.

On the landing page, you have two options: sign in if you already have an account or click on ‘Sign Up for Free’ if you are a new user. Signing up takes just two minutes, and you get 100 tasks free every month. After logging in, you will see a dashboard with various applications available for integration.


2. Creating Workflows in Pabbly Connect

Once you’re logged into Pabbly Connect, the next step is to create a new workflow for automating invoice generation. Click on the ‘Create Workflow’ button on your dashboard. This is where you will set up your automation.

  • Click on ‘Create Workflow’
  • Name your workflow based on the application you are integrating, like ‘Shopify to Xero’
  • Select the trigger and action applications

After creating the workflow, you will be ready to set up the triggers and actions that will automate the invoice generation process. For example, if you are connecting Shopify, the trigger will be set to a new order.


3. Integrating Shopify with Xero via Pabbly Connect

To automate invoice creation from Shopify orders, you will need to set Shopify as the trigger application in Pabbly Connect. Choose the trigger event as ‘New Order’. This means that every time a new order is placed in Shopify, it will trigger the workflow.

Once the trigger is set, you will need to select Xero as the action application. The action event will be ‘Create Invoice’. This setup ensures that whenever a new order is received in Shopify, an invoice will automatically be created in Xero. You will need to map the order details from Shopify to the invoice fields in Xero.


4. Automating Invoices from Google Sheets Using Pabbly Connect

Another powerful automation can be created by integrating Google Sheets with Xero through Pabbly Connect. First, set Google Sheets as the trigger application and choose the trigger event as ‘New or Updated Spreadsheet Row’. This will allow you to capture new order details added to your spreadsheet.

  • Connect your Google Sheets account to Pabbly Connect
  • Select the specific spreadsheet where your order data is stored
  • Map the data fields accordingly to create an invoice in Xero

After mapping the data, you can test the workflow to ensure that invoices are being created automatically in Xero whenever a new order is added to your Google Sheet.


5. Integrating WooCommerce and Stripe with Xero Using Pabbly Connect

For those using WooCommerce, set it as the trigger application with the event ‘New Order Created’. This will ensure that every new order in your WooCommerce store leads to an automatic invoice in Xero through Pabbly Connect.

Similarly, for Stripe, use the trigger event ‘Checkout Completed’. This setup will automatically generate invoices in Xero for every completed payment received through Stripe. Ensure to map the payment details properly to create accurate invoices.


Conclusion

Using Pabbly Connect, you can seamlessly automate invoice generation in Xero from various platforms like Shopify, WooCommerce, Google Sheets, and Stripe. This not only saves time but also improves accuracy in your invoicing process, allowing your business to operate more efficiently.

Ensure you check out Pabbly Connect to create business automation workflows and reduce manual tasks. Pabbly Connect currently offer integration with 2,000+ applications.

Automatically Schedule & Share Google Forms Link On WhatsApp Using Pabbly Connect

Learn how to automatically schedule and share Google Forms links on WhatsApp using Pabbly Connect. Follow this step-by-step tutorial for seamless integration. Eliminate manual repetitive tasks from your workflow. Discover proven automation methods with intuitive steps designed for efficiency-minded professionals.

Watch Step By Step Video Tutorial Below


1. Introduction to Pabbly Connect for Scheduling WhatsApp Messages

In this section, we will introduce how to use Pabbly Connect to automatically schedule and share Google Forms links on WhatsApp. Pabbly Connect is an automation platform that connects different applications seamlessly. For this tutorial, we will integrate Google Sheets and WhatsApp using Pabbly Connect to send messages to students.

To start, you need to sign in to your Pabbly Connect account. If you are a new user, you can sign up for free to explore the features. Once logged in, you will see the dashboard where you can create workflows to automate tasks.


2. Creating a Workflow in Pabbly Connect

To create a workflow in Pabbly Connect, click on the ‘Create Workflow’ button in the top right corner of the dashboard. Name your workflow, for example, ‘Automatically Schedule and Share Google Forms Link on WhatsApp’. You can also select a folder for better organization.

  • Click on ‘Create’ to set up your workflow.
  • Choose the trigger application as ‘Schedule by Pabbly’.
  • Select how often you want the workflow to run (e.g., once).

After setting the trigger, click on ‘Save’ to finalize your workflow. This sets up the scheduling aspect of the automation.


3. Integrating Google Sheets with Pabbly Connect

The next step involves integrating Google Sheets with Pabbly Connect. Select Google Sheets as your action application and choose the action event as ‘Get Rows’. This will allow you to retrieve the data stored in your Google Sheets.

To connect Google Sheets, click on ‘Connect’ and then select ‘Add New Connection’. Sign in with your Google account and allow access to Pabbly Connect. After successfully connecting, select the spreadsheet that contains your students’ data.

  • Choose the correct sheet (e.g., Sheet1) and enter the range (e.g., A2:C).
  • Click on ‘Save and Send Test Request’ to verify the connection.

Once the data is retrieved, you can see the response and ensure that all student details are correctly fetched.


4. Sending WhatsApp Messages Using Pabbly Connect

Now, we will add another action step to send WhatsApp messages using Pabbly Connect. Select ‘WhatsApp Cloud API’ as your action application and choose ‘Send Template Message’ as the action event. This will allow you to send messages to the students with the Google Forms link.

To connect WhatsApp Cloud API, click on ‘Connect’ and enter your token, phone number ID, and WhatsApp business account ID. After entering the required details, click on ‘Save’ to establish the connection.

Choose the template you created for the message. Map the recipient’s mobile number and the message body using variables.

After setting up the template and mapping the necessary fields, click on ‘Save and Send Test Request’ to send the WhatsApp message. You should see a successful response indicating that the message was sent.


5. Conclusion and Summary

In this tutorial, we explored how to use Pabbly Connect to automatically schedule and share Google Forms links on WhatsApp. By integrating Google Sheets and the WhatsApp Cloud API, we successfully set up a workflow to send messages to multiple students.

Ensure you check out Pabbly Connect to create business automation workflows and reduce manual tasks. Pabbly Connect currently offer integration with 2,000+ applications.

Check out Pabbly Connect – Automate your business workflows effortlessly! Sign Up Free – Start your journey with ease! 10,000+ Video Tutorials – Learn step by step! Join Pabbly Facebook Group – Connect with 21,000+ like minded people!

Using Pabbly Connect simplifies the process of automating tasks between different applications. This integration can save time and ensure effective communication with your audience.


In conclusion, automating the sharing of Google Forms links on WhatsApp can enhance your workflow efficiency significantly. With Pabbly Connect, you can easily connect various applications to streamline your processes.

How to Connect Dropbox with Google Drive Using Pabbly Connect

Learn how to integrate Dropbox with Google Drive using Pabbly Connect for seamless file uploads. Step-by-step tutorial with detailed instructions. Explore efficient methods for automating routine tasks with clear, concise instructions suited for both newcomers and experienced professionals.

Watch Step By Step Video Tutorial Below


1. Accessing Pabbly Connect for Integration

To connect Dropbox with Google Drive, you first need to access Pabbly Connect. Start by visiting the Pabbly Connect website, where you can log in or sign up for a free account. New users can enjoy 100 free tasks every month, making it easy to get started with automation.

Once logged in, you will see the Pabbly apps window. Click on the option to access Pabbly Connect. This will take you to the dashboard where you can create a new workflow for your integration.


2. Creating a Workflow in Pabbly Connect

In this step, you will create a workflow to automate the file transfer between Dropbox and Google Drive using Pabbly Connect. Click on the ‘Create Workflow’ button located in the top right corner of the dashboard. A dialog box will pop up asking for a workflow name.

  • Enter a name for your workflow, such as ‘Connect Dropbox with Google Drive’.
  • Select a folder where you want to save this workflow.

After naming your workflow and selecting the desired folder, click on the ‘Create’ button. You will now see two sections labeled ‘Trigger’ and ‘Action’ on your screen. This setup is crucial for defining how the automation will operate.


3. Setting Up the Trigger with Dropbox

To initiate the automation, you need to set up the trigger step in Pabbly Connect. Click on the dropdown for the trigger application and select ‘Dropbox’. Then, choose the trigger event as ‘New File’. This will ensure that whenever a new file is uploaded to your Dropbox folder, Pabbly Connect captures this event.

Next, click on ‘Connect’ to link your Dropbox account with Pabbly Connect. A new window will appear prompting you to add a new connection. After connecting successfully, specify the folder path in Dropbox where the files will be uploaded. For example, if your folder is named ‘Important Files’, enter it as ‘/Important Files’.

  • Click on ‘Save and Send Test Request’ to capture the last uploaded file.
  • Upload a new file to trigger the test.

After uploading the file, click on the save button. You should see a response containing the details of the uploaded file, confirming that the trigger setup is complete.


4. Setting Up the Action with Google Drive

Now that the trigger is set, it’s time to configure the action step in Pabbly Connect. Select ‘Google Drive’ as the action application and choose the action event as ‘Upload File’. This will allow the same file uploaded to Dropbox to be sent to your Google Drive.

Click on ‘Connect’ and authorize Pabbly Connect to access your Google Drive. After successful authorization, you will be prompted to enter the URL of the file you want to upload. Use the mapping feature to insert the URL from the previous step, ensuring that it dynamically updates whenever a new file is uploaded.

Paste the folder ID of your Google Drive folder where the file will be uploaded. Map the file name from the previous response.

Click on ‘Save and Send Test Request’ to finalize the action setup. Once you receive a success response, check your Google Drive to confirm that the file has been uploaded successfully.


5. Conclusion

In this tutorial, we explored how to connect Dropbox with Google Drive using Pabbly Connect. By setting up a trigger for new files in Dropbox and an action to upload those files to Google Drive, you can automate your workflow efficiently. This integration simplifies the process of managing files across platforms, ensuring that your important documents are always backed up.

Ensure you check out Pabbly Connect to create business automation workflows and reduce manual tasks. Pabbly Connect currently offer integration with 2,000+ applications.

Using Pabbly Connect for such integrations not only saves time but also enhances productivity by automating repetitive tasks. If you have any questions, feel free to reach out for support.

How to Send Dropbox Sign Document for Signature on Typeform Submission Using Pabbly Connect

Learn to automate sending Dropbox Sign documents for signatures using Typeform submissions with Pabbly Connect. Step-by-step guide to streamline your workflow! Discover how to seamlessly connect your essential tools through accessible instructions that make powerful automation available to professionals at every skill level.

Watch Step By Step Video Tutorial Below


1. Accessing Pabbly Connect for Integration

To send a Dropbox Sign document for signature on Typeform submission, we will use Pabbly Connect. Start by visiting the Pabbly Connect website to set up your account.

Once on the site, you have options to sign in or sign up for a free account. If you are new, click on the ‘Sign Up Free’ button and follow the prompts to create your account. After logging in, navigate to the dashboard.


2. Creating a Workflow in Pabbly Connect

After accessing Pabbly Connect, you need to create a new automation workflow. Click on the ‘Create Workflow’ button and name it, for example, ‘Typeform to Dropbox Sign’. This will help you identify the automation later.

  • Click on the folder in which you want to save this workflow.
  • Select ‘Create’ to open the workflow settings.

In the workflow, you will see two sections: a trigger and an action. The trigger will capture the Typeform submission, while the action will send the document through Dropbox Sign using Pabbly Connect.


3. Setting Up the Trigger with Typeform

To set up the trigger, search for Typeform in the ‘Choose App’ section. Select it, and then choose the ‘New Entry Beta’ trigger event from the dropdown menu. Click on ‘Connect’ to establish a connection.

When prompted to connect your Typeform account, click on the ‘Connect with Typeform’ button. Accept the permissions to allow Pabbly Connect to access your Typeform account. After connecting, select the specific form you want to use for this automation.


4. Sending the Document for Signature via Dropbox Sign

Once the trigger is set, it’s time to configure the action. Search for Dropbox Sign in the action step and select it. Choose the action event labeled ‘Send Signature Request from Template’. Click ‘Connect’ and create a new connection by entering your API key and password from your Dropbox Sign account. using Pabbly Connect

  • Generate the API key from the API section in your Dropbox Sign account.
  • Copy and paste the API key into Pabbly Connect.
  • Enter your Dropbox Sign password and save the connection.

After connecting, select the template document you want to send for signature from the dropdown list. Make sure to set the test mode to ‘Yes’ for initial testing. This way, the signatures will not be legally binding during testing.


5. Testing the Automation Workflow

With everything set up, it’s crucial to test the automation. Submit a new entry in your Typeform to trigger the workflow. After submission, check the responses in Pabbly Connect to ensure they are captured correctly.

Once the test is successful, the document will be sent to the email address provided in the Typeform submission. You can verify by checking the recipient’s email inbox for the signature request. This confirms that the automation created using Pabbly Connect is functioning as intended.


Conclusion

In this tutorial, we explored how to automate sending Dropbox Sign documents for signature based on Typeform submissions using Pabbly Connect. This integration streamlines your workflow, ensuring timely document processing and signature collection.

Ensure you check out Pabbly Connect to create business automation workflows and reduce manual tasks. Pabbly Connect currently offer integration with 2,000+ applications.

How to Send New Google Drive Files to Discord Channel Using Pabbly Connect

Learn how to integrate Google Drive and Discord using Pabbly Connect to automatically send new files to your Discord channel. Explore systematic approaches to creating efficient automation solutions that convert technical concepts into practical, implementable instructions.

Watch Step By Step Video Tutorial Below


1. Accessing Pabbly Connect for Google Drive and Discord Integration

To start the integration process, you need to access Pabbly Connect. This platform allows you to automate tasks between different applications, including Google Drive and Discord. To do this, visit the Pabbly Connect homepage by entering the URL Pabbly.com/connect in your browser.

Once you’re on the Pabbly Connect site, you can either sign up for a new account or log in if you already have one. New users can take advantage of the free plan, which offers 300 tasks per month. After signing in, you will be directed to the dashboard where you can begin creating your automation workflows.


2. Creating a Workflow in Pabbly Connect

In this step, we will create a workflow to send new Google Drive files to Discord using Pabbly Connect. Click on the ‘Create Workflow’ button located at the top right corner of the dashboard. A dialog box will appear, prompting you to name your workflow. You can name it ‘Send New Google Drive Files to Discord Channel’.

  • Click on ‘Create’ to finalize the workflow setup.
  • You will see the options for setting up the trigger and action.

In this workflow, the trigger application will be Google Drive, and the action application will be Discord. This means that whenever a new file is uploaded to Google Drive, it will automatically send a message to your Discord channel. Now, let’s set up the trigger for Google Drive.


3. Setting Up the Trigger for Google Drive

To set up the trigger in Pabbly Connect, select Google Drive as your trigger application. Choose the trigger event as ‘New File in a Specific Folder’. This allows Pabbly Connect to monitor a designated folder in your Google Drive for any new uploads.

Next, click on the ‘Connect’ button to link your Google Drive account. If it’s your first time connecting, select ‘Add New Connection’ and authenticate your account by clicking ‘Sign in with Google’. Once authorized, you’ll be prompted to select the specific folder you want to monitor. Choose the folder where you will upload new files.


4. Setting Up the Action to Send Messages to Discord

After successfully setting up the trigger, it’s time to configure the action step in Pabbly Connect. Select Discord as your action application and choose the action event as ‘Send Channel Message (Markdown)’. This action will send a message to your specified Discord channel whenever a new file is detected in Google Drive.

To proceed, connect your Discord account by clicking on the ‘Connect’ button. You will need to provide a Webhook URL from your Discord channel. Follow the instructions provided by Pabbly Connect to create a new Webhook in Discord, which involves navigating to your channel settings and generating a new Webhook URL.

  • Copy the Webhook URL and paste it back into Pabbly Connect.
  • Draft a message for your Discord notification, including placeholders for the file name and link.

After configuring the message, click on ‘Save and Send Test Request’ to complete the setup. You should receive a successful response indicating that your message was sent to the Discord channel.


5. Testing the Integration Workflow

Now that your workflow is set up, it’s time to test the integration using Pabbly Connect. Go back to your Google Drive and upload a new file to the designated folder. For this test, you can upload any document, such as ‘Digital Automation and Future Work’.

Wait for a few moments as Google Drive is a polling-based application, meaning it may take some time for Pabbly Connect to capture the new file upload. After a short wait, check your Discord channel for a new message from the bot you configured.

If the integration works correctly, you will see a message in your Discord channel indicating that a new file has been uploaded, complete with the file name and a link to access it. This confirms that your Google Drive and Discord integration through Pabbly Connect is functioning as intended.


Conclusion

In this tutorial, we explored how to use Pabbly Connect to automate the process of sending new Google Drive files to a Discord channel. By following the steps outlined, you can easily set up this integration to keep your team updated in real-time. Automating tasks with Pabbly Connect enhances productivity and ensures seamless communication.

Ensure you check out Pabbly Connect to create business automation workflows and reduce manual tasks. Pabbly Connect currently offer integration with 2,000+ applications.

How to Send SMS for Zoho Forms Submission using Twilio with Pabbly Connect

Learn how to send SMS notifications for Zoho Forms submissions using Pabbly Connect and Twilio in this detailed step-by-step tutorial. Follow this definitive guide to creating powerful automated workflows with straightforward, efficiency-focused solutions that save valuable time.

Watch Step By Step Video Tutorial Below


1. Accessing Pabbly Connect for Integration

To send SMS for Zoho Forms submissions, you first need to access Pabbly Connect. Start by visiting the Pabbly Connect landing page by entering ‘Pabbly.com/c/connect’ in your browser. This platform allows you to integrate various applications seamlessly.

Once on the Pabbly Connect page, you have two options: sign in or sign up for free. If you’re a new user, click on ‘Sign up for free’ to create an account and receive 100 free tasks per month. For existing users, simply click on ‘Sign in’ to access your dashboard.


2. Creating a New Workflow in Pabbly Connect

After signing into Pabbly Connect, the next step is to create a new workflow. Click on the ‘Create Workflow’ button on your dashboard. You will be prompted to name your workflow; enter ‘How to Send SMS for Zoho Form Submission using Twilio’ and select a folder to save it in.

  • Click ‘Create’ to initialize the workflow.
  • This opens the workflow window where you can set up triggers and actions.

In this window, you will set a trigger for your workflow. The trigger is essential as it determines when the SMS will be sent. In this case, select ‘Zoho Forms’ as your trigger application to initiate the SMS sending process.


3. Setting Up Zoho Forms for Integration

For the integration to work, you need to connect your Zoho Forms account to Pabbly Connect. Select ‘New Form Submission’ as the trigger event. Pabbly Connect will provide you with a webhook URL that you need to copy.

Now, go to your Zoho Forms account and select the form you want to integrate, for instance, the ‘KK Travelers’ form. Edit this form, navigate to ‘Integrations’, and select ‘Webhooks’. Paste the copied URL into the webhook field, set the content type to ‘application/json’, and save your changes.


4. Testing the Integration with Pabbly Connect

After setting up the webhook, you need to test the integration. Go back to Pabbly Connect and click on ‘Test Submission’ to generate a sample submission. Fill out the form with dummy data such as a name and phone number, and submit it.

Once you submit the form, check your Pabbly Connect workflow to see if it captured the response. You should see the data you entered, confirming that the connection between Zoho Forms and Pabbly Connect is working correctly.

  • Ensure all fields are mapped correctly to capture the necessary details.
  • This step is crucial for the SMS to contain accurate information.

If the data appears correctly, your trigger setup is successful, and you can proceed to the action step.


5. Sending SMS with Twilio via Pabbly Connect

Now, for the action application, select ‘Twilio’ in Pabbly Connect. Choose ‘Send SMS Message’ as the action event and click on ‘Connect’. If you have not connected your Twilio account yet, you will need to add a new connection by entering your Account SID and Authorization Token from your Twilio account.

Once connected, you will set up the SMS body. You can customize the message and use dynamic fields from the previous step to personalize the SMS. For example, include the recipient’s name and booking details. Ensure that you map these fields correctly so that the SMS content updates with each new form submission.

Enter the sender’s number from your Twilio account. Map the recipient’s phone number from the form submission.

After completing these steps, click on ‘Save and Send Test Request’ to verify that the SMS is sent successfully. Check your phone to confirm receipt of the message.


Conclusion

In this tutorial, we explored how to send SMS notifications for Zoho Forms submissions using Pabbly Connect and Twilio. By following the steps outlined, you can automate SMS responses for your business efficiently. This integration enhances customer communication and ensures timely updates for your leads.

Ensure you check out Pabbly Connect to create business automation workflows and reduce manual tasks. Pabbly Connect currently offer integration with 2,000+ applications.