Integrating Jet Form Builder with Google Sheets Using Pabbly Connect

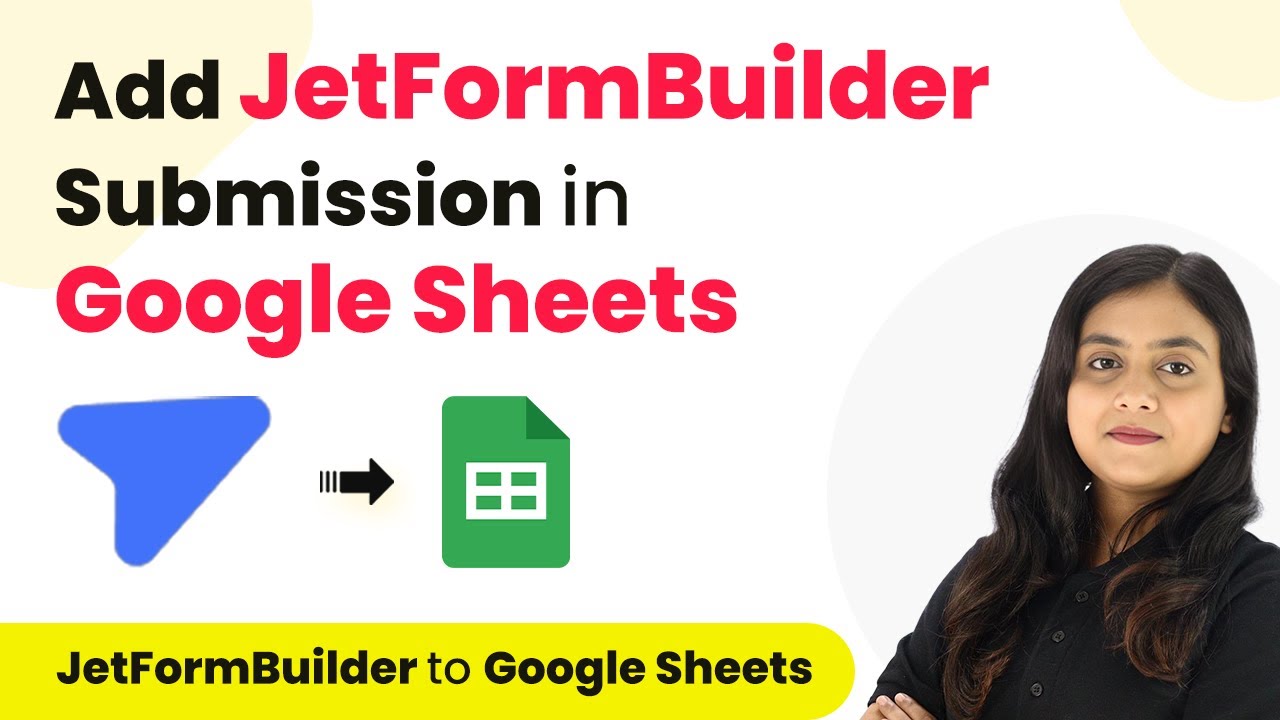
Learn how to seamlessly integrate Jet Form Builder submissions into Google Sheets using Pabbly Connect in this detailed tutorial. Learn to create powerful connections between your critical applications without requiring specialized programming knowledge or extensive technical background.

Watch Step By Step Video Tutorial Below


Accessing Pabbly Connect for Integration

To start integrating Jet Form Builder with Google Sheets, access Pabbly Connect by visiting the official website. If you’re new, you can sign up for a free account, which allows 100 tasks per month. Existing users should log in to their account to proceed with the integration.

Once logged in, you will see the Pabbly Connect dashboard. From here, you can create a new workflow. Click on the ‘Create Workflow’ button located at the top right corner. This initiates the process of setting up your automation.


Creating a Workflow in Pabbly Connect

After clicking on ‘Create Workflow’, a dialog box appears prompting you to name your workflow. Name it ‘Add Jet Form Builder Submission to Google Sheets’ and select a folder to save your workflow. This step is crucial as it organizes your workflows in Pabbly Connect.

To set up the automation, you need to configure a trigger and an action. The trigger is the event that starts the workflow, and the action is what happens as a result. In this case, the trigger will be a new submission from Jet Form Builder. Select Jet Form Builder as the trigger application and choose ‘New Submission’ as the trigger event.

  • Select Jet Form Builder as the trigger application.
  • Choose ‘New Submission’ as the trigger event.

With this setup, Pabbly Connect will listen for any new submissions made through the Jet Form Builder form.


Connecting Jet Form Builder to Pabbly Connect

Once you’ve set the trigger, Pabbly Connect provides a unique webhook URL. This URL acts as a bridge between Jet Form Builder and Pabbly Connect. Copy this URL and navigate to your Jet Form Builder settings.

In Jet Form Builder, go to the settings of the form you created. Under the settings, find the ‘Webhooks’ option and click on it. Here, you will add a new webhook by pasting the copied URL and setting the request method to POST. Ensure that the request format is set to JSON.

  • Paste the webhook URL from Pabbly Connect.
  • Set the request method to POST.
  • Choose JSON as the request format.

After saving the settings, return to Pabbly Connect where it will indicate that it is waiting for a webhook response. This means the connection is established and ready to capture submissions.


Testing the Integration with a Form Submission

With the webhook configured, it’s time to test the integration. Go back to your Jet Form Builder form and fill out the test submission. Include customer details like first name, last name, email, phone number, address, city, state, ZIP code, and any feedback.

After submitting the form, return to the Pabbly Connect dashboard to check if the response was captured. You should see the details filled in from your test submission. This confirms that the integration is functioning correctly.

Once the test submission is successful, you can proceed to set up the action step, which involves adding the captured data to Google Sheets. This will allow your team to access the feedback directly from the spreadsheet.


Adding Data to Google Sheets Using Pabbly Connect

Now that the trigger is set up and tested, it’s time to configure the action step in Pabbly Connect. Select Google Sheets as the action application and choose ‘Add New Row’ as the action event. This means that each new submission will create a new row in your specified Google Sheets document.

To connect Google Sheets to Pabbly Connect, click on ‘Connect’ and authorize the connection by signing in with your Google account. Once connected, select the spreadsheet you created for storing the form submissions.

Choose the spreadsheet for the data. Map the fields from the Jet Form Builder to the Google Sheets columns.

After mapping the fields, click on ‘Save and Test Request’. If successful, a new row will be created in your Google Sheets with the test submission data, confirming that the integration is complete.


Conclusion

In this tutorial, we successfully integrated Jet Form Builder with Google Sheets using Pabbly Connect. This automation allows businesses to streamline their feedback collection process effectively. By following the steps outlined, you can set up similar integrations to enhance operational efficiency and data management.

Ensure you check out Pabbly Connect to create business automation workflows and reduce manual tasks. Pabbly Connect currently offer integration with 2,000+ applications.

Automate Sending 80G Receipts on WhatsApp for Donations with Pabbly Connect

Learn how to automate sending 80G receipts on WhatsApp for donations using Pabbly Connect, Razorpay, and Google Docs in this detailed step-by-step tutorial. Discover hidden automation capabilities within your existing tools. This guide shows you how to connect your essential applications and permanently eliminate redundant manual processes.

Watch Step By Step Video Tutorial Below


1. Accessing Pabbly Connect for Automation

To start automating the process of sending 80G receipts on WhatsApp, you’ll first need to access Pabbly Connect. This platform allows you to integrate various applications seamlessly.

Visit the Pabbly Connect homepage and either sign in if you’re an existing user or create a new account. New users receive 100 free tasks every month, which is perfect for exploring the capabilities of Pabbly Connect.


2. Creating a Workflow in Pabbly Connect

Once logged into Pabbly Connect, navigate to the dashboard and click on the ‘Create Workflow’ button. Name your workflow something like ‘Send 80G Receipts on WhatsApp for Donations Received via Razorpay’. This will help you easily identify it later.

  • Click on ‘Create’ to save your workflow.
  • You will see two windows: Trigger and Action.
  • Select Razorpay as the trigger application.

Now, select the event ‘Payment Captured’ as the trigger. This sets the stage for your automation, ensuring that every time a donation is made through Razorpay, it initiates the workflow in Pabbly Connect.


3. Setting Up Razorpay Webhook

To connect Razorpay with Pabbly Connect, you will need to set up a webhook. Copy the webhook URL provided in Pabbly Connect after selecting your trigger.

Next, go to your Razorpay dashboard, navigate to ‘Settings’, and find the ‘Webhooks’ section. Click on ‘Add New Webhook’ and paste the copied URL. Set the active event as ‘Payment Captured’ so Razorpay sends data to Pabbly Connect whenever a payment is made.

  • Enter the webhook URL in Razorpay.
  • Select the event ‘Payment Captured’.
  • Click on ‘Create Webhook’.

After saving the webhook, return to Pabbly Connect and test the connection by making a test donation through Razorpay. This will confirm that the data is being sent correctly.


4. Creating ATG Certificates in Google Docs

After successfully capturing the payment data in Pabbly Connect, the next step is to generate the ATG certificate using Google Docs. Add a new action step and select Google Docs as the application.

Choose the action event ‘Create Document from Template’. You will need to select the ATG certificate template you have already created in Google Docs. This template should include placeholders for donor information such as name, email, and donation amount.

Select the template document from Google Docs. Map the donor’s details from the Razorpay response to the corresponding fields in the template. Click ‘Save and Send Test Request’ to create the document.

Once the document is created, you should see the new ATG certificate in your Google Docs, confirming that Pabbly Connect has successfully generated the document based on the payment data.


5. Sending the Receipt on WhatsApp

With the ATG certificate ready, the last step is to send it to the donor via WhatsApp. For this, you will use AI Sensi integrated with Pabbly Connect. Add another action step and select AI Sensi as the application.

Choose the action event ‘Send Template Message’. You will need to provide the necessary details such as the campaign name and the recipient’s phone number. Map the PDF link of the ATG certificate you created earlier so that it can be sent along with the message.

Enter the campaign name from AI Sensi. Map the donor’s phone number and name. Attach the PDF URL of the ATG certificate.

Click ‘Save and Send Test Request’ to send the WhatsApp message. The donor should receive a personalized message along with their ATG certificate, demonstrating the power of automation through Pabbly Connect.


Conclusion

In this tutorial, we explored how to automate sending 80G receipts on WhatsApp for donations using Pabbly Connect, Razorpay, and Google Docs. By following the steps outlined, you can efficiently manage donations and enhance donor communication with ease.

Ensure you check out Pabbly Connect to create business automation workflows and reduce manual tasks. Pabbly Connect currently offer integration with 2,000+ applications.

Automate Google Sheets with Pabbly Connect and Getform Submissions

Learn how to automate Google Sheets with Pabbly Connect by integrating Getform submissions. Step-by-step guide to streamline your data collection process. Explore systematic approaches to creating efficient automation solutions that convert technical concepts into practical, implementable instructions.

Watch Step By Step Video Tutorial Below


1. Accessing Pabbly Connect for Integration

To automate Google Sheets with Getform submissions, first access Pabbly Connect. Visit the Pabbly Connect website by typing Pabbly.com/connect in your browser. This platform allows you to integrate various applications seamlessly.

Once on the Pabbly Connect homepage, you can sign in if you are an existing user or sign up for free if you are new. Signing up grants you 100 free tasks monthly. After logging in, navigate to the Pabbly Connect dashboard to start creating your workflow.


2. Creating a New Workflow in Pabbly Connect

In your Pabbly Connect dashboard, you can create a new workflow for automating form submissions. Click on ‘Create Workflow’ and name it as ‘Add Getform Submission in Google Sheets’. Select the appropriate folder to save this workflow.

After naming your workflow, you will see two sections: Trigger and Action. The Trigger is the event that initiates your workflow. For this integration, select Getform as the trigger application and set the trigger event to ‘New Submission’. This means that every time a new form submission occurs, the workflow will be activated.

  • Click on ‘Create Workflow’
  • Name your workflow
  • Select the folder for saving
  • Choose Getform as the trigger application
  • Set the trigger event to ‘New Submission’

After setting the trigger, you will receive a webhook URL from Pabbly Connect. This URL is essential for connecting Getform to Pabbly Connect, allowing data transfer between the two applications.


3. Connecting Getform to Pabbly Connect

To connect Getform to Pabbly Connect, log into your Getform account and navigate to the form you created. Click on the Automation tab, then select ‘Send Webhook Request’. Here, you will paste the webhook URL provided by Pabbly Connect.

After pasting the URL, save the automation settings. This step ensures that whenever a new submission is made on your form, the data will be sent to Pabbly Connect. To verify the connection, fill out the form with sample data and submit it. You should see the response captured in Pabbly Connect.


4. Adding Google Sheets as the Action Application

Next, you will set up Google Sheets as the action application in your workflow. In Pabbly Connect, select Google Sheets and choose the action event as ‘Add New Row’. This action will insert the data from Getform submissions into your specified Google Sheets document. using Pabbly Connect

After selecting Google Sheets, connect your Google account to Pabbly Connect. You will then be prompted to choose the spreadsheet where you want to save the data. Ensure that the spreadsheet has columns for the data you are collecting, such as Name, Email, and Phone Number.

  • Select Google Sheets as the action application
  • Choose ‘Add New Row’ as the action event
  • Connect your Google account
  • Select the spreadsheet for data insertion

Finally, map the fields from Getform to the corresponding columns in Google Sheets. This mapping ensures that every new form submission automatically populates the correct fields in your spreadsheet.


5. Testing the Integration

After setting up the workflow, it is crucial to test the integration to ensure everything works correctly. Fill out the form again with new data and submit it. Go back to Google Sheets to verify if the new submission appears as a new row.

If the data is successfully captured in Google Sheets, your integration is working perfectly. You can now automate the process of collecting form submissions and storing them in Google Sheets using Pabbly Connect. This setup saves time and reduces manual data entry errors.

Conclusion

This guide summarizes the key points and helps you understand the essential features and benefits of using this tool.

Ensure you check out Pabbly Connect to create business automation workflows and reduce manual tasks. Pabbly Connect currently offer integration with 2,000+ applications.


In conclusion, using Pabbly Connect to integrate Getform submissions with Google Sheets streamlines your data collection process. By following these steps, you can automate the flow of information efficiently.

Integrating Notion with OneDrive Using Pabbly Connect: A Step-by-Step Guide

Learn how to automate file uploads from Notion to OneDrive using Pabbly Connect. Follow our detailed tutorial for seamless integration. Follow this definitive guide to creating powerful automated workflows with straightforward, efficiency-focused solutions that save valuable time.

Watch Step By Step Video Tutorial Below


1. Accessing Pabbly Connect for Integration

To begin using Pabbly Connect, you first need to access the platform. Open your web browser and navigate to the Pabbly Connect website. Here, you will see options to sign in or sign up for a free account, which provides you with 100 tasks per month.

If you already have an account, simply log in. If not, click on the ‘Sign up for free’ button and follow the instructions to create your account. Once logged in, you will be directed to the dashboard where you can start creating your workflow.


2. Creating a Workflow in Pabbly Connect

Creating a new workflow in Pabbly Connect is essential for integrating Notion with OneDrive. Click on the ‘Create Workflow’ button on your dashboard. You will be prompted to name your workflow; for this integration, name it something descriptive like ‘Upload OneDrive Files from Notion Database’.

  • Click on ‘Create’ after selecting the appropriate folder for your workflow.
  • You will see two boxes: Trigger and Action.
  • Set up your trigger application first, which will be Notion.

After setting up your trigger, you will be able to define the action that occurs when the trigger event happens. This setup is crucial for the automation process.


3. Setting Up Trigger with Notion in Pabbly Connect

In this step, you will set up the trigger using Pabbly Connect. Select Notion as your trigger application and choose the event as ‘New Database Item’. This event will initiate the workflow whenever a new file is added to your Notion database.

Next, you will need to connect Notion to Pabbly Connect. Click on ‘Connect’ and then ‘Add New Connection’. Follow the prompts to allow access to your Notion account, and select the specific database you will be using for this integration.

After successfully connecting, you can now set up the details for your database. Make sure to select the correct page or database where new files will be uploaded. This setup ensures that any new file uploaded to Notion will trigger the automation.


4. Setting Up Action with OneDrive in Pabbly Connect

Once the trigger is set up, it’s time to define the action in Pabbly Connect. Search for Microsoft OneDrive as your action application and select the event ‘Upload File’. This will allow you to upload files to OneDrive whenever a new item is added in Notion.

To connect OneDrive, click on ‘Connect’ and then ‘Add New Connection’. Accept the permissions required for Pabbly Connect to access your OneDrive account. After connecting, select the folder in OneDrive where you want the files to be uploaded.

  • Choose the appropriate folder in OneDrive.
  • Map the filename and file URL from the Notion response.
  • Ensure all details are correctly mapped for real-time updates.

By completing these steps, you will ensure that every new file uploaded to Notion is automatically backed up in OneDrive, streamlining your workflow significantly.


5. Testing the Integration in Pabbly Connect

After setting up both the trigger and action, it’s important to test the integration using Pabbly Connect. Click the ‘Save and Send Test Request’ button to check if everything is working correctly. You should receive a response indicating that the file has been successfully uploaded to OneDrive.

To verify, go to your OneDrive account and refresh the folder where you set the files to be uploaded. You should see the new file that was uploaded from your Notion database. This confirms that the integration is working as intended.

Remember, if you don’t see the response immediately, it may take some time due to polling intervals. However, you can always reach out to Pabbly support for assistance if needed. This integration will help you maintain a centralized storage solution for all your project files.


Conclusion

In this tutorial, we explored how to use Pabbly Connect to integrate Notion with OneDrive effectively. By automating file uploads, you can enhance your project management and ensure that important documents are always backed up securely. Follow these steps to streamline your workflow and improve collaboration.

Ensure you check out Pabbly Connect to create business automation workflows and reduce manual tasks. Pabbly Connect currently offer integration with 2,000+ applications.

Integrating URL, The Happening, and Google Sheets with Pabbly Connect

Learn how to integrate URL, The Happening, Simply, Google Sheets, WhatsApp Cloud AP, and Action Now using Pabbly Connect in this detailed tutorial. Follow this definitive guide to creating powerful automated workflows with straightforward, efficiency-focused solutions that save valuable time.

Watch Step By Step Video Tutorial Below


1. Setting Up Pabbly Connect for Integration

To integrate URL, The Happening, Simply, Google Sheets, WhatsApp Cloud AP, and Action Now, we will use Pabbly Connect. First, log into your Pabbly Connect account. This platform acts as a bridge between different applications, allowing seamless data transfer.

Once logged in, you will see the dashboard. Click on the ‘Create Workflow’ button to start setting up your integration. Name your workflow appropriately to reflect the applications involved, such as ‘Event Registration Integration’.


2. Setting Up the Trigger in Pabbly Connect

In this section, we will set up the trigger for our workflow. The trigger will be based on the form submission from URL, specifically from The Happening. Select URL as your trigger application in Pabbly Connect.

  • Choose the trigger event as ‘New Submission’.
  • Copy the provided webhook URL from Pabbly Connect.
  • Log into your form creation tool (e.g., Form Crafts) and paste the webhook URL.

After pasting the URL, save the settings in your form tool. This will ensure that every time a form is submitted, the data will be sent to Pabbly Connect for processing.


3. Configuring the Action Step in Pabbly Connect

Next, we will configure the action step in Pabbly Connect. Here, we will choose Google Sheets to store the form submission data. Select Google Sheets as your action application.

In the action setup, choose the event to ‘Create Spreadsheet Row’. Connect your Google account to allow Pabbly Connect to access your Google Sheets. Once connected, select the specific spreadsheet where you want to store the responses.

Map the fields from the form submission to the corresponding columns in Google Sheets. This mapping ensures that the data is accurately recorded. After mapping, save your settings to finalize the action configuration.


4. Adding WhatsApp Cloud API for Notifications

To enhance your workflow, you can add an additional action to send notifications via WhatsApp. In this step, select WhatsApp Cloud API as another action in Pabbly Connect.

  • Choose the action event as ‘Send Message’.
  • Connect your WhatsApp account to Pabbly Connect.
  • Customize the message using data from the form submission.

This integration allows you to notify users instantly after they register for an event. Ensure that the message content is engaging and informative.


5. Testing the Integration Setup

After setting up both the trigger and actions, it’s essential to test the integration. Go back to your form and submit a test entry. This will help verify that data flows correctly through Pabbly Connect to Google Sheets and WhatsApp.

Once you submit the form, check Pabbly Connect to see if it captures the response. If everything is set up correctly, you should see the data in Google Sheets and receive a WhatsApp message confirming the registration.

This testing phase is crucial to ensure that your automation works flawlessly before going live. If any issues arise, revisit your setup in Pabbly Connect to troubleshoot.


Conclusion

In this tutorial, we explored how to integrate URL, The Happening, Simply, Google Sheets, WhatsApp Cloud AP, and Action Now using Pabbly Connect. This powerful integration streamlines your workflow and automates data handling effectively. With Pabbly Connect, you can enhance your event management processes seamlessly.

Ensure you check out Pabbly Connect to create business automation workflows and reduce manual tasks. Pabbly Connect currently offer integration with 2,000+ applications.

Integrating API, Mite, Commander, and More with Pabbly Connect

Learn how to seamlessly integrate API, Mite, Commander, and other applications using Pabbly Connect in this detailed step-by-step tutorial. Explore efficient methods for automating routine tasks with clear, concise instructions suited for both newcomers and experienced professionals.

Watch Step By Step Video Tutorial Below


1. Accessing Pabbly Connect for Integration

To start integrating API, Mite, and other applications, you first need to access Pabbly Connect. Open your web browser and go to the Pabbly Connect landing page. If you are a new user, click on ‘Sign up for free’ to create an account.

If you already have an account, simply click on ‘Sign in.’ This will take you to the dashboard where you can see all the tools offered by Pabbly. Click on ‘Access Now’ for Pabbly Connect to begin the integration process.


2. Creating a Workflow in Pabbly Connect

Once you are in Pabbly Connect, the next step is to create a workflow. Click on the ‘Create Workflow’ button. You will be prompted to name your workflow and select a folder for it. Enter a name like ‘Integrating API with Mite’ and choose the appropriate folder.

  • Click on ‘Create’ to open the workflow window.
  • This window will allow you to set up triggers and actions.

In this workflow, you will set a trigger application. For this integration, select API as your trigger application. Choose the event that will trigger the workflow, such as ‘New Entry’ from the API application.


3. Setting Up the Trigger with API

After selecting API as the trigger application in Pabbly Connect, you will need to connect your API account. Click on ‘Connect’ and then select ‘Add New Connection.’ Enter the required API key and domain from your API dashboard. This information is crucial for establishing a connection.

Once you have entered the details, click on ‘Save.’ You will then send a test request to confirm the connection is successful. If the connection works, you will see a confirmation message. This step ensures that Pabbly Connect can communicate with your API.


4. Setting Up Action with Mite in Pabbly Connect

Now, you will configure the action step in your workflow using Pabbly Connect. Select Mite as your action application. You will choose the action event, such as ‘Create or Update a Subscriber.’ Click on ‘Connect’ to link your Mite account.

  • If you have an existing connection, select it; otherwise, create a new one.
  • Enter the API token from your Mite account to establish the connection.

After connecting, map the fields from your API trigger to the Mite action. For example, map the subscriber’s email and name to ensure that the correct data is passed through. Click ‘Save and Send Test Request’ to verify that the integration works properly.


5. Testing and Verifying the Integration

Once you have set up both the trigger and action in Pabbly Connect, it’s time to test the integration. To do this, create a test entry in your API application. This will trigger the workflow you just set up.

After submitting a test entry, check your Mite account to see if the new subscriber has been created. You should see the subscriber’s details matching what you entered in the API application. This confirms that the integration is functioning correctly.

With this successful integration, you can now automate the process of adding new subscribers from your API application to Mite, enhancing your workflow efficiency.


Conclusion

This tutorial has demonstrated how to use Pabbly Connect to integrate API, Mite, and other applications effectively. By following these steps, you can automate processes and improve your business operations.

Ensure you check out Pabbly Connect to create business automation workflows and reduce manual tasks. Pabbly Connect currently offer integration with 2,000+ applications.

Integrate Facebook Lead Ads with Close CRM Using Pabbly Connect

Learn how to integrate Facebook Lead Ads with Close CRM using Pabbly Connect for seamless lead management. Step-by-step guide included! This comprehensive guide reveals exactly how to connect your applications and automate repetitive tasks — accessible for professionals of all technical backgrounds.

Watch Step By Step Video Tutorial Below


1. Accessing Pabbly Connect for Integration

To begin the integration process, access Pabbly Connect by navigating to the official website. Type ‘Pabbly.com/connect’ in your browser’s address bar to reach the landing page.

Once on the site, you will see options to sign in or sign up. If you are a new user, click on ‘Sign Up for Free’ to receive 100 free tasks monthly. Existing users should click ‘Sign In’ to access their dashboard and start creating workflows.


2. Creating a New Workflow in Pabbly Connect

After signing into Pabbly Connect, you will land on your dashboard. To create a new workflow, click on the ‘Create Workflow’ button. You will be prompted to name your workflow; name it ‘Add Facebook Lead Ads Lead to Close CRM’.

  • Click on the folder where you want to save the workflow.
  • Select the ‘Home’ folder and click ‘Create’.

After creating the workflow, you will see two boxes: one for the trigger and another for the action. Here, you will set up Facebook Lead Ads as the trigger application and Close CRM as the action application.


3. Setting Up Facebook Lead Ads as Trigger

In this section, you will set Facebook Lead Ads as the trigger in your Pabbly Connect workflow. Click on the trigger box and select ‘Facebook Lead Ads’. The trigger event will be ‘New Lead’. Click on ‘Connect’ to establish a connection.

After clicking ‘Add New Connection’, you will be prompted to authorize the connection. Once connected, select your Facebook page, which in this example is ‘Prime Properties’. Next, choose the lead form you want to use for capturing leads.


4. Setting Up Close CRM as Action

Now, you will configure the action step in your Pabbly Connect workflow. Select ‘Close CRM’ as the action application and choose ‘Create Lead’ as the action event. Click ‘Connect’ to link your Close CRM account.

  • You will need to enter your Close CRM API key to establish the connection.
  • Leave the password field blank and click ‘Save’.

Once the connection is successful, map the fields from your Facebook Lead Ads to Close CRM. For example, map the first name, last name, email, and phone number to their respective fields in Close CRM.


5. Testing the Integration

After setting up the action, it is time to test the integration. Fill out the lead form on your Facebook page with dummy data, such as a first name, last name, email, and phone number. Submit the form and return to Pabbly Connect to check if the response has been received.

If the test is successful, you will see the lead data captured in Pabbly Connect. Now, check your Close CRM account to confirm that the lead has been added. You should see the newly created lead with the details you submitted.


Conclusion

In this tutorial, we demonstrated how to integrate Facebook Lead Ads with Close CRM using Pabbly Connect. This integration allows for seamless lead management and quick follow-ups with potential clients. By automating this process, you can enhance your lead generation strategy effectively.

Ensure you check out Pabbly Connect to create business automation workflows and reduce manual tasks. Pabbly Connect currently offer integration with 2,000+ applications.

Generate & Sync WordPress Blogs with Google Blogger using Google Generative AI

Learn how to automate the generation and synchronization of WordPress blogs with Google Blogger using Pabbly Connect and Google Generative AI. Develop expertise in application integration and learn how to design streamlined automation workflows using proven, simplified approaches.

Watch Step By Step Video Tutorial Below


Accessing Pabbly Connect for Automation

To generate and sync WordPress blogs with Google Blogger using Pabbly Connect, start by accessing the Pabbly Connect platform. This integration tool allows you to automate processes without coding skills. First, visit the Pabbly Connect website and sign in to your account. If you are a new user, you can sign up for free and receive 100 free tasks each month. using Pabbly Connect

Once logged in, navigate to the Pabbly Connect dashboard. Here, click on the ‘Create Workflow’ button located at the top right corner. A dialog box will appear, prompting you to name your workflow. For this tutorial, name it ‘Generate and Sync WordPress Blogs with Google Blogger using Google Generative AI’. After naming, select the appropriate folder to save your workflow and click on the ‘Create’ button to initiate the automation process.


Setting Up the Trigger with Google Sheets

The next step in using Pabbly Connect is to set up the trigger application, which will be Google Sheets. This is where you will enter the titles of your blog posts. Click on the trigger application dropdown and select Google Sheets. Then, choose the trigger event as ‘New or Updated Spreadsheet Row’. This ensures that whenever you add a new title in your Google Sheets, it will trigger the automation process.

  • Select Google Sheets as the trigger application.
  • Choose ‘New or Updated Spreadsheet Row’ as the trigger event.
  • Copy the provided webhook URL for connecting Google Sheets to Pabbly Connect.

After copying the webhook URL, open your Google Sheets document where you have prepared the blog titles. Click on the ‘Extensions’ menu, select ‘Add-ons’, and then choose ‘Get Add-ons’. Search for ‘Pabbly Connect Webhooks’ and install it. Once installed, refresh your Google Sheets page and go back to the Extensions menu to select ‘Pabbly Connect Webhooks’ and click on ‘Initial Setup’. Paste the webhook URL into the dialog box and set the trigger column to the column where you will enter blog titles.


Generating Content Using Google Gemini

With the trigger set, the next step is to generate content using Google Gemini through Pabbly Connect. For this, you will create an action step. Select Google Generative AI as the action application and choose the action event as ‘Generate Content’. Click on the connect button to establish a connection.

To connect, you will need an API key from Google AI Studio. Click on the provided hyperlink to access Google AI Studio, then click on ‘Get API Key’ and create a new API key. Copy this key and paste it into Pabbly Connect. After saving the connection, you will need to set up the prompt for content generation. Use the title and keywords from the previous step to create a prompt that instructs Google Gemini on what content to generate.

  • Select Google Generative AI as the action application.
  • Choose ‘Generate Content’ as the action event.
  • Map the title and keywords from the previous step into the prompt.

Once the prompt is set, click on ‘Save and Send Test Request’. Pabbly Connect will send the prompt to Google Gemini, and you will receive the generated content in the response. This content will be formatted with HTML tags, suitable for posting on both WordPress and Google Blogger.


Posting to WordPress and Google Blogger

After generating the content, the next step is to post it on your WordPress account using Pabbly Connect. Add another action step and select WordPress as the application. Choose the action event as ‘Create a Post’. Click on the connect button and provide your WordPress credentials along with the base URL of your site.

Once connected, map the title and content generated from the previous step into the respective fields. Set the post status to draft if you want to review it before publishing. After filling in all required details, click on ‘Save and Send Test Request’. You should receive a positive response indicating that the post has been created in your WordPress account.

Select WordPress as the action application. Choose ‘Create a Post’ as the action event. Map the title and content from the previous step into the post fields.

To also post the content on Google Blogger, add another action step, select Google Blogger, and choose the action event ‘Create a Post’. Connect your Google Blogger account, and then map the title and content fields similar to the WordPress setup. After configuring everything, click on ‘Save and Send Test Request’ to create the post on your Blogger account.


Conclusion

This tutorial demonstrated how to automate the generation and synchronization of WordPress blogs with Google Blogger using Pabbly Connect and Google Generative AI. With the steps outlined, you can efficiently manage your blogging process, saving time and increasing productivity.

Ensure you check out Pabbly Connect to create business automation workflows and reduce manual tasks. Pabbly Connect currently offer integration with 2,000+ applications.

Automatically Post New RSS Feed to Discord Channel Using Pabbly Connect

Learn how to automatically post new RSS feed updates to your Discord channel using Pabbly Connect in this step-by-step tutorial. Follow this definitive guide to creating powerful automated workflows with straightforward, efficiency-focused solutions that save valuable time.

Watch Step By Step Video Tutorial Below


1. Introduction to Pabbly Connect for Discord Integration

In this tutorial, we will use Pabbly Connect to automatically post new RSS feed items to a Discord channel. This process is particularly useful for sports communities wanting to stay updated with the latest news and highlights.

By leveraging Pabbly Connect, we can seamlessly connect RSS feeds from sources like Times of India directly to our Discord channel. This integration ensures that every new article is instantly shared, keeping your community informed.


2. Setting Up Pabbly Connect for RSS Feed

To start using Pabbly Connect, navigate to the Pabbly homepage and sign in or create a new account. Once you are logged in, access the dashboard to begin creating your workflow.

  • Click on the ‘Create Workflow’ button in the top right corner.
  • Name your workflow, e.g., ‘Automatically Post New RSS Feed to Discord Channel’.
  • Select a folder for your workflow or create a new one as needed.

After creating your workflow, you will need to set up the trigger. Select ‘RSS by Pabbly’ as your trigger application and choose ‘New Item in Feed’ as the trigger event. This setting will allow Pabbly Connect to monitor the RSS feed for new updates.


3. Configuring the RSS Feed in Pabbly Connect

Next, you will need to enter the RSS feed URL from your chosen source, such as Times of India. Ensure that the feed URL corresponds to the sports category to receive relevant updates.

To configure the feed URL, follow these steps:

  • Copy the RSS feed URL from the Times of India sports section.
  • Paste the URL into the feed URL field in Pabbly Connect.
  • Select the filter type as ‘Default’.

After entering the feed URL and selecting the filter type, click on ‘Save and Send Test Request’ to verify the connection. If successful, you will receive a response containing the latest RSS feed details, confirming that your trigger is correctly set up.


4. Connecting Discord Channel to Pabbly Connect

Once your RSS trigger is set up, the next step is to configure the action, which involves connecting your Discord channel. In Pabbly Connect, select Discord as your action application.

Choose the action event as ‘Send Channel Message (HTML)’. To establish the connection, you will need to provide a webhook URL from your Discord channel. Here’s how to get it:

Go to your Discord channel settings and select ‘Integrations’. Click on ‘View Webhooks’ and create a new webhook. Copy the generated webhook URL and paste it into Pabbly Connect.

After entering the webhook URL, you can customize the message that will be sent to your Discord channel. Use dynamic mapping to include the link from the RSS feed in your message.


5. Finalizing the Integration and Testing

To finalize your integration in Pabbly Connect, ensure all fields are filled correctly. You can enter a custom message such as ‘Hello sports champions, check out this new RSS feed post!’ and map the link dynamically.

Once everything is set, click on ‘Save and Send Test Request’ to send a test message to your Discord channel. Check your Discord channel to confirm that the message has been received successfully. If the test is successful, your integration is complete!

With this setup, every time a new RSS item is published, it will automatically be posted to your Discord channel, keeping your community updated effortlessly. This integration showcases the power of Pabbly Connect in automating workflows across different platforms.


Conclusion

In this tutorial, we demonstrated how to use Pabbly Connect to automatically post new RSS feed updates to a Discord channel. By following the steps outlined, you can ensure that your community stays informed with the latest sports news seamlessly.

Ensure you check out Pabbly Connect to create business automation workflows and reduce manual tasks. Pabbly Connect currently offer integration with 2,000+ applications.

Top 5 Automations for Data Management with Pabbly Connect

Discover the top 5 automations for data management using Pabbly Connect, integrating various applications like Microsoft Excel, MySQL, and more for efficient workflows. Eliminate manual repetitive tasks from your workflow. Discover proven automation methods with intuitive steps designed for efficiency-minded professionals.

Watch Step By Step Video Tutorial Below


1. Accessing Pabbly Connect for Data Management

To begin utilizing Pabbly Connect for data management, first visit the Pabbly website and sign in to your account. If you’re a new user, you can sign up for free and receive 100 tasks every month. Once logged in, you’ll see the dashboard where you can create and manage your workflows.

Creating a workflow is straightforward. Click on the ‘Create Workflow’ button, name your workflow, and select a folder. This will set the stage for all your automations, which will streamline your data management processes across various applications.


2. Integrating Facebook Lead Ads with MySQL

In this section, we will explore how to integrate Facebook Lead Ads with MySQL using Pabbly Connect. The goal is to automatically add new leads from Facebook to a MySQL database. Start by selecting Facebook Lead Ads as your trigger application and choose the event ‘New Lead Instant’.

  • Select the Facebook page where your leads are generated.
  • Choose the lead gen form that you have created.
  • Click on ‘Save and Send Test Request’ to capture the lead’s details.

After capturing the response, set up the action step by selecting MySQL as the action application and choosing ‘Insert Row’ as the action event. Map the fields such as name, email, and phone number from the Facebook lead response to the corresponding fields in your MySQL database. Finally, click ‘Save and Send Test Request’ to confirm the successful insertion of data.


3. Recording Payments from Razorpay in MySQL

Next, we will set up an automation to record payment details from Razorpay into MySQL using Pabbly Connect. Begin by selecting Razorpay as the trigger application and choose ‘Payment Captured’ as the trigger event. This ensures that every time a payment is processed, the details will be captured.

  • Connect Razorpay by using the webhook URL provided by Pabbly Connect.
  • Capture the payment details including customer name, amount, and order ID.

After capturing the payment details, set the action application to MySQL and select ‘Insert Row’ as the action event. Map the required fields such as first name, last name, payment ID, and amount. Click ‘Save and Send Test Request’ to ensure the payment record is successfully created in your MySQL database.


4. Adding WooCommerce Order Details to Microsoft Excel

This section focuses on automating the process of adding WooCommerce order details to Microsoft Excel with Pabbly Connect. The trigger application is WooCommerce, and you will select ‘New Order Created’ as the trigger event. This captures every new order placed by customers.

To set this up, you need to connect WooCommerce to Pabbly Connect using the webhook URL. Once connected, you will receive a response containing order details like order ID, customer name, and total amount. Next, set the action application to Microsoft Excel and choose ‘Add Row to Worksheet’. Map the order details to the corresponding columns in your Excel sheet.

Upon clicking ‘Save and Send Test Request’, you will receive confirmation that the order details have been successfully added to your Excel workbook. This integration allows for seamless management of sales data.


5. Syncing Google Drive Files with Notion

Lastly, we will automate the process of syncing files from Google Drive to Notion using Pabbly Connect. Start by selecting Google Drive as the trigger application and choose ‘New File in Specific Folder’ as the trigger event to capture uploads.

After connecting Google Drive to Pabbly Connect, select the specific folder where you will upload files. Upon triggering, you will receive a response containing the file details. Set up the action application as Notion and select ‘Create Database Item’. Map the file link and file name to the corresponding fields in your Notion database.

Click ‘Save and Send Test Request’ to confirm that the file details have been successfully recorded in Notion. This automation helps in organizing your files efficiently across platforms.


Conclusion

In summary, utilizing Pabbly Connect can significantly enhance your data management processes through automation. By integrating applications like Microsoft Excel, MySQL, and others, you can streamline operations and save valuable time.

Ensure you check out Pabbly Connect to create business automation workflows and reduce manual tasks. Pabbly Connect currently offer integration with 2,000+ applications.