How to Create Mailchimp Subscriber from New Google Sheets Table Row Using Pabbly Connect

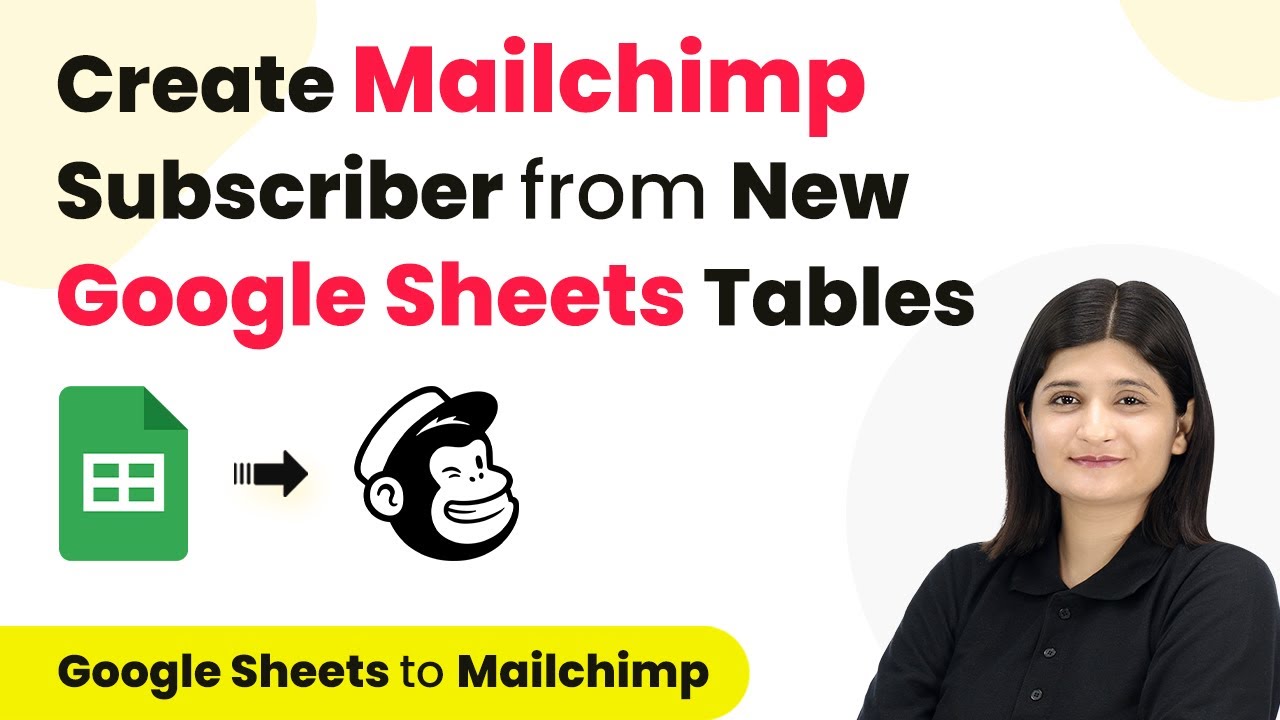
Learn to automate Mailchimp subscriber creation from Google Sheets using Pabbly Connect in this detailed tutorial. Step-by-step guide included. Explore systematic approaches to creating efficient automation solutions that convert technical concepts into practical, implementable instructions.

Watch Step By Step Video Tutorial Below


1. Accessing Pabbly Connect for Integration

To create a Mailchimp subscriber from a new Google Sheets table row, we start by accessing Pabbly Connect. This powerful integration tool allows us to automate workflows without any coding skills.

Visit the Pabbly Connect landing page by typing Pabbly.com/connect in your browser. If you’re new, sign up for a free account to get started. Existing users can simply click on ‘Sign In’ to access their dashboard.


2. Creating a Workflow in Pabbly Connect

After signing in, you will see your Pabbly Connect dashboard. Here, click on ‘Create Workflow’ to begin the automation process. Name your workflow, such as ‘Create Mailchimp Subscriber from New Google Sheets Row,’ and select a folder to save it in. using Pabbly Connect

  • Click on the plus icon to create a new folder if needed.
  • Select Google Sheets Automations for your workflow folder.

Once the workflow is created, you will see two boxes labeled ‘Trigger’ and ‘Action’. The trigger indicates when the automation starts, while the action is what happens next. For this integration, select Google Sheets as the trigger application.


3. Setting Up Google Sheets as the Trigger

In this step, we will configure Google Sheets as the trigger in Pabbly Connect. Choose the event ‘New or Updated Spreadsheet Row’ to initiate the workflow when a new row is added.

Next, you will need to connect your Google Sheets to Pabbly Connect. A webhook URL will be provided, which acts as a bridge between Google Sheets and Pabbly Connect. Copy this URL and prepare to paste it into Google Sheets.

  • Open Google Sheets and navigate to Extensions > Add-ons > Get Add-ons.
  • Search for ‘Pabbly Connect Webhooks’ and install it.
  • Refresh your Google Sheets after installation.

After installation, go back to Extensions, select Pabbly Connect Webhooks, and choose ‘Initial Setup’. Paste the webhook URL and specify the trigger column (e.g., Column D) for data entry.


4. Mapping Data from Google Sheets to Mailchimp

Now that we have set up Google Sheets as the trigger, we will proceed to map the data to Mailchimp using Pabbly Connect. Select Mailchimp as the action application and the event ‘Add New Member with Custom Fields’.

To connect Mailchimp to Pabbly Connect, you will need your Mailchimp API key. Log in to your Mailchimp account, navigate to your profile, and find the API key under Extras. Copy this key and paste it into Pabbly Connect.

Enter your Mailchimp API key and the data center (e.g., us6). Map the fields from Google Sheets to Mailchimp, such as email address, first name, and last name.

Once the mapping is complete, click on ‘Save and Send Test Request’ to ensure the data is correctly sent to Mailchimp. Check your Mailchimp account to confirm the new subscriber has been created.


5. Testing and Verifying the Integration

After setting up the integration, it’s crucial to test the workflow to ensure everything functions as expected. Go back to your Google Sheets and add a new subscriber’s details in the designated columns.

Once you enter the new data, return to Pabbly Connect. You should see a response indicating that the new subscriber has been successfully added to Mailchimp. Verify by checking your Mailchimp audience to confirm the new entry.

Ensure that the header row is in the first row of your Google Sheets. Refresh your Mailchimp audience page to see the new subscriber.

This testing phase ensures that your automation between Google Sheets and Mailchimp via Pabbly Connect is functioning correctly, allowing for seamless subscriber management.


Conclusion

In this tutorial, we explored how to create a Mailchimp subscriber from a new Google Sheets table row using Pabbly Connect. This integration automates the process, saving time and ensuring accurate data management.

Ensure you check out Pabbly Connect to create business automation workflows and reduce manual tasks. Pabbly Connect currently offer integration with 2,000+ applications.

With Pabbly Connect, you can effortlessly connect multiple applications, facilitating efficient workflows and enhancing your business operations.

How to Create HubSpot Contact on Weblium Form Submission Using Pabbly Connect

Learn how to create a HubSpot contact from Weblium form submissions using Pabbly Connect. Step-by-step guide to automate your workflow. This comprehensive guide reveals exactly how to connect your applications and automate repetitive tasks — accessible for professionals of all technical backgrounds.

Watch Step By Step Video Tutorial Below


1. Setting Up Pabbly Connect for HubSpot and Weblium Integration

To create a HubSpot contact on Weblium form submission, we start by accessing Pabbly Connect. This platform allows for seamless integration between Weblium and HubSpot CRM.

First, navigate to Pabbly Connect in your browser. If you are a new user, sign up for a free account to get started. Existing users can simply log in. Once logged in, you will see the dashboard where you can create a new workflow.


2. Creating a New Workflow in Pabbly Connect

In Pabbly Connect, click on the ‘Create Workflow’ button. You will be prompted to name your workflow. Enter a descriptive name such as ‘Create HubSpot Contact on Weblium Form Submission’. This helps in identifying the workflow later. using Pabbly Connect

  • Click on ‘Create’ to proceed.
  • You will be directed to the workflow window where you can set triggers and actions.

This window is crucial as it defines the trigger (Weblium form submission) and the action (creating a contact in HubSpot). Remember, Pabbly Connect allows for a single trigger with multiple actions.


3. Configuring the Trigger for Weblium Form Submission

Select Weblium as your trigger application in Pabbly Connect. For the trigger event, choose ‘New Form Submission’. This means that whenever a new form is submitted on your Weblium site, it will trigger the workflow. using Pabbly Connect

Once selected, Pabbly Connect will provide you with a webhook URL. Copy this URL as it will be used to connect your Weblium form to Pabbly Connect.

  • Log into your Weblium account.
  • Navigate to Site Settings and select Integrations.
  • Paste the copied webhook URL in the appropriate field and save.

After saving, ensure to publish your site to activate the webhook integration. This step is essential for Pabbly Connect to receive data from Weblium.


4. Testing the Integration with a Form Submission

With the webhook set up, it’s time to test the integration. Go back to your published Weblium site and fill out the form with test details. This is crucial as it allows Pabbly Connect to capture the data sent from the form submission. using Pabbly Connect

Submit the form and check back in Pabbly Connect. You should see a response indicating that the data has been captured successfully. This confirms that the trigger is working correctly.

Check for the test submission in the workflow response. If the details are displayed correctly, the integration is successful.

Once confirmed, you can move on to the action step where we will create a contact in HubSpot using the captured details.


5. Creating a HubSpot Contact from Pabbly Connect

Now, select HubSpot as your action application in Pabbly Connect. For the action event, choose ‘Create a Contact’. This action will automatically create a new contact in HubSpot whenever a form is submitted on Weblium. using Pabbly Connect

You will need to connect your HubSpot account with Pabbly Connect. Click on ‘Add New Connection’ and follow the prompts to authorize Pabbly Connect to access your HubSpot CRM account.

Fill in the required details such as email and phone number. Map the details from the previous step to ensure dynamic data insertion.

After setting up the contact details, click on ‘Save and Send Test Request’. If successful, you will see the new contact created in your HubSpot CRM. This confirms that the entire workflow is functioning as intended, with Pabbly Connect acting as the bridge between Weblium and HubSpot.


Conclusion

In this tutorial, we explored how to create a HubSpot contact on Weblium form submission using Pabbly Connect. By following the steps outlined, you can automate your lead generation process efficiently. This integration allows you to manage your leads effectively and enhance your marketing efforts.

Ensure you check out Pabbly Connect to create business automation workflows and reduce manual tasks. Pabbly Connect currently offer integration with 2,000+ applications.

Integrating Automation with WhatsApp Using Pabbly Connect: A Step-by-Step Guide

Learn how to integrate Automation with WhatsApp Using Pabbly Connect for sending notifications. This guide covers all essential steps and applications involved. Develop expertise in application integration and learn how to design streamlined automation workflows using proven, simplified approaches. with Pabbly Connect.

Watch Step By Step Video Tutorial Below


1. Setting Up Automation for WhatsApp Notifications

Automation is essential for sending timely WhatsApp notifications to your customers. By using Pabbly Connect, you can set up automated notifications without any coding skills. This process helps improve customer engagement and lead management.

To get started, visit the Pabbly Connect landing page. Click on ‘Sign Up for Free’ if you’re a new user, or ‘Sign In’ if you already have an account. New users receive 100 free tasks each month to explore the platform.


2. Sending WhatsApp Notifications to New Facebook Leads

Sending WhatsApp notifications to new Facebook leads is a powerful automation. Whenever someone fills out your Facebook lead form, Pabbly Connect sends an immediate WhatsApp message thanking them for their interest.

  • Set up a connection between Facebook Lead Ads and Pabbly Connect.
  • Use the WhatsApp Cloud API to send messages.
  • Customize messages with lead details for better engagement.

This automation allows you to send promotional offers and updates instantly. By doing so, you can increase the chances of converting leads into customers.


3. Automating SMS Appointment Reminders

Automating SMS appointment reminders is crucial for reducing no-shows in a dental clinic or similar businesses. Using Pabbly Connect, you can set up reminders that are sent 24 hours and 1 hour before the appointment.

To implement this automation, connect Google Sheets with Twilio, an SMS application. This setup will ensure that SMS notifications are sent automatically based on the scheduled appointment times.

  • Create a Google Sheet with patient appointment details.
  • Configure Twilio to send SMS messages.
  • Set triggers for sending reminders based on appointment times.

This automation ensures that your clients are reminded about their appointments, significantly reducing the chances of missed appointments.


4. Sending Cancellation Emails for WooCommerce Orders

Automating cancellation emails for WooCommerce orders is essential for maintaining customer trust. Whenever a customer cancels an order, Pabbly Connect can send an email confirming the cancellation and outlining the refund process.

Here’s how to set it up: connect WooCommerce to Gmail. When an order is updated in WooCommerce, an automated email will be sent to the customer.

Use WooCommerce’s order update trigger to initiate the workflow. Apply a filter to ensure emails are sent only for cancellations. Customize the email content for a more personal touch.

This automation keeps customers informed and reassured about their order status, enhancing their overall experience with your business.


5. Email Notifications for IndiaMart Leads

For B2B suppliers using IndiaMart, automating email notifications for new leads is crucial. Whenever a lead submits an inquiry, Pabbly Connect can send an immediate email response with product details and your contact information.

To set this up, connect IndiaMart to Gmail. Each inquiry submitted will trigger an automated email response, ensuring timely communication.

Configure the connection between IndiaMart and Gmail. Customize the email template to include product information. Ensure emails are sent immediately upon lead inquiry submission.

This automation guarantees that your leads receive prompt responses, helping to convert inquiries into sales.


Conclusion

Integrating Automation with WhatsApp using Pabbly Connect enhances customer communication and engagement. By automating notifications, you can streamline operations and improve customer satisfaction, ultimately leading to business growth.

Thanks for following along with this tutorial! Remember to subscribe to the channel for more helpful content like this.

If you found this guide useful, please consider giving it a thumbs up and sharing it with others who might benefit from it.

How to Send DocuSign Document on Google Forms Submission Using Pabbly Connect

Learn how to automate sending DocuSign documents upon Google Forms submission using Pabbly Connect. Step-by-step guide with detailed instructions. Eliminate manual repetitive tasks from your workflow. Discover proven automation methods with intuitive steps designed for efficiency-minded professionals.

Watch Step By Step Video Tutorial Below


1. Accessing Pabbly Connect for Automation

To automate sending a DocuSign document on Google Forms submission, first, access Pabbly Connect. Go to the Pabbly Connect homepage by typing the URL in your browser. Once there, you can either sign in if you’re an existing user or click on ‘Sign up for free’ to create a new account.

After signing up, you will receive 100 free tasks every month. Once logged in, you can navigate to the dashboard where all your workflows are displayed. Click on the ‘Create Workflow’ option to begin setting up your automation.


2. Creating the Workflow in Pabbly Connect

In this step, you will create a workflow in Pabbly Connect that connects Google Forms and DocuSign. After clicking on ‘Create Workflow’, a dialog box will prompt you to name your workflow. Name it ‘Send DocuSign Document on Google Form Submission’ and select a folder to save it.

  • Provide a clear name for your workflow.
  • Choose the appropriate folder for organization.

Once the workflow is created, you will see two windows: one for the trigger and one for the action. Select Google Forms as the trigger app and set the trigger event to ‘New Response Received’. This will initiate the automation whenever a response is submitted through your Google Form.


3. Linking Google Forms to Pabbly Connect

Next, you need to link your Google Form to Pabbly Connect. Go to your Google Form and navigate to the Responses section. Click on ‘Link to Sheets’ and create a new spreadsheet to store the responses. This allows Pabbly Connect to capture the data from the form submissions.

Ensure that the spreadsheet is linked correctly. Once a form is submitted, the data will populate in this spreadsheet. You will need to set up a webhook URL in Pabbly Connect to facilitate data transfer. Copy the webhook URL provided by Pabbly Connect and paste it into the Google Sheets add-on for Pabbly Connect Webhooks.


4. Setting Up the Action to Send DocuSign Document

After the Google Form is linked, the next step is to set up the action in Pabbly Connect. Select DocuSign as the action application and the action event as ‘Create Signature Request’. This allows you to send the lease agreement document for signature to the client.

  • Map the client’s name and email address from the Google Form response.
  • Set the email subject and message for the DocuSign request.

Once you have filled in the required fields, click on ‘Save and Send Test Request’. This will send a test email to ensure that the integration works correctly. If successful, the document will be sent to the client’s email for their signature.


5. Testing the Integration and Final Steps

Now that the workflow is set up, it’s time to test the integration. Submit a new response through your Google Form. Once submitted, check the linked Google Sheets to confirm that the data appears correctly. Then, verify that the DocuSign document is sent to the provided email address.

In this step, you can also implement a filter condition in Pabbly Connect to ensure that the document is only sent if the client agrees to receive it. This is done by checking the response to the question about receiving the document via email.

By following these steps, you can easily automate the process of sending DocuSign documents upon Google Forms submission using Pabbly Connect. This integration saves time and ensures that clients receive their lease agreements promptly.


Conclusion

In conclusion, using Pabbly Connect to send DocuSign documents on Google Forms submission is a straightforward process. By following the steps outlined, you can automate your workflow efficiently, ensuring timely document delivery to clients.

Ensure you check out Pabbly Connect to create business automation workflows and reduce manual tasks. Pabbly Connect currently offer integration with 2,000+ applications.

Automate Creative Newsletters with Pabbly Connect and Google Apps

Learn how to automate newsletter creation using Pabbly Connect, Google Sheets, and Google Docs. Step-by-step guide to streamline your marketing efforts! Develop expertise in application integration and learn how to design streamlined automation workflows using proven, simplified approaches.

Watch Step By Step Video Tutorial Below


1. Accessing Pabbly Connect to Automate Newsletters

To start automating your newsletter creation, you first need to access Pabbly Connect. This powerful integration platform allows you to connect various applications seamlessly. Visit the Pabbly Connect homepage by typing ‘Pabbly.com/connect’ in your browser.

Once on the homepage, you can either sign in if you have an existing account or click on the ‘Sign Up for Free’ option to create a new account. New users receive 100 free tasks per month, making it easy to explore the capabilities of Pabbly Connect.


2. Creating a Workflow in Pabbly Connect

After signing in, navigate to the dashboard of Pabbly Connect where you can manage all your workflows. Click on the ‘Create Workflow’ button to initiate a new automation. You will be prompted to enter a name for your workflow, such as ‘Automatically Generate Creative Newsletters with Google Gemini’.

  • Select a folder to save your workflow.
  • Click ‘Create’ to finalize the setup.

With your workflow created, you will see options for setting up triggers and actions. The trigger will define when the workflow starts, while actions will execute the tasks you want to automate using Pabbly Connect.


3. Setting Up Google Sheets as a Trigger

In this section, you will configure Google Sheets as the trigger application in Pabbly Connect. Select ‘Google Sheets’ as your trigger application and choose the trigger event ‘New or Updated Spreadsheet Row’. This means that whenever a new row is added to your Google Sheet, the workflow will initiate.

After selecting the trigger, you will be provided with a webhook URL. Copy this URL to set up the connection between Google Sheets and Pabbly Connect. In your Google Sheets, go to Extensions > Add-ons > Get Add-ons and search for the ‘Pabbly Connect Webhooks’ add-on to install it.


4. Connecting Google Gemini and Google Docs

Once the trigger is set up, the next step is to connect Google Gemini to generate content based on the data captured from Google Sheets. In Pabbly Connect, add Google Gemini as the action application and select the action event to generate content. You will need to connect using your API key from Google AI Studio.

After successfully connecting, map the title from the previous step to generate unique content. Once the content is generated, the next action will be to append this content into a Google Document. Select Google Docs as your next action application and choose the action event ‘Create a Blank Document’.

  • Map the document name with the title from Google Sheets.
  • Click ‘Save’ and send a test request to confirm the document creation.

This step ensures that every time a new title is added, a corresponding Google Document is created with the generated newsletter content.


5. Notifying Your Team via Google Chat

To complete the workflow, you can notify your team members via Google Chat when a new newsletter is ready. Add Google Chat as the final action application in Pabbly Connect. Select the action event ‘Create a Message’ and enter the chat webhook URL obtained from your Google Chat space.

Compose a message that informs your team about the newly created newsletter. This message will include the title of the newsletter, ensuring that your team is always updated. Click ‘Save’ and send a test request to check if the message is delivered successfully.

Once the setup is confirmed, your team will receive notifications automatically whenever a new newsletter is generated, streamlining the communication process. This entire automation significantly reduces manual work, allowing your marketing team to focus on content quality instead of logistics.


Conclusion

In this tutorial, you learned how to automate the creation of newsletters using Pabbly Connect, Google Sheets, and Google Docs. By following these steps, you can streamline your marketing efforts and ensure timely communication with your team. Automating this process not only saves time but also enhances the overall efficiency of your marketing strategy.

Ensure you check out Pabbly Connect to create business automation workflows and reduce manual tasks. Pabbly Connect currently offer integration with 2,000+ applications.

Integrating URL, Google Chat, and More Using Pabbly Connect: A Step-by-Step Guide

Learn how to integrate URL, Google Chat, Slack, Discord, and more using Pabbly Connect with this detailed tutorial. Follow the exact steps to enhance your workflow.

Watch Step By Step Video Tutorial Below


1. Setting Up Pabbly Connect for Integration

To integrate URL, Google Chat, and other applications, we first need to access Pabbly Connect. This platform serves as a bridge for connecting various applications seamlessly. Start by logging into your Pabbly Connect account and navigate to the workflows section.

Once in the workflows section, you can create a new workflow. This will allow you to set up a trigger and an action, which are the core components of any integration. The trigger will initiate the workflow, while the action will define what happens next.


2. Creating a Webhook in Freshdesk

The next step involves creating a webhook in Freshdesk, which will send data to Pabbly Connect. Log into your Freshdesk account and go to the Admin section. From the left sidebar, click on ‘Workflows’ and then ‘Automation’.

  • Select ‘New Rule’ to create a new automation rule.
  • Name your rule appropriately, such as ‘New Ticket Notification’.
  • Set conditions based on ticket properties, like subject or priority.

After setting conditions, choose ‘Webhook’ as the action and paste the webhook URL provided by Pabbly Connect. This integration will allow Freshdesk to communicate with Pabbly Connect whenever a new ticket is created.


3. Triggering and Testing the Integration

After setting up the webhook, it’s crucial to test the integration. Go back to Pabbly Connect and check if it is waiting for a webhook response. To test, create a new ticket in Freshdesk that meets the conditions set earlier.

Once the ticket is created, Pabbly Connect should capture the data from Freshdesk. You can view the captured data, including ticket ID, subject, and description. This confirms that the integration is functioning correctly.


4. Notifying Teams Using Google Chat

Now that data is captured in Pabbly Connect, you can set up an action to notify your team via Google Chat. In your Pabbly Connect workflow, select Google Chat as the action application.

  • Authenticate your Google Chat account in Pabbly Connect.
  • Choose the appropriate channel where notifications should be sent.
  • Customize the message format to include ticket details.

With this setup, every time a new ticket is created in Freshdesk, a notification will be sent to your team in Google Chat, ensuring everyone is informed about new issues promptly.


5. Expanding Notifications to Other Apps

Besides Google Chat, you can expand your notifications to other applications like Slack and Discord using Pabbly Connect. The process is similar to what you did for Google Chat.

Simply add additional actions in your Pabbly Connect workflow for Slack or Discord. Authenticate these applications and set up the message format to include relevant ticket details. This flexibility allows you to keep your entire team updated across multiple platforms.


Conclusion

This tutorial demonstrated how to use Pabbly Connect to integrate URL, Google Chat, and other applications effectively. By setting up webhooks and notifications, you can streamline your support processes and enhance team communication.

Ensure you check out Pabbly Connect to create business automation workflows and reduce manual tasks. Pabbly Connect currently offer integration with 2,000+ applications.

Integrating Forum with Pabbly Connect for Seamless Data Management

Learn how to integrate Forum with Pabbly Connect for efficient data management through webhooks. Follow this step-by-step tutorial to automate your workflows. Master proven automation processes with practical implementation examples and strategic recommendations you can apply immediately in your workflow.

Watch Step By Step Video Tutorial Below


1. Introduction to Forum and Pabbly Connect

In this section, we will discuss how Pabbly Connect facilitates the integration of Forum, an online form builder, for seamless data collection. Forum allows users to create and manage forms effectively, making it an essential tool for businesses.

Using Pabbly Connect, businesses can automate data collection from their forms. This integration helps in reducing manual entry errors and streamlining data management processes. By utilizing Forum with Pabbly Connect, users can enhance their operational efficiency and data handling capabilities.


2. Setting Up Webhook in Forum Using Pabbly Connect

To set up the webhook in Forum using Pabbly Connect, first log into your Forum account. Once logged in, select the form you wish to connect, which we will refer to as the lead form. This is where you will set up the webhook integration.

  • Click on the ‘Workflows’ option in the top left corner.
  • Select ‘Create’ to set up a new webhook.
  • Name your webhook (e.g., Test Webhook) and paste the URL provided by Pabbly Connect.
  • Choose the trigger event as ‘New Submission’.

After completing these steps, click on ‘Create’ to finalize the webhook setup. This allows Pabbly Connect to capture responses from your form submissions automatically.


3. Testing the Webhook Setup in Pabbly Connect

Once the webhook is set up, it’s time to test if Pabbly Connect captures the form submissions correctly. Open the lead form and fill it out with test data. For instance, enter a first name, last name, email, and phone number.

After filling out the form, click on the ‘Submit’ button. You should see a confirmation message indicating that your response has been recorded. Now, return to your Pabbly Connect dashboard to check if the response has been captured.

  • Wait a few seconds for Pabbly Connect to process the submission.
  • Check the captured response details for accuracy.

Ensure that the response matches the data you submitted. This confirms that the integration between Forum and Pabbly Connect is functioning correctly.


4. Creating Action Steps in Pabbly Connect

After successfully testing the webhook, you can now create action steps in Pabbly Connect. These actions can include sending notifications or recording data in Google Sheets. This flexibility allows you to customize your workflow based on your requirements.

To set up actions, navigate to your Pabbly Connect dashboard and choose the action application. You can select from various platforms such as Slack, Discord, or Google Sheets to automate your workflow further.

Select the action application (e.g., Google Sheets). Choose the action event, such as ‘Create Spreadsheet Row’. Map the fields from Forum to the corresponding columns in Google Sheets.

After setting up the action, click on ‘Save’ to implement your automated workflow. This integration enhances your data management process using Pabbly Connect.


5. Conclusion: Streamlining Data Management with Pabbly Connect

In conclusion, integrating Forum with Pabbly Connect allows for seamless data management and automation. By setting up webhooks and action steps, businesses can efficiently capture and manage form submissions.

Ensure you check out Pabbly Connect to create business automation workflows and reduce manual tasks. Pabbly Connect currently offer integration with 2,000+ applications.

This integration not only saves time but also reduces errors associated with manual data entry. Utilizing Pabbly Connect enhances operational efficiency and ensures that data is processed accurately and promptly.


Automatically Create & Schedule Blogs in Shopify using Google Gemini with Pabbly Connect

Learn how to automate blog creation and scheduling in Shopify using Google Gemini and Pabbly Connect. Follow this step-by-step tutorial for seamless integration. Develop expertise in application integration and learn how to design streamlined automation workflows using proven, simplified approaches.

Watch Step By Step Video Tutorial Below


1. Accessing Pabbly Connect for Integration

To automate the creation and scheduling of blogs in Shopify using Google Gemini, first, you need to access Pabbly Connect. Start by visiting the Pabbly Connect website and signing in to your account. If you are new, you can sign up for free and enjoy 100 free tasks every month.

Once logged in, you will see the dashboard of Pabbly Connect. Here, click on the option to create a new workflow. This is where you will set up the automation that links Google Gemini and Shopify through Google Sheets.


2. Creating a Workflow in Pabbly Connect

In Pabbly Connect, once you click on ‘Create Workflow’, a dialog box will prompt you to name your workflow. Name it something descriptive, like ‘Automatically Create and Schedule Blogs in Shopify using Google Gemini’. Then, select the appropriate folder for organization.

  • Name your workflow clearly for easy identification.
  • Choose a folder where the workflow will be saved.

Click ‘Create’ to finalize your workflow setup. Now, you will see two main sections: Trigger and Action. The Trigger defines what starts the workflow, while Action determines what happens as a result.


3. Setting Up the Trigger in Pabbly Connect

For this automation, we need to set up a trigger in Pabbly Connect. Click on the trigger application and select ‘Schedule by Pabbly’. This allows you to run the workflow daily, checking for blog titles to be published.

Set the trigger event to ‘Schedule Workflow’, and specify that you want this workflow to run every day at 12:00 PM. This ensures that your blog titles from Google Sheets will be checked daily for publishing on Shopify.

  • Select ‘Schedule by Pabbly’ as the trigger application.
  • Set the trigger event to ‘Schedule Workflow’.
  • Choose the time for the workflow to run daily.

After saving the trigger settings, your workflow is now configured to check for blog titles based on the current date.


4. Action Steps for Blog Content Generation

Next, we need to set up the action steps in Pabbly Connect. The first action is to retrieve the current date using the ‘Date/Time Formatter’ by Pabbly. This is essential for comparing against the dates listed in your Google Sheets.

Once you have the current date, the next action is to look up the relevant blog titles in Google Sheets. Use the ‘Google Sheets’ application and select ‘Lookup Spreadsheet Rows V2’ as the action event. Connect your Google Sheets account to Pabbly Connect and choose the spreadsheet that contains your blog titles and publishing dates.

Use ‘Date/Time Formatter’ to get the current date. Select ‘Lookup Spreadsheet Rows V2’ in Google Sheets. Map the current date to look up blog titles.

After mapping the data, you can process the results to generate blog content using Google Gemini.


5. Generating Blog Content and Publishing to Shopify

Now that we have the blog titles, we can generate content using Google Gemini. In Pabbly Connect, add an action step for Google Gemini and select ‘Generate Content’ as the action event. Connect your Google Gemini account by providing the required API key.

Map the title from the previous step as the prompt for content generation. Once the content is generated, add another action to publish the blog in Shopify by selecting ‘Create Blog Entry’. Connect your Shopify account and map the necessary fields such as blog title, content, and author.

Select ‘Generate Content’ in Google Gemini for the content creation step. Map the title to generate relevant blog content. Use ‘Create Blog Entry’ in Shopify to publish the blog.

After reviewing the generated content, you can choose whether to publish it immediately or keep it as a draft for later review.


Conclusion

By following this tutorial, you can effectively automate the creation and scheduling of blogs in Shopify using Google Gemini and Pabbly Connect. This integration streamlines your blogging process, enhancing customer engagement with minimal manual effort.

Ensure you check out Pabbly Connect to create business automation workflows and reduce manual tasks. Pabbly Connect currently offer integration with 2,000+ applications.

How to Send Dropbox Sign Signature Request on Elementor Form Submission Using Pabbly Connect

Learn how to automate sending Dropbox Sign signature requests from Elementor form submissions using Pabbly Connect. Follow our step-by-step tutorial for seamless integration. Eliminate manual repetitive tasks from your workflow. Discover proven automation methods with intuitive steps designed for efficiency-minded professionals.

Watch Step By Step Video Tutorial Below


Accessing Pabbly Connect for Integration

To send a Dropbox Sign signature request upon Elementor form submission, first, access Pabbly Connect. Open your browser and type in the URL for Pabbly Connect. This platform enables seamless integration between various applications, including Elementor and Dropbox Sign.

If you don’t have an account, click on the ‘Sign Up for Free’ button. This process is quick and provides you with 100 free tasks each month. Once logged in, navigate to the dashboard to start creating your workflow.


Creating a Workflow in Pabbly Connect

After accessing Pabbly Connect, click on ‘Create Workflow’ to begin setting up your integration. Name your workflow according to your objective, such as ‘Send Dropbox Sign Signature Request on Elementor Form Submission.’ This naming helps in identifying your workflow later.

In the workflow setup, you’ll see two sections: Trigger and Action. The Trigger is what initiates the workflow. For this integration, select ‘Elementor Form’ as your trigger application. The Trigger Event will be ‘New Form Submission.’ This setup ensures that each time a form is submitted, the workflow activates.

  • Click ‘Create’ to save your workflow.
  • Choose ‘Elementor Form’ as your trigger application.
  • Set the Trigger Event to ‘New Form Submission.’

Once these steps are completed, you have successfully set up the trigger for your workflow in Pabbly Connect.


Connecting Elementor Form to Pabbly Connect

Next, you need to connect your Elementor Form to Pabbly Connect. To do this, you will use a webhook URL provided by Pabbly. Copy the webhook URL from your Pabbly Connect dashboard.

Now, go to your WordPress site and edit the Elementor form. In the form settings, find the ‘Actions After Submit’ section. Click on the plus icon to add a new action and select ‘Webhook’. Paste the copied webhook URL into the designated field and enable the Advanced Data option before updating the form.

  • Edit your Elementor form in WordPress.
  • Add a new action under ‘Actions After Submit’ and select ‘Webhook’.
  • Paste the webhook URL and enable Advanced Data.

This connection allows your Elementor form to send data to Pabbly Connect whenever a form submission occurs, initiating the next steps in your workflow.


Setting Up Action in Pabbly Connect

With the trigger and Elementor form connected, it’s time to set up the action in Pabbly Connect. Here, you will select Dropbox Sign as your action application. The action event should be set to ‘Send Signature Request from Template.’ This action will send a signature request to the employee based on the form submission data.

To connect Dropbox Sign to Pabbly Connect, click on ‘Add New Connection’ and enter your API key and password from your Dropbox Sign account. After connecting, choose the relevant template for the signature request, which in this case is the NDA template you created earlier.

Select Dropbox Sign as the action application. Set the action event to ‘Send Signature Request from Template.’ Enter your Dropbox Sign API key and password.

Completing these steps ensures that every form submission triggers a signature request to the appropriate employee using Pabbly Connect.


Testing the Integration with Pabbly Connect

To ensure everything is working correctly, test the integration by submitting a new form through your Elementor form. Fill in the required fields with dummy data, such as employee name, email, phone number, and department. Once you submit the form, Pabbly Connect should receive the data and trigger the Dropbox Sign action.

Check your email for the signature request. You should receive an email containing the NDA signature request, confirming that the integration is functioning as intended. If everything is set up correctly, you will be able to sign the NDA document and be redirected back to Pabbly Connect.

Submit a new form with dummy data. Check your email for the signature request. Sign the NDA and ensure redirection to Pabbly Connect.

By following these testing steps, you can verify that Pabbly Connect successfully automates the process of sending Dropbox Sign signature requests upon Elementor form submissions.


Conclusion

This tutorial demonstrated how to send Dropbox Sign signature requests using Pabbly Connect on Elementor form submissions. By automating this process, you can streamline your onboarding workflow and enhance efficiency. Integrating these applications with Pabbly Connect ensures a smooth and error-free experience for both HR managers and new employees.

Ensure you check out Pabbly Connect to create business automation workflows and reduce manual tasks. Pabbly Connect currently offer integration with 2,000+ applications.

Automate Sharing Blogger Posts to Social Media with Pabbly Connect

Learn how to automate sharing your Google Blogger posts to Facebook and LinkedIn using Pabbly Connect. Step-by-step guide for seamless integration. Transform complex automation concepts into accessible, actionable steps that eliminate unnecessary manual work while maximizing existing application capabilities.

Watch Step By Step Video Tutorial Below


1. Accessing Pabbly Connect for Integration

To start automating the sharing of your Blogger posts, you need to access Pabbly Connect. This platform allows seamless integration between various applications, including Google Blogger, Facebook, and LinkedIn. First, navigate to the Pabbly Connect website and sign in or create a new account.

Once logged in, you will see the Pabbly Connect dashboard. Here, you can create workflows to automate your tasks. For new users, Pabbly Connect offers 100 free tasks every month, making it easy to get started without any cost.


2. Creating a Workflow in Pabbly Connect

Creating a workflow in Pabbly Connect is essential for automating your Blogger posts. Click on the ‘Create Workflow’ button located in the top right corner of the dashboard. A dialog box will appear, prompting you to name your workflow.

  • Name your workflow as ‘Automatically Share Blogger Post to Social Media’.
  • Select a folder to save your workflow, such as ‘Google Blogger Automations’.

After naming and selecting the folder, click on the ‘Create’ button. This action sets up your workflow, which consists of a trigger and an action. The trigger will be when a new post is added to your Google Blogger account.


3. Setting Up Trigger for Google Blogger

The next step involves setting up the trigger in Pabbly Connect. Click on the trigger application dropdown and select ‘Google Blogger’. This integration allows Pabbly Connect to monitor your Blogger account for new posts.

For the event, choose ‘New Post Added’. This will ensure that whenever you publish a new blog post, Pabbly Connect captures the event. Connect your Google Blogger account by clicking on ‘Connect’ and following the authentication steps.

  • Authorize Pabbly Connect to access your Google Blogger account.
  • Select the blog ID and set the status to ‘Only Live’ to capture only published posts.

After completing these steps, click on ‘Save and Send Test Request’ to verify that Pabbly Connect successfully captures the new post data from your Blogger account.


4. Setting Up Actions for Facebook and LinkedIn

Now that your trigger is set up in Pabbly Connect, it’s time to configure the actions. Start by adding an action step for Facebook. Select ‘Facebook Pages’ as the action application and choose ‘Create Page Photo Post’ as the action event. This will allow you to share your Blogger post on your Facebook page.

After connecting your Facebook account, select the page where you want to post the content. Map the photo URL from the previous step to include an image from your Blogger post. You can also add a description that includes the title and URL of your blog.

Map the image URL from the Blogger post to the Facebook post. Add the title and URL of the blog in the description field.

Click ‘Save and Send Test Request’ to ensure the post is successfully created on your Facebook page. Repeat this process for LinkedIn by selecting ‘LinkedIn’ as the action application and using the ‘Share Text with Image’ event.


5. Testing and Verifying the Automation

After setting up both actions in Pabbly Connect, it’s crucial to test the entire automation process. Publish a new blog post on your Google Blogger account. Once published, return to Pabbly Connect and click on ‘Save and Send Test Request’ for each action step to confirm that the posts are shared on Facebook and LinkedIn.

Check your social media accounts to verify that the posts appear as expected. You should see the title, content, and image from your Blogger post shared on both platforms. This confirms that Pabbly Connect has successfully automated the sharing process.

Make any necessary adjustments to the mapping fields or settings if the test does not produce the desired results. Once confirmed, your automation will run seamlessly every time you publish a new blog post.


Conclusion

By utilizing Pabbly Connect, you can automate the sharing of your Google Blogger posts to social media platforms like Facebook and LinkedIn. This integration saves time and enhances engagement with your audience, ensuring your content reaches them instantly.

Ensure you check out Pabbly Connect to create business automation workflows and reduce manual tasks. Pabbly Connect currently offer integration with 2,000+ applications.