How to Share New Videos from YouTube Channel on Facebook Page Using Pabbly Connect

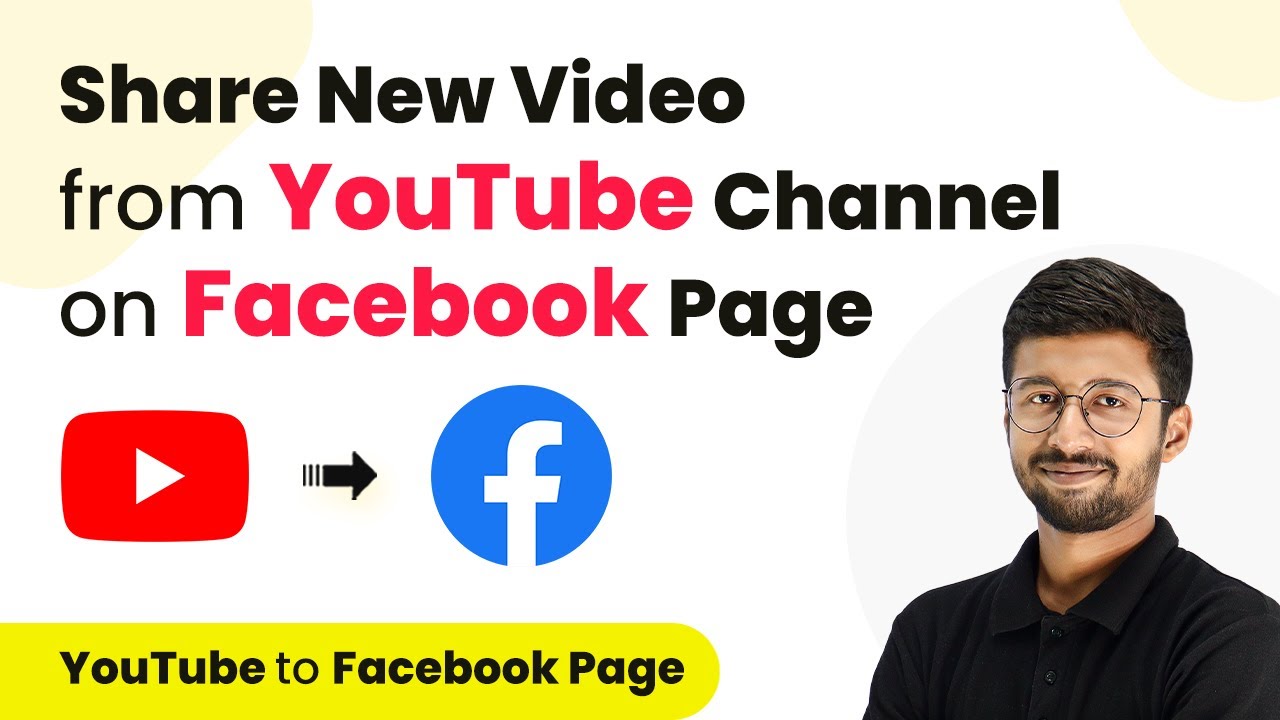
Learn how to automate sharing new YouTube videos on your Facebook page using Pabbly Connect. Step-by-step guide to streamline your video sharing process. Navigate the automation landscape confidently with clear, structured guidance suitable for professionals regardless of prior technical experience.

Watch Step By Step Video Tutorial Below


1. Accessing Pabbly Connect for Video Sharing

To share new videos from your YouTube channel on your Facebook page, you need to access Pabbly Connect. This integration platform allows seamless automation between various applications. Start by visiting your browser and entering the URL: Pabbly.com/connect.

Once on the Pabbly Connect landing page, you will see options to sign in or sign up. If you are new, click on ‘Sign Up for Free’ to create an account. Existing users can simply sign in to access the dashboard, where you will be able to create a new workflow for your automation.


2. Creating a Workflow in Pabbly Connect

After signing in to Pabbly Connect, click on the ‘Create Workflow’ button. Name your workflow, for instance, ‘YouTube to Facebook Page.’ Choose the appropriate folder in your Pabbly account to save this automation.

  • Click on ‘Create’ to open the workflow.
  • You will see two main sections: Trigger and Action.
  • The Trigger section is where you will set up the YouTube integration.

In the Trigger section, select ‘YouTube’ as the app. From the dropdown, choose ‘New Video in Channel’ as the trigger event. This setup ensures that every time a new video is published, Pabbly Connect captures the relevant details.


3. Connecting Your YouTube Channel to Pabbly Connect

To connect your YouTube channel, click on ‘Connect’ and then select ‘Add New Connection.’ This will prompt you to log in to your YouTube account. After logging in, grant the necessary permissions to allow Pabbly Connect to access your channel.

Once connected, you will need to select the channel ID from the dropdown list if you manage multiple channels. Choose the relevant channel and click on ‘Save and Send Test Request.’ This action fetches the latest video details from your YouTube channel into Pabbly Connect.


4. Posting the Video on Facebook via Pabbly Connect

Now that your YouTube channel is connected, it’s time to set up the action to post on Facebook. In the Action section, search for ‘Facebook Pages’ and select it. From the action event dropdown, choose ‘Create Page Post.’ This step allows you to share the video details on your Facebook page. using Pabbly Connect

  • Click ‘Connect’ and then ‘Add New Connection’ to link your Facebook account.
  • Once connected, select the Facebook page where you want to share the video.
  • Craft your message for the post, including the video title and a link to the video.

Use the mapping feature to insert the video title and URL from the trigger step into your Facebook post. After filling out the necessary fields, click on ‘Save and Send Test Request’ to create a test post on your Facebook page.


5. Testing the Automation Workflow

After setting up your workflow, it’s crucial to test it. Publish a new video on your YouTube channel and wait for about 10 minutes. During this time, Pabbly Connect will check for new videos every 10 minutes due to its polling mechanism.

After waiting, refresh your Facebook page to see if the new post has been created. You should see the post with the video title, description, and a link to the video. This confirms that the automation is functioning correctly, allowing you to share your YouTube videos on Facebook effortlessly.


Conclusion

In summary, using Pabbly Connect to automate sharing new videos from your YouTube channel to your Facebook page simplifies your workflow. This integration ensures your audience stays updated with your latest content without manual effort. Try it today for a seamless experience!

Ensure you check out Pabbly Connect to create business automation workflows and reduce manual tasks. Pabbly Connect currently offer integration with 2,000+ applications.

Automate SOP Documentation with Pabbly Connect: A Step-by-Step Guide

Learn how to automate SOP documentation using Pabbly Connect with Google Sheets and Gmail without coding. Follow our detailed tutorial for seamless integration. Discover how to seamlessly connect your essential tools through accessible instructions that make powerful automation available to professionals at every skill level.

Watch Step By Step Video Tutorial Below


1. Accessing Pabbly Connect for Automation

To begin automating SOP documentation, access Pabbly Connect through your web browser. You can reach the homepage by entering the URL Pabbly.com/connect. Once on the homepage, you will find options to sign in or sign up for a new account.

If you are a new user, click on the ‘Sign Up for Free’ button to create an account. Existing users can simply click on ‘Sign In’. After signing in, you will have access to the dashboard where you can manage your workflows. This is where the automation begins.


2. Creating a New Workflow in Pabbly Connect

In this section, we will create a new workflow in Pabbly Connect. To do this, click on the ‘Create Workflow’ button on your dashboard. A dialog box will appear asking for a name for your workflow. Enter ‘Automate SOP Documentation’ and select the folder where you want to save this workflow.

  • Click on ‘Create’ after naming your workflow.
  • You will see two windows: Trigger and Action.
  • Select Google Sheets as the Trigger application and Gmail as the Action application.

Understanding the trigger and action is crucial for setting up your automation. The trigger will activate when a new row is added to Google Sheets, and the action will send an SOP document via Gmail to the new employee.


3. Setting Up Google Sheets with Pabbly Connect

To set up the connection between Google Sheets and Pabbly Connect, select Google Sheets as your trigger application. Choose the trigger event as ‘New or Updated Spreadsheet Row’. This event will trigger the workflow whenever a new row is added to your spreadsheet.

Next, you will see a Webhook URL provided by Pabbly Connect. Copy this URL as it will be used to connect Google Sheets to Pabbly Connect. Now, go to your Google Sheets and navigate to Extensions > Add-ons > Get Add-ons to install the Pabbly Connect Webhooks add-on.

  • Search for ‘Pabbly Connect Webhooks’ and install it.
  • After installation, go back to your spreadsheet and refresh it.
  • Select ‘Initial Setup’ and paste the Webhook URL you copied earlier.

Set the trigger column to the last column containing data. Once set, click on ‘Send Test’ to ensure the connection is successful. If everything is configured correctly, you will see a success message in Pabbly Connect.


4. Integrating Gmail with Pabbly Connect

Now that Google Sheets is connected, it’s time to set up Gmail as the action application in Pabbly Connect. Select Gmail and choose the action event ‘Send Email’. You can either create a new connection or use an existing one. If creating a new connection, follow the prompts to authorize Pabbly Connect to access your Gmail account.

Once connected, you will need to fill in the email details. Map the recipient’s email address from the Google Sheets response so that it dynamically updates with each new row added. Enter a sender name, subject, and email content. You can customize the email content using mapped fields for personalization.

Set the email subject as ‘Standard Operating Procedure for [Company Name]’. Include a message body that greets the new employee. Attach the SOP document link in the email.

After entering all the required information, click ‘Save’ and send a test email to ensure everything works correctly. Check the recipient’s inbox to confirm the email was successfully sent.


5. Testing the Automation Workflow

With both Google Sheets and Gmail integrated through Pabbly Connect, it’s time to test the automation. Add a new row in your Google Sheets with the new employee’s details. Ensure that the information is complete up to the trigger column.

Once you add the new row, Pabbly Connect will automatically capture this data and trigger the email action. Check the Gmail inbox of the new employee to confirm that they received the SOP document successfully.

This automation allows you to streamline the onboarding process for new employees without any manual efforts. You can modify the email content or spreadsheet structure as needed to fit your organization’s requirements.


Conclusion

In this tutorial, we demonstrated how to automate SOP documentation using Pabbly Connect with Google Sheets and Gmail. By following these steps, you can efficiently send SOP documents to new employees without any coding skills. This automation not only saves time but also ensures consistency in onboarding processes.

Ensure you check out Pabbly Connect to create business automation workflows and reduce manual tasks. Pabbly Connect currently offer integration with 2,000+ applications.

Automate Tweeting from RSS Feeds with Pabbly Connect: A Step-by-Step Guide

Learn how to automate tweeting from RSS feeds using Pabbly Connect in this comprehensive step-by-step tutorial. Streamline your social media updates effortlessly! Master proven automation processes with practical implementation examples and strategic recommendations you can apply immediately in your workflow.

Watch Step By Step Video Tutorial Below


1. Accessing Pabbly Connect for Automation

To automate tweeting from RSS feeds, the first step is to access Pabbly Connect. You can do this by opening a new tab and searching for Pabbly Connect. Once on the landing page, you will see options to sign in or sign up for free.

If you don’t have an account, click on the ‘Sign up for free’ button. This process is quick and will give you 100 free tasks every month. If you are already a user, simply sign in to access the dashboard.


2. Creating a Workflow in Pabbly Connect

After signing in, you will be directed to the Pabbly Connect dashboard. Here, you can create a new workflow by clicking on the ‘Create Workflow’ button. A window will pop up asking you to name your workflow. using Pabbly Connect

  • Name your workflow, for example, ‘Automate Tweeting from RSS Feeds’.
  • Select the folder where you want to save this workflow.
  • Click on ‘Create’ to proceed.

Once created, you will see two main sections: Trigger and Action. The trigger is the event that starts the workflow, and the action is what happens as a result. For this automation, your trigger will be set to RSS by Pabbly.


3. Setting Up the Trigger in Pabbly Connect

In the trigger application, select RSS by Pabbly and then choose the trigger event. The event will be ‘New Item in Feed’. Click on connect to establish the connection between RSS and Pabbly Connect.

Next, you will need the RSS feed URL. For this tutorial, we will use the NDTV RSS feed. Copy the feed URL from the NDTV cricket news section and paste it into the feed URL field in Pabbly Connect. Choose the default filter type for the RSS feed.

  • Click on ‘Send Test’ to receive a response from the feed.
  • You should see the latest RSS feed news details.

This setup ensures that whenever there is an update in the RSS feed, Pabbly Connect will capture the details and prepare them for tweeting.


4. Setting Up the Action in Pabbly Connect

Now that the trigger is set, the next step is to configure the action application. In this case, the action application will be X (formerly known as Twitter). Select the action event as ‘Create Tweet’ and connect your X account with Pabbly Connect.

You will need to provide your client ID and client secret to authorize the connection. Access your X developer portal to find these credentials. After copying the client ID and client secret back into Pabbly Connect, click ‘Save’ to authorize the connection.

Create a message for your tweet, such as ‘Just dropped a fresh update on my RSS feed!’ Map the title and link of the news from the RSS feed to your tweet.

After filling in the necessary details, click on ‘Save and Send Test’. This will send a test tweet to your X account, confirming that the connection and automation are working correctly.


5. Testing and Verifying the Tweet in Pabbly Connect

Once you have set everything up, it’s time to test the integration. Go to your X account and refresh the page. You should see the tweet that was just created automatically using the details from the RSS feed.

This confirms that your setup is complete. Every time there is a new update in the RSS feed, Pabbly Connect will automatically create a new tweet on your X account using the mapped details from the RSS feed.

To summarize, you have successfully created a workflow that connects RSS feeds to your X account through Pabbly Connect. This automation saves time and keeps your followers updated with the latest news effortlessly.


Conclusion

In this tutorial, we demonstrated how to automate tweeting from RSS feeds using Pabbly Connect. This powerful integration allows you to streamline your social media updates and keep your audience informed effortlessly. With just a few steps, you can set up this automation and enjoy the benefits of efficient content sharing.

Ensure you check out Pabbly Connect to create business automation workflows and reduce manual tasks. Pabbly Connect currently offer integration with 2,000+ applications.

How to Create Pipedrive Meeting for Calendly Booking Using Pabbly Connect

Learn how to integrate Pipedrive and Calendly using Pabbly Connect to automate meeting scheduling seamlessly. Follow our step-by-step tutorial for effective automation. Eliminate manual repetitive tasks from your workflow. Discover proven automation methods with intuitive steps designed for efficiency-minded professionals.

Watch Step By Step Video Tutorial Below


1. Accessing Pabbly Connect for Integration

To create a Pipedrive meeting for Calendly bookings, the first step is to access Pabbly Connect. This platform facilitates the integration between Pipedrive and Calendly seamlessly, allowing automation without coding.

Start by visiting the Pabbly Connect website. If you don’t have an account, click on the ‘Sign Up for Free’ button. Once registered, you’ll receive 100 tasks free every month. If you already have an account, simply log in to access the dashboard.


2. Creating a New Workflow in Pabbly Connect

After logging into Pabbly Connect, you’ll create a new workflow to connect Calendly and Pipedrive. Click on the ‘Create Workflow’ button and name your workflow, such as ‘Create Pipedrive Meeting for Calendly Booking’.

  • Select the folder where you want to save your workflow.
  • Click on ‘Create’ to proceed to the next step.
  • You will see trigger and action boxes for your workflow.

In the trigger box, select Calendly as your trigger application and choose the event ‘Invitee Created’. This setup allows Pabbly Connect to capture new bookings from Calendly automatically.


3. Connecting Calendly to Pabbly Connect

Next, you need to connect your Calendly account to Pabbly Connect. Click on ‘Connect’ and then ‘Add New Connection’. Since you are already logged into your Calendly account, the connection will be established successfully.

After connecting, select the organization and user associated with your Calendly account. Click on ‘Save’ and then the ‘Test Request’ button to ensure everything is working correctly. Pabbly Connect will wait for a response, which you can generate by creating a new booking in Calendly.


4. Setting Up Pipedrive Integration with Pabbly Connect

Now, it’s time to set up the action for Pipedrive in Pabbly Connect. Select Pipedrive as your action application and choose the action event ‘Find Person’. This will allow you to search for the person based on the booking details from Calendly.

  • Connect Pipedrive with Pabbly Connect using your API token.
  • Map the email address from the Calendly response to search for the person.
  • Click on ‘Save and Send Test’ to receive a response from Pipedrive.

If the person exists, you will receive their details, including the Item ID and organization ID. This means you can now create a meeting for this individual in Pipedrive.


5. Creating a Meeting in Pipedrive

The final step is to create a meeting in Pipedrive using the booking details from Calendly through Pabbly Connect. Add another action step and select Pipedrive again, then choose the action event ‘Create Activity’.

Map the required fields such as subject, organization ID, and person ID using the details retrieved from previous steps. Set the due date and time according to your requirements. Click on ‘Save and Send Test’ to finalize the meeting creation.

After successful completion, check your Pipedrive account under activities to confirm that the meeting has been created with the correct details from the Calendly booking. This automation ensures that every new booking is captured and processed efficiently.


Conclusion

In this tutorial, we demonstrated how to create a Pipedrive meeting for Calendly bookings using Pabbly Connect. By following these steps, you can automate your scheduling process effectively, ensuring no booking details are missed.

Ensure you check out Pabbly Connect to create business automation workflows and reduce manual tasks. Pabbly Connect currently offer integration with 2,000+ applications.

Automate Production Reports with Pabbly Connect: A Step-by-Step Guide

Learn how to automate production reports using Pabbly Connect with Google Chat and Google Forms. Follow our detailed tutorial for seamless integration. Transform complex automation concepts into accessible, actionable steps that eliminate unnecessary manual work while maximizing existing application capabilities.

Watch Step By Step Video Tutorial Below


1. Accessing Pabbly Connect for Automation

To automate production reports, start by accessing Pabbly Connect. Open your browser and type in Pabbly.com/connect to reach the landing page. Here, you will find options to sign in or sign up for free, which allows you to create a new workflow for automation.

Once signed in, navigate to the Pabbly Connect dashboard by selecting it from the applications page. Click on the ‘Create Workflow’ button located in the top right corner of the dashboard to begin setting up your automation.


2. Creating a Workflow in Pabbly Connect

Creating a workflow is essential to automate production reports using Pabbly Connect. After clicking the ‘Create Workflow’ button, a dialog box will appear. Name your workflow, for example, ‘Automate Production Reports with Pabbly Connect,’ and select a folder to save it in.

  • Name the workflow clearly for easy identification.
  • Choose a relevant folder to keep your workflows organized.

After naming, click on ‘Create’ to proceed to the important window where you can set up the trigger and action for your automation process.


3. Setting Up Trigger and Action in Pabbly Connect

In Pabbly Connect, the trigger and action are crucial for automation. For this setup, select Google Forms as your trigger application and choose the event ‘New Response Received’. This will activate the workflow whenever a new form submission occurs.

Next, set Google Chat as your action application. The action event will be ‘Create a New Message’. This configuration ensures that every time an employee submits a work report, an automatic update is sent to your HR team on Google Chat.


4. Configuring Google Forms and Sheets

To integrate Google Forms with Pabbly Connect, you need to link the Google Form responses to Google Sheets. In your Google Form, navigate to the ‘Responses’ tab and click on ‘Link to Sheets’. Name the spreadsheet, for example, ‘HR Update Employee Daily Work Report’ and click ‘Create’.

After creating the spreadsheet, go to the extensions menu and ensure the Pabbly Connect Webhooks extension is installed. If not, search for it in the add-ons section and install it. Once installed, go to the Pabbly Connect Webhooks extension and select ‘Initial Setup’ to configure the webhook URL from Pabbly Connect.

  • Copy the webhook URL from Pabbly Connect.
  • Paste it into the Google Sheets setup.
  • Specify the trigger column as the final data column (e.g., column G).

After completing these steps, click ‘Submit’ to finish the configuration. This setup ensures that whenever a new form response is received, the details will be sent to Pabbly Connect.


5. Sending Updates to Google Chat

Once the trigger is set up and linked to Google Sheets, it’s time to send updates to Google Chat using Pabbly Connect. In the Google Chat application, create a webhook URL for the HR team space. This involves navigating to ‘Apps and Integrations’ and selecting ‘Webhooks’ to add a new webhook.

After creating the webhook, copy the URL and return to your Pabbly Connect action setup. Paste the Google Chat webhook URL in the appropriate field. Then, frame the message you want to send to your HR team, including dynamic fields like employee name, ID, and task summary. This mapping ensures that the message reflects the latest submission details.

Map the employee name, ID, and task summary in the message. Click ‘Save and Send Test Request’ to verify the integration.

Upon successful testing, your HR team will receive updates on Google Chat every time a new form submission occurs, fully automating the production reporting process through Pabbly Connect.


Conclusion

By following this tutorial, you have learned how to effectively automate production reports using Pabbly Connect, Google Chat, and Google Forms. This integration streamlines communication and ensures timely updates for your HR team, enhancing productivity.

Ensure you check out Pabbly Connect to create business automation workflows and reduce manual tasks. Pabbly Connect currently offer integration with 2,000+ applications.

How to Create ConvertKit Subscriber in Sequence from Google Sheets Using Pabbly Connect

Learn how to automate adding ConvertKit subscribers from Google Sheets using Pabbly Connect in this detailed tutorial. Step-by-step guide included. Eliminate manual repetitive tasks from your workflow. Discover proven automation methods with intuitive steps designed for efficiency-minded professionals.

Watch Step By Step Video Tutorial Below


Accessing Pabbly Connect for Integration

To create ConvertKit subscribers in sequence from Google Sheets, you need to access Pabbly Connect. This platform allows you to automate the integration without requiring coding skills. Start by visiting the Pabbly Connect homepage and signing in or creating a new account.

Once logged in, you will be directed to the dashboard. Here, you can create a new workflow by clicking on the ‘Create Workflow’ button. Name your workflow, for example, ‘Create ConvertKit Subscriber in Sequence from Google Sheets’. Organizing your workflows into folders helps manage them efficiently.


Setting Up the Trigger with Google Sheets

In this step, you will set Google Sheets as the trigger application in Pabbly Connect. The goal is to trigger the workflow whenever a new row is added to your Google Sheets. Select Google Sheets, then choose the trigger event as ‘New or Updated Spreadsheet Row’.

After selecting the trigger event, a webhook URL will be generated. Copy this URL as it will be used to connect Google Sheets with Pabbly Connect. In your Google Sheets, navigate to ‘Extensions’ > ‘Add-ons’ > ‘Get Add-ons’ and install the Pabbly Connect Webhook add-on. Once installed, refresh your spreadsheet.

  • Copy the webhook URL from Pabbly Connect.
  • Paste it in the Pabbly Connect Webhook setup in Google Sheets.
  • Set the trigger column to the last data column (e.g., D).

After completing these steps, click on the ‘Send Test’ button to verify the connection. If successful, you will see the response captured in Pabbly Connect, confirming that the trigger setup is complete.


Configuring the Action in ConvertKit

Next, you will set up ConvertKit as the action application in Pabbly Connect. This step involves adding the subscriber to a specific sequence based on the data received from Google Sheets. Select ConvertKit and choose the action event as ‘Add Subscriber to a Sequence’.

To establish a connection, you will need your ConvertKit API key and secret. Navigate to your ConvertKit account settings to find these details. Once connected, you will map the sequence ID that corresponds to the course of interest for the lead.

  • Map the email address and other relevant fields from Google Sheets.
  • Use the lookup table to dynamically retrieve the sequence ID based on the course name.
  • Ensure all fields are correctly mapped to automate the process.

After mapping the required fields, click on ‘Save and Send Test Request’. If successful, the subscriber will be added to the specified sequence in ConvertKit, confirming that the action setup is complete.


Finalizing the Automation Process

To ensure the automation runs smoothly, you need to enable the event sending option in the Pabbly Connect Webhook add-on. Go to ‘Extensions’ > ‘Pabbly Connect Webhooks’ and select ‘Send on Event’. This setting will ensure that every time a new row is added in Google Sheets, the data is sent to Pabbly Connect automatically.

With the automation configured, you can test the entire workflow by adding a new lead in Google Sheets. Upon adding the lead, check your ConvertKit account to confirm that the subscriber has been added to the correct sequence.

Add a new row in the Google Sheets with lead details. Verify the subscriber status in ConvertKit. Ensure the subscriber is added to the correct sequence and form.

This final step confirms that your automation is working effectively, allowing you to manage your leads seamlessly.


Conclusion

In conclusion, using Pabbly Connect simplifies the process of adding ConvertKit subscribers from Google Sheets. By following the outlined steps, you can automate your workflow efficiently, ensuring that leads are added to the appropriate sequences based on their interests.

Ensure you check out Pabbly Connect to create business automation workflows and reduce manual tasks. Pabbly Connect currently offer integration with 2,000+ applications.

This integration not only saves time but also enhances your lead management process, making it easier to engage with your audience effectively.

Automating Blogger Posts to Facebook with Pabbly Connect

Learn how to automate sharing your Google Blogger posts on Facebook using Pabbly Connect. Follow our step-by-step tutorial for seamless integration. Transform complex automation concepts into accessible, actionable steps that eliminate unnecessary manual work while maximizing existing application capabilities.

Watch Step By Step Video Tutorial Below


1. Setting Up Pabbly Connect for Automation

To automate sharing your Google Blogger posts on Facebook, you’ll first need to set up Pabbly Connect. Begin by signing up for a free account on the Pabbly Connect website. After logging in, navigate to the dashboard where you’ll create a new workflow.

Click on the ‘Create Workflow’ button, name your workflow (e.g., ‘Blogger to Facebook’), and select an appropriate folder for organization. This step is crucial as it lays the foundation for your automation process.


2. Connecting Google Blogger to Pabbly Connect

In this section, we will connect your Google Blogger account to Pabbly Connect. In the trigger window, select Google Blogger as the app. From the dropdown menu, choose the trigger event ‘New Post Added’. This ensures that every time a new post is published, Pabbly Connect will capture the details.

  • Select the Google Blogger app.
  • Choose ‘New Post Added’ as the trigger event.
  • Click on ‘Connect’ and add a new connection.

Next, sign in with your Google account and select the specific blog from which you want to pull new posts. Ensure you select the status as ‘Live’ to only get active posts. Once this setup is complete, click on ‘Save and Send Test Request’ to confirm the connection.


3. Creating Facebook Posts with Pabbly Connect

After successfully connecting Google Blogger, the next step is to create a Facebook post through Pabbly Connect. In the action step, search for Facebook Pages and select it. Choose the action event ‘Create Page Post’ to automate your Facebook updates.

  • Select Facebook Pages as the app.
  • Choose ‘Create Page Post’ as the action event.
  • Connect your Facebook account to Pabbly Connect.

Once connected, select the Facebook page where you want to publish the post. In the message field, craft your post content, which can include the title of the blog post and a link to it. You can map the title and URL from the trigger step response to ensure the post is accurate.


4. Testing the Integration with Pabbly Connect

With the Facebook post setup completed, it’s time to test the integration through Pabbly Connect. Click on ‘Save and Send Test Request’ in the action step. This will send a test post to your selected Facebook page.

Once the test request is successful, navigate to your Facebook page to verify that the post appears as expected. You should see the message you created along with the blog title and link. This confirms that your automation is functioning correctly, and new posts from Google Blogger will now automatically share on Facebook.


5. Final Setup and Tips for Using Pabbly Connect

After successfully setting up the automation, Pabbly Connect will check for new blog posts in your Google Blogger account every 8 hours. If you prefer a shorter interval, you can contact Pabbly Connect support to reduce it to every 10 minutes.

Additionally, you can explore more integrations with various applications using Pabbly Connect. This flexibility allows you to enhance your automation capabilities further. Remember to regularly check your workflows to ensure they are running smoothly and make adjustments as needed.

Conclusion

This guide summarizes the key points and helps you understand the essential features and benefits of using this tool.

Ensure you check out Pabbly Connect to create business automation workflows and reduce manual tasks. Pabbly Connect currently offer integration with 2,000+ applications.


In conclusion, using Pabbly Connect to automate sharing your Google Blogger posts on Facebook streamlines your workflow. This integration ensures that your audience is always updated with your latest content without manual effort. By following this tutorial, you can set up an efficient automation process that saves you time and enhances your online presence.

How to Add HubSpot Deal in Microsoft Excel Sheets Using Pabbly Connect

Learn to integrate HubSpot CRM with Microsoft Excel Sheets using Pabbly Connect. Follow our step-by-step tutorial to automate your workflow effortlessly. Follow this definitive guide to creating powerful automated workflows with straightforward, efficiency-focused solutions that save valuable time.

Watch Step By Step Video Tutorial Below


1. Accessing Pabbly Connect for HubSpot and Excel Integration

To begin the integration process, access Pabbly Connect by searching ‘Pabbly.com/connect’ in your web browser. This platform allows seamless automation between HubSpot CRM and Microsoft Excel Sheets.

Once on the landing page, you will see options to sign in or sign up. If you are a new user, click on ‘Sign up for free’ to receive 100 tasks free each month. Existing users should select ‘Sign in’ to access their dashboard. After signing in, click on ‘Access Now’ under Pabbly Connect to proceed.


2. Creating a Workflow in Pabbly Connect

After accessing your dashboard, click on the ‘Create Workflow’ button. In this step, name your workflow as ‘Add HubSpot Deal in Microsoft Excel Sheets’ and save it in the designated folder.

  • Select a folder for your workflow.
  • Enter the workflow name clearly.

Click on ‘Create’ to open the workflow window. Here, you will set up the trigger and action for your integration. The trigger is HubSpot CRM, and the action will be Microsoft Excel. This setup allows Pabbly Connect to automate the process efficiently.


3. Setting the Trigger for HubSpot CRM

In the workflow, start by selecting HubSpot CRM as your trigger application. Choose the trigger event ‘New Deal Added’ to ensure that every time a new deal is created in HubSpot, it will trigger the action in Excel. using Pabbly Connect

Next, click on ‘Connect’ and either select an existing connection or add a new one. If adding a new connection, follow the prompts to authenticate your HubSpot account. After successful connection, select the deal properties you want to extract, such as:

  • Deal Name
  • Priority
  • Close Date
  • Create Date
  • Amount

After selecting the required properties, click on ‘Save and Send Test Request’ to confirm the integration is working correctly.


4. Configuring the Action Step in Microsoft Excel

Once the trigger is set, move on to the action step by selecting Microsoft Excel as the action application. Choose the action event ‘Add Row to Worksheet’ to add deal details automatically into your Excel sheet.

Click on ‘Connect’ and authenticate your Microsoft Excel account by granting the necessary permissions. After connecting, select the workbook and worksheet where you want the data to be added. For instance, if your workbook is named ‘Hub Excel,’ select it, and then choose the worksheet named ‘Deal.’

Map the deal name, amount, create date, close date, and priority from the trigger step. Ensure all fields are correctly filled to avoid errors.

After mapping, click on ‘Save and Send Test Request’ to verify if the details are being accurately added to your Excel sheet. This confirms that Pabbly Connect is functioning correctly and your workflow is operational.


5. Testing the Integration and Finalizing

To test the integration, create a new deal in your HubSpot CRM. For example, name the deal ‘Real Estate Deal 2,’ set the amount, close date, and priority, then click on ‘Create.’ This simulates a real-time scenario where Pabbly Connect will check for new deals every 10 minutes.

After creating the deal, wait for about 10 minutes and check your Microsoft Excel sheet. You should see the new deal details automatically populated. This confirms that the integration works as intended, allowing for seamless data transfer between HubSpot CRM and Microsoft Excel.

In summary, your workflow is successful if the deal appears in Excel with the correct details. This process showcases how Pabbly Connect effectively automates your workflow and enhances productivity by integrating HubSpot CRM with Microsoft Excel Sheets.


Conclusion

This tutorial demonstrated how to add HubSpot deals to Microsoft Excel Sheets using Pabbly Connect. By following the steps outlined, you can automate your workflow efficiently and ensure your data is always up-to-date.

Ensure you check out Pabbly Connect to create business automation workflows and reduce manual tasks. Pabbly Connect currently offer integration with 2,000+ applications.

Integrate Slack Channel with URL Using Pabbly Connect: A Step-by-Step Guide

Learn how to automate Facebook lead ads notifications to your Slack Channel Using Pabbly Connect. Follow this detailed guide for seamless integration. This comprehensive guide reveals exactly how to connect your applications and automate repetitive tasks — accessible for professionals of all technical backgrounds. with Pabbly Connect.

Watch Step By Step Video Tutorial Below


1. Setting Up the Integration with Slack Channel and URL

To start the integration process for the Slack Channel and URL, you first need to access the PAB Connect platform. Begin by searching for PAB Connect in your browser and navigate to the landing page. Here, you will find options to either sign in or sign up for free. using Pabbly Connect

If you’re a new user, click on ‘Sign up for free’ to get 100 tasks free every month. Existing users should click on ‘Sign in’ to access their dashboard. Once logged in, click on the ‘Create Workflow’ button to initiate the integration process.


2. Creating a Workflow for Facebook Lead Ads and Slack Channel

In this section, you will create a workflow specifically for integrating Facebook Lead Ads with your Slack Channel. After clicking on ‘Create Workflow,’ you will be prompted to name your workflow. Enter a name like ‘Automate Facebook Lead Ads Notifications on Slack’ and choose a folder to save it in. using Pabbly Connect

  • Name your workflow appropriately.
  • Select the folder where you want to save it.

After saving, you will enter the workflow window where you can set up triggers and actions. For this integration, select ‘Facebook Lead Ads’ as your trigger application and choose ‘New Lead Instant’ as the trigger event. Click on ‘Connect’ to establish the connection.


3. Configuring Facebook Lead Ads for the Trigger

Configuring Facebook Lead Ads is essential for capturing leads effectively. When prompted, you will need to add a new connection or select an existing one. If you haven’t connected your Facebook Lead Ads account yet, click on ‘Add a New Connection’ and follow the prompts to link your account. using Pabbly Connect

Once connected, you’ll need to specify the page name and lead generation form. Select your Facebook page (e.g., ‘Craft Leads’) and the specific lead generation form. After making your selections, click on ‘Save and Send Test Request’ to verify the connection.

  • Select the correct Facebook page.
  • Choose the lead generation form you want to use.
  • Click on ‘Save and Send Test Request’ to test the connection.

After the test request, you should see a confirmation that the lead was captured successfully. This indicates that the trigger is now functional and ready to send notifications to your Slack Channel.


4. Setting Up the Action in Slack Channel

Now that your Facebook Lead Ads trigger is configured, it’s time to set up the action that will send notifications to your Slack Channel. Select ‘Slack’ as your action application and choose ‘Send Channel Message’ as the action event. As before, you will need to connect your Slack account. If prompted, click on ‘Add a New Connection’ and follow the instructions. using Pabbly Connect

After connecting, specify the token type as either ‘user’ or ‘bot.’ For this integration, you should choose ‘bot’ to send messages through a bot account. Click on ‘Save’ to proceed, and grant any necessary permissions requested by PAB Connect.

Select the correct Slack channel for notifications. Draft a message that includes dynamic fields from the lead submission.

Make sure to map the details like name, email, and phone number from the trigger step to the message. This ensures that each notification is personalized with the lead’s information.


5. Testing and Verifying the Integration

Once you have set up the action in Slack, it’s time to test the entire integration. Go back to the Facebook Lead Ads testing tool and submit a test lead. Ensure that you enter all required fields like first name, last name, email, and phone number. using Pabbly Connect

After submission, check your Slack Channel to see if the notification appears. The message should include the details of the lead, confirming that the integration is successful. If you see the message in your Slack Channel, you have successfully integrated Facebook Lead Ads with your Slack Channel using PAB Connect.

Submit a test lead through Facebook Lead Ads. Verify the notification in your Slack Channel.

With this setup, your team will receive instant notifications for new leads, allowing for timely follow-ups and improved lead management.


Conclusion

Integrating your Slack Channel with Facebook Lead Ads using PAB Connect allows for streamlined lead notifications. By following these steps, you can ensure that your team is promptly informed about new leads, enhancing your business’s responsiveness and efficiency.

Thanks for following along with this tutorial! Remember to subscribe to the channel for more helpful content like this.

If you found this guide useful, please consider giving it a thumbs up and sharing it with others who might benefit from it.

Integrate Google Chat with Google Ads Using Pabbly Connect: A Step-by-Step Guide

Learn how to integrate Google Chat with Google Ads using Pabbly Connect for seamless lead notifications. Follow our detailed tutorial for step-by-step instructions. Navigate the automation landscape confidently with clear, structured guidance suitable for professionals regardless of prior technical experience.

Watch Step By Step Video Tutorial Below


1. Accessing Pabbly Connect for Google Chat Integration

To start integrating Google Chat with Google Ads, first access Pabbly Connect. Go to the Pabbly Connect website and sign in to your account. If you are a new user, you can sign up for free and enjoy 100 free tasks every month.

Once logged in, you will see the Pabbly Connect dashboard. Here, you can create workflows that automate tasks between applications. Click on the ‘Create Workflow’ button to begin setting up your integration.


2. Creating a Workflow in Pabbly Connect

After clicking on the ‘Create Workflow’ button, a dialog box will appear asking for a workflow name. Name your workflow something descriptive, such as ‘Send Google Lead Ads Leads to Google Chat’. Next, select a folder to save your workflow. using Pabbly Connect

  • Choose a specific folder for organization.
  • Click ‘Create’ to finalize your workflow setup.

Once your workflow is created, you will see two main sections: Trigger and Action. The trigger will be set to Google Ads, and the action will be Google Chat. This setup allows Pabbly Connect to automate the process of sending lead notifications to your Google Chat.


3. Setting Up the Trigger in Pabbly Connect

In the trigger section, select Google Ads as your trigger application and choose the trigger event as ‘New Lead Form Entry’. This means that every time a new lead is generated through Google Ads, it will trigger an action in Pabbly Connect. using Pabbly Connect

To connect Google Ads with Pabbly Connect, you will need to use a webhook URL provided by Pabbly. Copy this URL and navigate to your Google Ads account. In the lead delivery options of your test campaign, paste the webhook URL and enter a dummy key. Click on ‘Send Test Data’ to verify the connection.


4. Setting Up the Action in Pabbly Connect

After successfully setting up the trigger, it’s time to configure the action. Select Google Chat as your action application and choose the action event as ‘Create Message’. This action will send a notification to your Google Chat whenever a new lead is generated. using Pabbly Connect

  • Click on ‘Connect’ to link Google Chat with Pabbly Connect.
  • Obtain the chat webhook URL from your Google Chat space settings.

Once you have the webhook URL, paste it into Pabbly Connect. Next, write the message format you want to send to your team in Google Chat. Include dynamic fields such as first name, last name, email, and phone number from the lead data captured in the trigger step.


5. Testing the Integration Between Google Ads and Google Chat

After configuring both the trigger and action, it’s essential to test the integration. Click on ‘Save and Send Test Request’ in Pabbly Connect. This will send a test message to your Google Chat space, confirming that everything is set up correctly. using Pabbly Connect

Check your Google Chat space to see if the test message appears. This message should include the details of the new lead generated through Google Ads. If everything works as expected, your integration is successful and ready for live use.

Conclusion

This guide summarizes the key points and helps you understand the essential features and benefits of using this tool.

Ensure you check out Pabbly Connect to create business automation workflows and reduce manual tasks. Pabbly Connect currently offer integration with 2,000+ applications.


In summary, using Pabbly Connect allows you to seamlessly integrate Google Ads with Google Chat. By following these steps, you can automate lead notifications and enhance your business communication.