How to Integrate Discord Channel Notifications with Pabbly Connect

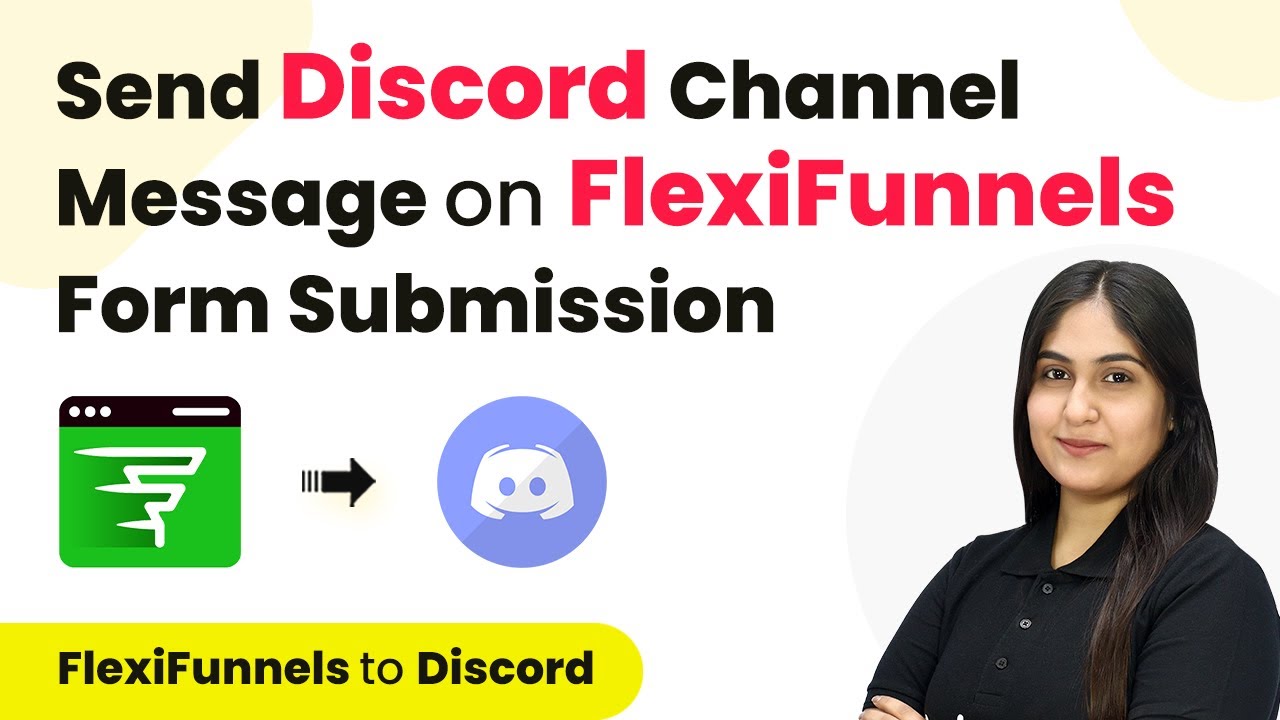
Learn how to automate Discord Channel notifications for Flexi Funnels form submissions using Pabbly Connect. Step-by-step guide included. Transform complex automation concepts into accessible, actionable steps that eliminate unnecessary manual work while maximizing existing application capabilities.

Watch Step By Step Video Tutorial Below


1. Accessing Pabbly Connect for Discord Channel Integration

To start automating notifications to your Discord channel, first, you need to access Pabbly Connect. Visit the homepage of Pabbly Connect by entering the URL in your browser. Here, you will find options to sign up or sign in.

If you’re new, click on the ‘Sign Up Free’ button to get 300 tasks every month for exploring the software. For existing users, simply click ‘Sign In’ to access your dashboard.


2. Creating a Workflow in Pabbly Connect

Once logged in, you will see the Pabbly apps window. Click on the ‘Create Workflow’ button located at the top right corner. This is where you will set up your automation for the Discord channel. using Pabbly Connect

  • Enter a name for your workflow, like ‘Send Discord Channel Message for Flexi Funnels Form Submission’.
  • Select a folder for organization, such as ‘Automations’.
  • Click the ‘Create’ button to establish the workflow.

Your workflow will now be created, showing the trigger and action setup. The trigger will be Flexi Funnels, and the action will be Discord.


3. Setting Up the Trigger with Flexi Funnels

In this step, select Flexi Funnels as your trigger application and choose the event as ‘New Form Submission’. Pabbly Connect will provide you with a webhook URL that will connect Flexi Funnels to Pabbly Connect. using Pabbly Connect

Copy this webhook URL and log in to your Flexi Funnels account. Navigate to the form settings, click on ‘Project Settings’, and then select ‘PC Integration’. Here, you will edit the webhook settings to paste the copied URL.

  • Remove any existing webhook URL.
  • Enter the new webhook URL and name it appropriately.
  • Save the settings and publish the form.

After setting up the webhook, return to Pabbly Connect to test the trigger by submitting a dummy form response in Flexi Funnels.


4. Configuring the Action to Send Messages to Discord

Now, you need to set up the action in Pabbly Connect. Select Discord as your action application and choose ‘Send Channel Message’ as the action event. Click on the connect button to link your Discord account with Pabbly Connect. using Pabbly Connect

After connecting, you will be prompted to enter the Discord webhook URL. To obtain this, log in to your Discord account, go to your server settings, and navigate to ‘Integrations’ to find the webhook URL for your desired channel.

Select the channel where you want to send messages. Copy the webhook URL and paste it into Pabbly Connect. Compose the message you want to send, using dynamic fields from the Flexi Funnels submission.

Map the fields for name, email, and phone number to personalize the message. This ensures that every new lead submission sends updated information to your Discord channel.


5. Testing Your Automation Workflow

With everything set up, it’s time to test your automation. Submit another form response in Flexi Funnels to see if the notification goes through to your Discord channel. For testing, enter a new set of dummy data and submit the form.

Check your Discord channel to confirm that the message has been received. It should display the lead details you configured in the previous steps, ensuring that your team gets timely notifications of new leads.

By following these steps, you have successfully automated the process of sending Discord channel notifications using Pabbly Connect. This setup not only saves time but also keeps your team informed about new leads instantly.


Conclusion

In this tutorial, we demonstrated how to use Pabbly Connect to automate Discord channel notifications for new Flexi Funnels form submissions. This integration enhances team communication and ensures prompt follow-ups on leads.

Ensure you check out Pabbly Connect to create business automation workflows and reduce manual tasks. Pabbly Connect currently offer integration with 2,000+ applications.

Integrate URL and Box Using Pabbly Connect: A Step-by-Step Guide

Learn how to integrate URL and Box using Pabbly Connect. Follow this detailed tutorial for seamless automation between your applications. Discover how to seamlessly connect your essential tools through accessible instructions that make powerful automation available to professionals at every skill level.

Watch Step By Step Video Tutorial Below


1. Accessing Pabbly Connect for Integration

To integrate URL and Box, you will first need to access Pabbly Connect. Visit the Pabbly Connect homepage by searching for it in your browser. Once there, you can either sign in if you’re an existing user or click on ‘Sign up free’ to create a new account.

After signing in, you will be directed to the Pabbly Connect dashboard. Here, you can see all available applications. To start your integration, click on the ‘Create Workflow’ button located at the top right corner of the dashboard.


2. Creating a New Workflow in Pabbly Connect

In this step, you will create a new workflow to automate the integration between URL and Box using Pabbly Connect. A dialog box will appear asking you to name your workflow. Enter a descriptive name such as ‘Integrate URL with Box’ and select a folder for organization.

  • Name your workflow appropriately.
  • Select a folder to save the workflow.
  • Click on the ‘Create’ button to finalize.

After creating your workflow, you will see a screen displaying the trigger and action setup. Here, you will define what event triggers the automation and what action follows.


3. Setting Up the Trigger in Pabbly Connect

For the trigger application, select URL and the event as ‘New Response’. Once selected, you will receive a webhook URL. This URL is crucial as it will connect your URL account with Pabbly Connect.

Copy the webhook URL provided. Next, log in to your URL account and navigate to the settings of the form you wish to integrate. Under the integrations tab, choose webhooks and enter the copied URL. After saving the integration, your URL is now connected with Pabbly Connect.


4. Configuring the Action Step in Pabbly Connect

Now that the trigger is set up, it’s time to configure the action step. Select Box as your action application and choose the action event as ‘Create a Subscriber’. This action will be executed whenever a new response is received from the URL form.

To connect your Box account with Pabbly Connect, click on ‘Connect’ and then ‘Add New Connection’. You will need to provide an access token. This token can be generated from your Box account settings under API access. Copy this token and paste it back into Pabbly Connect.

  • Select Box as the action application.
  • Choose ‘Create a Subscriber’ as the action event.
  • Paste the access token from your Box account.

After entering the necessary details, click on ‘Save and Send Request’ to finalize the action setup.


5. Testing the Integration with Pabbly Connect

With both the trigger and action set up, it’s time to test the integration. Go back to your URL form and submit a test response. Ensure that you fill in all required fields accurately.

After submitting the test response, return to Pabbly Connect. You should see that the response has been captured successfully. Now, check your Box account to verify that a new subscriber has been created with the details provided in the test submission.

To confirm everything is working correctly, submit another test response in your URL form. If all steps were followed correctly, you should see the new details reflected in your Box account as well.


Conclusion

This tutorial showcased how to integrate URL and Box using Pabbly Connect. By following the steps outlined, you can automate your workflows and enhance productivity. With Pabbly Connect, managing integrations becomes seamless and efficient.

Ensure you check out Pabbly Connect to create business automation workflows and reduce manual tasks. Pabbly Connect currently offer integration with 2,000+ applications.

Integrating One’s Hub and Fluent CRM Using Pabbly Connect

Learn how to automate the creation of Fluent CRM contacts from One’s Hub bookings using Pabbly Connect in this detailed step-by-step tutorial. Eliminate manual repetitive tasks from your workflow. Discover proven automation methods with intuitive steps designed for efficiency-minded professionals.

Watch Step By Step Video Tutorial Below


1. Accessing Pabbly Connect to Start Integration

To begin the integration process, access Pabbly Connect by searching for Pabbly.com/c/connect. This platform facilitates the connection between One’s Hub and Fluent CRM, allowing you to automate contact creation based on booking data.

After reaching the Pabbly Connect landing page, you can either sign in or sign up for free. If you’re new, click on the ‘Sign Up for Free’ button, which provides 100 free tasks monthly. Once signed in, click on the ‘Access Now’ button under Pabbly Connect to enter the dashboard.


2. Creating a New Workflow in Pabbly Connect

In the Pabbly Connect dashboard, the next step is to create a new workflow. Click on the ‘Create Workflow’ button, which opens a dialog box for naming your workflow. Name it something descriptive, like ‘Create Fluent CRM Contact for One’s Hub Booking’. using Pabbly Connect

  • Select a folder to save your workflow.
  • Click ‘Create’ to proceed to the main workflow interface.

Here, you will see two boxes labeled Trigger and Action. The Trigger is the event that starts the workflow, while the Action is what happens as a result. For this integration, set the Trigger application to One’s Hub.


3. Setting Up the Trigger in Pabbly Connect

To set the trigger, select One’s Hub from the application list. You will need to choose a Trigger event, which in this case is ‘Booking Scheduled’. This event will initiate the workflow whenever a new booking is made.

Next, click on the ‘Connect’ button to establish the connection between One’s Hub and Pabbly Connect. You will be prompted to add a new connection, requiring an API key from your One’s Hub account. Navigate to the settings in One’s Hub, find the API section, and regenerate your API key.

  • Copy the regenerated API key.
  • Paste the key into Pabbly Connect and save the connection.

After saving, you can name the webhook (for example, ‘One Booking’) and click save to send a test request. This prepares the workflow to capture booking details.


4. Setting Up the Action in Pabbly Connect

Now that the trigger is set, proceed to set up the action. Select Fluent CRM as your action application. The action event will be ‘Create Contact’. This step will create a new contact in Fluent CRM whenever a booking is received from One’s Hub. using Pabbly Connect

Similar to the previous step, click on ‘Connect’ to establish a connection with Fluent CRM. You will need to provide the username, password, and site URL for your Fluent CRM account. Ensure you have the necessary API credentials ready from your Fluent CRM settings.

Fill in the required details and save the connection. Map the fields from One’s Hub to Fluent CRM for contact creation.

At this point, you can map the user’s first name, last name, email, and phone number from the booking data to the corresponding fields in Fluent CRM. This ensures that every new booking results in a contact being created accurately.


5. Testing the Integration Workflow

After setting up both the trigger and action, it’s crucial to test the integration. Create a new booking in One’s Hub to simulate real-world use. Fill out the booking details, including user name, email, and phone number, and confirm the booking.

Once the booking is confirmed, return to Pabbly Connect. You should see that the response from One’s Hub is captured, showing the booking details. This indicates that the trigger is working correctly.

Check Fluent CRM to confirm that a new contact has been created. Verify that all details match the booking information.

This successful test confirms that your integration between One’s Hub and Fluent CRM via Pabbly Connect is functioning as intended. Each new booking will automatically create a contact in Fluent CRM, streamlining your customer management process.


Conclusion

In this tutorial, we explored how to integrate One’s Hub with Fluent CRM using Pabbly Connect. By following these steps, you can automate contact creation for every new booking, enhancing your CRM efficiency.

Ensure you check out Pabbly Connect to create business automation workflows and reduce manual tasks. Pabbly Connect currently offer integration with 2,000+ applications.

How to Insert Records in Multiple MySQL Tables Instantly Using Pabbly Connect

Learn how to use Pabbly Connect to insert records in multiple MySQL tables instantly from Jotform submissions. Step-by-step guide included. This comprehensive guide reveals exactly how to connect your applications and automate repetitive tasks — accessible for professionals of all technical backgrounds.

Watch Step By Step Video Tutorial Below


1. Setting Up Pabbly Connect for MySQL Integration

To start using Pabbly Connect, navigate to the Pabbly Connect website and either sign in or sign up for a free account. This platform is essential for automating workflows between Jotform and MySQL.

Once logged in, click on the ‘Access Now’ button under Pabbly Connect. This action takes you to the dashboard where you can create workflows. Click on the ‘Create Workflow’ button to begin setting up your integration.


2. Creating the Trigger for Jotform Submissions

In this section, you’ll set up the trigger in Pabbly Connect using Jotform. Select Jotform as your trigger application and choose the event ‘New Response’. This ensures that every time a form is submitted, it will trigger the workflow.

  • Select Jotform as the trigger application.
  • Choose ‘New Response’ as the trigger event.
  • Copy the webhook URL provided by Pabbly Connect.

Next, navigate to your Jotform account, go to the form settings, and find the integrations section. Here, paste the copied webhook URL to connect Jotform with Pabbly Connect. This integration is crucial for capturing form submissions automatically.


3. Setting Up the MySQL Action in Pabbly Connect

After configuring the trigger, the next step involves setting up the action in Pabbly Connect to insert records into MySQL. Choose MySQL as your action application and select ‘Insert Row’ as the action event. This allows you to add new records based on the data received from Jotform.

To connect MySQL with Pabbly Connect, you will need to enter your database details, including username, password, host, and database name. If you’ve previously set up a connection, you can select it from the existing connections.

  • Select the appropriate MySQL table for inserting records.
  • Map the fields from Jotform to the corresponding columns in MySQL.
  • Ensure all required fields are mapped correctly to avoid errors.

Once everything is set, click on the ‘Save’ button to finalize the action setup. This process allows Pabbly Connect to automatically insert records into your MySQL database whenever a new form submission occurs.


4. Testing the Integration with Jotform

To ensure the integration works correctly, you need to test it by submitting a form on Jotform. Fill out the required fields and submit the form. After submission, return to Pabbly Connect to check if the data has been captured successfully.

If the integration is set up correctly, you should see the details of the form submission reflected in Pabbly Connect. This confirms that the trigger from Jotform is functioning as intended and that the data is being sent to MySQL.

To verify that the records are inserted into MySQL, refresh your MySQL database table. You should see the new record corresponding to the data submitted through Jotform. This step is crucial to ensure that the integration is seamless and functional.


5. Finalizing the Workflow for Continuous Integration

After successful testing, you can finalize your workflow in Pabbly Connect. Make sure to save all changes and ensure that the workflow is active. This allows the integration to run continuously, capturing new submissions from Jotform and inserting them into your MySQL tables automatically.

Additionally, you can create multiple actions within the same workflow to insert data into different MySQL tables as needed. This flexibility allows you to manage various data types efficiently.

With the workflow finalized, you can now enjoy the benefits of automated data entry, reducing manual errors and saving time. Pabbly Connect ensures that your data flow between Jotform and MySQL is efficient and reliable.


Conclusion

In this tutorial, we explored how to use Pabbly Connect to insert records in multiple MySQL tables instantly from Jotform submissions. By following these steps, you can automate your data management processes effectively.

Ensure you check out Pabbly Connect to create business automation workflows and reduce manual tasks. Pabbly Connect currently offer integration with 2,000+ applications.

How to Send Jotform Responses to Multiple Email Addresses Using Pabbly Connect

Learn how to use Pabbly Connect to send Jotform responses to multiple email addresses efficiently. Follow this step-by-step tutorial for seamless integration with Gmail. Develop expertise in application integration and learn how to design streamlined automation workflows using proven, simplified approaches.

Watch Step By Step Video Tutorial Below


1. Accessing Pabbly Connect for Jotform Integration

To send Jotform responses to multiple email addresses, first, you need to access Pabbly Connect. Open your browser and type in Pabbly.com/connect. You will see options to sign in or sign up for free. If you’re an existing user, simply sign in; if not, click on the ‘Sign up for free’ button to create your account.

After signing in, you will be directed to the Pabbly Connect dashboard. From here, click on the ‘Create Workflow’ button to start setting up your integration. This is where you will name your workflow, for example, ‘Send Jotform Responses to Multiple Email Addresses’. Ensure that you save this workflow in a relevant folder for easy access later.


2. Setting Up Trigger and Action in Pabbly Connect

In this step, you will define the trigger and action in Pabbly Connect. The trigger application will be Jotform, and the action application will be Gmail. Start by selecting Jotform as your trigger application and choose the event ‘New Response’. This setup means that every time a new response is received, it will trigger the next action.

  • Select Jotform as the Trigger Application.
  • Choose the Trigger Event as ‘New Response’.
  • Choose Gmail as the Action Application.
  • Select the Action Event as ‘Send Email’.

Now that the trigger and action are set, Pabbly Connect will facilitate the connection between Jotform and Gmail. This means that every time a new response is submitted via Jotform, an email will automatically be sent to the specified addresses in Gmail.


3. Connecting Jotform with Pabbly Connect

Next, you need to connect Jotform with Pabbly Connect. In the trigger window, you will see a webhook URL generated by Pabbly Connect. This URL is crucial as it acts as a bridge between Jotform and Pabbly Connect. Copy this webhook URL to your clipboard.

Now, go to your Jotform account, open the form you’ve created, and navigate to the ‘Settings’ tab. From there, go to ‘Integrations’ and search for ‘Webhooks’. In the Webhooks integration, paste the copied webhook URL into the provided field and click on ‘Complete Integration’. This action will create a successful connection.


4. Setting Up Gmail Integration in Pabbly Connect

After establishing the connection with Jotform, you now need to set up Gmail integration in Pabbly Connect. Click on the ‘Connect’ button to link your Gmail account. Make sure you have your Gmail account open in another tab, as you will need to allow access for Pabbly Connect.

Once connected, you will see a field for recipient email addresses. Here, you can enter multiple email addresses separated by commas. For example, you can input the HR team emails such as [email protected], [email protected], and [email protected]. Fill in the sender name, email subject, and content type as required. In the email content, you can map the details from the Jotform response, ensuring that the email sent will have the relevant information.

  • Enter multiple email addresses in the recipient field.
  • Fill in the sender name and email subject.
  • Map the details from the Jotform response to the email content.

After you have successfully configured these settings, click on ‘Save and Send Test Request’ to ensure everything is working correctly. If the email is sent successfully, you will see a confirmation response from Pabbly Connect.


5. Conclusion on Sending Jotform Responses to Multiple Email Addresses

In conclusion, using Pabbly Connect to send Jotform responses to multiple email addresses is a straightforward process. By setting up the trigger and action correctly, you can automate email notifications to your HR team seamlessly. This integration not only saves time but also ensures that important information is shared promptly.

Ensure you check out Pabbly Connect to create business automation workflows and reduce manual tasks. Pabbly Connect currently offer integration with 2,000+ applications.

With this tutorial, you have learned how to effectively use Pabbly Connect for your Jotform and Gmail integration, enhancing your workflow efficiency. Now, you can ensure that every Jotform submission reaches the right people in your organization without any manual effort.

Integrate Instagram Leads with System.io Using Pabbly Connect

Learn how to seamlessly integrate Instagram leads with System.io using Pabbly Connect. Follow our step-by-step guide for automation. Revolutionize your productivity approach with just a few strategic clicks. Uncover professional methods for connecting applications and creating workflows that reclaim hours of your week.

Watch Step By Step Video Tutorial Below


1. Accessing Pabbly Connect for Integration

To integrate Instagram leads with System.io, you first need to access Pabbly Connect. Start by navigating to the Pabbly Connect website, where you have options to sign in or sign up for free. If you are a new user, you can sign up and receive 100 tasks for free every month.

Once signed in, you will be directed to the dashboard. Here, you can create a new workflow by clicking on the ‘Create Workflow’ button located at the top right corner of the screen. This is where the integration process begins, utilizing the automation capabilities of Pabbly Connect.


2. Setting Up Trigger and Action in Pabbly Connect

In this section, you will set up the trigger and action for your integration using Pabbly Connect. The trigger application will be Instagram Lead Ads, and the action application will be System.io. Begin by naming your workflow appropriately, such as ‘Create System.io Contact from Instagram Ads Leads’.

  • Select ‘Instagram Lead Ads’ as your trigger application.
  • Choose the trigger event as ‘New Lead Instant’.
  • Set ‘System.io’ as your action application with the action event as ‘Create a New Contact’.

Once you have selected your trigger and action applications, click on the ‘Connect’ button to establish the connection. This will allow Pabbly Connect to automate the process of capturing leads from Instagram and creating contacts in System.io.


3. Connecting Instagram Lead Ads to Pabbly Connect

To connect Instagram Lead Ads to Pabbly Connect, you need to authorize the connection through your Facebook account. Click on the ‘Connect with Instagram Lead Ads’ button and select your Facebook account. Ensure that your Instagram account is linked to this Facebook account.

After successful authorization, you will see a confirmation message. Now, you need to select the Facebook page that is associated with your Instagram account and the lead gen form you have created. This step is crucial as it allows Pabbly Connect to access your leads from Instagram.


4. Testing the Integration with a Sample Lead

To ensure that your integration works correctly, you should test it by generating a sample lead. You can use the Meta Lead Ads Testing Tool to create a test lead. Fill in the necessary details in the lead form and submit it to see if the lead is captured in Pabbly Connect.

  • Navigate to the Meta for Developers page and access the lead ads testing tool.
  • Select your Facebook page and lead form.
  • Submit the form to generate a test lead.

Once the test lead is submitted, check Pabbly Connect to confirm that the lead details have been captured successfully. This ensures that your automation is functioning as intended.


5. Finalizing the Automation to Create a Contact in System.io

After confirming that the test lead has been captured in Pabbly Connect, proceed to create a contact in System.io using the lead details. You will need to establish a connection with System.io by providing an API key from your System.io account.

To do this, go to your System.io settings and create a new API key. Once you have copied the key, paste it into Pabbly Connect to complete the connection. After mapping the lead details to the respective fields in System.io, click on ‘Save and Send Test Request’ to finalize the process.


Conclusion

In this tutorial, we demonstrated how to integrate Instagram leads with System.io using Pabbly Connect. By following the step-by-step process, you can automate the creation of contacts from your Instagram ads, streamlining your lead management. This integration enhances efficiency and ensures that no lead is missed in your marketing efforts.

Ensure you check out Pabbly Connect to create business automation workflows and reduce manual tasks. Pabbly Connect currently offer integration with 2,000+ applications.

How to Automate File Upload from One Drive to Google Drive Using Pabbly Connect

Learn how to automate file uploads from One Drive to Google Drive using Pabbly Connect in this detailed step-by-step tutorial. Revolutionize your productivity approach with just a few strategic clicks. Uncover professional methods for connecting applications and creating workflows that reclaim hours of your week.

Watch Step By Step Video Tutorial Below


1. Accessing Pabbly Connect for Automation

To automate file uploads from One Drive to Google Drive, the first step is accessing Pabbly Connect. Start by visiting the Pabbly Connect website, where you can sign in or create a free account to get started.

Once you are logged in, you will see the Pabbly dashboard. From here, you can select Pabbly Connect to begin creating your automation workflow. This platform allows the integration of various applications seamlessly.


2. Creating a Workflow in Pabbly Connect

To create a new workflow, click on the ‘Create Workflow’ button located in the top right corner of the dashboard. You will need to name your workflow, for instance, ‘Upload File from One Drive to Google Drive.’ Next, choose a folder to save this workflow.

  • Click on the drop-down arrow to select a folder.
  • Choose the appropriate folder, such as ‘Google Drive Automations.’

After selecting the folder and naming your workflow, click the ‘Create’ button. This will set up your workflow, allowing you to define the trigger and action steps necessary for the automation process using Pabbly Connect.


3. Setting Up the Trigger in Pabbly Connect

In this step, you will set up the trigger for your automation. Click on the trigger application and select ‘Microsoft One Drive’ as your trigger application. Choose the trigger event as ‘New File’ to capture any new files uploaded to your One Drive folder.

Once selected, click on the ‘Connect’ button. If you do not have an existing connection, choose the ‘Add New Connection’ option. After authorizing your Microsoft One Drive account, specify the folder path for the trigger. This folder path will direct Pabbly Connect to monitor the correct folder.


4. Defining the Action in Pabbly Connect

After setting up the trigger, it’s time to define the action step. Select ‘Google Drive’ as your action application and choose ‘Upload a File’ as the action event. Click on ‘Connect’ and authorize your Google Drive account.

In the action setup, you will need to map the data from the previous trigger step to upload the file correctly. You will specify the file URL from One Drive that you want to upload to Google Drive. This mapping ensures that Pabbly Connect dynamically uploads the correct file each time a new file is added.

  • Map the file URL from the One Drive trigger.
  • Specify the destination folder ID in Google Drive.

Once all details are filled, click on ‘Save and Send Test Request’ to ensure everything is functioning as intended. This step will upload the specified file to your Google Drive, confirming the integration via Pabbly Connect.


5. Testing the Automation Process

To verify that your automation is working correctly, upload a new file to your One Drive folder. After the upload, wait for the pulling duration, which is typically set at 10 minutes for One Drive.

After the waiting period, check your Google Drive folder to see if the new file has been uploaded. This process confirms that Pabbly Connect successfully integrates the two applications, allowing for seamless file transfers.

By following these steps, you can automate file uploads between One Drive and Google Drive efficiently. Ensure to monitor and adjust the settings as necessary for optimal performance.


Conclusion

In this tutorial, we demonstrated how to automate file uploads from One Drive to Google Drive using Pabbly Connect. This integration streamlines your workflow, allowing for efficient file management across platforms.

Ensure you check out Pabbly Connect to create business automation workflows and reduce manual tasks. Pabbly Connect currently offer integration with 2,000+ applications.

Automatically Send Facebook Lead Ads Leads to Specific Email ID Using Pabbly Connect

Learn how to automatically send Facebook Lead Ads leads to a specific email ID using Pabbly Connect. Step-by-step tutorial with detailed instructions. Implement the precise methodologies leading organizations use to automate repetitive tasks, illustrated with practical examples designed for immediate application.

Watch Step By Step Video Tutorial Below


1. Accessing Pabbly Connect for Integration

To automatically send Facebook Lead Ads leads to a specific email ID, you need to access Pabbly Connect. Start by visiting the Pabbly Connect website and signing in to your account. If you are a new user, you can sign up for free and get 100 free tasks every month.

Once signed in, you will see the Pabbly Connect dashboard. From here, click on the ‘Access Now’ button for Pabbly Connect. This will take you to the main interface where you can create your automation workflows.


2. Creating a Workflow in Pabbly Connect

After accessing Pabbly Connect, the next step is to create a workflow. Click on the ‘Create Workflow’ button in the top right corner. A dialog box will appear asking you to name your workflow. You can name it ‘Automatically Send Facebook Lead Ads Leads to Specific Email ID’.

  • Name your workflow appropriately.
  • Select the folder where you want to save this workflow.
  • Click ‘Create’ to finalize the workflow creation.

Your workflow is now created, and you will see two main sections: Trigger and Action. The Trigger will be set to Facebook Lead Ads, while the Action will be set to Gmail, both facilitated by Pabbly Connect.


3. Setting Up the Trigger for Facebook Lead Ads

In this step, you will set up the trigger in Pabbly Connect. Click on the Trigger section and select Facebook Lead Ads as your trigger application. For the trigger event, choose ‘New Lead Instant’. This means that every time a new lead is generated, it will trigger the workflow.

Next, click on ‘Connect’ to link your Facebook account. A new window will open where you can add a new connection. Select your Facebook page, which in this case is ‘Innova Tech’. After that, select the lead generation form you created, named ‘Lead Ads Form’. Click ‘Save and Test Request’ to ensure that Pabbly Connect captures the lead response.


4. Generating a Test Lead for Facebook Lead Ads

To verify that Pabbly Connect is capturing leads correctly, you need to generate a test lead. Use the Facebook Lead Ads Testing Tool to create a test lead. Select the page ‘Innova Tech’ and the form ‘Lead Ads Form’. Fill in the required details, such as first name, last name, email, and mobile number.

  • Enter dummy details for the test lead.
  • Click ‘Continue’ and then ‘Submit’ to send the test lead.
  • Check back in Pabbly Connect to see if the lead was captured.

If the lead appears in your workflow, it means that the trigger has been successfully set up. You can now proceed to set up the action step.


5. Setting Up the Action to Send Email via Gmail

Now that the trigger is working, it’s time to set up the action in Pabbly Connect. Click on the Action section and select Gmail as your action application. For the action event, choose ‘Send Email’. After selecting this, click on ‘Connect’ to link your Gmail account.

Once authorized, you will need to fill in the details for the email you want to send. Enter the recipient’s email address (the specific email ID), the sender’s name, and the email subject. In the email content, you can write: ‘Hello Sir/Madam, a new lead has been generated via Facebook Lead Ads. Below are the details…’. You will also map the lead details dynamically from the previous step.


Conclusion

In this tutorial, we demonstrated how to automatically send Facebook Lead Ads leads to a specific email ID using Pabbly Connect. By following these steps, you can ensure that every new lead is captured and forwarded efficiently, enhancing your business communication and lead management.

Ensure you check out Pabbly Connect to create business automation workflows and reduce manual tasks. Pabbly Connect currently offer integration with 2,000+ applications.

Automate WhatsApp Notifications for Stripe Refunds Using Pabbly Connect

Learn how to automate WhatsApp notifications for Stripe refunds using Pabbly Connect. This step-by-step tutorial guides you through the integration process. Eliminate manual repetitive tasks from your workflow. Discover proven automation methods with intuitive steps designed for efficiency-minded professionals.

Watch Step By Step Video Tutorial Below


1. Accessing Pabbly Connect for Automation

To start using Pabbly Connect, visit the official website and sign up for a free account. This platform allows you to automate workflows without coding skills.

Once you create your account, you will receive 100 free tasks monthly. Log in to access the dashboard, where you can manage your workflows and integrations effectively.


2. Creating a Workflow in Pabbly Connect

In this section, we will create a workflow in Pabbly Connect to send WhatsApp messages for Stripe refunds. Click on the ‘Create Workflow’ button and name it appropriately, such as ‘Send WhatsApp Message for Stripe Refunds’.

  • Select a folder for saving your workflow, e.g., ‘Stripe and WhatsApp Automations’.
  • Click on ‘Create’ to initiate the workflow setup.

After creating the workflow, you will see two sections: Trigger and Action. The Trigger will be Stripe, and the Action will be WhatsApp Cloud API. This setup ensures that when a refund occurs in Stripe, a message is sent automatically via WhatsApp.


3. Setting Up the Trigger for Stripe Refunds

To set the trigger in Pabbly Connect, select Stripe as your application and choose the trigger event as ‘New Refund’. This event will activate the workflow whenever a refund is initiated.

Copy the provided webhook URL and navigate to your Stripe account. Go to the Developer section and select Webhooks. Here, you will add a new endpoint using the copied URL.

  • Click on ‘Add Endpoint’ and paste the webhook URL.
  • Select the event type as ‘Charge Refund’ to receive notifications for refunds.

Once the webhook is active, return to Pabbly Connect and test the webhook by initiating a refund in Stripe. This will confirm that the connection is working correctly.


4. Setting Up the Action to Send WhatsApp Messages

After confirming the trigger, we will set up the action in Pabbly Connect. Select WhatsApp Cloud API as your action application. The action event will be ‘Send Template Message’ to automate the message delivery.

To connect to WhatsApp Cloud API, provide necessary details like the token, phone number ID, and WhatsApp business account ID. You can find these details in the Meta for Developers dashboard.

Select the template you created in WhatsApp for sending messages. Map the recipient’s mobile number and other variables like name, amount, and product details.

After mapping all necessary details, click on ‘Save and Send Test Request’ to verify that the message is sent successfully to the customer.


5. Conclusion: Automating Refund Notifications with Pabbly Connect

In conclusion, using Pabbly Connect allows you to automate WhatsApp notifications for Stripe refunds seamlessly. By setting up triggers and actions, you can ensure that customers are promptly informed about their refunds.

Ensure you check out Pabbly Connect to create business automation workflows and reduce manual tasks. Pabbly Connect currently offer integration with 2,000+ applications.

This integration not only saves time but also enhances customer communication. With Pabbly Connect, you can easily manage various automations without any coding knowledge, making it an invaluable tool for businesses.


Integrate Google Forms with PDF and Gmail Using Pabbly Connect

Learn how to automate Google Forms responses as PDF and send them via Gmail using Pabbly Connect. Step-by-step tutorial included. Build sophisticated automated workflows in less time than you think. This guide translates complex integrations into straightforward steps for immediate implementation.

Watch Step By Step Video Tutorial Below


1. Accessing Pabbly Connect for Integration

To integrate Google Forms with PDF and Gmail, you first need to access Pabbly Connect. Simply type in Pabbly.com/connect in your browser. This platform enables seamless automation between various applications.

Once on the Pabbly Connect page, you can either sign in if you are an existing user or sign up for free if you are new. As a new user, you will receive 100 tasks for free every month, which is a great way to start automating your processes.


2. Creating a Workflow in Pabbly Connect

After signing in, navigate to your dashboard and click on the ‘Create Workflow’ button. Here, you will name your workflow, for instance, ‘Save Google Forms Responses as PDF and Auto Send via Gmail.’ This step is crucial as it sets the foundation for your automation.

  • Name your workflow appropriately.
  • Select a folder to save your workflow.
  • Click on ‘Create’ to finalize your workflow setup.

Once the workflow is created, you will be directed to the trigger and action setup window. Here, you will define what triggers the automation and what actions follow. This is where the power of Pabbly Connect truly shines, allowing you to automate tasks seamlessly.


3. Setting Up Trigger and Actions in Pabbly Connect

In this section, you will set up the trigger for your workflow. Select Google Forms as your trigger application and choose ‘New Response Received’ as the trigger event. This means that every time a new form is submitted, the workflow will be activated automatically.

Next, you will set up the actions that follow the trigger. The first action is to create a document from a template in Google Docs. Search for Google Docs in Pabbly Connect and select ‘Create Document from Template’ as the action event. This action will generate a PDF based on the form responses.

  • Choose Google Docs for the first action.
  • Select the appropriate template for document creation.
  • Map the form response data into the document.

This setup allows Pabbly Connect to create personalized PDF documents automatically based on each new Google Form submission, ensuring timely responses to customers.


4. Linking Google Sheets with Pabbly Connect

After setting up the document creation, the next step is to link Google Sheets with Pabbly Connect. This is done by navigating to the Google Form responses and linking them to a Google Sheet. Click on ‘Responses’ and then select ‘Link to Sheets’ to create a new sheet for your form responses.

Once the Google Sheet is created, go to the extensions menu, select Pabbly Connect Webhooks, and perform the initial setup. You will need to paste the webhook URL provided by Pabbly Connect into the setup window. This URL acts as a bridge connecting Google Sheets to Pabbly.

Ensure the Google Sheets extension for Pabbly Connect is installed. Paste the webhook URL in the setup window. Set the trigger column to the last data column in your sheet.

This integration allows Pabbly Connect to receive form submission data in real-time, ensuring that your workflow executes promptly with every new entry.


5. Sending PDF via Gmail Using Pabbly Connect

The final step in this automation is to send the generated PDF via Gmail. In Pabbly Connect, select Gmail as your action application and choose ‘Send Email’ as the action event. This allows you to automatically email the generated PDF to the customer.

Map the recipient’s email address, subject, and body of the email using the response data. This ensures that each customer receives their personalized email with the discount offer PDF attached.

Map the recipient’s email from the Google Form response. Set the email subject to include the customer’s name. Attach the generated PDF document to the email.

By completing this setup, Pabbly Connect automates the entire process, ensuring that every customer receives their PDF promptly after submitting the form.


Conclusion

This tutorial demonstrates how to use Pabbly Connect to integrate Google Forms, PDF generation, and Gmail for seamless automation. By following these steps, you can enhance your business processes efficiently.

Ensure you check out Pabbly Connect to create business automation workflows and reduce manual tasks. Pabbly Connect currently offer integration with 2,000+ applications.