How to Create QuickBooks Online Customer from ThriveCart Purchase & Add Data in Google Sheets Using Pabbly Connect

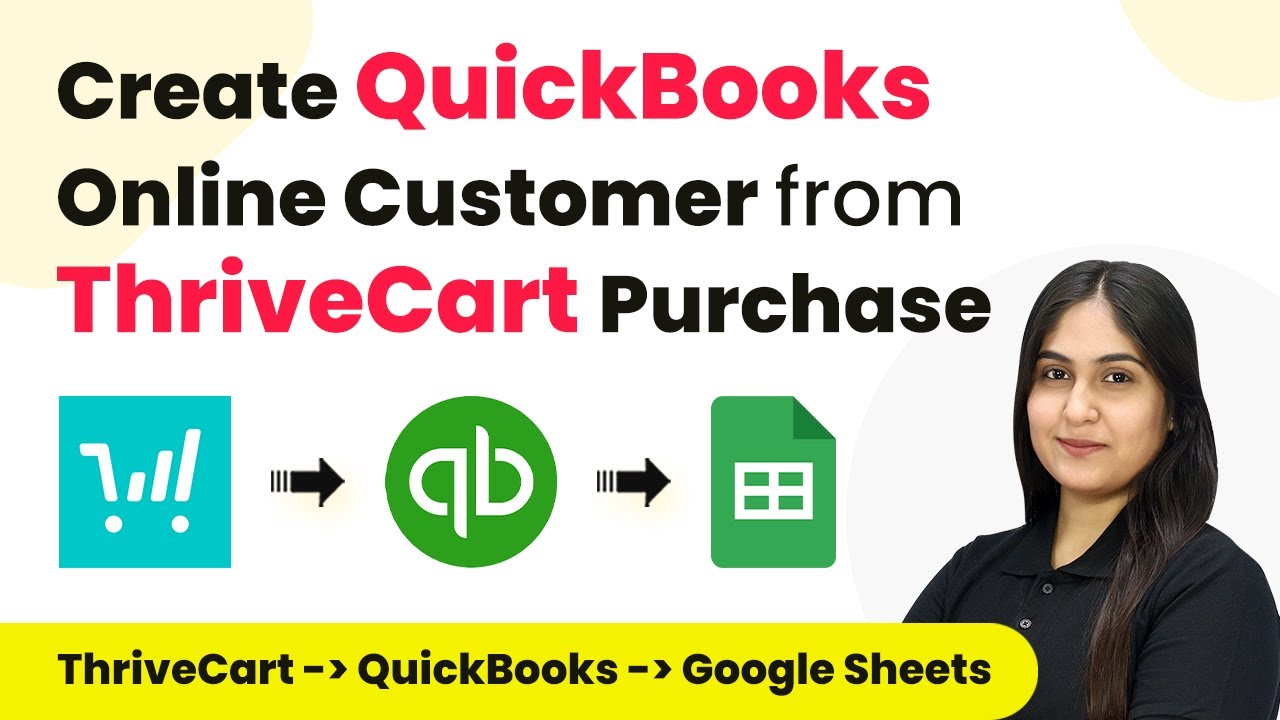
Learn how to create QuickBooks Online customers from ThriveCart purchases and add data to Google Sheets using Pabbly Connect in this detailed tutorial. Eliminate manual repetitive tasks from your workflow. Discover proven automation methods with intuitive steps designed for efficiency-minded professionals.

Watch Step By Step Video Tutorial Below


1. Accessing Pabbly Connect for Integration

To create QuickBooks Online customers from ThriveCart purchases and add data to Google Sheets, you will first need to access Pabbly Connect. This platform enables seamless automation between different applications, making it essential for this integration.

Start by visiting the Pabbly Connect homepage. If you are a new user, click on ‘Sign Up Free’ to create an account and receive 300 tasks every month. Existing users can simply click on ‘Sign In’ to access their dashboards.


2. Creating a New Workflow in Pabbly Connect

Once logged in, you will be on the Pabbly Connect dashboard. To begin, click on the ‘Create Workflow’ button located at the top right corner. Name your workflow, such as ‘Create QuickBooks Online Customer from ThriveCart Purchase and Add Data in Google Sheets,’ and select your desired folder.

  • Click on the ‘Create’ button to initiate the workflow.
  • Understand the two key components: Trigger and Action.
  • Set your trigger application as ThriveCart and your action applications as QuickBooks and Google Sheets.

With this setup, you are ready to define the trigger that will start the automation process using Pabbly Connect.


3. Setting Up the Trigger for ThriveCart

The next step is to set up the trigger application. Select ThriveCart as your trigger application and choose ‘Product Purchase’ as the trigger event. Click on ‘Connect’ to establish a connection with ThriveCart. using Pabbly Connect

If you need to create a new connection, select ‘Add New Connection’ and provide a name for your connection. Generate an API key from your ThriveCart account settings under ‘API and Webhooks’ and copy it back to Pabbly Connect. Once done, click on the ‘Save’ button.


4. Configuring Action Steps in QuickBooks and Google Sheets

After setting up your trigger, it’s time to configure the action steps. Choose QuickBooks as your first action application and set the action event to ‘Create a Customer’. Connect your QuickBooks account by clicking on ‘Connect’ and authorizing access. using Pabbly Connect

  • Map fields such as First Name, Last Name, Email, City, and Phone Number from the ThriveCart response.
  • Ensure that all necessary fields are filled out correctly.

After mapping the data, click on ‘Save and Send Test Request’ to verify if the customer is created successfully in QuickBooks. Next, set up Google Sheets as your second action application and choose ‘Add a New Row’. Connect to your Google Sheets account and select the spreadsheet you previously created.


5. Testing and Verifying the Integration

To ensure everything is working as expected, perform a test purchase in ThriveCart. Use dummy data for the test submission and complete the order. After the purchase, go back to Pabbly Connect and check if you received a successful response with the purchase details.

Verify in your QuickBooks account if the new customer has been created and check your Google Sheets to see if the new row has been added with the correct information. This confirms that the integration between ThriveCart, QuickBooks, and Google Sheets via Pabbly Connect is functioning properly.


Conclusion

In this tutorial, we have successfully demonstrated how to create QuickBooks Online customers from ThriveCart purchases and add data to Google Sheets using Pabbly Connect. This automation streamlines your workflow and ensures that customer data is accurately recorded across platforms. By following the steps outlined above, you can easily set up this integration for your own business needs.

Ensure you check out Pabbly Connect to create business automation workflows and reduce manual tasks. Pabbly Connect currently offer integration with 2,000+ applications.

How to Add New Facebook Leads to MS Excel Using Pabbly Connect

Learn how to integrate Facebook Lead Ads with MS Excel using Pabbly Connect. Follow this step-by-step guide for seamless automation of lead data. Learn to create powerful connections between your critical applications without requiring specialized programming knowledge or extensive technical background.

Watch Step By Step Video Tutorial Below


Setting Up Pabbly Connect for Facebook Leads Integration

To start integrating Facebook Lead Ads with MS Excel, you need to access Pabbly Connect. This platform allows you to automate workflows seamlessly. Begin by visiting the Pabbly Connect homepage and signing in or signing up for a free account to explore its features.

Once logged in, you will see the Pabbly Connect dashboard. Here, you can create a new workflow by clicking on the ‘Create Workflow’ button. Name your workflow, such as ‘Add New Facebook Leads to Microsoft Excel,’ and select a folder for organization.


Configuring the Trigger with Facebook Lead Ads

After setting up your workflow in Pabbly Connect, the next step is to configure the trigger application. Choose ‘Facebook Lead Ads’ as your trigger application and select the trigger event as ‘New Lead Instant.’ This selection ensures that every time a new lead is generated, Pabbly Connect captures it immediately.

To connect your Facebook account, click on ‘Connect’ and select ‘Add New Connection.’ Enter a name for the connection, such as ‘MS Excel,’ and authorize the connection. After successful authorization, select your Facebook page and the lead form you want to use. This setup allows Pabbly Connect to receive lead data from your specified Facebook lead form.


Setting Up the Action to Add Leads to MS Excel

With the trigger configured, the next step is to set up the action in Pabbly Connect. Choose ‘Microsoft Excel’ as the action application and select the action event as ‘Add a Row to Worksheet.’ This action will send the captured lead data to your Excel sheet.

Click on ‘Connect’ to establish a connection with your Microsoft Excel account. If prompted, accept the permissions for Pabbly Connect to access your Excel data. After successful connection, specify the workbook where you want the leads to be added. Make sure to select the correct worksheet where the data will be stored.

  • Select the workbook named ‘Facebook Leads’.
  • Choose the worksheet as ‘Sheet1’.
  • Map the fields for full name, email, and phone number.

After mapping the fields, click on ‘Save and Send Test Request’ to confirm the integration. You should receive a successful response indicating that the lead data has been added to your Excel sheet.


Testing the Automation Workflow

Now that you have set up the integration between Facebook Lead Ads and MS Excel using Pabbly Connect, it’s essential to test the automation. Start by generating a test lead in your Facebook lead form. You can do this by using the Meta for Developers tool to submit a test lead with dummy data.

Once you submit the test lead, return to Pabbly Connect to check if the lead data has been captured successfully. You should see the details of the test lead, including the first name, last name, email, and phone number. This confirmation indicates that the trigger is working correctly.

  • Delete previous test leads to avoid conflicts.
  • Use the same lead form to generate new test data.
  • Verify that the new lead appears in your Excel sheet.

After confirming that the test lead appears in your Excel sheet, your automation is successfully set up and ready to use.


Conclusion

In this tutorial, we demonstrated how to integrate Facebook Lead Ads with MS Excel using Pabbly Connect. By following these steps, you can automate the process of adding new leads to your Excel sheet seamlessly. This integration not only saves time but also ensures accurate lead management.

Ensure you check out Pabbly Connect to create business automation workflows and reduce manual tasks. Pabbly Connect currently offer integration with 2,000+ applications.

How to Add OnceHub Booking Details in Google Sheets Using Pabbly Connect

Learn how to seamlessly integrate OnceHub booking details into Google Sheets using Pabbly Connect. Follow this step-by-step tutorial for efficient automation. Follow this definitive guide to creating powerful automated workflows with straightforward, efficiency-focused solutions that save valuable time.

Watch Step By Step Video Tutorial Below


1. Accessing Pabbly Connect for Integration

To start this process, we will access Pabbly Connect to automate the integration between OnceHub and Google Sheets. First, open your web browser and search for Pabbly Connect.

Once on the landing page, you will find options to sign in or sign up. If you’re a new user, click on ‘Sign Up for Free’ to get started. Existing users can directly sign in to access the dashboard. After logging in, locate and click on the ‘Access Now’ button for Pabbly Connect.


2. Creating a Workflow in Pabbly Connect

After accessing Pabbly Connect, the next step is to create a workflow that connects OnceHub with Google Sheets. Click on the ‘Create Workflow’ button, which will prompt you to name your workflow. using Pabbly Connect

  • Name your workflow as ‘Add OnceHub Booking Details in Google Sheets’.
  • Select the folder for this workflow, such as ‘Automations’.

After naming your workflow, click on the ‘Create’ button. You will be directed to the workflow window where you can set up the trigger and action for your automation.


3. Setting Up the Trigger with OnceHub

In this step, we will configure the trigger for our workflow using OnceHub. Click on the ‘Select App’ field and search for OnceHub, then select it as the trigger application. using Pabbly Connect

For the trigger event, choose ‘Booking Scheduled’. Click on the ‘Connect’ button to establish a connection. If you haven’t connected your OnceHub account before, you’ll need to add a new connection using your API key.

  • Log into your OnceHub account to retrieve your API key.
  • Paste the API key into Pabbly Connect and click ‘Save’.

After saving, you will need to create a test booking in OnceHub to trigger the workflow and confirm that the connection is successful.


4. Setting Up the Action to Google Sheets

Once the trigger is set up, the next step is to configure the action that sends data to Google Sheets. Search for Google Sheets in the action app selection and select it. using Pabbly Connect

For the action event, choose ‘Add New Row’ and click on ‘Connect’. If you haven’t connected your Google Sheets account before, you will need to sign in with your Google account and grant permissions to Pabbly Connect.

Select the spreadsheet you want to use, such as ‘Event’. Choose the specific sheet, like ‘Sheet1’, for the data entry.

Next, map the data fields from the OnceHub booking details to the corresponding columns in Google Sheets. This mapping ensures that each new booking will automatically populate the correct fields in your spreadsheet.


5. Finalizing the Workflow and Testing

After mapping the fields, save your settings and send a test request to verify that the data is correctly sent to Google Sheets. If successful, you will see the booking details reflected in your spreadsheet.

To test the workflow, create another booking in OnceHub and check if the details appear in Google Sheets as expected. This confirms that the integration is functioning correctly.

In summary, the workflow involves:

Trigger: OnceHub (Booking Scheduled) Action: Google Sheets (Add New Row)

By following these steps, you can effectively automate the process of adding OnceHub booking details into Google Sheets using Pabbly Connect.


Conclusion

This tutorial demonstrated how to integrate OnceHub booking details into Google Sheets using Pabbly Connect. By automating this process, you can efficiently manage your bookings and keep your records updated seamlessly.

Ensure you check out Pabbly Connect to create business automation workflows and reduce manual tasks. Pabbly Connect currently offer integration with 2,000+ applications.

How to Shorten URL from Microsoft Excel via Bitly Using Pabbly Connect

Learn how to shorten URLs from Microsoft Excel using Bitly through Pabbly Connect in this detailed tutorial. Step-by-step instructions included. Explore efficient methods for automating routine tasks with clear, concise instructions suited for both newcomers and experienced professionals.

Watch Step By Step Video Tutorial Below


1. Accessing Pabbly Connect for URL Shortening

To shorten URLs from Microsoft Excel via Bitly, we first need to access Pabbly Connect. Begin by searching for Pabbly Connect in your browser and navigate to the landing page. Here, you can either sign in if you already have an account or sign up for free to get started.

Once logged in, you will see various tools offered by Pabbly. Select Pabbly Connect to initiate the integration process. Click on the ‘Access Now’ button to open your dashboard, where you can create a new workflow for shortening URLs.


2. Creating a Workflow in Pabbly Connect

In this step, we will create a new workflow in Pabbly Connect specifically for shortening URLs. Click on the ‘Create Workflow’ button and provide a name for your workflow, such as ‘How to Shorten URL from Microsoft Excel via Bitly.’ Choose a folder to save your workflow, like ‘Automations,’ and click on ‘Create.’

  • Name your workflow appropriately.
  • Select a folder for organization.
  • Click ‘Create’ to proceed.

Now, you’ll be directed to the workflow window where you can set up triggers and actions. The trigger will be Microsoft Excel, and the action will be Bitly. This setup allows you to automate the process of shortening URLs as soon as new data is added to your Excel sheet.


3. Setting Up the Trigger in Pabbly Connect

The next step involves setting up the trigger in Pabbly Connect. Search for Microsoft Excel and select it as your trigger application. Choose the trigger event as ‘New Row in Worksheet.’ This means that every time a new row is updated in your Excel sheet, the workflow will be triggered.

Click on ‘Connect’ to establish a connection with your Microsoft Excel account. If you haven’t connected your account before, select ‘Add a New Connection’ and follow the prompts to allow Pabbly Connect access to your Excel data. Once connected, specify the workbook and worksheet names where your video details are stored.


4. Shortening URL with Bitly via Pabbly Connect

After successfully setting up the trigger, it’s time to configure the action using Pabbly Connect. Search for Bitly and select it as your action application. Choose the action event as ‘Shorten Link.’ This will allow Pabbly Connect to take the long URL from your Excel sheet and shorten it using Bitly.

  • Select Bitly as the action application.
  • Choose ‘Shorten Link’ as the action event.
  • Connect your Bitly account by allowing necessary permissions.

Once you’ve mapped the long URL from the previous step, click on ‘Save and Send Test Request’ to verify the integration. If successful, you will see the shortened URL generated by Bitly, confirming that the action step is complete.


5. Adding Shortened URL Back to Excel via Pabbly Connect

Finally, to complete the process, we will add the shortened URL back to Microsoft Excel using Pabbly Connect. Again, select Microsoft Excel as the action application and this time choose ‘Add Row to Worksheet’ as the action event. Connect to your Excel account once more, ensuring you are linked to the correct workbook and worksheet.

Map the video title, video URL, and the shortened URL from Bitly to the corresponding fields in your Excel sheet. After mapping, click ‘Save and Send Test Request’ to add the new row with the shortened URL into your worksheet. A successful response will indicate that the details have been added correctly.


Conclusion

In this tutorial, we learned how to shorten URLs from Microsoft Excel using Bitly through Pabbly Connect. By following the steps outlined, you can automate the process of URL shortening seamlessly. This integration not only saves time but also enhances your data management efficiency.

Ensure you check out Pabbly Connect to create business automation workflows and reduce manual tasks. Pabbly Connect currently offer integration with 2,000+ applications.

How to Create Jumpseller Product from Google Sheets Using Pabbly Connect

Learn how to create Jumpseller products from Google Sheets using Pabbly Connect. Follow this step-by-step guide for seamless integration. Discover how to seamlessly connect your essential tools through accessible instructions that make powerful automation available to professionals at every skill level.

Watch Step By Step Video Tutorial Below


1. Accessing Pabbly Connect for Integration

To create Jumpseller products from Google Sheets, the first step is accessing Pabbly Connect. Start by opening a new tab in your browser and navigating to the Pabbly Connect homepage.

If you don’t have an account, click on the ‘Sign Up for Free’ button. This will only take a couple of minutes, and you will receive 100 free tasks each month. For existing users, simply sign in to access the dashboard.


2. Creating a New Workflow in Pabbly Connect

Once logged into Pabbly Connect, you will see your dashboard. Click on the ‘Create Workflow’ button to start setting up your integration. Name your workflow something descriptive, like ‘Create Jumpseller Product from Google Sheets’.

  • Select the appropriate folder for your workflow.
  • Click ‘Create’ to move to the main workflow setup.

In the workflow setup, you will see two main sections: Trigger and Action. The Trigger is the event that starts the workflow, while Action is what happens as a result. Here, you will set up Google Sheets as the Trigger application.


3. Setting Up Google Sheets as the Trigger

In the Trigger section, select Google Sheets from the list of applications. You will then need to choose the event that triggers the workflow, which is ‘New or Updated Spreadsheet Row’. This means that whenever a new row is added or updated in your Google Sheet, it will trigger the workflow.

To connect Google Sheets with Pabbly Connect, you will need to copy the provided Webhook URL. This URL acts as a bridge between Google Sheets and Pabbly Connect. Go to your Google Sheet, navigate to Extensions, and access the Pabbly Connect Webhooks extension. If you do not have this extension, install it from the Google Workspace Marketplace.


4. Initial Setup in Google Sheets

After installing the Pabbly Connect Webhooks extension, go back to your Google Sheet. Click on ‘Extensions’, then ‘Pabbly Connect Webhook’, and select ‘Initial Setup’. Here, paste the Webhook URL you copied earlier.

  • Set the Trigger Column to the last data entry column, which is typically your designated final column.
  • Click on ‘Send Test’ to verify that the connection is working.

Once the test is successful, click ‘Submit’ to finalize the setup. This process ensures that whenever a new product detail is added to your Google Sheet, it will be automatically sent to Pabbly Connect.


5. Creating a Product in Jumpseller

Now that the trigger is set, it’s time to create the product in Jumpseller. Go back to your Pabbly Connect workflow and set Jumpseller as the Action application. Choose the action event as ‘Create Product’. This action will create a new product in your Jumpseller store using the details captured from Google Sheets.

Connect your Jumpseller account to Pabbly Connect by clicking ‘Add New Connection’. Once connected, map the necessary fields from the Google Sheets response to the corresponding fields in Jumpseller. This includes product name, price, description, and image URL.

After mapping the fields, click ‘Save and Send Test Request’. If the integration is successful, you will receive a positive response indicating that the product has been created in your Jumpseller store. You can verify this by checking your Jumpseller products list.


Conclusion

In this tutorial, we explored how to create Jumpseller products from Google Sheets using Pabbly Connect. By following these steps, you can automate the process of adding new products to your Jumpseller store seamlessly. This integration not only saves time but also ensures accuracy in your product listings.

Ensure you check out Pabbly Connect to create business automation workflows and reduce manual tasks. Pabbly Connect currently offer integration with 2,000+ applications.

Integrating Wix Forms with GoHighLevel CRM Using Pabbly Connect

Learn how to automate lead management by integrating Wix Forms with GoHighLevel CRM using Pabbly Connect. Follow our step-by-step tutorial for seamless automation. Explore efficient methods for automating routine tasks with clear, concise instructions suited for both newcomers and experienced professionals.

Watch Step By Step Video Tutorial Below


1. Accessing Pabbly Connect for Integration

To begin integrating Wix Forms with GoHighLevel CRM, you first need to access Pabbly Connect. This platform allows you to automate workflows without any coding skills. Start by visiting the Pabbly Connect homepage and signing in or signing up for free to create your account.

Once logged in, you will be directed to the dashboard. Here, you can create new workflows and manage existing ones. To create a new workflow, click on the ‘Create Workflow’ button, and provide a relevant name, such as ‘Create GoHighLevel Opportunity on Wix Form Submission’. Select the appropriate folder to save your workflow.


2. Setting Up the Trigger with Wix Forms

In this step, you will configure the trigger in Pabbly Connect to capture new form submissions from Wix. Select Wix Forms as your trigger application and choose the ‘New Form Submission’ event. This event will initiate the workflow whenever a form is submitted.

  • Select the Wix form that will trigger the automation.
  • Ensure the frequency is set to trigger every time a form is submitted.
  • Copy the webhook URL provided by Pabbly Connect.

Next, navigate to your Wix Forms account, go to the ‘Automations’ section, and create a new automation. Paste the webhook URL in the designated field to link Wix Forms with Pabbly Connect. Activate this automation to start capturing form submissions.


3. Testing the Connection Between Wix Forms and Pabbly Connect

After setting up the trigger, it’s crucial to test the connection between Wix Forms and Pabbly Connect. Submit a test form to ensure that the data is correctly captured. Enter dummy data for the first name, last name, email, and phone number, and submit the form.

Once the form is submitted, return to Pabbly Connect and check for the webhook response. You should see all the details of the submitted form, confirming that the connection is working successfully. This step verifies that whenever a new form is submitted, the response will be captured in Pabbly Connect.


4. Creating an Opportunity in GoHighLevel CRM

The next step involves adding the submitted lead as an opportunity in GoHighLevel CRM using Pabbly Connect. For this, select the ‘Lead Connector V2’ as your action application and choose the ‘Create a Contact’ action event. This will allow you to create a new contact in the CRM whenever a form is submitted.

  • Map the data fields from the previous step (first name, last name, email).
  • Ensure you save and send the test request to confirm the contact creation.
  • Check GoHighLevel CRM to verify that the contact has been successfully added.

Once the contact is created, you can proceed to add the same lead as an opportunity. Again, select ‘Lead Connector V2’ and choose the ‘Create Opportunity’ action event. Map the necessary fields, including the pipeline and stage ID, to ensure the opportunity is created in the correct context.


5. Finalizing the Integration and Workflow

To finalize the integration, ensure that all mappings are correct and that you have set the status of the opportunity as open. Click on ‘Save and send test request’ to confirm that the opportunity is created successfully in GoHighLevel CRM. You should receive a response indicating the opportunity ID, confirming the process.

To further validate the workflow, submit another test form through Wix. Check both your GoHighLevel CRM contacts and opportunities sections to ensure the new lead is added correctly. This confirms that your entire automation workflow using Pabbly Connect is functioning as intended.


Conclusion

This tutorial demonstrates how to use Pabbly Connect to automate the process of creating opportunities in GoHighLevel CRM from Wix form submissions. By following these steps, you can streamline your lead management process effectively.

Ensure you check out Pabbly Connect to create business automation workflows and reduce manual tasks. Pabbly Connect currently offer integration with 2,000+ applications.

How to Send Google Calendar Event Details on Google Chat Using Pabbly Connect

Learn how to send Google Calendar event details to Google Chat using Pabbly Connect. Follow this step-by-step tutorial for seamless integration. Master proven automation processes with practical implementation examples and strategic recommendations you can apply immediately in your workflow.

Watch Step By Step Video Tutorial Below


1. Setting Up Pabbly Connect for Google Calendar and Google Chat

To send Google Calendar event details to Google Chat, you need to set up Pabbly Connect. Start by visiting the Pabbly Connect website. You can access it by typing ‘Pabbly.com/connect’ in your browser. Here, you can either sign in if you are an existing user or click on ‘Sign Up for Free’ if you are new.

Once you have signed in, navigate to the dashboard. Click on the ‘Create Workflow’ button in the upper right corner. Name your workflow, for example, ‘Send Google Calendar Event Details on Google Chat’, and select a folder for organization. Click ‘Create’ to proceed to the trigger and action setup.


2. Choosing Google Calendar as the Trigger Application

In this step, you will set Google Calendar as the trigger application in Pabbly Connect. In the trigger window, search for and select ‘Google Calendar’. Choose the trigger event as ‘New Event’. This means that the workflow will activate whenever a new event is created in your Google Calendar.

Next, you need to establish a connection between Google Calendar and Pabbly Connect. Click on the ‘Connect’ button, and sign in with your Google account. Authorize the connection by clicking ‘Allow’. This will ensure that Pabbly Connect can access your Google Calendar data.

  • Search for Google Calendar in the trigger application.
  • Select ‘New Event’ as the trigger event.
  • Click ‘Connect’ and authorize access to your Google account.

After successfully connecting, click on ‘Save and Send Test Request’. This will fetch the latest event details from your Google Calendar, confirming that the trigger is working correctly.


3. Setting Up Google Chat as the Action Application

Now that you have configured Google Calendar as the trigger, it’s time to set Google Chat as the action application in Pabbly Connect. In the action window, search for ‘Google Chat’ and select it. For the action event, choose ‘Create a New Message’. This action will send a message to your Google Chat whenever a new event is created.

To connect Google Chat to Pabbly Connect, click on the ‘Connect’ button. Ensure you are logged into your Google Chat account. Once connected, you will need to set up a webhook URL. This URL will allow Pabbly Connect to send messages to your Google Chat space.

  • Select Google Chat as the action application.
  • Choose ‘Create a New Message’ as the action event.
  • Connect your Google Chat account to Pabbly Connect.

Once the connection is established, you will need to copy the webhook URL from your Google Chat space and paste it into Pabbly Connect. This URL is essential for sending messages to your team on Google Chat.


4. Mapping Google Calendar Event Details to Google Chat Message

With the connections established, the next step is to map the event details from Google Calendar to your Google Chat message via Pabbly Connect. Start by creating a message template. For example, your message could say, ‘Hello Team, new meeting update: here are the details…’. You can customize this message to suit your needs.

To include specific event details, use the mapping feature in Pabbly Connect. This allows you to pull data from the Google Calendar event response, such as the event title, description, date, and time. Ensure to map these fields correctly to ensure accurate information is sent to your team.

Create a message template for Google Chat. Use the mapping feature to include event details. Ensure all fields are correctly mapped for accurate messaging.

After mapping the details, click on ‘Save and Send Test Request’ to send a test message to Google Chat. This will confirm that the integration is functioning as intended, and your team will receive the event details in real-time.


5. Testing and Finalizing the Integration with Pabbly Connect

Finally, to ensure everything is working smoothly, conduct a test by creating a new event in your Google Calendar. For example, create an event titled ‘Meeting with the CEO’ with the relevant details. Once the event is saved, Pabbly Connect should automatically capture this information and send it to Google Chat.

Check your Google Chat to see if the message has been successfully sent. If the message appears with all the correct details, your integration is complete. This automation will now run seamlessly, sending Google Calendar event details to Google Chat every time a new event is created.

Create a test event in Google Calendar. Confirm that the message is sent to Google Chat. Ensure all details are accurate in the Google Chat message.

By following these steps, you have successfully set up an integration between Google Calendar and Google Chat using Pabbly Connect. This automation will help keep your team informed about upcoming events efficiently.


Conclusion

In this tutorial, you learned how to send Google Calendar event details to Google Chat using Pabbly Connect. This integration streamlines communication within your team, ensuring everyone stays updated on important events.

Ensure you check out Pabbly Connect to create business automation workflows and reduce manual tasks. Pabbly Connect currently offer integration with 2,000+ applications.

How to Send Birthday Wishes on Microsoft Teams from Google Sheets Using Pabbly Connect

Learn how to send birthday wishes on Microsoft Teams from Google Sheets using Pabbly Connect. Follow this step-by-step tutorial to automate your greetings! Explore efficient methods for automating routine tasks with clear, concise instructions suited for both newcomers and experienced professionals.

Watch Step By Step Video Tutorial Below


1. Accessing Pabbly Connect to Automate Sending Birthday Wishes

To send birthday wishes on Microsoft Teams from Google Sheets, you need to access Pabbly Connect. Start by typing ‘Pabbly.com/connect’ in your browser. Once there, you will see options to sign in or sign up for free.

If you are a new user, click on the ‘Sign Up for Free’ button. As an existing user, simply sign in. After logging in, navigate to the Pabbly Connect dashboard by clicking on ‘Access Now’ under the Pabbly Connect option.


2. Creating a New Workflow in Pabbly Connect

In the Pabbly Connect dashboard, you can create a new workflow to automate sending birthday wishes. Click on the ‘Create Workflow’ button located in the top right corner. In the dialog box that appears, name your workflow, such as ‘Send Birthday Wishes on Microsoft Teams from Google Sheets’. using Pabbly Connect

Next, select a folder to save your workflow, like ‘Auto Greetings with Pabbly’. Click on ‘Create’ to proceed. This will take you to an important window where you set up the trigger and action for your automation.


3. Setting the Trigger for the Workflow Using Pabbly Connect

The trigger is essential for your workflow, as it dictates when your automation will run. In the trigger window, search for ‘Schedule by Pabbly’ to set the workflow to run daily. Choose the time for the automation to execute, such as 8:00 AM, and click on ‘Save’. using Pabbly Connect

Now that your trigger is set, the next step is to fetch the current date. Add an action step using ‘Date Time Formatter by Pabbly’. Choose the action event as ‘Current Date’ and click on ‘Connect’. Set the basic format to ‘dd-mm-yy’ and click ‘Save and Send Test Request’ to fetch the current date.


4. Looking Up Employee Birthdays in Google Sheets

To look up the employee birthdays, add another action step and select ‘Google Sheets’ as your action application. Choose the action event ‘Lookup Spreadsheet Rows’ and click on ‘Connect’. You will need to sign in with your Google account to establish a secure connection. using Pabbly Connect

Once connected, select the spreadsheet containing employee details. Ensure that the lookup column is set to the birthday column (Column D). For the lookup value, you need the current date format to match the date format in your Google Sheet. Use ‘Text Formatter by Pabbly’ to split the current date. Set the action event to ‘Split Text’ and use the hyphen as a separator.

  • Select the current date to split into day, month, and year.
  • Map the day and month to match the format in your Google Sheet.
  • Test the lookup to ensure it retrieves the correct employee data.

After mapping the lookup value, click on ‘Save and Send Test Request’. This step will confirm if the data retrieval was successful.


5. Sending Birthday Wishes via Microsoft Teams Using Pabbly Connect

Now that you have the employee data, it’s time to send the birthday wishes. Add another action step and select ‘Microsoft Teams’ as your application. Choose the action event ‘Send Message in a Channel’. Click on ‘Connect’ to establish a connection with your Microsoft Teams account.

Once connected, select the team and channel where you want to send the birthday message. Craft your birthday message, ensuring to include the employee’s name by mapping it from the previous steps. A sample message could be: ‘Happy Birthday [Employee Name]! Wishing you a day filled with happiness.’

Finally, click ‘Save and Send Test Request’. If successful, you will see a confirmation that the birthday message has been sent to Microsoft Teams. This completes the automation process using Pabbly Connect to send birthday wishes from Google Sheets.


Conclusion

In this tutorial, you learned how to send birthday wishes on Microsoft Teams from Google Sheets using Pabbly Connect. This automation simplifies the process of sending personalized greetings to employees on their special day, ensuring no one is forgotten. By following these steps, you can enhance your team’s morale and create a positive workplace atmosphere.

Ensure you check out Pabbly Connect to create business automation workflows and reduce manual tasks. Pabbly Connect currently offer integration with 2,000+ applications.

How to Shorten URL from Google Sheets via Bitly Using Pabbly Connect

Learn how to shorten URLs from Google Sheets using Bitly through Pabbly Connect in this detailed step-by-step tutorial. Explore systematic approaches to creating efficient automation solutions that convert technical concepts into practical, implementable instructions.

Watch Step By Step Video Tutorial Below


1. Accessing Pabbly Connect for URL Shortening

To shorten URLs from Google Sheets via Bitly, first, you need to access Pabbly Connect. This platform allows seamless integration between Google Sheets and Bitly.

Begin by signing into your Pabbly Connect account. If you are a new user, you can sign up for free and enjoy 100 tasks monthly. After logging in, you will see the dashboard where you can start setting up your automation.


2. Creating a Workflow in Pabbly Connect

To create a workflow, click on the ‘Create Workflow’ button located in the top right corner of the dashboard. You will be prompted to name your workflow. Enter ‘Shorten URL from Google Sheets via Bitly’ as the workflow name. using Pabbly Connect

  • Select a folder to save your workflow.
  • Choose the folder named ‘Bitly Automations’.
  • Click on the ‘Create’ button to finalize your workflow setup.

Now your workflow is created, and you will see two sections: Trigger and Action. The Trigger section defines when the automation will start, while the Action section outlines what will happen as a result.


3. Setting Up the Trigger with Google Sheets

In this step, we will configure the trigger to activate when a new row is added to Google Sheets. Click on the Trigger application and select Google Sheets as your trigger app.

For the trigger event, choose ‘New or Updated Spreadsheet Row’. This means that whenever you add a new video title and URL in Google Sheets, Pabbly Connect will capture this data.

  • Copy the webhook URL provided by Pabbly Connect.
  • Open your Google Sheets and click on ‘Extensions’.
  • Select ‘Add-ons’ and then ‘Get Add-ons’ to install the Pabbly Connect Webhooks add-on.

After installation, go back to Extensions, select Pabbly Connect Webhooks, and click on ‘Initial Setup’. Paste the copied webhook URL and set the trigger column to the one where your final data will be added.


4. Setting Up the Action Step with Bitly

Next, we need to set up the action step that will shorten the URL using Bitly. Select Bitly as your action application and choose the action event ‘Shorten Link’.

To connect Bitly with Pabbly Connect, click on ‘Connect’ and then ‘Add New Connection’. After authorizing, you will need to select the group and map the long URL from the previous step.

Select the group you wish to associate the shortened URL with. Map the long URL from the previous response to the action step. Click on ‘Save and Send Test Request’ to generate the shortened link.

Once the shortened link is generated, you can verify it by pasting it into a new tab. This confirms that the integration is working successfully.


5. Updating Google Sheets with the Shortened URL

Finally, we need to update the Google Sheets with the shortened URL. Click on the plus button to add another action step and select Google Sheets as the action application.

For the action event, choose ‘Update Row’ and connect to your Google Sheets account. Select the spreadsheet and the specific sheet where you want to update the data.

Map the row index from the previous step to identify which row to update. Map the shortened URL to the corresponding column in your Google Sheets. Click on ‘Save and Send Test Request’ to finalize the update.

After completing these steps, check your Google Sheets to see the updated shortened URL in place of the original URL, confirming that the integration through Pabbly Connect has worked as intended.


Conclusion

This tutorial demonstrated how to shorten URLs from Google Sheets via Bitly using Pabbly Connect. With these steps, you can automate your workflow and save time efficiently.

Ensure you check out Pabbly Connect to create business automation workflows and reduce manual tasks. Pabbly Connect currently offer integration with 2,000+ applications.

How to Add LinkedIn Leads to Mailmodo as Contacts Using Pabbly Connect

Learn to seamlessly integrate LinkedIn Leads with Mailmodo using Pabbly Connect. Follow our step-by-step tutorial to automate contact creation. Follow this definitive guide to creating powerful automated workflows with straightforward, efficiency-focused solutions that save valuable time.

Watch Step By Step Video Tutorial Below


1. Access Pabbly Connect for Integration

To begin integrating LinkedIn Leads with Mailmodo, first, access Pabbly Connect by visiting its website. If you are a new user, you can sign up for free and receive 100 tasks monthly. Existing users can simply log in to their accounts.

Once logged in, you will see various Pabbly applications. For this integration, click on Pabbly Connect to start creating your workflow. This platform will allow you to automate the process of adding new leads from LinkedIn directly to Mailmodo.


2. Create a New Workflow in Pabbly Connect

After accessing Pabbly Connect, click on the ‘Create Workflow’ button. You will need to name your workflow, for example, ‘LinkedIn Leads to Mailmodo as Contacts.’ Choose the folder where you want to save it and click ‘Create’ to proceed.

  • Name your workflow appropriately.
  • Select the desired folder for saving.
  • Click ‘Create’ to open the workflow window.

This window is crucial as it includes trigger and action settings. Here, you will set LinkedIn Leads as the trigger application and Mailmodo as the action application. Understanding these components is essential for a successful automation process using Pabbly Connect.


3. Set Up Trigger for LinkedIn Leads

In the workflow window, select LinkedIn Lead Gen Forms as your trigger application. Choose the trigger event as ‘New Lead in Form Response.’ This will ensure that every time a new lead is submitted, your workflow gets triggered.

Next, you will need to connect your LinkedIn account. Click on ‘Connect’ and either select an existing connection or create a new one. Follow the prompts to authenticate your LinkedIn account with Pabbly Connect. Once connected, select the specific lead form you want to use.


4. Configure Action to Add Contacts in Mailmodo

After setting up the trigger, it’s time to configure the action. Select Mailmodo as the action application and choose the action event as ‘Add Contact to List.’ Click ‘Connect’ to link your Mailmodo account with Pabbly Connect.

  • Input your Mailmodo API Key for authentication.
  • Map the required fields such as email, first name, last name, and phone number.
  • Ensure that the list name is correctly specified.

This setup allows Pabbly Connect to automatically add new leads as contacts in Mailmodo, streamlining your lead management process effectively.


5. Test and Verify the Integration

Once everything is set up, it’s crucial to test the workflow. Submit a test lead through your LinkedIn lead form to ensure that Pabbly Connect captures the response and creates a contact in Mailmodo. Monitor the workflow to confirm that the contact appears correctly.

If successful, you will see the new contact listed in your Mailmodo account with all the details you mapped earlier. This confirms that your integration is working as intended, allowing for seamless lead management from LinkedIn to Mailmodo.


Conclusion

In this tutorial, we explored how to use Pabbly Connect to integrate LinkedIn Leads with Mailmodo. By following these steps, you can automate the process of adding new leads as contacts effortlessly, enhancing your lead management efficiency.

Ensure you check out Pabbly Connect to create business automation workflows and reduce manual tasks. Pabbly Connect currently offer integration with 2,000+ applications.