Mastering Post-Sales Review & Feedback using Google Forms & Slack with Pabbly Connect

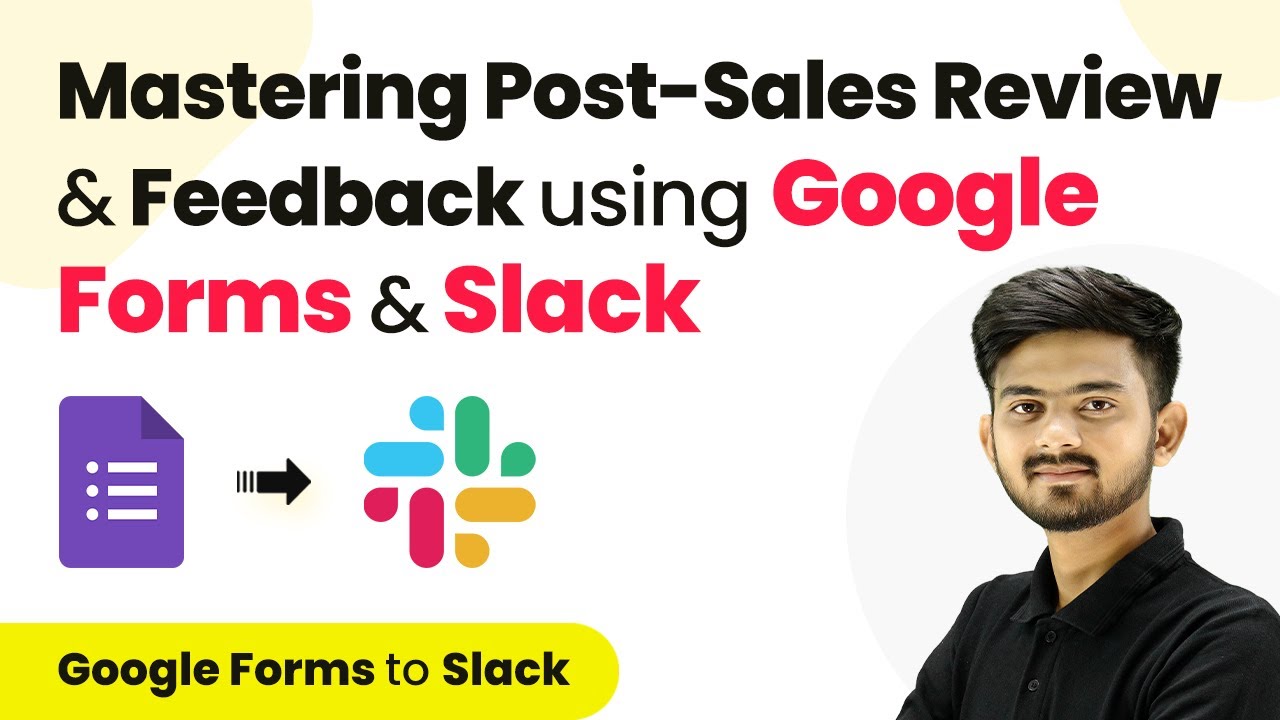
Learn how to automate post-sales review and feedback using Google Forms and Slack through Pabbly Connect. Step-by-step integration guide included. Learn to create powerful connections between your critical applications without requiring specialized programming knowledge or extensive technical background.

Watch Step By Step Video Tutorial Below


1. Accessing Pabbly Connect for Automation

To begin mastering post-sales review and feedback, you need to access Pabbly Connect. This platform enables seamless integration between Google Forms and Slack, allowing you to automate the feedback process.

Start by visiting the Pabbly Connect website. If you don’t already have an account, click on the ‘Sign Up for Free’ button to create one. Once logged in, navigate to the dashboard where you can create new workflows.


2. Creating a New Workflow in Pabbly Connect

After logging into Pabbly Connect, the next step is to create a new workflow to connect Google Forms and Slack. Click on the ‘Create Workflow’ button and name your workflow based on your objective.

  • Name your workflow: Mastering Post-Sales Review and Feedback
  • Select a folder to save your workflow.
  • Click on ‘Create’ to initiate the workflow setup.

Now, you will see two sections: Trigger and Action. The first step is to set up the Trigger application, which will be Google Forms. This is essential for capturing feedback automatically.


3. Setting Up Google Forms as the Trigger

In this step, select Google Forms as your Trigger application within Pabbly Connect. The specific trigger event to choose is ‘New Response Received’. This event will activate whenever a customer submits feedback through the form.

To integrate Google Forms with Pabbly Connect, you will need to copy the webhook URL provided. This URL acts as a bridge between Google Forms and Pabbly Connect, enabling data transfer.

  • Open your Google Form and navigate to the responses section.
  • Paste the webhook URL into the form’s settings.
  • Ensure you have the necessary extension installed for Pabbly Connect.

With the webhook URL set up, your Google Form is now ready to send feedback data to Pabbly Connect whenever a customer submits their response.


4. Configuring Slack as the Action Application

Now that Google Forms is configured as the trigger, the next step is to set Slack as the Action application in your Pabbly Connect workflow. This allows you to send the captured feedback to your Slack channel.

Select ‘Send Channel Message’ as your action event. You will need to connect your Slack account by providing the necessary token type (User or Bot) and allowing access to Pabbly Connect.

Choose the Slack channel where you want to send the feedback. Compose a message that includes the feedback details. Use mapping to insert dynamic data from Google Forms into your message.

This configuration ensures that every time feedback is received, it is automatically relayed to your Slack channel for your team to review.


5. Testing the Integration for Success

With both Google Forms and Slack set up in Pabbly Connect, it’s time to test the integration. Fill out the Google Form with a sample feedback response to trigger the automation.

Once the form is submitted, check your Google Sheet to confirm that the response has been recorded. Then, look at your Slack channel to see if the feedback message has been sent correctly.

Ensure all fields are mapping correctly in the Slack message. Adjust any settings in Pabbly Connect if necessary. Repeat the test to ensure consistency in data transmission.

If everything works as expected, you have successfully set up an automated feedback process using Pabbly Connect that enhances your post-sales review strategy.


Conclusion

In this tutorial, we explored how to use Pabbly Connect to automate post-sales review and feedback using Google Forms and Slack. This integration streamlines the feedback process, improving team communication and helping businesses grow effectively.

Ensure you check out Pabbly Connect to create business automation workflows and reduce manual tasks. Pabbly Connect currently offer integration with 2,000+ applications.

Generate E-Certificates & Share on WhatsApp Using Google Sheets & Pabbly Connect

Learn how to generate e-certificates and share them via WhatsApp using Google Sheets and Pabbly Connect. Follow our step-by-step guide for automation. Develop expertise in application integration and learn how to design streamlined automation workflows using proven, simplified approaches.

Watch Step By Step Video Tutorial Below


Accessing Pabbly Connect for E-Certificate Generation

To generate e-certificates and share them via WhatsApp, start by accessing Pabbly Connect. This powerful integration platform allows you to automate tasks across various applications, including Google Sheets and Google Slides.

First, sign in to your Pabbly Connect account. If you are a new user, you can sign up for free and get 100 tasks each month. After signing in, navigate to the Pabbly Connect dashboard to create your workflow.


Creating a Workflow in Pabbly Connect

In Pabbly Connect, creating a workflow is essential for automating the e-certificate generation process. Click on the ‘Create Workflow’ button in the top right corner of the dashboard. Name your workflow something descriptive, such as ‘Generate E-Certificates and Share on WhatsApp.’

Next, select the folder where you want to save this workflow. For example, you can create a folder named ‘Google Slides Automations’. After naming your workflow and selecting the folder, click on ‘Create’ to proceed. Your new workflow will now have a trigger and an action section.


Setting Up Google Sheets Trigger in Pabbly Connect

The first step in your workflow is to set up a trigger using Google Sheets. In the trigger section, select Google Sheets as your trigger application and choose ‘New or Updated Spreadsheet Row’ as the trigger event. This means that whenever you add or update a row in your Google Sheet, the workflow will initiate.

Pabbly Connect will provide you with a unique webhook URL. Copy this URL, as you will need it to connect Google Sheets with Pabbly Connect. Open your Google Sheet where you have intern details, go to ‘Extensions,’ then ‘Add-ons,’ and select ‘Get Add-ons.’ Search for Pabbly Connect Webhooks and install it if you haven’t already.

  • Click on ‘Extensions’ again and select ‘Pabbly Connect Webhooks’.
  • Choose ‘Initial Setup’ and paste the webhook URL.
  • Set the trigger column to the column where your final data will be added.

After completing these steps, click ‘Submit’ to finish the setup. A confirmation message will indicate that the setup was successful. Ensure to enable the ‘Send on Event’ option in the Pabbly Connect Webhooks menu to allow data to be sent to Pabbly Connect whenever new data is added.


Creating Certificates with Google Slides via Pabbly Connect

Now, let’s set up the action to create the e-certificates using Google Slides. In the action section of your Pabbly Connect workflow, select Google Slides as your action application and choose ‘Create Presentation from Template’ as the action event. This will allow you to generate a certificate based on a pre-made template.

After selecting the action, connect your Google Slides account to Pabbly Connect by clicking ‘Add New Connection’ and authorizing access. Choose the template you created for the internship certificate and name the new presentation. You can dynamically insert the intern’s name into the certificate by mapping the data from the previous Google Sheets step.

  • Select the Google Slides template for the internship certificate.
  • Map the intern’s name to the appropriate fields in the template.
  • Specify the location in Google Drive where the certificate will be saved.

After filling in all the required details, click on ‘Save and Send Test Request’. If successful, you will receive a presentation ID confirming that the certificate has been created.


Sharing Certificates on WhatsApp via Pabbly Connect

To share the generated certificates on WhatsApp, you need to add another action step in your Pabbly Connect workflow. Select WhatsApp Cloud API as the action application and choose ‘Send Template Message’ as the action event. This will allow you to send a WhatsApp message that includes the certificate link.

Connect your WhatsApp Cloud API to Pabbly Connect by entering the required credentials such as token and phone number ID. Next, map the intern’s phone number and the certificate link in the message body. Ensure that you have created a message template in WhatsApp that will be used for sending the message.

Enter the recipient’s phone number where the message will be sent. Map the body fields with the intern’s name and the certificate link. Click ‘Save and Send Test Request’ to send the message.

If everything is set up correctly, you should receive a WhatsApp message with the certificate link successfully sent to the intern.


Conclusion

In this tutorial, we explored how to generate e-certificates and share them via WhatsApp using Google Sheets and Pabbly Connect. By following these steps, you can automate the process of sending personalized certificates to your interns, enhancing your workflow efficiency.

Ensure you check out Pabbly Connect to create business automation workflows and reduce manual tasks. Pabbly Connect currently offer integration with 2,000+ applications.

How to Create Bitlinks for New OneDrive Files with Bitly Using Pabbly Connect

Learn how to automate the creation of Bitlinks for new OneDrive files using Pabbly Connect, Bitly, and Google Sheets in this detailed tutorial. Follow this definitive guide to creating powerful automated workflows with straightforward, efficiency-focused solutions that save valuable time.

Watch Step By Step Video Tutorial Below


1. Accessing Pabbly Connect for Automation

To create Bitlinks for new OneDrive files, you first need to access Pabbly Connect. This platform allows you to automate workflows between different applications seamlessly.

Start by visiting the Pabbly Connect website and signing in to your account. If you are a new user, you can sign up for free and receive 100 free tasks each month. Once logged in, you will see the Pabbly Connect dashboard where you can begin creating your workflow.


2. Creating Your Workflow in Pabbly Connect

To set up your automation, you need to create a new workflow in Pabbly Connect. Click on the ‘Create Workflow’ button in the top right corner. Name your workflow something descriptive, like ‘Create Bitlinks from New OneDrive Files with Bitly’.

  • Click on the drop-down arrow to select a folder for your workflow.
  • Choose a folder such as ‘Bitly Automations’.
  • After naming and selecting the folder, click on ‘Create’.

Now, your workflow is ready to be configured with a trigger and actions. Remember, the trigger indicates when the automation starts, while actions define what happens next.


3. Setting Up the Trigger with Microsoft OneDrive

The next step is to set up the trigger for your workflow using Pabbly Connect. Select Microsoft OneDrive as your trigger application and choose the event as ‘New File’. This ensures that whenever a new file is uploaded to OneDrive, it will trigger the workflow.

After selecting the trigger, click on ‘Connect’ to link your Microsoft OneDrive account with Pabbly Connect. You will be prompted to authorize the connection. Once authorized, specify the folder path where the new files will be uploaded.

  • Enter the folder path, excluding any unnecessary parent directory names.
  • Set the event type to ‘New File Created’.
  • Click on ‘Save and Send Test Request’ to check the connection.

Once you upload a file to the specified OneDrive folder, Pabbly Connect will capture the file details as a response, confirming that the trigger is working correctly.


Now that the trigger is set, the next action is to create a Bitlink using Bitly through Pabbly Connect. Select Bitly as your action application and choose ‘Create Bitlink’ as the action event.

Click on ‘Connect’ and authorize your Bitly account. After the connection is established, you will need to fill out the required fields, including the long URL you want to shorten. Map the long URL from the OneDrive trigger response to ensure it dynamically updates with each new file.

Provide a title for your Bitlink. Copy the domain from the help desk provided in Pabbly Connect. Click on ‘Save and Send Test Request’ to create the Bitlink.

After successfully creating the Bitlink, you will receive a positive response, including the shortened URL that you can use for sharing.


5. Recording Data in Google Sheets

The final step involves recording the Bitlink and file details into Google Sheets using Pabbly Connect. Select Google Sheets as your action application and choose ‘Add New Row’ as the action event.

Connect your Google Sheets account by authorizing it through Pabbly Connect. Once connected, select the spreadsheet where you want to store the Bitlink data. Map the fields for the image title, long URL, and Bitlink to ensure the data is accurately recorded.

Select the spreadsheet named ‘OneDrive Images Bitlinks’. Choose the appropriate sheet for data entry. Map the data for the image title, long URL, and Bitlink.

Click on ‘Save and Send Test Request’ to finalize the recording process. You can then check your Google Sheets to confirm that the data has been successfully entered, verifying that the entire automation works as intended.


Conclusion

In this tutorial, we demonstrated how to automate the creation of Bitlinks for new OneDrive files using Pabbly Connect, Bitly, and Google Sheets. This integration streamlines your workflow by automatically generating and recording shortened links.

Ensure you check out Pabbly Connect to create business automation workflows and reduce manual tasks. Pabbly Connect currently offer integration with 2,000+ applications.

How to Send Email Notifications on Google Chat Using Pabbly Connect

Learn how to automate email notifications to Google Chat using Pabbly Connect. Follow this step-by-step tutorial for seamless integration. Follow this definitive guide to creating powerful automated workflows with straightforward, efficiency-focused solutions that save valuable time.

Watch Step By Step Video Tutorial Below


1. Accessing Pabbly Connect for Google Chat Integration

To begin, access Pabbly Connect by navigating to its official website. If you are a new user, click on the ‘Sign Up for Free’ option to create an account. Existing users can simply sign in to their accounts. Once logged in, you will have access to the dashboard where all your workflows are managed.

Pabbly Connect allows you to automate tasks without coding. You’ll find options to create workflows that connect various applications. Begin by clicking on the ‘Create Workflow’ button to set up your automation.


2. Creating a Workflow in Pabbly Connect

After clicking on ‘Create Workflow’, you need to name your workflow. For this tutorial, use the title ‘Send Email Notifications on Google Chat’. Select a folder to save your workflow, such as ‘Automations for Lead Management’. using Pabbly Connect

  • Name your workflow appropriately.
  • Select a folder for organization.
  • Click on ‘Create’ to finalize your workflow setup.

With the workflow created, you will see two sections: Trigger and Action. The Trigger specifies what event will start the workflow, and the Action defines what happens when the trigger occurs. In this case, set the trigger to ‘Email Parser’ to capture emails from your Gmail account.


3. Setting Up Email Parser in Pabbly Connect

In this step, you will configure the Email Parser as your trigger application. This is essential for capturing incoming emails from Gmail. After selecting ‘Email Parser’, you will receive an email hook that will be used to forward emails to Pabbly Connect.

Copy the email hook provided. Now, go to your Gmail account and navigate to the settings. Under ‘Forwarding and POP/IMAP’, add the copied email hook as a forwarding address. Confirm the forwarding by verifying the link sent to the email hook.

  • Go to Gmail settings and find ‘Forwarding and POP/IMAP’.
  • Add the Email Parser hook as a forwarding address.
  • Confirm the forwarding by clicking the verification link sent to the hook.

Once verified, return to Pabbly Connect and click on ‘Recapture Email Response’ to ensure that the integration is working properly. You can test this by sending a sample email to your Gmail account.


4. Filtering Emails for Google Chat Notifications

After setting up the email parser, you can now filter the emails to ensure only relevant notifications are sent to Google Chat. In the Action section, select ‘Filter’ as your action application. This allows you to set conditions for which emails should trigger notifications. using Pabbly Connect

Set the filter criteria to check the email subject. For instance, if the subject contains ‘New Lead Alert’, the workflow will proceed to send the notification. If it does not meet the criteria, the workflow will stop.

Select ‘Filter’ as the action application. Set the condition to check for specific email subjects. Click on ‘Save and Send Test Request’ to validate the filter.

Once the filter is successfully set, you can proceed to send the message to Google Chat if the condition is met. This ensures that only important notifications are forwarded to your team.


5. Sending Notifications to Google Chat

The final step is to set up the action to send messages to Google Chat. In the Action section, select ‘Google Chat’ and choose the action event ‘Create Message’. This action will send the filtered email details to your Google Chat space.

To connect Google Chat, you will need to set up a webhook URL. Follow the instructions provided in Pabbly Connect to create a webhook in your Google Chat space. Once you have the webhook URL, paste it into the appropriate field in Pabbly Connect.

Select ‘Google Chat’ as the action application. Choose ‘Create Message’ as the action event. Paste the webhook URL into the field provided.

Compose the message you want to send, including the details of the lead. After mapping the necessary fields, click on ‘Save and Send Test Request’ to verify that the message is sent successfully to your Google Chat space.


Conclusion

In this tutorial, we explored how to automate sending email notifications from Gmail to Google Chat using Pabbly Connect. By setting up an email parser, applying filters, and configuring Google Chat, you can efficiently manage lead notifications without coding. This integration enhances communication and ensures your team stays informed about new leads promptly.

Ensure you check out Pabbly Connect to create business automation workflows and reduce manual tasks. Pabbly Connect currently offer integration with 2,000+ applications.

How to Set Up Webhook Inside Elementor Using Pabbly Connect

Learn how to set up a webhook inside Elementor using Pabbly Connect. This detailed tutorial covers step-by-step integration for seamless data transfer between applications. Revolutionize your productivity approach with just a few strategic clicks. Uncover professional methods for connecting applications and creating workflows that reclaim hours of your week.

Watch Step By Step Video Tutorial Below


1. Setting Up Pabbly Connect for Elementor Integration

To set up a webhook inside Elementor, we first need to access Pabbly Connect. This platform acts as a bridge to facilitate data transfer between Elementor and other applications. Start by logging into your Pabbly Connect account.

Once logged in, navigate to the ‘Create Workflow’ section. Here, you will select Elementor as your trigger application. This step is crucial as it defines the event that will initiate the data transfer process.


2. Selecting the Trigger Event in Pabbly Connect

In this section, you will select the trigger event for your workflow. Choose ‘New Form Submission’ from the list of available options in Pabbly Connect. This event will capture the responses submitted through your Elementor forms.

  • Select ‘Elementor’ as the trigger application.
  • Choose ‘New Form Submission’ as the trigger event.
  • Copy the generated webhook URL provided by Pabbly Connect.

This unique webhook URL will be used to connect Elementor with Pabbly Connect, allowing the form responses to be sent automatically to the platform.


3. Configuring Elementor to Use Pabbly Connect Webhook

Next, we need to configure Elementor to send form submissions to Pabbly Connect. Open your WordPress dashboard and select the Elementor plugin. Create a new form or edit an existing one where you want to capture responses.

In the form settings, navigate to the ‘Actions After Submit’ section. Click on the plus icon to add a new action and select ‘Webhook’. Paste the webhook URL that you copied from Pabbly Connect into the designated field.


4. Testing the Integration Between Elementor and Pabbly Connect

After configuring the webhook in Elementor, it’s time to test the integration. Publish your form and preview it to ensure all fields are visible. Fill in the form with test data and submit it.

Return to your Pabbly Connect dashboard. You should see the response captured in real-time, confirming that the integration is successful. This step is essential to validate that data is being sent correctly from Elementor to Pabbly Connect.


5. Expanding Your Integration Options with Pabbly Connect

Once you have confirmed that the webhook is functioning, you can expand your integration capabilities. Pabbly Connect allows you to send form responses to various applications, such as Google Sheets or WhatsApp.

  • Add Google Sheets as an action to create a record of responses.
  • Utilize WhatsApp Cloud API to send notifications to team members.
  • Configure email notifications for form submissions.

These additional integrations enhance the functionality of your Elementor forms and streamline your workflow, all thanks to Pabbly Connect.


Conclusion

In this tutorial, we explored how to set up a webhook inside Elementor using Pabbly Connect. By following these steps, you can effortlessly transfer form submissions to various applications, enhancing your data management capabilities.

Ensure you check out Pabbly Connect to create business automation workflows and reduce manual tasks. Pabbly Connect currently offer integration with 2,000+ applications.

How to Send Google Chat Notification on Jotform Submission Using Pabbly Connect

Learn how to automate Google Chat notifications on Jotform submissions using Pabbly Connect. Step-by-step guide for seamless integration. Navigate the automation landscape confidently with clear, structured guidance suitable for professionals regardless of prior technical experience.

Watch Step By Step Video Tutorial Below


1. Accessing Pabbly Connect for Google Chat Integration

To send Google Chat notifications on Jotform submissions, you first need to access Pabbly Connect. Start by typing ‘Pabbly.com/connect’ in your browser. This will take you to the Pabbly Connect landing page.

On the landing page, you will see options to either sign in or sign up for free. If you are a new user, click on the ‘Sign up for free’ button, which allows you to get 100 tasks free each month. For existing users, simply sign in to your account.


2. Creating a New Workflow in Pabbly Connect

After signing in, navigate to your dashboard. To create a new workflow, click on the ‘Create Workflow’ button located at the top right corner. You will be prompted to name your workflow. For this integration, you can name it ‘Send Google Chat Notification on Jotform Submission’. using Pabbly Connect

Next, select a folder to save your workflow. You can create a new folder named ‘Jotform to Google Chat Automation’ for better organization. After naming and selecting the folder, click on the ‘Create’ button to proceed.


3. Setting Up Trigger and Action in Pabbly Connect

Now that your workflow is created, it’s time to set up the trigger and action. The trigger application will be Jotform, and the action application will be Google Chat. In the trigger section, search for Jotform and select it. using Pabbly Connect

For the trigger event, choose ‘New Response’. This means that the workflow will start whenever there is a new submission in Jotform. Next, move to the action section and search for Google Chat. Select it, and for the action event, choose ‘Create a New Message’.

  • Search for Jotform as the trigger application.
  • Select ‘New Response’ as the trigger event.
  • Search for Google Chat as the action application.
  • Choose ‘Create a New Message’ as the action event.

With these settings, you have successfully set up the trigger and action for your Pabbly Connect workflow.


4. Connecting Jotform with Pabbly Connect

To connect Jotform with Pabbly Connect, you will be provided with a webhook URL in your Pabbly Connect dashboard. Copy this URL as it will serve as a bridge between Jotform and Pabbly Connect.

Next, go to your Jotform account and select the form you want to integrate. Click on ‘Edit Form’, then navigate to the ‘Settings’ tab. Under the settings, find the ‘Integrations’ option and search for ‘Webhooks’. Paste the copied webhook URL in the provided field and complete the integration. You should see a message indicating that the integration is ready.


5. Finalizing the Google Chat Notification Setup

After successfully connecting Jotform to Pabbly Connect, it’s time to finalize the Google Chat notification setup. You will need to establish a connection between Google Chat and Pabbly Connect. Open Google Chat and create a new webhook.

In Google Chat, go to the settings and find the ‘Apps and Integrations’ section. Select ‘Add Webhooks’ and create a new webhook. Copy the newly created webhook URL and paste it into Pabbly Connect. Now, map the fields from the Jotform submission to the message you want to send in Google Chat.

  • Open Google Chat and create a new webhook.
  • Copy the webhook URL and paste it into Pabbly Connect.
  • Map the fields from Jotform submission to the message format.

Once you have mapped all the necessary fields, send a test message to ensure everything is working correctly. If successful, you will see the message appear in your Google Chat.


Conclusion

Using Pabbly Connect, you can seamlessly automate Google Chat notifications for Jotform submissions. This integration enhances communication and keeps your team informed in real-time.

Ensure you check out Pabbly Connect to create business automation workflows and reduce manual tasks. Pabbly Connect currently offer integration with 2,000+ applications.

How to Set Up Webhook Inside Gumroad Using Pabbly Connect

Learn how to set up a webhook inside Gumroad using Pabbly Connect to automate your sales data integration. Follow this step-by-step guide for seamless integration.

Watch Step By Step Video Tutorial Below


1. Setting Up Pabbly Connect for Gumroad Integration

To set up a webhook inside Gumroad, you first need to access Pabbly Connect. This platform acts as a bridge between your Gumroad account and other applications, allowing you to automate processes seamlessly.

Start by logging into your Pabbly Connect account. Navigate to the dashboard, where you can create a new workflow. This workflow will enable you to capture events from Gumroad, specifically when a new sale occurs.


2. Configuring the Gumroad Trigger in Pabbly Connect

In this step, you will configure the trigger for your workflow in Pabbly Connect. Search for Gumroad as the trigger application. Select the trigger event as ‘New Sale’. This ensures that every time a new sale is made, the workflow will activate.

  • Search for ‘Gumroad’ in the trigger application list.
  • Select the trigger event ‘New Sale’.
  • Copy the provided webhook URL for later use.

Once you have selected the trigger event, a webhook URL will be generated. This URL is crucial as it connects your Gumroad account with Pabbly Connect. Make sure to copy it as you will paste it into your Gumroad settings.


3. Updating Gumroad Settings with Webhook URL

Now, navigate to your Gumroad account to set up the webhook URL. Go to the settings, then to the Advanced section, where you will find the ‘Ping’ option. Here, you will replace any existing webhook URL with the one you copied from Pabbly Connect.

After pasting the URL, click on ‘Update Settings’. This action connects your Gumroad account to Pabbly Connect, allowing it to receive data whenever a new sale occurs.


4. Testing the Webhook Connection

To ensure everything is set up correctly, you need to test the webhook connection. In your Gumroad settings, click on the ‘Send Test Ping to URL’ button. This sends a test response to Pabbly Connect, confirming that the connection is active.

Once the test is sent, return to Pabbly Connect to verify that the details of the last sale have been received. You should see the sales data appear in your Pabbly dashboard, confirming that the webhook is functioning properly.


5. Capturing Sale Data in Pabbly Connect

With the webhook successfully set up, you can now capture data for each new sale made through Gumroad. To do this, click on ‘Recapture Webhook Response’ in Pabbly Connect. This will prepare the system to receive the next sale data.

Next, simulate a sale by purchasing a product from your Gumroad account. Fill in the required details such as email, phone number, and address. Once the purchase is successful, Pabbly Connect will automatically capture and display the sale details in your dashboard.


Conclusion

In this tutorial, we explored how to set up a webhook inside Gumroad using Pabbly Connect. By following these steps, you can automate the integration of sales data seamlessly and efficiently. This setup allows for real-time data capture and enhances your workflow automation.

Ensure you check out Pabbly Connect to create business automation workflows and reduce manual tasks. Pabbly Connect currently offer integration with 2,000+ applications.

Boost Your Team’s Productivity with Automation Using Pabbly Connect

Learn how to boost your team’s productivity with automation using Pabbly Connect in this step-by-step tutorial. Integrate Google Chat, Facebook Messenger, and more! Transform complex automation concepts into accessible, actionable steps that eliminate unnecessary manual work while maximizing existing application capabilities.

Watch Step By Step Video Tutorial Below


1. Accessing Pabbly Connect for Automation

To boost your team’s productivity with automation, start by accessing Pabbly Connect. Visit the homepage at Pabbly.com/connect, where you’ll find options to sign in or sign up for free.

If you’re new, click on the ‘Sign Up for Free’ button to create your account. Existing users can directly sign in. Once registered, you’ll receive 100 free tasks every month to explore the platform’s capabilities.


2. Creating Facebook to Gmail Integration

In this section, we will create an automation to send Facebook messages to your team via Gmail using Pabbly Connect. This integration helps in managing customer leads effectively.

To set this up, follow these steps:

  • Connect your Facebook Messenger account to Pabbly Connect.
  • Set Gmail as the action app to forward messages.
  • Use mapping to insert the sender’s name and message dynamically.

Now, whenever a new message is received on Facebook Messenger, the details will automatically be forwarded to your team through Gmail, ensuring prompt responses to leads.


3. Sending Weekly Reminders on Google Chat

Next, we will set up a weekly reminder for team meetings using Pabbly Connect. This automation sends reminders to team members via Google Chat.

To create this workflow, use the scheduling feature in Pabbly Connect. You can set reminders for specific times:

  • Select the schedule trigger for weekly reminders.
  • Choose the specific day and time for sending reminders.
  • Connect to Google Chat as the action app to send messages.

This setup ensures that your team members receive timely reminders to prepare for their presentations, enhancing overall productivity.


4. Integrating Facebook Lead Ads with Slack

For effective lead management, we will integrate Facebook Lead Ads with Slack using Pabbly Connect. This automation sends lead alerts to your team instantly.

Follow these steps to set up the integration:

Connect your Facebook Lead Ads account to Pabbly Connect. Set Slack as the action app to receive lead notifications. Map lead details like name, email, and phone number in the message.

With this integration, your team will receive immediate notifications about new leads, allowing them to respond quickly and effectively.


5. Automating Production Reports with Google Forms

Lastly, we will automate the process of sending production reports using Google Forms and Pabbly Connect. This is particularly useful for HR departments.

To set this up, create a Google Form for daily work reports and connect it to Pabbly Connect:

Connect your Google Form to Pabbly Connect. Set Google Chat as the action app to send updates. Automatically send the summary of the work report to the HR team.

This automation ensures that your HR team receives daily updates on employee productivity, helping them manage resources more effectively.


Conclusion

In this tutorial, we explored how to boost your team’s productivity with automation using Pabbly Connect. By integrating various applications like Google Chat, Facebook Messenger, and more, you can streamline workflows and enhance communication. Automation not only saves time but also allows your team to focus on core activities, ultimately driving business growth.

Ensure you check out Pabbly Connect to create business automation workflows and reduce manual tasks. Pabbly Connect currently offer integration with 2,000+ applications.

Integrating Jumpseller Customer Details into Google Sheets Using Pabbly Connect

Learn how to seamlessly integrate Jumpseller customer details into Google Sheets using Pabbly Connect with this step-by-step tutorial. Navigate the automation landscape confidently with clear, structured guidance suitable for professionals regardless of prior technical experience.

Watch Step By Step Video Tutorial Below


Accessing Pabbly Connect for Integration

To start integrating Jumpseller customer details into Google Sheets, you will first need to access Pabbly Connect. Begin by navigating to the Pabbly Connect website and signing in to your account. If you are a new user, you can sign up for free and enjoy 100 free tasks each month.

Once logged in, you will see the Pabbly Connect dashboard. Click on the ‘Access Now’ button to enter the main interface. From here, you will create a new workflow to automate the process of capturing customer details from Jumpseller and sending them to Google Sheets.


Creating a Workflow in Pabbly Connect

In this section, you will create a workflow in Pabbly Connect that automates the transfer of customer data. Click on the ‘Create Workflow’ button located at the top right corner of the dashboard. A dialog box will appear prompting you to name your workflow.

For this integration, name your workflow as ‘Add Jumpseller Customer Details to Google Sheets’. You can also select a specific folder to save this workflow. After entering the name and selecting the folder, click on the ‘Create’ button to finalize the setup.

  • Enter the workflow name as ‘Add Jumpseller Customer Details to Google Sheets’.
  • Select a folder to save your workflow.
  • Click on ‘Create’ to finalize the workflow.

Now you will see two sections labeled ‘Trigger’ and ‘Action’. The trigger is the event that starts the automation, while the action is the response to that event. In this case, the trigger will be a new customer created in Jumpseller, and the action will be to add that customer’s details to Google Sheets.


Setting Up the Trigger in Pabbly Connect

The next step is to set up the trigger in Pabbly Connect. Click on the arrow next to the trigger section and select Jumpseller as your trigger application. For the trigger event, choose ‘New Customer Created’. This will ensure that every time a new customer is added to Jumpseller, the event is captured by Pabbly Connect.

Upon selecting Jumpseller, you will be provided with a unique webhook URL. Copy this URL as it will be used to connect Jumpseller with Pabbly Connect. Now, navigate to your Jumpseller account, go to the settings, and find the notifications section. Here, paste the webhook URL and select the event as ‘Customer Created’ before clicking on ‘Add’.

  • Select Jumpseller as the trigger application.
  • Choose ‘New Customer Created’ as the trigger event.
  • Paste the copied webhook URL into the Jumpseller notifications settings.

Once you have added the webhook, go back to Pabbly Connect and click on ‘Capture Webhook Response’ to test if the integration is successful. You should see a test response indicating that the webhook is functioning correctly.


Adding Customer Details in Jumpseller

Now that the trigger is set up, you can add customer details in Jumpseller. Navigate to the Jumpseller customer section and click on ‘Add Customer’. Fill in the required fields such as email, phone number, category, and language. For example, use a dummy email like ‘[email protected]’ and a dummy phone number. using Pabbly Connect

After entering the details, click on ‘Save’. Jumpseller will confirm that the customer has been successfully created. This action will trigger the webhook, and you should see the customer details captured in Pabbly Connect.

Go to Jumpseller and click on ‘Add Customer’. Fill in the required fields with customer information. Click ‘Save’ to create the customer.

Once the customer is added, the response will be captured in Pabbly Connect, showing the email and phone number. If you need to include the first and last name, you can update the customer details in Jumpseller and repeat this process to capture those additional fields.


Sending Data to Google Sheets Using Pabbly Connect

After successfully capturing customer details from Jumpseller, the next step is to send this data to Google Sheets using Pabbly Connect. Click on the plus button to add an action step and select Google Sheets as the action application. For the action event, choose ‘Add New Row’.

Click on ‘Connect’ to authorize the connection between Pabbly Connect and Google Sheets. You will be prompted to sign in with your Google account and grant the necessary permissions. Once authorized, select the spreadsheet you created earlier, named ‘Jumpseller Customer Details’, and choose the appropriate sheet.

Select Google Sheets as the action application. Choose ‘Add New Row’ as the action event. Authorize the connection with your Google account.

Once the connection is established, map the fields for first name, last name, email, and phone number from the captured response. After mapping, click on ‘Save and Send Test Request’. A positive response indicates that the details have been successfully sent to Google Sheets.


Conclusion

In this tutorial, we explored how to use Pabbly Connect to integrate Jumpseller customer details into Google Sheets. By following the steps outlined, you can automate the process of capturing customer information and transferring it seamlessly into your spreadsheets. This integration enhances your workflow and ensures that customer data is readily available for analysis and reporting.

Ensure you check out Pabbly Connect to create business automation workflows and reduce manual tasks. Pabbly Connect currently offer integration with 2,000+ applications.

How to Shorten URLs Using Bitly & Airtable with Pabbly Connect

Learn how to automate URL shortening using Bitly and Airtable with Pabbly Connect in this detailed tutorial. Follow the exact steps for seamless integration. Eliminate manual repetitive tasks from your workflow. Discover proven automation methods with intuitive steps designed for efficiency-minded professionals.

Watch Step By Step Video Tutorial Below


1. Setting Up Pabbly Connect for URL Shortening

To start automating the URL shortening process using Pabbly Connect, first, access the Pabbly Connect website. Sign in to your existing account or create a new one if you’re a new user. Pabbly Connect offers 100 free tasks every month for new users, making it easy to get started.

After logging in, you will see the Pabbly Connect dashboard. Here, click on the ‘Create Workflow’ button located in the top right corner. You will be prompted to name your workflow. For this tutorial, name it ‘Shorten URLs using Bitly and Airtable’. Select an appropriate folder for organization, such as ‘Bitly Automations’, and then click on ‘Create’ to initiate your workflow.


2. Trigger Setup: Connecting Airtable with Pabbly Connect

In this step, we will set up the trigger application using Pabbly Connect. Click on the trigger section and select Airtable as your trigger application. For the trigger event, choose ‘New Record’. This means that every time a new record is added to Airtable, it will trigger the workflow in Pabbly Connect.

  • Select Airtable as the trigger application.
  • Choose ‘New Record’ as the trigger event.
  • Click on ‘Connect’ to link Airtable with Pabbly Connect.

Once connected, you’ll need to authorize Pabbly Connect to access your Airtable account. Select the base you want to work with (e.g., ‘Bit Links’) and grant access. After successful authorization, create a record in Airtable with the document title and URL to proceed with the automation.


3. Action Setup: Shortening URLs with Bitly

Now that we have set up the trigger, it’s time to configure the action step using Pabbly Connect. For the action application, select Bitly and choose ‘Shorten Link’ as the action event. This action will take the long URL from the previous step and convert it into a shorter version.

Click on ‘Connect’ to establish a connection with Bitly. If you have an existing connection, you can use that; otherwise, create a new connection. Authorize Pabbly Connect to access your Bitly account by clicking on ‘Allow’. After authorization, you will need to select the group in your Bitly account where the shortened links will be stored.

  • Select the Bitly group for your links.
  • Map the long URL from the previous step.
  • Click on ‘Save and Send Test Request’ to generate the shortened URL.

After clicking ‘Save and Send Test Request’, Pabbly Connect will return a response containing the shortened URL. This confirms that the integration between Airtable and Bitly via Pabbly Connect is working successfully.


4. Updating Airtable with Shortened URL

The final step involves updating the original record in Airtable with the newly created shortened URL using Pabbly Connect. To do this, add another action step and select Airtable again. For the action event, choose ‘Update Record’. This will allow you to replace the long URL with the shortened version.

Connect to Airtable using your existing connection. Select the same base and table as before. For the record ID, map the ID from the previous step. This ensures that the correct record is updated with the shortened URL.

Map the record ID from the previous response. Map the shortened URL to the URL field in Airtable. Click on ‘Save and Send Test Request’ to finalize the update.

Once you receive a confirmation response, check your Airtable to verify that the long URL has been successfully replaced with the shortened URL. This completes the automation process using Pabbly Connect between Airtable and Bitly.


Conclusion: Automating URL Shortening with Pabbly Connect

In this tutorial, we demonstrated how to automate the URL shortening process using Pabbly Connect, Bitly, and Airtable. By following the exact steps outlined, you can efficiently manage your URL records and streamline your workflow.

Ensure you check out Pabbly Connect to create business automation workflows and reduce manual tasks. Pabbly Connect currently offer integration with 2,000+ applications.

Check out Pabbly Connect – Automate your business workflows effortlessly! Sign Up Free – Start your journey with ease! 10,000+ Video Tutorials – Learn step by step! Join Pabbly Facebook Group – Connect with 21,000+ like minded people!

Utilizing Pabbly Connect for integrating these applications allows for seamless automation, ensuring that every time a new document is added to Airtable, its long URL is automatically shortened and updated. This not only saves time but also enhances productivity.