How to Send Workshop Certificates on WhatsApp using Google Sheets & Google Slides with Pabbly Connect

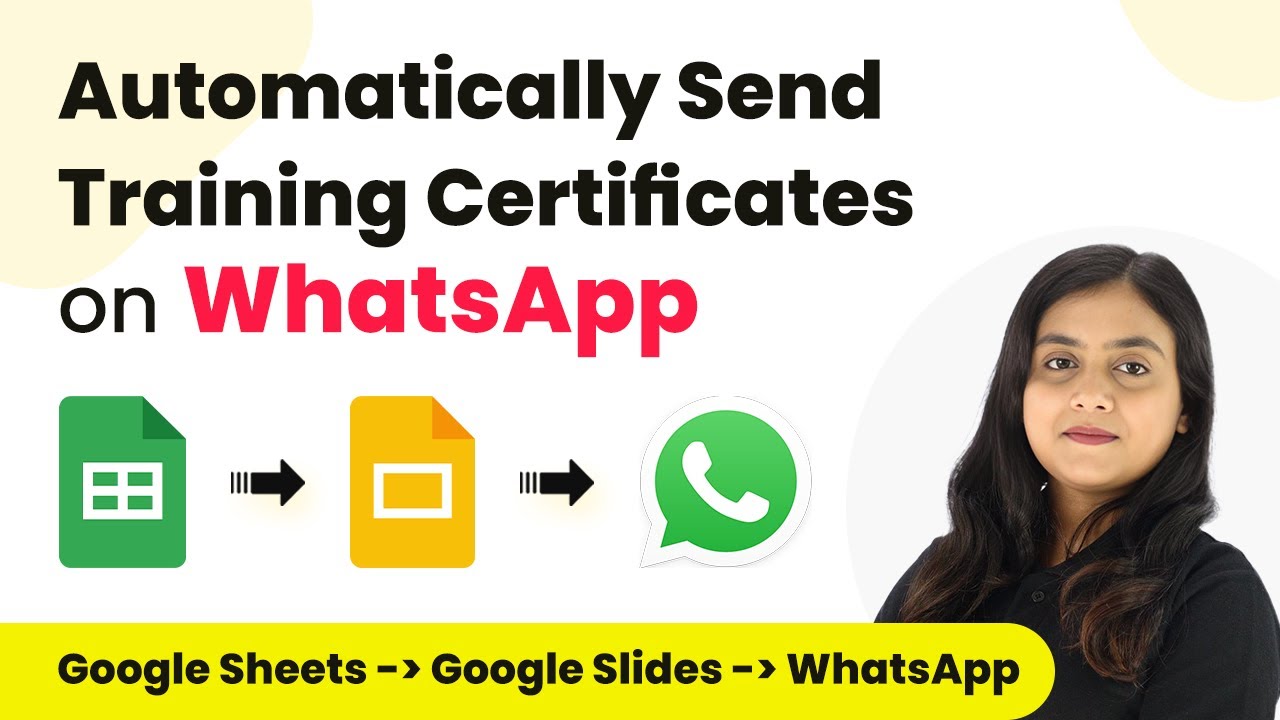
Learn how to automate sending workshop certificates via WhatsApp using Google Sheets and Google Slides with Pabbly Connect. Step-by-step tutorial included! Master proven automation processes with practical implementation examples and strategic recommendations you can apply immediately in your workflow.

Watch Step By Step Video Tutorial Below


1. Accessing Pabbly Connect for Automation

To start sending workshop certificates on WhatsApp, you need to access Pabbly Connect. Begin by visiting the Pabbly Connect website and signing in to your account. If you’re a new user, you can sign up for free and get 100 tasks every month.

Once logged in, you’ll be directed to the Pabbly apps window. From here, select Pabbly Connect by clicking on ‘Access Now’. This will take you to the Pabbly Connect dashboard where you can create a new workflow.


2. Creating a Workflow in Pabbly Connect

In the Pabbly Connect dashboard, click on the button in the top right corner that says ‘Create Workflow’. You will be prompted to name your workflow. Enter a name like ‘Send Workshop Certificates on WhatsApp using Google Sheets and Google Slides’.

  • Select a folder to save your workflow, such as ‘Google Slides Automation’.
  • Click ‘Create’ to finalize your workflow setup.

Your new workflow will now be displayed, showing two sections: Trigger and Action. This is where you will set up the automation process using Pabbly Connect.


3. Setting Up the Trigger Step with Google Sheets

The first step in your automation is to set up the trigger. Click on the arrow in the trigger section and select Google Sheets as your trigger application. Choose the event as ‘New or Updated Spreadsheet Row’. This means that every time a new attendee’s details are added, Pabbly Connect will capture this data.

After selecting the trigger, you will receive a webhook URL from Pabbly Connect. Copy this URL and go to your Google Sheets. Here, you need to set up the webhook by installing the Pabbly Connect Webhook add-on if you haven’t done so already.

  • Open your Google Sheets, click on Extensions, and then Add-ons.
  • Search for Pabbly Connect Webhook and install it.

After installation, click on Extensions again, select Pabbly Connect Webhook, and then Initial Setup. Paste the webhook URL you copied earlier and set the trigger column to the final column where data will be added. Click ‘Submit’ to finalize.


4. Action Step: Creating Certificates Using Google Slides

Once the trigger is set, it’s time to set up the action step. Click on the action section and select Google Slides as your action application. Choose the event ‘Create Presentation from Template’. This allows you to generate a certificate based on a pre-made template in Google Slides.

After selecting the action event, connect Google Slides to Pabbly Connect. You will need to authorize the connection by signing in with your Google account and granting the necessary permissions.

Select the template presentation you created for certificates. Map the data fields such as name and date from the previous step.

Finally, specify the folder in Google Drive where the new certificates will be saved. Once all details are filled, click ‘Save and Send Test Request’ to create a sample certificate.


5. Sharing Certificates via WhatsApp Cloud API

After generating the certificate, the next step is to share it via WhatsApp. Add another action step in your workflow and select WhatsApp Cloud API as the application. Choose the action event ‘Send Template Message’ to send the certificate link to the attendee.

Connect WhatsApp Cloud API to Pabbly Connect by entering your API token and other required details. You can obtain these from your WhatsApp Cloud API setup.

Map the recipient’s mobile number from your Google Sheets. Insert the certificate link and other dynamic fields into the message template.

Finally, click ‘Save and Send Test Request’ to send a test message. Check your WhatsApp to confirm that the message with the certificate link has been received successfully.


Conclusion

In this tutorial, we learned how to automate sending workshop certificates on WhatsApp using Google Sheets and Google Slides with Pabbly Connect. By following these steps, you can efficiently manage and send certificates to attendees, ensuring a seamless experience.

Ensure you check out Pabbly Connect to create business automation workflows and reduce manual tasks. Pabbly Connect currently offer integration with 2,000+ applications.

How to Notify Team on Google Chat for New Elementor Forms Submission Using Pabbly Connect

Learn how to use Pabbly Connect to automate notifications on Google Chat for new Elementor form submissions with this step-by-step tutorial. Explore efficient methods for automating routine tasks with clear, concise instructions suited for both newcomers and experienced professionals.

Watch Step By Step Video Tutorial Below


1. Setting Up Pabbly Connect for Google Chat Notifications

To notify your team on Google Chat for new Elementor form submissions, you’ll first need to set up Pabbly Connect. Start by visiting the Pabbly Connect website and logging in or signing up for a free account. This platform is essential for automating notifications based on form submissions.

Once logged in, navigate to the dashboard and click on the ‘Create Workflow’ button. You will need to name your workflow, such as ‘Notify Team on Google Chat for New Elementor Forms Submission’. Select a folder to save your workflow in, then proceed to the main workflow setup screen.


2. Configuring the Trigger with Elementor Form

In this section, you will set up the trigger for your workflow using Pabbly Connect. The trigger application will be Elementor. Select ‘Elementor’ from the list of applications and choose the trigger event as ‘New Form Submission’. This step is crucial as it initiates the workflow whenever a new form is submitted.

  • Select Elementor as the trigger application.
  • Choose the trigger event: New Form Submission.
  • Copy the webhook URL provided by Pabbly Connect.

After copying the webhook URL, you will need to integrate it into your Elementor form. This integration allows Elementor to communicate with Pabbly Connect upon receiving new submissions. You can do this by going to your WordPress dashboard, editing the Elementor form, and adding the webhook URL under the ‘Actions After Submit’ section.


3. Setting Up Google Chat Action in Pabbly Connect

Next, you will configure the action that sends notifications to Google Chat using Pabbly Connect. Select ‘Google Chat’ as the action application and choose the action event as ‘Create Message’. This step allows you to send a notification message to your team whenever a new form submission occurs.

To connect Google Chat with Pabbly Connect, you will need to provide a chat webhook URL. Go to your Google Chat workspace, add a new webhook for your team space, and copy the generated URL. Return to Pabbly Connect and paste this URL into the respective field.


4. Customizing Your Notification Message

In this step, you will customize the message that will be sent to Google Chat using Pabbly Connect. Craft a message that includes the details of the form submission. For example, your message could read: ‘Hello team, we have received a new form submission from Elementor form. Here are the details: Name, Email, Phone Number, City, and Age.’ This personalization ensures your team receives all relevant information.

  • Map the response fields from Elementor to your message.
  • Use dynamic mapping to ensure new submissions update the message in real-time.

Once you have set up the message, click on the ‘Save and Send Test’ button. This action will send a test notification to Google Chat, allowing you to verify that everything is working correctly. If successful, you will see your test message appear in your Google Chat.


5. Testing and Verifying the Integration

Finally, it’s important to test the integration to ensure that notifications are sent correctly. Use Pabbly Connect to submit a test form via your Elementor form and check if the notification appears in Google Chat. This step is crucial for confirming that your automation setup works as intended.

After submitting the test form, return to Google Chat to see if the notification message you configured appears with the correct details. If everything is set up properly, your team will receive real-time notifications for every new form submission.


Conclusion

Using Pabbly Connect, you can seamlessly automate notifications to your team on Google Chat for new Elementor form submissions. This integration enhances communication and ensures your team stays informed about new registrations efficiently.

Ensure you check out Pabbly Connect to create business automation workflows and reduce manual tasks. Pabbly Connect currently offer integration with 2,000+ applications.

How to Create Kommo Contacts from Google Sheets Using Pabbly Connect

Learn how to automate contact creation in Kommo from Google Sheets using Pabbly Connect. Follow these detailed steps to set up your integration. Eliminate manual repetitive tasks from your workflow. Discover proven automation methods with intuitive steps designed for efficiency-minded professionals.

Watch Step By Step Video Tutorial Below


1. Accessing Pabbly Connect to Start Integration

To create Kommo contacts from Google Sheets, we first need to access Pabbly Connect. Begin by searching for Pabbly Connect in your browser and navigating to its landing page. If you don’t have an account, click on the ‘Sign Up for Free’ button; it only takes a couple of minutes to set up.

Once signed in, you will see a dashboard with various applications. Click on the ‘Access Now’ button under Pabbly Connect to start creating your workflow. This platform enables seamless connections between Google Sheets and Kommo, making it essential for automating your contact creation process.


2. Creating a Workflow in Pabbly Connect

Next, we will create a workflow in Pabbly Connect. Click on the ‘Create Workflow’ button. A pop-up window will appear where you can name your workflow, such as ‘Create Kommo Contacts from Google Sheets’. Select a folder to save the workflow, and then click on ‘Create’ to proceed.

  • Name your workflow appropriately.
  • Choose a folder for better organization.
  • Click ‘Create’ to finalize.

After creating the workflow, you will see two boxes labeled ‘Trigger’ and ‘Action’. The trigger is the event that starts the workflow, while the action is what happens as a result. In our case, the trigger will be Google Sheets, and the action will be to create a contact in Kommo.


3. Setting Up the Trigger in Google Sheets

The next step is to set up the trigger using Pabbly Connect. Select Google Sheets as your trigger application. You will then need to choose the trigger event, which is ‘New or Updated Spreadsheet Row’. This event will activate the workflow whenever a new customer detail is added to the Google Sheet.

To connect Google Sheets with Pabbly Connect, you will need to use a webhook URL. Copy the provided webhook URL from Pabbly Connect and paste it into your Google Sheets extension setup. This connection allows data from the Google Sheet to be sent to Pabbly Connect.

  • Go to Extensions in Google Sheets.
  • Select the Pabbly Connect Webhook extension.
  • Paste the webhook URL and set the trigger column to the desired column.

After configuring the webhook, enable the option to send data when a new entry is added. This setup ensures that every time a new customer detail is entered, it will automatically be sent to Pabbly Connect.


4. Configuring the Action in Kommo

Once the trigger is set up, we will configure the action to create a contact in Kommo using Pabbly Connect. Select Kommo as your action application and choose the action event as ‘Create Contact’. This action will be performed whenever the trigger activates.

To connect Kommo with Pabbly Connect, you will need to enter your Kommo subdomain. This can be found in your Kommo account URL. Paste this subdomain in the connection setup and click on ‘Save’. After that, grant access to allow Pabbly Connect to manage your contacts.

Select the action application as Kommo. Choose ‘Create Contact’ as the action event. Enter your Kommo subdomain and save the connection.

After connecting, you will need to map the fields from Google Sheets to the corresponding fields in Kommo. This mapping ensures that the data is accurately transferred and that new contacts are created with the correct information.


5. Testing the Integration

Now that everything is set up, it’s time to test the integration using Pabbly Connect. Add a new customer detail in your Google Sheet. Once the data is entered, it should automatically trigger the workflow, sending the data to Pabbly Connect.

Check your Kommo CRM to confirm that the new contact has been created with the details you entered in Google Sheets. This successful test indicates that the integration is functioning correctly, allowing for seamless contact management.

Add customer details in Google Sheets. Verify that the new contact appears in Kommo. Ensure all details are correctly mapped.

With this, you have successfully created a workflow that automatically creates contacts in Kommo from Google Sheets using Pabbly Connect. This integration saves time and enhances your CRM efficiency.


Conclusion

In this tutorial, we demonstrated how to use Pabbly Connect to create contacts in Kommo from Google Sheets. By following these steps, you can automate your contact management and streamline your workflow effectively.

Ensure you check out Pabbly Connect to create business automation workflows and reduce manual tasks. Pabbly Connect currently offer integration with 2,000+ applications.

How to Send Google Classroom Invitation on Successful Razorpay Payment Using Pabbly Connect

Learn how to automate sending Google Classroom invitations upon successful Razorpay payments using Pabbly Connect. Step-by-step tutorial included. Learn to create powerful connections between your critical applications without requiring specialized programming knowledge or extensive technical background.

Watch Step By Step Video Tutorial Below


1. Accessing Pabbly Connect for Automation

To start automating the process of sending Google Classroom invitations, first access Pabbly Connect. Open your browser and type in Pabbly.com/connect to reach the Pabbly Connect landing page.

Here, you will find options to either sign in or sign up for free. Existing users can sign in directly, while new users should click on the ‘Sign up for free’ button. Once logged in, you’ll have access to the dashboard where you can create workflows.


2. Creating a Workflow in Pabbly Connect

After accessing the dashboard, the next step is to create a new workflow in Pabbly Connect. Click on the ‘Create Workflow’ button located in the top right corner of your screen.

  • Name your workflow, e.g., ‘Send Google Classroom Invitation on Successful Razorpay Payment’.
  • Select the folder to save your workflow, such as ‘Razorpay to Google Classroom Automation’.
  • Click on the ‘Create’ button to proceed.

This will take you to the trigger and action setup window where you can define how the automation will work.


3. Setting Up Trigger and Action in Pabbly Connect

In this step, you will set up the trigger and action for your workflow in Pabbly Connect. The trigger application will be Razorpay, and the action application will be Google Classroom.

First, search for Razorpay in the trigger application section and select the trigger event as ‘Payment Captured’. This means the workflow will activate whenever a payment is successfully captured. Next, search for Google Classroom in the action application section and select the action event as ‘Create Invitation’ to send an invitation to the student.


4. Configuring the Webhook in Razorpay

To connect Razorpay with Pabbly Connect, you need to configure a webhook. In the trigger setup, you will see a webhook URL provided by Pabbly Connect. Copy this URL.

Next, log in to your Razorpay account and navigate to ‘Account Settings’. Here, find the ‘Webhooks’ section and add a new webhook. Paste the copied webhook URL in the designated field and set the event to ‘Payment Captured’. Click on ‘Create Webhook’ to save your settings. This step ensures that Razorpay communicates with Pabbly Connect whenever a payment is made.


5. Sending Google Classroom Invitation

With the webhook configured, you can now proceed to send the Google Classroom invitation using Pabbly Connect. After a successful payment, Pabbly Connect will receive the payment details, including the student’s email.

In the action setup for Google Classroom, select the course you want to enroll the student in and map the student’s email address from the Razorpay payment details. Click on ‘Save and Send Test Request’ to verify if the invitation is sent successfully.

If everything is set up correctly, the student will receive an invitation link to join the Google Classroom course. This automation ensures that every time a student makes a payment, they are automatically invited to the course, streamlining the enrollment process.


Conclusion

In this tutorial, we explored how to send Google Classroom invitations on successful Razorpay payments using Pabbly Connect. This automation simplifies the enrollment process for students, ensuring they receive timely invitations to their courses.

Ensure you check out Pabbly Connect to create business automation workflows and reduce manual tasks. Pabbly Connect currently offer integration with 2,000+ applications.

How to Set Up Webhook Inside Gravity Forms with Pabbly Connect

Learn how to set up a webhook inside Gravity Forms using Pabbly Connect for seamless integration with Google Sheets, Gmail, and WhatsApp. Develop expertise in application integration and learn how to design streamlined automation workflows using proven, simplified approaches.

Watch Step By Step Video Tutorial Below


1. Understanding Webhooks and Pabbly Connect

In this section, we will explore how webhooks work and their integration with Pabbly Connect. A webhook acts as a bridge that connects applications, enabling data transfer when a specific event occurs.

Using Pabbly Connect, you can automate workflows easily by capturing data from Gravity Forms and sending it to various applications. This process simplifies managing form submissions and enhances data handling capabilities.


2. Setting Up Pabbly Connect Trigger for Gravity Forms

To set up a trigger in Pabbly Connect, start by selecting the Gravity Forms application. The trigger event we will use is ‘New Response,’ which activates the workflow when a form is submitted.

Once you select the trigger event, Pabbly Connect provides a unique webhook URL. This URL is crucial for connecting Gravity Forms to Pabbly Connect. Follow these steps to proceed with the setup:

  • Select ‘Gravity Forms’ as the application in Pabbly Connect.
  • Choose ‘New Response’ as the trigger event.
  • Copy the provided webhook URL for later use.

Now that you have the webhook URL, you can set up the connection in Gravity Forms.


3. Configuring the Webhook in Gravity Forms

To configure the webhook in Gravity Forms, navigate to your WordPress dashboard and select the Gravity Forms plugin. First, ensure that the Webhooks add-on is installed and activated.

Next, follow these steps to set up the webhook:

  • Go to the Forms section and select the form you want to connect.
  • Under Settings, find the Webhooks option and click on it.
  • Click ‘Add New’ to create a new webhook connection.
  • Paste the webhook URL from Pabbly Connect into the Request URL field.
  • Set the Request Method to POST and click ‘Save Settings’.

Once saved, your Gravity Forms setup is now connected to Pabbly Connect through the webhook.


4. Testing the Webhook Integration

After configuring the webhook, it’s crucial to test the integration to ensure everything works smoothly. Go back to Pabbly Connect and check that it is waiting for a webhook response.

To test the connection, submit a test form in Gravity Forms. Here’s how to do it:

Open the form in preview mode. Fill in the form with dummy details. Click ‘Submit’ to send the form data.

If the setup is correct, you will see the response captured in Pabbly Connect, confirming that the integration is successful.


5. Adding Actions in Pabbly Connect

Now that the webhook is successfully set up, you can enhance your automation by adding action steps in Pabbly Connect. This allows you to send form responses to various applications, such as Google Sheets or WhatsApp.

To add actions, follow these steps in Pabbly Connect:

Select the application you want to connect in the action step. Map the fields from Gravity Forms to the selected application. Repeat for additional applications as needed.

This flexibility enables you to automate processes without coding, making it easier to manage your form submissions effectively.


Conclusion

Setting up a webhook inside Gravity Forms using Pabbly Connect allows for seamless integration with various applications. This process automates data handling and enhances productivity, making it a valuable tool for any WordPress user.

Ensure you check out Pabbly Connect to create business automation workflows and reduce manual tasks. Pabbly Connect currently offer integration with 2,000+ applications.

How to Set Up Webhook Inside ClickBank Using Pabbly Connect

Learn how to set up a webhook in ClickBank using Pabbly Connect. Follow our step-by-step tutorial to integrate ClickBank and automate your sales process. Build sophisticated automated workflows in less time than you think. This guide translates complex integrations into straightforward steps for immediate implementation.

Watch Step By Step Video Tutorial Below


1. Setting Up Pabbly Connect for ClickBank

To set up a webhook inside ClickBank, you need to use Pabbly Connect. This integration allows you to send new sale details as events occur. Begin by accessing your Pabbly Connect account and navigate to the trigger window.

Search for ClickBank as your trigger application and select the trigger event as ‘New Sale.’ This event will initiate the workflow whenever a new sale is recorded in ClickBank. You will see a webhook URL generated by Pabbly Connect, which acts as the bridge between ClickBank and Pabbly Connect.


2. Configuring Your ClickBank Account

Next, log into your ClickBank account to configure the webhook settings. On the left-hand side, navigate to the ‘Accounts’ section and select your account. Then, go to ‘Vendor Settings’ to access the ‘My Site’ options.

  • Scroll down to find ‘Advanced Tools’ where you will see the Instant Notification URL.
  • Click on ‘Edit’ to modify the existing URL.
  • Paste the new webhook URL from Pabbly Connect into the appropriate field.

Once you have pasted the URL, click on the ‘Test IPN’ button to verify the connection. A test response will be sent to Pabbly Connect, confirming that the webhook has been successfully added to ClickBank.


3. Decrypting the Response Using Pabbly Connect Transformer

After successfully setting up the webhook, you will receive an encrypted response in Pabbly Connect. To decode this response, you will utilize the Data Transformer feature within Pabbly Connect. Search for ‘Data Transformer’ as your action application.

Select the action event as ‘ClickBank Decodes the ClickBank Encoded Data.’ You will need to enter specific fields including the secret key, encrypted data, and IV from your ClickBank account. The secret key can be found under the Advanced Tools section in your ClickBank settings.

  • Map the encrypted data received from ClickBank into the respective field in Pabbly Connect.
  • Map the IV as well, ensuring all necessary details are correctly entered.

Once all fields are filled, click on ‘Save and Send Test Request’ to verify that the data is decoded properly. A successful response will confirm that you have set up the webhook correctly.


4. Finalizing the Webhook Setup in Pabbly Connect

With the webhook successfully configured and the response decrypted, you can now finalize the setup in Pabbly Connect. This integration ensures that every new sale in ClickBank is captured automatically.

Whenever a new sale occurs, the details will be sent to Pabbly Connect in an encrypted format. You can use the Data Transformer to decrypt this data, allowing you to view the sale details clearly.

Furthermore, you can add additional action steps in Pabbly Connect to send this data to other applications as needed. This flexibility allows you to automate your sales processes seamlessly.


5. Conclusion: Leveraging Pabbly Connect for ClickBank Integration

Setting up a webhook inside ClickBank using Pabbly Connect allows for efficient data management and automation. By following the steps outlined, you can easily connect ClickBank with other applications, enhancing your sales workflow.

Ensure you check out Pabbly Connect to create business automation workflows and reduce manual tasks. Pabbly Connect currently offer integration with 2,000+ applications.

This integration not only simplifies the process of tracking sales but also enables you to respond to sales events in real-time. With Pabbly Connect, you can unlock numerous automation possibilities to optimize your business operations.


How To Connect Google Calendar with Discord | Send Meeting Reminders Using Pabbly Connect

Learn how to integrate Google Calendar with Discord to automate meeting reminders using Pabbly Connect. Follow our step-by-step tutorial for seamless automation. Explore systematic approaches to creating efficient automation solutions that convert technical concepts into practical, implementable instructions.

Watch Step By Step Video Tutorial Below


1. Accessing Pabbly Connect for Google Calendar and Discord Integration

To connect Google Calendar with Discord, we will use Pabbly Connect. This automation platform allows users to integrate various applications seamlessly. Start by visiting the Pabbly Connect homepage at Pabbly.com/connect.

Once there, you can either sign in as an existing user or create a new account for free. New users receive 100 free tasks every month to explore the features of Pabbly Connect. After logging in, navigate to the dashboard to begin setting up your integration.


2. Creating a New Workflow in Pabbly Connect

To create a workflow, click on the ‘Create Workflow’ button on the dashboard of Pabbly Connect. A dialog box will prompt you to name your workflow. Enter a descriptive name, such as ‘Connect Google Calendar with Discord to Send Meeting Reminders’.

  • Choose a folder to save your workflow, such as ‘Internal Communications’.
  • Click on ‘Create’ to proceed.

After creating the workflow, you will see two windows: one for the trigger and one for the action. The trigger defines when the automation starts, and the action specifies what happens next, showcasing the core functionality of Pabbly Connect.


3. Setting Up Google Calendar as the Trigger

In the trigger window, select Google Calendar as your trigger application. The trigger event should be set to ‘New Event’ because we want the workflow to activate whenever a new meeting is scheduled in Google Calendar.

Click on ‘Connect’ to establish a connection. Choose the option to add a new connection and sign in to your Google account to grant Pabbly Connect the necessary permissions. After successful authorization, select the calendar where you want to monitor events.


4. Configuring Discord as the Action

Now, it’s time to set Discord as the action application. In the action window, select Discord and choose the action event as ‘Send Channel Message HTML’. This action will send a message to your Discord channel when a new meeting is detected.

  • Copy the Webhook URL from your Discord channel settings.
  • Customize your message to include meeting details.

After configuring the message, click on ‘Save and Send Test Request’. This sends a test message to your Discord channel, confirming the integration works correctly through Pabbly Connect.


5. Finalizing the Integration and Sending Reminders

To ensure timely reminders, you can add a delay step in your workflow. This step will allow you to send reminders 30 minutes before the meeting starts. Use the ‘Add Delay’ feature in Pabbly Connect to set this up.

Finally, set a second reminder for 15 minutes before the meeting. Repeat the process of connecting to Discord and configuring the message. This way, your team receives two reminders, ensuring they are notified in a timely manner.


Conclusion

By following these steps, you can effectively connect Google Calendar with Discord using Pabbly Connect to automate meeting reminders. This integration enhances team communication and ensures everyone is informed about upcoming meetings.

Ensure you check out Pabbly Connect to create business automation workflows and reduce manual tasks. Pabbly Connect currently offer integration with 2,000+ applications.

How to Create Bitlinks for New Dropbox Files using Bitly with Pabbly Connect

Learn how to automate the creation of Bitlinks for new Dropbox files using Bitly through Pabbly Connect in this detailed tutorial. Eliminate manual repetitive tasks from your workflow. Discover proven automation methods with intuitive steps designed for efficiency-minded professionals.

Watch Step By Step Video Tutorial Below


1. Accessing Pabbly Connect for Integration

The first step to create Bitlinks for new Dropbox files is to access Pabbly Connect. This powerful tool allows you to integrate various applications seamlessly. Start by visiting the Pabbly Connect website and signing in to your account. If you are a new user, you can sign up for free and get 100 tasks every month.

After logging in, you’ll see the Pabbly Connect dashboard. Here, you can create a new workflow by clicking the ‘Create Workflow’ button. This will initiate the setup process for your automation.


2. Creating a Workflow in Pabbly Connect

In this section, we will create a workflow to automate the process of generating Bitlinks. Click on the ‘Create Workflow’ button at the top right corner. A dialog box will prompt you to name your workflow. You can name it something like ‘Create Bitlinks for New Dropbox Files Using Bitly’. using Pabbly Connect

  • Enter a descriptive name for your workflow.
  • Select a folder to save your workflow.
  • Click on the ‘Create’ button to finalize your workflow setup.

Once your workflow is created, you will see two main sections: Trigger and Action. The Trigger is the event that starts the automation, and the Action is what happens as a result. In this case, the Trigger will be a new file uploaded to Dropbox, and the Action will be creating a Bitlink using Bitly.


3. Setting Up the Trigger with Dropbox

The next step is to set up the trigger in Pabbly Connect. Select Dropbox as your trigger application and choose the trigger event as ‘New File’. This means that every time a new file is uploaded to your specified Dropbox folder, Pabbly Connect will capture this event. using Pabbly Connect

After selecting Dropbox, you will need to connect your Dropbox account to Pabbly Connect. Click on the ‘Connect’ button, and if you don’t have an existing connection, select ‘Add New Connection’. Authorize Pabbly Connect to access your Dropbox account.

  • Specify the folder path in Dropbox where the files will be uploaded.
  • Set the polling duration to 10 minutes to check for new files.
  • Click on ‘Save and Send Test Request’ to ensure Pabbly Connect captures the new file data.

Once the test is successful, you will receive a response containing the file details, including the long URL of the uploaded file.


After successfully capturing the new file details from Dropbox, the next step is to create a Bitlink using Bitly through Pabbly Connect. Select Bitly as your action application and choose the action event as ‘Create Bitlink’. This action will convert the long URL captured from the previous step into a shortened Bitlink.

Connect your Bitly account to Pabbly Connect by clicking on the ‘Connect’ button. If you haven’t authorized Bitly before, you will need to allow Pabbly Connect to access your Bitly account. Once connected, you need to specify the group and the long URL you want to shorten.

Map the long URL from the Dropbox trigger step. Set a title for your Bitlink, ideally the name of the uploaded file. Click on ‘Save and Send Test Request’ to create the Bitlink.

After clicking the test request, you will receive a response with the newly created Bitlink, confirming that the process was successful.


5. Recording Details in Google Sheets

The final step is to log the details of the uploaded file and its corresponding Bitlink in Google Sheets. To do this, add another action step in Pabbly Connect and select Google Sheets as your action application. Choose the action event ‘Add New Row’ to create a record in your spreadsheet. using Pabbly Connect

Connect your Google Sheets account to Pabbly Connect. After authorization, select the spreadsheet you created to hold the data. Map the fields such as file title, long URL, and Bitlink from the previous steps.

Select the spreadsheet and sheet where you want to log the data. Map the file title, long URL, and Bitlink to their respective fields. Click on ‘Save and Send Test Request’ to finalize the logging process.

Once the test request is successful, check your Google Sheets to confirm that a new row has been added with the file details, including the Bitlink.


Conclusion

In this tutorial, we explored how to create Bitlinks for new Dropbox files using Bitly with the help of Pabbly Connect. By following these steps, you can automate the process of generating short links and logging them into Google Sheets, enhancing your workflow efficiency.

Ensure you check out Pabbly Connect to create business automation workflows and reduce manual tasks. Pabbly Connect currently offer integration with 2,000+ applications.

How to Enroll Students in Google Classroom on Successful Stripe Payment Using Pabbly Connect

Learn how to integrate Google Classroom and Stripe using Pabbly Connect to automate student enrollment after successful payments. Master proven automation processes with practical implementation examples and strategic recommendations you can apply immediately in your workflow.

Watch Step By Step Video Tutorial Below


1. Accessing Pabbly Connect for Integration

To enroll students in Google Classroom after a successful Stripe payment, first, you need to access Pabbly Connect. This powerful integration platform allows you to connect multiple applications without any coding skills.

Visit the Pabbly Connect homepage by typing the URL in your browser. You will see options to sign in or sign up for free. If you are a new user, click on the ‘Sign Up for Free’ button to create an account. After signing in, you can begin setting up your workflow.


2. Creating a Workflow in Pabbly Connect

Once logged into Pabbly Connect, click on the ‘Create Workflow’ button to start a new automation. You will be prompted to name your workflow; enter ‘Enroll Student in Google Classroom on Successful Stripe Payment’ and select a folder to save it in.

  • Click on ‘Create’ to set up your workflow.
  • You will see two windows: Trigger and Action.
  • Select Stripe as the trigger application and Google Classroom as the action application.

This setup ensures that when a payment is received through Stripe, a corresponding action will occur in Google Classroom, specifically enrolling the student.


3. Setting Up Stripe as the Trigger

In this step, you will configure Stripe as the trigger application in Pabbly Connect. Select Stripe from the list of applications and choose the trigger event as ‘Checkout Session Completed’. This means that the workflow will activate when a payment is successfully processed.

Next, you will need to set up a webhook URL provided by Pabbly Connect. This URL acts as a bridge between Stripe and Pabbly Connect, sending data from Stripe to Pabbly Connect. Copy the webhook URL and navigate to your Stripe account.

  • In Stripe, go to the Developer section and select Webhooks.
  • Click on ‘Add Endpoint’ and paste the copied URL in the Endpoint URL field.
  • Select the event ‘Checkout Session Completed’ and click on ‘Add Events’.

Finally, click on ‘Add Endpoint’ to complete the setup. This allows Pabbly Connect to receive notifications when a payment is completed.


4. Filtering Payments for Google Classroom Enrollment

After setting up Stripe, the next step is to filter the payments that will trigger student enrollment in Google Classroom. In Pabbly Connect, you will add a filter to ensure that only specific payments lead to enrollments.

To do this, select the filter action in your workflow. You will need to map the payment link from the Stripe response and set the condition to check if it matches the specific link for your course in Google Classroom.

Choose the label as the payment link from the previous response. Set the filter type to ‘Equals’ and enter the specific payment link value. Test the condition to ensure it is true before proceeding.

This filtering process guarantees that only students who pay for the designated course will be enrolled in Google Classroom.


5. Enrolling Students in Google Classroom

With the payment filtering in place, it’s time to set up the action that enrolls students in Google Classroom through Pabbly Connect. Select Google Classroom as the action application and choose the action event ‘Create Invitation’.

This action will send an invitation link to the student who made the payment. You will need to connect your Google account, allowing Pabbly Connect to access your Google Classroom.

Select the course ID for the relevant course. Map the student’s email address from the Stripe response to ensure the invitation is sent to the correct person. Click on ‘Save and Send Test Request’ to verify if the invitation is sent successfully.

Once this is set up, students will receive an invite link to join the course upon successful payment, automating the enrollment process.


Conclusion

In this tutorial, we have demonstrated how to use Pabbly Connect to enroll students in Google Classroom after a successful Stripe payment. By following these steps, you can automate the enrollment process, enhancing your Learning Management experience. This integration saves time and ensures that students receive their course invitations promptly.

Ensure you check out Pabbly Connect to create business automation workflows and reduce manual tasks. Pabbly Connect currently offer integration with 2,000+ applications.

How to Send Training Certificates on WhatsApp Using Pabbly Connect with Google Sheets and Google Slides

Learn how to automate sending training certificates via WhatsApp using Pabbly Connect, Google Sheets, and Google Slides. Follow this detailed tutorial for step-by-step guidance. Discover how to seamlessly connect your essential tools through accessible instructions that make powerful automation available to professionals at every skill level.

Watch Step By Step Video Tutorial Below


1. Accessing Pabbly Connect for Automation

To begin sending training certificates via WhatsApp, you first need to access Pabbly Connect. Sign in to your account or create a new one if you’re a new user. Pabbly Connect allows you to automate the entire process of generating certificates from Google Slides and sending them through WhatsApp.

Once logged in, navigate to the Pabbly Connect dashboard. Click on the ‘Create Workflow’ button located in the top right corner. You will be prompted to name your workflow, such as ‘Send Training Certificates on WhatsApp with Google Sheets and Google Slides’. Select the appropriate folder to save your workflow and click on ‘Create’.


2. Setting Up Google Sheets Trigger in Pabbly Connect

In this step, you will set up Google Sheets as the trigger application in Pabbly Connect. This means that whenever you add a new training detail in Google Sheets, it will automatically trigger the workflow. Click on the arrow under the trigger section and select Google Sheets as your trigger application.

  • Select the trigger event as ‘New or Updated Spreadsheet Row’.
  • Copy the webhook URL provided by Pabbly Connect.
  • Open your Google Sheets and navigate to Extensions > Add-ons > Get Add-ons, then search for ‘Pabbly Connect Webhooks’.

After installing the add-on, go back to Extensions > Pabbly Connect Webhooks > Initial Setup. Paste the copied webhook URL into the trigger column, selecting the appropriate data column (e.g., Column D) for the trigger. Click on ‘Submit’ to finalize the setup.


3. Creating Certificates with Google Slides via Pabbly Connect

Next, you will set up Google Slides as the action application to create the training certificates. In the action section of Pabbly Connect, select Google Slides and choose the action event ‘Create Presentation from Template’. This action will use a pre-designed certificate template in Google Slides.

After connecting Google Slides, select your template presentation (e.g., ‘Training Certificate Template’). For the title of the new presentation, map the trainee’s name from the Google Sheets data. This mapping allows the certificate title to dynamically include the name of each trainee.

  • Choose the folder in Google Drive where the new certificate will be saved.
  • Map additional details such as the date of completion to the corresponding fields in the template.

Click on ‘Save and Send Test Request’ to check if the certificate is created successfully. You should see a confirmation message indicating that the presentation was created.


4. Sharing Certificates on Google Drive Using Pabbly Connect

Once the certificate is created, the next step is to make it accessible to everyone. For this, you will add another action step in Pabbly Connect and select Google Drive as the application. Choose the action event ‘Share a File with Anyone’ to allow Pabbly access to the certificate.

In the configuration, map the presentation ID from the previous step to the file ID field. This mapping ensures that the specific certificate created is shared. Click on ‘Save and Send Test Request’ to finalize this step.

Confirm that the response indicates the file is now shareable. Note the PDF link provided in the response for sending via WhatsApp.

This step is crucial as it allows the certificate to be accessed by the trainees when they receive it on WhatsApp.


5. Sending Certificates via WhatsApp Using Pabbly Connect

Finally, you will set up WhatsApp Cloud API as the action application to send the certificate link to the trainee. In Pabbly Connect, select WhatsApp Cloud API and choose the action event ‘Send Template Message’. This will enable you to send a personalized message along with the certificate link.

Fill in the required fields, mapping the recipient’s mobile number and the certificate link from the previous steps. Ensure that you have the necessary API credentials set up for WhatsApp Cloud API in Pabbly Connect.

Enter the template name for the message. Customize the message body to include the trainee’s name and the certificate link.

Click on ‘Save and Send Test Request’ to send the message. You should receive a confirmation that the message was accepted, indicating that the trainee will receive their certificate on WhatsApp.


Conclusion

In this tutorial, we explored how to automate the process of sending training certificates via WhatsApp using Pabbly Connect, Google Sheets, and Google Slides. By following these steps, you can streamline your training program and ensure timely delivery of certificates to your trainees.

Ensure you check out Pabbly Connect to create business automation workflows and reduce manual tasks. Pabbly Connect currently offer integration with 2,000+ applications.