Boost Marketing Team Productivity with Pabbly Connect Automations

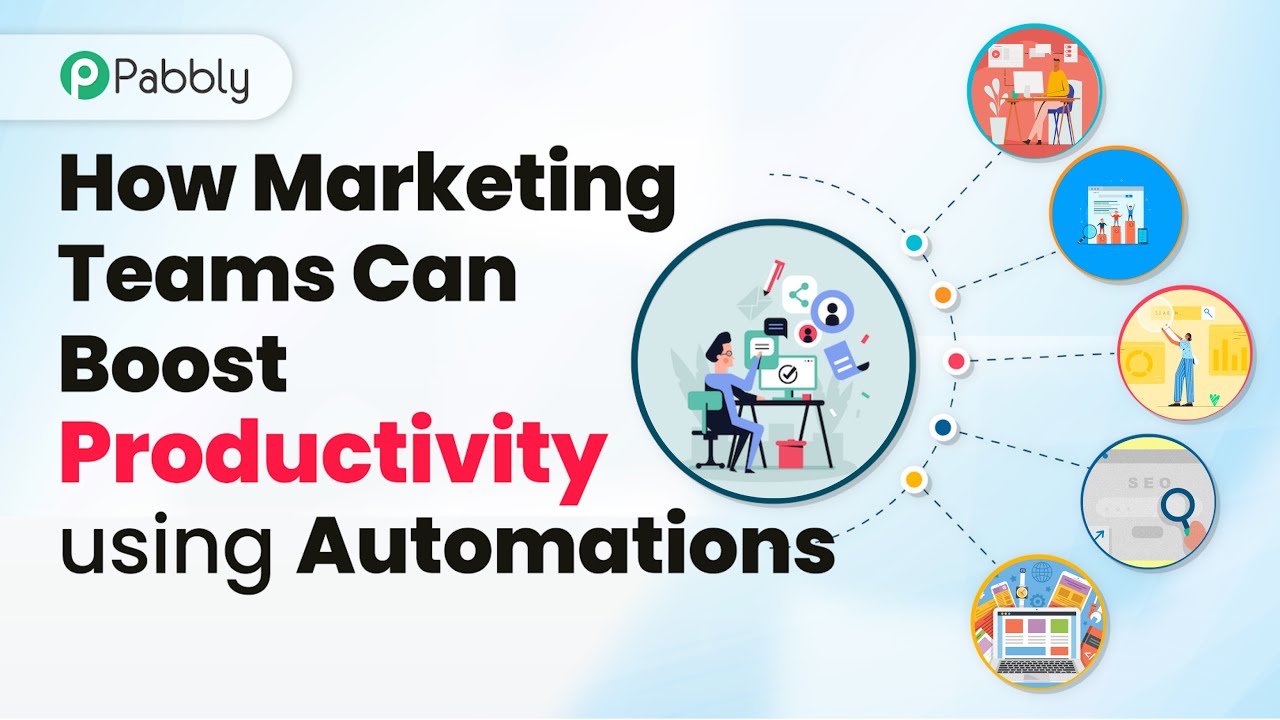
Learn how marketing teams can enhance productivity using Pabbly Connect to automate WhatsApp, Google Sheets, and more. Step-by-step guide included. Explore systematic approaches to creating efficient automation solutions that convert technical concepts into practical, implementable instructions.

Watch Step By Step Video Tutorial Below


1. Accessing Pabbly Connect for Automations

To boost productivity using automations, marketing teams can start by accessing Pabbly Connect. Visit the Pabbly Connect homepage by entering the URL in your browser. Here, you will find options to sign in or sign up for a free account.

If you are a new user, click on ‘Sign Up Free’ to receive 300 tasks every month. Existing users can simply click ‘Sign In’. After signing in, navigate to the Pabbly Connect dashboard where you can create and manage your automations.


2. Automate Event Promotion with Pabbly Connect

Using Pabbly Connect, you can automate event promotions by integrating Google Sheets, WhatsApp Cloud API, and Gmail. Start by creating a Google Sheet with client details. This will serve as your trigger application.

  • Add client details in Google Sheets.
  • Set up WhatsApp Cloud API in Pabbly Connect.
  • Map recipient details in Gmail to send promotional emails.

Once the setup is complete, any new entry in your Google Sheets will trigger an automatic WhatsApp message and an email to the client. This ensures timely communication and boosts productivity in your marketing efforts.


3. Automate Email Campaigns Using Pabbly Connect

Another effective automation is sending email campaigns through Pabbly Connect. This process also involves Google Sheets and Gmail. Create a Google Sheet containing email data, including subject, sender name, and recipient addresses.

Whenever a new row is added, Pabbly Connect will trigger an email to all mapped addresses. This allows you to reach multiple customers efficiently.

  • Map sender’s name, subject, and email content in Gmail.
  • Ensure all recipient addresses are included for seamless sending.

This automation streamlines your email marketing campaigns, ensuring no potential lead is missed while saving time for your marketing team.


4. WhatsApp Marketing for Lead Generation with Pabbly Connect

For lead generation, Pabbly Connect can automate responses to leads generated from Facebook lead ads. Set up your Facebook page and create lead ads to collect leads efficiently.

When a new lead is generated, Pabbly Connect captures the information and sends a WhatsApp message to nurture that lead. This immediate response helps in converting leads into customers.

Select Facebook lead ads as the trigger application. Map the lead details to send a WhatsApp message.

This automation not only saves time but also enhances the customer experience by providing instant communication through WhatsApp.


5. Automated Nurturing Workflow with Pabbly Connect

The final automation involves nurturing leads through multiple applications using Pabbly Connect. This includes Facebook lead ads, Google Sheets, Zoho CRM, and WhatsApp.

Once a lead is captured from Facebook, the details are automatically added to Google Sheets and Zoho CRM. This ensures all lead information is organized and accessible.

Create a spreadsheet for lead details. Map lead details to create a new contact in Zoho CRM. Send a WhatsApp message to the lead using the mapped details.

This comprehensive automation ensures that leads are not only captured but also nurtured through timely follow-ups, enhancing the overall productivity of marketing teams.


Conclusion

Using Pabbly Connect for automations can significantly boost productivity for marketing teams. By integrating various applications like WhatsApp, Google Sheets, and Gmail, teams can streamline their workflows and enhance lead nurturing processes. Embrace these automations to improve efficiency and communication in your marketing efforts.

Ensure you check out Pabbly Connect to create business automation workflows and reduce manual tasks. Pabbly Connect currently offer integration with 2,000+ applications.

How to Set Up Webhook Inside Zoho Inventory Using Pabbly Connect

Learn how to set up a webhook inside Zoho Inventory using Pabbly Connect for seamless integration with Google Chat and Google Sheets. Navigate the automation landscape confidently with clear, structured guidance suitable for professionals regardless of prior technical experience.

Watch Step By Step Video Tutorial Below


Understanding Webhooks and Pabbly Connect

In this tutorial, we will explore how to set up a webhook inside Zoho Inventory using Pabbly Connect. Webhooks serve as a bridge for transferring data between Zoho Inventory and other applications like Google Sheets and Google Chat. By using Pabbly Connect, you can automate this data transfer seamlessly.

The process involves creating a trigger in Zoho Inventory that activates when specific events occur, such as creating or updating an item. The actions will then be executed in other applications, allowing for real-time updates and communication.


Setting Up Pabbly Connect Trigger

To begin, you need to access Pabbly Connect and set up your trigger. First, log in to your Pabbly Connect account and navigate to the dashboard. Here, you will create a new workflow that will listen for events from Zoho Inventory.

Select Zoho Inventory as your trigger application. You will then choose the trigger event. The options include:

  • Create or Update Item
  • Create or Update Customer
  • Create or Update Invoice

After selecting the ‘Create or Update Item’ event, Pabbly Connect will generate a webhook URL for you to use in Zoho Inventory.


Configuring Webhook in Zoho Inventory

Next, you will set up the webhook in Zoho Inventory by accessing the settings section. Navigate to the Automations tab and select Workflow Actions. Click on the ‘New Webhook’ button to create a new webhook.

In the new webhook configuration, provide a name such as ‘Test Item’ and select the module as ‘Item’. Paste the webhook URL you copied from Pabbly Connect into the URL field. You can also add an optional description, but it is not mandatory. Once done, click on the ‘Save’ button to finalize your webhook setup.


Creating Workflow Rule in Zoho Inventory

After setting up the webhook, the next step is to create a workflow rule in Zoho Inventory. This rule will define when the webhook is triggered. To do this, click on ‘New Workflow Rule’ and name it, for example, ‘Item Created’. using Pabbly Connect

Choose the module as ‘Item’ and then select the trigger event. You can pick from options like:

  • Created
  • Edited
  • Created or Edited

For our example, select ‘Created or Edited’. After setting the trigger, you can specify to execute the workflow when any field in the item is updated, and then save the rule.


Testing the Webhook Setup

Now that everything is configured, it’s time to test the webhook setup. Go back to Pabbly Connect and click on the ‘Recapture Webhook Response’ button. This will allow you to capture a real response from Zoho Inventory.

To generate a response, create a new item in Zoho Inventory. Fill in the required fields like item name, SKU, and price, and click on ‘Save’. After a few seconds, return to Pabbly Connect to see if the response has been captured successfully. You should see the item details reflected in Pabbly Connect, confirming that the integration works correctly.


Conclusion

In this tutorial, we covered how to set up a webhook inside Zoho Inventory using Pabbly Connect. By following the steps outlined, you can automate data transfers to applications like Google Sheets and Google Chat. This integration enhances your workflow efficiency and ensures real-time updates.

Ensure you check out Pabbly Connect to create business automation workflows and reduce manual tasks. Pabbly Connect currently offer integration with 2,000+ applications.

How to Send WhatsApp Notification for New Graphy Learner Using Pabbly Connect

Learn how to send WhatsApp notifications for new Graphy learners using Pabbly Connect. This tutorial covers step-by-step integration with WhatsApp Cloud API. Explore efficient methods for automating routine tasks with clear, concise instructions suited for both newcomers and experienced professionals.

Watch Step By Step Video Tutorial Below


1. Accessing Pabbly Connect for Integration

To send WhatsApp notifications for new Graphy learners, you need to access Pabbly Connect. Start by navigating to the Pabbly Connect website and signing in to your account. If you are a new user, you can sign up for free and receive 100 free tasks each month.

Once signed in, you will see the Pabbly Apps window. Click on the ‘Access Now’ button under Pabbly Connect. This will take you to the Pabbly Connect dashboard where you can create your automation workflow.


2. Creating a Workflow in Pabbly Connect

In order to set up the automation process, you need to create a workflow in Pabbly Connect. Click on the ‘Create Workflow’ button located at the top right corner. A dialog box will appear prompting you to name your workflow.

  • Name your workflow as ‘Send WhatsApp Notification for New Graphy Learner’.
  • Select a folder to save your workflow. Choose the folder named ‘Graph Automations’.
  • Click on the ‘Create’ button to finalize the workflow creation.

Your workflow for sending WhatsApp notifications is now created in Pabbly Connect. You will see two windows labeled Trigger and Action, which are essential for the automation process.


3. Setting Up the Trigger in Pabbly Connect

The next step is to set up the trigger in Pabbly Connect. Click on the arrow in the Trigger section and select ‘Graphy’ as your trigger application. For the trigger event, choose ‘New Learner Created’. This ensures that every time a new learner is added to your Graphy account, it triggers the workflow.

Pabbly Connect will provide you with a unique webhook URL. Copy this URL as it will be used to connect Graphy with Pabbly Connect. Go to your Graphy account, navigate to the Integrations section, and click on Webhooks.

  • Click on ‘New Webhook’.
  • Paste the copied webhook URL and remove the ‘https://’ part.
  • Select ‘New Learner Created’ for the event.
  • Click on ‘Save’ to add the webhook.

After saving, you will see the webhook status as active. Your trigger setup is now complete in Pabbly Connect.


4. Setting Up the Action in Pabbly Connect

Now that the trigger is set, it’s time to configure the action step. In the Action section of Pabbly Connect, select ‘WhatsApp Cloud API’ as your action application. Choose ‘Send Template Message’ as the action event. This will send a WhatsApp message using the template you have created.

To connect WhatsApp Cloud API with Pabbly Connect, click on ‘Connect’ and then ‘Add New Connection’. You will need to enter your WhatsApp API token, phone number ID, and WhatsApp Business Account ID. These details can be obtained from your WhatsApp Cloud API setup.

Copy the token from your WhatsApp API setup and paste it in Pabbly Connect. Copy the phone number ID and paste it accordingly. Finally, paste the WhatsApp Business Account ID.

After entering all the required details, click on ‘Save’ to establish the connection. Your action step is now configured in Pabbly Connect.


5. Testing the Integration in Pabbly Connect

To test the integration, create a new learner in your Graphy account. Fill in the required details such as name, email, phone number, and password, then click on ‘Add’. This action will trigger the webhook you set up earlier in Pabbly Connect.

After adding the new learner, return to your Pabbly Connect workflow and check if the response has been captured. If successful, you will see the learner’s details displayed, confirming that the trigger was activated.

Verify that the learner’s name and phone number appear in the captured response. Ensure that the WhatsApp message is sent to the learner’s phone number. Check your WhatsApp account for the received message.

If everything is set up correctly, you will receive a WhatsApp notification welcoming the new learner, confirming that Pabbly Connect has successfully automated the process.


Conclusion

This tutorial demonstrated how to send WhatsApp notifications for new Graphy learners using Pabbly Connect. By following the steps outlined, you can automate your communication with learners effectively. Utilize this integration to enhance your educational business and keep your learners informed.

Ensure you check out Pabbly Connect to create business automation workflows and reduce manual tasks. Pabbly Connect currently offer integration with 2,000+ applications.

How to Send Automated Email on Elementor Form Submission Using Pabbly Connect

Learn how to automate email sending on Elementor form submission using Pabbly Connect. Step-by-step guide to integrate Elementor with Gmail for seamless communication. Discover hidden automation capabilities within your existing tools. This guide shows you how to connect your essential applications and permanently eliminate redundant manual processes.

Watch Step By Step Video Tutorial Below


1. Accessing Pabbly Connect for Email Automation

To begin sending automated emails upon Elementor form submission, you first need to access Pabbly Connect. This powerful integration platform allows you to connect various applications seamlessly.

Start by visiting the Pabbly Connect website. If you’re a new user, click on ‘Sign Up for Free’ to create your account. Existing users can simply log in. Once logged in, navigate to the Pabbly Connect dashboard where you can create a new workflow.


2. Creating a Workflow in Pabbly Connect

After accessing the dashboard, you will need to create a new workflow in Pabbly Connect. Click on the ‘Create Workflow’ button and name your workflow appropriately, such as ‘Automated Email on Elementor Form Submission’.

  • Click on the ‘Create’ button to proceed.
  • You will now be taken to the workflow window where you can set up triggers and actions.

In this window, select ‘Elementor’ as your trigger application. Choose the event ‘New Form Submission’ to ensure that the workflow triggers when a form is submitted through Elementor. This is where Pabbly Connect starts facilitating the connection.


3. Setting Up Elementor with Pabbly Connect

Now that you have selected Elementor as your trigger, Pabbly Connect generates a webhook URL. Copy this URL as you will need to integrate it into your Elementor form settings.

Log into your Elementor account and locate the form you wish to integrate. In the form settings, navigate to the ‘Actions After Submit’ section and add a new action by selecting ‘Webhook’. Paste the copied URL into the appropriate field.

  • Ensure you click on ‘Update’ to save your changes.
  • This setup will enable Elementor to send form submission data to Pabbly Connect.

After updating, perform a test submission on the form to confirm that the data is being captured correctly by Pabbly Connect. This testing phase is crucial to ensure the integration works as intended.


4. Configuring Gmail Action in Pabbly Connect

With the trigger set up in Elementor, the next step is to configure the action in Pabbly Connect. Select ‘Gmail’ as the action application and choose the action event ‘Send Email’.

Click on ‘Connect’ to link your Gmail account to Pabbly Connect. If you have not previously connected your Gmail, you will need to authorize Pabbly Connect to access your account.

Authorize the necessary permissions when prompted. Once connected, map the recipient email address using the data captured from the Elementor form submission.

This mapping feature in Pabbly Connect allows you to personalize the emails sent out, ensuring that each lead receives a tailored response based on their submission.


5. Testing the Integration and Finalizing

After configuring the Gmail action, it’s time to test the entire integration workflow. Perform another test submission on your Elementor form to ensure that the email is sent correctly.

Check your Gmail account for the automated email. You should see a confirmation email with the details you set up in the email content. This ensures that Pabbly Connect has successfully facilitated the integration between Elementor and Gmail.

Make sure the email content includes personalized elements such as the lead’s name. This adds a personal touch and enhances user experience.

Once confirmed, your automated email workflow is complete, and you can now efficiently communicate with leads through your website.


Conclusion

In this tutorial, we explored how to send automated emails on Elementor form submission using Pabbly Connect. By integrating Elementor with Gmail, users can ensure timely communication with leads, enhancing their business efficiency.

Ensure you check out Pabbly Connect to create business automation workflows and reduce manual tasks. Pabbly Connect currently offer integration with 2,000+ applications.

How to Set Up Webhook Inside Nifty PM with Pabbly Connect

Learn how to set up a webhook inside Nifty PM using Pabbly Connect. This step-by-step tutorial guides you through the integration process for efficient project management.

Watch Step By Step Video Tutorial Below


1. Setting Up Pabbly Connect for Nifty PM Webhook

To set up a webhook inside Nifty PM using Pabbly Connect, start by accessing your Pabbly Connect account. This integration allows you to connect Nifty PM with other applications seamlessly.

Once logged in, navigate to the trigger window. Here, you will search for Nifty PM as your trigger application. Select the trigger event as ‘Task Created’ to capture new tasks created in Nifty PM.


2. Configuring Nifty PM for Webhook Integration

Next, you need to configure your Nifty PM account to accept the webhook from Pabbly Connect. Go to your profile settings in Nifty PM and select the App Center from the left sidebar.

  • Navigate to ‘Integrate with API’.
  • Click on the ‘Configure’ button under Webhooks.
  • Paste the webhook URL from Pabbly Connect into the Endpoint URL field.
  • Select ‘Task Created’ as the event type to match your trigger event in Pabbly Connect.

After entering the details, click on the create button to finalize the webhook setup. This action successfully creates a connection between Nifty PM and Pabbly Connect.


3. Testing the Webhook Integration

To verify that the webhook is functioning correctly, you need to perform a test submission. In your Nifty PM account, create a new task.

  • Enter a task name, such as ‘Create a Social Media Calendar’.
  • Add a description and select appropriate project settings.
  • Set the due dates and assign priority tags.

Once you create the task, switch back to Pabbly Connect to see if the webhook response captures the new task details. This confirmation indicates that the integration is successful.


4. Retrieving Task Details from Nifty PM

After confirming the webhook captures the task creation event, you can retrieve the task details using Pabbly Connect. In the action window, search for Nifty PM and select it as your action application.

Choose the action event ‘Get Object by ID’ to fetch the task details. You will need to authorize Pabbly Connect to access your Nifty PM account by clicking ‘Connect with Nifty PM’. Once authorized, select the object type as ‘Task’.

In the Object ID field, map the object ID you received from the webhook response. This mapping allows Pabbly Connect to pull the specific task details you created earlier.


5. Finalizing the Webhook Integration

Finally, click on ‘Save and Send Test Request’ in Pabbly Connect to complete the integration process. You should receive a positive response containing the task details, confirming that everything is set up correctly.

This successful integration means that every time a new task is created in Nifty PM, the task details will automatically be captured in Pabbly Connect for further actions or notifications.

With this setup, you can streamline your project management processes by integrating Nifty PM with various applications using Pabbly Connect.


Conclusion

In this tutorial, we covered how to set up a webhook inside Nifty PM using Pabbly Connect. By following these steps, you can efficiently manage tasks and automate workflows between Nifty PM and other applications.

Ensure you check out Pabbly Connect to create business automation workflows and reduce manual tasks. Pabbly Connect currently offer integration with 2,000+ applications.

How to Collect Payments From Google Forms Using Pabbly Connect

Learn how to collect payments from Google Forms using Pabbly Connect with Stripe. This detailed tutorial covers step-by-step integration. Discover how to seamlessly connect your essential tools through accessible instructions that make powerful automation available to professionals at every skill level.

Watch Step By Step Video Tutorial Below


1. Accessing Pabbly Connect for Google Forms Payment Integration

To collect payments from Google Forms, the first step is to access Pabbly Connect. This platform facilitates the integration between Google Forms, Stripe, and Gmail, allowing you to automate payment collection seamlessly.

Begin by navigating to the Pabbly Connect website. If you do not have an account, click on the ‘Sign Up for Free’ button to create one. Once signed in, you will be directed to your dashboard where you can start building your workflow.


2. Creating a Workflow in Pabbly Connect

Once you are on the dashboard of Pabbly Connect, the next step is to create a new workflow. This is essential for setting up the automation process for collecting payments from Google Forms.

  • Click on the ‘Create Workflow’ button.
  • Name your workflow, for example, ‘Collect Payments from Google Forms Using Stripe’.
  • Select the folder where you want to save this workflow.

After naming your workflow, you will see two main boxes: Trigger and Action. The Trigger will be set to Google Forms, and the Action will involve Stripe and Gmail, enabling you to automate the payment process effectively.


3. Setting Up the Trigger for Google Forms

The next step involves setting up the Trigger in Pabbly Connect. This is where you specify what event will initiate your workflow.

Select Google Forms as the Trigger application and choose the event ‘New Response Received’. This means that every time a new form submission occurs, the workflow will be activated.

  • Copy the Webhook URL provided by Pabbly Connect.
  • Go to your Google Form and paste this Webhook URL in the Pabbly Connect add-on settings.
  • Set the trigger column in your Google Sheets to ensure data is sent to Pabbly Connect.

Once this is set up, every new response in your Google Form will automatically trigger the workflow in Pabbly Connect, sending the data to the connected applications.


After setting up the Trigger, the next step involves creating a payment link using Stripe through Pabbly Connect. This is crucial for allowing customers to make payments for their selected courses.

Select Stripe as the Action application and choose the action event ‘Create Payment Link’. Connect your Stripe account by providing the necessary API keys.

Fill in the required details such as shipping address collection and allowed countries. Set the custom message for confirmation after payment. Map the line items including price and quantity from the Google Form response.

This integration allows you to generate a unique payment link based on the course selected by the customer, which will be sent via email later.


5. Sending an Email with the Payment Link via Gmail

The final step in this process is to send an email to the customer with their payment link using Gmail through Pabbly Connect. This ensures that customers receive the link to complete their payment promptly.

Select Gmail as the final Action application and choose the action event ‘Send Email’. Connect your Gmail account and set up the email content including the subject and body.

Map the recipient’s email address from the Google Form response. Craft a personalized email message that includes the payment link generated from Stripe. Test the email to ensure it sends correctly to the customer.

By completing this step, you have successfully automated the entire payment collection process from Google Forms using Pabbly Connect, Stripe, and Gmail.


Conclusion

In this tutorial, we explored how to collect payments from Google Forms using Pabbly Connect. By integrating Google Forms, Stripe, and Gmail, you can automate payment processing efficiently. This setup allows for seamless transactions and enhances customer experience.

Ensure you check out Pabbly Connect to create business automation workflows and reduce manual tasks. Pabbly Connect currently offer integration with 2,000+ applications.

How to Create Flowlu Contact from Contact Form 7 Submission Using Pabbly Connect

Learn how to integrate Contact Form 7 with Flowlu using Pabbly Connect for seamless contact management. Step-by-step tutorial included. Develop expertise in application integration and learn how to design streamlined automation workflows using proven, simplified approaches.

Watch Step By Step Video Tutorial Below


1. Accessing Pabbly Connect for Integration

To create a Flowlu contact from a Contact Form 7 submission, you first need to access Pabbly Connect. Start by visiting the Pabbly Connect homepage.

If you’re a new user, click on the ‘Sign Up Free’ button to create an account and get 300 tasks every month. Existing users can simply sign in. Once logged in, you will see the dashboard where you can create a new workflow.


2. Creating a Workflow in Pabbly Connect

In this step, you will create a workflow in Pabbly Connect to automate the process. Click on the ‘Create Workflow’ button in the top right corner of the dashboard.

  • Name your workflow as ‘Create Flowlu Contact from Contact Form 7 Submission’.
  • Select your folder for organizing your workflows.
  • Click the ‘Create’ button to finalize your workflow setup.

Now, you will see your newly created workflow, which consists of a trigger and an action. The trigger will be set to Contact Form 7, and the action will be set to Flowlu.


3. Setting Up the Trigger with Contact Form 7

The next step involves setting the trigger application in Pabbly Connect. Select ‘Contact Form 7’ as your trigger application and choose ‘New Form Submission’ as the trigger event.

Once you select this, you will receive a webhook URL. This URL is crucial as it connects your Contact Form 7 with Pabbly Connect. You will need to copy this URL and paste it into your WordPress Contact Form 7 settings.

  • Navigate to your Contact Form 7 settings in WordPress.
  • Click on ‘Webhook’ and enable ‘Send to Webhook’.
  • Paste the copied webhook URL and save the settings.

After saving, you will need to perform a test submission on your Contact Form 7 to ensure it works correctly with Pabbly Connect.


4. Setting Up the Action to Create a Flowlu Contact

Now that the trigger is set, it’s time to configure the action in Pabbly Connect. Choose ‘Flowlu’ as the action application and select ‘Create CRM Account (Contact)’ as the action event.

To connect your Flowlu account with Pabbly Connect, you will need to enter your API key and account URL. Generate a new API key from your Flowlu account settings and copy it.

Log in to your Flowlu account and navigate to API settings. Generate a new API key and copy it. Enter the API key and your Flowlu account URL in Pabbly Connect.

Once you have entered all the required information, you can proceed to map the fields from the Contact Form 7 submission to the Flowlu contact fields.


5. Testing the Integration

With everything set up, it’s time to test the integration. Submit a new response in your Contact Form 7, ensuring to enter valid data. After submission, check Pabbly Connect to see if the response was received.

If successful, you will see the data from your submission reflected in Pabbly Connect. Now, refresh your Flowlu account to verify that the new contact has been created successfully.

Enter a dummy name and email in your Contact Form 7. Click submit and check for the confirmation message. Refresh your Flowlu account to see the new contact.

Once confirmed, your automation is successfully set up! You can repeat this process to create more contacts as needed.


Conclusion

In this tutorial, we demonstrated how to create a Flowlu contact from a Contact Form 7 submission using Pabbly Connect. By following the steps outlined, you can automate your contact management efficiently.

Ensure you check out Pabbly Connect to create business automation workflows and reduce manual tasks. Pabbly Connect currently offer integration with 2,000+ applications.

Utilizing Pabbly Connect streamlines the integration process, ensuring that every form submission is captured and managed effectively within your Flowlu CRM. This setup enhances productivity and ensures no leads are missed.

How to Send Email Notifications on Successful Graphy Payments Using Pabbly Connect

Learn how to use Pabbly Connect to send email notifications for successful Graphy payments. Step-by-step tutorial for seamless integration with Gmail. Discover how to seamlessly connect your essential tools through accessible instructions that make powerful automation available to professionals at every skill level.

Watch Step By Step Video Tutorial Below


1. Accessing Pabbly Connect for Graphy Payment Notifications

To send email notifications on successful Graphy payments, first, you need to access Pabbly Connect. Start by visiting the Pabbly Connect website and signing in to your account. If you are a new user, you can sign up for free and receive 100 free tasks each month.

Once logged in, you will see the Pabbly Connect dashboard. Here, you can create a new workflow to automate the process between Graphy and Gmail. Click on the ‘Create Workflow’ button in the top right corner to begin.


2. Creating a Workflow in Pabbly Connect

In this step, you will create a workflow in Pabbly Connect for sending email notifications. After clicking ‘Create Workflow’, a dialog box will appear asking for a workflow name. Enter ‘Send Email Notification on Successful Graphy Payment’ and select a folder to save your workflow, such as ‘Graphy Automations’.

  • Name your workflow appropriately
  • Select the folder for organization
  • Click on ‘Create’ to finalize

After creating the workflow, you will see two sections: Trigger and Action. The Trigger is where you set the event that starts the automation, while the Action defines what happens when that event occurs.


3. Setting Up the Trigger for Successful Payments

In this section, you will configure the Trigger for your workflow in Pabbly Connect. Click on the trigger application and select ‘Graphy’ as the trigger application. For the trigger event, choose ‘Success Transaction’. This ensures that the workflow activates only when a payment is successful.

Pabbly Connect will provide you with a unique webhook URL. Copy this URL, as you will need it to connect Graphy with Pabbly Connect. This URL allows Pabbly Connect to receive data from Graphy whenever a successful payment occurs.

  • Select Graphy as the trigger application
  • Choose ‘Success Transaction’ as the trigger event
  • Copy the provided webhook URL for further use

Next, you will need to set up this webhook URL in your Graphy account to complete the integration with Pabbly Connect.


4. Integrating Graphy with Pabbly Connect

To integrate Graphy with Pabbly Connect, log into your Graphy account and navigate to the ‘Integrations’ section. Here, select ‘Webhooks’ and click on ‘New Webhook’. Paste the copied webhook URL into the designated field. This step is crucial as it allows Graphy to send data to Pabbly Connect when a payment is successful.

After pasting the URL, you can skip the description field and select the event type to send through the webhook. Choose the ‘Successful Transaction’ event. Once done, save the webhook settings. This will activate the webhook, allowing it to send data to Pabbly Connect.


5. Configuring the Action to Send Email via Gmail

Now that the trigger is set up, it’s time to configure the action in Pabbly Connect. Select ‘Gmail’ as the action application and choose the ‘Send Email’ action event. Click on ‘Connect’ to link your Gmail account with Pabbly Connect.

After connecting, you will need to fill in the email details. Map the recipient’s email address from the previous step, set a sender name, and write a subject line for the email. For the email content, include a personalized message with the payment details. This ensures that the customer receives the relevant information regarding their successful payment.

Map the recipient’s email address dynamically Include a personalized subject line and message Click on ‘Save and Send Test Request’ to verify

Once the test email is sent successfully, check your Gmail account to confirm that the notification has been received. This completes the integration process between Graphy and Gmail using Pabbly Connect.


Conclusion

In this tutorial, we explored how to use Pabbly Connect to send email notifications upon successful Graphy payments. By following the steps outlined, you can automate customer communication effectively. This integration not only enhances user experience but also streamlines your business operations.

Ensure you check out Pabbly Connect to create business automation workflows and reduce manual tasks. Pabbly Connect currently offer integration with 2,000+ applications.

How to Send Slack Notification on Google Forms Submission Using Pabbly Connect

Learn how to integrate Google Forms with Slack using Pabbly Connect to send automatic notifications on form submissions. Step-by-step guide included. Follow this definitive guide to creating powerful automated workflows with straightforward, efficiency-focused solutions that save valuable time.

Watch Step By Step Video Tutorial Below


1. Accessing Pabbly Connect for Google Forms and Slack Integration

To send Slack notifications on Google Forms submission, you first need to access Pabbly Connect. Simply visit the Pabbly website and sign in to your account. If you are a new user, you can sign up for free and start with 100 tasks monthly.

Once you are signed in, navigate to the Pabbly Connect application. Here, you will find the option to create new workflows. Click on ‘Create Workflow’ to begin setting up the integration process.


2. Creating a Workflow in Pabbly Connect

In this section, you will create a workflow to connect Google Forms with Slack using Pabbly Connect. Name your workflow something descriptive, such as ‘Send Slack Notification on Google Form Submission’ and select the folder where you want to save it.

  • Click on the ‘Create’ button to open the workflow window.
  • In the workflow, select Google Forms as the trigger application.
  • Choose the trigger event ‘New Response Received’.

After selecting the trigger, Pabbly Connect will provide you with a webhook URL. This URL is essential for connecting your Google Forms to Pabbly Connect, enabling the automatic notifications to Slack.


3. Setting Up Google Forms to Work with Pabbly Connect

Now that you have your webhook URL, you need to set up Google Forms. Open your Google Forms account and navigate to the form you want to use. Click on ‘Responses’, then ‘View in Sheets’ to access the connected Google Sheets.

In Google Sheets, go to ‘Extensions’, then ‘Add-ons’, and select ‘Get Add-ons’. Search for ‘Pabbly Connect Webhooks’ and install it if you haven’t already. After installation, click on ‘Initial Setup’ under the Pabbly Connect Webhooks menu.

  • Paste the webhook URL you copied from Pabbly Connect.
  • Set the trigger column to the last column of your Google Sheets.
  • Click on ‘Submit’ to complete the setup.

With this setup, every new form submission will trigger Pabbly Connect, sending the data to Slack.


4. Sending Notifications to Slack via Pabbly Connect

Once your Google Forms are set up, it’s time to send notifications to Slack. Return to your Pabbly Connect workflow and select Slack as the action application. Choose the action event ‘Send Channel Message’ to notify your team.

Click on ‘Connect’ to link your Slack account with Pabbly Connect. If you haven’t connected Slack before, you will need to enter the token type, which can be either user or bot. Choose ‘bot’ if you want the message sent as a bot.

Select the channel where you want to receive notifications. Map the fields from your Google Form response to the Slack message. Customize your message to include details like name, email, and organization.

After mapping the fields, you can test the workflow to ensure everything is functioning correctly. Pabbly Connect will handle the data transfer seamlessly, allowing your team to receive timely notifications.


5. Testing and Finalizing Your Pabbly Connect Workflow

To ensure that your integration is working properly, perform a test submission on your Google Form. Check your Google Sheets to confirm that the data has been captured. Then, go back to Pabbly Connect and click on ‘Send Test’ to verify that the data is sent to Slack as expected.

After testing, make sure to enable the ‘Send on Event’ option in Google Sheets to ensure that every new submission triggers the workflow in Pabbly Connect. This will automate the process completely, ensuring that your team is notified instantly upon new registrations.

Perform multiple test submissions to confirm the workflow’s reliability. Check the Slack channel for incoming messages. Adjust any message formatting as necessary.

Once you are satisfied with the results, your integration between Google Forms and Slack via Pabbly Connect is complete and ready for use.


Conclusion

In this tutorial, we explored how to use Pabbly Connect to send Slack notifications for Google Forms submissions. By following the steps outlined, you can automate notifications seamlessly, ensuring your team is always updated with new registrations. This integration enhances communication and streamlines your event management process.

Ensure you check out Pabbly Connect to create business automation workflows and reduce manual tasks. Pabbly Connect currently offer integration with 2,000+ applications.

How to Share WordPress Post Link on Discord with Bitly Link Using Pabbly Connect

Learn how to share WordPress post links on Discord using Bitly links through Pabbly Connect. Step-by-step tutorial with precise actions and integrations. Master proven automation processes with practical implementation examples and strategic recommendations you can apply immediately in your workflow.

Watch Step By Step Video Tutorial Below


1. Access Pabbly Connect for Integration

To share a WordPress post link on Discord using a Bitly link, we need to access Pabbly Connect. First, open your browser and search for Pabbly Connect. You will find options to sign in or sign up for free.

If you are a new user, click on ‘Sign up for free’. Existing users can simply click on ‘Sign in’. After logging in, navigate to the Pabbly Connect dashboard to start creating your workflow.


2. Create a Workflow in Pabbly Connect

In the Pabbly Connect dashboard, click on the ‘Create Workflow’ button to initiate your automation. Name your workflow something like ‘Share WordPress Post Link on Discord with Bitly Link’ and select a folder for organization. using Pabbly Connect

Now, you will see the workflow window where you define your trigger and actions. For this integration, the trigger will be WordPress, and the actions will involve Bitly and Discord. This setup allows Pabbly Connect to automate the process seamlessly.


3. Set Up WordPress Trigger in Pabbly Connect

In this step, we will configure the trigger for our workflow. Select WordPress as your trigger application and choose the event ‘New Post Published’. Pabbly Connect will generate a webhook URL that you will need to copy for the next steps. using Pabbly Connect

Next, go to your WordPress account. In the left sidebar, click on ‘Plugins’, then search for and install the ‘WP Webhooks’ plugin if you haven’t already. After installation, navigate to the settings of the WP Webhooks plugin.

  • Select the trigger as ‘Post Created’.
  • Add the webhook URL you copied from Pabbly Connect.
  • Save the settings to establish the connection.

After saving, your WordPress account is now linked to Pabbly Connect, allowing it to trigger actions based on new posts.


Once your WordPress trigger is set up, the next step in Pabbly Connect is to create a Bitly link. Select Bitly as your action application and choose the action event ‘Create Bit Link’. If you haven’t connected your Bitly account yet, you will need to do so now. using Pabbly Connect

When prompted, authorize Pabbly Connect to access your Bitly account. You will then need to map the long URL from your WordPress post. This mapping allows Pabbly Connect to dynamically insert the URL of the new post into the Bitly link creation process.

  • Map the long URL to the post link from the WordPress trigger.
  • Enter the post title for the Bitly link.
  • Choose a domain for your Bitly link.

After entering the required information, save the settings. Pabbly Connect will now create a shortened Bitly link for the new WordPress post.


5. Send Message to Discord Channel

The final step is to send the newly created Bitly link to your Discord channel. In Pabbly Connect, add another action step and select Discord. Choose the action event ‘Send Channel Message’. You will need to connect your Discord account if you haven’t done so yet. using Pabbly Connect

Once connected, provide the webhook URL from your Discord server settings. This allows Pabbly Connect to send messages directly to your specified channel. Customize the message to include details about the new post, such as the title and the Bitly link.

Map the post title from the WordPress trigger. Map the Bitly link created in the previous step.

Finally, save your settings and test the workflow. Upon publishing a new post in WordPress, Pabbly Connect will automatically create a Bitly link and send it to your Discord channel, notifying your team of the new content.


Conclusion

This tutorial demonstrated how to share a WordPress post link on Discord using a Bitly link through Pabbly Connect. By following these steps, you can automate the process of notifying your team about new posts effectively.

Ensure you check out Pabbly Connect to create business automation workflows and reduce manual tasks. Pabbly Connect currently offer integration with 2,000+ applications.