Create Personalized Certificates and Send on WhatsApp Using Pabbly Connect, Google Sheets, and Google Slides

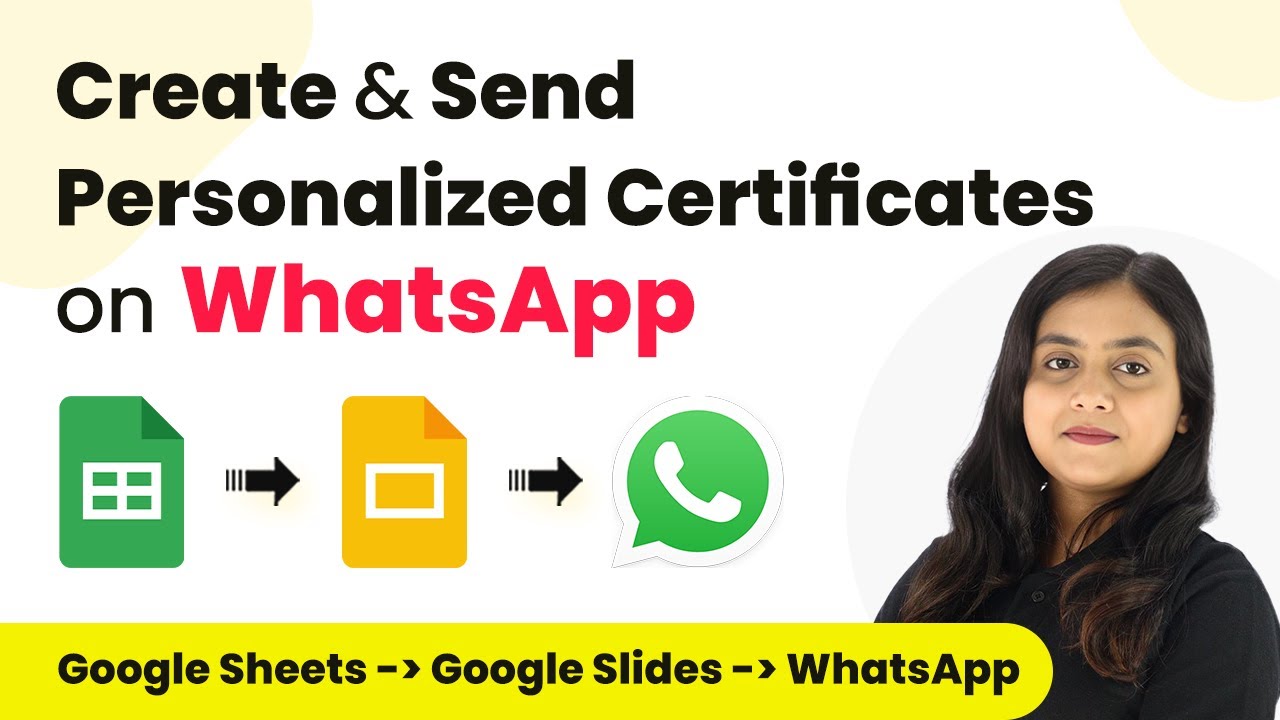
Learn how to create personalized certificates and send them via WhatsApp using Pabbly Connect, Google Sheets, and Google Slides in this detailed tutorial. Follow this definitive guide to creating powerful automated workflows with straightforward, efficiency-focused solutions that save valuable time.

Watch Step By Step Video Tutorial Below


1. Setting Up Pabbly Connect for Automation

To create personalized certificates and send them via WhatsApp, we first need to set up Pabbly Connect. Start by visiting the Pabbly Connect website, where you can either sign in or create a new account. Once logged in, you will see the dashboard where you can access various applications.

After accessing the dashboard, click on the ‘Create Workflow’ button located at the top right corner. This will prompt you to name your workflow. Enter a name like ‘Create Personalized Certificates and Send on WhatsApp’ and select a folder to save your workflow. For example, choose the ‘Google Slides Automations’ folder and click ‘Create’ to proceed.


2. Triggering the Workflow with Google Sheets

The next step involves setting up a trigger in your workflow using Google Sheets. Select Google Sheets as your trigger application and choose the event ‘New or Updated Spreadsheet Row’. This means that every time you add or update an entry in your Google Sheets, it will trigger the workflow. using Pabbly Connect

  • Select the trigger application as Google Sheets.
  • Choose the trigger event: New or Updated Spreadsheet Row.
  • Copy the provided webhook URL from Pabbly Connect.
  • Open your Google Sheets, click on Extensions, then Add-ons, and select Get Add-ons.
  • Search for Pabbly Connect Webhooks and install it.

Once installed, go back to Extensions, select Pabbly Connect Webhooks, and choose ‘Initial Setup’. Paste the copied webhook URL into the designated field and set the trigger column to the final data column in your spreadsheet. Click on Submit to confirm the setup.


3. Creating Certificates with Google Slides

After successfully setting up the trigger, it’s time to create the personalized certificates using Google Slides. In your Pabbly Connect workflow, add a new action step and select Google Slides as the action application. Choose the event ‘Create Presentation from Template’ to utilize your pre-designed certificate template. using Pabbly Connect

Connect your Google Slides account to Pabbly Connect by signing in and granting permissions. Once connected, select your certificate template, for example, ‘Certificate of Achievement’. You will need to map the data from the previous step (Google Sheets) to the appropriate fields in your template, such as the employee’s name and date.

  • Select the template you created in Google Slides.
  • Map the employee’s name and date into the template variables.
  • Specify the location in Google Drive where the generated certificate will be saved.

After mapping all necessary fields, click on ‘Save and Send Test Request’. This will generate a new certificate based on the template and save it in your specified Google Drive folder.


4. Sharing Certificates via Google Drive

Once the certificate is created, the next step is to share it with the intended recipient. Add another action step in your Pabbly Connect workflow and select Google Drive as the action application. Choose the action event ‘Share a File with Anyone’ to make the certificate accessible. using Pabbly Connect

Connect your Google Drive account to Pabbly Connect and map the presentation ID from the previous step to the file ID field. This ensures that the correct file is shared. After mapping, click on ‘Save and Send Test Request’ to finalize the sharing process.

Select the action application as Google Drive. Choose the action event: Share a File with Anyone. Map the presentation ID to the file ID field.

Upon successful execution, the certificate will now be accessible to anyone with the link, allowing you to share it easily.


5. Sending Certificates via WhatsApp

The final step is to send the personalized certificate link via WhatsApp. Add another action step in your Pabbly Connect workflow and select WhatsApp Cloud API as the action application. Choose the action event ‘Send Template Message’ to send the certificate link to the employee. using Pabbly Connect

Connect your WhatsApp Cloud API account to Pabbly Connect. You will need to input your token, phone number ID, and WhatsApp business account ID. After connecting, select the template you created for sending messages and map the recipient’s phone number and the certificate link into the message body.

Select WhatsApp Cloud API as the action application. Choose the action event: Send Template Message. Map the employee’s phone number and the PDF certificate link.

Click on ‘Save and Send Test Request’ to send the message. The employee will receive a WhatsApp message containing the link to their personalized certificate, completing the automation process.


Conclusion

In this tutorial, we explored how to create personalized certificates and send them via WhatsApp using Pabbly Connect, Google Sheets, and Google Slides. By following these steps, you can automate the process and easily share certificates with your employees, enhancing efficiency and productivity.

Ensure you check out Pabbly Connect to create business automation workflows and reduce manual tasks. Pabbly Connect currently offer integration with 2,000+ applications.

How to Set Up Webhook Inside Todoist Using Pabbly Connect

Learn how to set up a webhook inside Todoist using Pabbly Connect for seamless task management integration with other applications. Navigate the automation landscape confidently with clear, structured guidance suitable for professionals regardless of prior technical experience.

Watch Step By Step Video Tutorial Below


1. Setting Up Pabbly Connect for Todoist Integration

To begin with, Pabbly Connect serves as the central platform for integrating Todoist with other applications. You will first need to access your Pabbly Connect account and create a new workflow. This workflow will enable you to set up a webhook that connects Todoist to various applications seamlessly.

Once you are logged into Pabbly Connect, click on the ‘Create Workflow’ button. You will be prompted to name your workflow. For this integration, you can name it ‘Todoist Webhook Setup’. After naming it, click on the ‘Create’ button to proceed with the integration.


2. Configuring the Todoist Trigger in Pabbly Connect

The next step involves configuring the Todoist trigger in Pabbly Connect. In the trigger section, select Todoist as your application. You will then need to choose the trigger event; select ‘New Task’ to initiate the workflow whenever a new task is created in Todoist.

  • Select Todoist as the application.
  • Choose ‘New Task’ as the trigger event.
  • Copy the webhook URL provided by Pabbly Connect.

After selecting the trigger event, a webhook URL will be generated. This URL acts as a bridge between Todoist and Pabbly Connect, allowing data transfer when a new task is created. Ensure you copy this URL for later use in the Todoist app.


3. Creating an App in Todoist for Webhook Setup

Now, you need to create a new app in Todoist to set up the webhook. Log into your Todoist account and navigate to the App Management console. Click on the ‘Create a New App’ button and provide a name for your app, such as ‘Todoist Webhook’. This will help identify the app later on.

Once the app is created, you will receive a Client ID and Client Secret. Scroll down to find the ‘Create Test Token’ button and click it to generate a test token. This token will be used to authenticate the connection between Todoist and Pabbly Connect.


4. Configuring the Webhook in Todoist

With the test token generated, it’s time to configure the webhook in Todoist. In the webhook section, paste the webhook URL you copied from Pabbly Connect. You will also need to select the event you want to watch for; in this case, select ‘Item Added’ to trigger the webhook whenever a new task is added.

  • Paste the webhook URL in the callback URL field.
  • Select ‘Item Added’ as the watch event.
  • Activate the webhook and save the configuration.

After saving the webhook configuration, your Todoist will now send data to Pabbly Connect whenever a new task is created. Make sure to test the connection by creating a task in Todoist to verify that it works correctly.


5. Testing the Webhook Connection

To ensure that the integration is working smoothly, you need to test the webhook connection. Create a new task in Todoist with a name and description. For example, name it ‘Urgent Team Discussion’ and provide a description like ‘Budget planning for upcoming month’. Set a due date and priority, then click on ‘Add Task’.

After creating the task, return to Pabbly Connect and wait for a few seconds. You should see a response indicating that the task details have been successfully received. This response will include all relevant information about the task, confirming that the integration is functioning as intended.


Conclusion

In conclusion, setting up a webhook inside Todoist using Pabbly Connect allows for seamless integration with various applications. By following the steps outlined, you can automate task management and ensure efficient collaboration across your team. This integration enhances productivity and simplifies task tracking.

Ensure you check out Pabbly Connect to create business automation workflows and reduce manual tasks. Pabbly Connect currently offer integration with 2,000+ applications.

How to Set Up Webhook Inside Zenler Using Pabbly Connect: A Step-by-Step Guide

Learn how to set up a webhook inside Zenler using Pabbly Connect. This detailed tutorial covers all steps, integrations, and features for seamless automation. Discover how to seamlessly connect your essential tools through accessible instructions that make powerful automation available to professionals at every skill level.

Watch Step By Step Video Tutorial Below


1. Introduction to Pabbly Connect and Zenler Integration

In this tutorial, we will explore how to set up a webhook inside Zenler using Pabbly Connect. This integration allows you to send data to other applications whenever a specific event occurs, such as a new enrollment in a course. Zenler is a powerful course builder, and Pabbly Connect acts as the bridge for seamless data transfer.

To begin, you need to access your Pabbly Connect account. Once logged in, you will set up the trigger for your webhook. This process will allow you to automate your workflows effectively and ensure that your data flows smoothly between Zenler and other applications.


2. Setting Up the Trigger in Pabbly Connect

To set up the webhook, start by navigating to your trigger window in Pabbly Connect. Search for Zenler as your trigger application. Select the trigger event as ‘New Enrollment to a Course’. This event will activate every time a new student enrolls in your Zenler course.

  • Open your Pabbly Connect account.
  • Search for Zenler in the trigger application list.
  • Choose ‘New Enrollment to a Course’ as the trigger event.

Once you select the trigger event, a webhook URL will be generated. This URL is crucial as it will connect your Zenler account with Pabbly Connect. Make sure to copy this URL as it will be used in the next steps.


3. Configuring Zenler to Use the Webhook URL

Now, switch to your Zenler account and navigate to the course for which you want to set up the webhook. In this case, we will use the ‘Python for Beginners’ course. Open the course in edit mode and go to the Automation section.

Here, you will add automation rules. Click on ‘Add Rule’ and name it something like ‘Student Rule’. Set the trigger as ‘On Enroll’. After saving the changes, you will add an action to send a webhook. Enter the action name as ‘Enrollment’ and paste the webhook URL from Pabbly Connect into the designated field.


4. Testing the Webhook Integration

After configuring the webhook in Zenler, it’s essential to test the integration. Go back to your Pabbly Connect account and click on the ‘Recapture Response’ button. This will allow you to capture the data from the new enrollment.

To trigger the webhook, open an incognito window and enroll in the course using a new email. Fill in the required details and complete the enrollment process. Once you submit the form, the data should be sent to Pabbly Connect, confirming that the webhook is working correctly.

Check back in Pabbly Connect to see the response received from Zenler, which should include the student’s first name, last name, email address, and enrollment date. This confirms that your webhook setup is successful!


5. Conclusion and Further Steps with Pabbly Connect

Setting up a webhook inside Zenler using Pabbly Connect is a straightforward process that significantly enhances your course management capabilities. You can now automate data transfers and improve your workflow efficiency. Additionally, you can integrate various other applications with Pabbly Connect to create more complex automations.

Ensure you check out Pabbly Connect to create business automation workflows and reduce manual tasks. Pabbly Connect currently offer integration with 2,000+ applications.

By following these steps, you ensure that every new enrollment is captured and processed seamlessly, allowing you to focus on delivering quality content to your students. Explore more integrations and maximize the potential of Pabbly Connect for your business needs.


In this tutorial, we demonstrated how to set up a webhook inside Zenler using Pabbly Connect. This integration allows for efficient data management and automation, enhancing your course delivery experience.

How to Generate and Send GST Invoice on Successful Razorpay Payment Using Pabbly Connect

Learn how to automate GST invoice generation and sending via email upon successful Razorpay payments using Pabbly Connect in this detailed tutorial. Follow this definitive guide to creating powerful automated workflows with straightforward, efficiency-focused solutions that save valuable time.

Watch Step By Step Video Tutorial Below


Accessing Pabbly Connect for GST Invoice Automation

To generate and send GST invoices upon successful Razorpay payments, you will need to access Pabbly Connect. Begin by opening a new tab in your browser and navigating to the Pabbly Connect website. If you do not have an account, click on the ‘Sign Up for Free’ button to create one, which only takes a couple of minutes.

Once logged in, you will be directed to the dashboard. From here, click on the ‘Accel Now’ button under Pabbly Connect to access your workflows. You can create a new workflow by clicking on the ‘Create Workflow’ button. Name your workflow something descriptive, such as ‘Generate and Send GST Invoice on Successful Razorpay Payment’ and select the appropriate folder for saving it.

Conclusion

This guide summarizes the key points and helps you understand the essential features and benefits of using this tool.

Ensure you check out Pabbly Connect to create business automation workflows and reduce manual tasks. Pabbly Connect currently offer integration with 2,000+ applications.


Setting Up Trigger with Razorpay in Pabbly Connect

In this section, you will set up the trigger for your workflow using Pabbly Connect to connect with Razorpay. The trigger application will be Razorpay, and the trigger event you need to select is ‘Order Paid’. This action will initiate the workflow whenever a payment is successfully made.

To connect Razorpay with Pabbly Connect, you will need to copy the webhook URL provided by Pabbly Connect. Follow these steps to set up the webhook in your Razorpay account:

  • Navigate to your Razorpay account and go to ‘Accounts and Settings’.
  • Select the ‘Webhooks’ option and click on ‘Add New Webhook’.
  • Paste the copied webhook URL and select the event ‘Order Paid’.

After saving the webhook, return to Pabbly Connect, where you will see it waiting for a response from Razorpay. To test this, make a successful payment through the Razorpay payment page you have set up.

How to Create Microsoft Office 365 Contact from HubSpot Contact Using Pabbly Connect

Learn how to integrate HubSpot CRM with Microsoft Office 365 using Pabbly Connect. This guide provides step-by-step instructions for seamless contact creation. Follow this definitive guide to creating powerful automated workflows with straightforward, efficiency-focused solutions that save valuable time.

Watch Step By Step Video Tutorial Below


1. Accessing Pabbly Connect for Integration

To create a Microsoft Office 365 contact from HubSpot contact, you first need to access Pabbly Connect. Start by searching for ‘Pabbly.com/connect’ in your browser. This automation software will facilitate the entire integration process.

Upon arriving at the Pabbly Connect landing page, you will see options to either sign in or sign up. If you are a new user, click on ‘Sign up for free’ to receive 100 free tasks each month. Existing users should click on ‘Sign in’ to access their dashboard.


2. Creating a New Workflow in Pabbly Connect

After signing in, navigate to the dashboard and click on the ‘Create Workflow’ button. This is where you will name your workflow for creating Microsoft Office 365 contacts from HubSpot. Choose a relevant folder for organization, such as ‘Automations’. using Pabbly Connect

  • Enter a name for your workflow, e.g., ‘Create Microsoft 365 Contact from HubSpot Contact’.
  • Select the appropriate folder to save your workflow.

Once you have named your workflow, click on ‘Create’. This will take you to the workflow window where you can set up the trigger and action for your integration.


3. Setting Up HubSpot CRM as the Trigger

In the workflow window, the first step is to set up the trigger application. For this integration, select Pabbly Connect and then search for ‘HubSpot CRM’. This will initiate the process whenever a new contact is added in HubSpot.

For the trigger event, choose ‘New Contact Added’. Click on ‘Connect’ to establish a connection with your HubSpot account. If you have an existing connection, you can select it; otherwise, click on ‘Add a New Connection’. This will prompt you to log in to your HubSpot account and grant the necessary permissions.


4. Defining Microsoft Office 365 as the Action

After successfully setting up the trigger, the next step is to define the action application. Search for ‘Microsoft Office 365’ and select it as your action application. For the action event, choose ‘Create Contact’. Again, click on ‘Connect’ to link your Microsoft Office 365 account.

Similar to the previous step, if you have already connected your Microsoft Office 365 account, select it; otherwise, click on ‘Add a New Connection’. Accept the permissions required for the connection. This ensures that Pabbly Connect can manage the data flow between HubSpot and Microsoft Office 365.


5. Mapping Fields to Create Contacts

With both the trigger and action set up, the next step is to map the fields from HubSpot to Microsoft Office 365. This involves selecting the data you want to transfer, such as first name, last name, email, and phone number. using Pabbly Connect

  • Map the first name and last name from the HubSpot contact.
  • Select the email address and phone number to complete the contact details.

After mapping all required fields, click on ‘Save and Send Test Request’. This will create a new contact in your Microsoft Office 365 account with the details from HubSpot. You can verify this by checking your Microsoft Office 365 contacts to ensure the new entry has been created successfully.


Conclusion

In this tutorial, we explored how to create a Microsoft Office 365 contact from a HubSpot contact using Pabbly Connect. By following these steps, you can automate your contact management process seamlessly. This integration enhances efficiency and ensures that your contacts are synced in real time.

Ensure you check out Pabbly Connect to create business automation workflows and reduce manual tasks. Pabbly Connect currently offer integration with 2,000+ applications.

How to Update GoHighLevel Task for Completed ClickUp Task Using Pabbly Connect

Learn how to automate task updates between ClickUp and GoHighLevel using Pabbly Connect. Step-by-step tutorial for seamless integration. Discover hidden automation capabilities within your existing tools. This guide shows you how to connect your essential applications and permanently eliminate redundant manual processes.

Watch Step By Step Video Tutorial Below


1. Accessing Pabbly Connect for Integration

To begin the integration process of ClickUp and GoHighLevel, it’s essential to access Pabbly Connect. This platform allows you to automate tasks without needing any coding skills. Start by navigating to the Pabbly Connect website.

Once there, you can either sign in if you are an existing user or click on the ‘Sign Up for Free’ button to create a new account. New users can enjoy 100 free tasks per month to explore the software.


2. Creating a New Workflow in Pabbly Connect

After signing into Pabbly Connect, the dashboard will display your existing workflows. To create a new automation, click on the ‘Create Workflow’ option. This is where you will define the task update process.

  • Provide a name for your workflow, such as ‘Update GoHighLevel Task for Completed ClickUp Task’.
  • Select the appropriate folder for saving your workflow.
  • Click on the ‘Create’ button to finalize your new workflow.

Now, you will see two windows open: one for the trigger and the other for the action. The trigger will be ClickUp, and the action will be GoHighLevel, allowing the automation to function effectively.


3. Setting Up Trigger and Action in Pabbly Connect

In this step, you will configure the trigger in Pabbly Connect to monitor completed tasks in ClickUp. Select ClickUp as your trigger application and choose the trigger event as ‘Task Updated’. This means whenever a task is marked as completed in ClickUp, it will trigger the workflow.

To connect ClickUp, you will need to provide an API token from your ClickUp account. Navigate to your ClickUp profile settings, find the API section, and copy your token. Paste this into Pabbly Connect to establish a connection.

  • Select your workspace and space in ClickUp.
  • Choose the specific folder where tasks are located.
  • Save and send a test request to ensure the connection works.

Once you receive a response confirming the connection, you are ready to proceed with the action setup in GoHighLevel.


4. Configuring the Action in GoHighLevel

Now, it’s time to set up the action in Pabbly Connect. Select GoHighLevel as your action application and choose the action event as ‘Search Task’. This step is crucial as it allows you to find the task in GoHighLevel that corresponds to the completed task in ClickUp.

After selecting the action event, connect GoHighLevel using the existing connection you created earlier. Map the task name you received from the ClickUp response to search for the corresponding task in GoHighLevel.

Save and send a test request to retrieve task details. Ensure you receive all necessary task details in the response. Prepare to update this task based on the information received.

This setup ensures that you can accurately update the task status in GoHighLevel once it is marked as completed in ClickUp.


5. Updating the Task Status in GoHighLevel

The final step involves updating the task status in GoHighLevel using Pabbly Connect. After retrieving the task details, you will set up another action event to ‘Update Task’ in GoHighLevel. This action will mark the task as completed based on the updates received from ClickUp.

Connect to GoHighLevel again, ensuring you use the existing connection. Map the necessary fields such as task ID and contact ID from the previous responses to ensure the correct task is updated.

Set the task status to true to indicate completion. Assign the task to the appropriate user. Save and send a test request to confirm the update.

After successfully updating the task, you can verify in GoHighLevel that the task status reflects the completion from ClickUp. This integration proves the power of using Pabbly Connect for seamless task management across platforms.


Conclusion

This tutorial demonstrated how to automate the process of updating GoHighLevel tasks based on completed ClickUp tasks using Pabbly Connect. By following these steps, you can streamline your task management effectively.

Ensure you check out Pabbly Connect to create business automation workflows and reduce manual tasks. Pabbly Connect currently offer integration with 2,000+ applications.

How to Create Stripe Customer from Webhook Response Using Pabbly Connect

Learn how to create a Stripe customer from a webhook response using Pabbly Connect and Pabbly Connect. Follow this step-by-step guide for seamless integration.

Watch Step By Step Video Tutorial Below


1. Accessing Pabbly Connect for Integration

To create a Stripe customer from a webhook response, we first need to access Pabbly Connect. Simply search for ‘Pabbly Connect’ in your browser and navigate to the landing page. Here, you will find options to sign in or sign up for free, where new users can benefit from 100 free tasks monthly.

After signing in, you will see all the Pabbly applications. Click on the ‘Access Now’ button for Pabbly Connect. Once in your dashboard, click on the ‘Create Workflow’ button to start the automation process.


2. Creating a Workflow in Pabbly Connect

In this step, we will create a workflow that connects the webhook response to Stripe. Name your workflow ‘How to Create a Stripe Customer from Webhook Response’ and select the folder where you want to save it. using Pabbly Connect

  • Select the trigger application as ‘Webhook by Pabbly’.
  • Choose the trigger event as ‘Catch Webhook’.
  • Copy the provided webhook URL to use in your form application.

After copying the URL, you will set up the Pabbly Form Builder to send responses to this webhook. This is crucial for capturing the data needed to create a customer in Stripe.


3. Integrating Pabbly Form Builder with Pabbly Connect

Next, we will integrate Pabbly Form Builder with Pabbly Connect. Open your Pabbly Form Builder and navigate to the integration settings. Here, select ‘Create Webhook’ and paste the copied webhook URL.

Once the webhook is saved, you can test the integration. Fill out the form with details like first name, last name, email, and phone number. After submission, check back in Pabbly Connect to ensure the response was captured successfully.

  • Enter the first name as ‘Demo’ and the last name as ‘User’.
  • Provide a valid email and phone number.
  • Submit the form to trigger the webhook.

After submission, verify that the data captured by Pabbly Connect includes all the fields you entered. This confirms that the trigger step is successful.


4. Setting Up Stripe Integration in Pabbly Connect

Now, we will set up the action application, which is Stripe. In Pabbly Connect, select Stripe as the action application and choose the event ‘Create Customer’. You will then be prompted to connect your Stripe account.

If you are connecting for the first time, click on ‘Add New Connection’ and follow the instructions to enter your Stripe API key. To find your API key, log in to your Stripe account, navigate to the API Keys section, and copy the secret key provided.

Log in to your Stripe account and go to the API Keys section. Reveal your test secret key and copy it. Paste the key into your Pabbly Connect workflow and save.

Once the connection is established, you will need to map the details from the webhook response to the customer creation fields in Stripe. This ensures that each new customer reflects the data captured from the form submission.


5. Testing the Integration and Finalizing the Workflow

Finally, run a test to ensure everything works as expected. Click on ‘Save and Send Test Request’ in Pabbly Connect. If successful, you will see a confirmation that a new customer has been created in Stripe with the details provided in the form.

To verify, log in to your Stripe account and check the Customers section. You should see the new customer listed with the information from your test submission. This confirms that the integration between Pabbly Connect and Stripe is functioning correctly.

Submit another form entry to test real-time functionality. Check for the new customer in Stripe after each submission. Ensure all details are accurately reflected in Stripe.

This process confirms that Pabbly Connect can efficiently create customers in Stripe from webhook responses, streamlining your workflow.


Conclusion

In this tutorial, we demonstrated how to create a Stripe customer from a webhook response using Pabbly Connect and Pabbly Form Builder. By following these steps, you can automate customer creation seamlessly, enhancing your operational efficiency.

Ensure you check out Pabbly Connect to create business automation workflows and reduce manual tasks. Pabbly Connect currently offer integration with 2,000+ applications.

How to Add Facebook Lead Ads Leads to Google Sheets for Sports Training Centre Using Pabbly Connect

Learn how to seamlessly integrate Facebook Lead Ads with Google Sheets for your Sports Training Centre using Pabbly Connect in this detailed tutorial. Implement the precise methodologies leading organizations use to automate repetitive tasks, illustrated with practical examples designed for immediate application.

Watch Step By Step Video Tutorial Below


1. Accessing Pabbly Connect for Integration

To start integrating Facebook Lead Ads with Google Sheets, first, access Pabbly Connect. This platform is essential for automating the process of adding leads to your Google Sheets.

Once on the Pabbly Connect homepage, you have two options: sign in if you’re an existing user or click on ‘Sign Up Free’ to create a new account. New users can explore the platform with 300 free tasks per month.


2. Creating a Workflow in Pabbly Connect

After signing in, you will be directed to the Pabbly Connect dashboard. Here, click on the ‘Create Workflow’ button located at the top right corner. This is where you will set up your integration workflow for your Sports Training Centre. using Pabbly Connect

  • Name your workflow: ‘Add Facebook Leads to Google Sheets for Sports Training Centre’.
  • Select a folder for organization, e.g., ‘Facebook Lead Ads’.
  • Click the ‘Create’ button to finalize the workflow setup.

With the workflow created, you will notice the trigger and action setup. The trigger will be Facebook Lead Ads, and the action will be Google Sheets, allowing automated lead data transfer.


3. Setting Up Facebook Lead Ads Trigger

Next, set up the trigger in Pabbly Connect by selecting Facebook Lead Ads as the trigger application. Choose the trigger event as ‘New Lead Instant’. This ensures that every time a new lead is generated, Pabbly Connect captures the details.

To connect Facebook Lead Ads with Pabbly Connect, click on ‘Connect’ and then select ‘Add New Connection’. Ensure you are logged into your Facebook account for a seamless connection. Once connected, choose the Facebook page associated with your Sports Training Centre.

  • Select the lead form you want to use.
  • Click ‘Save and Send Test Request’ to verify the connection.

After successfully setting up the trigger, proceed to test the connection by generating a test lead from the Lead Ads form.


4. Adding Leads to Google Sheets

Now it’s time to set up the action in Pabbly Connect. Choose Google Sheets as the action application and select the action event as ‘Add New Row’. This action will ensure that every new lead from Facebook Lead Ads is automatically added to your Google Sheets.

Connect your Google Sheets account by clicking on ‘Connect’ and selecting ‘Add New Connection’. You will be prompted to sign in with your Google account. Once authorized, select the spreadsheet named ‘Sports Elite’ and the specific sheet where you want the data to be recorded.

Map the fields: Name, Email, and Phone Number. Click ‘Save and Send Test Request’ to finalize the setup.

Upon successful mapping and testing, check your Google Sheets to confirm that the new lead details have been accurately added.


5. Testing the Integration

To ensure the integration works flawlessly, generate another test lead. Go back to the Facebook Lead Ads testing tool, delete the previous test lead, and refresh the page. Then, create a new lead by filling out the form with dummy data.

After submitting the new lead, return to Pabbly Connect to see if the new lead details appear in your Google Sheets. This step confirms that your automation is functioning correctly and that leads are being captured as intended.

With this successful test, you have automated the process of adding Facebook Lead Ads leads to your Google Sheets, enhancing the efficiency of your Sports Training Centre’s lead management.


Conclusion

Using Pabbly Connect, you can seamlessly integrate Facebook Lead Ads with Google Sheets, ensuring that all leads for your Sports Training Centre are efficiently managed. This automation saves time and enhances data accuracy, allowing you to focus on growing your business.

Ensure you check out Pabbly Connect to create business automation workflows and reduce manual tasks. Pabbly Connect currently offer integration with 2,000+ applications.

How to Set Up Webhook Inside Cognito Forms Using Pabbly Connect

Learn how to set up a webhook inside Cognito Forms using Pabbly Connect for seamless integration and automation. Follow our step-by-step guide! Eliminate manual repetitive tasks from your workflow. Discover proven automation methods with intuitive steps designed for efficiency-minded professionals.

Watch Step By Step Video Tutorial Below


1. Introduction to Pabbly Connect and Cognito Forms

In this tutorial, we will explore how to set up a webhook inside Cognito Forms using Pabbly Connect. This integration allows users to automate the transfer of form responses to other applications seamlessly. Cognito Forms is a powerful tool for creating customized forms for various purposes, including surveys and registrations.

To begin, we will utilize Pabbly Connect as the central platform for our integration. This tool enables users to connect Cognito Forms with other applications like Google Sheets and Gmail, automating workflows effectively. With Pabbly Connect, you can easily send form responses to multiple applications based on specific triggers.


2. Setting Up the Trigger in Pabbly Connect

To set up the automation, the first step is to create a trigger in Pabbly Connect. Start by logging into your Pabbly Connect account and clicking on ‘Create Workflow’. Here, select Cognito Forms as your trigger application.

  • Choose ‘New Entry’ as the trigger event.
  • Copy the webhook URL provided by Pabbly Connect.
  • This URL will be used to send data from Cognito Forms to Pabbly Connect.

After copying the webhook URL, you will need to configure it in your Cognito Forms. This setup is crucial for ensuring that the form responses are sent to Pabbly Connect whenever a new entry is submitted. Once the trigger is set, you can proceed to configure the form in Cognito.


3. Configuring Cognito Forms for Webhook

Next, we will configure Cognito Forms to use the webhook URL from Pabbly Connect. Log into your Cognito Forms account and select the form you wish to connect. Navigate to the ‘Build’ tab of your form.

  • Locate the option ‘Post JSON data to a website’ and turn it on.
  • Paste the copied webhook URL into the ‘Submit Entry Endpoint’ field.
  • Click on ‘Save’ to apply the changes.

By enabling this setting, you ensure that every time a new entry is submitted through your form, the data is sent to Pabbly Connect. This step is vital for the automation process to work smoothly.


4. Testing the Webhook Connection

Once the webhook is configured in Cognito Forms, it’s time to test the connection with Pabbly Connect. Go back to your Pabbly Connect dashboard, where you will see a message indicating that it is waiting for a webhook response.

Now, perform a test submission of your Cognito Form. Fill in the required fields with dummy data and submit the form. This action will trigger the webhook and send the data to Pabbly Connect.

After submitting the form, return to Pabbly Connect. You should see the data from your test submission reflected in the response section. This confirms that the integration is working correctly, and you are ready to set up additional actions based on this trigger.


5. Setting Up Actions in Pabbly Connect

With the webhook successfully tested, you can now set up actions in Pabbly Connect to determine what happens with the data received from Cognito Forms. For instance, you might want to add the response to Google Sheets or send an email notification via Gmail.

Select Google Sheets as an action application and choose the action event to ‘Add Row’. Map the fields from Cognito Forms to the corresponding columns in Google Sheets. Additionally, you can add Gmail as another action to send notifications.

By setting up these actions, you create a robust workflow that automates the handling of form submissions. This is the power of using Pabbly Connect to integrate multiple applications seamlessly.


Conclusion

In conclusion, setting up a webhook inside Cognito Forms using Pabbly Connect allows for efficient automation of form responses. By following the steps outlined, you can easily connect Cognito Forms to other applications, enhancing your workflow and productivity. This integration empowers users to manage data effectively without manual intervention.

Ensure you check out Pabbly Connect to create business automation workflows and reduce manual tasks. Pabbly Connect currently offer integration with 2,000+ applications.

How to Notify Team on Telegram for New LinkedIn Leads Using Pabbly Connect

Learn how to set up notifications on Telegram for new LinkedIn leads using Pabbly Connect. Step-by-step guide for seamless integration. Explore systematic approaches to creating efficient automation solutions that convert technical concepts into practical, implementable instructions.

Watch Step By Step Video Tutorial Below


1. Accessing Pabbly Connect for Integration

To start notifying your team on Telegram for new LinkedIn leads, access Pabbly Connect. Begin by visiting the Pabbly Connect website where you can sign up or log in if you already have an account.

Once logged in, you will see the dashboard with various Pabbly applications. Click on the ‘Create Workflow’ button located at the top-right corner. This will allow you to set up a new workflow for your integration.


2. Creating a New Workflow in Pabbly Connect

In this section, you will create a new workflow in Pabbly Connect to connect LinkedIn and Telegram. Name your workflow as ‘Notify Team on LinkedIn Leads’ for easy identification.

  • Click on the ‘Create Workflow’ button.
  • Enter the workflow name.
  • Select the trigger application as LinkedIn.

After naming your workflow, select LinkedIn as the trigger application. This will allow Pabbly Connect to listen for new leads generated from your LinkedIn forms.


3. Connecting LinkedIn Account to Pabbly Connect

To connect your LinkedIn account, select the option to create a new connection in Pabbly Connect. You will be prompted to authorize your LinkedIn account, allowing Pabbly Connect to access your lead data.

Once the connection is established, select the specific lead form you want to track. This is crucial as it tells Pabbly Connect which leads to monitor. After selecting your lead form, test the connection to ensure everything is set up correctly.


4. Setting Up Telegram Notifications for New Leads

Now that your LinkedIn account is connected, it’s time to set up Telegram notifications. In Pabbly Connect, select Telegram as the action application. This will allow you to send messages to your team whenever a new lead comes in.

  • Choose the action event as ‘Send Message’.
  • Connect your Telegram account by entering the required token.
  • Select the chat ID for your team group.

After entering the necessary information, customize the message you want to send. This message should include details from the new LinkedIn lead, ensuring your team receives all relevant information.


5. Testing the Integration and Finalizing Setup

With the workflow set up, it’s essential to test the integration. Generate a test lead through your LinkedIn form to verify that Pabbly Connect successfully sends notifications to your Telegram group.

After waiting for a few minutes to allow the system to capture the new lead, check your Telegram group for the notification. If everything is set up correctly, your team should receive a message with the lead’s details, confirming that the integration works seamlessly.

Conclusion

This guide summarizes the key points and helps you understand the essential features and benefits of using this tool.

Ensure you check out Pabbly Connect to create business automation workflows and reduce manual tasks. Pabbly Connect currently offer integration with 2,000+ applications.


By following these steps, you can efficiently notify your team on Telegram for new LinkedIn leads using Pabbly Connect. This automation not only saves time but also ensures that your team stays updated on potential opportunities.