Automatically Share Digital Downloads on Successful Razorpay Payment with Pabbly Connect

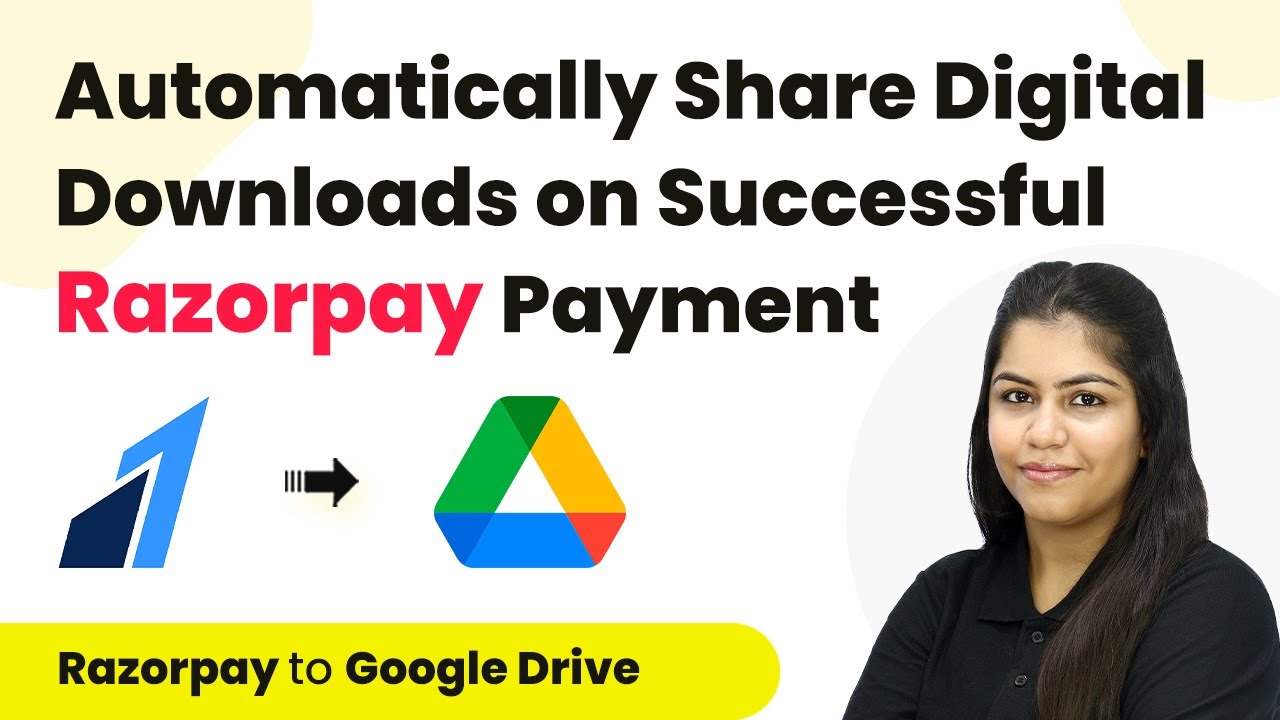
Learn how to automatically share digital downloads on successful Razorpay payments using Pabbly Connect. Step-by-step guide for seamless integration. Explore systematic approaches to creating efficient automation solutions that convert technical concepts into practical, implementable instructions.

Watch Step By Step Video Tutorial Below


1. Accessing Pabbly Connect for Integration

To automatically share digital downloads on successful Razorpay payments, you first need to access Pabbly Connect. Start by navigating to the Pabbly Connect landing page at Pabbly.com/connect. If you are a new user, click on ‘Sign up for free’ to create an account and receive 100 free tasks each month.

Once logged in, you will see various applications offered by Pabbly. Click on ‘Access Now’ under the Pabbly Connect option to enter your dashboard. This is where you will create the workflow to connect Razorpay and Google Drive seamlessly.


2. Creating a Workflow in Pabbly Connect

In your Pabbly Connect dashboard, click on the ‘Create Workflow’ button. You will be prompted to name your workflow. Enter ‘Automatically Share Digital Downloads on Successful Razorpay Payment’ and select a folder for organization, such as ‘Customer Support Automations’. using Pabbly Connect

  • Click on ‘Create’ to initialize the workflow.
  • This opens the workflow window where you can set triggers and actions.

In this window, select Razorpay as the trigger application. The trigger event will be set to ‘Payment Captured’. This means that whenever a payment is successfully made, the workflow will be triggered automatically.


3. Setting Up the Razorpay Trigger

After selecting Razorpay as your trigger application, you will receive a webhook URL. This URL is essential for connecting Razorpay to your Pabbly Connect workflow. Copy this URL to your clipboard. using Pabbly Connect

Next, log in to your Razorpay account and navigate to the ‘Developers’ section. Click on ‘Webhooks’ and then select ‘Add New Webhook’. Paste the copied URL into the designated field. For the secret field, leave it blank, as it is not required for this setup. Choose ‘Payment Captured’ as the active event to ensure the webhook triggers correctly.

  • Click on ‘Create Webhook’ to save your settings.
  • You will see a confirmation that the webhook has been saved successfully.

This setup allows Razorpay to send payment details to your Pabbly Connect workflow, enabling automatic sharing of digital downloads.


4. Testing the Integration with Pabbly Connect

To test the integration, you will need to perform a test payment in Razorpay. Select the product, in this case, the ‘Java Notes’ course, and fill in the required details such as amount and customer information. Proceed to payment and complete the transaction. using Pabbly Connect

Once the payment is successful, return to your Pabbly Connect workflow. You should see that the payment details have been captured. This confirms that the trigger is functioning correctly. Now, proceed to set up the action application, which will be Google Drive.

Select Google Drive as the action application. Choose the action event as ‘Share a File’.

This action will allow you to automatically share the digital download file with the customer once their payment is confirmed.


5. Sharing Files on Google Drive via Pabbly Connect

After selecting Google Drive for the action, you will need to connect your Google account. Click on ‘Connect’ and sign in to your Google account, granting the necessary permissions for Pabbly Connect to access your files. using Pabbly Connect

Next, you will need to specify the file you want to share. Locate the ‘Java Notes PDF’ in your Google Drive and select it. Then, map the email address from the Razorpay payment details to ensure that the correct customer receives the file. Set the role to ‘Can view only’ to restrict access.

Click on ‘Save and Send Test Request’ to finalize the setup. Check the recipient’s email to confirm that the PDF has been shared successfully.

Once this step is complete, your workflow is fully operational. Every time a payment is captured in Razorpay, the corresponding digital download will be shared automatically via Google Drive.


Conclusion

In this tutorial, we demonstrated how to automatically share digital downloads on successful Razorpay payments using Pabbly Connect. By following the outlined steps, you can streamline your sales process and enhance customer satisfaction with immediate delivery of digital products.

Ensure you check out Pabbly Connect to create business automation workflows and reduce manual tasks. Pabbly Connect currently offer integration with 2,000+ applications.

How to Send Messages on Multiple Slack Channels at Once Using Pabbly Connect

Learn how to send messages on multiple Slack channels simultaneously using Pabbly Connect. Step-by-step guide for Slack automation. Explore systematic approaches to creating efficient automation solutions that convert technical concepts into practical, implementable instructions.

Watch Step By Step Video Tutorial Below


1. Accessing Pabbly Connect for Slack Automation

To send messages on multiple Slack channels at once, you first need to access Pabbly Connect. This platform allows you to automate workflows between different applications, including Slack.

Visit the Pabbly Connect homepage and log in. If you are a new user, you can sign up for free to explore the features. Once logged in, you will see your dashboard where you can create workflows seamlessly.


2. Creating a Workflow in Pabbly Connect

Creating a workflow in Pabbly Connect is essential for automating Slack messages. Click on the ‘Create Workflow’ button at the top right corner of the dashboard. You will be prompted to name your workflow, so choose something descriptive like ‘Send Message on Multiple Slack Channels at Once’.

  • Name your workflow appropriately.
  • Select a folder for organization.
  • Click on the ‘Create’ button to proceed.

After creating your workflow, you will see the trigger and action setup. This is crucial for connecting your Slack channels through Pabbly Connect.


3. Setting Up the Trigger for Slack

Next, you need to set up the trigger in Pabbly Connect. Choose Slack as your trigger application and select the event as ‘New Message’. This means that every time a new message is posted in your specified Slack channel, it will trigger the action to send the same message to other channels.

To connect your Slack account, click on the ‘Connect’ button and follow the prompts to authorize Pabbly Connect. Make sure to select the correct private channel where you want to monitor new messages.


4. Setting Up the Action to Send Messages

After configuring the trigger, you need to set up the action in Pabbly Connect. Again, select Slack as your action application and choose the action event as ‘Send Channel Message’. This allows you to send the triggered message to multiple channels.

  • Select the channel where the message will be sent.
  • Map the message content from the trigger step.
  • Click on ‘Save & Send Test Request’ to check if it works.

Repeat the action setup for other channels where you want to send the same message. This way, Pabbly Connect will ensure that your message reaches all specified Slack channels simultaneously.


5. Testing the Automation

Once you have set everything up, it’s time to test your automation in Pabbly Connect. Post a new message in your selected private channel and observe if it is sent to the other channels you configured.

Check each channel to confirm that the message appears as expected. If all channels receive the message, congratulations! You have successfully set up your Slack automation using Pabbly Connect.


Conclusion

Using Pabbly Connect, you can easily send messages on multiple Slack channels at once. This automation saves time and ensures that your team is always informed simultaneously.

Ensure you check out Pabbly Connect to create business automation workflows and reduce manual tasks. Pabbly Connect currently offer integration with 2,000+ applications.

How to Send Telegram Message on Typeform Submission Using Pabbly Connect

Learn how to automate sending Telegram messages on Typeform submissions using Pabbly Connect. Follow this step-by-step guide for seamless integration. Explore systematic approaches to creating efficient automation solutions that convert technical concepts into practical, implementable instructions.

Watch Step By Step Video Tutorial Below


Setting Up Pabbly Connect for Telegram and Typeform Integration

To send a Telegram message on Typeform submission, we will use Pabbly Connect. This powerful automation tool allows seamless integration between applications like Typeform and Telegram. Start by visiting the Pabbly Connect homepage and logging into your account.

If you are a new user, you can sign up for free and explore its features. Once logged in, navigate to the dashboard where you can create a new workflow. This is essential for connecting Typeform submissions to Telegram messages.


Creating a Workflow in Pabbly Connect

In this section, we will create a workflow specifically for sending Telegram messages when a new Typeform submission occurs. Click on the ‘Create Workflow’ button in the top right corner of the Pabbly Connect dashboard. using Pabbly Connect

When prompted, name your workflow as ‘Send Telegram Message on Typeform Submission’ and select a folder for organization. This will help keep your automations organized. After naming, click on the ‘Create’ button to proceed.

  • Name your workflow appropriately.
  • Select a suitable folder for better organization.
  • Click on the ‘Create’ button to save your workflow.

Now that we have created the workflow, we will set up the trigger, which will be Typeform.


Configuring Typeform Trigger in Pabbly Connect

To configure the trigger, select Typeform as your trigger application and choose the ‘New Entry’ event. This ensures that every time a new form submission occurs, Pabbly Connect will capture the response automatically.

Next, click on ‘Connect’ to set up the connection with your Typeform account. If you do not have an existing connection, select ‘Add New Connection’ and log in to your Typeform account. Once connected, select the form you wish to use for this automation.

  • Choose ‘New Entry’ as the trigger event for Typeform.
  • Connect to your Typeform account by logging in.
  • Select the specific form you want to use.

After selecting your form, click on ‘Save and Send Test Request’ to ensure everything is set up correctly.


Setting Up Telegram Action in Pabbly Connect

Now that the trigger is configured, it’s time to set up the action step. Choose Telegram as your action application and select the ‘Send a Text Message’ action event. This allows Pabbly Connect to send a message to your Telegram group whenever a new submission is received.

To connect your Telegram bot, click on ‘Connect’ again. If you don’t have a connection, select ‘Add New Connection’ and provide the required token from your Telegram bot. You can create a bot using the BotFather on Telegram, which will give you the token needed for this integration.

Select ‘Send a Text Message’ as the action event. Obtain the bot token from BotFather on Telegram. Connect your Telegram bot to Pabbly Connect by entering the token.

After entering the token, you will need to specify the chat ID where the message will be sent. Create a group on Telegram and add your bot to this group to get the chat ID.


Testing the Integration with Pabbly Connect

To test the integration, submit a test response in your Typeform. This will trigger the workflow we created in Pabbly Connect. Ensure you enter all necessary details in the test submission form.

Once the test submission is made, check your Telegram group to see if the message was sent successfully. The message should include the details from the form submission, confirming that the integration is working as intended.

Submit a test response in your Typeform to trigger the workflow. Verify that the message appears in your Telegram group. Ensure the message includes the correct lead details.

By following these steps, you can confirm that your automation is set up correctly and is functioning as expected.


Conclusion

In this tutorial, we explored how to send a Telegram message on Typeform submission using Pabbly Connect. By automating this process, you can streamline your lead management and ensure timely communication with your team. Follow these steps to enhance your workflow and improve efficiency.

Ensure you check out Pabbly Connect to create business automation workflows and reduce manual tasks. Pabbly Connect currently offer integration with 2,000+ applications.

How to Send Slack Messages for Updated Notion Database Items Using Pabbly Connect

Learn how to send Slack messages for updated Notion database items using Pabbly Connect. Follow this step-by-step guide to automate notifications efficiently. Explore systematic approaches to creating efficient automation solutions that convert technical concepts into practical, implementable instructions.

Watch Step By Step Video Tutorial Below


1. Accessing Pabbly Connect for Integration

To send Slack messages for updated Notion database items, first, access Pabbly Connect. This integration platform allows you to automate workflows without coding. Open your browser and go to Pabbly.com/connect.

If you don’t have an account, click on the ‘Sign Up for Free’ button. Once you create your account, you will have access to 100 free tasks every month. If you already have an account, simply sign in to access the dashboard of Pabbly Connect.


2. Creating a Workflow in Pabbly Connect

Once logged in to Pabbly Connect, create a new workflow to connect Notion and Slack. Click on the ‘Create Workflow’ button and name your workflow, for example, ‘Send Slack Messages for Updated Notion Database Items’.

  • Select the folder where you want to save your workflow.
  • Click on ‘Create’ to initiate the workflow setup.

In the workflow interface, you will see two main boxes: Trigger and Action. The Trigger will be set up first to determine when the automation will occur. Select Notion as your trigger application and proceed to set the trigger event.


3. Setting Up the Trigger with Notion

In this step, you will configure the trigger in Pabbly Connect to listen for updates in Notion. Choose ‘Notion’ as your trigger application and select the trigger event as ‘Update Database Item’.

Next, connect your Notion account by clicking on ‘Connect’. You will need to grant Pabbly Connect access to your Notion database by selecting the appropriate pages and allowing access. Once the connection is successful, select your specific database from the dropdown list.

  • Open the database tab to find your Notion database.
  • Update an item in your Notion database to trigger the event.

After updating the item, go back to Pabbly Connect and click on ‘Save and Continue’. You will receive a response containing the updated details from Notion, confirming the integration is working correctly.


4. Setting Up the Action to Send Slack Messages

Now that you have configured the trigger, it’s time to set up the action in Pabbly Connect. Select Slack as your action application and choose the action event ‘Send Channel Message’.

Connect your Slack account by clicking on ‘Connect’. Choose the token type (either user or bot) and allow access. After successfully connecting, select the channel where you want to send the message.

Map the message content using details from the Notion response. Include customer name, email, phone number, order ID, product name, and status in your message.

Once all details are mapped, click on ‘Save and Send Test Request’. You should receive a confirmation that the message has been sent successfully to your Slack channel.


5. Testing and Confirming the Integration

After setting up the workflow in Pabbly Connect, it’s crucial to test the integration. Go to your Slack channel and verify if the message was sent successfully after updating the Notion database.

You should see a message stating, ‘Hello team, we have successfully delivered a new order with details…’ This confirms that every time an order status is updated in Notion, a message will automatically be sent to the designated Slack channel.

Ensure that the integration is working consistently by updating different items in Notion. Monitor your Slack channel for timely notifications.

With this setup, you have successfully automated the process of sending Slack messages for updated Notion database items using Pabbly Connect. This integration enhances team communication and keeps everyone informed about order statuses.


Conclusion

In summary, using Pabbly Connect allows you to seamlessly send Slack messages for updated Notion database items. By following the steps outlined, you can automate notifications efficiently and keep your team updated in real time.

Ensure you check out Pabbly Connect to create business automation workflows and reduce manual tasks. Pabbly Connect currently offer integration with 2,000+ applications.

How to Send TidyCal Meeting Reminders on WhatsApp Using Pabbly Connect

Learn how to use Pabbly Connect to send TidyCal meeting reminders via WhatsApp 30 minutes before your scheduled meetings. Follow our step-by-step guide. Explore systematic approaches to creating efficient automation solutions that convert technical concepts into practical, implementable instructions.

Watch Step By Step Video Tutorial Below


1. Accessing Pabbly Connect for Meeting Reminders

To send TidyCal meeting reminders on WhatsApp, you first need to access Pabbly Connect. Begin by visiting the Pabbly Connect website in your browser. If you don’t have an account, click on the ‘Sign Up for Free’ button to create one, which takes only two minutes.

Once logged in, you will see various applications offered by Pabbly. Click on the ‘Access Now’ button under Pabbly Connect. This action will direct you to the dashboard where you can create a new workflow to automate your meeting reminders.


2. Creating a Workflow in Pabbly Connect

In this section, you will create a workflow that sends reminders 30 minutes before a scheduled meeting. Click on the ‘Create Workflow’ button on your Pabbly Connect dashboard. You will need to name your workflow; for example, name it ‘Send TidyCal Meeting Reminders on WhatsApp’. using Pabbly Connect

  • Select the appropriate folder to save your workflow.
  • Click on ‘Create’ to proceed to the next step.

After creating the workflow, you will see two boxes labeled ‘Trigger’ and ‘Action’. The trigger will be TidyCal, and the action will be WhatsApp Cloud API. This setup is critical for sending timely reminders to your clients.


3. Setting Up the Trigger with TidyCal

To set up the trigger, select TidyCal as your application. Then, choose the event ‘New Booking’ as your trigger event. This means that whenever a new booking is made in TidyCal, it will initiate the reminder process.

Next, you will need to connect TidyCal with Pabbly Connect. Click on the ‘Connect’ button and select ‘Add New Connection’. Once connected, you can create a new booking in TidyCal to test the trigger.


4. Configuring the Action with WhatsApp Cloud API

After setting up the trigger, you need to configure the action to send a WhatsApp message. Select the action application as WhatsApp Cloud API and choose ‘Send Template Message’ as the action event. Connect WhatsApp Cloud API with Pabbly Connect by entering the necessary credentials like token and phone number.

Once connected, you will need to select the template message you want to send. Make sure that your template is approved by WhatsApp. You can customize the message to include the client’s name and meeting details.

  • Map the client’s WhatsApp number from the TidyCal response.
  • Fill in the template variables with meeting information.

After mapping all the necessary details, click on ‘Save and Send Test Request’ to ensure everything is working correctly.


5. Finalizing the Setup and Testing

With the action configured, it’s time to finalize your setup. You will want to add a delay to ensure the reminder is sent 30 minutes before the meeting starts. Use the ‘Delay’ action by selecting ‘Add Time Delay’ and configure it to delay until the calculated time.

Finally, test your workflow by creating a new booking in TidyCal. Ensure that you receive the reminder message on WhatsApp 30 minutes before the scheduled time. This setup will ensure that both you and your client never miss a meeting again.

By using Pabbly Connect, you have successfully automated the process of sending meeting reminders via WhatsApp, enhancing your communication with clients.


Conclusion

In this tutorial, you learned how to use Pabbly Connect to send TidyCal meeting reminders on WhatsApp. By following these steps, you can ensure timely notifications for all your meetings, improving overall communication.

Ensure you check out Pabbly Connect to create business automation workflows and reduce manual tasks. Pabbly Connect currently offer integration with 2,000+ applications.

How to Send Automated WhatsApp Messages on Google Forms Submission Using Pabbly Connect

Learn how to integrate Google Forms with WhatsApp using Pabbly Connect to send automated messages on form submission. Step-by-step tutorial included. Explore systematic approaches to creating efficient automation solutions that convert technical concepts into practical, implementable instructions.

Watch Step By Step Video Tutorial Below


1. Accessing Pabbly Connect for WhatsApp Integration

To send automated WhatsApp messages upon Google Forms submission, the first step is accessing Pabbly Connect. Navigate to the Pabbly Connect homepage and either sign in or sign up for a free account. New users will receive 100 free tasks each month, allowing you to explore the platform’s capabilities.

Once logged in, you will find the dashboard displaying all your workflows. To create a new workflow, click on the ‘Create Workflow’ button. You will be prompted to name your workflow. For this integration, name it ‘Send WhatsApp Messages on Google Form Submission’ and select a folder to save it in.


2. Setting Up Trigger and Action in Pabbly Connect

In Pabbly Connect, the next step is to define your trigger and action. Select ‘Google Forms’ as your trigger application and choose the trigger event as ‘New Response Received’. This event will initiate the workflow whenever a new form response is submitted.

  • Select Google Forms as the trigger application.
  • Choose ‘New Response Received’ as the trigger event.
  • Copy the webhook URL provided by Pabbly Connect.

After setting up the trigger, proceed to configure the action. Select ‘WaBots’ as the action application and choose ‘Custom API Request’ as the action event. This setup allows you to send WhatsApp messages automatically using the WhatsApp API.


3. Linking Google Forms to Google Sheets

To ensure that form responses are captured properly, link your Google Form to a Google Sheet. In your Google Form, navigate to the ‘Responses’ tab and click on the ‘Link to Sheets’ option. Create a new spreadsheet for the responses.

Once linked, the Google Sheet will automatically capture responses, including fields like timestamp, name, email, and phone number. This information will be essential for sending automated messages via Pabbly Connect.

  • Select ‘Link to Sheets’ in the Responses tab.
  • Choose to create a new spreadsheet for the responses.
  • Ensure the columns match the fields in your Google Form.

After setting up the Google Sheet, you can now proceed to connect it to Pabbly Connect by installing the Pabbly Connect Webhook add-on in Google Sheets. This will enable data to flow from Google Sheets to Pabbly Connect seamlessly.


4. Configuring Webhook in Google Sheets

In your Google Sheet, go to ‘Extensions’ and select ‘Pabbly Connect Webhook’ to configure the webhook settings. Here, you will need to enter the webhook URL and specify the trigger column. The trigger column is essential as it determines when data will be sent to Pabbly Connect.

Paste the webhook URL you copied earlier and set the trigger column to the one that corresponds to the last field you want to send (such as the phone number). After completing these steps, click on ‘Send Test’ to verify the connection.

Go to Extensions > Pabbly Connect Webhook. Paste the webhook URL in the designated field. Set the trigger column to the appropriate field.

After setting up the webhook, submit a test response in your Google Form to ensure that the data is captured correctly in the Google Sheet and sent to Pabbly Connect.


5. Sending WhatsApp Messages Using Pabbly Connect

With the integration set up, the next step is to send automated WhatsApp messages using Pabbly Connect and WaBots. In the action step, configure the API request to send the message. You will need to enter your WhatsApp Business Account ID and Access Token, which you can obtain from your WhatsApp API dashboard.

Once you have the necessary credentials, configure the message template that you want to send. Ensure that the message template is approved in your WaBots account. You can create a simple confirmation message like, ‘Hello, thank you for your response. We will get back to you soon with further details.’ After configuring the message, click ‘Save and Send Test Request’ to check if the message is delivered successfully.

Enter your WhatsApp Business Account ID and Access Token. Select the message template you created in WaBots. Click ‘Save and Send Test Request’ to deliver the message.

Once the message is sent successfully, your integration is complete. Now, every time a Google Form is submitted, an automated WhatsApp message will be sent to the responder, enhancing communication through the power of Pabbly Connect.


Conclusion

This tutorial demonstrated how to send automated WhatsApp messages on Google Forms submission using Pabbly Connect. By integrating Google Forms with WaBots, you can streamline communication effortlessly. This setup not only enhances customer engagement but also simplifies the process of managing responses efficiently.

Ensure you check out Pabbly Connect to create business automation workflows and reduce manual tasks. Pabbly Connect currently offer integration with 2,000+ applications.

How to Set-Up Webhook Inside Postmark with Pabbly Connect

Learn how to set up a webhook inside Postmark using Pabbly Connect to automate email delivery tracking and integrate with other applications seamlessly. Explore efficient methods for automating routine tasks with clear, concise instructions suited for both newcomers and experienced professionals.

Watch Step By Step Video Tutorial Below


1. Understanding Webhooks and Pabbly Connect

In this section, we will explore how webhooks work with Pabbly Connect. Webhooks are essential for automating data transfer between applications. They act as a bridge that sends real-time data from one application to another when a specific event occurs.

Using Pabbly Connect, you can seamlessly set up webhooks to connect Postmark and other applications like Google Sheets and Slack. This allows for real-time notifications and data logging without manual intervention.


2. Setting Up Pabbly Connect for Postmark Integration

To begin the integration, access your Pabbly Connect account. Here, you will create a new workflow that involves a trigger and an action. The trigger will be set to an event in Postmark, while the action will define what happens next.

  • Log into your Pabbly Connect account.
  • Create a new workflow and select Postmark as the trigger application.
  • Choose the trigger event, such as ‘New Delivery’.

After selecting the trigger event, Pabbly Connect will generate a webhook URL. You will need this URL to configure your Postmark account.


3. Configuring the Webhook in Postmark

Now that you have the webhook URL from Pabbly Connect, it’s time to set it up in your Postmark account. This step is crucial for enabling the data transfer.

Log into your Postmark account and navigate to the server settings. Here’s how to configure the webhook:

  • Select the server where you want to add the webhook.
  • Click on the ‘Add Webhook’ button.
  • Paste the webhook URL from Pabbly Connect into the URL field.
  • Select the event type, such as ‘New Delivery’.

After configuring the webhook, send a test response to ensure everything is working correctly. If successful, you’ll receive a confirmation in Pabbly Connect.


4. Capturing Responses in Pabbly Connect

Once the webhook is set up in Postmark, you can capture responses in Pabbly Connect. This allows you to see the data being sent from Postmark whenever an email is delivered.

To capture responses, go back to your Pabbly Connect workflow and click on the ‘Capture Webhook Response’ button. This will display the details of the email delivery, including the message ID and recipient email.

For example, if you send a test email to a user, you will see the delivery record in Pabbly Connect with all relevant information. This confirms that your integration is successful and functioning as intended.


5. Expanding Integrations with Pabbly Connect

After successfully setting up the webhook, you can expand your integrations using Pabbly Connect. This means you can connect Postmark to various applications like Google Sheets, Slack, and others to streamline your workflow.

For example, you can log email deliveries in Google Sheets or notify your team on Slack without any manual effort. Simply add these applications as actions in your Pabbly Connect workflow.

With Pabbly Connect, you can automate multiple tasks, ensuring that your email data is efficiently managed and communicated across your team.


Conclusion

Setting up a webhook inside Postmark using Pabbly Connect allows for seamless automation of email delivery tracking. By following the steps outlined, you can easily integrate various applications to enhance your workflow efficiency.

Ensure you check out Pabbly Connect to create business automation workflows and reduce manual tasks. Pabbly Connect currently offer integration with 2,000+ applications.

How to Send WhatsApp Messages on Successful Instamojo Payments Using Pabbly Connect

Learn how to automate WhatsApp messages on successful Instamojo payments using Pabbly Connect. Follow this detailed tutorial step-by-step for seamless integration. Navigate the automation landscape confidently with clear, structured guidance suitable for professionals regardless of prior technical experience.

Watch Step By Step Video Tutorial Below


1. Setting Up Pabbly Connect for WhatsApp Messaging

To send WhatsApp messages on successful Instamojo payments, you first need to set up Pabbly Connect. This powerful automation tool enables seamless integration between Instamojo and WhatsApp Cloud API. Start by visiting the Pabbly Connect website and either sign in or sign up for a free account.

Once logged in, navigate to the dashboard. Here, you can create a new workflow by clicking the ‘Create Workflow’ button. Name your workflow, for example, ‘Send WhatsApp Message on Successful Instamojo Payments’, and select a folder for organization.


2. Creating a Trigger in Pabbly Connect

The next step involves setting up the trigger in Pabbly Connect. Click on the trigger window and search for Instamojo as your trigger application. Select it and choose the trigger event as ‘New Sale’. This event will activate whenever a successful payment is processed.

  • Search for Instamojo in the trigger application.
  • Choose ‘New Sale’ as the trigger event.
  • This will start the automation on a successful payment.

After setting the trigger, Pabbly Connect will provide a webhook URL. This URL is crucial as it connects your Instamojo account with Pabbly Connect. Copy the webhook URL and proceed to your Instamojo account to paste it in the appropriate field under the product settings.


3. Connecting Instamojo with Pabbly Connect

Now that you have the webhook URL from Pabbly Connect, go to your Instamojo dashboard. Under the product you wish to connect, scroll to the Advanced settings and find the Webhook URL field. Paste the copied URL here to establish the connection.

Once you save the changes, Instamojo will send payment notifications to Pabbly Connect via the webhook. You can now test this setup by making a purchase through your e-commerce store. Ensure the payment is successful to trigger the automation.


4. Setting Up WhatsApp Cloud API in Pabbly Connect

After confirming that the webhook is working, the next step is to set up WhatsApp Cloud API in Pabbly Connect. You will select WhatsApp Cloud API as your action application and choose the action event as ‘Send Template Message’. This will allow you to send customized messages to customers.

  • Select WhatsApp Cloud API as the action application.
  • Choose ‘Send Template Message’ as the action event.
  • Connect your WhatsApp Cloud API account by entering the required credentials.

In this step, you will need to input your WhatsApp Business Account ID, Phone Number ID, and Access Token. These credentials can be obtained from your WhatsApp Cloud API setup. After entering these details, click on Save to establish the connection.


5. Sending WhatsApp Message on Successful Payment

With both the trigger and action set up in Pabbly Connect, you can now send WhatsApp messages automatically. Select the message template you want to use for notifications. Ensure the template includes placeholders for dynamic data like customer name and payment details.

Map the relevant fields from the Instamojo response to the WhatsApp message template. This mapping ensures that every time a payment is received, the correct information is sent to the customer. Test the entire setup by processing a new payment and confirming that the WhatsApp message is sent successfully.


Conclusion

In this tutorial, we explored how to use Pabbly Connect to automate sending WhatsApp messages on successful Instamojo payments. By following these steps, you can enhance customer communication and streamline your payment processing workflow effectively.

Ensure you check out Pabbly Connect to create business automation workflows and reduce manual tasks. Pabbly Connect currently offer integration with 2,000+ applications.

How to Set Up Webhook Inside Systeme.io Using Pabbly Connect

Learn how to set up a webhook inside Systeme.io with Pabbly Connect. This step-by-step guide covers the integration process in detail. Build sophisticated automated workflows in less time than you think. This guide translates complex integrations into straightforward steps for immediate implementation.

Watch Step By Step Video Tutorial Below


1. Setting Up Pabbly Connect Webhook

To set up a webhook inside Systeme.io, start by accessing Pabbly Connect. This platform acts as a bridge to connect your Systeme.io account with other applications. Begin by logging into your Pabbly Connect account and navigating to the trigger section.

Once in the trigger section, search for Systeme.io as your trigger application. Select it, and then choose the trigger event labeled ‘Contact Subscribed to a Form.’ This event will activate whenever a new contact subscribes through your form in Systeme.io.


2. Copying the Webhook URL from Pabbly Connect

After selecting your trigger event, Pabbly Connect will generate a unique webhook URL. This URL is crucial as it will be used to connect your Systeme.io account with Pabbly Connect. Copy this webhook URL for the next steps.

Next, navigate to your Systeme.io dashboard. Here are the steps to follow:

  • Go to the Automations section.
  • Select Rules and click on the Create button.
  • In the trigger event, select ‘Funnel Step Form Subscribed’.

These steps ensure that the webhook is correctly set up to capture data from your forms.


3. Creating a Rule in Systeme.io

To create a rule in Systeme.io, ensure you have selected the correct funnel and funnel step. This is essential for linking the form submission to the webhook. In the action window, you will choose the option to send a webhook.

Here’s how you can proceed with the setup:

  • Select ‘Send Webhook’ as the action event.
  • Paste the copied webhook URL from Pabbly Connect into the designated field.
  • Save the rule to finalize the setup.

By completing these steps, you have successfully integrated Systeme.io with Pabbly Connect, allowing data to flow seamlessly when a new contact subscribes.


4. Testing the Integration with Pabbly Connect

After setting up the webhook, it’s crucial to test the integration to ensure everything is functioning correctly. Go back to your Pabbly Connect dashboard, where you will see that it is waiting for a webhook response.

To conduct a test, fill out the lead capture form you created in Systeme.io. Here’s what you should do:

Enter the required details such as first name, last name, mobile number, and email. Submit the form.

Once you submit the form, check your Systeme.io account to confirm that a new contact has been created. Additionally, verify that the contact details appear in Pabbly Connect, indicating that the integration is successful.


Conclusion

In this tutorial, we explored how to set up a webhook inside Systeme.io using Pabbly Connect. This process enables seamless data transfer between applications whenever a contact subscribes to your form. By following these steps, you can effectively automate your workflows and enhance your marketing efforts.

Ensure you check out Pabbly Connect to create business automation workflows and reduce manual tasks. Pabbly Connect currently offer integration with 2,000+ applications.

How to Send Telegram Invitation on Zenler Course Enrollment Using Pabbly Connect

Learn how to send Telegram invitations automatically upon Zenler course enrollment using Pabbly Connect. Step-by-step tutorial with detailed instructions. Discover hidden automation capabilities within your existing tools. This guide shows you how to connect your essential applications and permanently eliminate redundant manual processes.

Watch Step By Step Video Tutorial Below


1. Access Pabbly Connect to Start the Integration

To send a Telegram invitation upon Zenler course enrollment, you will need to access Pabbly Connect. This powerful tool enables automation between various applications, including Zenler and Telegram. Begin by navigating to the Pabbly Connect website in your browser.

If you do not have an account, click on the ‘Sign Up for Free’ button. This will allow you to create an account in under two minutes, giving you access to 100 free tasks each month. If you already have an account, simply sign in to proceed to the dashboard.


2. Create a New Workflow in Pabbly Connect

After logging in to Pabbly Connect, you will need to create a new workflow. Click on the ‘Create Workflow’ button, and a pop-up will appear where you can name your workflow. Name it something relevant, like ‘Send Telegram Invitation on Zenler Course Enrollment’.

Once you have named the workflow, click on ‘Create’. You will be directed to the workflow setup page, where you will set up your trigger and action applications. The trigger application will be Zenler, and the action applications will be Telegram and Gmail.


3. Set Up Trigger for New Enrollment in Zenler

In this step, you will configure the trigger for your workflow using Pabbly Connect. Select Zenler as the trigger application and choose the event ‘New Enrollment to a Course’. This will initiate the workflow whenever a new user enrolls in your Zenler course.

Next, you will need to connect your Zenler account with Pabbly Connect. To do this, copy the webhook URL provided by Pabbly Connect and navigate to your Zenler account. In Zenler, go to the Automation section of your course, create a new automation rule, and paste the webhook URL. Save your changes to establish the connection.


Now, it’s time to set up the action in Pabbly Connect to create a Telegram invite link. Select Telegram as the action application and choose the ‘Create Chat Invite Link’ event. You will need to connect your Telegram bot with Pabbly Connect to proceed.

To connect your Telegram bot, you will need a token from the BotFather in Telegram. Create a new bot, copy the token provided, and paste it into Pabbly Connect. After connecting, provide the chat ID of your Telegram group to generate the invite link. You can find the chat ID from the Telegram group settings.

  • Select Telegram as the action application.
  • Choose the action event ‘Create Chat Invite Link’.
  • Connect your Telegram bot using the token from BotFather.
  • Provide the chat ID for the group.

After setting up these details, click on ‘Send Test Request’ to generate the invite link for your Telegram group.


5. Send the Invitation Email via Gmail

Finally, you will use Pabbly Connect to send an email invitation via Gmail. Add Gmail as the action application and select the ‘Send Email’ event. Connect your Gmail account and allow the necessary permissions.

Now, fill in the email fields. Use the email address of the student from the Zenler response, set the sender name, and create a subject such as ‘Join Our Course Community on Telegram’. For the email content, choose HTML as the content type and include a message that contains the invite link generated earlier.

  • Map the recipient’s email address from the Zenler response.
  • Set a sender name and email subject.
  • Create the email content with the invite link.

After completing these steps, click on ‘Save and Send Test Request’ to ensure everything is functioning correctly. You will receive a positive response confirming that the email has been sent successfully.


Conclusion

By following these steps, you can effectively automate the process of sending a Telegram invitation upon Zenler course enrollment using Pabbly Connect. This integration enhances communication with your students and fosters community engagement.

Ensure you check out Pabbly Connect to create business automation workflows and reduce manual tasks. Pabbly Connect currently offer integration with 2,000+ applications.