How to Create Systeme.io Contact on ConvertBox Form Submission Using Pabbly Connect

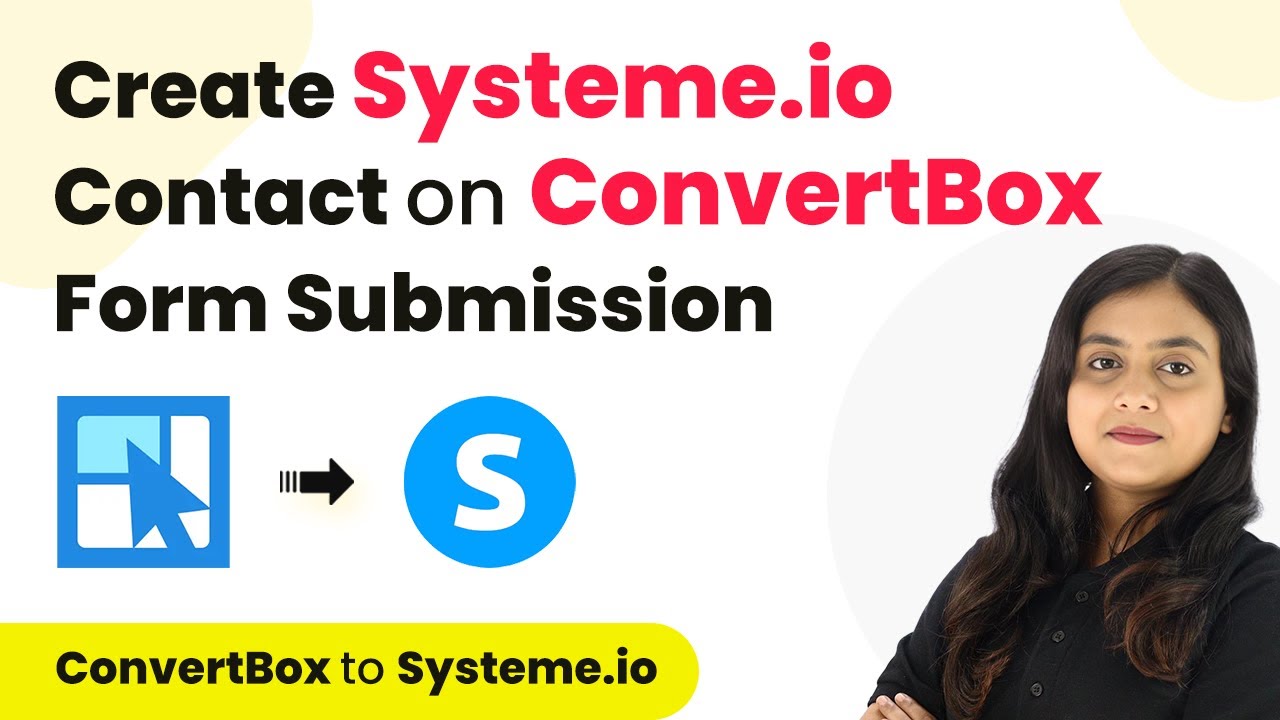
Learn how to create a Systeme.io contact automatically from ConvertBox form submissions using Pabbly Connect. Step-by-step tutorial with detailed instructions. Navigate the automation landscape confidently with clear, structured guidance suitable for professionals regardless of prior technical experience.

Watch Step By Step Video Tutorial Below


1. Accessing Pabbly Connect for Integration

To create a Systeme.io contact on ConvertBox form submission, we first need to access Pabbly Connect. Start by visiting the Pabbly Connect website and signing in to your account. If you are a new user, you can sign up for free to get 100 tasks each month.

Once logged in, you will see the Pabbly Apps window. Click on ‘Access Now’ under Pabbly Connect to proceed. This will take you to the Pabbly Connect dashboard where you can create your automation workflow.


2. Creating a Workflow in Pabbly Connect

In the Pabbly Connect dashboard, click on the ‘Create Workflow’ button located at the top right corner. You will be prompted to name your workflow. Enter a name like ‘Create Systeme.io Contact on ConvertBox Form Submission’ to identify your workflow easily. using Pabbly Connect

  • Click on the dropdown to select a folder to save your workflow.
  • Select the appropriate folder (e.g., ConvertBox) to keep your workflow organized.
  • Finally, click on ‘Create’ to establish your workflow.

Your workflow is now created, and you will see two main sections: Trigger and Action. The Trigger is what initiates the workflow, while the Action is the response to that trigger.


3. Setting Up the Trigger in Pabbly Connect

Now, we need to set up the trigger for our workflow. Click on the arrow in the Trigger section and select ‘ConvertBox’ as your trigger application. For the trigger event, choose ‘New Lead Submission.’ This event will trigger the workflow whenever a new lead submits the form in ConvertBox.

After selecting the trigger application and event, Pabbly Connect will generate a webhook URL. Copy this URL, as it will be used to connect ConvertBox to Pabbly Connect.

  • Open your ConvertBox account and locate the form you want to connect.
  • Edit the form and navigate to Form Settings.
  • Add a new integration and select Webhooks, then paste the copied webhook URL.

After saving your settings in ConvertBox, your trigger setup is complete, and Pabbly Connect is now ready to capture responses.


4. Setting Up the Action in Pabbly Connect

With the trigger set, we now move to the Action section. Click on the Action application dropdown and select ‘Systeme.io.’ For the action event, choose ‘Create Contact.’ This action will create a new contact in your Systeme.io account based on the information submitted in the ConvertBox form.

To connect Systeme.io to Pabbly Connect, you will need to enter your API key. To find this key, log in to your Systeme.io account, navigate to the profile settings, and select Pabbly API. Here, you can create a new API key.

Name your API key (e.g., Demo Key) and save it. Copy the API key and paste it back into Pabbly Connect to establish the connection. After connecting, you will see fields to map the data from ConvertBox to Systeme.io.

Map the necessary fields such as Email, First Name, Last Name, and others to ensure the contact is created with accurate information. Once mapping is complete, click on ‘Save and Send Test Request’ to verify the setup.


5. Testing the Integration in Pabbly Connect

To test whether the integration is working, go back to your ConvertBox form and perform a test submission. Fill in the required fields such as First Name, Last Name, Email, Street, State, and Mobile Number, then click on ‘Send’ to submit the form.

After submitting the form, return to Pabbly Connect and check the response captured in your workflow. You should see the details of the new lead, confirming that the trigger was successful.

Open your Systeme.io account to verify that the new contact has been created. Refresh the contacts page to see the newly added contact. Repeat the test with different submissions to ensure consistency.

This confirms that the automation between ConvertBox and Systeme.io using Pabbly Connect is functioning correctly, allowing you to efficiently manage your leads.


Conclusion

In this tutorial, we learned how to create a Systeme.io contact automatically from ConvertBox form submissions using Pabbly Connect. By setting up triggers and actions, you can streamline your lead management process effectively.

Ensure you check out Pabbly Connect to create business automation workflows and reduce manual tasks. Pabbly Connect currently offer integration with 2,000+ applications.

Sync Google Sheets with Google Contacts Using Pabbly Connect

Learn how to sync Google Sheets with Google Contacts using Pabbly Connect. This step-by-step tutorial covers the exact process for seamless integration. Navigate the automation landscape confidently with clear, structured guidance suitable for professionals regardless of prior technical experience.

Watch Step By Step Video Tutorial Below


1. Accessing Pabbly Connect for Integration

To sync Google Sheets with Google Contacts, you first need to access Pabbly Connect. Start by visiting the Pabbly Connect landing page. If you’re a new user, click on ‘Sign up for free’ to create an account and receive 100 tasks free every month.

As an existing user, select ‘Sign In’ to enter your dashboard. Once logged in, you will see various Pabbly applications. Click on ‘Access Now’ under Pabbly Connect to begin the integration process.


2. Creating a New Workflow in Pabbly Connect

After accessing Pabbly Connect, you will need to create a new workflow. Click on the ‘Create Workflow’ button. In the prompt, name your workflow (e.g., ‘Create Google Contact for New or Updated Spreadsheet Rows’) and choose a folder to save it in.

  • Click on ‘Create’ to open the workflow window.
  • Select Google Sheets as your trigger application.
  • Choose ‘New or Updated Spreadsheet Row’ as the trigger event.

This setup allows Pabbly Connect to recognize when new rows are added or updated in Google Sheets, initiating the workflow.


3. Connecting Google Sheets to Pabbly Connect

To connect Google Sheets to Pabbly Connect, you will receive a webhook URL. Copy this URL to establish the connection. Open your Google Sheets and navigate to ‘Extensions’ > ‘Add-ons’ > ‘Get add-ons’.

Search for ‘Pabbly Connect Webhooks’ and install it if you haven’t already. Once installed, go back to ‘Extensions’ > ‘Pabbly Connect Webhooks’ and select ‘Initial Setup’. Paste the copied webhook URL and specify the trigger column (the last filled column in your sheet).


4. Setting Up Google Contacts Action in Pabbly Connect

After configuring Google Sheets, it’s time to set up the action in Pabbly Connect. Select Google Contacts as your action application and choose ‘Create Contact’ as the action event. If prompted, connect your Google Contacts account by selecting ‘Add a New Connection’ and signing in with your Google account.

Once connected, you will need to map the details from the Google Sheets trigger. This includes fields such as first name, last name, email, and phone number. Mapping ensures that the data from the new or updated row in Google Sheets is accurately transferred to Google Contacts.

  • Map the first name, last name, gender, email, company name, and phone number accordingly.
  • Click on ‘Save and Send Test Request’ to verify the setup.

Upon successful mapping and testing, a new contact will be created in Google Contacts based on the data from Google Sheets.


5. Testing the Integration Workflow

To ensure your workflow is functioning correctly, return to your Google Sheets and add a new contact. For example, input the first name as ‘Test’, last name as ‘User’, and fill in the email and phone number. Once you save the new row, Pabbly Connect will capture this data and trigger the workflow.

Check your Google Contacts to confirm that the new contact appears with the correct details. This step validates the successful integration between Google Sheets and Google Contacts through Pabbly Connect.

Finally, if everything is working as expected, you can automate this process for future entries, ensuring that every new contact added to your Google Sheets is automatically created in Google Contacts.


Conclusion

In this tutorial, we explored how to sync Google Sheets with Google Contacts using Pabbly Connect. By following the exact steps outlined, you can automate the creation of new contacts from your Google Sheets, streamlining your workflow efficiently.

Ensure you check out Pabbly Connect to create business automation workflows and reduce manual tasks. Pabbly Connect currently offer integration with 2,000+ applications.

How to Get Notifications for New Leads from Facebook Lead Ads Using Pabbly Connect

Learn how to get notifications for new leads from Facebook Lead Ads using Pabbly Connect. This detailed tutorial guides you through the setup process step by step.

Watch Step By Step Video Tutorial Below


1. Accessing Pabbly Connect for Facebook Lead Ads

To get notifications for new leads from Facebook Lead Ads, you need to access Pabbly Connect. Start by visiting the Pabbly Connect website and logging in or signing up for a free account.

Once logged in, you will see various Pabbly tools. Click on ‘Access Now’ under Pabbly Connect to enter the dashboard where you can create your workflow.


2. Creating a Workflow in Pabbly Connect

In this section, we will create a workflow to connect Facebook Lead Ads and Gmail using Pabbly Connect. Click on the ‘Create Workflow’ button and name your workflow as ‘Get Notification for New Leads from Facebook Lead Ads’.

  • Click on ‘Create’ to open the workflow interface.
  • Select ‘Facebook Lead Ads’ as the trigger application.
  • Choose ‘New Lead Instant’ as the trigger event.

Once you have set the trigger, click on ‘Connect’ to establish the connection with your Facebook Lead Ads account through Pabbly Connect.


3. Connecting Facebook Lead Ads to Pabbly Connect

After selecting the trigger event, you will need to connect your Facebook account. Click on ‘Add a New Connection’ to link your Facebook Lead Ads with Pabbly Connect.

Follow these steps to complete the connection:

  • Select your Facebook account and click ‘Continue’.
  • Choose the Facebook page and lead generation form you are using.
  • Click on ‘Save and Send Test Request’ to verify the connection.

Once the connection is successful, Pabbly Connect will be ready to capture new leads from your Facebook Lead Ads.


4. Setting Up Gmail Notifications for New Leads

Now that we have connected Facebook Lead Ads, the next step is to set up Gmail notifications using Pabbly Connect. Select Gmail as the action application and choose the action event as ‘Send Email’.

To connect your Gmail account, click on ‘Add a New Connection’ and grant the necessary permissions. Once connected, enter your sales team’s email address in the recipient field.

Set the sender’s name to your business name. Define the email subject as ‘New Lead Alert’. Map the lead details from the previous step to personalize the email.

This setup ensures that every time a new lead comes in, your sales team will receive an email notification through Pabbly Connect.


5. Testing the Integration Process

After setting everything up, it’s crucial to test the integration process. Use the Lead Ads Testing Tool to submit a test lead, ensuring that Pabbly Connect captures the lead details correctly.

Once you submit the test lead, check your Gmail to confirm that the notification email has been received. You should see the email with all the mapped details such as name, email, and city.

Ensure the workflow captures the lead details accurately. Verify that the email content is personalized with the lead’s information.

If everything works as expected, your integration is successful, and Pabbly Connect is effectively sending notifications for new leads from Facebook Lead Ads.


Conclusion

This tutorial demonstrated how to get notifications for new leads from Facebook Lead Ads using Pabbly Connect. By following these steps, you can automate your lead notifications efficiently and keep your sales team informed in real time.

Ensure you check out Pabbly Connect to create business automation workflows and reduce manual tasks. Pabbly Connect currently offer integration with 2,000+ applications.

How to Auto Send SMS on ThriveCart Purchase Using Pabbly Connect and Twilio

Learn how to automate SMS sending on ThriveCart purchases using Pabbly Connect and Twilio. Follow our step-by-step tutorial for seamless integration. Explore efficient methods for automating routine tasks with clear, concise instructions suited for both newcomers and experienced professionals.

Watch Step By Step Video Tutorial Below


1. Accessing Pabbly Connect for SMS Automation

To begin automating SMS sending on ThriveCart purchases, you need to access Pabbly Connect. This platform allows you to create workflows that connect ThriveCart and Twilio seamlessly. Start by visiting the Pabbly Connect homepage and signing in or signing up for a new account.

Once logged in, you will see the dashboard where all your applications are listed. To set up the automation, click on the ‘Create Workflow’ button located at the top right corner. This initiates the process of linking your ThriveCart with Twilio through Pabbly Connect.


2. Creating a Workflow in Pabbly Connect

In the workflow creation dialog, name your workflow something descriptive like ‘Auto Send SMS on ThriveCart Purchase’. This helps you easily identify your automation later. You can also choose a folder to organize your workflows, which is a useful feature of Pabbly Connect.

  • Click ‘Create’ after naming your workflow.
  • Select ‘ThriveCart’ as your trigger application.
  • Choose ‘Product Purchase’ as the trigger event.

After selecting the trigger, click on ‘Connect’ to establish a connection between ThriveCart and Pabbly Connect. Follow the prompts to add a new connection using your ThriveCart API key, which you can find in the API and Webhook section of your ThriveCart account settings.


3. Configuring ThriveCart Integration

Once you have connected ThriveCart to Pabbly Connect, select the product you want to automate SMS for. This is where you can specify the product status as well. If you are testing, select the test mode to ensure everything works correctly.

After setting up the product, click on ‘Save and Send Test Request’ to check if the integration is functioning. You will need to make a test purchase to trigger the automation. Fill in the purchase details, including a dummy name, email, and phone number to simulate a real transaction.

  • Enter a dummy card number and valid billing details.
  • Click ‘Complete Order’ to finalize the test purchase.

After the test purchase, return to Pabbly Connect to see if the response has been captured correctly. You should see all the purchase details, including order ID and customer information.


4. Setting Up Twilio SMS Action

Next, you will set up Twilio as your action application in Pabbly Connect. Select Twilio and the action event as ‘Send SMS Message’. Click on ‘Connect’ to establish a connection with your Twilio account.

For the connection, you will need your Twilio Account SID and Authorization Token. These can be found in your Twilio dashboard. Enter these credentials into Pabbly Connect to establish the integration.

Input the SMS body, which can be a custom message for your customers. Specify the sender number, which must be an approved Twilio number. Map the recipient’s phone number from the ThriveCart response.

After filling in all the required fields, click ‘Save and Send Test Request’. If everything is set up correctly, you should receive a confirmation SMS on the specified number, indicating that the integration is working.


5. Testing and Finalizing the Integration

To ensure your automation works as intended, perform another test purchase in ThriveCart. Use a different set of dummy data to simulate a new customer. This step is crucial to verify that the SMS is sent correctly upon purchase.

After completing the test purchase, check your phone for the SMS sent from Twilio. The message should match the body you set up in the Twilio action step. This confirms that Pabbly Connect has successfully automated the SMS sending process.

Once tested, you can finalize your workflow in Pabbly Connect. This integration will now automatically send SMS notifications for every purchase made through your ThriveCart account, enhancing customer engagement and satisfaction.


Conclusion

This tutorial demonstrated how to automate SMS sending on ThriveCart purchases using Pabbly Connect and Twilio. By following these steps, you can easily set up a seamless integration that enhances your customer communication.

Ensure you check out Pabbly Connect to create business automation workflows and reduce manual tasks. Pabbly Connect currently offer integration with 2,000+ applications.

Integrating ThriveCart Approved Affiliate Data in Google Sheets Using Pabbly Connect

Learn how to seamlessly integrate ThriveCart approved affiliate data into Google Sheets using Pabbly Connect with this step-by-step tutorial. Build sophisticated automated workflows in less time than you think. This guide translates complex integrations into straightforward steps for immediate implementation.

Watch Step By Step Video Tutorial Below


1. Setting Up Pabbly Connect for ThriveCart Integration

To integrate ThriveCart approved affiliate data into Google Sheets, you will first need to set up Pabbly Connect. This platform allows you to automate workflows without any coding skills. Start by visiting the Pabbly Connect website and either sign in or create a new account.

Once logged in, you will be directed to your dashboard. Here, you can create a new workflow by clicking on the ‘Create Workflow’ button. Name your workflow to reflect its purpose, such as ‘ThriveCart Approved Affiliate Data in Google Sheets.’ Now, select the folder where you want to save this workflow.


2. Configuring the Trigger Event in Pabbly Connect

The next step involves configuring the trigger event in Pabbly Connect. For this integration, select ThriveCart as your trigger application. Then, choose the trigger event as ‘Affiliate Approved’ from the dropdown menu. This will initiate the workflow whenever a new affiliate request is approved in ThriveCart.

  • Select ThriveCart as the trigger application.
  • Choose ‘Affiliate Approved’ as the trigger event.
  • Click on the connect button to set up the connection.

After this, you will need to connect your ThriveCart account with Pabbly Connect. Click on ‘Add New Connection’ and input your API token. You can acquire this token from your ThriveCart account settings under the API section. This establishes a secure link between ThriveCart and Pabbly Connect, allowing data to flow smoothly.


3. Setting Up Action in Google Sheets

Now that you have set up the trigger, the next step is to configure the action in Pabbly Connect. For the action application, select Google Sheets. The action event will be ‘Add New Row,’ which will allow the approved affiliate data to be recorded in your Google Sheets.

  • Select Google Sheets as the action application.
  • Choose ‘Add New Row’ as the action event.
  • Connect your Google account to Pabbly Connect.

After connecting your Google account, select the specific spreadsheet where you want the affiliate data to be stored. Ensure that your spreadsheet is set up with appropriate columns like Affiliate Name, User ID, Affiliate ID, etc. This setup is crucial for proper data mapping in the next steps.


4. Mapping Data from ThriveCart to Google Sheets

With your action set up, the next step is to map the data from ThriveCart to Google Sheets using Pabbly Connect. Mapping allows you to specify which data points from ThriveCart correspond to the columns in your Google Sheets. This ensures that whenever an affiliate is approved, their data will be automatically populated in the correct fields.

To map the data, you will need to select the fields from the ThriveCart response. For instance, map the Affiliate Name to the corresponding column in Google Sheets. Repeat this process for other fields like User ID, Affiliate ID, and Email. By doing this, you ensure that the data is dynamic and updates in real-time.


5. Testing and Finalizing the Integration

After mapping all the required fields, it’s time to test the integration using Pabbly Connect. Click on the ‘Save and Send Test Request’ button. This action will send a test entry to your Google Sheets to verify that everything works correctly.

Once the test is successful, you can check your Google Sheets to confirm that the data has been accurately recorded. If everything looks good, your integration is complete. You can now approve new affiliate requests in ThriveCart, and their data will automatically be added to your Google Sheets.


Conclusion

In this tutorial, we detailed how to use Pabbly Connect to integrate ThriveCart approved affiliate data into Google Sheets. By following these steps, you can automate your workflow and ensure that affiliate information is accurately captured in real-time, enhancing your tracking and reporting capabilities.

Ensure you check out Pabbly Connect to create business automation workflows and reduce manual tasks. Pabbly Connect currently offer integration with 2,000+ applications.

How to Send Telegram Invitation on Graphy Course Enrollment Using Pabbly Connect

Learn how to send Telegram invitations upon course enrollment in Graphy using Pabbly Connect. Step-by-step tutorial with detailed instructions. Learn to create powerful connections between your critical applications without requiring specialized programming knowledge or extensive technical background.

Watch Step By Step Video Tutorial Below


1. Setting Up Pabbly Connect for Graphy Course Enrollment

To send a Telegram invitation when a new student enrolls in a Graphy course, we will use Pabbly Connect. First, access Pabbly Connect by searching for it in your browser. You will land on the Pabbly Connect homepage where you can either sign in or sign up for free.

If you don’t have an account, click on the ‘Sign Up for Free’ button. This process takes only a few minutes, and you will receive 100 free tasks every month. After signing in, you will be directed to the dashboard where you can create a new workflow.


2. Creating the Workflow in Pabbly Connect

In your Pabbly Connect dashboard, click on the ‘Create Workflow’ button to begin. You will be prompted to name your workflow. Enter a name that reflects your objective, such as ‘Send Telegram Invitation on Graphy Course Enrollment’. using Pabbly Connect

  • Click on ‘Create’ to set up the workflow.
  • You will see two boxes: Trigger and Action.
  • Select ‘Graphy’ as the trigger application.

Next, choose ‘New Enrollment’ as the trigger event. This setup means that every time a new student enrolls in your Graphy course, the workflow will be activated. Pabbly Connect will now wait for this trigger to initiate the next steps.


3. Connecting Graphy to Pabbly Connect

To connect Graphy with Pabbly Connect, you will need to copy the provided webhook URL. This URL acts as a bridge between Graphy and Pabbly Connect. Go to your Graphy account and navigate to the third-party integrations section.

Here, select Pabbly Connect and paste the webhook URL you copied earlier. Click on ‘Save’ to establish the connection. This step ensures that whenever a new enrollment occurs, Graphy will send the data to Pabbly Connect.

  • Create a new student account to perform a test enrollment.
  • Enroll in a course, such as Core PHP Programming.
  • Complete the payment process to trigger the webhook.

After completing the enrollment, return to Pabbly Connect. You should see a successful response indicating that the enrollment details have been captured.


4. Sending Telegram Invitation via Pabbly Connect

With the enrollment details captured, it’s time to create a Telegram invite link using Pabbly Connect. Set up the action application by selecting Telegram Bot. Choose the action event as ‘Create Chat Invite Link’. This will allow you to generate a unique invite link for your Telegram group.

To connect Telegram with Pabbly Connect, you need a token from the BotFather on Telegram. Search for BotFather, create a new bot, and copy the token provided. Paste this token into Pabbly Connect and save the connection. After that, enter the chat ID of your Telegram group to generate the invite link.

Add your bot as an admin in the Telegram group. Copy the chat ID from your group’s URL. Click ‘Save and Send Test’ to create the invitation link.

Upon successful creation, you will receive the invite link, which can now be used to invite students to your Telegram group.


5. Sending Email Invitation Using Pabbly Connect

The final step is to send the Telegram invite link to the student via email using Pabbly Connect. Set Gmail as the action application and select ‘Send Email’ as the action event. You will need to connect your Gmail account to Pabbly Connect for this step.

Once connected, map the recipient’s email address from the Graphy enrollment response. You can also customize the email subject and content, ensuring to include the Telegram invite link you generated earlier.

Provide a sender name and subject for the email. Use HTML format for the email content. Test the email by clicking ‘Save and Send Test’.

After sending the test email, check your Gmail account to confirm that the email with the Telegram invite link has been sent successfully to the student.


Conclusion

This tutorial demonstrated how to use Pabbly Connect to send Telegram invitations upon course enrollment in Graphy. By following these steps, you can automate your communication with students, enhancing their experience and engagement.

Ensure you check out Pabbly Connect to create business automation workflows and reduce manual tasks. Pabbly Connect currently offer integration with 2,000+ applications.

How to Share Google Drive Files on Telegram Using Pabbly Connect

Learn how to share Google Drive files on Telegram using Pabbly Connect. This step-by-step guide covers integration and automation processes. Revolutionize your productivity approach with just a few strategic clicks. Uncover professional methods for connecting applications and creating workflows that reclaim hours of your week.

Watch Step By Step Video Tutorial Below


1. Accessing Pabbly Connect for Google Drive and Telegram Integration

To share Google Drive files on Telegram, start by accessing Pabbly Connect. This powerful automation tool will help you connect your Google Drive and Telegram accounts seamlessly.

Open your web browser and navigate to the Pabbly Connect landing page. If you are a new user, click on ‘Sign up for free’ to create an account. Existing users can simply click on ‘Sign in’ to access their dashboard.


2. Creating a Workflow in Pabbly Connect

Once logged into Pabbly Connect, you will see various applications available. Click on ‘Access Now’ under Pabbly Connect to start creating your workflow.

Next, click on the ‘Create Workflow’ button. You will be prompted to name your workflow. Name it ‘How to Share Google Drive Files on Telegram’ and choose a folder to save it in. After naming it, click on ‘Create’ to proceed.

  • Click on ‘Create Workflow’
  • Name your workflow
  • Select a folder to save it

Now, you will see the workflow window where you can set up the trigger and action. The trigger will be Google Drive, and the action will be Telegram.


3. Setting Up Google Drive as the Trigger in Pabbly Connect

In this step, you will set Google Drive as the trigger application in Pabbly Connect. Search for Google Drive and select it as your trigger application.

For the trigger event, select ‘New File in Specific Folder’. Make sure to have a designated folder in Google Drive where you will upload files. Before connecting, adjust the folder’s sharing settings to ‘Anyone with the link’ to ensure accessibility.

  • Select Google Drive as the trigger
  • Choose ‘New File in Specific Folder’
  • Set folder sharing to ‘Anyone with the link’

After setting this up, click on ‘Connect’ to link your Google Drive account to Pabbly Connect.


4. Formatting Text and Connecting to Telegram

After successfully setting Google Drive as the trigger, the next step is to format the file name before sending it to Telegram. Utilize the ‘Text Formatter by Pabbly’ as your action application. using Pabbly Connect

Select ‘Split Text’ as the action event. Here, map the filename from the previous trigger response. Use a dot (.) as the separator to split the filename and extract the desired title. Click on ‘Save and Send Test Request’ to verify.

Choose ‘Text Formatter by Pabbly’ Select ‘Split Text’ as the action event Map the filename and set the separator

Once you receive a positive response, proceed to the next action step, which is to connect to Telegram.


5. Sending the Document to Telegram Using Pabbly Connect

For the final step, search for Telegram in Pabbly Connect and select it as your action application. Choose ‘Send Document’ as the action event.

Connect your Telegram account by providing the bot token you created earlier. Ensure you also input the chat ID where you want to send the message. Map the formatted title and the file link from the previous steps, then click on ‘Save and Send Test Request’.

Select Telegram as the action application Choose ‘Send Document’ as the action event Map the title and file link

After testing, you should see the document sent to your Telegram group successfully. This confirms that your workflow is operational.


Conclusion

In this tutorial, we explored how to share Google Drive files on Telegram using Pabbly Connect. With simple steps, you can automate file sharing seamlessly between these two platforms, enhancing your workflow efficiency.

Ensure you check out Pabbly Connect to create business automation workflows and reduce manual tasks. Pabbly Connect currently offer integration with 2,000+ applications.

How to Add/Update AWeber Subscriber from New Beehiiv Subscription Using Pabbly Connect

Learn how to seamlessly add or update AWeber subscribers from New Beehiiv subscriptions using Pabbly Connect. Follow this step-by-step tutorial for effective automation. Develop expertise in application integration and learn how to design streamlined automation workflows using proven, simplified approaches.

Watch Step By Step Video Tutorial Below


1. Access Pabbly Connect to Start Integration

To begin the integration process, access Pabbly Connect by searching for ‘Pabbly.com/connect’ in your browser. This platform facilitates the connection between New Beehiiv and AWeber seamlessly.

Once on the landing page of Pabbly Connect, you will see options to sign in or sign up for free. Existing users can click on ‘Sign In’ to access their dashboard, while new users can sign up for a free account that allows 100 tasks every month.


2. Create a Workflow in Pabbly Connect

After signing into Pabbly Connect, navigate to the dashboard and click on the ‘Create Workflow’ button. This allows you to set up a new workflow for integrating New Beehiiv and AWeber.

In the workflow setup window, name your workflow, such as ‘Add or Update AWeber Subscriber from New Beehiiv Subscription’. Choose a folder to save your workflow, and then click on the ‘Create’ button to proceed to the workflow window.


3. Set Trigger Event for New Beehiiv Subscription

In the workflow window, select New Beehiiv as your trigger application. This is crucial as it initiates the process whenever a new subscription is created in your Beehiiv account.

For the trigger event, select ‘Subscription Created’. After this, Pabbly Connect provides a webhook URL, which you need to copy for the next steps. This URL will link your Beehiiv account with your Pabbly workflow.

  • Open your Beehiiv account and navigate to Settings.
  • Select Integration and then Webhooks.
  • Click on ‘Add Endpoint’ and paste the copied URL.

After pasting the URL, you can leave the description blank and select ‘Subscription Created’ as the event type. Click on ‘Save’ to finalize the webhook setup. This establishes a connection between Beehiiv and Pabbly Connect.


4. Add or Update AWeber Subscriber

Now that the trigger is set, proceed to the action step by selecting AWeber as your action application in Pabbly Connect. This action will add or update subscribers in your AWeber account based on new subscriptions from Beehiiv.

For the action event, choose ‘Add or Update a Subscriber’. Click on ‘Connect’ and either select an existing connection or create a new one by entering your AWeber login credentials. After allowing access, select the appropriate List ID, such as ‘New Customers’.

  • Map the subscriber details from the trigger step to the action step.
  • Ensure that the email field is dynamically mapped to allow updates with each new subscription.
  • Click on ‘Save and Send Test Request’ to test the integration.

Upon successful mapping and testing, you will receive a confirmation that a new subscriber has been added to your AWeber account, demonstrating the effectiveness of Pabbly Connect.


5. Verify the Integration Success

To confirm that the integration works correctly, check your AWeber account under Subscribers. You should see the new subscriber added from the Beehiiv subscription.

For further testing, you can repeat the subscription process in Beehiiv. Each time a new subscription is created, Pabbly Connect will automatically trigger the workflow and add the subscriber in AWeber, ensuring seamless integration.

With this setup, you can efficiently manage subscribers without manual intervention, showcasing the power of automation through Pabbly Connect.


Conclusion

This tutorial demonstrated how to add or update AWeber subscribers from New Beehiiv subscriptions using Pabbly Connect. By following the steps outlined, you can automate your subscriber management effectively.

Ensure you check out Pabbly Connect to create business automation workflows and reduce manual tasks. Pabbly Connect currently offer integration with 2,000+ applications.

Boosting Admin Team Productivity with Pabbly Connect Automations

Learn how to enhance admin team productivity using Pabbly Connect with Google Chat and automation processes. Step-by-step guide included. Implement the precise methodologies leading organizations use to automate repetitive tasks, illustrated with practical examples designed for immediate application.

Watch Step By Step Video Tutorial Below


1. Accessing Pabbly Connect for Automations

To boost productivity with automations, accessing Pabbly Connect is the first step. Start by visiting the Pabbly Connect website and signing in to your account. If you are a new user, you can sign up for free, allowing you to utilize 100 tasks every month.

Once signed in, you will see the ‘All P Apps’ window. From here, select Pabbly Connect by clicking on ‘Access Now’. This will take you to the Pabbly Connect dashboard where you can create workflows to automate various tasks effectively.


2. Automating Exit Document Creation with Google Forms

The first automation to discuss is how to automate document creation for exit forms using Pabbly Connect. This process begins with creating a Google Form that collects data from employees who are exiting the organization. Each form submission triggers the automation.

  • Set Google Forms as the trigger in Pabbly Connect.
  • Capture the employee’s details from the form submission.
  • Use Google Docs to create an exit document based on a predefined template.

After configuring these steps, you will receive a document ID confirming the successful creation of the exit document. This document can then be made accessible to the relevant parties and uploaded to Google Drive, ensuring that all exit documentation is handled efficiently.


3. Automating Onboarding Checklist with Google Forms and Google Chat

Next, we will explore how to automate the onboarding checklist using Pabbly Connect. This involves collecting essential documents from newly hired employees through a Google Form. Upon submission, a message is sent via Google Chat to confirm that the onboarding checklist is complete.

To set this up, first create a Google Form to gather the necessary documents. After the form submission, you will capture the responses, which will include links to the submitted documents. The next step is to apply a filter to ensure that a message is only sent once all required documents are submitted.

  • Set Google Forms as the trigger in your Pabbly Connect workflow.
  • Configure the filter to check for all necessary document submissions.
  • Send a confirmation message to Google Chat once all documents are submitted.

This automation not only streamlines the onboarding process but also ensures that all necessary documentation is received and acknowledged promptly.


4. Automating Employee Evaluations with Google Forms and Google Chat

Another useful automation is the employee evaluation process, facilitated by Pabbly Connect. When an employee submits their evaluation feedback via a Google Form, a notification is sent to the designated Google Chat space.

To implement this, create a Google Form specifically for employee evaluations. The form will capture the evaluator’s feedback and the details of the employee being evaluated. Once a submission is made, the response is captured in Pabbly Connect, and a message is sent to Google Chat to notify the team about the evaluation.

Set up Google Forms as the trigger in Pabbly Connect. Capture the evaluation details from the form submission. Send a notification message to Google Chat with the evaluation results.

This automation helps keep all stakeholders informed about employee performance evaluations, enhancing communication and productivity across the team.


5. Automating Meeting Scheduling with Google Forms and Google Meet

Finally, we will look at how to automate meeting scheduling using Pabbly Connect. When a client fills out a Google Form to request a meeting, a Google Meet link is generated and sent to their Gmail.

Start by creating a Google Form for clients to submit their meeting requests. When a form is submitted, Pabbly Connect captures the data and creates a meeting link via Google Meet. This link is then sent to the client’s email address automatically.

Set Google Forms as the trigger in Pabbly Connect. Generate a Google Meet link based on the form submission. Send the meeting link as an email to the client via Gmail.

This automation ensures that clients receive timely meeting invitations, improving client engagement and streamlining the scheduling process.


Conclusion

In this tutorial, we explored how to enhance productivity for admin teams using Pabbly Connect with Google Chat and various automations. By implementing these processes, businesses can streamline operations and improve communication effectively.

Ensure you check out Pabbly Connect to create business automation workflows and reduce manual tasks. Pabbly Connect currently offer integration with 2,000+ applications.

How to Send Email on Google Forms Submission using Google Generative AI with Pabbly Connect

Learn how to automate sending emails on Google Forms submissions using Google Generative AI and Pabbly Connect with our step-by-step tutorial. Explore efficient methods for automating routine tasks with clear, concise instructions suited for both newcomers and experienced professionals.

Watch Step By Step Video Tutorial Below


1. Accessing Pabbly Connect for Integration

To send emails on Google Forms submission using Google Generative AI, you first need to access Pabbly Connect. This platform allows you to automate tasks across different applications seamlessly. Start by visiting the Pabbly Connect website and signing in or signing up if you are a new user.

Once you are logged in, you will see the Pabbly Connect dashboard. Here, you can create a new workflow which will be the foundation for your integration. Click on the ‘Create Workflow’ button to begin setting up your automation.


2. Creating a Workflow in Pabbly Connect

In this step, you will create a workflow to automate the email sending process. Name your workflow something like ‘Send Email on Google Form Submission using Google Generative AI’. This will help you identify the workflow later on. After naming your workflow, select a folder for organization purposes. using Pabbly Connect

  • Click on the ‘Create’ button to finalize your workflow.
  • You will then see options for setting up your trigger and action steps.

Next, you will set up the trigger application as Google Forms. Choose the trigger event as ‘New Response Received’. This allows Pabbly Connect to listen for new submissions from your Google Form.


3. Connecting Google Forms to Pabbly Connect

To connect Google Forms to Pabbly Connect, you will receive a webhook URL. This URL is essential for linking your Google Form to Pabbly Connect. Copy this URL, as you will need it shortly. In your Google Form, navigate to the responses section and link it to Google Sheets.

Next, create a new spreadsheet where the responses will be stored. Ensure that the fields in the spreadsheet match the questions in your Google Form. After setting up the spreadsheet, go back to your Google Form and click on the ‘Extensions’ tab. From there, select ‘Add-ons’ and search for Pabbly Connect Webhooks to install it.


4. Setting Up the Webhook in Google Sheets

Once the Pabbly Connect Webhooks add-on is installed, you need to perform the initial setup. Click on the ‘Extensions’ tab again, find Pabbly Connect Webhooks, and choose ‘Initial Setup’. Here, paste the webhook URL you copied earlier and specify the trigger column, which typically is the last column where data will be added. using Pabbly Connect

  • Enter the trigger column as G or the relevant final column for your data.
  • Click ‘Submit’ to save the configuration.

After submitting, you can send a test to ensure the setup is working correctly. Once you receive a successful response in Pabbly Connect, your Google Sheets and Google Forms are now linked through Pabbly Connect.


5. Generating Email Content Using Google Generative AI

Now that your Google Forms and Sheets are connected, it’s time to set up the action step using Google Generative AI. In Pabbly Connect, select Google Generative AI as your action application and choose ‘Generate Content’ as the action event. You will need to connect your Google Generative AI account by entering your API key, which you can obtain from the Google AI Studio. using Pabbly Connect

After connecting, you will enter a prompt for generating the email body. This prompt should include dynamic fields from the Google Form responses. For example, you might say, ‘I am giving you some details of a user from a feedback Google Form submission. Write a compelling thank you email based on the feedback description from ABC Company.’

Finally, you will map the relevant fields such as full name, feedback type, and feedback description from the Google Sheets to personalize the email content. Once the content is generated, you can proceed to set up the next action step to send the email via Gmail.


Conclusion: Sending Email via Gmail

In the final step, you will select Gmail as your action application in Pabbly Connect and choose ‘Send Email’ as the action event. Connect your Gmail account and map the recipient’s email address from the Google Sheets. Customize the email subject and sender name, and map the email body generated by Google Generative AI.

Ensure you check out Pabbly Connect to create business automation workflows and reduce manual tasks. Pabbly Connect currently offer integration with 2,000+ applications.

Check out Pabbly Connect – Automate your business workflows effortlessly! Sign Up Free – Start your journey with ease! 10,000+ Video Tutorials – Learn step by step! Join Pabbly Facebook Group – Connect with 21,000+ like minded people!

After completing all the fields, click on ‘Save and Send Test Request’. You should receive a confirmation that the email was sent successfully. This entire process demonstrates how Pabbly Connect can seamlessly integrate Google Forms with Google Generative AI and Gmail to automate email communications based on user feedback submissions.

By following these steps, you can efficiently set up automated email responses for any Google Form submissions using Pabbly Connect, enhancing your customer communication and workflow automation.