Auto-Reply to YouTube Comments Using Google Generative AI and Pabbly Connect

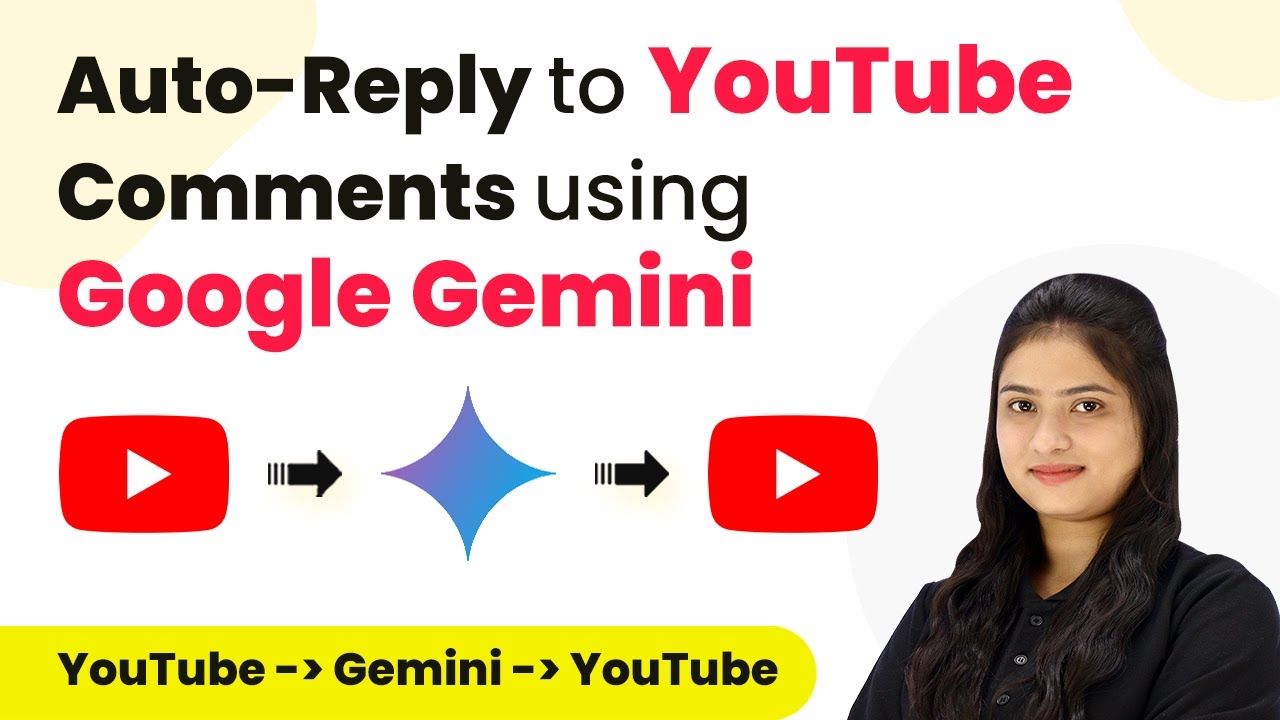
Learn how to auto-reply to YouTube comments using Google Generative AI with Pabbly Connect in this detailed step-by-step tutorial. Discover how to seamlessly connect your essential tools through accessible instructions that make powerful automation available to professionals at every skill level.

Watch Step By Step Video Tutorial Below


1. Setting Up Pabbly Connect for YouTube Comments

To auto-reply to YouTube comments using Google Generative AI, we first need to set up Pabbly Connect. Start by accessing the Pabbly Connect homepage by typing the URL in your browser. You can sign in if you already have an account, or click on ‘Sign Up for Free’ if you are a new user. New users can create an account quickly and get 100 free tasks monthly to explore the platform.

Once logged in, navigate to the ‘All Apps’ section and select Pabbly Connect. Click on ‘Access Now’ to enter the dashboard where you can create workflows. To initiate the auto-reply setup, click on the ‘Create Workflow’ button. You will be prompted to name your workflow, such as ‘Auto Reply to YouTube Comments Using Google Generative AI,’ and select a folder to save it in.


2. Creating the Workflow in Pabbly Connect

After naming your workflow, you will see two main sections: trigger and action. The trigger is the event that starts the workflow, while the action is the response that follows. In this case, the trigger will be YouTube, and the action will be Google Generative AI.

  • Select YouTube as the trigger application.
  • Choose the trigger event as ‘New Comment’ on a video.
  • Click on ‘Connect’ and then ‘Add New Connection’ to link your YouTube account.

After connecting your YouTube account, you will select the specific channel and video from which you want to capture comments. Once set up, this workflow will trigger whenever a new comment is posted on the chosen video, allowing Pabbly Connect to manage the automation seamlessly.


3. Generating Replies with Google Generative AI

With the trigger set, the next step involves generating replies using Google Generative AI, which we will integrate as the action in Pabbly Connect. Select Google Generative AI as the action application and the action event as ‘Generate Content.’ Click on connect and create a new connection by providing your API key from Google AI Studio.

After entering your API key, select the model you want to use for generating replies, such as ‘Gemini 1.0 Pro.’ In the prompt section, you will provide a brief description of your YouTube channel and instruct the AI on how to respond to comments. For example, you might write, ‘Please respond to the following YouTube comment in a friendly manner, encouraging further interaction.’ Map the comment received from the trigger to this prompt to make it dynamic.


4. Posting Replies to YouTube Comments

Once you have generated a reply using Google Generative AI, the next step is to post this reply back to the YouTube comment. In Pabbly Connect, set up another action step where the action application is again YouTube, and the action event is ‘Reply to Comment.’ Since you have already connected to YouTube, you can use the existing connection.

Map the generated reply text and the comment ID from the previous steps. This ensures that the correct reply is posted to the correct comment. After saving and sending a test request, you will receive confirmation that the reply has been successfully posted. This entire process is automated by Pabbly Connect, ensuring that every new comment receives a timely response.


5. Conclusion

In this tutorial, we learned how to auto-reply to YouTube comments using Google Generative AI through Pabbly Connect. By setting up triggers and actions, we can automate responses efficiently, enhancing engagement on our YouTube channel. This integration allows for dynamic and personalized replies to every comment, ensuring that your audience feels valued and heard.

Ensure you check out Pabbly Connect to create business automation workflows and reduce manual tasks. Pabbly Connect currently offer integration with 2,000+ applications.

How to Create Pipedrive Contacts from Elementor Form Submission Using Pabbly Connect

Learn how to create Pipedrive contacts from Elementor form submissions using Pabbly Connect. Follow our step-by-step tutorial for seamless integration. Develop expertise in application integration and learn how to design streamlined automation workflows using proven, simplified approaches.

Watch Step By Step Video Tutorial Below


1. Accessing Pabbly Connect for Integration

To create Pipedrive contacts from Elementor form submissions, you first need to access Pabbly Connect. Start by visiting the Pabbly website and signing in to your account. If you are a new user, you can sign up for free and receive 100 tasks each month.

Once logged in, navigate to the Pabbly Connect dashboard. Here, you will find various applications available. Click on ‘Access Now’ under Pabbly Connect to begin creating your workflow. This platform will facilitate the integration between Elementor and Pipedrive seamlessly.


2. Creating a New Workflow in Pabbly Connect

In this step, you will create a new workflow in Pabbly Connect. Click on the ‘Create Workflow’ button, and you’ll be prompted to name your workflow. Name it ‘Create Pipedrive Contacts from Elementor Form Submission’ and select the folder where you want to save it.

  • Click on ‘Create’ to open the workflow window.
  • Select ‘Elementor’ as the trigger application.
  • Choose ‘New Form Submission’ as the trigger event.

After selecting the trigger, Pabbly Connect will provide you with a webhook URL. This URL is essential for connecting your Elementor form to Pabbly Connect, allowing it to trigger actions based on form submissions.


3. Connecting Elementor to Pabbly Connect

To connect Elementor to Pabbly Connect, you need to copy the provided webhook URL and paste it into your Elementor form settings. Open your WordPress site and navigate to the page where your Elementor form is located. Edit the page with Elementor.

  • Click on the form widget and go to ‘Actions After Submit’.
  • Add an action and select ‘Webhook’.
  • Paste the webhook URL you copied from Pabbly Connect.

After pasting the URL, click on ‘Update’ to save your changes. This connection allows Elementor to send form data to Pabbly Connect whenever a form is submitted.


4. Setting Up Pipedrive Integration in Pabbly Connect

Now that Elementor is connected to Pabbly Connect, you can set up the action to create a Pipedrive contact. In your Pabbly Connect workflow, select ‘Pipedrive’ as the action application.

Choose ‘Create Person’ as the action event. If you haven’t connected your Pipedrive account yet, click on ‘Add New Connection’. You will need to provide an API token, which you can obtain from your Pipedrive account settings. After entering the API token, click on ‘Save’ to connect your Pipedrive account to Pabbly Connect.


5. Mapping Data and Testing the Workflow

With the connection established, you now need to map the data from the Elementor form to Pipedrive fields in Pabbly Connect. This mapping ensures that the correct information is sent to Pipedrive when a form is submitted.

Map the first name, last name, email, and phone number from the Elementor submission. Leave any non-required fields blank. Click on ‘Save’ and then send a test request to verify the integration.

Once the test request is successful, check your Pipedrive account to confirm that a new contact has been created with the submitted details. This completion indicates that the integration between Elementor and Pipedrive via Pabbly Connect is functioning correctly.


Conclusion

This tutorial detailed how to create Pipedrive contacts from Elementor form submissions using Pabbly Connect. By following these steps, you can automate your contact creation process and enhance your workflow efficiency.

Ensure you check out Pabbly Connect to create business automation workflows and reduce manual tasks. Pabbly Connect currently offer integration with 2,000+ applications.

How to Get WhatsApp Message for Updated WordPress Post Using Pabbly Connect

Learn how to automate WhatsApp notifications for updated WordPress posts using Pabbly Connect. Follow our detailed step-by-step tutorial. Explore efficient methods for automating routine tasks with clear, concise instructions suited for both newcomers and experienced professionals.

Watch Step By Step Video Tutorial Below


1. Setting Up Pabbly Connect for WhatsApp Notifications

To get WhatsApp messages for updated WordPress posts, we will use Pabbly Connect. First, access Pabbly Connect by typing ‘Pabbly.com/connect’ in your browser. From here, you can either sign in or sign up for a free account, which gives you 100 tasks each month.

Once logged in, navigate to the dashboard and click on the ‘Create Workflow’ button. Name your workflow as ‘Get WhatsApp Message for Updated WordPress Post’ and save it in a folder named ‘WordPress to WhatsApp Automation’. This step is essential as it sets up the foundation for our automation.


2. Configuring Trigger and Action in Pabbly Connect

In this section, we will configure the trigger and action applications in Pabbly Connect. The trigger application will be WordPress, and the action application will be WhatsApp Cloud API. Start by searching for WordPress in the trigger window and select ‘Post Updated Instant’ as the trigger event.

  • Trigger Application: WordPress
  • Trigger Event: Post Updated Instant

Next, move to the action window and search for WhatsApp Cloud API. Choose ‘Send Template Message’ as the action event. This setup ensures that whenever a post is updated in your WordPress account, a WhatsApp message will be sent automatically.


3. Connecting WordPress to Pabbly Connect

Now, we need to establish a connection between your WordPress account and Pabbly Connect. In the Pabbly Connect interface, you will see a webhook URL. This URL acts as a bridge to connect your WordPress account with Pabbly Connect.

Go to your WordPress dashboard, navigate to Plugins, and add a new plugin called WP Webhooks. Install and activate this plugin. After activation, go to the settings of WP Webhooks and select ‘Send Data’. Here, add the webhook URL from Pabbly Connect for the ‘Post Updated’ trigger. Name it ‘Post Updated’ and save the settings. This ensures that whenever a post is updated, the data is sent to Pabbly Connect.


4. Testing the Integration with Pabbly Connect

After setting up the connection, it’s essential to test whether everything works correctly. In Pabbly Connect, you will see that it is waiting for a webhook response. To test this, go to your WordPress account and edit an existing post. Add some content and click on the update button.

  • Edit an existing post in WordPress
  • Add new content and update the post

Once updated, return to Pabbly Connect. You should see a positive response indicating that the updated post details have been captured. This confirms that the integration is functioning properly and the data is being sent to Pabbly Connect.


5. Sending WhatsApp Notifications for Updated Posts

With the integration tested successfully, it’s time to send WhatsApp notifications. In Pabbly Connect, after receiving the updated post data, you need to set up the WhatsApp Cloud API connection. Click on connect and enter your WhatsApp Cloud API token, phone number ID, and business account ID.

Once connected, select the template you created for WhatsApp notifications and fill in the required fields, such as post title, post link, and updated by details. Make sure to map these fields correctly so that they pull data from the previous step’s response. Finally, click on ‘Save and Send Test Request’ to send a WhatsApp message. You should receive a notification on your WhatsApp confirming the details of the updated post.


Conclusion

Using Pabbly Connect, you can easily automate WhatsApp notifications for updated WordPress posts. This integration streamlines your workflow and keeps you informed about changes in real-time, enhancing your productivity and engagement.

Ensure you check out Pabbly Connect to create business automation workflows and reduce manual tasks. Pabbly Connect currently offer integration with 2,000+ applications.

How to Get WhatsApp Message for Updated WordPress Post Using Pabbly Connect

Learn how to get WhatsApp messages for updated WordPress posts using Pabbly Connect. This tutorial covers step-by-step integration with WhatsApp Cloud API. Follow this definitive guide to creating powerful automated workflows with straightforward, efficiency-focused solutions that save valuable time.

Watch Step By Step Video Tutorial Below


1. Setting Up Pabbly Connect for Integration

To get WhatsApp messages for updated WordPress posts, you first need to access Pabbly Connect. Start by navigating to the Pabbly Connect website and signing in or signing up for a free account. Once you are logged in, you will be directed to the applications page.

From the applications page, click on Pabbly Connect to access your dashboard. To create a new workflow, locate the ‘Create Workflow’ button in the top right corner. Name your workflow something like ‘Get WhatsApp Message for Updated WordPress Post’ and save it in a relevant folder.


2. Configuring the Trigger Application: WordPress

The next step is to configure the trigger application in Pabbly Connect. In your workflow, select WordPress as your trigger application. The trigger event should be set to ‘Post Updated’. This means that the workflow will start whenever an existing post in your WordPress account is updated.

To establish this connection, Pabbly Connect will provide you with a webhook URL. This URL acts as a bridge between your WordPress account and Pabbly Connect. Copy this webhook URL to use in your WordPress settings.

  • Navigate to your WordPress dashboard and go to Plugins.
  • Search for and install the WP Webhooks plugin.
  • Activate the plugin and go to Settings > WP Webhooks.
  • Add the copied webhook URL under the ‘Send Data’ section for the ‘Post Updated’ trigger.

After adding the webhook URL, ensure that you save your settings. This will allow your WordPress account to send updated post data to Pabbly Connect.


3. Testing the Trigger with WordPress

Once the webhook is set up, you need to test the trigger to ensure it works correctly. Go back to Pabbly Connect and check that it is waiting for a webhook response. Now, update a post in your WordPress account to trigger the webhook.

Edit an existing post, add some content, and click on the update button. After updating the post, return to Pabbly Connect to see if the webhook has received the updated post details. You should see the post link, title, and other relevant information in the response.

  • Verify that the post title and content reflect the changes you made.
  • Check for the correct post ID and modification timestamp in the response.

Once you confirm that the trigger is successfully capturing the updated post data, you can proceed to set up the action application.


4. Configuring the Action Application: WhatsApp Cloud API

The next step is to configure the action application in Pabbly Connect. Search for WhatsApp Cloud API as your action application and select the action event ‘Send Template Message’. This will allow you to send a WhatsApp message whenever a post is updated.

To connect WhatsApp Cloud API with Pabbly Connect, you need to enter your WhatsApp business account details. This includes the temporary access token, phone number ID, and WhatsApp business account ID. Make sure you have these details ready from your WhatsApp developer dashboard.

Paste the access token and phone number ID into the respective fields. Enter your WhatsApp business account ID in the appropriate field.

Once you have filled in all required fields, click on save to establish the connection. You are now ready to set up the message template for the WhatsApp notifications.


5. Finalizing the WhatsApp Message Template

In this final step, you will set up the message template that will be sent via WhatsApp. In Pabbly Connect, select the template you created for notifying updates. This template should include placeholders for the post title, link, post ID, and updated by details.

Map the fields from the previous step’s response to the template fields. This ensures that every time a post is updated, the correct information is sent in the WhatsApp message. After mapping the necessary fields, click on ‘Save and Send Test Request’ to send a test message.

Ensure the recipient’s phone number is correctly entered. Check that the message content includes the updated post details.

Once the test is successful, you will receive a WhatsApp message confirming the update, including the post title, link, and other details. This completes your integration, allowing you to receive WhatsApp notifications for any updated posts in your WordPress account.


Conclusion

In this tutorial, we explored how to get WhatsApp messages for updated WordPress posts using Pabbly Connect. By setting up a trigger from WordPress and an action to send messages via WhatsApp Cloud API, you can stay informed about your content updates efficiently. With this automation, you will never miss an important post update again!

Ensure you check out Pabbly Connect to create business automation workflows and reduce manual tasks. Pabbly Connect currently offer integration with 2,000+ applications.

How to Set Up Webhook Inside WhatsApp Cloud API Using Pabbly Connect

Learn how to set up a webhook inside WhatsApp Cloud API using Pabbly Connect. Follow this step-by-step tutorial for seamless integration. Build sophisticated automated workflows in less time than you think. This guide translates complex integrations into straightforward steps for immediate implementation.

Watch Step By Step Video Tutorial Below


1. Setting Up Pabbly Connect for WhatsApp Cloud API

To set up a webhook inside WhatsApp Cloud API, you first need to access Pabbly Connect. This platform acts as a central hub for integrating various applications, including WhatsApp Cloud API. Once logged in, navigate to the trigger window to begin your setup.

In the trigger application section, search for WhatsApp Cloud API. Select it as your trigger application, and then choose the trigger event, which will be the message notification. This event will trigger whenever a new message is sent, delivered, or received through WhatsApp.


2. Configuring the Webhook URL in Pabbly Connect

Once you have selected the trigger event, Pabbly Connect generates a unique webhook URL. This URL acts as a bridge to connect your WhatsApp Cloud API account with Pabbly Connect. You can find this URL in the help desk section for reference.

  • Copy the webhook URL from Pabbly Connect.
  • Navigate to your Meta for Developers dashboard.
  • Go to the WhatsApp configuration settings.

In the configuration settings, you will find an option to edit the webhook settings. Paste the copied webhook URL into the designated field. This step is crucial as it links the WhatsApp Cloud API to Pabbly Connect, enabling data transfer.


3. Verifying the Webhook Setup

After pasting the webhook URL, you need to set a verify token. This token can be obtained from the help desk in Pabbly Connect. Copy the verify token and paste it into the corresponding field in the WhatsApp configuration settings.

Once both the webhook URL and verify token are entered, click on the verify button and then save the settings. This action confirms that the webhook is correctly set up and ready to receive notifications from WhatsApp Cloud API.


4. Subscribing to Messages through Pabbly Connect

With the webhook successfully configured, the next step is to subscribe to message notifications. In the WhatsApp configuration settings, look for the manage option and scroll down to find the subscribe button.

  • Click on the subscribe button to enable message notifications.
  • Confirm the subscription by clicking done when prompted.

After subscribing, your WhatsApp Cloud API account is now linked with Pabbly Connect. This setup ensures that every time a message is sent or received, the details are captured in Pabbly Connect.


5. Testing the Integration with Pabbly Connect

To test your webhook integration, you need to send a WhatsApp message. This action will trigger the webhook and allow you to see if the data is captured correctly in Pabbly Connect. After sending the message, return to Pabbly Connect to check for the webhook response.

Once the message is sent, the details such as message content, sender’s number, and message type will be displayed in Pabbly Connect. This confirms that the integration between WhatsApp Cloud API and Pabbly Connect is functioning as intended.


Conclusion

In this tutorial, we explored how to set up a webhook inside WhatsApp Cloud API using Pabbly Connect. Following these steps allows for seamless integration and real-time message notifications, enhancing communication capabilities for businesses.

Ensure you check out Pabbly Connect to create business automation workflows and reduce manual tasks. Pabbly Connect currently offer integration with 2,000+ applications.

How to Create ClickUp Task for Calendly Invitee Using Pabbly Connect

Learn how to integrate Calendly with ClickUp using Pabbly Connect to automate task creation for invitees. Follow this step-by-step tutorial for seamless integration. Follow this definitive guide to creating powerful automated workflows with straightforward, efficiency-focused solutions that save valuable time.

Watch Step By Step Video Tutorial Below


1. Accessing Pabbly Connect for Integration

To create a ClickUp task from a Calendly invitee, you need to access Pabbly Connect. Start by searching for Pabbly Connect in your browser and navigating to its landing page. Here, you will find options to either sign in or sign up for free.

If you are a new user, click on the ‘Sign Up for Free’ option, which grants you 100 tasks per month. Existing users can simply sign in to access their dashboard. Once logged in, select the ‘Access Now’ button for Pabbly Connect, which will enable you to create workflows that integrate Calendly and ClickUp.


2. Creating a Workflow in Pabbly Connect

After accessing Pabbly Connect, the next step is to create a workflow. Click on the ‘Create Workflow’ button and name your workflow as ‘How to Create ClickUp Task for Calendly Invitee’. Choose the folder where you want to save this workflow, such as ‘Automations’.

  • Click on the ‘Create’ button to finalize your workflow name.
  • This opens the workflow window where you can set triggers and actions.
  • Select Calendly as the trigger application for your workflow.

In the trigger event section, select ‘Invite Created’. This means that whenever a new invite is created in your Calendly account, the workflow will be triggered. Click on ‘Connect’ to establish a connection between Calendly and Pabbly Connect.


3. Setting Up the Trigger for Calendly

Once you have selected Calendly as the trigger application, you will need to create a new connection. If you have already connected Calendly, you can select the existing connection. Otherwise, click on ‘Add a New Connection’. After logging into your Calendly account, grant necessary permissions.

Next, choose the organization you want to use from the dropdown menu and select the user as ‘Demo User’. Click on ‘Save and Send Test Request’ to capture the response from your Calendly account. You will need to perform a test submission to see if Pabbly Connect captures the invite details correctly.

  • Open your Calendly account and copy the booking link.
  • Schedule a meeting by entering the necessary details like date, time, and attendee information.
  • Check if the details are captured in Pabbly Connect.

If the invite details appear correctly, it confirms that the trigger is set up successfully.


4. Setting Up Action for ClickUp

Now that the trigger is successfully configured, it is time to set up the action in Pabbly Connect. Choose ClickUp as the action application and select ‘Create Task’ as the action event. Click on ‘Connect’ to establish a connection with your ClickUp account.

If you have already connected ClickUp, select the existing connection. Otherwise, click on ‘Add a New Connection’. You will need to provide your ClickUp API token, which can be found in your ClickUp account under settings. Make sure to copy and paste the token into Pabbly Connect.

Select your workspace and the space where the task should be created. Specify the folder name as ‘Meetings’ and the list name as ‘Calendly’. Map the task name and description from the trigger response.

By mapping these details, the task created in ClickUp will dynamically reflect the invitee’s information every time a new invite is created.


5. Finalizing the Integration and Testing

To finalize your integration, you need to set the due date and start date for the task. Use the DateTime Formatter feature in Pabbly Connect to convert the time from UTC to milliseconds. Add a new action step, select ‘DateTime Formatter’, and set the action event to format the date with the desired timezone.

Map the start time from the trigger response, and after receiving a positive response, repeat the same process for the end time. This ensures that both the start and end times are accurately formatted. Finally, return to the ClickUp action step and map the due date and start date from the DateTime Formatter response.

Set the task status to ‘Open’. Click on ‘Save and Send Test Request’ to check if the task is created successfully. Verify the task in your ClickUp account to ensure everything is working as intended.

Once the task is confirmed to be created in ClickUp, your integration is successfully set up and ready to automate the task creation process for every new Calendly invitee.


Conclusion

In this tutorial, we explored how to use Pabbly Connect to create ClickUp tasks for Calendly invitees seamlessly. By following the steps outlined, you can automate your workflow and enhance productivity. This integration not only saves time but also ensures that you never miss a meeting detail.

Ensure you check out Pabbly Connect to create business automation workflows and reduce manual tasks. Pabbly Connect currently offer integration with 2,000+ applications.

How to Create Content using Google Sheets, Google Generative AI and Google Docs with Pabbly Connect

Learn how to create content using Google Sheets, Google Docs, and Google Generative AI with Pabbly Connect for seamless integration. Implement the precise methodologies leading organizations use to automate repetitive tasks, illustrated with practical examples designed for immediate application.

Watch Step By Step Video Tutorial Below


1. Accessing Pabbly Connect for Google Integration

To create content using Google Sheets, Google Docs, and Google Generative AI, start by accessing Pabbly Connect. This platform enables seamless integration between these applications, allowing for automated workflows.

First, visit the Pabbly Connect website. If you’re a new user, click on ‘Sign Up Free’ to create an account and receive 100 free tasks every month. Existing users can simply log in to their dashboard.


2. Creating a Workflow in Pabbly Connect

After logging into Pabbly Connect, you need to create a workflow to automate your content creation process. Click on the ‘Create Workflow’ button located in the top right corner of the dashboard.

  • Enter a name for your workflow, such as ‘Create Content using Google’.
  • Select a folder to save your workflow.
  • Click on the ‘Create’ button to finalize.

Once your workflow is created, you will be directed to the workflow window where you can set up triggers and actions for your automation process. This is where Pabbly Connect shines by allowing you to connect Google Sheets as the trigger application.


3. Setting Up Trigger in Google Sheets

In this step, you will set Google Sheets as the trigger application in Pabbly Connect. Select Google Sheets as your trigger application and choose the event type as ‘New or Updated Spreadsheet Row’. This event will initiate the automation whenever a new prompt is added.

To connect your Google Sheets, you will need to authorize Pabbly Connect to access your Google account. Follow the prompts to log in and provide the necessary permissions. After successfully connecting, select the specific spreadsheet and worksheet you want to monitor.


4. Generating Content with Google Generative AI

Next, set Google Generative AI as your action application in Pabbly Connect. Choose the action event as ‘Generate Content’. This step will allow you to create content based on the prompts received from Google Sheets.

In the action setup, you will need to enter the API key for Google Generative AI. This key is crucial for authenticating your requests. After entering the API key, map the data from your Google Sheets to the required fields in Google Generative AI.

  • Map the prompt text from Google Sheets to the corresponding field in Google Generative AI.
  • Select the model you want to use for content generation.
  • Click on the ‘Save and Send Test Request’ button to test the integration.

After testing, you should receive a response with the generated content, confirming that the integration is working successfully.


5. Saving Generated Content to Google Docs

Finally, to save the generated content, set Google Docs as your next action application in Pabbly Connect. Select the action event as ‘Create Document’. This will create a new document in Google Docs with the content generated from Google Generative AI.

In the setup for Google Docs, you will need to specify the document name and location. Map the title and content received from Google Generative AI to the respective fields in Google Docs.

After configuring these settings, click on the ‘Save’ button to finalize the action. You can then test the entire workflow to ensure that everything is functioning as expected, from Google Sheets to Google Docs via Pabbly Connect.


Conclusion

In this tutorial, we explored how to create content using Google Sheets, Google Docs, and Google Generative AI with the help of Pabbly Connect. This integration allows for a seamless workflow that automates content generation efficiently.

Ensure you check out Pabbly Connect to create business automation workflows and reduce manual tasks. Pabbly Connect currently offer integration with 2,000+ applications.

How to Create Microsoft Office 365 Events from Zoho CRM Records Using Pabbly Connect

Learn how to automate event creation in Microsoft Office 365 from Zoho CRM records using Pabbly Connect. Step-by-step guide to streamline your workflow. Build sophisticated automated workflows in less time than you think. This guide translates complex integrations into straightforward steps for immediate implementation.

Watch Step By Step Video Tutorial Below


1. Accessing Pabbly Connect for Integration

To create Microsoft Office 365 events from Zoho CRM records, start by accessing Pabbly Connect. Simply search for Pabbly in your browser and open its landing page. Here, you’ll find options to either sign in or sign up for free. New users can register for a free account to enjoy 100 tasks each month.

As an existing user, click on the sign-in button. Once logged in, navigate to the dashboard where you will find various Pabbly applications. For this integration, select Pabbly Connect by clicking on the ‘Access Now’ button. This is your gateway to creating automated workflows between Zoho CRM and Microsoft Office 365.


2. Creating a Workflow in Pabbly Connect

After accessing Pabbly Connect, the next step is to create a workflow. Click on the ‘Create Workflow’ button, which will prompt you to name your workflow and select a folder for saving it. Name your workflow as ‘Create Microsoft Office 365 Event from Zoho CRM Record’ and choose the folder labeled ‘Automations’.

  • Click on the ‘Create’ button to proceed.
  • This opens the workflow window where you can set triggers and actions.

This window is crucial for automation as it defines the trigger (the event that starts the workflow) and the action (what happens as a result). In this case, the trigger will be from Zoho CRM, and the action will be to create an event in Microsoft Office 365.


3. Setting Up Zoho CRM as the Trigger

Within the workflow window of Pabbly Connect, select Zoho CRM as your trigger application. Choose ‘New Module Entry’ as the trigger event. Click on the ‘Connect’ button to establish a link between Zoho CRM and Pabbly Connect.

You will be prompted to add a new connection or select an existing one. If you haven’t previously connected your Zoho CRM account, click on ‘Add a New Connection’. Enter your Zoho CRM domain and click on ‘Save’. Grant the necessary permissions for Pabbly Connect to access your Zoho CRM data. This step ensures that your records can be pulled into the workflow.


4. Configuring Microsoft Office 365 Action

Now that Zoho CRM is set up as the trigger, the next step involves configuring Microsoft Office 365 as the action application in Pabbly Connect. Search for Microsoft Office 365 and select it. Choose ‘Create Event in Calendar’ as the action event.

Click on ‘Connect’ and again, if you have not connected your Office 365 account, you will need to add a new connection. Follow the prompts to grant permissions. Then, select the calendar where the event will be created. This integration allows you to automatically create calendar events based on new entries in your Zoho CRM.

  • Map the details from the Zoho CRM trigger, such as event title and date.
  • Set the start and end times, and any additional details like reminders.

Once all fields are filled out, you can click on ‘Save and Send Test Request’ to ensure everything is functioning correctly. This will create a test event in your Microsoft Office 365 calendar.


5. Testing and Verifying the Integration

After setting up both Zoho CRM and Microsoft Office 365 in Pabbly Connect, it’s important to test the integration. Create a new meeting in Zoho CRM with all required details. Once saved, Pabbly Connect will automatically trigger the workflow, capturing the new record and sending it to Microsoft Office 365.

To verify, check your Microsoft Office 365 calendar for the newly created event. You should see the event reflecting the details entered in Zoho CRM. This confirms that the integration is successful and functioning as intended.

For further testing, create additional meetings in Zoho CRM and observe if events are consistently created in Microsoft Office 365. This automation significantly streamlines the process, saving you time and reducing manual entry errors.


Conclusion

In this tutorial, we explored how to create Microsoft Office 365 events from Zoho CRM records using Pabbly Connect. By automating this process, you enhance efficiency and ensure timely event creation based on your CRM data. With just a few steps, you can streamline your workflow and focus on more critical tasks.

Ensure you check out Pabbly Connect to create business automation workflows and reduce manual tasks. Pabbly Connect currently offer integration with 2,000+ applications.

How to Set Up Webhook Inside Google Forms Using Pabbly Connect

Learn how to set up a webhook inside Google Forms using Pabbly Connect for seamless data integration and automation. Follow this definitive guide to creating powerful automated workflows with straightforward, efficiency-focused solutions that save valuable time.

Watch Step By Step Video Tutorial Below


1. Setting Up Pabbly Connect for Google Forms

To set up a webhook inside Google Forms, you first need to access Pabbly Connect. This platform serves as the integration tool that connects your Google Forms with other applications. Start by logging into your Pabbly Connect account and navigating to the dashboard.

Once in the dashboard, click on the ‘Create Workflow’ button. This action will allow you to start the integration process. You will then be prompted to name your workflow, which helps you identify it later.


2. Selecting Google Forms as the Trigger Application

In this step, you will select Google Forms as the trigger application within Pabbly Connect. Click on the trigger window and search for ‘Google Forms.’ Once found, select it to set it as your trigger application.

  • Choose the trigger event: ‘New Response Received’.
  • This event will activate whenever a new form response is submitted.

After selecting the trigger event, Pabbly Connect will provide you with a webhook URL. This URL is crucial as it will connect your Google Forms to Pabbly Connect, enabling data transfer.


3. Linking Google Forms to Pabbly Connect

Now, you need to link your Google Forms to Pabbly Connect. Open your Google Form and navigate to the responses tab. Click on the ‘Link to Sheets’ option to create a new Google Sheet for storing responses.

In the Google Sheet, ensure that the columns correspond to the fields in your Google Form. This setup allows Pabbly Connect to accurately capture the data. After creating the sheet, return to Pabbly Connect and copy the webhook URL provided earlier.

  • Paste the webhook URL into the form settings under ‘Response Destination’.
  • Select the appropriate column for your trigger data.

After setting this up, click on ‘Submit’ in your Google Form settings. This action finalizes the connection between Google Forms and Pabbly Connect.


4. Testing the Integration with Pabbly Connect

Once the setup is complete, it’s essential to test the integration. Go back to your Google Form and fill out a sample response. After submitting, you will check if the data appears in Pabbly Connect.

In the Pabbly Connect dashboard, refresh the page to see if the new response appears in the webhook response section. This step verifies that the integration is working correctly and that data from Google Forms is being captured accurately.

Ensure that all fields are populated correctly in the Google Sheet. Check for any discrepancies in the data format.

After confirming the data transfer, your Google Forms and Pabbly Connect integration is successfully set up and ready for use.


5. Finalizing and Utilizing the Integration

With the integration finalized, you can now utilize the data captured from Google Forms through Pabbly Connect. You can send this data to various applications based on your needs.

In Pabbly Connect, navigate to the action window to select the application where you want to send the data. This could be any application supported by Pabbly Connect, allowing you to automate further actions based on the form submissions.

Choose the desired application from the list. Map the fields from Google Forms to the corresponding fields in the selected application.

After mapping the fields, click on ‘Submit’ to finalize the action setup. Now, every time a form is submitted, Pabbly Connect will automatically send the data to your chosen application, streamlining your workflow.


Conclusion

Setting up a webhook inside Google Forms using Pabbly Connect allows for efficient data integration and automation. This process captures form responses and sends them to various applications seamlessly.

Ensure you check out Pabbly Connect to create business automation workflows and reduce manual tasks. Pabbly Connect currently offer integration with 2,000+ applications.

How to Send Automated SMS to Website Leads Using Pabbly Connect

Learn how to send automated SMS to website leads using Pabbly Connect. This detailed tutorial covers all the steps for seamless integration. This comprehensive guide reveals exactly how to connect your applications and automate repetitive tasks — accessible for professionals of all technical backgrounds.

Watch Step By Step Video Tutorial Below


1. Accessing Pabbly Connect to Send Automated SMS

To send automated SMS to website leads, first access Pabbly Connect. This platform allows you to connect various applications seamlessly. Start by visiting the Pabbly Connect homepage and either sign in or sign up if you are a new user.

Once logged in, you will see the Pabbly Connect dashboard. Here, you can create a new workflow that will automate the SMS sending process. Click on the ‘Create Workflow’ button located at the top right corner of the dashboard.


2. Creating a Workflow in Pabbly Connect

To create a workflow in Pabbly Connect, you need to name it appropriately. For this case, you can name it ‘Send Automated SMS to Website Leads’. After naming, select a folder for better organization, or create a new one if needed.

  • Select your workflow name.
  • Choose a folder for organization.
  • Click on ‘Create’ to finalize your workflow.

After creating the workflow, you will see the trigger and action setup. For this automation, the trigger application will be ‘Webhook by Pabbly’. This will capture the data submitted from your website form.


3. Setting Up the Trigger in Pabbly Connect

In this step, you will configure the trigger in Pabbly Connect. Choose ‘Webhook by Pabbly’ as your trigger application and select the event as ‘Catch Webhook’. This will allow you to receive data from your website form submissions.

After selecting the trigger, Pabbly Connect will provide you with a unique webhook URL. Copy this URL, as you will need to paste it into your website form settings to establish the connection.


4. Configuring Your Website Form for SMS Automation

Now, go to your website form builder. For this tutorial, let’s assume you are using Elementor. Edit your form and look for the ‘Actions After Submit’ option. Click on it to add a new action. using Pabbly Connect

  • Select ‘Webhook’ from the list of actions.
  • Paste the copied webhook URL from Pabbly Connect.
  • Save the changes to your form.

This step ensures that every time a user submits the form, the data will be sent to the webhook, triggering the automation in Pabbly Connect.


5. Sending SMS Using Pabbly Connect

After configuring the webhook, it’s time to set up the action in Pabbly Connect. Choose ‘Twilio’ as the action application and select the event ‘Send SMS’. This will allow you to send SMS messages based on the data received from the webhook.

Fill in the required fields such as the sender number, recipient number, and the message body. You can map the recipient’s number dynamically from the webhook data to personalize the SMS sent to each lead.

Once you have completed the setup, test the workflow by submitting a test entry in your website form. Check if the SMS is sent successfully to the specified number. If everything is set up correctly, you will receive an SMS confirming the submission.


Conclusion

In this tutorial, we explored how to send automated SMS to website leads using Pabbly Connect. By following the steps outlined, you can easily integrate your website forms with SMS services to enhance customer communication.

Ensure you check out Pabbly Connect to create business automation workflows and reduce manual tasks. Pabbly Connect currently offer integration with 2,000+ applications.