Integrate Google Drive with Google Sheets Using Pabbly Connect: A Step-by-Step Guide

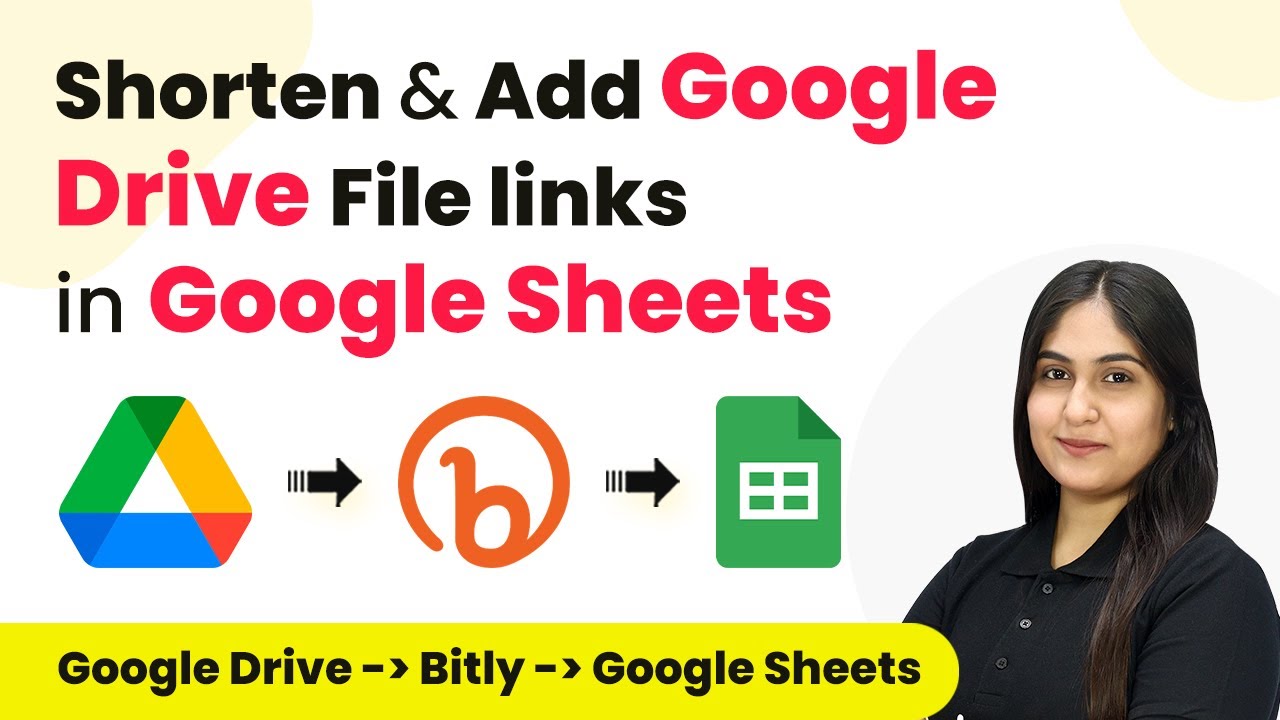
Learn how to integrate Google Drive with Google Sheets using Pabbly Connect to automate URL shortening and data management. Follow this detailed tutorial now! This comprehensive guide reveals exactly how to connect your applications and automate repetitive tasks — accessible for professionals of all technical backgrounds.

Watch Step By Step Video Tutorial Below


1. Accessing Pabbly Connect for Integration

To start using Pabbly Connect, first visit the official website. If you are a new user, click on ‘Sign Up Free’ to create an account, which gives you access to 300 tasks per month. Existing users can simply sign in to their accounts.

After signing in, you will be directed to the dashboard of Pabbly Connect. Here, you can view all available applications. To build your workflow, you need to create a new workflow by clicking on the ‘Create Workflow’ button located at the top right corner of the dashboard.


2. Creating a Workflow in Pabbly Connect

In the workflow creation dialog, name your workflow, such as ‘Shorten and Add Google Drive File Link in Google Sheets’. You can also select a folder for your workflow, which helps in organizing your tasks within Pabbly Connect.

  • Click on ‘Create’ to finalize your workflow setup.
  • Understand the two main principles of automation: Trigger and Action.
  • Set your trigger as Google Drive with the event as ‘New File in a Specific Folder’.

Once you set the trigger, Pabbly Connect will listen for any new files uploaded in your specified Google Drive folder. This initiates the automation process.


3. Connecting Google Drive to Pabbly Connect

To connect Google Drive to Pabbly Connect, click on the ‘Connect’ button next to the Google Drive option. If it’s your first time, select ‘Add New Connection’. You’ll be prompted to sign in with your Google account and allow Pabbly Connect access to your Google Drive.

After successful authorization, you need to select the specific folder where new files will be uploaded. For instance, if you have a folder named ‘New Files’, select that folder. This allows Pabbly Connect to monitor it for any new uploads.


4. Setting Up Bitly for URL Shortening

The next step involves connecting Bitly to Pabbly Connect. Select Bitly as your action application and choose the action event as ‘Shorten Link’. Similar to Google Drive, click on ‘Connect’ to build the connection with your Bitly account.

  • If you already have a Bitly account connected, select the existing connection.
  • Authorize Pabbly Connect to access your Bitly account.
  • Map the long URL from the previous step into the Bitly action.

After mapping the URL, click on ‘Save and Send Test Request’. This will generate a shortened URL for the uploaded file, completing the URL shortening process.


5. Adding Data to Google Sheets

The final step is to add the shortened URL and file details to Google Sheets. Select Google Sheets as your action application and choose ‘Add a New Row’ as the action event. Click on ‘Connect’ to link Google Sheets with Pabbly Connect.

After connecting, select the spreadsheet where you want to add the data. For example, if your spreadsheet is named ‘File Links’, choose that. Then, map the required fields such as file name, long URL, and short URL from the previous steps.

Click on ‘Save and Send Test Request’ to complete the setup. You can now check your Google Sheets to see if the new file details have been added successfully. This demonstrates how Pabbly Connect effectively automates the process of managing file links.


Conclusion

This tutorial demonstrated how to integrate Google Drive with Google Sheets using Pabbly Connect. By automating the URL shortening and data management process, you enhance efficiency and organization. Follow these steps to streamline your workflows effectively.

Ensure you check out Pabbly Connect to create business automation workflows and reduce manual tasks. Pabbly Connect currently offer integration with 2,000+ applications.

How to Use Pabbly Connect for Invoice Automation with Xero

Learn how to automate invoice creation in Xero using Pabbly Connect with Shopify, WooCommerce, Google Sheets, and Stripe. Step-by-step guide included. Transform complex automation concepts into accessible, actionable steps that eliminate unnecessary manual work while maximizing existing application capabilities.

Watch Step By Step Video Tutorial Below


1. Accessing Pabbly Connect for Invoice Automation

To begin using Pabbly Connect for invoice automation with Xero, you first need to access the Pabbly Connect platform. Simply search for ‘Pabbly Connect’ in your browser, which will lead you to the Pabbly Connect landing page.

On this page, you have two options: sign in or sign up for free. If you are new to Pabbly Connect, click on the ‘Sign Up for Free’ button, which takes just two minutes and grants you 100 free tasks every month.


2. Creating Workflows in Pabbly Connect

After logging into Pabbly Connect, you will see the dashboard. To create a new workflow, click on the ‘Create Workflow’ button. This is where you will set up your automations for generating invoices in Xero.

  • Click on ‘Create Workflow’
  • Name your workflow for easy identification
  • Set up the trigger and action applications

Once you have created your workflow, you can proceed to set up the connections between Shopify, WooCommerce, Google Sheets, Stripe, and Xero. Each connection will automate the invoice generation process based on specific triggers.


3. Automating Invoices from Shopify Using Pabbly Connect

To automate invoice creation from Shopify, you will use Pabbly Connect to link Shopify and Xero. The trigger event will be ‘New Order’ from Shopify, which means that every time a new order is placed, it will trigger the workflow.

In the action application, select Xero and set the action event to ‘Create Invoice.’ You will then map the order details from Shopify to the invoice fields in Xero. This mapping ensures that all relevant order information is included in the invoice.


4. Automating Invoices from Google Sheets Using Pabbly Connect

For automating invoices from Google Sheets, start by connecting your Google Sheets account in Pabbly Connect. Set the trigger event to ‘New or Updated Spreadsheet Row.’ This means every time a new row is added for an order, it will trigger the workflow to create an invoice.

  • Select the specific Google Sheet containing your order data
  • Map the order details from Google Sheets to the invoice fields in Xero

After mapping the details, click on the ‘Send Test Request’ button to generate an invoice in Xero automatically. This automation streamlines the process of invoice generation based on your order data maintained in Google Sheets.


5. Automating Invoices from WooCommerce Using Pabbly Connect

For WooCommerce, set up a similar workflow using Pabbly Connect. The trigger application will be WooCommerce, with the trigger event set to ‘New Order Created.’ This setup ensures that every new order from your WooCommerce store triggers an invoice creation in Xero.

In the action application, select Xero and choose the ‘Create Invoice’ action event. Map the order details from WooCommerce to the invoice fields in Xero, ensuring all necessary information is included for accurate invoicing.


6. Automating Invoices from Stripe Using Pabbly Connect

Finally, to automate invoice generation from Stripe payments, use Pabbly Connect to set the trigger application to Stripe with the event ‘Checkout Completed.’ This means whenever a payment is completed, it will trigger the invoice creation.

Before creating the invoice in Xero, you will need to format the payment amount using the ‘Number Format by Pabbly’ tool to convert the smallest currency unit to the required format. After formatting, map all payment details to the invoice fields in Xero and send the test request to generate the invoice.


Conclusion

In this tutorial, we explored how to use Pabbly Connect for invoice automation with Xero. By integrating Shopify, WooCommerce, Google Sheets, and Stripe, you can streamline the invoice generation process, saving time and effort in your business operations.

Ensure you check out Pabbly Connect to create business automation workflows and reduce manual tasks. Pabbly Connect currently offer integration with 2,000+ applications.

How to Create GoZen Growth Contact for Tally Forms Submission Using Pabbly Connect

Learn how to integrate Tally Forms with GoZen Growth using Pabbly Connect for seamless contact creation. Follow our step-by-step tutorial for efficient automation. Discover how to seamlessly connect your essential tools through accessible instructions that make powerful automation available to professionals at every skill level.

Watch Step By Step Video Tutorial Below


Accessing Pabbly Connect for Tally Forms Submission

To create a GoZen Growth contact for Tally forms submission, we start by accessing Pabbly Connect. This platform enables seamless integration between Tally and GoZen Growth CRM. Simply visit the Pabbly website and click on the ‘Sign In’ option if you already have an account, or choose ‘Sign Up for Free’ if you are a new user.

Once logged in, you will see the dashboard with various Pabbly applications. Click on ‘Access Now’ for Pabbly Connect. This will lead you to the workflow creation area where you can set up the automation for Tally forms submissions.


Creating a Workflow in Pabbly Connect

In this section, we will create a workflow in Pabbly Connect. Click on the ‘Create Workflow’ button to begin. You will be prompted to name your workflow; enter ‘Create GoZen Contact for Tally Form Submission’ and select the folder for saving it, such as ‘Automations’.

Next, you will see the workflow window which includes a trigger and action setup. The trigger is the event that starts the workflow, while the action is what follows. For our integration, we will select Tally as the trigger application and choose ‘New Response’ as the trigger event. This means that every time a new response is submitted in Tally, the workflow will be activated.

  • Select Tally as the trigger application.
  • Choose ‘New Response’ as the trigger event.
  • Copy the webhook URL provided by Pabbly Connect.

After copying the webhook URL, you will need to paste it into your Tally account to establish the connection. This ensures that every time a form is submitted, the data is sent to Pabbly Connect.


Connecting Tally with Pabbly Connect

To connect Tally with Pabbly Connect, navigate to your Tally account and select the form you wish to integrate. Go to the ‘Integrations’ section and find the Webhooks option. Here, paste the webhook URL you copied earlier and click on ‘Connect’. This action establishes the link between Tally and Pabbly Connect.

Once connected, Tally will display a message indicating that it is waiting for a webhook response. To test this, you need to submit a test response through your Tally form. Fill in the necessary details such as name, email, and course registration, and submit the form. This action will trigger the webhook and send the data to Pabbly Connect.

  • Fill in the test response in your Tally form.
  • Click on ‘Register’ to submit the form.
  • Check Pabbly Connect for the captured response.

After submitting, return to Pabbly Connect to verify that the response has been captured successfully. This confirms that Tally is properly connected to your workflow.


Adding Contact in GoZen Growth via Pabbly Connect

The next step is to set up the action in Pabbly Connect to add the contact to GoZen Growth. Select GoZen Growth as the action application and choose ‘Add Contact V2’ as the action event. This action allows you to create a new contact in your GoZen Growth CRM based on the data received from Tally.

You will need to connect your GoZen Growth account to Pabbly Connect. If you haven’t connected it yet, click on ‘Add New Connection’. You will be prompted to enter an API key, which you can generate from your GoZen account under the settings section. After entering the API key, click on ‘Save’ to establish the connection.

Select GoZen Growth as the action application. Choose ‘Add Contact V2’ as the action event. Enter the API key from your GoZen account.

Once connected, you will need to map the fields from the Tally response to the corresponding fields in GoZen Growth. This mapping ensures that the correct data is sent to create a new contact. After mapping the fields, click on ‘Save and Send Test Request’ to confirm that the contact has been added successfully.


Verifying Contact Creation in GoZen Growth

After completing the setup, it is essential to verify that the new contact has been created in GoZen Growth. You can do this by navigating to the ‘Audience’ section in your GoZen account. Refresh the page to see the newly created contact based on the test submission you made through Tally.

If the integration is successful, you will see the contact details displayed, including the name, email, and status. This confirms that Pabbly Connect has effectively automated the process of adding contacts from Tally forms to GoZen Growth.

To ensure everything works in real-time, you can perform additional test submissions through your Tally form and check if new contacts are created in GoZen Growth each time. This functionality highlights the efficiency of using Pabbly Connect for automation.


Conclusion

In this tutorial, we demonstrated how to create a GoZen Growth contact for Tally forms submission using Pabbly Connect. This process allows you to automate contact creation efficiently, ensuring that you never lose a lead. By following the steps outlined, you can set up this integration seamlessly and enhance your CRM capabilities.

Ensure you check out Pabbly Connect to create business automation workflows and reduce manual tasks. Pabbly Connect currently offer integration with 2,000+ applications.

How to Schedule & Send WhatsApp Messages from Google Sheets using Pabbly Connect and Ultra Message

Learn how to automate WhatsApp messages from Google Sheets using Pabbly Connect and Ultra Message. Follow this step-by-step tutorial to streamline your communication. Implement the precise methodologies leading organizations use to automate repetitive tasks, illustrated with practical examples designed for immediate application.

Watch Step By Step Video Tutorial Below


Accessing Pabbly Connect for WhatsApp Messaging

To schedule and send WhatsApp messages using Pabbly Connect, start by accessing the platform. Visit the Pabbly Connect website and either sign in if you are an existing user or click on the ‘Sign up for free’ button to create a new account. using Pabbly Connect

Once signed in, you will have access to the dashboard where you can create workflows. Pabbly Connect allows you to automate tasks effectively, linking Google Sheets with WhatsApp via Ultra Message without any coding required.


Creating a Workflow in Pabbly Connect

After logging into Pabbly Connect, click on the ‘Create Workflow’ button. Name your workflow something descriptive, like ‘Schedule and Send WhatsApp Messages from Google Sheets.’ This name will help you identify the workflow later. using Pabbly Connect

Next, select a folder to save your workflow. This organization helps keep your automations tidy. Pabbly Connect facilitates the creation of workflows that automate the messaging process, ensuring messages are sent on a specified schedule.


Setting Up the Trigger for Scheduling

In this step, you will set the trigger for your automation. Select ‘Schedule by Pabbly’ as your trigger application. This feature enables you to specify how often your workflow runs. using Pabbly Connect

  • Choose to run the workflow on the 25th of every month.
  • Set the time for the workflow to trigger at 10:00 AM.

Once you save these settings, Pabbly Connect will automatically schedule the workflow to send messages on the specified date and time each month.


Fetching Data from Google Sheets

Now it’s time to connect Google Sheets to your workflow. Select Google Sheets as your action application and choose the action event ‘Get Rows’. This allows Pabbly Connect to retrieve customer details from your Google Sheets. using Pabbly Connect

  • Connect your Google Sheets account by clicking on ‘Add New Connection’.
  • Authorize access by selecting your Google account and allowing permissions.
  • Specify the spreadsheet and the range (A2:C5) to capture customer data.

Pabbly Connect will now fetch the relevant customer details, which will be used in the messaging process later on.


Sending Messages via Ultra Message

In this final step, set up the action to send messages using Ultra Message. Select Ultra Message as your action application and choose the action event ‘Send Message’. using Pabbly Connect

To establish this connection, you will need to provide your instance ID and token from your Ultra Message account. After entering these details, map the phone number and message body using the data fetched from Google Sheets.

Your message can be customized to include customer names and other details, making it feel personal. Once everything is mapped correctly, Pabbly Connect will handle the sending of WhatsApp messages automatically every month.


Conclusion

Using Pabbly Connect to schedule and send WhatsApp messages from Google Sheets is a powerful way to automate your communication. This integration allows you to efficiently manage subscription renewals and maintain customer relations seamlessly.

Ensure you check out Pabbly Connect to create business automation workflows and reduce manual tasks. Pabbly Connect currently offer integration with 2,000+ applications.

How to Send SMS for Zoho Forms Submission using Twilio with Pabbly Connect

Learn how to send SMS notifications for Zoho Forms submissions using Pabbly Connect and Twilio in this detailed step-by-step tutorial. This comprehensive guide reveals exactly how to connect your applications and automate repetitive tasks — accessible for professionals of all technical backgrounds.

Watch Step By Step Video Tutorial Below


1. Accessing Pabbly Connect for SMS Automation

To send SMS notifications for Zoho Forms submissions, first, access Pabbly Connect. Open your browser and navigate to the Pabbly Connect landing page. If you are a new user, click ‘Sign up for free’ to create an account and receive 100 free tasks monthly.

As an existing user, click ‘Sign in’ to enter your account. Once logged in, you will see various Pabbly applications. Click on ‘Access Now’ for Pabbly Connect to begin the integration process.


2. Creating a Workflow in Pabbly Connect

After accessing Pabbly Connect, create a workflow by clicking the ‘Create Workflow’ button. You will be prompted to name your workflow and select a folder. Name it ‘How to Send SMS for Zoho Form Submission using Twilio’ and save it in the ‘Automations’ folder.

  • Click on ‘Create’ to open the workflow window.
  • Select ‘Zoho Forms’ as your trigger application.
  • Choose ‘New Form Submitted’ as the trigger event.

This setup allows Pabbly Connect to listen for new submissions from your Zoho Forms account, enabling automated SMS notifications.


3. Connecting Zoho Forms to Pabbly Connect

To connect Zoho Forms to Pabbly Connect, you will receive a webhook URL after selecting your trigger. Copy this URL and navigate to your Zoho Forms account. Select the form you wish to automate, such as ‘KK Travelers,’ and go to the ‘Integrations’ tab.

  • Choose ‘Webhooks’ from the left sidebar.
  • Paste the copied webhook URL into the URL field.
  • Set the content type to ‘application/json’ and authorization type to ‘None’.

After saving the webhook, go back to Pabbly Connect and click on ‘Test Submission’ to ensure the connection is working correctly.


4. Mapping Data from Zoho Forms to Twilio in Pabbly Connect

Now that Zoho Forms is connected, it’s time to set up the action step in Pabbly Connect. For the action application, select ‘Twilio’ and choose ‘Send SMS Message’ as the action event. Click ‘Connect’ to link your Twilio account.

You will need to provide your Twilio Account SID and Authorization Token. Copy these from your Twilio account and paste them into the respective fields in Pabbly Connect. After saving the connection, you can set up the SMS body.

Enter a message body, including placeholders for dynamic data. Map fields from the Zoho Forms submission to the SMS body for personalization.

This mapping ensures that every new form submission sends a personalized SMS to the lead using Pabbly Connect and Twilio.


5. Testing the Integration for SMS Notifications

With everything set up, it’s essential to test the integration. Go back to your Zoho Forms and submit a test entry. After submission, check Pabbly Connect to see if it captured the response correctly.

Once you confirm that the data has been captured, click ‘Save and Send Test Request’ in the Twilio action step. If successful, you should receive an SMS to the designated phone number, confirming the booking details.

Repeat the test with different entries to ensure the workflow is functioning as intended. This process demonstrates how Pabbly Connect effectively automates SMS notifications based on Zoho Forms submissions.


Conclusion

In this tutorial, we detailed how to send SMS notifications for Zoho Forms submissions using Pabbly Connect and Twilio. By following these steps, you can automate your customer notifications efficiently.

Ensure you check out Pabbly Connect to create business automation workflows and reduce manual tasks. Pabbly Connect currently offer integration with 2,000+ applications.

Integrate Telegram with GoHighLevel Using Pabbly Connect: A Step-by-Step Guide

Learn how to integrate Telegram with GoHighLevel using Pabbly Connect. This step-by-step tutorial covers all necessary actions for seamless automation. Explore systematic approaches to creating efficient automation solutions that convert technical concepts into practical, implementable instructions.

Watch Step By Step Video Tutorial Below


1. Access Pabbly Connect for Integration

To integrate Telegram with GoHighLevel, you first need to access Pabbly Connect. This platform allows you to automate tasks without coding. Simply visit the Pabbly Connect website and sign in or create a new account.

After signing in, you will be directed to the dashboard where you can manage your workflows. Click on the ‘Create Workflow’ button to start setting up your automation. This is where the integration process begins, and Pabbly Connect will serve as the bridge between your applications.


2. Create a Workflow in Pabbly Connect

In this step, you will create a new workflow in Pabbly Connect. Name your workflow ‘Send Telegram Message for GoHighLevel Task’ and select a folder to save it. This helps in organizing your automation tasks effectively.

  • Click on ‘Create Workflow’ from the dashboard.
  • Provide a name for your workflow.
  • Select a folder to save your workflow.

Now that the workflow is created, you will see two sections: Trigger and Action. The trigger will be ‘Lead Connector V2’ from GoHighLevel, while the action will be ‘Telegram Bot’. This setup ensures that whenever a new task is created in GoHighLevel, a message is sent via Telegram.


3. Set Up Trigger for GoHighLevel

The next step involves setting up the trigger in Pabbly Connect. Choose ‘Lead Connector V2’ as your trigger application and select the event ‘New Task Created’. This will capture the task details when a new task is added in GoHighLevel.

Once you select the trigger event, Pabbly Connect will provide a webhook URL. Copy this URL as it will be used in GoHighLevel to send data to Pabbly Connect. This webhook acts as a bridge for data transfer between GoHighLevel and Pabbly Connect.


4. Configure GoHighLevel for Webhook

Now, you need to set up the webhook in GoHighLevel. Go to your GoHighLevel account and navigate to the Automation section. Here, create a new workflow that triggers when a task is added.

  • Select ‘Create Workflow’ and choose ‘Start from Scratch’.
  • Name your workflow and set the trigger to ‘Task Added’.
  • Select ‘Webhook’ as the action and paste the copied URL from Pabbly Connect.

After saving the workflow, publish it. Now, whenever a new task is created in GoHighLevel, the details will be sent to Pabbly Connect via the webhook.


5. Set Up Action to Send Telegram Message

With the trigger and webhook ready, the final step is to set up the action in Pabbly Connect to send a message to your Telegram channel. Choose ‘Telegram Bot’ as the action application and select ‘Send Text Message’ as the action event.

Connect your Telegram bot by entering the token you received from the BotFather. After successfully connecting, enter the chat ID of the Telegram group where you want to send messages. Map the task details like title and description into the message format.


Conclusion

In this tutorial, we covered how to integrate Telegram with GoHighLevel using Pabbly Connect. This setup allows you to automate notifications for new tasks seamlessly. Automating your workflow can enhance productivity and ensure timely communication with your team.

Ensure you check out Pabbly Connect to create business automation workflows and reduce manual tasks. Pabbly Connect currently offer integration with 2,000+ applications.

Automatically Create QuickBooks Invoice from Stripe Payment Using Pabbly Connect

Learn how to automatically create QuickBooks invoices from Stripe payments using Pabbly Connect. This step-by-step guide covers the entire integration process. Discover hidden automation capabilities within your existing tools. This guide shows you how to connect your essential applications and permanently eliminate redundant manual processes.

Watch Step By Step Video Tutorial Below


1. Accessing Pabbly Connect for Integration

To automate the process of creating QuickBooks invoices from Stripe payments, you need to access Pabbly Connect. Start by searching for Pabbly Connect in your browser, which will direct you to the landing page.

On the landing page, you have two options: sign in or sign up for free. If you don’t have an account, click on the sign-up button, which takes only two minutes and provides you with 100 free tasks every month. Once logged in, you will be able to create workflows that connect Stripe and QuickBooks using Pabbly Connect.


2. Creating a Workflow in Pabbly Connect

After logging into Pabbly Connect, the next step is to create a new workflow. Click on the ‘Create Workflow’ button. A window will pop up prompting you to name your workflow. Name it something descriptive, like ‘Automatically Create QuickBooks Invoice from Stripe Payment.’

  • Select the folder where you want to save your workflow.
  • Click on ‘Create’ to proceed.

Now, you will see the workflow interface with two boxes labeled ‘Trigger’ and ‘Action.’ The trigger will be the Stripe payment event, and the action will be creating an invoice in QuickBooks. This setup is essential for automating the process using Pabbly Connect.


3. Setting Up the Trigger for Stripe Payments

To set up the trigger, select Stripe as your trigger application within Pabbly Connect. Choose the trigger event as ‘Checkout Session Completed.’ This event will initiate the workflow whenever a payment is received in Stripe.

Next, you need to connect Stripe with Pabbly Connect using the webhook URL provided. Copy the webhook URL and navigate to your Stripe account. Go to the Developers section and select Webhooks to add a new endpoint. Paste the copied URL here and provide a description, such as ‘QuickBook Invoices.’ Make sure to select the latest API version and add the event ‘Checkout Session Completed’ to complete the setup.


4. Creating an Invoice in QuickBooks

After setting up the trigger, the next step is to create an invoice in QuickBooks using the payment details received from Stripe. In Pabbly Connect, add a new action step and select QuickBooks as the action application. Choose ‘Create Invoice’ as the action event.

Map the customer ID received from Stripe to ensure that the invoice is created for the correct customer. You will also need to provide additional details such as product name, quantity, and amount. Make sure to map these details accurately to reflect the payment received.

  • Map the customer ID from the Stripe response.
  • Specify the product name and quantity.
  • Select the currency code (INR for Indian Rupees).

Once all details are mapped, click ‘Save and Send Test Request’ to confirm that the invoice is created successfully in QuickBooks. This integration using Pabbly Connect allows you to automate the invoicing process seamlessly.


5. Finalizing the Integration and Testing

After creating the invoice, it’s important to test the entire workflow to ensure that everything works as expected. Check your QuickBooks account to confirm that the invoice has been created with the correct details. You should see the invoice reflecting the payment made through Stripe.

With Pabbly Connect, you have successfully set up an automation that creates QuickBooks invoices from Stripe payments. This not only saves time but also reduces manual errors in your accounting process. Whenever a new payment is received in Stripe, an invoice will be generated automatically in QuickBooks, streamlining your workflow.


Conclusion

In this tutorial, we explored how to use Pabbly Connect to automatically create QuickBooks invoices from Stripe payments. By following the steps outlined, you can enhance your business automation, saving time and minimizing errors.

Ensure you check out Pabbly Connect to create business automation workflows and reduce manual tasks. Pabbly Connect currently offer integration with 2,000+ applications.

How to Create SendPulse Subscriber from Weblium Form Submission Using Pabbly Connect

Learn how to create a SendPulse subscriber from Weblium form submissions using Pabbly Connect. Follow this step-by-step guide for seamless integration. Explore systematic approaches to creating efficient automation solutions that convert technical concepts into practical, implementable instructions.

Watch Step By Step Video Tutorial Below


1. Accessing Pabbly Connect for Integration

To create a SendPulse subscriber from a Weblium form submission, start by accessing Pabbly Connect. This platform allows you to automate workflows without any coding skills. Simply visit the Pabbly Connect website and either sign in or sign up for a new account.

Once you are logged in, navigate to the dashboard. Here, you will find various Pabbly applications. Click on the ‘Access Now’ button for Pabbly Connect to start creating your workflow.


2. Creating Your Workflow in Pabbly Connect

In this section, you will create a workflow that connects Weblium and SendPulse using Pabbly Connect. Click on the ‘Create Workflow’ button. You will need to name your workflow, such as ‘Create SendPulse Subscriber from Weblium Form Submission,’ and choose a folder for it.

  • Click on the ‘Create’ button to proceed.
  • You will now see the workflow window, where you can set up triggers and actions.

In the workflow window, select Weblium as the trigger application. Choose the trigger event as ‘New Form Submission’. This setup allows your workflow to activate whenever a new form is submitted in your Weblium account.


3. Setting Up Webhook for Weblium

The next step is to set up a webhook URL in Pabbly Connect. After selecting the trigger event, a webhook URL will be generated. Copy this URL as you will need to paste it into your Weblium account.

Open your Weblium account and navigate to the settings of the form you wish to connect. Go to the ‘Integrations’ section, then select ‘Form Management’. Here, you will find the option to add a new webhook URL. Paste the URL you copied from Pabbly Connect and click on ‘Publish’ to save the changes.


4. Testing the Webhook Response

After setting up the webhook, it’s time to test the connection. Go back to your Weblium form and submit a test entry. This will trigger the webhook and send data to Pabbly Connect. You should see a message indicating that the webhook is waiting for a response.

Once the test form is submitted, check your Pabbly Connect workflow to see if it has captured the response. If successful, you will see the details of the submission, which you can then use for mapping in the next step.


5. Adding Subscriber in SendPulse

Now that you have captured the webhook response, it’s time to add a subscriber in SendPulse. In your Pabbly Connect workflow, select SendPulse as the action application. Choose the action event as ‘Add Subscriber’.

You will need to connect your SendPulse account by providing the API ID and Secret. Navigate to your SendPulse account, go to your profile, and find the API section to generate a new API key. Copy these credentials back to Pabbly Connect and click ‘Save’.

  • Map the fields from the webhook response to the SendPulse subscriber fields.
  • Select the mailing list where the subscriber will be added.

Once you have mapped all necessary fields, click on ‘Save and Send Test Request’. You should see a confirmation that a new subscriber has been successfully created in your SendPulse account.


Conclusion

In this tutorial, we explored how to create a SendPulse subscriber from a Weblium form submission using Pabbly Connect. By following these steps, you can seamlessly integrate your form submissions with your email marketing efforts, enhancing your business automation.

Ensure you check out Pabbly Connect to create business automation workflows and reduce manual tasks. Pabbly Connect currently offer integration with 2,000+ applications.

How to Create GoHighLevel Contact from ClickUp Tasks Using Pabbly Connect

Learn how to create GoHighLevel contacts from ClickUp tasks using Pabbly Connect, step-by-step guide for seamless integration. Learn to create powerful connections between your critical applications without requiring specialized programming knowledge or extensive technical background.

Watch Step By Step Video Tutorial Below


1. Accessing Pabbly Connect for Integration

To create a GoHighLevel contact from ClickUp tasks, you need to access Pabbly Connect. This platform serves as the central hub for integrating ClickUp and GoHighLevel seamlessly. Start by visiting the Pabbly Connect website and signing in or signing up for a new account.

Once you are logged in, you will be directed to the Pabbly Connect dashboard. Here, you can create workflows that connect various applications. Ensure you have your ClickUp and GoHighLevel accounts ready for the integration process.


2. Creating a Workflow in Pabbly Connect

In this section, you will create a workflow in Pabbly Connect to automate the process. Click on the ‘Create Workflow’ button located at the top right corner of the dashboard. Give your workflow a name, such as ‘Create GoHighLevel Contact from ClickUp Task,’ and select a folder for organization.

  • Click on the ‘Create’ button to initiate your workflow.
  • Set the trigger application as ClickUp and the trigger event as ‘New Task.’
  • Connect your ClickUp account by entering the required API token.

After setting up the trigger, you will be able to capture new tasks from ClickUp automatically. This setup is crucial for the subsequent action of creating a contact in GoHighLevel.


3. Configuring ClickUp Trigger in Pabbly Connect

Now, configure the ClickUp trigger in Pabbly Connect. Select the workspace, space name, folder name, and list name corresponding to your ClickUp setup. This ensures that the automation captures the correct tasks.

For example, you might select:

  • Workspace: ‘P’s Workspace’
  • Space: ‘Pabbly Connect’
  • Folder: ‘ClickUp’
  • List: ‘Task’

After entering these details, create a new task in ClickUp to test the trigger. Ensure that the task contains lead details like name, email, and phone number, which will be used to create the contact in GoHighLevel.


4. Setting Up GoHighLevel Action in Pabbly Connect

With the ClickUp trigger set, you can now configure the action in Pabbly Connect to create a contact in GoHighLevel. Select ‘Lead Connector V2’ as your action application and choose the action event as ‘Create a Contact.’ This step is critical, as it defines what happens when a new task is created.

To connect your GoHighLevel account, click on ‘Connect’ and add a new connection. You will need to select your agency and ensure you are logged into your GoHighLevel account. After a successful connection, map the required fields such as first name, last name, email, and phone number using the details captured from the ClickUp task.


5. Testing the Integration

After setting up the action step in Pabbly Connect, it’s essential to test the integration. Create a new task in ClickUp with lead details, and then check your GoHighLevel account to ensure the contact is created successfully. This step validates that the automation is functioning as expected.

Refresh your GoHighLevel account after a few minutes to see the new contact. The integration may take a short time due to ClickUp being a polling-based application. If everything is set up correctly, you should see the new contact reflecting the details entered in ClickUp.

This integration allows you to automate your lead management effectively, saving time and effort while ensuring that every new lead is captured in your GoHighLevel account seamlessly.


Conclusion

In this tutorial, we explored how to create GoHighLevel contacts from ClickUp tasks using Pabbly Connect. This integration streamlines the process of managing leads, ensuring that every new task in ClickUp translates into a contact in GoHighLevel efficiently. By following the steps outlined, you can automate your workflows and enhance productivity.

Ensure you check out Pabbly Connect to create business automation workflows and reduce manual tasks. Pabbly Connect currently offer integration with 2,000+ applications.

How to Create GoHighLevel Contact for Ticket Tailor Order Using Pabbly Connect

Learn how to automate creating GoHighLevel contacts from Ticket Tailor orders using Pabbly Connect. Follow this step-by-step guide for seamless integration. Learn to create powerful connections between your critical applications without requiring specialized programming knowledge or extensive technical background.

Watch Step By Step Video Tutorial Below


1. Accessing Pabbly Connect for Integration

To start integrating Ticket Tailor with GoHighLevel, you first need to access Pabbly Connect. Begin by visiting the Pabbly Connect website and signing in to your account. If you are new, you can sign up for a free account to explore the features.

After logging in, you will see the dashboard with various Pabbly applications. Click on ‘Access Now’ under Pabbly Connect to navigate to the dashboard where you can create a new workflow for automation.


2. Creating a Workflow in Pabbly Connect

In this step, you will create a workflow to automate the process of creating contacts in GoHighLevel when a new ticket order is placed through Ticket Tailor. Click on the ‘Create Workflow’ button in the top right corner of the Pabbly Connect dashboard. using Pabbly Connect

  • Name your workflow as ‘How to Create GoHighLevel Contact for Ticket Tailor Order’.
  • Select a folder to save your workflow, such as ‘GoHighLevel Automations’.
  • Click on the ‘Create’ button to finalize your workflow setup.

After creating the workflow, you will see two sections: Trigger and Action. This is where the automation takes shape, with the Trigger capturing the event and the Action executing the response.


3. Setting Up the Trigger with Ticket Tailor

The next step involves setting up the Trigger in Pabbly Connect using Ticket Tailor. Select Ticket Tailor as your trigger application and choose the event as ‘New Ticket Order’. This configuration allows Pabbly Connect to capture new ticket orders automatically.

Once you select the trigger application and event, Pabbly Connect will generate a unique webhook URL. Copy this URL as it will be used to connect Ticket Tailor to Pabbly Connect.

  • Open your Ticket Tailor account.
  • Navigate to Box Office Settings and click on API.
  • Create a new webhook by selecting ‘Order Created’ as the event and pasting the copied URL.

After setting up the webhook, you can test the connection by creating a new ticket order in Ticket Tailor to ensure that Pabbly Connect captures the response.


4. Configuring the Action Step in Pabbly Connect

Now that the trigger is configured, it’s time to set up the Action step. Select ‘Lead Connector V2’ as your action application, which corresponds to GoHighLevel. Choose ‘Create Contact’ as the action event to create a new contact in your GoHighLevel account. using Pabbly Connect

In the next step, connect your GoHighLevel account to Pabbly Connect. Click on ‘Add New Connection’ and authorize the connection. Once connected, you will be prompted to map the data from the trigger step to the action step.

Map the first name, last name, email, and phone number from the Ticket Tailor order. Skip any unnecessary fields and click on ‘Save and Send Test Request’.

If the data mapping is successful, you will receive a confirmation response indicating that a new contact has been created in your GoHighLevel account.


5. Verifying the Integration in GoHighLevel

To ensure that everything is working correctly, you need to verify the integration by checking your GoHighLevel account. Refresh the contacts page to see if a new contact has been created based on the ticket order you placed.

For instance, if you created a test order with the name ‘Test Person 45’, you should see this contact appear in your GoHighLevel account. This confirms that the automation setup using Pabbly Connect is functioning as intended.

To further test the setup, you can create additional ticket orders and repeat the verification process. Each time a new order is placed, a corresponding contact will automatically be created in GoHighLevel, streamlining your workflow.


Conclusion

In this tutorial, we successfully demonstrated how to create GoHighLevel contacts for Ticket Tailor orders using Pabbly Connect. This integration streamlines your workflow, ensuring that every ticket order results in a new contact creation automatically. By following these steps, you can enhance your event management process efficiently.

Ensure you check out Pabbly Connect to create business automation workflows and reduce manual tasks. Pabbly Connect currently offer integration with 2,000+ applications.