Get Real-Time SMS Alerts on Webhook Response with Pabbly Connect and Twilio

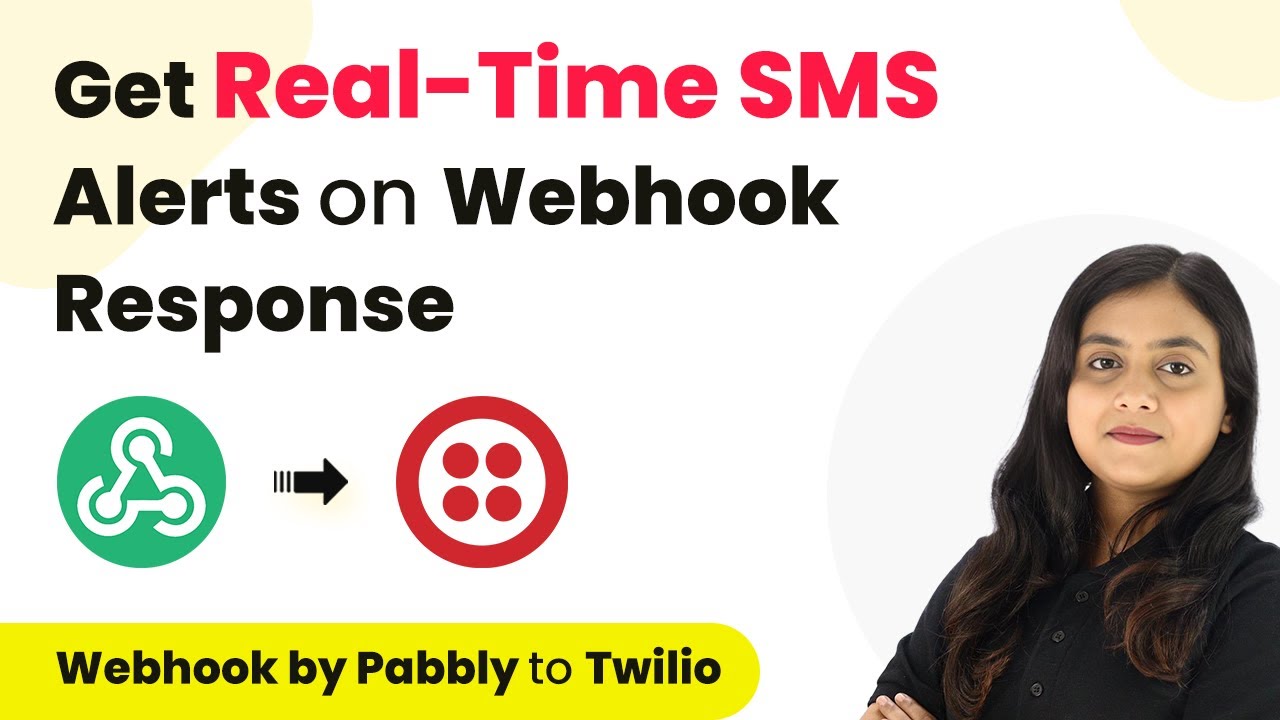
Learn how to set up real-time SMS alerts using Pabbly Connect and Twilio through webhook responses. Follow this detailed tutorial for step-by-step guidance. Explore efficient methods for automating routine tasks with clear, concise instructions suited for both newcomers and experienced professionals.

Watch Step By Step Video Tutorial Below


Accessing Pabbly Connect for Integration

To start receiving real-time SMS alerts on webhook responses, you need to access Pabbly Connect. Begin by visiting the official Pabbly Connect website and signing in to your account. If you are a new user, you can sign up for free and get 100 free tasks every month.

After logging in, you will see the dashboard with various Pabbly applications. Click on Pabbly Connect to enter the automation dashboard. Here, you will create a workflow that connects your application to Twilio for SMS notifications.


Creating a Workflow in Pabbly Connect

In the Pabbly Connect dashboard, you will need to create a new workflow. Click on the ‘Create Workflow’ button located at the top right corner. A dialog box will appear prompting you to name your workflow. Enter a suitable name, such as ‘Get Real-Time SMS Alerts on Webhook Response’.

Next, select a folder to save your workflow. You can choose an existing folder or create a new one. After naming your workflow and selecting a folder, click on the ‘Create’ button to proceed. This will set up the initial framework for your automation.

  • Name the workflow as per your requirement.
  • Select an appropriate folder to organize your workflows.
  • Click on ‘Create’ to finalize the setup.

Now, you have a workflow ready in Pabbly Connect, which consists of a trigger and an action step that you will configure next.


Setting Up Webhook Trigger in Pabbly Connect

The next step involves setting up the trigger in your workflow. Choose ‘Webhook by Pabbly’ as your trigger application. This allows Pabbly Connect to receive data from any application that is not directly integrated with it.

After selecting the trigger application, you will need to choose the trigger event. Select ‘Catch Webhook’ from the options provided. Pabbly Connect will generate a unique webhook URL for you. Copy this URL as it will be used to connect your form application.

  • Select ‘Webhook by Pabbly’ as the trigger application.
  • Choose the ‘Catch Webhook’ event.
  • Copy the generated webhook URL for use in your form application.

This webhook will act as a bridge between your form application and Pabbly Connect, enabling real-time data capture.


Integrating Elementor Form with Pabbly Connect

To integrate your form created with Elementor, go to the form settings. Click on the ‘Actions After Submit’ option and add a new action by selecting ‘Webhook’. This is where you will paste the webhook URL that you copied from Pabbly Connect.

After pasting the URL, click on the ‘Update’ button to save your changes. This action ensures that whenever a form submission occurs, the data will be sent to Pabbly Connect via the webhook.

Access the settings of your Elementor form. Select ‘Actions After Submit’ and add ‘Webhook’. Paste the copied webhook URL and click ‘Update’.

Once this setup is complete, your form is now connected to Pabbly Connect, and you are ready to test the integration.


Testing the Integration with Twilio

Now that your webhook is set up, it’s time to test the integration. Fill out the form you created with Elementor and submit it. This action should trigger the webhook and send the data to Pabbly Connect.

Once the form is submitted, check your Pabbly Connect workflow. You should see the webhook response captured in the workflow. This indicates that the integration is working correctly and that data is being received from your form.

Next, set up the action step to send an SMS notification via Twilio. Select Twilio as your action application and choose the ‘Send SMS’ action event. Connect your Twilio account by entering the required credentials, including the Account SID and Authorization Token.

Select Twilio as the action application. Choose the ‘Send SMS’ action event. Enter your Twilio Account SID and Authorization Token to connect.

After configuring the action step, you can map the data from the webhook response to customize the SMS body. This will allow you to receive customer details directly in your SMS notifications.


Conclusion

In this tutorial, we demonstrated how to set up real-time SMS alerts using Pabbly Connect and Twilio by integrating a webhook response from your form application. This process enables effective communication with customers and enhances your business operations through automation.

Ensure you check out Pabbly Connect to create business automation workflows and reduce manual tasks. Pabbly Connect currently offer integration with 2,000+ applications.

How to Create GoHighLevel Sub-Accounts from Google Sheets Using Pabbly Connect

Learn how to create GoHighLevel sub-accounts from Google Sheets using Pabbly Connect. This step-by-step guide ensures seamless integration for your business. Navigate the automation landscape confidently with clear, structured guidance suitable for professionals regardless of prior technical experience.

Watch Step By Step Video Tutorial Below


1. Introduction to Pabbly Connect for Creating Sub-Accounts

Pabbly Connect is the central platform that facilitates the integration between Google Sheets and GoHighLevel sub-accounts. This tutorial will guide you through the process of setting this up effectively. By using Pabbly Connect, you can automate the creation of sub-accounts whenever new customer data is added to your Google Sheets. using Pabbly Connect

To start, access Pabbly Connect by visiting its homepage. As an existing user, sign in to your account. If you are new, you can sign up for free and explore its features. Pabbly Connect simplifies your workflow by allowing seamless integration between multiple applications.


2. Creating a Workflow in Pabbly Connect

To create a new workflow in Pabbly Connect, click on the ‘Create Workflow’ button located at the top right corner of the dashboard. Name your workflow as ‘Create GoHighLevel Sub Accounts from Google Sheets’. This helps in identifying your workflow easily later on. using Pabbly Connect

  • Click on the ‘Create’ button to finalize your workflow setup.
  • Select Google Sheets as your trigger application.
  • Choose the trigger event as ‘New or Updated Spreadsheet Row’.

After setting up the trigger, Pabbly Connect will generate a webhook URL. This URL is crucial for connecting your Google Sheets to Pabbly Connect, allowing it to capture new entries automatically.


3. Setting Up Google Sheets for Integration

To connect Google Sheets with Pabbly Connect, you need to install the Pabbly Connect Webhooks add-on. Open your Google Sheets, navigate to Extensions, select Add-ons, and then Get Add-ons. Search for the Pabbly Connect Webhooks add-on and install it. using Pabbly Connect

  • After installation, go back to Extensions, select Pabbly Connect Webhooks, and choose Initial Setup.
  • Paste the webhook URL you copied from Pabbly Connect.
  • Set the trigger column to the last data column in your sheet.

Once you’ve configured the webhook settings, click on Submit. This will enable Pabbly Connect to capture data whenever a new row is added to your Google Sheets.


4. Creating GoHighLevel Sub-Accounts Using Pabbly Connect

With your Google Sheets set up, it’s time to create the sub-accounts in GoHighLevel. In Pabbly Connect, select the action application as Lead Connector V2. This is where you will create a new sub-account for each new entry captured from Google Sheets. using Pabbly Connect

Map the data from the trigger step to the action step, ensuring all necessary fields are filled. For instance, map the sub-account name, phone number, and other relevant details. Pabbly Connect will handle the data transfer, ensuring that each sub-account is created with the correct information.

Select the action event as ‘Create a Location’. Ensure all required fields are filled, including the customer’s email and timezone. Click on Save and Send Test Request to create the sub-account.

Once the test is successful, you can verify in your GoHighLevel account that the new sub-account has been created correctly.


5. Adding Users to GoHighLevel Sub-Accounts

The final step is to add users to the newly created sub-accounts. In Pabbly Connect, add another action step using Lead Connector V2 to create a user in the sub-account. This ensures that the customer has access to their account. using Pabbly Connect

Map the required fields such as Company ID, first name, last name, and email. You can also set a common password format for ease of access. Pabbly Connect will streamline this process, allowing you to add users without manual entry.

Select the action event as ‘Create a User’. Ensure to map the phone number and set the user role appropriately. Click on Save and Send Test Request to finalize user creation.

After this step, you can check your GoHighLevel account to confirm that the user has been added successfully to their respective sub-account. This completes the automation process using Pabbly Connect.


Conclusion

In this tutorial, we explored how to create GoHighLevel sub-accounts from Google Sheets using Pabbly Connect. By following the outlined steps, you can automate the process and enhance efficiency in managing customer accounts.

Ensure you check out Pabbly Connect to create business automation workflows and reduce manual tasks. Pabbly Connect currently offer integration with 2,000+ applications.

Integrate WebinarKit with FlexiFunnels and WhatsApp Using Pabbly Connect

Learn how to integrate WebinarKit with FlexiFunnels and automate WhatsApp reminders using Pabbly Connect in this step-by-step tutorial. Transform complex automation concepts into accessible, actionable steps that eliminate unnecessary manual work while maximizing existing application capabilities.

Watch Step By Step Video Tutorial Below


Access Pabbly Connect for Integration

To start integrating WebinarKit with FlexiFunnels and WhatsApp, access Pabbly Connect. This platform allows you to automate workflows without any coding skills. Simply navigate to Pabbly Connect by entering the URL in your browser.

Once on the homepage, you will see options to sign in or sign up for free. Existing users can sign in directly, while new users can create a free account to explore features and get 100 free tasks monthly. After signing in, access the dashboard to begin creating your workflow.


Create a Workflow in Pabbly Connect

After accessing Pabbly Connect, create a new workflow by clicking on the ‘Create Workflow’ button. Name your workflow something descriptive, such as ‘Add WebinarKit Registrant for FlexiFunnels Submission and Send WhatsApp Reminder’. This will help you identify the workflow later. using Pabbly Connect

Select the appropriate folder to save your workflow and click on ‘Create’. This action opens two windows: one for setting up the trigger and another for the action. The trigger will be the FlexiFunnels form submission that prompts the action of adding a registrant in WebinarKit.

  • Select ‘FlexiFunnels’ as your trigger application.
  • Choose ‘New Form Submission’ as the trigger event.
  • Copy the webhook URL provided by Pabbly Connect.

After setting up the trigger, you will use this webhook URL in your FlexiFunnels account to capture form submissions. This ensures that every time a new registration is submitted, it will trigger the workflow you are creating in Pabbly Connect.


Setting Up FlexiFunnels for Registration

Log into your FlexiFunnels account and navigate to the project settings where your registration form resides. Select the form you want to integrate, and click on ‘Edit Page’. Here, you can customize your form fields as needed. using Pabbly Connect

Within the form settings, locate the ‘Webhook’ option. Enter the webhook URL you copied from Pabbly Connect and name it appropriately, such as ‘New Webinar Registration’. Save the settings and publish the form to ensure it captures submissions correctly.

  • Ensure the webhook is correctly set up to send data to Pabbly Connect.
  • Test the form by submitting a dummy registration.

Once the form is submitted, Pabbly Connect will receive the response, confirming the integration is successful. This means that every new registrant will automatically trigger the addition of their details into WebinarKit.


Integrate WebinarKit with Pabbly Connect

With the FlexiFunnels form submission successfully set up, return to Pabbly Connect to add the action step. Select ‘WebinarKit’ as the action application and choose ‘New Webinar Registration’ as the action event. This will allow you to add registrants automatically.

To connect your WebinarKit account, you’ll need an API token. Access your WebinarKit account, navigate to the profile section, and find the API access option. Copy the API key and paste it into Pabbly Connect to establish the connection.

Select the specific webinar ID to which you want to add the registrant. Map the email and name fields from the FlexiFunnels response to the corresponding fields in WebinarKit. Test the action to ensure the registrant is added successfully.

Once the registrant is added, you can send a confirmation message via WhatsApp to notify them of their successful registration. This is another important step in ensuring participants are engaged and informed.


Send WhatsApp Reminders Using Pabbly Connect

To enhance participant engagement, you can set up reminders using the WhatsApp Cloud API through Pabbly Connect. Start by adding a new action step after the WebinarKit registration step. Select WhatsApp Cloud API as your action application and choose ‘Send Template Message’ as the action event.

To connect your WhatsApp Cloud API account, you will need the token and phone number ID. Access your WhatsApp Cloud API account to retrieve these details. Input them into Pabbly Connect to create the connection.

Select the template you created for confirmation messages. Map the phone number and name fields to personalize the message. Test the message sending to ensure it works correctly.

After testing, you should see that the WhatsApp message is sent successfully to the registrant, confirming their registration. This setup ensures participants receive timely reminders before the webinar, enhancing attendance rates.


Conclusion

By following this detailed tutorial, you can effectively integrate WebinarKit with FlexiFunnels and automate WhatsApp reminders using Pabbly Connect. This process not only streamlines registration management but also enhances participant engagement through timely notifications.

Ensure you check out Pabbly Connect to create business automation workflows and reduce manual tasks. Pabbly Connect currently offer integration with 2,000+ applications.

Utilizing Pabbly Connect allows for seamless automation without the need for coding, making it accessible for all users. Automate your webinars today for better management and increased attendance!

Enhance Email Marketing with Pabbly Connect and Mailchimp Integration

Learn how to enhance email marketing by adding Mailchimp subscribers from webhook responses using Pabbly Connect. Follow this step-by-step tutorial for seamless integration. Build sophisticated automated workflows in less time than you think. This guide translates complex integrations into straightforward steps for immediate implementation.

Watch Step By Step Video Tutorial Below


1. Accessing Pabbly Connect for Email Marketing Integration

To enhance email marketing by adding Mailchimp subscribers from webhook responses, start by accessing Pabbly Connect. Open your browser and search for Pabbly Connect to reach its landing page.

Once on the Pabbly Connect homepage, you’ll see two options: ‘Sign In’ and ‘Sign Up for Free.’ If you’re a new user, click on ‘Sign Up for Free’ to create an account. Existing users should click ‘Sign In’ to access their dashboard.


2. Creating a Workflow in Pabbly Connect

After signing in, you will be directed to your dashboard. Here, click on the ‘Create Workflow’ button. This is where you will set up the automation to capture email responses from your form.

  • Name your workflow as ‘Enhance Email Marketing by Adding Mailchimp Subscribers from Webhook Responses’.
  • Select the folder where you want to save your workflow.
  • Click on ‘Create’ to proceed to the workflow window.

In the workflow window, you will define your trigger and action. The trigger represents an event that starts the workflow, while the action is what happens as a result of that trigger. For this integration, we will use Pabbly Connect to connect the webhook to Mailchimp.


3. Setting Up the Trigger with Webhook

In this step, you will select the trigger application. Click on the trigger application dropdown and choose ‘Webhook by Pabbly’. Set the trigger event to ‘Capture Webhook Response’.

Once selected, Pabbly Connect will generate a unique webhook URL. This URL is crucial as it connects your form submissions to the workflow. Copy this URL, as you will need it to set up your form.

  • Open your form builder application.
  • Navigate to the integrations section and select ‘Create Webhook’.
  • Paste the copied webhook URL and save the settings.

Now your form is connected to Pabbly Connect and ready to send data when a submission occurs.


4. Configuring Mailchimp Integration in Pabbly Connect

After setting up the webhook, it’s time to configure Mailchimp as the action application. In the action application dropdown, search for and select ‘Mailchimp’.

For the action event, choose ‘Add Member with Custom Fields’. Click on ‘Connect’ to establish a connection between Pabbly Connect and your Mailchimp account. If you haven’t connected Mailchimp before, you will need to create a new connection.

Enter your Mailchimp API Key, which you can find in your Mailchimp account under ‘Extras’ > ‘API keys’. Also, provide the data center part of your Mailchimp account URL (e.g., us19). Select the audience list you want to add subscribers to.

Once all details are filled in, save the connection. This allows Pabbly Connect to add new subscribers to Mailchimp automatically whenever a webhook response is received.


5. Testing the Integration with Pabbly Connect

With your workflow set up, it’s time to test the integration. Go back to your form and make a test submission to simulate a new response. Fill in the required fields and submit the form.

After submission, return to Pabbly Connect to check if the webhook has captured the response. If successful, you will see the captured data in the workflow.

Verify that the details from the form appear correctly in the webhook response. Check your Mailchimp account to ensure the new subscriber is added with the correct details.

This confirms that Pabbly Connect is successfully integrating your form submissions with Mailchimp, enhancing your email marketing efforts.


Conclusion

In this tutorial, we demonstrated how to enhance email marketing by adding Mailchimp subscribers from webhook responses using Pabbly Connect. By following these steps, you can automate subscriber management and improve your email campaigns efficiently.

Ensure you check out Pabbly Connect to create business automation workflows and reduce manual tasks. Pabbly Connect currently offer integration with 2,000+ applications.

How to Set Up Webhook Inside MakeForms Using Pabbly Connect

Learn how to set up a webhook inside MakeForms using Pabbly Connect for seamless data integration. Follow our step-by-step guide for efficient automation. Follow this definitive guide to creating powerful automated workflows with straightforward, efficiency-focused solutions that save valuable time.

Watch Step By Step Video Tutorial Below


1. Introduction to Pabbly Connect for MakeForms

To set up a webhook inside MakeForms, we will use Pabbly Connect as the integration platform. Pabbly Connect allows you to automate workflows between different applications, making it essential for connecting MakeForms with other services.

MakeForms is a user-friendly online form builder designed for businesses to collect data efficiently. By integrating it with Pabbly Connect, you can streamline data collection and management processes, ensuring that submissions are captured seamlessly.


2. Setting Up the Trigger in Pabbly Connect

The first step in the integration process is to set up the trigger in Pabbly Connect. This trigger will activate whenever there is a new form submission in MakeForms. Start by logging into your Pabbly Connect account.

Once logged in, create a new workflow and select MakeForms as your trigger application. For the trigger event, choose ‘New Form Submission’. This means that every time a customer submits a form, Pabbly Connect will automatically capture the response.

  • Log into your Pabbly Connect account.
  • Create a new workflow.
  • Select MakeForms as the trigger application.
  • Choose ‘New Form Submission’ as the trigger event.

After setting up the trigger, Pabbly Connect will provide you with a webhook URL. This URL acts as a bridge between MakeForms and Pabbly Connect, enabling data transfer whenever a form is submitted.


3. Configuring MakeForms with Pabbly Connect

After obtaining the webhook URL from Pabbly Connect, the next step is to configure this URL in MakeForms. Log into your MakeForms account and navigate to the settings.

In the settings menu, click on ‘Integrations’ and then select ‘Webhook’. Here, you will add the webhook URL you copied from Pabbly Connect. Set the method to POST and choose the data format as JSON. Select the form you wish to connect, ensuring that all relevant fields are included.

  • Navigate to settings in MakeForms.
  • Click on ‘Integrations’ and select ‘Webhook’.
  • Paste the Pabbly Connect webhook URL.
  • Set the method to POST and choose JSON as the data format.

After entering the required information, save the settings. Your MakeForms is now configured to send data to Pabbly Connect whenever a form is submitted, allowing for automated data handling.


4. Testing the Integration with Pabbly Connect

With the webhook set up, it’s time to test the integration between MakeForms and Pabbly Connect. Submit a test entry in your MakeForms form to see if the data is captured correctly. Ensure that you fill out all required fields.

Once you submit the form, return to Pabbly Connect and check if the response from the webhook is received. You should see the details of your submission, confirming that the integration is working as intended.

Submit a test entry in your MakeForms form. Return to Pabbly Connect to check for the webhook response. Verify that the details of your submission are captured.

If the response is received successfully, you have successfully set up the webhook integration. This allows Pabbly Connect to capture data from MakeForms automatically, streamlining your workflow.


5. Exploring Action Steps in Pabbly Connect

After successfully setting up the webhook and testing it, you can enhance your workflow by adding action steps in Pabbly Connect. These actions can include sending notifications to platforms like Slack or Discord, or creating records in Google Sheets.

To add an action step, select the desired application from the list and configure the action you wish to perform. For instance, if you choose Google Sheets, you can create a new row for each form submission, ensuring that all data is logged efficiently.

Select the application for the action step in Pabbly Connect. Configure the action based on your requirements. For Google Sheets, create a new row for each submission.

This flexibility allows businesses to automate their processes effectively, leveraging the full potential of Pabbly Connect to manage data from MakeForms and other applications seamlessly.


Conclusion

Setting up a webhook inside MakeForms using Pabbly Connect can significantly enhance your data integration process. By following the steps outlined, you can automate data collection and streamline workflows efficiently. This integration not only saves time but also ensures accuracy in data handling.

Ensure you check out Pabbly Connect to create business automation workflows and reduce manual tasks. Pabbly Connect currently offer integration with 2,000+ applications.

How to Add Student to Uteach Bundle from ThriveCart Purchase Using Pabbly Connect

Learn how to seamlessly add students to your Uteach bundle from ThriveCart purchases using Pabbly Connect. This detailed guide covers all steps for automation. Master proven automation processes with practical implementation examples and strategic recommendations you can apply immediately in your workflow.

Watch Step By Step Video Tutorial Below


1. Accessing Pabbly Connect for Integration

To get started with adding students to your Uteach bundle from ThriveCart purchases, you need to access Pabbly Connect. This integration platform allows you to automate the process seamlessly. Begin by navigating to the Pabbly Connect website in your browser.

Once there, you can either sign in if you have an account or click on the ‘Sign up for free’ button to create a new account. Signing up is quick and grants you 100 free tasks each month, which is sufficient for initial testing.


2. Creating a New Workflow in Pabbly Connect

After logging into Pabbly Connect, the next step is to create a new workflow. Click on the ‘Create Workflow’ button, which prompts you to name your workflow. In this case, name it something descriptive like ‘Add Student to Uteach Bundle from ThriveCart Purchase’.

Next, select the folder where you want to save your workflow. You can create a new folder or select an existing one. After selecting the folder, click on ‘Create’ to proceed. This action will take you to the workflow setup page, where you will define the trigger and action for your integration.

  • Click ‘Create Workflow’
  • Name your workflow
  • Select or create a folder

After setting up your workflow, you will see two boxes labeled ‘Trigger’ and ‘Action’. The trigger will initiate the workflow when a new purchase is made on ThriveCart.


3. Setting Up the Trigger for ThriveCart

The next step is to set up the trigger in Pabbly Connect. For this integration, select ‘ThriveCart’ as your trigger application. After selecting it, you will need to choose the trigger event, which in this case is ‘Product Purchase’.

To connect ThriveCart with Pabbly Connect, click on ‘Connect’ and then choose ‘Add New Connection’. You will be prompted to enter an API token from ThriveCart. To obtain this token, go to your ThriveCart account, access the settings, and create a new API key under API settings.

  • Select ‘ThriveCart’ as the trigger application
  • Choose ‘Product Purchase’ as the trigger event
  • Obtain API token from ThriveCart settings

After entering the token in Pabbly Connect, save the connection. This setup will ensure that every time a purchase is made, the workflow is triggered, allowing you to add the student to your Uteach bundle automatically.


4. Configuring the Action to Add Student in Uteach

Now that the trigger is set up, it’s time to configure the action in Pabbly Connect. For the action application, select ‘Uteach’. Then, choose ‘Create Student’ as the action event. This step is crucial as it allows you to create a new student profile based on the purchase information from ThriveCart.

To connect Uteach with Pabbly Connect, you will need to provide your domain and API key from your Uteach account. Navigate to the settings in Uteach, find the integration settings, and retrieve your API details.

Select ‘Uteach’ as the action application Choose ‘Create Student’ as the action event Input domain and API key from Uteach

Once connected, map the student’s name and email address from the ThriveCart response to the respective fields in Uteach. This mapping ensures that the correct information is used to create the student profile.


5. Finalizing the Integration and Testing

After configuring the action steps, you will need to finalize the integration in Pabbly Connect. This involves adding the student to the specific course bundle in Uteach. Select ‘Add Student to Bundle’ as the final action event.

Here, you will again map the student’s email address and provide the bundle slug, which can be found in your Uteach account under the marketing section. This slug is essential for identifying the correct course bundle.

Once everything is set, click on ‘Save and Send Test Request’. If the integration is successful, you will see a response confirming that the student has been added to the Uteach bundle. You can verify this by checking the student list in your Uteach account to ensure that the new student appears correctly.


Conclusion

In this tutorial, we demonstrated how to use Pabbly Connect to automate the process of adding students to a Uteach bundle from ThriveCart purchases. By following these steps, you can streamline your enrollment process and enhance the experience for both you and your students.

Ensure you check out Pabbly Connect to create business automation workflows and reduce manual tasks. Pabbly Connect currently offer integration with 2,000+ applications.

Utilizing Pabbly Connect not only saves time but also minimizes manual errors, ensuring a seamless educational experience. Start automating your processes today with Pabbly Connect!

How to Send Data from iPhone to Pabbly Connect: A Step-by-Step Guide

Learn how to send data from your iPhone to Pabbly Connect using webhooks. Follow this detailed guide to automate your workflows effectively. Navigate the automation landscape confidently with clear, structured guidance suitable for professionals regardless of prior technical experience.

Watch Step By Step Video Tutorial Below


1. Introduction to Pabbly Connect for iPhone Integration

Pabbly Connect is a powerful automation platform that allows you to send data from your iPhone seamlessly. By using a webhook URL, you can connect your iPhone to Pabbly Connect and trigger various automation workflows. This integration enables you to send different types of data, such as text messages, location data, and more. using Pabbly Connect

With Pabbly Connect, you can automate tasks like sending SMS messages, sharing social media posts, and even managing contacts. This tutorial will guide you through the exact steps to set up this integration effectively.


2. Setting Up the Webhook in Pabbly Connect

To send data from your iPhone to Pabbly Connect, you first need to set up a webhook in your Pabbly Connect account. Begin by creating a new workflow and selecting the webhook as the trigger event. This step is crucial for receiving data sent from your iPhone. using Pabbly Connect

  • Log in to your Pabbly Connect account.
  • Click on ‘Create Workflow’ and name it appropriately.
  • Select ‘Webhook’ as the trigger app.
  • Choose ‘Catch Hook’ as the trigger event.

Once you have created the webhook, Pabbly Connect will generate a unique webhook URL. You will need this URL to send data from your iPhone.


3. Creating a Shortcut on Your iPhone

Now that you have the webhook URL, the next step is to create a shortcut on your iPhone. Open the Shortcuts app on your iPhone and click the plus (+) button to create a new shortcut. This shortcut will facilitate the sending of data to Pabbly Connect. using Pabbly Connect

Start by naming your shortcut, for example, ‘Pabbly Connect Webhook.’ Then, add the action to dictate text, which will capture the data you want to send. After that, you will need to add the ‘Get Contents of URL’ action to send the dictated text to Pabbly Connect.

  • Select ‘Dictate Text’ as your first action.
  • Add ‘Get Contents of URL’ as your second action.
  • Paste the webhook URL from Pabbly Connect in the URL field.

Make sure to set the method to POST and choose JSON as the request body type. This configuration is essential for the data to be sent correctly to Pabbly Connect.


4. Testing the Integration from iPhone to Pabbly Connect

After setting up the shortcut, it’s time to test the integration. Run the shortcut from your iPhone, and dictate a message. This message will be sent to the webhook URL you configured in Pabbly Connect. using Pabbly Connect

Once you dictate the text and allow permissions, check your Pabbly Connect workflow. You should see the data received in the webhook response. This confirms that the integration is working correctly.

To ensure everything is functioning smoothly, you can repeat the process multiple times, sending different types of data. This will help you understand how versatile the Pabbly Connect integration can be.


5. Advanced Automation Possibilities with Pabbly Connect

Pabbly Connect offers numerous automation possibilities beyond simple text dictation. You can automate sending SMS messages, managing contacts, and even integrating with CRM systems. For instance, you can set up your iPhone to automatically send OTP messages to your team via Slack whenever they are received. using Pabbly Connect

By creating specific automations in Pabbly Connect, you can streamline your workflow significantly. Here are a few advanced use cases:

Send location data when tapping an NFC tag. Automatically log fitness activities in a Google Sheet. Share social media posts directly to your team.

These advanced automations can significantly enhance productivity and ensure that important information is shared in real-time.


Conclusion

In conclusion, using Pabbly Connect to send data from your iPhone is a straightforward process that opens up many automation possibilities. By following the steps outlined, you can easily integrate various data types and streamline your workflows effectively. With Pabbly Connect, you can enhance communication and efficiency within your team.

Ensure you check out Pabbly Connect to create business automation workflows and reduce manual tasks. Pabbly Connect currently offer integration with 2,000+ applications.

How to Add Students to ThriveCart Learn+ from Elementor Form Submission Using Pabbly Connect

Learn how to integrate Elementor with ThriveCart Learn+ using Pabbly Connect for seamless student enrollment. Step-by-step tutorial included. Master proven automation processes with practical implementation examples and strategic recommendations you can apply immediately in your workflow.

Watch Step By Step Video Tutorial Below


1. Introduction to Pabbly Connect for Elementor and ThriveCart Learn+

Pabbly Connect is an essential tool that allows you to automate workflows between various applications, including Elementor and ThriveCart Learn+. In this tutorial, we will explore how to add students to ThriveCart Learn+ from Elementor form submissions using Pabbly Connect. using Pabbly Connect

To begin, ensure you have access to your Pabbly Connect account. If you are new, you can sign up for free and get started with automation. This integration will enable you to capture leads from your Elementor forms and automatically enroll them in your ThriveCart Learn+ courses.


2. Setting Up Pabbly Connect for Integration

To set up the integration, log into your Pabbly Connect account and navigate to the dashboard. Click on the ‘Create Workflow’ button to initiate the process. You will need to name your workflow, for example, ‘Add Students to ThriveCart Learn+ from Elementor Form Submission.’ This name will help you identify the workflow later. using Pabbly Connect

  • Click on ‘Create’ to open the workflow window.
  • Select ‘Elementor’ as your trigger application.
  • Choose ‘New Form Submission’ as the trigger event.

After selecting Elementor, Pabbly Connect will provide you with a webhook URL. This URL will be used to connect your Elementor form with Pabbly Connect. Copy this URL and proceed to your Elementor account.


3. Configuring Elementor to Work with Pabbly Connect

In your Elementor account, navigate to the form you created for course enrollment. Click on the form widget and go to the ‘Actions After Submit’ section. Here, you will add a new action for the webhook. using Pabbly Connect

Add the webhook action and paste the URL you copied from Pabbly Connect into the designated field. Click on ‘Update’ to save your changes. Once this is done, your Elementor form is now connected to Pabbly Connect, and submissions will trigger the workflow.

  • Ensure that you have added the webhook action correctly.
  • Test the form by submitting dummy details to verify the connection.

After submitting a test form, check your Pabbly Connect workflow to see if the details have been captured successfully. This confirms that the integration between Elementor and Pabbly Connect is functioning correctly.


4. Adding Google Sheets to Capture Leads

Now that your Elementor form is integrated with Pabbly Connect, the next step is to add Google Sheets to capture the lead details. In your Pabbly Connect workflow, select Google Sheets as the action application. using Pabbly Connect

Choose ‘Add New Row’ as the action event and connect your Google Sheets account. If this is your first time connecting, follow the prompts to authorize Pabbly Connect to access your Google Sheets. Once connected, select the spreadsheet where you want to store the leads.

Map the fields from the Elementor submission to the corresponding columns in Google Sheets. Click on ‘Save and Send Test Request’ to verify that the data is being added correctly.

After completing this step, check your Google Sheets to ensure that the lead details have been recorded. This allows you to maintain a record of all new leads captured through your Elementor forms.


5. Enrolling Students in ThriveCart Learn+

The final step is to enroll the captured leads into your ThriveCart Learn+ course. In your Pabbly Connect workflow, add another action, and select ThriveCart Learn+ as the application. using Pabbly Connect

Choose ‘Create New Student’ as the action event and connect your ThriveCart Learn+ account. You will need to provide the API key from your ThriveCart account to establish this connection. Once connected, map the necessary fields, such as name and email, from the Elementor submission.

Make sure to include the course ID for the course you want to enroll students in. Click on ‘Save and Send Test Request’ to finalize the enrollment process.

Once the test request is successful, check your ThriveCart Learn+ account to confirm that the new student has been enrolled. This integration allows for seamless enrollment of leads captured through your Elementor forms into your courses.


Conclusion

In this tutorial, we demonstrated how to integrate Elementor with ThriveCart Learn+ using Pabbly Connect. By following these steps, you can automate the process of capturing leads and enrolling them in your courses effortlessly. This not only saves time but also helps you convert leads into customers effectively.

Ensure you check out Pabbly Connect to create business automation workflows and reduce manual tasks. Pabbly Connect currently offer integration with 2,000+ applications.

How to Add Instagram Lead Ads Leads to ActiveCampaign Using Pabbly Connect

Learn how to seamlessly integrate Instagram Lead Ads with ActiveCampaign using Pabbly Connect. Follow this step-by-step tutorial to automate your lead capture process. Eliminate manual repetitive tasks from your workflow. Discover proven automation methods with intuitive steps designed for efficiency-minded professionals.

Watch Step By Step Video Tutorial Below


1. Accessing Pabbly Connect for Integration

To start integrating Instagram Lead Ads with ActiveCampaign, you need to access Pabbly Connect. This platform allows seamless automation between various applications. Begin by navigating to the Pabbly Connect homepage, where you can sign up or log in if you already have an account.

Once logged in, you will be greeted with the dashboard of Pabbly Connect. Here, you can create a new workflow that will facilitate the connection between Instagram Lead Ads and ActiveCampaign. To do this, click on the ‘Create Workflow’ button located on the top right corner of the dashboard.


2. Creating a Workflow in Pabbly Connect

Creating a workflow in Pabbly Connect is essential to automate the lead capture process. When prompted, name your workflow something descriptive like ‘Instagram Lead Ads to ActiveCampaign’. Organize your workflow by selecting a suitable folder, such as ‘Automations’.

  • Select a trigger application: Instagram Lead Ads
  • Choose the trigger event: New Lead Instant
  • Connect your Instagram account to Pabbly Connect

After selecting the trigger application and event, click on ‘Connect’ to establish a new connection. Follow the prompts to authorize Pabbly Connect to access your Instagram Lead Ads account, ensuring a smooth data flow between platforms.


3. Setting Up the Trigger in Pabbly Connect

With the trigger set up in Pabbly Connect, you will need to specify the Facebook account associated with your Instagram. Select your Facebook page, which should be linked to your Instagram account, such as the ‘Sports Elite Training Center’. This connection is crucial for capturing leads generated from your Instagram ads.

Next, choose the lead generation form linked to your Instagram ad. This is the form that users fill out to submit their information. After selecting the form, click on ‘Save and Send Test Request’ to test the connection.

  • Generate a test lead using Meta for Developers
  • Submit dummy data to ensure the connection is working
  • Verify that Pabbly Connect captures the lead information

After successfully submitting a test lead, you will see the captured data in Pabbly Connect, confirming that the trigger setup is working correctly.


4. Configuring the Action Step in Pabbly Connect

The next step is to configure the action that will occur when a new lead is captured. In Pabbly Connect, select the action application as ActiveCampaign and the action event as ‘Create a Contact’. This ensures that every new lead from Instagram is automatically added to your ActiveCampaign account.

To establish this connection, click on ‘Connect’ and provide the necessary API key and URL from your ActiveCampaign account. Navigate to the settings in ActiveCampaign to find these details. This is critical for ensuring that Pabbly Connect can communicate effectively with ActiveCampaign.

Map the lead data fields from Instagram to ActiveCampaign Email, First Name, Last Name, and Phone Number must be mapped correctly Test the action to confirm successful data transfer

After mapping the required fields, click on ‘Save and Test Request’ to ensure that the new contact is created successfully in ActiveCampaign. You can verify this by checking your ActiveCampaign contacts for the new entry.


5. Testing the Automation with Real Leads

Once your workflow is set up in Pabbly Connect, it’s essential to test the automation with real leads. To do this, return to the lead testing tool in Meta for Developers and delete the previous test lead. This step is necessary to create a new lead for testing purposes.

After deleting the existing lead, generate a new test lead by filling out the form with new dummy data. Submit the form, and then return to your ActiveCampaign account to verify that the new contact has been added successfully. This final test confirms that your integration is working as intended.

By following these steps, you have successfully automated the lead capture process from Instagram Lead Ads to ActiveCampaign using Pabbly Connect. This integration will save you time and ensure that you never miss a potential customer.


Conclusion

In this tutorial, we demonstrated how to use Pabbly Connect to add Instagram Lead Ads leads to ActiveCampaign. By automating this process, you can streamline your lead management and enhance your email marketing efforts.

Ensure you check out Pabbly Connect to create business automation workflows and reduce manual tasks. Pabbly Connect currently offer integration with 2,000+ applications.

How to Set Up Webhook Inside Getform Using Pabbly Connect

Learn how to set up a webhook inside Getform using Pabbly Connect to automate data transfer seamlessly between applications like Google Sheets, Slack, and more.

Watch Step By Step Video Tutorial Below


1. Introduction to Pabbly Connect for Webhook Setup

In this tutorial, we will explore how to set up a webhook inside Getform using Pabbly Connect. This powerful integration tool allows you to automate data transfers between Getform and various applications seamlessly. With Pabbly Connect, you can enhance your workflow by ensuring that data collected through forms is efficiently processed and sent to your desired applications.

Getform simplifies form management and data collection without requiring server-side code. By integrating it with Pabbly Connect, you can automatically transfer submissions to Google Sheets, Slack, Discord, and more. This setup is particularly useful for generating leads, collecting feedback, or managing job applications.


2. Configuring the Webhook in Getform

To begin, log into your Getform account and select the form you wish to connect. In this case, we will use a lead form. The next step is crucial as we will be setting up the webhook to connect with Pabbly Connect. Navigate to the automation section of your form settings.

  • Click on the three dots and select ‘Edit’ under the ‘Send Webhook Request’ option.
  • Paste the webhook URL provided by Pabbly Connect into the designated field.
  • Click ‘Complete’ and then ‘Save’ to finalize your webhook setup.

Once saved, Getform will confirm that your automation is updated, indicating a successful webhook setup. This URL acts as a bridge for transferring data from Getform to Pabbly Connect.


3. Testing the Webhook Connection

Now that we have configured the webhook, it’s time to test the connection. Return to Pabbly Connect where you will see a message indicating it is waiting for a webhook response. This means it’s ready to receive data from Getform.

To conduct the test, submit a sample entry using the lead form you have set up. For example, enter a name, email, and phone number. Once the form is submitted, Pabbly Connect should capture the response almost instantly.

  • Ensure the details entered match the fields in your Getform.
  • Click ‘Send’ after filling out the form to submit your test data.

After submission, check Pabbly Connect to see if the details have been captured correctly. You should see all the information including the name, email, and submission timestamp.


4. Integrating Other Applications via Pabbly Connect

Once the webhook is tested successfully, you can proceed to integrate other applications with Pabbly Connect. For instance, if you want to send the captured lead information to Google Sheets, add Google Sheets as an action step in your workflow.

In this step, you will configure how the data from Getform will be added to Google Sheets. This is done by selecting the appropriate fields from the webhook data and mapping them to the columns in your spreadsheet.

Choose the Google Sheets action you want to perform, such as ‘Add Row’. Map the fields from the webhook response to the respective columns in Google Sheets. Save the action to complete the integration.

With this setup, every time a form is submitted in Getform, the lead details will automatically populate in your Google Sheets, streamlining your data management process.


5. Conclusion

In conclusion, setting up a webhook inside Getform using Pabbly Connect allows for seamless data transfer between applications. By following the steps outlined in this tutorial, you can automate the process of capturing leads, managing job applications, or collecting feedback efficiently. Embrace the power of automation with Pabbly Connect to enhance your workflow today!

Ensure you check out Pabbly Connect to create business automation workflows and reduce manual tasks. Pabbly Connect currently offer integration with 2,000+ applications.