How to Create ConvertKit Subscriber on Instamojo Payment & Add Data in Google Sheets Using Pabbly Connect

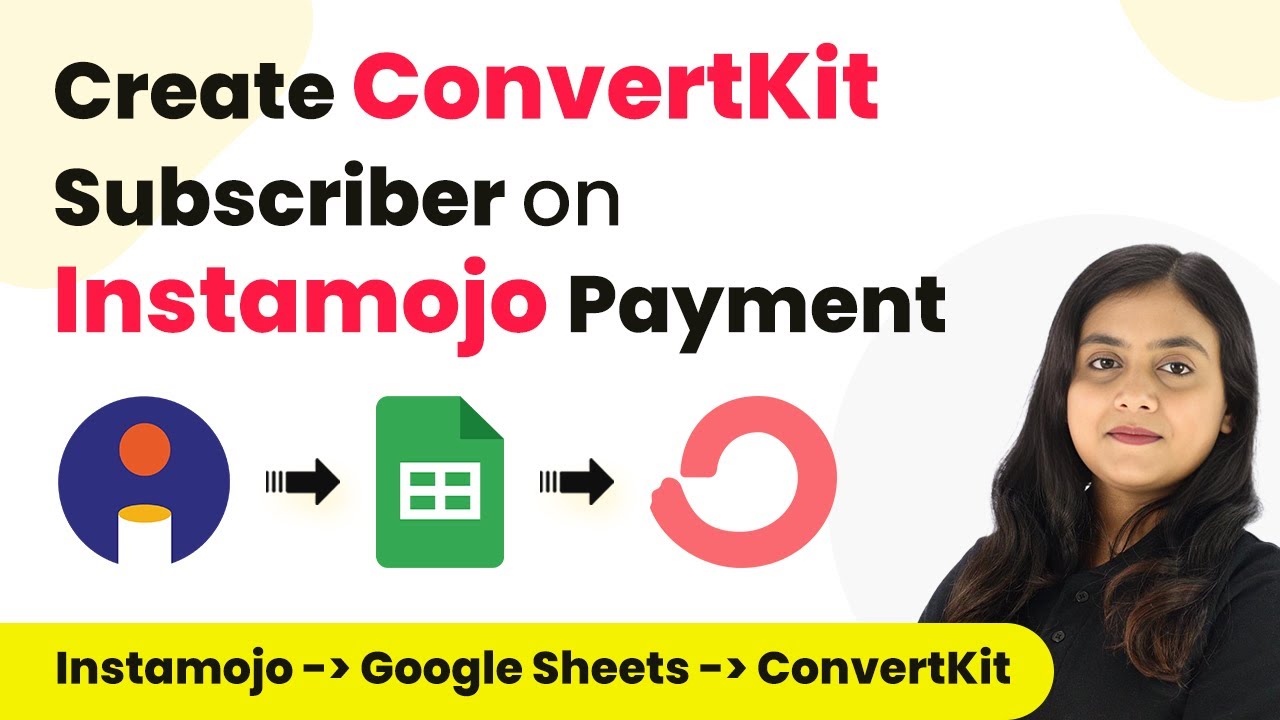
Learn how to automate the process of creating ConvertKit subscribers from Instamojo payments and adding data to Google Sheets using Pabbly Connect in this detailed tutorial.

Watch Step By Step Video Tutorial Below


Accessing Pabbly Connect to Automate Your Workflow

To start automating the process of creating ConvertKit subscribers from Instamojo payments, first access Pabbly Connect. This platform allows you to integrate various applications seamlessly without any programming skills.

Begin by signing into your Pabbly Connect account. If you’re a new user, you can sign up for free and receive 100 free tasks monthly. After logging in, you’ll see the dashboard with various applications available for integration.


Creating a Workflow in Pabbly Connect

Once you are on the Pabbly Connect dashboard, the next step is to create a workflow. Click on the ‘Create Workflow’ button located in the top right corner. A dialog box will prompt you to name your workflow.

For this tutorial, name your workflow ‘Create ConvertKit Subscriber on Instamojo Payment & Add Data in Google Sheets’. Select a folder to save your workflow, for example, ‘Instamojo Automations’. After naming and selecting the folder, click on ‘Create’ to set up your workflow.


Setting Up Trigger and Action in Pabbly Connect

In the workflow, you will see two sections: Trigger and Action. The trigger is the event that starts the workflow, while the action is what happens in response. For our trigger application, select ‘Instamojo V2’ and choose the event as ‘New Sale’. This means that whenever a new payment is made, it will trigger the workflow.

After selecting the trigger, Pabbly Connect generates a webhook URL. Copy this URL as it will be used to connect Instamojo with Pabbly Connect. Now, go to your Instamojo account and navigate to the settings of your payment page. Under payment settings, enable the webhook and paste the copied URL. Ensure you select ‘Successful Payments’ to capture the correct data.

  • Select ‘Instamojo V2’ as the trigger application.
  • Choose ‘New Sale’ as the trigger event.
  • Copy the webhook URL provided by Pabbly Connect.

After setting up the webhook, perform a test purchase to ensure that the webhook captures the sale data correctly. This step is crucial for confirming that the integration works as intended.


Adding Payment Data to Google Sheets Using Pabbly Connect

With the trigger set, the next step is to add the payment data to Google Sheets. In the action section of your workflow, select ‘Google Sheets’ as the action application and choose ‘Add New Row’ as the action event. This will allow you to record each payment automatically.

Connect your Google Sheets account to Pabbly Connect by clicking on ‘Connect’ and authorizing access. Once connected, select the spreadsheet you wish to use (e.g., ‘Instamojo Payment Details’) and the specific sheet (e.g., ‘Sheet1’). Map the required fields such as date, payment ID, name, email, etc., from the previous step’s data.

  • Select ‘Google Sheets’ as the action application.
  • Choose ‘Add New Row’ as the action event.
  • Map fields from the Instamojo payment response.

After mapping the fields, test the action to ensure that a new row is added to your Google Sheets whenever a payment is made through Instamojo. This step will confirm that your integration is functioning correctly.


Creating ConvertKit Subscriber Using Pabbly Connect

The final step is to create a subscriber in ConvertKit for each payment made. In the action section, select ‘ConvertKit’ as the action application and choose ‘Add Subscriber’ as the action event. Connect your ConvertKit account to Pabbly Connect using the API key and secret from your ConvertKit settings.

Once connected, select the sequence ID where you want to add the subscriber. Map the subscriber’s email, first name, last name, and other relevant details from the payment data captured in the previous steps. This ensures that each customer is added to your email list for future communications.

After filling in the required fields and mapping the data, test the action to confirm that a new subscriber is created in ConvertKit. This integration allows you to manage your email marketing effectively while keeping track of payments.


Conclusion

In this tutorial, we explored how to use Pabbly Connect to automate the process of creating ConvertKit subscribers from Instamojo payments and adding data to Google Sheets. By following these steps, you can streamline your workflow and enhance your customer engagement.

Ensure you check out Pabbly Connect to create business automation workflows and reduce manual tasks. Pabbly Connect currently offer integration with 2,000+ applications.

How to Create Asana Tasks for New Flodesk Subscribers Using Pabbly Connect

Learn how to integrate Flodesk and Asana using Pabbly Connect to automate task creation for new subscribers added to a segment. Follow our step-by-step guide!

Watch Step By Step Video Tutorial Below


1. Accessing Pabbly Connect for Integration

To create Asana tasks for new Flodesk subscribers added to a segment, you need to access Pabbly Connect. Start by opening your web browser and navigating to Pabbly Connect’s landing page.

If you don’t have an account, click on the ‘Sign Up for Free’ button. This will allow you to create an account quickly, giving you access to 100 tasks free every month. If you already have an account, simply sign in.


2. Creating a Workflow in Pabbly Connect

In Pabbly Connect, the next step is to create a new workflow. Click on the ‘Create Workflow’ button and name your workflow, such as ‘Create Asana Task for New Flodesk Subscriber Added to a Segment’.

  • Select the folder where you want to save your workflow.
  • Click on ‘Create’ to finalize your workflow setup.

After creating the workflow, you will see two boxes: Trigger and Action. The trigger will be set up first, which in this case is Flodesk.


3. Setting Up the Trigger for Flodesk

To set up the trigger in Pabbly Connect, search for Flodesk as your trigger application. Select the trigger event as ‘Subscriber Added to a Segment’. This will initiate the workflow when a new subscriber is added.

Next, connect your Flodesk account to Pabbly Connect. Click on ‘Connect’, then ‘Add New Connection’. Log into your Flodesk account and allow access. After successful connection, give your webhook a name, such as ‘New Webinar Registration’.


4. Creating an Asana Task Action

Now, it’s time to set up the action in Pabbly Connect. Add a new action step and select Asana as the action application. Choose ‘Create Task’ as the action event.

  • Connect your Asana account to Pabbly Connect by clicking ‘Connect’ and logging in.
  • Select the workspace and project where you want the task to be created.

Next, fill in the task details, including the task name, which could be ‘New Subscriber Added’ along with subscriber details mapped from the Flodesk response.


5. Testing and Verifying Integration

After setting up the action in Pabbly Connect, click on ‘Save and Send Test’. This will create a task in Asana based on the subscriber details received from Flodesk. Verify the task in your Asana account to ensure it was created successfully.

Once verified, your integration is complete. From now on, every time a new subscriber is added to your specified segment in Flodesk, a corresponding task will automatically be created in Asana.


Conclusion

Using Pabbly Connect, you can seamlessly integrate Flodesk and Asana to automate task creation for new subscribers. This not only streamlines your workflow but also ensures no important follow-ups are missed.

Ensure you check out Pabbly Connect to create business automation workflows and reduce manual tasks. Pabbly Connect currently offer integration with 2,000+ applications.

Integrate LinkedIn Leads to Flodesk as Subscribers Using Pabbly Connect

Learn how to integrate LinkedIn leads with Flodesk as subscribers using Pabbly Connect. Follow this step-by-step tutorial for automation. Learn to create powerful connections between your critical applications without requiring specialized programming knowledge or extensive technical background.

Watch Step By Step Video Tutorial Below


1. Accessing Pabbly Connect for Integration

To start integrating LinkedIn leads with Flodesk as subscribers, first, you need to access Pabbly Connect. Open your browser and go to the Pabbly Connect website. If you are a new user, click on ‘Sign up for free’ to create an account. Existing users should click on ‘Sign in’ to access their dashboard.

Once logged in, you will see various Pabbly applications. Click on ‘Access Now’ under Pabbly Connect to enter your dashboard. Here, you can create workflows that automate the process of adding LinkedIn leads as subscribers to Flodesk.


2. Creating a Workflow in Pabbly Connect

After accessing Pabbly Connect, you need to create a new workflow. Click on the ‘Create Workflow’ button. You will be prompted to name your workflow and select a folder to save it in. Name it ‘How to Add LinkedIn Leads to Flodesk as Subscribers’ and choose the appropriate folder.

  • Click on ‘Create’ to open the workflow window.
  • In the workflow window, set the trigger application to LinkedIn Lead Gen Forms.
  • Select ‘New Leads in Form Response’ as the trigger event.

This setup will allow Pabbly Connect to trigger the workflow every time a new lead is submitted in your LinkedIn Lead Gen Forms.


3. Connecting LinkedIn Lead Gen Forms to Pabbly Connect

To connect your LinkedIn Lead Gen Forms, select the option to add a new connection. Make sure you are logged into your LinkedIn account for a seamless connection. Choose the specific lead form you want to use for this automation.

Click on ‘Save and Send Test Request’ to test the connection. Remember that LinkedIn Lead Gen Forms are pooling-based applications, meaning they check for new data at intervals. The default check interval is set to 10 minutes. Adjust this if necessary using the ‘Set Trigger Time’ option in Pabbly Connect.


4. Adding Subscribers to Flodesk

Once your LinkedIn Lead Gen Forms are connected, the next step is to set up the action application, which is Flodesk. Search for Flodesk in the action application section and select it. For the action event, choose ‘Create/Update Subscriber’. This will ensure that every new lead from LinkedIn is added as a subscriber in Flodesk.

  • You will need to connect your Flodesk account to Pabbly Connect.
  • Map the fields from the LinkedIn lead form to the corresponding fields in Flodesk.
  • Test the connection by clicking ‘Save and Send Test Request’ again.

This mapping ensures that the lead details are dynamically updated in Flodesk with each new submission captured by Pabbly Connect.


5. Verifying the Integration

After setting up the action for adding subscribers, it’s important to verify that the integration works correctly. Submit a test lead through your LinkedIn form and check if the new subscriber appears in Flodesk. Ensure that all mapped fields are correctly filled in the Flodesk subscriber list.

If everything is set up correctly, you should see the new subscriber in your Flodesk account under the audience section. This confirms that Pabbly Connect has successfully automated the process of adding LinkedIn leads as subscribers to Flodesk.


Conclusion

In this tutorial, we demonstrated how to use Pabbly Connect to seamlessly integrate LinkedIn leads with Flodesk as subscribers. By following the steps outlined, you can automate your lead management and enhance your email marketing efforts.

Ensure you check out Pabbly Connect to create business automation workflows and reduce manual tasks. Pabbly Connect currently offer integration with 2,000+ applications.

How to Set Up Webhook Inside Formcrafts Using Pabbly Connect

Learn how to set up a webhook inside Formcrafts using Pabbly Connect for seamless data integration with Google Sheets and other applications. Implement the precise methodologies leading organizations use to automate repetitive tasks, illustrated with practical examples designed for immediate application.

Watch Step By Step Video Tutorial Below


1. Introduction to Pabbly Connect for Webhook Integration

Pabbly Connect is a powerful integration platform that allows users to automate workflows between various applications. In this tutorial, we will use Pabbly Connect to set up a webhook inside Formcrafts. This integration enables seamless data transfer from Formcrafts to other applications, such as Google Sheets.

Webhook functionality in Formcrafts acts as a bridge to connect with Pabbly Connect. By utilizing this feature, we can automate the process of capturing form submissions and sending them to the desired application. The goal is to ensure that every time a form is submitted, the data is instantly recorded in your Google Sheets.


2. Setting Up Webhook in Formcrafts

To begin setting up the webhook, first, log into your Formcrafts account. After logging in, select the workspace where your form resides. If you haven’t created a form yet, create one that you want to connect with Pabbly Connect.

Next, navigate to the form you want to integrate and select the ‘Workflows’ option on the left sidebar. Click on the ‘Add Workflow’ button to start setting up your trigger and action. The trigger will be a new response submission in Formcrafts, which will initiate the workflow.

  • Select your form in Formcrafts.
  • Choose ‘New Response’ as the trigger event.
  • Add a webhook action to capture the form response.

This step sets the foundation for the integration, allowing Pabbly Connect to receive data whenever a form is submitted.


3. Copying the Webhook URL from Pabbly Connect

After setting up the trigger, the next step is to copy the webhook URL provided by Pabbly Connect. This URL will be used to connect Formcrafts to Pabbly Connect for data transfer. In your Pabbly Connect dashboard, select the trigger application as Formcrafts and the trigger event as ‘New Submission’.

Once you have selected these options, you will see a webhook URL generated for your integration. Copy this URL to use it in your Formcrafts setup. Make sure to follow the instructions provided by Pabbly Connect to ensure proper setup.

  • Navigate to your Pabbly Connect dashboard.
  • Select Formcrafts as the trigger application.
  • Copy the provided webhook URL.

This URL is crucial for the integration, as it allows Formcrafts to send data to Pabbly Connect upon form submission.


4. Configuring Formcrafts to Use the Webhook

With the webhook URL copied, the next step is to configure Formcrafts to utilize this webhook for form submissions. Go back to your Formcrafts account and select the form you are working with. Under the workflows section, click on ‘Add Action’ and select ‘Webhook’.

In the action configuration, paste the webhook URL you copied from Pabbly Connect. Make sure to set the method to ‘POST’ and confirm that the setup is correctly saved. This step ensures that every time a form is submitted, the data will be sent directly to Pabbly Connect.

Select ‘Webhook’ as the action in your Formcrafts workflow. Paste the copied webhook URL in the action settings. Set the method to ‘POST’ and save the configuration.

Now, Formcrafts is set to send data to Pabbly Connect whenever a new submission occurs, establishing a functional integration.


5. Testing the Webhook Integration

To ensure that the webhook integration is functioning correctly, it’s essential to perform a test submission through your Formcrafts form. Preview the form and fill in the necessary fields such as first name, last name, email, and phone number. Submit the form to trigger the webhook. using Pabbly Connect

Once you submit the form, return to your Pabbly Connect dashboard. You should see the response captured in real-time, confirming that the data has been successfully transferred from Formcrafts to Pabbly Connect. This feedback indicates that your integration is working as intended.

Fill in the form with test data. Submit the form to trigger the webhook. Check Pabbly Connect for the captured response.

If the response appears in Pabbly Connect, your webhook integration is successful, allowing you to automate data handling across applications.


Conclusion

In this tutorial, we demonstrated how to set up a webhook inside Formcrafts using Pabbly Connect. This integration allows seamless data transfer from Formcrafts to applications like Google Sheets, enhancing your workflow automation. By following the steps outlined, you can easily automate your form responses.

Ensure you check out Pabbly Connect to create business automation workflows and reduce manual tasks. Pabbly Connect currently offer integration with 2,000+ applications.

How to Automatically Post Moneycontrol RSS Feed on X (Formerly Twitter) Using Pabbly Connect

Learn how to use Pabbly Connect to automatically post Moneycontrol RSS feed updates on X (formerly Twitter). Follow our detailed step-by-step tutorial. This comprehensive guide reveals exactly how to connect your applications and automate repetitive tasks — accessible for professionals of all technical backgrounds.

Watch Step By Step Video Tutorial Below


1. Accessing Pabbly Connect for Automation

To start using Pabbly Connect, open your browser and search for Pabbly Connect. This platform enables automation between various applications seamlessly. If you are a new user, click on ‘Sign Up for Free’ to create an account and receive 100 free tasks every month.

For existing users, click on ‘Sign In’. Once logged in, navigate to the dashboard where you can see all Pabbly apps. Click on ‘Access Now’ for Pabbly Connect to begin creating your workflow.


2. Creating a Workflow in Pabbly Connect

In Pabbly Connect, click on the ‘Create Workflow’ button to start. Name your workflow, for example, ‘Automatically Post Moneycontrol RSS Feed on X’. Select the folder where you want to save it, such as ‘Automations’, and click on ‘Create’.

  • Name your workflow appropriately.
  • Select a folder for organization.
  • Click ‘Create’ to proceed.

This action opens the workflow window, where you will define your trigger and action. The trigger is the event that starts the workflow, while the action is what happens in response to that trigger.


3. Setting Up RSS Trigger in Pabbly Connect

In the workflow window, select ‘RSS by Pabbly’ as your trigger application. For the trigger event, choose ‘New Item in Feed’. This means that every time a new item is posted to the RSS feed, it will trigger the workflow in Pabbly Connect.

Next, connect the RSS feed by entering the feed URL from Moneycontrol. To find this URL, visit the Moneycontrol RSS feed page and copy the URL for the business news section. Paste this URL into the feed URL section in Pabbly Connect.

  • Select ‘RSS by Pabbly’ as the trigger application.
  • Choose ‘New Item in Feed’ as the trigger event.
  • Paste the copied Moneycontrol RSS feed URL.

After setting this up, click on ‘Save and Send Test Request’ to test the connection. Ensure you receive a response confirming that the feed is working correctly.


4. Configuring Twitter Action in Pabbly Connect

Now that the RSS trigger is set up, it’s time to configure the action. Select ‘X’ (formerly Twitter) as the action application in Pabbly Connect. For the action event, choose ‘Create Tweet’. This action will post a tweet whenever a new item appears in your RSS feed.

To connect your X account, you will need the client ID and client secret. Follow the prompts to obtain these credentials from the X developer portal. After entering these details in Pabbly Connect, authorize the application to access your account.

Select ‘X’ as the action application. Choose ‘Create Tweet’ as the action event. Authorize access to your X account.

After successfully connecting, you can set the tweet message. Use dynamic mapping to include the title and link of the news article. This mapping allows the tweet to automatically update with each new news item.


5. Finalizing and Testing Your Workflow

Once you have configured the action, review your settings in Pabbly Connect. Ensure that the tweet message is set to something like ‘Check out this latest business news’ followed by the mapped title and link from your RSS feed.

Finally, test the workflow by clicking on ‘Save and Send Test Request’. Check your X account to confirm that the tweet has been posted successfully. This completes the automation process, allowing you to keep your followers updated without manual effort.

Review all settings for accuracy. Test the workflow to ensure it works as intended. Confirm the tweet appears on your X account.

This integration using Pabbly Connect allows for seamless posting of Moneycontrol RSS feed updates on X, keeping your followers informed effortlessly.


Conclusion

In this tutorial, we demonstrated how to use Pabbly Connect to automatically post Moneycontrol RSS feed updates on X (formerly Twitter). By following these steps, you can keep your audience engaged with fresh business news effortlessly.

Ensure you check out Pabbly Connect to create business automation workflows and reduce manual tasks. Pabbly Connect currently offer integration with 2,000+ applications.

Automate WhatsApp Confirmation & Reminder Messages for Calendly Invitees Using Pabbly Connect

Learn how to send automated WhatsApp confirmation and reminder messages to Calendly invitees using Pabbly Connect in this step-by-step guide. Eliminate manual repetitive tasks from your workflow. Discover proven automation methods with intuitive steps designed for efficiency-minded professionals.

Watch Step By Step Video Tutorial Below


1. Accessing Pabbly Connect for Automation

To automate WhatsApp confirmation and reminder messages for Calendly invitees, start by accessing Pabbly Connect. This tool allows seamless integration without any coding skills required.

First, visit the Pabbly Connect website. If you are a new user, sign up for free to access 100 tasks every month. Existing users should log in to their accounts.


2. Creating a New Workflow in Pabbly Connect

After logging into Pabbly Connect, navigate to the dashboard and click on the ‘Create Workflow’ button. You will be prompted to name your workflow.

For this automation, name your workflow ‘Automated WhatsApp Confirmation and Reminder Messages to Calendly Invitees’. Then, select a folder where you want to save this workflow.

  • Click on the ‘Create’ button to initialize the workflow.
  • You will see two sections: Trigger and Action.
  • Select Calendly as your trigger application.

Once you have selected Calendly, the next step is to choose the trigger event as ‘Invite Created’. This ensures that every time a new invite is created, the automation will trigger.


3. Connecting Calendly to Pabbly Connect

In this step, you will connect Calendly to Pabbly Connect. Click on the ‘Connect’ button and a new window will pop up.

Click on ‘Add New Connection’ and authorize your Calendly account. You will need to select your organization and user from the dropdown menus provided. After selecting, click on ‘Save and Send Test Request’ to confirm the connection.

  • Ensure that you see a message indicating a successful connection.
  • Create a dummy invite in Calendly to test the trigger.

Once the dummy invite is created, return to Pabbly Connect to verify that the response has been captured successfully. This confirms that your trigger setup is complete.


4. Setting Up WhatsApp for Sending Messages

After confirming the trigger, the next step is to set up WhatsApp for sending messages using Pabbly Connect. Select WhatsApp Cloud API as your action application.

Choose the action event as ‘Send Template Message’. Before proceeding, ensure you have created a message template in your WhatsApp Cloud API account.

Connect WhatsApp Cloud API to Pabbly Connect by entering the required credentials. Map the recipient’s mobile number and the variables in your message template.

Once all the details are filled, click on ‘Save and Send Test Request’ to send a confirmation message to the invitee. This step verifies that the WhatsApp integration is working correctly.


5. Automating Reminder Messages with Pabbly Connect

To complete the automation, you need to set up reminder messages using Pabbly Connect. Add another action step in your workflow and select WhatsApp Cloud API again.

Choose the action event as ‘Send Template Message’ for reminders. Ensure you have a separate template for reminders that includes relevant details about the session.

Map the necessary variables such as appointment date and time. Set a delay for the reminder to be sent one hour before the appointment.

After setting up the delay and mapping the reminder details, click on ‘Save and Send Test Request’. This ensures that your clients receive timely reminders before their appointments.


Conclusion

This tutorial demonstrated how to use Pabbly Connect to automate WhatsApp confirmation and reminder messages for Calendly invitees. By following these steps, you can enhance client engagement and streamline appointment management.

Ensure you check out Pabbly Connect to create business automation workflows and reduce manual tasks. Pabbly Connect currently offer integration with 2,000+ applications.

How to Set-Up Webhook Inside Formium Using Pabbly Connect

Learn how to set up a webhook inside Formium using Pabbly Connect. This tutorial covers the exact steps to integrate your form submissions seamlessly. Learn to create powerful connections between your critical applications without requiring specialized programming knowledge or extensive technical background.

Watch Step By Step Video Tutorial Below


1. Introduction to Formium and Pabbly Connect

In this section, we will discuss how Pabbly Connect integrates with Formium to automate form submissions. Formium is an online form builder that simplifies data collection through its drag-and-drop interface. By using Pabbly Connect, you can seamlessly capture responses from your forms and manage them efficiently.

Formium allows you to create various types of forms for different purposes, such as surveys and registrations. With Pabbly Connect, you can enhance the functionality of your forms by connecting them to other applications, ensuring that data flows smoothly from Formium to your preferred tools.


2. Setting Up Pabbly Connect for Formium Integration

To start the integration process, access your Pabbly Connect account. You will see two main windows: one for the trigger and another for the action. The trigger is essential as it defines the event that initiates the workflow.

Begin by selecting Formium as your trigger application. For the trigger event, choose ‘REST API – Form Submission.’ This setup ensures that every time a form is submitted on Formium, Pabbly Connect captures the response. Follow these steps:

  • Log into your Pabbly Connect account.
  • Select Formium as the trigger application.
  • Choose ‘REST API – Form Submission’ as the trigger event.

Once the trigger is set, Pabbly Connect will provide you with a webhook URL. This URL acts as a bridge between Formium and Pabbly Connect, allowing it to capture the data from form submissions.


3. Connecting Formium to Pabbly Connect

After obtaining the webhook URL from Pabbly Connect, log into your Formium account. Select the form you wish to connect, and navigate to the workflows section. Here’s how to set it up:

In the workflows section, create a new webhook by clicking on the ‘Create’ button. You will need to provide a name for your webhook and paste the URL from Pabbly Connect. Additionally, set the trigger event to ‘New Submission’ to ensure that the webhook activates whenever a form is submitted. Follow these steps:

  • Navigate to the workflows section in Formium.
  • Click on ‘Create’ to add a new webhook.
  • Paste the Pabbly Connect webhook URL and name your webhook.
  • Set the trigger event to ‘New Submission.’

Once the webhook is created, Pabbly Connect will be ready to capture any new submissions from your Formium forms.


4. Testing the Integration with Pabbly Connect

To ensure that the integration is working correctly, perform a test submission on the Formium form you connected to Pabbly Connect. Fill in the required fields like first name, last name, email, and phone number, then submit the form.

After submitting, return to your Pabbly Connect dashboard. You should see that the webhook has captured the response from the test submission. Verify the captured data to ensure everything is functioning as expected. Follow these steps:

Open the form you created in Formium. Fill out the form with test data. Submit the form and check Pabbly Connect for the response.

Once you confirm that Pabbly Connect has captured the data accurately, you can proceed to set up additional actions, such as sending notifications to Slack or storing data in Google Sheets.


5. Conclusion

This tutorial has shown you how to set up a webhook inside Formium using Pabbly Connect. By following the steps outlined, you can automate your form submissions and streamline your data management process. With Pabbly Connect, integrating Formium with other applications is seamless and efficient.

Ensure you check out Pabbly Connect to create business automation workflows and reduce manual tasks. Pabbly Connect currently offer integration with 2,000+ applications.

Utilizing Pabbly Connect allows you to enhance your workflow by connecting multiple applications, ensuring that your data is handled effectively. Start automating your processes today!

How to Set Up Webhook in iPhone Using Pabbly Connect

Learn how to set up a webhook in iPhone using Pabbly Connect. Follow this step-by-step guide to integrate URL and JSON seamlessly. Explore efficient methods for automating routine tasks with clear, concise instructions suited for both newcomers and experienced professionals.

Watch Step By Step Video Tutorial Below


1. Setting Up Pabbly Connect for Webhook Integration

To set up a webhook in your iPhone, you first need to access Pabbly Connect. This integration platform allows you to create workflows that connect various applications. Start by logging into your Pabbly Connect account and creating a new workflow.

In the workflow setup, select the trigger app as Webhook. This will enable you to capture data from the webhook URL you will generate. Once you choose Webhook, you can select the trigger event as ‘Catch Hook’ from the dropdown menu.


2. Creating the Webhook URL in Pabbly Connect

After selecting ‘Catch Hook’, Pabbly Connect will generate a unique webhook URL for you. This URL is essential as it will be used to send data from your iPhone. Copy this webhook URL to your clipboard for later use.

  • Log into Pabbly Connect.
  • Create a new workflow and select Webhook as the trigger app.
  • Choose ‘Catch Hook’ as the trigger event.
  • Copy the generated webhook URL.

This webhook URL is now ready to be integrated into your iPhone shortcut, allowing seamless data transfer.


3. Configuring the iPhone Shortcut to Use the Webhook

To send data to the webhook URL, open the Shortcuts app on your iPhone. Tap the plus button to create a new shortcut. In the search action bar, look for the action called ‘Get Contents of URL’ and select it. This action will allow you to send data to the copied webhook URL. using Pabbly Connect

Paste the copied webhook URL into the designated URL field. Next, you need to configure the method for the API call. For example, if you want to send data, select the POST method. Optionally, you can configure headers, but for this example, we will skip that step.


4. Sending JSON Data through the Webhook

In the ‘Get Contents of URL’ action, you can specify the request body format. Choose JSON as the format to send structured data. You can also add input fields to gather data before sending it. For instance, use the ‘Ask for Input’ action to prompt the user for text input.

  • Select ‘Ask for Input’ and place it above the ‘Get Contents of URL’ action.
  • Configure the prompt message, such as ‘Say something’.
  • Link the input field to the JSON body in the URL action.

This setup ensures that any text entered will be sent to the Pabbly Connect webhook URL as JSON data.


5. Testing the Webhook Integration

Once your shortcut is configured, you can test it by tapping the play button in the Shortcuts app. The shortcut will prompt you for input, allowing you to enter text. After entering your text, allow the shortcut to send the data to the webhook URL.

After the data is sent, you can return to your Pabbly Connect workflow to verify that the data has been received successfully. You should see the exact text you entered displayed in the webhook response section, confirming that the integration works.


Conclusion

This tutorial demonstrated how to set up a webhook in iPhone using Pabbly Connect. By following these detailed steps, you can easily send data from your iPhone to any application integrated with Pabbly Connect. This process enhances automation and streamlines data management across platforms.

Ensure you check out Pabbly Connect to create business automation workflows and reduce manual tasks. Pabbly Connect currently offer integration with 2,000+ applications.

Integrate Instagram Lead Ads with Google Sheets and ConvertKit Using Pabbly Connect

Learn how to use Pabbly Connect to automate adding Instagram Lead Ads leads to Google Sheets and creating subscribers in ConvertKit step-by-step. Implement the precise methodologies leading organizations use to automate repetitive tasks, illustrated with practical examples designed for immediate application.

Watch Step By Step Video Tutorial Below


1. Accessing Pabbly Connect to Set Up Integration

To begin integrating Instagram Lead Ads leads with Google Sheets and ConvertKit, first, access Pabbly Connect. This platform allows you to automate tasks between different applications seamlessly.

Visit the Pabbly Connect homepage and either sign up for a new account or sign in if you are an existing user. Once logged in, you will be directed to the dashboard where you can create a workflow for your integration.


2. Creating a Workflow in Pabbly Connect

After accessing Pabbly Connect, the next step is to create a new workflow. Click on the ‘Create Workflow’ button located at the top right corner of the dashboard.

In the dialog box, enter a name for your workflow, such as ‘Add Instagram Lead Ads Leads in Google Sheets & Create a Subscriber in ConvertKit’. You can also select a folder for better organization.

  • Click on ‘Create’ to initiate the workflow.
  • Understand the two main components: Trigger and Action.
  • Select Instagram Lead Ads as the trigger application.

By setting up this workflow, you are preparing to capture new leads from Instagram and automate their entry into Google Sheets and ConvertKit.


3. Setting Up Trigger for Instagram Lead Ads

In this step, you will configure the trigger in Pabbly Connect. Choose Instagram Lead Ads as your trigger application and set the trigger event to ‘New Lead Instant’. This ensures that every time a new lead is generated, it is captured automatically.

To connect your Instagram account, click on ‘Connect’ and choose ‘Add New Connection’. Make sure you are logged into your Facebook account, as Instagram is linked through Facebook.

  • Select the Facebook page associated with your Instagram account.
  • Choose the lead form you want to capture leads from.
  • Save and send test request to check the connection.

This setup allows Pabbly Connect to monitor your Instagram account for new leads and prepare for the next action step.


4. Adding Leads to Google Sheets via Pabbly Connect

After successfully setting up the trigger, the next step is to add the captured leads to Google Sheets using Pabbly Connect. Select Google Sheets as your action application and choose the action event ‘Add a New Row’.

Connect your Google Sheets account by clicking on ‘Connect’ and selecting ‘Add New Connection’. Sign in with your Google account and authorize access. Once connected, select the spreadsheet and sheet where you want the leads to be added.

Map the fields such as first name, last name, email, and phone number from the trigger data. Click on ‘Save and Send Test Request’ to verify the integration. Check your Google Sheets to confirm the new lead has been added.

With this configuration, every new lead from Instagram will be automatically added to your Google Sheets, keeping your data organized and up-to-date.


5. Creating a Subscriber in ConvertKit Using Pabbly Connect

The final step in this integration process is to create a subscriber in ConvertKit using Pabbly Connect. Select ConvertKit as your action application and set the action event to ‘Add a Subscriber to a Form’.

Connect your ConvertKit account by clicking ‘Connect’ and entering your API key and API secret from your ConvertKit settings. Once connected, select the form you want to add subscribers to.

Map the fields for first name, last name, email, and phone number from the lead data. Click on ‘Save and Send Test Request’ to check if the subscriber is added successfully. Refresh your ConvertKit account to see the new subscriber.

This setup ensures that every new lead captured from Instagram is also added as a subscriber in ConvertKit, allowing for targeted follow-ups and engagement.


Conclusion

In this tutorial, we demonstrated how to use Pabbly Connect to integrate Instagram Lead Ads with Google Sheets and ConvertKit. By automating these processes, you can efficiently manage leads and enhance your marketing efforts.

Ensure you check out Pabbly Connect to create business automation workflows and reduce manual tasks. Pabbly Connect currently offer integration with 2,000+ applications.

Integrating Uteach Students with GoHighLevel Using Pabbly Connect

Learn how to seamlessly add new Uteach students to GoHighLevel as contacts using Pabbly Connect in this detailed tutorial. Master proven automation processes with practical implementation examples and strategic recommendations you can apply immediately in your workflow.

Watch Step By Step Video Tutorial Below


1. Introduction to Pabbly Connect for Uteach and GoHighLevel Integration

Pabbly Connect is an essential tool that allows you to automate workflows between different applications. In this tutorial, we will focus on how to add new Uteach students to GoHighLevel as contacts using Pabbly Connect. This integration streamlines the process of managing student data, ensuring that every new enrollment in Uteach automatically creates a contact in GoHighLevel.

By using Pabbly Connect, educators can eliminate manual data entry, saving time and reducing errors. This seamless connection enhances the relationship between your Learning Management System (LMS) and marketing platform, allowing for efficient communication and management of student information.


2. Setting Up the Pabbly Connect Workflow

To begin, log in to your Pabbly Connect account. If you are a new user, you can sign up for a free account to explore its features. Once logged in, navigate to the dashboard where you can create a new workflow. Click on the ‘Create Workflow’ button located at the top right corner.

  • Click on ‘Create Workflow’ to initiate a new integration.
  • Name your workflow, for example, ‘Add New Uteach Students to GoHighLevel as Contacts’.
  • Select your preferred folder for organization.

After naming your workflow, you will be presented with two main components: the trigger and the action. The trigger will initiate the workflow whenever a new student is enrolled in Uteach.


3. Configuring the Trigger Application for Uteach

In this step, you will set up the trigger by selecting Uteach as your application. Click on the trigger application dropdown and choose Uteach. The trigger event you need to select is ‘New Student’, which activates the workflow when a new student registers.

To connect Uteach with Pabbly Connect, click on the ‘Connect’ button. If you have not connected your Uteach account before, select ‘Add New Connection’. You will be prompted to enter your domain and API key, which can be found in your Uteach account under Settings > Integrations.

  • Navigate to Uteach settings to find the API key and domain.
  • Copy these details into the respective fields in Pabbly Connect.
  • Click on ‘Save’ to establish the connection.

After saving, click on ‘Save and Send Test Request’ to ensure the connection is working. This step will allow Pabbly Connect to receive a test response from Uteach, confirming the workflow setup.


4. Setting Up the Action Application for GoHighLevel

Now that your trigger is configured, it’s time to set up the action application. Search for ‘Lead Connector V2’ in Pabbly Connect to connect with GoHighLevel. Select the action event as ‘Create a Contact’, which will add the new student as a contact in your GoHighLevel account.

As with the trigger step, click on ‘Connect’ to link your GoHighLevel account with Pabbly Connect. Choose ‘Add New Connection’ if you haven’t connected before. Make sure you are logged into your GoHighLevel account to facilitate a smooth connection.

Select the desired sub-account for the action. Authorize the connection to ensure data can flow between Pabbly Connect and GoHighLevel. Map the fields from the trigger response to the action fields.

In this step, you will map the full name and email of the new student received from Uteach to GoHighLevel. Click on ‘Save and Send Test Request’ to finalize the setup. You should see a successful response confirming that the contact has been created in GoHighLevel.


5. Testing the Integration with Real-Time Data

To ensure everything is functioning correctly, create a new student in your Uteach account. Click on the ‘Create New Student’ button and enter the required details such as full name and email. After saving the new student, return to Pabbly Connect and refresh the GoHighLevel contacts page.

Upon refreshing, you should see the newly created student listed as a contact in GoHighLevel. This confirms that the integration is working as intended, automating the process of adding new students from Uteach to GoHighLevel.

With this setup, you can efficiently manage your student contacts without manual intervention, allowing you to focus more on teaching and less on administrative tasks. If you wish to replicate this workflow, a Clone Link will be available for you to use.


Conclusion

In this tutorial, we demonstrated how to integrate Uteach with GoHighLevel using Pabbly Connect. By automating the process of adding new students as contacts, you can save time and enhance your educational business’s efficiency. This integration not only streamlines your workflow but also ensures that your student data is always up to date.

Ensure you check out Pabbly Connect to create business automation workflows and reduce manual tasks. Pabbly Connect currently offer integration with 2,000+ applications.