Creating 5 Stars Reputation Contact from Facebook Lead Ads with Pabbly Connect

Learn how to integrate Facebook Lead Ads with Stars Reputation Contact using Pabbly Connect for seamless automation and improved customer management. Follow this definitive guide to creating powerful automated workflows with straightforward, efficiency-focused solutions that save valuable time.

Watch Step By Step Video Tutorial Below


1. Accessing Pabbly Connect for Integration

To start the integration process, first, access Pabbly Connect by visiting its homepage. Here, you can sign up for a free account or log in if you are an existing user. This platform will allow you to automate the process of adding leads from Facebook Lead Ads to Stars Reputation Contact.

Once logged in, you will see the dashboard. To create a workflow, click on the ‘Create Workflow’ button located on the top right corner. This step is crucial as it sets up the automation that connects your Facebook Lead Ads with Stars Reputation.


2. Creating Workflow in Pabbly Connect

In this section, you will create a new workflow in Pabbly Connect to automate the addition of Facebook leads to Stars Reputation. Name your workflow something descriptive, like ‘Create Five Stars Reputation Contact from Facebook Lead Ads Leads’. Selecting a folder for organization is also recommended.

After naming your workflow, you will set a trigger. The trigger application will be Facebook Lead Ads, and the trigger event should be set to ‘New Lead Instant’. This ensures that every time a new lead is generated, Pabbly Connect captures it immediately. Follow these steps to set the trigger:

  • Select ‘Facebook Lead Ads’ as your trigger application.
  • Choose ‘New Lead Instant’ as the trigger event.
  • Connect your Facebook account to Pabbly Connect.

After these steps, you will be ready to capture leads effectively.


3. Testing the Trigger in Pabbly Connect

Now that your trigger is set up, it’s time to test it. You need to generate a test lead through Facebook Lead Ads. To do this, go to the Meta for Developers site and use the Lead Ads Testing Tool. Select your page and form, then click on preview to enter dummy data.

Fill in the fields with sample information like first name, last name, email, and phone number. After completing the form, submit it. This action will send a test lead to Pabbly Connect. You can then check the response in your workflow to ensure everything is functioning as intended. Here’s how to test:

  • Access the Lead Ads Testing Tool on Meta.
  • Select your Facebook page and lead form.
  • Submit a test lead with dummy data.

Once submitted, check Pabbly Connect for the captured lead data.


4. Setting Up Action in Pabbly Connect

With the trigger tested successfully, you can now set up the action step in Pabbly Connect. Here, select Stars Reputation as your action application and choose the action event ‘Create Contacts’. This step allows the captured leads from Facebook to be added directly to your Stars Reputation account.

To connect Stars Reputation with Pabbly Connect, you will need an API token. Generate the API key from your Stars Reputation account and input it into Pabbly Connect. After this, map the fields from your trigger data to the action fields. This includes mapping the lead’s first name, last name, email, and phone number. Follow these steps:

Select ‘Stars Reputation’ as your action application. Choose ‘Create Contacts’ as the action event. Enter the API token from Stars Reputation.

This will ensure that every new lead is automatically added to your Stars Reputation account, enhancing your customer relationship management.


5. Final Testing and Summary of the Integration

After setting up the action, it’s crucial to perform a final test to ensure everything is working correctly. Generate another test lead using the same process as before. Once you submit the new lead, check your Stars Reputation account for the new contact.

To summarize, we have successfully integrated Facebook Lead Ads with Stars Reputation using Pabbly Connect. This automation allows you to streamline your lead management process, making it easier to connect with potential clients. Here’s a recap of the steps:

Set up trigger with Facebook Lead Ads in Pabbly Connect. Test the trigger by submitting a lead. Configure action to create contacts in Stars Reputation.

With these steps complete, you can now automate your lead generation and management effectively.


Conclusion

In this tutorial, we explored how to use Pabbly Connect to create a seamless integration between Facebook Lead Ads and Stars Reputation Contact. This integration enhances your ability to manage leads and grow your real estate business efficiently.

Ensure you check out Pabbly Connect to create business automation workflows and reduce manual tasks. Pabbly Connect currently offer integration with 2,000+ applications.

How to Share YouTube Videos on Social Media Platforms Using Pabbly Connect

Learn how to automate sharing YouTube videos on social media platforms using Pabbly Connect. Step-by-step tutorial with specific integration details. Develop expertise in application integration and learn how to design streamlined automation workflows using proven, simplified approaches.

Watch Step By Step Video Tutorial Below


1. Accessing Pabbly Connect for YouTube Video Sharing

To share YouTube videos on social media platforms, we will use Pabbly Connect. Start by navigating to the Pabbly Connect website. If you are an existing user, sign in to your account. New users can create a free account to get started.

Once logged in, you will see the dashboard. Click on the button that says ‘Access Now’ next to Pabbly Connect. This will take you to the main interface where you can create your automation workflows.


2. Creating a Workflow in Pabbly Connect

In Pabbly Connect, creating a workflow is essential for automating the sharing process. Click on the ‘Create Workflow’ button located at the top right corner. A dialog box will prompt you to name your workflow. Enter a name such as ‘How to Share YouTube Videos on Social Media Platforms’.

Next, select a folder where you want to save this workflow. For example, you can choose the ‘YouTube Automations’ folder. After naming your workflow and selecting the folder, click on the ‘Create’ button. You will now see two sections: Trigger and Action.

  • Trigger: When a new video is published on YouTube.
  • Action: Share the video on Facebook and Twitter.

With this setup, you can automate the sharing process effectively. Now, let’s set up the trigger.


3. Setting Up the YouTube Trigger in Pabbly Connect

For the trigger application, select Pabbly Connect and then choose YouTube as your trigger application. The trigger event should be set to ‘New Video in Channel with Video URL’. This ensures that whenever you publish a new video, it triggers the automation.

Next, click on ‘Connect’ to link your YouTube account with Pabbly Connect. A new window will appear asking you to add a new connection. Click on ‘Add New Connection’ and follow the prompts to authorize access to your YouTube channel.

  • Select your YouTube Channel ID where videos will be published.
  • Click on ‘Save and Send Test Request’ to confirm the connection.

After confirming, you will see the last video published on your YouTube channel captured in the trigger response. This confirms that YouTube is successfully connected with Pabbly Connect.


4. Sharing YouTube Videos on Social Media Platforms

Now that you have set up the trigger, it’s time to share the video URL on social media platforms. Start by adding an action step for Facebook. Select Facebook Pages as your action application and choose the action event as ‘Create Page Post’.

Connect your Facebook account to Pabbly Connect by clicking on ‘Connect’ and following the authorization steps. Once connected, select the page where you want to post the video. For the message, map the data from the previous step to include the video title and URL.

Map the video title to the message field. Map the video URL to the link URL field.

After filling in the details, click on ‘Save and Send Test Request’. If successful, check your Facebook page to see the new post. This confirms that your video has been shared successfully through Pabbly Connect.


5. Tweeting the Video from Pabbly Connect

Finally, to share the video on Twitter, add another action step in your workflow. Select X (formerly Twitter) as the action application and choose ‘Create Tweet’ as the action event. Connect your Twitter account to Pabbly Connect using the same method as before.

Once connected, you will need to map the message for the tweet. Include the video title and a message like ‘Check out my new video!’ along with the video URL. After filling in the required fields, click on ‘Save and Send Test Request’.

Map the title and URL from the YouTube trigger. Ensure the tweet message is engaging to attract viewers.

After sending the test request, check your Twitter account to confirm the tweet has been posted. This completes the automation process using Pabbly Connect to share your YouTube videos on social media platforms.


Conclusion

Using Pabbly Connect, you can efficiently automate the sharing of your YouTube videos across social media platforms like Facebook and Twitter. This process enhances your online presence and boosts engagement with your audience.

Ensure you check out Pabbly Connect to create business automation workflows and reduce manual tasks. Pabbly Connect currently offer integration with 2,000+ applications.

How to Schedule Facebook Page Posts Using Pabbly Connect and Google Gemini

Learn how to automate Facebook page post scheduling using Pabbly Connect and Google Gemini. Follow our step-by-step tutorial for seamless integration. Revolutionize your productivity approach with just a few strategic clicks. Uncover professional methods for connecting applications and creating workflows that reclaim hours of your week.

Watch Step By Step Video Tutorial Below


1. Accessing Pabbly Connect for Automation

To schedule Facebook page posts using Pabbly Connect, first, access the Pabbly Connect platform. This integration tool allows you to connect various applications seamlessly without any coding skills. using Pabbly Connect

Visit the Pabbly Connect website and sign in to your account. If you are a new user, you can sign up for free and get 100 free tasks every month. After logging in, you will see the dashboard where you can start creating your automation workflow.


2. Creating a Workflow in Pabbly Connect

Creating a workflow in Pabbly Connect is essential for scheduling your Facebook posts. Click on the ‘Create Workflow’ button located in the top right corner of the dashboard. using Pabbly Connect

  • Name your workflow, e.g., ‘Schedule Facebook Page Post Using Google Gemini.’
  • Select a folder to save your workflow, such as ‘Facebook Automations.’

Once you have named your workflow and selected the folder, click on the ‘Create’ button. This will take you to the workflow setup page where you can set triggers and actions.


3. Setting Up the Trigger in Pabbly Connect

To automate the scheduling process, you need to set up a trigger in Pabbly Connect. Click on the trigger application dropdown and select ‘Schedule by Pabbly.’ This will allow you to publish posts at regular intervals. using Pabbly Connect

Configure the trigger settings by selecting how often you want the workflow to run. For example, you can set it to run daily at a specific time, such as 11:30 AM. After setting the frequency, click on the ‘Save’ button to confirm your trigger settings.


4. Generating Content with Google Gemini

After setting up the trigger, the next step is to generate content for your Facebook posts using Google Gemini. Add a new action step in your workflow and select ‘Google Gemini’ as the action application. using Pabbly Connect

  • Choose ‘Generate Content’ as the action event.
  • Connect Google Gemini to Pabbly Connect by entering your API key.

Once connected, input the prompt for the content you want to generate. For example, you might write a prompt about fashion tips. After entering the prompt, click on the ‘Save and Send Test Request’ button to generate the content.


5. Posting to Facebook Using Pabbly Connect

The final step is to post the generated content to your Facebook page. Add another action step in Pabbly Connect and select ‘Facebook Pages’ as the action application. using Pabbly Connect

Choose ‘Create Page Post’ as the action event. Connect your Facebook account to Pabbly Connect, select the page where you want to post, and map the content generated from Google Gemini into the message field. After filling in the required details, click on ‘Save and Send Test Request’ to publish your post.


Conclusion

In this tutorial, we explored how to schedule Facebook page posts using Pabbly Connect and Google Gemini. By automating the process, you can save time while maintaining an active online presence. This integration not only boosts engagement but also ensures your content is consistently high quality and published at optimal times.

Ensure you check out Pabbly Connect to create business automation workflows and reduce manual tasks. Pabbly Connect currently offer integration with 2,000+ applications.

How to Generate Job Descriptions Automatically using Google Gemini with Pabbly Connect

Learn how to automate job description generation using Google Gemini and Pabbly Connect in this step-by-step guide. Learn to create powerful connections between your critical applications without requiring specialized programming knowledge or extensive technical background.

Watch Step By Step Video Tutorial Below


1. Accessing Pabbly Connect for Job Descriptions

To generate job descriptions automatically, the first step is to access Pabbly Connect. Start by visiting the Pabbly Connect website, where you can either sign in or sign up for a free account. If you are a new user, signing up allows you to utilize 100 free tasks every month.

Once logged in, navigate to your dashboard. Here, you will find various Pabbly applications. Click on the option that says ‘Access Now’ for Pabbly Connect to initiate the integration process. This setup will enable you to connect Google Sheets and Google Gemini seamlessly.


2. Creating a Workflow in Pabbly Connect

After accessing Pabbly Connect, you need to create a new workflow for generating job descriptions. Click on the ‘Create Workflow’ button, and you will be prompted to name your workflow. Enter a name like ‘Job Description Automation with Google Gemini’ and select a folder to save it.

  • Click on the ‘Create’ button to initialize your workflow.
  • This will open the workflow window where you can set triggers and actions.

In this window, you will set a trigger for your workflow. Since you want to generate job descriptions whenever a new job title is added to Google Sheets, select Google Sheets as your trigger application. This is where Pabbly Connect plays a crucial role in managing the data flow between applications.


3. Setting Up Google Sheets Trigger in Pabbly Connect

For the trigger event, choose ‘New or Updated Spreadsheet Row’ in Pabbly Connect. This selection ensures that every time a new job title is entered, the workflow is activated. You will receive a webhook URL that you need to copy for the next steps.

  • Log into your Google Sheets account and create a new spreadsheet.
  • Navigate to Extensions > Add-ons > Get Add-ons and search for Pabbly Connect Webhooks.

Install the Pabbly Connect Webhooks add-on. After installation, refresh your Google Sheets page. In the extensions menu, select Pabbly Connect Webhooks and proceed to the initial setup. Paste the webhook URL you copied earlier and specify the trigger column where your job titles will be entered.


4. Generating Job Descriptions with Google Gemini

Now that your trigger is set, the next step involves generating the job descriptions using Google Gemini through Pabbly Connect. For this, select Google Generative AI as your action application. The action event should be set to ‘Generate Content’.

You will need to connect your Google Generative AI account by entering your API key. To obtain the API key, log into your Google AI Studio, select the Gemini model, and create a new API key. Copy this key and paste it into the Pabbly Connect workflow.

Set up the prompt for Gemini to create a comprehensive job description. Ensure to map the job title from the Google Sheets trigger to the prompt.

After configuring the prompt and model settings, click on ‘Save and Send Test Request’ to check if the integration is successful. You should receive a positive response with the generated job description from Google Gemini.


5. Updating Google Sheets with Job Descriptions

With the job description generated, the final step is to update your Google Sheets with this information using Pabbly Connect. Add another action step, selecting Google Sheets again, and choose the action event ‘Update Cell Value’.

Connect your Google Sheets account if you haven’t already. Specify the spreadsheet name and the range where you want the job description to be updated. You will map the job description received from Google Gemini to this cell in your Google Sheets.

Ensure the row index is mapped correctly to accommodate new entries. Click on ‘Save and Send Test Request’ to confirm the update.

Once you verify that the job description has been successfully updated in Google Sheets, your automation is complete. This workflow demonstrates how Pabbly Connect effectively integrates various applications to streamline the job description generation process.


Conclusion

In this tutorial, we explored how to use Pabbly Connect to automate job descriptions with Google Gemini and Google Sheets. By following the steps outlined, you can save time and enhance efficiency in your hiring process, ensuring that job titles are transformed into comprehensive descriptions seamlessly.

Ensure you check out Pabbly Connect to create business automation workflows and reduce manual tasks. Pabbly Connect currently offer integration with 2,000+ applications.

WhatsApp Marketing Automation for Your Paint Store Using Pabbly Connect

Learn how to automate WhatsApp messages to Facebook leads for your paint store using Pabbly Connect. Step-by-step guide for seamless integration. Discover how to seamlessly connect your essential tools through accessible instructions that make powerful automation available to professionals at every skill level.

Watch Step By Step Video Tutorial Below


1. Accessing Pabbly Connect for Your Paint Store

To start automating WhatsApp messages for your paint store, access Pabbly Connect by visiting the landing page at Pabbly.com/connect. This platform is essential for connecting your Facebook leads with WhatsApp Marketing Automation.

Once on the Pabbly Connect page, you will see options to sign in or sign up for free. If you are a new user, click on ‘Sign Up for Free’ to create your account. Existing users should click on ‘Sign In’ to access their dashboard.


2. Creating a Workflow in Pabbly Connect

After signing into Pabbly Connect, navigate to the dashboard and click on the ‘Create Workflow’ button. This initiates the process of setting up your automation for sending WhatsApp messages to Facebook leads.

  • Name your workflow (e.g., WhatsApp Marketing Automation for Your Paint Store).
  • Select a folder to save the workflow.
  • Click on ‘Create’ to proceed.

After creating the workflow, you will enter the workflow window where you will set up the trigger and action. The trigger will be your Facebook lead ads, which will initiate the workflow every time a new lead is generated.


3. Setting Up the Trigger with Facebook Lead Ads

In the workflow window of Pabbly Connect, select Facebook Lead Ads as your trigger application. This selection will allow the workflow to respond to new leads automatically.

For the trigger event, choose ‘New Lead Instant’ and click on ‘Connect’. If this is your first time, you’ll need to add a new connection by selecting your Facebook account. After connecting, select your Facebook page and lead form.

  • Select your Facebook page (e.g., Color Splash Paints).
  • Choose the lead form (e.g., Lead Ads Form).
  • Click on ‘Save and Send Test Request’ to capture the lead response.

Once you have set this up, you will need to create a test lead to verify the connection with Pabbly Connect.


4. Sending WhatsApp Messages Using Pabbly Connect

After successfully capturing the lead response, the next step in Pabbly Connect is to set up the action application, which will be WhatsApp Cloud API. This will enable you to send automated WhatsApp messages to your leads.

Select WhatsApp Cloud API as your action application and choose ‘Send Template Message’ as the action event. Connect your WhatsApp account by adding your API setup details, including the temporary access token and phone number ID.

Paste the temporary access token, phone number ID, and WhatsApp business account ID. Select the message template you created (e.g., Marketing Lead Ads). Map the recipient’s mobile number and other dynamic fields.

Finally, click on ‘Save and Send Test Request’ to send a WhatsApp message to verify that everything is working correctly.


5. Testing Your WhatsApp Marketing Automation Workflow

To ensure your setup is functioning, it’s crucial to test the workflow you created in Pabbly Connect. Refresh the lead testing tool and create a new lead with different details to check if the WhatsApp message is sent correctly.

Once you submit the new lead, open your WhatsApp to see if the automated message appears. The message should reflect the details you set up in the template, including the name of the lead dynamically changing based on the input.

Submit a new lead through the testing tool. Check WhatsApp for the received message. Verify that the message content is accurate and personalized.

If everything is set up correctly, you will see the WhatsApp message received in your chat, confirming the workflow is successful.


Conclusion

This tutorial has guided you through the process of using Pabbly Connect to automate WhatsApp messages for your paint store from Facebook leads. By following these steps, you can enhance your lead conversion rates effectively.

Ensure you check out Pabbly Connect to create business automation workflows and reduce manual tasks. Pabbly Connect currently offer integration with 2,000+ applications.

Top 5 Automations to Boost Your Social Media Using Pabbly Connect

Discover how to enhance your social media management with Pabbly Connect through five powerful automations. Learn step-by-step integrations for maximum engagement. Learn to create powerful connections between your critical applications without requiring specialized programming knowledge or extensive technical background.

Watch Step By Step Video Tutorial Below


1. Automate Social Media Posting with Pabbly Connect

Using Pabbly Connect, you can automate your social media posting across multiple platforms like Instagram, LinkedIn, and Pinterest. This automation helps maintain an active presence without the hassle of manual posting.

To set this up, you need to create a workflow in Pabbly Connect. Here’s how you can do it:

  • Log in to your Pabbly Connect account.
  • Create a new workflow and name it accordingly.
  • Select Instagram as the trigger application.
  • Set up the trigger event to detect new posts.
  • Connect LinkedIn and Pinterest as action applications.
  • Configure the action to post automatically on these platforms.

With this setup, every time you post on Instagram, it will automatically share the same content on LinkedIn and Pinterest, enhancing your social media reach effortlessly.


2. Share YouTube Videos on Social Media with Pabbly Connect

Content creators can leverage Pabbly Connect to share YouTube videos across various social media platforms like Facebook, Instagram, and Twitter. This automation ensures that your audience is promptly notified of new content.

To implement this automation, follow these steps in Pabbly Connect:

  • Access your Pabbly Connect dashboard.
  • Create a new workflow for YouTube video sharing.
  • Select YouTube as the trigger application.
  • Set the trigger event to new video published.
  • Connect Facebook, Instagram, and Twitter as action applications.
  • Configure the action to share the video link with title and description.

Now, every time you publish a new video, it will automatically share across your social media platforms, increasing engagement and visibility.


3. Cross-Posting on Social Media Using Pabbly Connect

As a social media manager, you can use Pabbly Connect to cross-post content across platforms like Instagram, Facebook, Twitter, and LinkedIn. This ensures consistent branding and messaging.

To set up this automation, you can follow these steps:

Log in to Pabbly Connect and create a new workflow. Choose Instagram as the trigger application. Select the trigger event for new media posts. Connect Facebook, Twitter, and LinkedIn as action applications. Set up actions to post the same content on these platforms.

With this automation, every time you post on Instagram, it will automatically be shared on Facebook, Twitter, and LinkedIn, saving you time and ensuring your message reaches a wider audience.


4. Create Social Media Posts Using Google Generative AI and Pabbly Connect

By integrating Google Generative AI with Pabbly Connect, you can automate the creation of engaging social media posts. This is particularly useful for businesses like travel agencies that require fresh content.

To set up this automation, you can follow these steps:

Create a new workflow in Pabbly Connect. Select Google Sheets as the trigger application. Set the trigger event to new row added. Connect Google Generative AI as an action application to generate content. Select the action to generate captions based on the provided title. Add action to post the generated content on social media platforms.

This way, you can automatically generate and post content on your social media accounts based on the data in your Google Sheets, enhancing your content strategy.


5. Schedule Instagram Posts Using Pabbly Connect

With Pabbly Connect, you can schedule Instagram posts easily to ensure consistent content delivery. This is ideal for fitness coaches or any business needing regular updates.

To schedule posts, follow these steps:

Access your Pabbly Connect account and create a new workflow. Select the scheduling trigger to run daily or weekly. Connect Google Sheets to fetch the post title and content. Set the action to post this content automatically on Instagram.

This setup allows you to maintain a consistent posting schedule without manual effort, ensuring your audience stays engaged.


Conclusion

Utilizing Pabbly Connect for social media automations can significantly enhance your productivity. By automating processes like posting and content generation, you can focus on engaging with your audience more effectively. Explore these automations to maximize your social media presence.

Ensure you check out Pabbly Connect to create business automation workflows and reduce manual tasks. Pabbly Connect currently offer integration with 2,000+ applications.

How to Upload OneDrive Files from Notion Database Using Pabbly Connect

Learn how to automate the upload of OneDrive files from your Notion database using Pabbly Connect. Step-by-step tutorial with detailed instructions. Revolutionize your productivity approach with just a few strategic clicks. Uncover professional methods for connecting applications and creating workflows that reclaim hours of your week.

Watch Step By Step Video Tutorial Below


1. Accessing Pabbly Connect for Integration

To upload OneDrive files from your Notion database, the first step is to access Pabbly Connect. Open your browser and navigate to Pabbly.com/c/connect. This will take you to the Pabbly Connect landing page.

If you don’t have an account, click on ‘Sign Up for Free’ to create one. This process will only take a couple of minutes, and you will receive 100 free tasks per month. If you already have an account, simply sign in to continue.


2. Creating a Workflow in Pabbly Connect

Once signed in, you will see the dashboard of Pabbly Connect. To create a new workflow, click on the ‘Create Workflow’ button. You will be prompted to name your workflow.

  • Name your workflow according to your objective, such as ‘Upload OneDrive Files from Notion Database.’
  • Select the folder where you want to save your workflow.
  • Click on ‘Create’ to proceed.

This action will open a new window displaying two main boxes: Trigger and Action. The trigger is the event that initiates the workflow, while actions are the tasks that follow. You will set up the trigger first using Notion.


3. Setting Up the Trigger with Notion

In the Trigger application box, search for and select Notion. For the trigger event, choose ‘New Database Item.’ This event will trigger whenever a new item is added to your Notion database.

Next, connect Notion with Pabbly Connect by clicking on ‘Connect’ and then ‘Add New Connection.’ You will need to authorize Pabbly Connect to access your Notion account. After connecting, select the specific database you want to use and click ‘Allow Access.’

Once the connection is successful, you can proceed to your Notion account and create a new row in your chosen database. Fill in the task details and upload your file, which will then trigger the action in Pabbly Connect.


4. Adding Action to Upload Files to OneDrive

After successfully setting up the trigger, it’s time to add the action. In the Action application box, search for and select Microsoft OneDrive. The action event you need to choose is ‘Upload File.’ This action will upload files to your OneDrive account automatically.

Connect Microsoft OneDrive with Pabbly Connect by clicking on ‘Connect’ and then ‘Add New Connection.’ Authorize the connection by accepting the required permissions. After connecting, select the folder in OneDrive where you want to store the uploaded files.

  • Map the file name and file URL from the Notion response.
  • Ensure that the details are dynamic to reflect new uploads in real-time.

Once you have mapped all necessary details, save your workflow and send a test request to ensure everything is functioning correctly.


5. Testing and Verifying the Integration

After setting everything up, it’s essential to test your integration. Click on ‘Save and Send Test Request’ in Pabbly Connect. You should receive a response indicating that the file has been uploaded successfully.

To verify, go back to your OneDrive account and refresh the folder where you set up the uploads. You should see the newly uploaded file from your Notion database. This confirms that the integration between Notion and OneDrive via Pabbly Connect is working successfully.

By automating this process, you can ensure that all files uploaded to your Notion database are backed up in OneDrive, creating a centralized storage solution for your project files.


Conclusion

In this tutorial, we explored how to use Pabbly Connect to automate the upload of OneDrive files from a Notion database. By following these steps, you can streamline your file management and enhance collaboration within your projects.

Ensure you check out Pabbly Connect to create business automation workflows and reduce manual tasks. Pabbly Connect currently offer integration with 2,000+ applications.

How to Create LinkedIn Posts using Google Gemini with Pabbly Connect

Learn how to automate LinkedIn posts using Google Gemini and Pabbly Connect with this detailed step-by-step tutorial. Transform complex automation concepts into accessible, actionable steps that eliminate unnecessary manual work while maximizing existing application capabilities.

Watch Step By Step Video Tutorial Below


1. Setting Up Pabbly Connect for LinkedIn Posts

To create LinkedIn posts using Google Gemini, the first step is to set up Pabbly Connect. This platform facilitates the integration between Google Sheets and LinkedIn, streamlining the posting process. Start by accessing the Pabbly Connect website and signing up or logging into your account.

Once logged in, navigate to the dashboard and click on the ‘Create Workflow’ button. You will be prompted to name your workflow, for example, ‘Create LinkedIn Posts using Google Gemini’. Select an appropriate folder to save your workflow and click ‘Create’. This setup is essential for automating your LinkedIn posting process.


2. Connecting Google Sheets with Pabbly Connect

The next step involves connecting Google Sheets to Pabbly Connect to track new post details. In your workflow, you will set Google Sheets as your trigger application. Click on the trigger application box and select Google Sheets, then choose the trigger event as ‘New or Updated Spreadsheet Row’.

  • Select Google Sheets as the trigger application.
  • Choose ‘New or Updated Spreadsheet Row’ as the trigger event.
  • Copy the webhook URL provided by Pabbly Connect.

After copying the webhook URL, go to your Google Sheets document. Under the Extensions menu, find and install the Pabbly Connect Webhooks add-on if you haven’t done so. Once installed, refresh your Google Sheet and go to the initial setup of the add-on to connect your sheet with Pabbly Connect.


3. Generating Post Content with Google Gemini

After setting up the trigger, the next step is to generate the post content using Google Gemini through Pabbly Connect. In your workflow, add an action step and select Google Generative AI as the application. Choose ‘Generate Content’ as the action event.

To connect Google Gemini with Pabbly Connect, you will need to provide an API key. Log in to your Google Gemini account, navigate to Google AI Studio, and generate a new API key. Once you have the API key, paste it into Pabbly Connect to establish the connection.

  • Select Google Generative AI as the action application.
  • Set the action event to ‘Generate Content’.
  • Map the post title from Google Sheets to your content prompt.

By using the mapped title in your prompt, Google Gemini will generate a professional and engaging description for your LinkedIn post. Ensure that you select the appropriate model for content generation before saving your settings.


4. Posting to LinkedIn Using Pabbly Connect

With the content generated, the final step is to post it to LinkedIn through Pabbly Connect. Add another action step in your workflow and select LinkedIn as the application. Choose ‘Share Text with Image’ as the action event.

Connect your LinkedIn account to Pabbly Connect, ensuring you select the correct author for the post. Map the generated content and image URL from your previous steps to the LinkedIn post fields. This mapping ensures that the correct title, description, and image are used in your LinkedIn post.

Select LinkedIn as the action application. Choose ‘Share Text with Image’ as the action event. Map the title, description, and image URL to the LinkedIn post fields.

After mapping all necessary fields, save your settings and test the connection. If successful, you will see your new post appear on your LinkedIn account, demonstrating the effectiveness of this integration.


5. Conclusion: Automating LinkedIn Posts with Pabbly Connect

In this tutorial, we explored how to use Pabbly Connect to automate the creation of LinkedIn posts using Google Gemini. By integrating Google Sheets, Google Gemini, and LinkedIn, we streamlined the process of generating and posting content. This automation not only saves time but also ensures consistent and engaging posts.

Ensure you check out Pabbly Connect to create business automation workflows and reduce manual tasks. Pabbly Connect currently offer integration with 2,000+ applications.

Check out Pabbly Connect – Automate your business workflows effortlessly! Sign Up Free – Start your journey with ease! 10,000+ Video Tutorials – Learn step by step! Join Pabbly Facebook Group – Connect with 21,000+ like minded people!

By following the steps outlined, you can easily set up your own automated workflow for LinkedIn posts. Pabbly Connect simplifies the integration process, allowing you to focus on creating quality content for your audience.


Top 5 Automation for Sending Notifications to Your Customers Using Pabbly Connect

Learn how to automate customer notifications using Pabbly Connect. Discover the top 5 automation methods including WhatsApp, SMS, and email notifications. Navigate the automation landscape confidently with clear, structured guidance suitable for professionals regardless of prior technical experience.

Watch Step By Step Video Tutorial Below


1. Setting Up Pabbly Connect for Customer Notifications

To start automating notifications to your customers, you first need to access Pabbly Connect. This platform allows you to create workflows without any coding skills. Simply navigate to the Pabbly Connect website and sign up for a free account, which gives you 100 free tasks each month.

Once you are logged in, you will be directed to the dashboard. Here, you can create different folders to organize your workflows. For our tutorial, we will be focusing on sending notifications through various channels like WhatsApp and SMS using Pabbly Connect.


2. Sending WhatsApp Notifications to New Leads

The first automation we will set up is to send WhatsApp notifications to new leads generated through Facebook. This integration ensures that whenever a new lead fills out your Facebook lead form, a WhatsApp message is sent immediately. This process enhances customer engagement and increases the chance of conversion.

  • Create a new workflow in Pabbly Connect.
  • Select Facebook Lead Ads as your trigger application.
  • Connect your Facebook account and choose the lead form you want to use.
  • Add WhatsApp as the action application using the Interact API or WhatsApp Cloud API.

After these steps, every time a new lead is generated, a WhatsApp message will be sent to them thanking them for their interest and providing more information about your services. This automation improves engagement and ensures timely communication using Pabbly Connect.


3. Automating SMS Appointment Reminders

Next, we will set up automated SMS reminders for appointments using Pabbly Connect. This is especially useful for businesses like dental clinics where no-shows can significantly affect operations. By sending reminders, you can ensure your clients remember their appointments.

To create this automation, follow these steps:

  • Connect Google Sheets as the trigger application to manage your appointment data.
  • Use Twilio as the action application to send SMS notifications.
  • Set up the workflow to send reminders 24 hours and 1 hour before the appointment.

This automation helps reduce no-shows significantly and keeps your clients informed about their appointments using Pabbly Connect. Once set up, the reminders will be sent automatically without any manual effort.


4. Sending WooCommerce Cancellation Emails

For online stores using WooCommerce, it’s crucial to manage order cancellations effectively. Using Pabbly Connect, you can automate the process of sending cancellation emails to customers. This keeps customers informed and reassured about their orders.

Here’s how to set up this automation:

Set WooCommerce as the trigger application to detect order cancellations. Connect your Gmail account as the action application to send emails. Create an email template confirming the cancellation and details about the refund process.

With this automation, every time a customer cancels an order, they will receive an immediate email notification. This improves customer relations and ensures transparency using Pabbly Connect.


5. Email Notifications for IndiaMart Leads

As a B2B supplier on IndiaMart, responding quickly to inquiries is vital. Using Pabbly Connect, you can automate email notifications to your leads, ensuring they receive timely responses.

To set this up:

Connect IndiaMart as the trigger application to capture new inquiries. Use Gmail as the action application to send out emails. Craft an email with product details and your contact information.

This automation ensures that every inquiry receives an immediate response, enhancing customer satisfaction and engagement through Pabbly Connect.


6. Sending Shopify Order Notifications on WhatsApp

Finally, let’s discuss sending order notifications via WhatsApp for your Shopify store. This integration allows you to notify customers about their order status in real-time, enhancing their shopping experience.

Follow these steps to set this automation up:

Set Shopify as the trigger application to detect new orders. Connect WhatsApp using the WhatsApp Cloud API as the action application. Create a message template to inform customers about their order confirmation and shipping details.

With this setup, customers will receive real-time updates about their orders, improving trust and satisfaction through Pabbly Connect.


Conclusion

In conclusion, automating notifications to your customers using Pabbly Connect can significantly enhance customer engagement and satisfaction. By using various integrations like WhatsApp, SMS, and email, you can ensure timely communication and improve overall business operations. Explore these automations to streamline your customer interactions effectively.

Ensure you check out Pabbly Connect to create business automation workflows and reduce manual tasks. Pabbly Connect currently offer integration with 2,000+ applications.

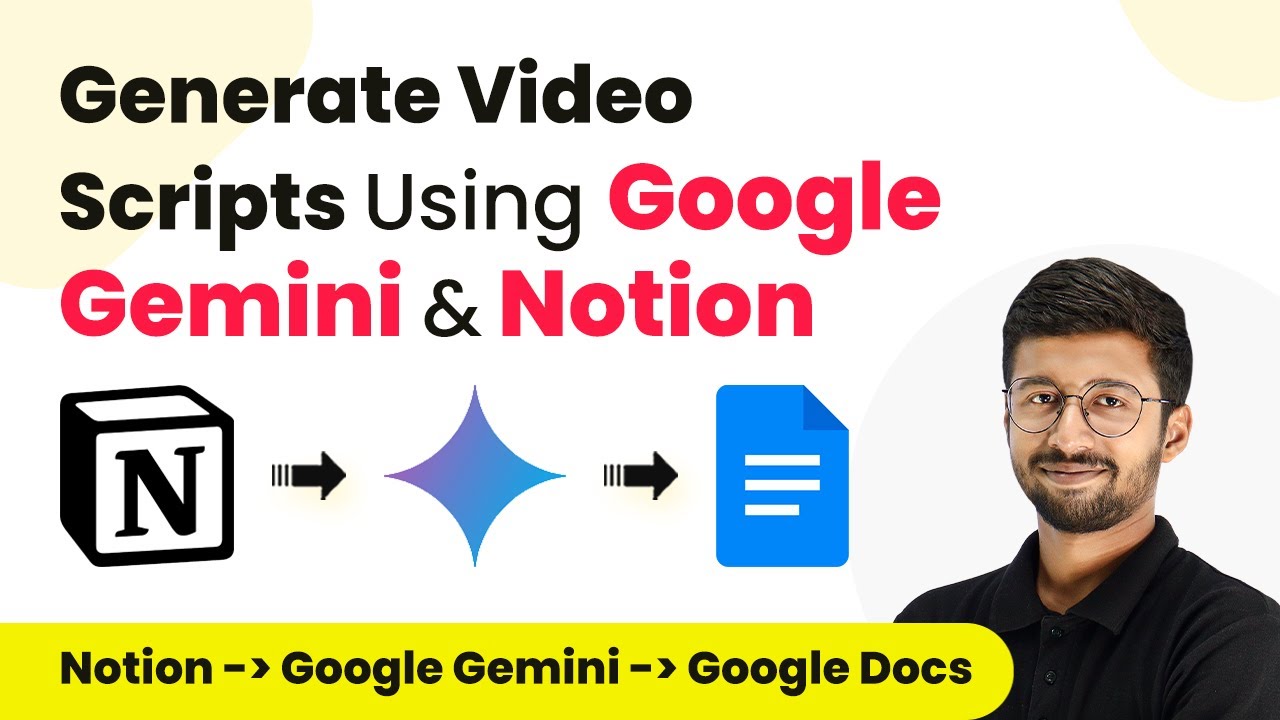
Automate Video Script Generation with Pabbly Connect: Google Gemini and Notion Integration

Learn how to automate video script generation using Pabbly Connect, Google Gemini, and Notion. This detailed tutorial guides you through the integration process step by step.

Watch Step By Step Video Tutorial Below


1. Accessing Pabbly Connect for Automation

To start automating video script generation, you need to access Pabbly Connect. Open your web browser and navigate to the Pabbly Connect landing page by searching for ‘Pabbly.com/connect’. Here, you will find options to sign in or sign up for a free account.

If you are new to Pabbly Connect, click on the ‘Sign Up Free’ button to create an account. Existing users can directly sign in. Once logged in, you will be directed to the dashboard where you can create automation workflows.


2. Creating a Workflow in Pabbly Connect

After signing in to Pabbly Connect, click on the ‘Create Workflow’ button. Name your workflow something like ‘Notion to Google Gemini to Google Docs’. Select the folder in your Pabbly account where you want to save this workflow.

  • Click on ‘Create’ to open the workflow editor.
  • You will see two windows: Trigger and Action.
  • Set up the trigger to initiate the workflow whenever a new Notion item is added.

In the Trigger window, search for ‘Notion’ and select it. Choose the event ‘New Database Item’ to start the workflow when a new item is added in Notion.


3. Connecting Notion to Pabbly Connect

To connect Notion with Pabbly Connect, click on the ‘Connect’ button and select ‘Add New Connection’. A pop-up will appear asking for permission to access your Notion account. Click on ‘Connect with Notion’ to proceed.

After logging in, select the Notion database you want to connect. Once selected, click on ‘Allow Access’. Now, you will be able to receive data from the selected Notion database in your Pabbly Connect workflow.

After the connection is established, click on ‘Save and Send Test Request’. This action will fetch the most recent item details from your Notion database, confirming that the connection works correctly.


4. Integrating Google Gemini with Pabbly Connect

Now it’s time to integrate Google Gemini using Pabbly Connect. In the Action window, search for ‘Google Generative AI’ and select it. Choose the action event ‘Generate Content’ and connect it to your Google account.

  • You need to provide an API key from Google AI Studio to connect.
  • Follow the instructions to create an API key if you haven’t done so already.
  • Once the API key is entered, click on ‘Save’ to establish the connection.

After connecting, set up the prompt for Google Gemini to generate the script. You can format your prompt by adding the topic and description received from Notion, and then click on ‘Save and Send Test Request’ to generate the script.


5. Saving the Generated Script to Google Docs

The final step involves saving the generated script into Google Docs using Pabbly Connect. In the Action step, search for ‘Google Docs’ and select it. Choose the action event ‘Create Document from Template’.

Connect your Google Docs account and select the template you created for video scripts. Map the topic, description, and generated script into the corresponding fields of the template.

Map the topic from Notion to the ‘Topic’ field. Map the description from Notion to the ‘Description’ field. Map the script generated by Google Gemini to the ‘Script’ field.

Click on ‘Save and Send Test Request’ to create the document in Google Docs. Verify that the document has been created in your specified Google Drive folder.


Conclusion

This tutorial shows how to automate video script generation using Pabbly Connect, Google Gemini, and Notion. By following these steps, you can efficiently streamline your content creation process, saving time and effort in scriptwriting.

Ensure you check out Pabbly Connect to create business automation workflows and reduce manual tasks. Pabbly Connect currently offer integration with 2,000+ applications.