How to Set Up Webhook Inside Salesmate Using Pabbly Connect

Learn how to set up a webhook inside Salesmate using Pabbly Connect for seamless integration. Step-by-step guide to automate your workflows effectively. Build sophisticated automated workflows in less time than you think. This guide translates complex integrations into straightforward steps for immediate implementation.

Watch Step By Step Video Tutorial Below


1. Introduction to Pabbly Connect for Salesmate Integration

Pabbly Connect is an essential platform for setting up a webhook inside Salesmate. This integration allows you to automate data transfer between Salesmate and various applications seamlessly. By using Pabbly Connect, you can streamline your workflow and enhance productivity. using Pabbly Connect

Salesmate is a powerful CRM tool that helps manage sales processes. With the integration through Pabbly Connect, you can automatically send information from Salesmate to other applications whenever a specific event occurs. This tutorial will guide you through the exact steps to set up this integration.


2. Setting Up Pabbly Connect for Webhook

To begin with Pabbly Connect, log into your Pabbly Connect account. Here, you will set up a trigger that will initiate the webhook process. Start by selecting Salesmate as your trigger application and choose the event as ‘New Contact’. This event will activate the webhook whenever a new contact is created in Salesmate. using Pabbly Connect

  • Select Salesmate as the trigger application.
  • Choose ‘New Contact’ as the trigger event.
  • Copy the generated webhook URL for use in Salesmate.

After copying the webhook URL, navigate to your Salesmate account. Here, you will set up the automation to send data to Pabbly Connect whenever a new contact is created. This step is crucial for establishing the connection between Salesmate and Pabbly Connect.


3. Creating a Workflow in Salesmate

In your Salesmate account, click on your profile icon and navigate to the ‘Setup’ option. From there, select ‘Automation’ and then go to ‘Workflow Management’. Here, you can create a new workflow by clicking on the ‘New Rule’ button. This workflow will capture the new contact data and send it to Pabbly Connect. using Pabbly Connect

For the workflow, select the module as ‘Contact’ and name your rule (e.g., ‘New Contact’). After naming your rule, proceed by clicking on ‘Next’ to configure the execution settings. Make sure to select ‘Create’ for the execution option, which ensures that the workflow triggers when a new contact is created.

  • Name your workflow appropriately.
  • Select ‘Create’ as the execution option.
  • Skip adding any rule criteria for simplicity.

Once you have configured these settings, click on ‘Next’ to proceed to the actions section where you will define what happens when a new contact is created.


4. Defining Actions in Salesmate Workflow

In the actions section of your workflow, select ‘Call Webhooks’ and click on the ‘Add’ button. Here, you will name the webhook (e.g., ‘New Contact’) and choose the method as ‘POST’. This setup is critical because it tells Salesmate to send the data to the webhook URL you copied from Pabbly Connect. using Pabbly Connect

Now, enter the webhook URL in the designated field. After entering the URL, you will configure the body of the request. This involves mapping the fields from your lead form (first name, last name, email, cell phone) to the keys that Pabbly Connect will receive.

Enter the webhook URL from Pabbly Connect. Map the form fields to the appropriate keys. Save the workflow to finalize the setup.

After completing these steps, you will have successfully set up the webhook in Salesmate that communicates with Pabbly Connect. This integration allows for seamless data transfer between the two applications whenever a new contact is created.


5. Testing the Integration with Pabbly Connect

With the webhook set up, it’s time to test the integration. Go back to your lead form in Salesmate and submit a test entry. Fill in the fields with dummy data (e.g., first name, last name, email, and phone number) and click on submit. This action will trigger the webhook you configured in Salesmate. using Pabbly Connect

After submitting the form, return to Pabbly Connect to check if the data was received successfully. You should see the response containing the first name, last name, email, and cell phone in Pabbly Connect. This confirms that the integration is working as intended.

Once confirmed, you can further customize your Pabbly Connect workflow to send this data to other applications as needed, enhancing your automation capabilities.


Conclusion

In this tutorial, we explored how to set up a webhook inside Salesmate using Pabbly Connect. By following the exact steps provided, you can automate data transfer between Salesmate and other applications, streamlining your workflow and improving efficiency. This integration is invaluable for managing customer interactions and sales processes effectively.

Ensure you check out Pabbly Connect to create business automation workflows and reduce manual tasks. Pabbly Connect currently offer integration with 2,000+ applications.

Auto-Reply to Facebook Page & Ads Comment using Pabbly Connect and ChatGPT

Learn how to automate replies to Facebook comments using Pabbly Connect and ChatGPT. Boost engagement effortlessly with this step-by-step tutorial. Navigate the automation landscape confidently with clear, structured guidance suitable for professionals regardless of prior technical experience.

Watch Step By Step Video Tutorial Below


1. Accessing Pabbly Connect for Automation

To start automating replies to your Facebook page comments, you need to access Pabbly Connect. This platform enables seamless integration between your Facebook account and AI tools like ChatGPT.

Begin by signing up for a free account on Pabbly Connect. Once logged in, navigate to the dashboard where you can create your automation workflow. This will allow you to set up the necessary connections for your Facebook page and the AI platform.


2. Creating Your Automation Workflow in Pabbly Connect

In Pabbly Connect, creating an automation workflow is straightforward. Click on the ‘Create Workflow’ button and give your workflow a name, such as ‘Auto Reply to Facebook Comments’. Select the appropriate folder to save your workflow.

  • Click on the ‘Create’ button to open the workflow interface.
  • You will see two main sections: Trigger and Action.
  • Configure the Trigger to respond to new comments on your Facebook page.

After setting up the trigger, you will connect your Facebook page to Pabbly Connect. This ensures that whenever a new comment is made, the automation is activated, setting the stage for generating replies using AI.


3. Setting Up Facebook Trigger in Pabbly Connect

To configure the Facebook trigger, select ‘Facebook Pages’ from the app options in Pabbly Connect. Choose the trigger event as ‘New Comment’ to capture comments made on your posts or ads.

Next, connect your Facebook account by clicking on ‘Connect with Facebook Pages’. Ensure that you are logged into the correct account and have admin rights for the page you want to monitor.

  • Select the specific Facebook page you want to monitor for comments.
  • Click on ‘Save and Send Test Request’ to confirm the connection.

Once this is done, Pabbly Connect will be ready to listen for new comments on your selected Facebook page, allowing the automation process to begin.


4. Generating Replies Using ChatGPT

After setting up the trigger, the next step in Pabbly Connect is to generate a reply using ChatGPT. For this, search for ‘OpenAI’ in the action step and select ‘ChatGPT’ as the action event.

Connect your OpenAI account by entering your API key, which you can obtain from your OpenAI account settings. Once connected, you will set the AI model to use, typically ‘gpt-4’ for generating responses.

Input the prompt for ChatGPT to generate a reply, specifying the context of the comment. Map the relevant fields from the Facebook trigger response to ensure the AI has the necessary context.

After setting up the prompt and mapping the fields, click on ‘Save and Send Test Request’ to generate a reply. This reply will be used in the final step of posting back to the Facebook comment.


5. Posting Replies Back to Facebook Comments

The final step in your automation involves posting the generated reply back to the original comment on Facebook. In Pabbly Connect, add another action step and choose ‘Facebook Comments’ as the app.

Select the action event as ‘Reply Comment on Page Post’ and connect your Facebook account again. This connection is necessary to allow Pabbly Connect to post replies on your behalf.

Map the required fields: select the Facebook page, post ID, and the comment ID from the trigger step. Map the reply generated by ChatGPT to the comment field.

After mapping all necessary fields, click on ‘Save and Send Test Request’. This action will post the AI-generated reply back to the original comment on your Facebook post, completing the automation process.


Conclusion

Using Pabbly Connect, you can automate replies to comments on Facebook, enhancing user engagement effortlessly. This integration with ChatGPT allows for quick, meaningful interactions with your audience, streamlining communication and saving time.

Ensure you check out Pabbly Connect to create business automation workflows and reduce manual tasks. Pabbly Connect currently offer integration with 2,000+ applications.

Connect Elementor Form to Google Sheets with Pabbly Connect

Learn how to connect Elementor Form to Google Sheets using Pabbly Connect, ensuring automatic data transfer with record numbers for better tracking. Transform complex automation concepts into accessible, actionable steps that eliminate unnecessary manual work while maximizing existing application capabilities.

Watch Step By Step Video Tutorial Below


1. Accessing Pabbly Connect for Integration

To connect Elementor Form to Google Sheets, the first step is to access Pabbly Connect. You can do this by typing ‘Pabbly.com/connect’ in your browser’s address bar. Once on the Pabbly Connect website, you will need to sign in to your account.

If you are a new user, click on ‘Sign up for free’ to create an account and receive 100 free tasks monthly. Existing users can simply click ‘Sign in’ at the top right corner. After logging in, you will be directed to your dashboard, where you will find all Pabbly applications.


2. Creating a New Workflow in Pabbly Connect

Once you are on the Pabbly Connect dashboard, the next step is to create a new workflow. Click on ‘Create Workflow’ and name it ‘Connect Elementor Form to Google Sheets with Record Number’. Choose the appropriate folder for saving the workflow, such as ‘Google Sheets Automations’.

  • Click on ‘Create’ to initiate the workflow.
  • You will see two boxes: Trigger and Action.
  • Select Elementor Form as the trigger application and ‘New Form Submission’ as the trigger event.

This step is crucial as it sets up the automation process. The trigger will activate whenever a new form submission is made in Elementor, and this will communicate with Pabbly Connect to proceed with the action.


3. Connecting Elementor Form to Pabbly Connect

To connect the Elementor Form to Pabbly Connect, you will need to generate a webhook URL. This URL acts as a bridge between Elementor and Pabbly Connect. Copy the webhook URL provided in the trigger step.

Next, navigate to your WordPress dashboard and locate the Elementor Form you want to integrate. Click on ‘Edit with Elementor’, then select the form field and go to ‘Actions After Submit’. Here, you will find an option for Webhook. Paste the copied webhook URL into this field and click ‘Update’ to save the changes.


4. Testing the Integration with Pabbly Connect

After setting up the webhook, it’s essential to test the integration. Go back to your Elementor Form and submit a test entry with dummy details. Once submitted, return to Pabbly Connect to check if the response has been captured.

  • Check the captured response in Pabbly Connect to ensure it matches the submitted data.
  • Make sure the City and other details are correctly recorded.

This step confirms that Elementor is successfully connected to Pabbly Connect and is ready to send data to Google Sheets.


5. Adding Data to Google Sheets with Pabbly Connect

The final step is to set up the action to add the captured data into Google Sheets. In Pabbly Connect, select Google Sheets as the action application and choose ‘Add New Row’ as the action event. Connect your Google Sheets account if you haven’t already done so.

Map the fields from the Elementor Form submission to the corresponding columns in Google Sheets. For instance, map the First Name, Last Name, City, and other relevant fields. Ensure to also include a Record Number that increments with each submission using the Number Formatter feature provided by Pabbly Connect.

After mapping the fields, click on ‘Save’ and then ‘Send Test Request’ to verify that the data is being added correctly to your Google Sheets. Check your Google Sheets to confirm the new entry has been recorded with the correct details and record number.


Conclusion

In this tutorial, we learned how to connect Elementor Form to Google Sheets using Pabbly Connect. This integration allows for automatic data transfer with record numbers, making it easy to track submissions efficiently. By following these steps, you can streamline your data collection process effectively.

Ensure you check out Pabbly Connect to create business automation workflows and reduce manual tasks. Pabbly Connect currently offer integration with 2,000+ applications.

How to Set Up Webhook Inside Weblium Using Pabbly Connect

Learn how to set up a webhook inside Weblium using Pabbly Connect for seamless data integration. Follow our step-by-step guide. Discover how to seamlessly connect your essential tools through accessible instructions that make powerful automation available to professionals at every skill level.

Watch Step By Step Video Tutorial Below


Introduction to Webhooks and Pabbly Connect

In this section, we will introduce the concept of webhooks and how Pabbly Connect facilitates their setup. A webhook is a powerful tool that allows different applications to communicate with each other automatically. By using Pabbly Connect, you can easily set up a webhook inside Weblium to capture form submissions and transfer that data to other applications seamlessly.

Weblium is a website builder that helps users create modern websites effortlessly. Integrating it with Pabbly Connect allows for automated data handling, which is essential for businesses looking to streamline their processes. Understanding how to set up this connection is crucial for effective lead management.


Setting Up Webhook Inside Weblium with Pabbly Connect

To set up a webhook inside Weblium using Pabbly Connect, you first need to access your Pabbly Connect account. Start by creating a new workflow where you will define the trigger and action. The trigger will be the form submission from Weblium, and the action will be the data transfer to another application, such as Google Sheets.

  • Log into your Pabbly Connect account.
  • Create a new workflow and select Weblium as your trigger application.
  • Choose ‘New Form Submission’ as the trigger event.

Once you have configured the trigger in Pabbly Connect, you will receive a webhook URL. This URL is crucial as it acts as a bridge for data transfer. Copy this URL and proceed to your Weblium account to set up the webhook.


Configuring Weblium for Integration with Pabbly Connect

Now that you have the webhook URL from Pabbly Connect, it’s time to configure Weblium. Go to your Weblium account and navigate to the site settings of your website. Here, you will find the option for form management. Click on it to set up the integration.

  • Select your website and go to the settings tab.
  • Click on ‘Integrations’ in the left sidebar.
  • Scroll down to ‘Webhook’ and paste the copied URL into the designated field.

After pasting the URL, click on the ‘Publish’ button to make your website live with the new webhook integration. This step is vital as it allows Weblium to send data to Pabbly Connect whenever a form is submitted.


Testing the Webhook Setup with Pabbly Connect

With your webhook set up in Weblium, the next step is to test the integration using Pabbly Connect. Go back to your Pabbly Connect dashboard and ensure it is ready to capture data. You will see a message indicating that it is waiting for a webhook response.

To test the setup, fill out the form on your published website. Enter dummy data for the fields such as name, email, and phone number, and submit the form. This action should trigger the webhook, and you will receive the data in Pabbly Connect.

Enter a name and email address in the form fields. Click on the submit button to send the form data. Check back in Pabbly Connect to see if the data was captured successfully.

Once the form is submitted, you should see the details captured in Pabbly Connect, indicating that the webhook is functioning correctly. This confirms that the integration between Weblium and Pabbly Connect is successful.


Conclusion

Setting up a webhook inside Weblium using Pabbly Connect is a straightforward process that greatly enhances your data management capabilities. By following the steps outlined, you can automate the transfer of form submission data to other applications like Google Sheets. This integration allows for efficient lead management and streamlined workflows.

Ensure you check out Pabbly Connect to create business automation workflows and reduce manual tasks. Pabbly Connect currently offer integration with 2,000+ applications.

With Pabbly Connect, you can easily connect multiple applications without any coding knowledge, making it accessible for everyone. Start leveraging the power of automation today!

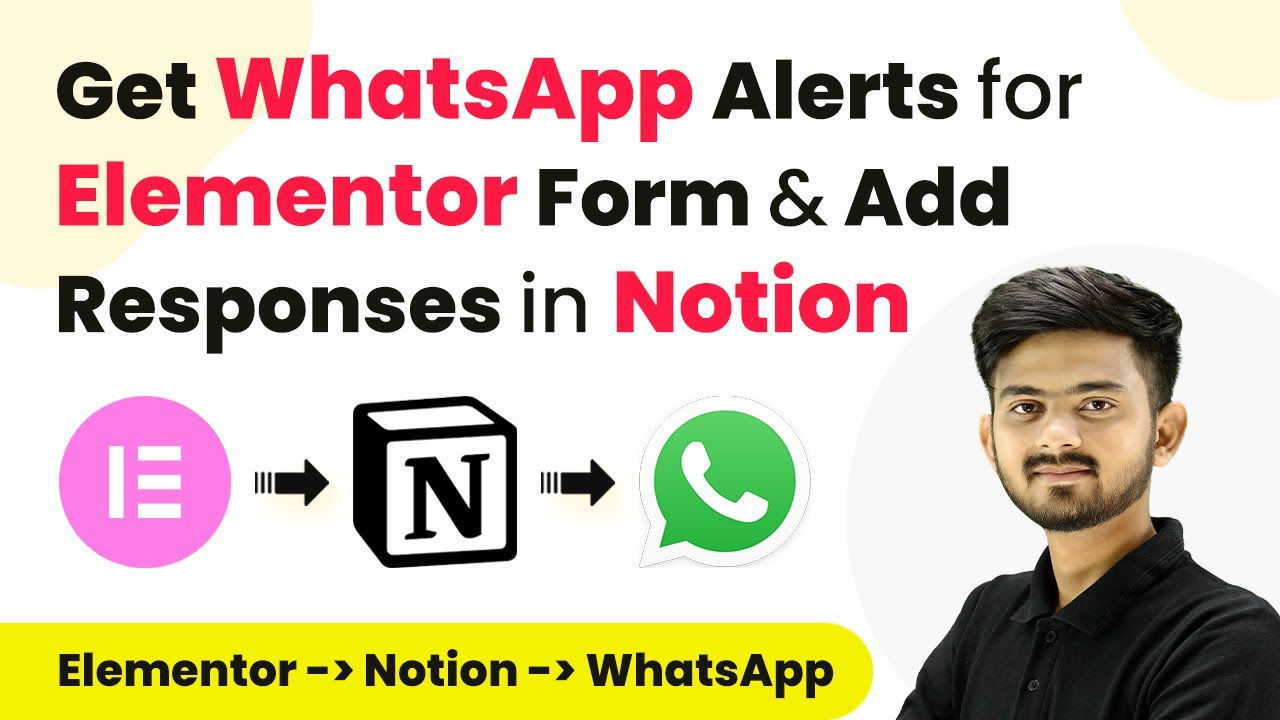
Get WhatsApp Alerts on Elementor Form Submission & Add Responses in Notion Database Using Pabbly Connect

Learn how to get WhatsApp alerts on Elementor form submissions and add responses to Notion Database using Pabbly Connect in this detailed tutorial. Transform complex automation concepts into accessible, actionable steps that eliminate unnecessary manual work while maximizing existing application capabilities.

Watch Step By Step Video Tutorial Below


1. Setting Up Pabbly Connect for Integration

To get WhatsApp alerts on Elementor form submission and add responses in Notion Database, you first need to set up Pabbly Connect. Access the Pabbly Connect website by searching for it in your browser. If you don’t have an account, click on the ‘Sign Up for Free’ button to create one, which only takes about 2 minutes.

Once logged in, navigate to the dashboard and create a new workflow. Click on the ‘Create Workflow’ button, name your workflow (e.g., ‘WhatsApp Alerts on Elementor Form Submission’), and select the folder to save it. This is your first step in utilizing Pabbly Connect to integrate Elementor and Notion.


2. Setting Up Trigger Event for Elementor Form

In this section, you will configure the trigger event in Pabbly Connect to monitor Elementor form submissions. Click on the trigger application and search for ‘Elementor.’ Select it, then choose the trigger event as ‘New Form Submission.’ This sets up the connection to listen for submissions.

  • Select ‘Elementor’ as the trigger application.
  • Choose ‘New Form Submission’ as the trigger event.
  • Copy the webhook URL provided by Pabbly Connect.

Next, go to your Elementor form in WordPress and set the action after submit to ‘Webhook.’ Paste the copied URL into the designated field. This step ensures that every time a form is submitted, the data will be sent to Pabbly Connect.


3. Adding Notion Integration in Pabbly Connect

Now that you have set up the trigger, the next step is to add Notion as an action in Pabbly Connect. Click on the action application and search for ‘Notion.’ Select it and choose the action event as ‘Create Database Item.’ This allows you to store form responses in your Notion database.

Connect your Notion account by clicking on ‘Add New Connection’ and allow access to the necessary databases. Once connected, select the specific Notion database where you want to store the form submissions. You will map the fields from the Elementor form to the corresponding fields in Notion.

  • Select the Notion database for storing entries.
  • Map the fields from Elementor to Notion (e.g., name, email, phone, city).
  • Click on ‘Save and Send Test Request’ to verify the connection.

This integration ensures that every form submission is automatically logged into your Notion database, streamlining your data management process through Pabbly Connect.


4. Setting Up WhatsApp Alerts with Pabbly Connect

The final part of this integration involves setting up WhatsApp alerts using the WhatsApp Cloud API through Pabbly Connect. Add another action step and select ‘WhatsApp Cloud API’ as the application. Choose ‘Send Template Message’ as the action event.

To connect WhatsApp Cloud API, you need to provide the required credentials, including your access token, phone number ID, and WhatsApp Business Account ID. These details can be obtained from your WhatsApp Cloud API account. Once connected, select the message template you want to use for alerts.

Input your WhatsApp credentials (access token, phone number ID). Select the message template for alerts. Map the necessary variables (e.g., customer name, email, phone, city).

After setting up the template, click on ‘Save and Send Test Request’ to check if the alert is sent successfully to your WhatsApp. This completes the integration process, allowing you to receive instant alerts via WhatsApp for every new form submission through Pabbly Connect.


5. Conclusion

In conclusion, using Pabbly Connect to integrate Elementor with Notion and WhatsApp Cloud API allows for seamless data management and immediate client communication. You can easily receive WhatsApp alerts for form submissions and store responses in Notion, enhancing your workflow efficiency.

Ensure you check out Pabbly Connect to create business automation workflows and reduce manual tasks. Pabbly Connect currently offer integration with 2,000+ applications.

This setup not only saves time but also improves customer service by ensuring quick acknowledgment of inquiries. By following the steps outlined in this tutorial, you can implement this powerful automation for your business.


How to Create Facebook Pages Post from Microsoft Excel Using Pabbly Connect

Learn how to automate Facebook page posts from Microsoft Excel using Pabbly Connect in this step-by-step tutorial. Streamline your posting process today! Explore systematic approaches to creating efficient automation solutions that convert technical concepts into practical, implementable instructions.

Watch Step By Step Video Tutorial Below


1. Accessing Pabbly Connect for Automation

To create Facebook page posts from Microsoft Excel, you’ll first need to access Pabbly Connect. This platform serves as the central hub for automating your tasks between different applications.

Start by visiting the Pabbly Connect website. If you are a new user, you can sign up for a free account, which allows you to execute 100 tasks every month. Existing users can simply log in to their account to begin the automation process.


2. Creating a Workflow in Pabbly Connect

Once you are logged into Pabbly Connect, navigate to the dashboard. Here, you will need to create a new workflow to start automating your Facebook posts.

Click on the ‘Create Workflow’ button located in the top right corner. A dialog box will appear, prompting you to enter a name for your workflow. For this example, name it ‘Create Facebook Page Post from Microsoft Excel’ and choose a folder to save it in.

  • Enter the workflow name.
  • Select a folder for the workflow.
  • Click on ‘Create’ to finalize your workflow.

After creating the workflow, you will see two sections: Trigger and Action. The trigger is what starts the workflow, and the action is what happens as a result.


3. Setting Up the Trigger with Microsoft Excel

In this step, you will set up the trigger for your workflow using Pabbly Connect. Click on the arrow under the Trigger section to select Microsoft Excel as your trigger application.

For the trigger event, choose ‘New Row in Worksheet’. This means that every time you add a new row in your Excel worksheet, it will trigger the automation. Click on the ‘Connect’ button to establish a connection with Microsoft Excel.

  • Select ‘New Row in Worksheet’ as the trigger event.
  • Click on ‘Connect’ to link Microsoft Excel with Pabbly Connect.
  • Authorize the connection by clicking ‘Accept’ on the permission window.

After authorizing, select the workbook and worksheet where you will input your post details. For instance, select your workbook named ‘Facebook Page Content’ and the worksheet named ‘Content’.


4. Setting Up the Action to Post on Facebook

Now that your trigger is set up, it’s time to configure the action in Pabbly Connect. Choose Facebook Pages as the action application and select ‘Create Page Post’ as the action event.

Click on the connect button again to link your Facebook account with Pabbly Connect. Make sure you are logged into your Facebook account for a seamless connection. After connecting, select the Facebook page where you want to publish the post.

Select ‘Create Page Post’ as the action event. Choose the Facebook page to post content. Map the post title and content from the previous step.

For the message, you will map the title and content from the Excel worksheet. This means whenever you enter new data into Excel, it will automatically update the post on your Facebook page.


5. Testing the Automation

With everything set up, it’s time to test the automation using Pabbly Connect. Click on the ‘Save and Send Test Request’ button. This will send a test post to your Facebook page using the data from your Excel worksheet.

After clicking the button, check your Facebook page to see if the post has been created successfully. Refresh the page, and you should see the new post with the title and content that you entered in your Excel worksheet.

If the post appears on your Facebook page, congratulations! You have successfully automated the process of creating Facebook page posts from Microsoft Excel using Pabbly Connect.


Conclusion

In this tutorial, we demonstrated how to use Pabbly Connect to automate Facebook page posts from Microsoft Excel. By following the steps outlined, you can streamline your posting process, saving time and ensuring timely updates for your audience. This integration not only enhances your online presence but also keeps your followers engaged effortlessly.

Ensure you check out Pabbly Connect to create business automation workflows and reduce manual tasks. Pabbly Connect currently offer integration with 2,000+ applications.

Set Up Automation for Multiple Products in Razorpay Using Pabbly Connect

Learn how to automate multiple product sales in Razorpay with Pabbly Connect. Step-by-step guide for integrating Google Drive and Razorpay without coding. Implement the precise methodologies leading organizations use to automate repetitive tasks, illustrated with practical examples designed for immediate application.

Watch Step By Step Video Tutorial Below


Access Pabbly Connect to Set Up Automation

To start automating processes with Razorpay, first access Pabbly Connect. This platform allows you to easily integrate multiple applications without any coding skills. Begin by visiting the Pabbly Connect homepage and signing in or signing up for a new account.

Once logged in, you will see the dashboard where you can create workflows. Click on the ‘Create Workflow’ option. You will be prompted to name your workflow, such as ‘Set Up Automation for Multiple Products in Razorpay’ and select a folder for organization. This setup is crucial as it helps in managing different workflows effectively.


Set Up Trigger for Razorpay Payments

In this section, you will configure the trigger for your automation using Pabbly Connect. Select Razorpay as your trigger application. The trigger event should be set to ‘Payment Captured’. This means the workflow will start when a payment is successfully processed through Razorpay.

After selecting Razorpay, you will receive a webhook URL. This URL is essential for connecting Razorpay with Pabbly Connect. Go to your Razorpay dashboard, navigate to ‘Accounts and Settings’, and then to ‘Webhooks’. Here, click on ‘Add New Webhook’ and paste the copied URL. Ensure you select the ‘Payment Captured’ event as the active event before saving the webhook.


Test Payment to Capture Response

After setting up the webhook in Razorpay, it’s time to test the payment process. This step is crucial to ensure that Pabbly Connect receives the payment details correctly. Make a test payment using the payment page for your digital product. Once the payment is processed, return to Pabbly Connect to see if it captures the response.

Upon successful payment, you should see the payment details in your Pabbly Connect dashboard. This information includes the payment status, customer details, and amount. It’s essential to verify that the payment amount matches the product price to ensure the correct workflow will execute.


Set Up Routing and Actions for Product Access

Now that you have captured the payment response, you need to set up routing in Pabbly Connect. This allows you to differentiate between products based on the payment amount. Use the Router feature to create two different routes: one for the Digital Dynamics course and another for Java notes.

  • Create a condition in the first route for payments of 9999 for Digital Dynamics.
  • In the second route, set the condition for payments of 3999 for Java notes.
  • For each route, add action steps to share the respective files from Google Drive.

For the action steps, select Google Drive as the application and set the action event to ‘Share File’. Map the email address of the customer from the Razorpay response to ensure they receive access to the correct course materials. This setup allows for seamless delivery of digital products based on the payment received.


Final Testing and Verification of Automation

After configuring all routes and actions, it’s time to test the entire workflow. Make a test payment for both courses using Razorpay. Verify that upon successful payment, the correct course access is granted to the customer via Google Drive. This is the final check to ensure that Pabbly Connect is functioning as intended.

Once you confirm that the automation works for both products, you can confidently use this setup for actual transactions. This process exemplifies how Pabbly Connect simplifies integration between multiple applications, allowing for efficient management of digital product sales.


Conclusion

In this tutorial, we explored how to set up automation for multiple products in Razorpay using Pabbly Connect. The integration allows for automatic access to digital products upon payment, streamlining your sales process. This setup is ideal for anyone looking to enhance their online sales efficiency.

Ensure you check out Pabbly Connect to create business automation workflows and reduce manual tasks. Pabbly Connect currently offer integration with 2,000+ applications.

How to Create Flodesk Subscriber from New Google Sheets Tables Row Using Pabbly Connect

Learn how to seamlessly create Flodesk subscribers from new Google Sheets rows using Pabbly Connect in this detailed step-by-step tutorial. Master proven automation processes with practical implementation examples and strategic recommendations you can apply immediately in your workflow.

Watch Step By Step Video Tutorial Below


1. Accessing Pabbly Connect for Integration

To create a Flodesk subscriber from a new Google Sheets row, you first need to access Pabbly Connect. Start by visiting the Pabbly website and signing in to your account. If you are new, you can sign up for free and get started with 100 tasks each month.

Once you are logged in, navigate to your dashboard and click on the ‘Access Now’ button for Pabbly Connect. This will allow you to create a new workflow that integrates Google Sheets with Flodesk.


2. Creating a Workflow in Pabbly Connect

In Pabbly Connect, the next step is to create a new workflow. Click on the ‘Create Workflow’ button, and you will be prompted to name your workflow. Name it ‘Create Flodesk Subscriber from Google Sheets Table Row’ and select the folder where you want to save it.

  • Click on the ‘Create’ button to proceed.
  • This opens the workflow window where you will set the trigger and action.

In this window, you will select Google Sheets as the trigger application. Choose the trigger event as ‘New or Updated Spreadsheet Row’. This configuration will ensure that every time a new row is added or updated in Google Sheets, it triggers the workflow in Pabbly Connect.


3. Setting Up Google Sheets with Pabbly Connect

After setting up the trigger, Pabbly Connect provides you with a webhook URL. This URL is essential for connecting your Google Sheets to the workflow. Copy this URL and head to your Google Sheets account.

In Google Sheets, go to the ‘Extensions’ menu, select ‘Add-ons’, and then click on ‘Get Add-ons’. Search for the Pabbly Connect Webhook extension. If you haven’t installed it yet, click on the install button. After installation, refresh the Google Sheets page.

  • Go back to the ‘Extensions’ menu and find the Pabbly Connect Webhook option.
  • Select ‘Initial Setup’ and paste the webhook URL you copied earlier.
  • Specify the trigger column (e.g., G) where the final data will be entered.

Once you click on ‘Submit’, you will see a confirmation message indicating that the setup is configured successfully, establishing a connection between Google Sheets and Pabbly Connect.


4. Testing the Integration with Pabbly Connect

Now that you have set up Pabbly Connect with Google Sheets, it’s time to test the integration. Ensure that the ‘Send On Event’ option in the Pabbly Connect Webhook settings is turned on. This ensures that any new event in Google Sheets will automatically send data to your workflow.

To test, add a new row in Google Sheets with the lead details such as first name, last name, email, company, phone number, source, and status. After entering the details, check your Pabbly Connect workflow to see if it captures the response correctly.

Make sure to fill in all necessary fields in the new row. Verify that the data appears correctly in the workflow response.

If the response is captured successfully, you are ready to move on to the action step where you will create a subscriber in Flodesk.


5. Creating a Subscriber in Flodesk via Pabbly Connect

With the trigger successfully set, the next step involves selecting Flodesk as the action application in Pabbly Connect. Choose the action event as ‘Create or Update a Subscriber’. Click on ‘Connect’ to establish a connection with your Flodesk account.

If this is your first time connecting, you will need to enter your Flodesk email and password. After signing in, grant the necessary permissions to Pabbly Connect. Once connected, you will map the fields from Google Sheets to Flodesk, starting with the subscriber’s email.

Map the email, first name, last name, phone number, and company fields from the Google Sheets response. Decide whether to send confirmation emails to the subscribers.

After mapping all required fields, click on ‘Save and Send Test Request’. If successful, you will receive a positive response indicating that a new Flodesk subscriber has been created. You can verify this by checking your Flodesk account for the newly added subscriber.


Conclusion

This tutorial demonstrates how to create a Flodesk subscriber from a new Google Sheets row using Pabbly Connect. By following these steps, you can automate your email marketing process effectively and engage with your leads efficiently.

Ensure you check out Pabbly Connect to create business automation workflows and reduce manual tasks. Pabbly Connect currently offer integration with 2,000+ applications.

How to Set Up Webhook Inside Pipeline CRM Using Pabbly Connect

Learn how to set up a webhook inside Pipeline CRM using Pabbly Connect. This tutorial covers each step to integrate new leads effectively. Explore efficient methods for automating routine tasks with clear, concise instructions suited for both newcomers and experienced professionals.

Watch Step By Step Video Tutorial Below


1. Introduction to Pipeline CRM and Pabbly Connect

In this tutorial, we will explore how to set up a webhook inside Pipeline CRM using Pabbly Connect. Pipeline CRM is a powerful tool that helps manage customer relationships and sales processes. Integrating it with Pabbly Connect allows you to automate tasks efficiently.

Using Pabbly Connect, you can connect Pipeline CRM with various applications to send information automatically. This integration ensures that you can manage new leads effectively and streamline your sales process.


2. Setting Up the Webhook in Pipeline CRM

To set up the webhook, first log into your Pipeline CRM account and navigate to your profile icon. Click on it to access account settings. Here, you will find the option for automations, which is crucial for integrating with Pabbly Connect.

  • Click on ‘Account Settings’
  • Select ‘Automations’
  • Click on ‘Create New Automation’

After clicking on ‘Create New Automation’, give your automation a name like ‘New Leads’. This will help you identify the automation later. You can also add a description for better clarity on its purpose.


3. Configuring Trigger and Action in Pabbly Connect

Next, you need to configure the trigger for your automation. Within Pabbly Connect, select Pipeline CRM as your application and choose the trigger event as ‘New Person’. This event will activate whenever a new lead is added.

Once you select the trigger event, Pabbly Connect will generate a webhook URL. Copy this URL and return to your Pipeline CRM account to complete the setup.

  • Paste the webhook URL in the appropriate field
  • Set the condition to run the automation when a new person is created
  • Add actions as necessary to handle the new lead

This configuration allows Pabbly Connect to receive data from Pipeline CRM automatically whenever a new lead is created. This setup is essential for ensuring that no lead is missed.


4. Testing the Automation in Pabbly Connect

After setting up the automation, it’s crucial to test it. Go back to Pabbly Connect and click on the ‘Test’ button to verify that the webhook is functioning correctly. You should receive a test response indicating that the setup is successful.

To perform a live test, create a new lead in your Pipeline CRM by submitting a form. After submission, check Pabbly Connect to see if it captured the new lead’s information correctly. This ensures that your integration is working as intended.


5. Conclusion

In this tutorial, we learned how to set up a webhook inside Pipeline CRM using Pabbly Connect. This integration allows you to automate the process of managing new leads effectively. By following the steps outlined, you can ensure that your sales processes are streamlined and efficient.

Ensure you check out Pabbly Connect to create business automation workflows and reduce manual tasks. Pabbly Connect currently offer integration with 2,000+ applications.

Utilizing Pabbly Connect for your CRM integrations will significantly enhance your ability to manage new leads and improve overall productivity. Make sure to implement these steps to take full advantage of automated workflows.


Automate Certificate Sending with Pabbly Connect Based on Quiz Results

Learn how to automate sending certificates based on quiz results using Pabbly Connect, Google Forms, and Gmail. Step-by-step tutorial included. Learn to create powerful connections between your critical applications without requiring specialized programming knowledge or extensive technical background.

Watch Step By Step Video Tutorial Below


1. Accessing Pabbly Connect for Automation

To start automating the sending of certificates based on quiz results, first access Pabbly Connect. Open your browser and navigate to the Pabbly Connect website. Here, you can either sign up for a new account or log in if you already have one.

Once signed in, you will reach the dashboard. Click on the ‘Create Workflow’ button to begin setting up your automation. You can name your workflow something descriptive like ‘Google Forms to Google Slides to Gmail’ to reflect the applications involved.


2. Setting Up the Trigger with Google Forms

The next step involves setting up the trigger in Pabbly Connect. Choose Google Forms as the application and select the trigger event as ‘New Response Received.’ This setup allows Pabbly Connect to capture responses from your quiz form.

  • Select the Google Form you created for the quiz.
  • Copy the webhook URL provided by Pabbly Connect.
  • Link your Google Form to Google Sheets to store the responses.

After linking, ensure that the Google Sheets add-on for Pabbly Webhooks is installed and configured correctly to send data to Pabbly Connect each time a new response is submitted.


3. Filtering Quiz Results with Pabbly Connect

Once the trigger is set, the next step is to filter the quiz results. Use the ‘Text Formatter’ feature in Pabbly Connect to extract the score from the Google Forms response. This allows you to check if the score is above the threshold, which is six points in this case.

  • Select ‘Text Formatter’ and choose the action event as ‘Split Text’.
  • Map the score response from Google Forms to this action.
  • Set the separator as ‘/’ to split the score from the total.

After splitting the score, set up a filter condition using the ‘Filter’ feature in Pabbly Connect to continue the automation only if the score is greater than six.


4. Generating Certificates Using Google Slides

After filtering the quiz results, you can generate certificates using Google Slides within Pabbly Connect. Choose Google Slides as the action app and select the action event as ‘Create Presentation from Template’.

Connect your Google Slides account and select the certificate template you’ve created. Map the participant’s name and score to the appropriate fields in the template to personalize the certificate for each user.


5. Sending Certificates via Gmail

The final step in this automation process is to send the generated certificate via email using Gmail. In Pabbly Connect, select Gmail as the action application and choose the action event ‘Send Email’.

Map the recipient’s email address from the Google Forms response to ensure the certificate is sent to the correct person. Customize the email subject and body, and include the PDF link of the certificate as an attachment.


Conclusion

In this tutorial, we explored how to automate sending certificates based on quiz results using Pabbly Connect, Google Forms, and Gmail. By following these steps, you can streamline your workflow and enhance user engagement effectively.

Ensure you check out Pabbly Connect to create business automation workflows and reduce manual tasks. Pabbly Connect currently offer integration with 2,000+ applications.