Automate Offer Letter Creation with Pabbly Connect and Google Sheets

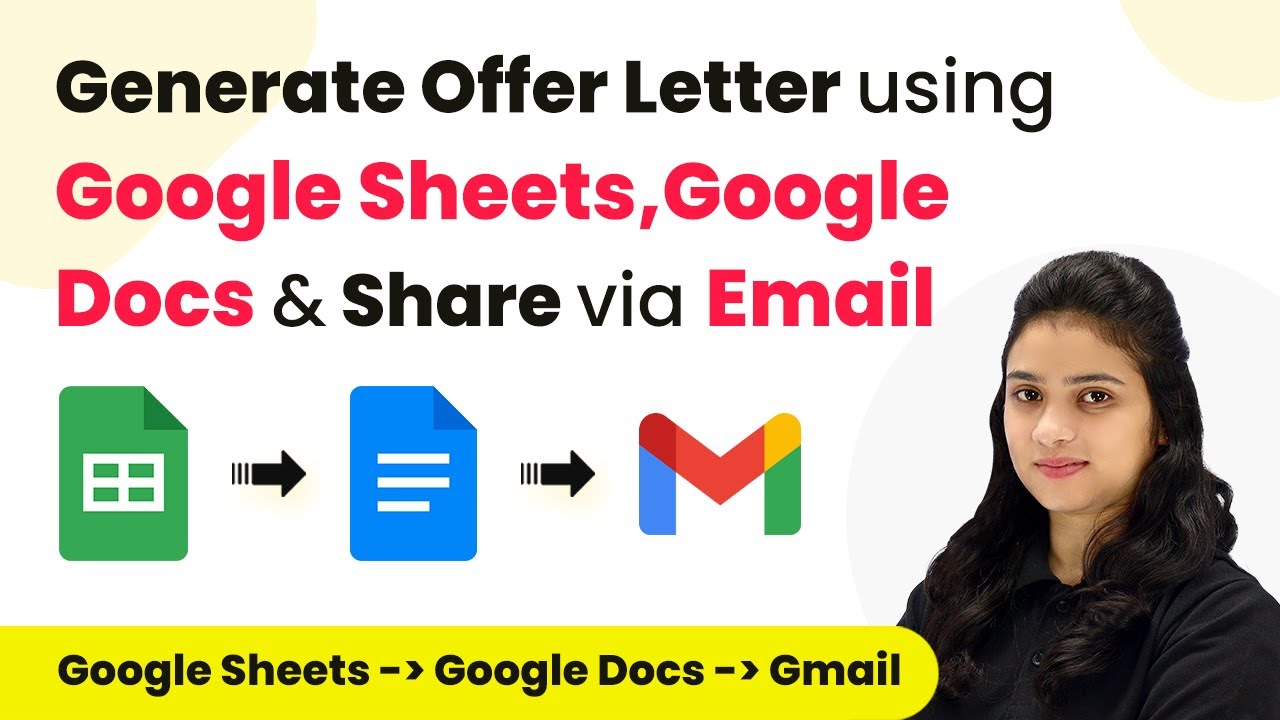
Learn how to automate the creation and sharing of offer letters using Pabbly Connect, Google Sheets, and Gmail. Step-by-step tutorial included. Implement the precise methodologies leading organizations use to automate repetitive tasks, illustrated with practical examples designed for immediate application.

Watch Step By Step Video Tutorial Below


1. Setting Up Pabbly Connect for Offer Letters

To automate the creation of offer letters, we will use Pabbly Connect as the central integration platform. Start by signing into your Pabbly Connect account or create a new one if you haven’t already. Once signed in, navigate to the dashboard to create a new workflow.

Click on the ‘Create Workflow’ button and name your workflow. For example, name it ‘Create and Send Job Offer Letters Automatically.’ After naming, select a folder to save your workflow. This will help in organizing your automations.


2. Triggering the Workflow with Google Sheets

The first step in our automation is to set Google Sheets as the trigger application in Pabbly Connect. Select ‘Google Sheets’ as your trigger app and choose the event ‘New or Updated Row’. This means that every time a new row is added in your Google Sheets, it will trigger the workflow.

  • Select ‘Google Sheets’ as the trigger application.
  • Choose the trigger event as ‘New or Updated Row’.
  • Copy the provided webhook URL for connecting Google Sheets.

Next, go to your Google Sheets and install the Pabbly Connect Webhooks add-on. After installation, go to Extensions > Pabbly Connect Webhooks and set up the initial configuration by pasting the webhook URL and defining the trigger column.


3. Creating Offer Letters in Google Docs

After setting up the trigger, the next step is to create the offer letter in Google Docs using Pabbly Connect. Select ‘Google Docs’ as the action application and choose ‘Create Document from Template’ as the action event. This allows us to use a pre-defined template for the offer letter.

Map the required fields from Google Sheets to your Google Docs template, ensuring that details like candidate name, designation, and other dynamic fields are accurately filled in. This mapping makes sure that every new entry in Google Sheets generates a personalized offer letter.

  • Select the template document for the offer letter.
  • Map the candidate’s details such as name, address, and designation.
  • Save the document and ensure it is created in the specified location.

This step is crucial as it automates the letter creation process, eliminating manual errors and saving time.


4. Sending the Offer Letter via Gmail

Once the offer letter is created, the next step involves sending it via email using Gmail integrated through Pabbly Connect. Select ‘Gmail’ as the action application and choose the action event ‘Send Email’. This will allow you to send the offer letter directly to the candidate’s email.

Fill in the required fields such as the recipient’s email address, subject line, and email body. Map the PDF link of the offer letter so it can be attached to the email. Ensure that the sender’s name and email content are also dynamically mapped to personalize the message for each candidate.

Map the recipient’s email address from Google Sheets. Set the subject line to include the candidate’s designation. Attach the PDF link of the created offer letter.

This integration ensures that candidates receive their offer letters promptly, enhancing the efficiency of the HR process.


5. Finalizing the Automation and Testing

To finalize the automation, test the entire workflow to ensure everything works seamlessly. Add a new row in your Google Sheets with the candidate’s details and set the status to ‘send’. This should trigger the workflow, creating the offer letter and sending it via email.

After testing, check both Google Docs for the newly created offer letter and Gmail for the sent email. Ensure that all details are correctly filled in and that the email is received by the candidate. This step is crucial for validating the entire integration process using Pabbly Connect.

Once confirmed, your automation is ready to go! You can now create and send job offer letters automatically, saving time and effort in your HR tasks.


Conclusion

In this tutorial, we explored how to automate the creation and sending of job offer letters using Pabbly Connect, Google Sheets, and Gmail. This integration streamlines HR processes and enhances efficiency in managing candidate communications.

Ensure you check out Pabbly Connect to create business automation workflows and reduce manual tasks. Pabbly Connect currently offer integration with 2,000+ applications.

How to Generate Offer Letters Using Pabbly Connect with Google Sheets and Google Docs

Learn how to automate offer letter generation using Pabbly Connect, Google Sheets, Google Docs, and Slack. Step-by-step guide for seamless integration. Master proven automation processes with practical implementation examples and strategic recommendations you can apply immediately in your workflow.

Watch Step By Step Video Tutorial Below


Setting Up Pabbly Connect for Offer Letter Generation

To generate offer letters using Google Sheets and Google Docs, start by setting up Pabbly Connect. This integration platform allows you to automate workflows seamlessly. Visit the Pabbly Connect dashboard and create a new workflow by clicking on the ‘Create Workflow’ button.

Give your workflow a name, such as ‘Automatically Generate Offer Letters.’ Once you create this workflow, you will be presented with a trigger and action window. The trigger will be Google Sheets, and the action will involve Google Docs and Slack, all facilitated by Pabbly Connect.


Next, you will link your Google Sheets to Pabbly Connect. In the trigger step, select Google Sheets and choose the trigger event as ‘New or Updated Spreadsheet Row.’ This will allow Pabbly Connect to monitor when new candidate details are added to the sheet.

After selecting the trigger event, Pabbly Connect will provide a webhook URL. Copy this URL and navigate to your Google Sheets. Go to Extensions > Add-ons > Get Add-ons, and search for ‘Pabbly Connect Webhooks.’ Install this add-on, then refresh your Google Sheets.

  • Select the sheet containing candidate details.
  • Paste the webhook URL in the designated field.
  • Set the trigger column, usually the last column of data.

Click on ‘Send Test’ to validate the connection. Once confirmed, your Google Sheets will be successfully linked to Pabbly Connect.


Generating the Offer Letter Using Google Docs

With Google Sheets linked, the next step is to generate the offer letter in Google Docs using the data entered. In the action step of Pabbly Connect, select Google Docs and choose the action event as ‘Create Document from Template.’ This allows you to use a predefined template for the offer letter.

After connecting your Google Docs account, select the template document you prepared earlier. For the new document name, you can use dynamic fields from the previous steps, such as the candidate’s name followed by ‘Offer Letter.’ This ensures each document is uniquely named based on the candidate.

  • Map the candidate’s name, address, and other details from Google Sheets.
  • Ensure all dynamic fields in the template are correctly filled.
  • Click ‘Save and Send Test Request’ to create the document.

Once the document is created, it will be saved in your Google Drive, and you can verify this by checking the specified folder.


Sharing the Offer Letter via Slack

The final step involves sharing the generated offer letter with your HR team on Slack. In this action step, select Google Drive and choose the action event ‘Share a File with Anyone.’ This will allow you to adjust the sharing settings of the offer letter.

Connect your Google Drive account to Pabbly Connect and map the document ID received from the previous Google Docs step. After mapping, change the sharing permissions to ensure the document is accessible to your HR team.

Select the channel on Slack where you want to send the message. Create a message that includes the candidate’s name and a link to the PDF file. Click ‘Save and Send Test Request’ to send the message.

Now, your HR team will receive a message on Slack with the link to the generated offer letter, completing the automation process.


Testing the Automation Workflow

To ensure everything functions correctly, it’s crucial to test the entire automation workflow. Enter the details of a new candidate in your Google Sheets and set the status to ‘Generate.’ This action should trigger the workflow in Pabbly Connect.

Monitor the Google Drive folder to see if the offer letter is generated. Then, check your Slack channel for the message that includes the candidate’s details and the link to the PDF offer letter.

If the status is not set to ‘Generate,’ the automation will not proceed, demonstrating the effectiveness of the filter condition you set earlier. Adjusting the status will allow you to see the complete automation in action.


Conclusion

By using Pabbly Connect, you can automate the process of generating offer letters from Google Sheets and Google Docs, sharing them seamlessly on Slack. This integration enhances efficiency and reduces manual errors in HR processes.

Ensure you check out Pabbly Connect to create business automation workflows and reduce manual tasks. Pabbly Connect currently offer integration with 2,000+ applications.

How to Send WhatsApp Message to Facebook Leads Using Pabbly Connect

Learn how to automate sending WhatsApp messages to Facebook leads for your insurance agency using Pabbly Connect. Step-by-step tutorial included. Explore efficient methods for automating routine tasks with clear, concise instructions suited for both newcomers and experienced professionals.

Watch Step By Step Video Tutorial Below


1. Accessing Pabbly Connect for Automation

To start sending WhatsApp messages to Facebook leads, first access Pabbly Connect. This automation tool allows you to connect your Facebook leads with WhatsApp seamlessly, making it perfect for your insurance agency.

Begin by visiting the Pabbly Connect website. If you are a new user, click on ‘Sign Up for Free’ to create an account. Existing users should click ‘Sign In’ to access their dashboard. Once logged in, navigate to the Pabbly Connect application and click on ‘Access Now’ to begin setting up your workflow.


2. Creating Your Workflow in Pabbly Connect

After accessing Pabbly Connect, click on the ‘Create Workflow’ button. This is where you will set up the automation to send WhatsApp messages to your Facebook leads. Name your workflow, for instance, ‘Facebook Lead Ads to WhatsApp for Insurance Agency,’ and choose an appropriate folder for organization.

  • Click on the ‘Create’ button to initiate the workflow.
  • Select Facebook Lead Ads as your trigger application.
  • Choose ‘New Lead Instant’ as the trigger event.

These steps effectively set the stage for your automation, establishing Facebook as the trigger for sending WhatsApp messages via Pabbly Connect.


3. Connecting Facebook Lead Ads to Pabbly Connect

Once you’ve set the trigger, the next step is to connect your Facebook Lead Ads account. Click on ‘Connect’ and choose to add a new connection. Follow the prompts to link your Facebook account to Pabbly Connect.

After establishing the connection, select your Facebook page, in this case, ‘Elite Chore Insurance,’ and the lead form you want to use. Click on ‘Save and Send Test Request’ to capture a dummy lead response, which Pabbly Connect will use to trigger the WhatsApp message.


4. Setting Up WhatsApp Integration in Pabbly Connect

After successfully capturing the lead information, proceed to set up the action application. Select ‘WhatsApp Cloud API’ as the action application and choose ‘Send Template Message’ as the action event. This allows Pabbly Connect to send a WhatsApp message automatically when a new lead is captured.

Click on ‘Connect’ to establish the WhatsApp Cloud API connection. You will need to enter your API token, phone number ID, and WhatsApp business account ID, which can be obtained from the Meta for Developers platform. After entering these details, click on ‘Save’ to complete the connection.


5. Mapping Fields and Testing the Workflow

With the WhatsApp connection established, it’s time to map the necessary fields. Select the template name and language code from your WhatsApp account. Ensure you map the phone number and personalize the message body using variables to make it dynamic.

  • Replace the dummy mobile number with the actual number for testing.
  • Click on ‘Save and Send Test Request’ to verify the integration.

If everything is set correctly, you will receive a WhatsApp message confirming the successful automation. This step proves that Pabbly Connect effectively connects your Facebook leads with WhatsApp, ensuring no lead goes unattended.


Conclusion

In this tutorial, we explored how to use Pabbly Connect to send WhatsApp messages to Facebook leads for your insurance agency. By following the outlined steps, you can automate your communication process effectively and efficiently.

Ensure you check out Pabbly Connect to create business automation workflows and reduce manual tasks. Pabbly Connect currently offer integration with 2,000+ applications.

How to Send SMS from Google Sheets using Pabbly Connect and Dove Soft

Learn how to send SMS from Google Sheets using Pabbly Connect and Dove Soft. This detailed tutorial covers step-by-step integration without coding. Master proven automation processes with practical implementation examples and strategic recommendations you can apply immediately in your workflow.

Watch Step By Step Video Tutorial Below


1. Accessing Pabbly Connect for Automation

To send SMS from Google Sheets using Pabbly Connect, start by accessing the platform. Simply visit the Pabbly Connect website and either sign in if you are an existing user or click on ‘Sign up for free’ to create a new account. New users receive 100 free tasks monthly, allowing them to explore this powerful automation tool.

Once logged in, navigate to the dashboard where you can manage your workflows. Click on the ‘Create Workflow’ option to begin setting up your automation. Here, you will provide a name for your workflow, such as ‘Send Automated SMS from Google Sheets using Dove Soft’. After naming, select the folder where you want to save this workflow.


2. Setting Up the Trigger with Google Sheets

In this step, you will configure the trigger for your workflow using Google Sheets. Select Google Sheets as your trigger application in Pabbly Connect. The trigger event you need to choose is ‘New or Updated Spreadsheet Row’. This event will initiate the workflow whenever a new row is added to your Google Sheets.

  • Select Google Sheets as the trigger application.
  • Choose ‘New or Updated Spreadsheet Row’ as the trigger event.
  • Copy the provided webhook URL for later use.

After selecting the trigger event, a webhook URL will be generated. This URL is crucial for connecting your Google Sheets with Pabbly Connect. Copy this URL and proceed to your Google Sheets to set up the integration.


3. Integrating Google Sheets with Pabbly Connect

In your Google Sheets, navigate to the Extensions menu and select Add-ons, then click on ‘Get Add-ons’. Search for ‘Pabbly Connect Webhook’ and install it. After installation, refresh your Google Sheets to ensure the add-on appears under Extensions.

  • Go to Extensions > Pabbly Connect Webhooks > Initial Setup.
  • Paste the copied webhook URL into the designated field.
  • Specify the trigger column (e.g., column C for mobile numbers).

Once you have set this up, click the ‘Send Test’ button to verify the connection. This will send a test response to Pabbly Connect, confirming that your Google Sheets integration is successful.


4. Configuring Dove Soft SMS as the Action

Now, it’s time to set up Dove Soft SMS as the action in your Pabbly Connect workflow. Select Dove Soft SMS as your action application and choose the action event ‘Send SMS’. This step allows you to automate the sending of SMS messages to the customers listed in your Google Sheets.

To establish a connection with Dove Soft, select ‘Add New Connection’ and enter your Dove Soft username and key. You can find these details in your Dove Soft account under the JSON API section. After entering the required information, click on ‘Save’ to finalize the connection.

Next, you will need to enter the SMS content. Personalize your message by mapping the customer name from the previous response. For example, your SMS could read: ‘Dear [Customer Name], enjoy our grand opening discount at Divine Glamour Makeup Studio. Book any service and get 20% off!’ Remember to format the mobile number correctly, including the country code.


5. Finalizing the Automation Process

With your workflow set up, you can now finalize the automation process in Pabbly Connect. Click on the ‘Save and Send Test Request’ button to ensure the SMS is sent correctly. You should receive a success response indicating that the SMS was sent to the mapped number.

If you want to send SMS to all existing customers listed in your Google Sheets, use the ‘Send All Data’ button in the Pabbly Connect Webhooks menu. This action will automatically send messages to all customers whose details are present in your spreadsheet.

For ongoing automation, ensure that you check the ‘Send on Event’ option. This setting will allow SMS to be sent automatically whenever a new row is added to your Google Sheets. This integration through Pabbly Connect ensures that your SMS sending process is efficient and requires no manual intervention.


Conclusion

In this tutorial, we explored how to send SMS from Google Sheets using Pabbly Connect and Dove Soft. This integration allows for automated messaging, enhancing communication with customers without the need for coding skills. Enjoy seamless SMS automation!

Ensure you check out Pabbly Connect to create business automation workflows and reduce manual tasks. Pabbly Connect currently offer integration with 2,000+ applications.

How to Send WhatsApp Messages to Facebook Leads for Performance Marketing Agency Using Pabbly Connect

Learn how to send WhatsApp messages to Facebook leads for your performance marketing agency using Pabbly Connect. Step-by-step tutorial included. Follow this definitive guide to creating powerful automated workflows with straightforward, efficiency-focused solutions that save valuable time.

Watch Step By Step Video Tutorial Below


1. Setting Up Pabbly Connect for WhatsApp Messaging

To send WhatsApp messages to Facebook leads for your performance marketing agency, the first step is to access Pabbly Connect. This platform allows you to automate the process by connecting different applications seamlessly. Start by signing into your Pabbly Connect account or create a new account if you are a first-time user.

Once logged in, navigate to the dashboard and click on the ‘Create Workflow’ button. Name your workflow, such as ‘Send WhatsApp Messages to Facebook Leads for Performance Marketing Agency,’ and save it in a designated folder for easy access.


2. Setting Up Facebook Lead Ads as a Trigger in Pabbly Connect

In this section, you will configure Facebook Lead Ads as the trigger application in Pabbly Connect. This means that whenever a new lead is generated through your Facebook ads, it will initiate the workflow you created. Select Facebook Lead Ads as your trigger application and choose the trigger event as ‘New Lead Instant.’

  • Click on ‘Connect’ to establish a connection with Facebook Lead Ads.
  • Authorize Pabbly Connect to access your Facebook account.
  • Select the appropriate Facebook page and lead form associated with your ads.

After selecting the page and lead form, click on ‘Save and Send Test Request’ to ensure the connection is established successfully. This will allow Pabbly Connect to capture new leads in real-time.


3. Testing the Facebook Lead Ads Connection

Testing the connection between Facebook Lead Ads and Pabbly Connect is crucial to ensure that your setup works correctly. To do this, you will need to perform a test submission of your lead form. Navigate to the Meta for Developers page and access the Lead Ads Testing Tool.

  • Select your Facebook page and lead form from the dropdown menus.
  • Fill in the required fields and click on ‘Submit’ to send a test lead.
  • Confirm that the test lead has been received in Pabbly Connect.

Once the test lead is successfully captured in Pabbly Connect, you are ready to move on to the next step of sending WhatsApp messages.


4. Configuring WhatsApp Cloud API in Pabbly Connect

Now, you will configure the WhatsApp Cloud API as the action application in Pabbly Connect. This step involves connecting your WhatsApp Cloud API account to Pabbly Connect to send messages. Click on ‘Connect’ and enter your WhatsApp API token, phone number ID, and WhatsApp Business Account ID.

After entering the required information, click on ‘Save’ to establish the connection. Once connected, select the message template you created in WhatsApp Cloud API, which will be used to send messages to new leads.


5. Sending WhatsApp Messages to New Leads

In this final step, you will set up how Pabbly Connect sends WhatsApp messages to your new leads. Use the mapping feature to dynamically insert lead details such as the recipient’s mobile number and name into your message template. This ensures that each message is personalized for the lead.

Select the appropriate message template for the WhatsApp message. Map the lead’s mobile number and name from the previous step. Click on ‘Save and Send Test Request’ to send a test message.

Upon successful test completion, you can confirm that WhatsApp messages will now be sent automatically to new leads generated through your Facebook ads. This automation streamlines your communication process, allowing you to engage with potential clients effectively.


Conclusion

Using Pabbly Connect, you can efficiently send WhatsApp messages to Facebook leads for your performance marketing agency. This integration not only saves time but also enhances your lead engagement strategy. Automate your communication today for better results!

Ensure you check out Pabbly Connect to create business automation workflows and reduce manual tasks. Pabbly Connect currently offer integration with 2,000+ applications.

Automate SMS Notifications with Pabbly Connect and Jotform

Learn how to send automated SMS notifications using Pabbly Connect with Jotform submissions. Follow this step-by-step tutorial for seamless integration. Eliminate manual repetitive tasks from your workflow. Discover proven automation methods with intuitive steps designed for efficiency-minded professionals.

Watch Step By Step Video Tutorial Below


1. Setting Up Pabbly Connect for Jotform Integration

Pabbly Connect is the central platform that facilitates the integration between Jotform and Dove Soft SMS. To start, you need to access your Pabbly Connect dashboard. If you don’t have an account, you can sign up for free using the link in the description. using Pabbly Connect

Once logged in, click on ‘Create Workflow’ and name your workflow, for example, ‘Jotform to Dove Soft SMS.’ Select the appropriate folder in your Pabbly Connect account where you want to save this workflow and click on ‘Create’ to open the workflow.


2. Creating a Trigger for New Jotform Submission

In this step, you will set up the trigger in Pabbly Connect to listen for new submissions from Jotform. In the trigger section, search for ‘Jotform’ and select it as the app. Then, choose the trigger event as ‘New Response.’ Pabbly Connect will generate a webhook URL for you. using Pabbly Connect

  • Copy the webhook URL provided by Pabbly Connect.
  • Go to your Jotform account and open the form you want to connect.
  • Navigate to Settings > Integrations, and search for ‘Webhook’.
  • Paste the copied webhook URL and complete the integration.

After completing the integration, Pabbly Connect will be ready to receive data whenever a new form submission occurs in Jotform. This setup ensures that every time a user submits the form, their details will be sent to Pabbly Connect.


3. Testing the Jotform Integration with Pabbly Connect

To test the integration, you will need to make a test submission on your Jotform. Fill out the form with dummy data, including the name, mobile number, and email address. After submitting the form, check Pabbly Connect to see if the new response has been captured. using Pabbly Connect

When the test submission is successful, Pabbly Connect will display the details of the form submission, including the name and mobile number of the user. This confirms that the trigger is functioning correctly and that data is being transmitted from Jotform to Pabbly Connect.


4. Sending SMS Using Dove Soft SMS through Pabbly Connect

With the trigger set up and tested, the next step is to send an SMS using Dove Soft SMS. In the action step of your workflow, search for ‘Dove Soft SMS’ and select it. Choose the action event as ‘Send SMS’ and click on ‘Connect’ to set up the connection with your Dove Soft account. using Pabbly Connect

  • Enter your Dove Soft SMS username and API key to connect.
  • In the SMS body, you can write a message like: ‘Hello [First Name], thank you for your feedback!’
  • Map the mobile number field from the Jotform response to the SMS action.

After configuring the SMS settings, click on ‘Save and Send Test Request’. If successful, you will receive a notification confirming that the SMS has been sent to the user’s mobile number. This completes the integration process, ensuring that every new form submission triggers an SMS notification.


5. Conclusion

In this tutorial, we demonstrated how to use Pabbly Connect to automate SMS notifications for new Jotform submissions. By following these steps, you can easily set up a workflow that sends personalized SMS messages to users after they submit a form.

Ensure you check out Pabbly Connect to create business automation workflows and reduce manual tasks. Pabbly Connect currently offer integration with 2,000+ applications.

This integration not only streamlines your communication process but also enhances user engagement through timely notifications. Start using Pabbly Connect today to automate your workflows efficiently.

Integrate Facebook Leads to Google Sheets for Your Handloom Business Using Pabbly Connect

Learn how to seamlessly integrate Facebook leads into Google Sheets for your handloom business using Pabbly Connect. Follow our step-by-step guide. Develop expertise in application integration and learn how to design streamlined automation workflows using proven, simplified approaches.

Watch Step By Step Video Tutorial Below


1. Accessing Pabbly Connect for Integration

To start integrating Facebook leads into Google Sheets for your handloom business, first, access Pabbly Connect. If you are a new user, sign up for a free account, which includes 100 tasks every month. Existing users can simply log in.

Upon logging into Pabbly Connect, navigate to your dashboard. Click on the ‘Create Workflow’ button to begin the automation process. Enter a name for your workflow, such as ‘Facebook Leads to Google Sheets for Handloom Business’, and select a folder for organization.


2. Setting Up the Trigger with Facebook Lead Ads

In this step, you will set up the trigger in Pabbly Connect using Facebook Lead Ads. Select Facebook Lead Ads as your application and choose the ‘New Lead Instant’ trigger event to ensure leads are captured immediately.

  • Select ‘Add New Connection’ to connect your Facebook account.
  • Choose your Facebook page, in this case, ‘Crafted with Care’.
  • Select the lead form to be used, which should also be ‘Crafted with Care’.

After saving and sending the test request, Pabbly Connect will wait for a lead response. To generate a lead, use the Meta for Developers tools to preview your form and submit a dummy lead. This will allow Pabbly Connect to capture the lead data.


3. Setting Up Action Step in Google Sheets

Once you have your trigger set, it’s time to configure the action in Pabbly Connect. Choose Google Sheets as your application and select ‘Add a New Row’ as the action event. This will allow you to add new leads directly to your Google Sheet.

Click on ‘Add New Connection’ to connect your Google account. You will need to sign in and grant permissions to Pabbly Connect. After connecting, specify the spreadsheet name as ‘Facebook Leads’ and the sheet name as ‘Handloom’.

  • Map the fields from your Facebook lead data to your Google Sheet, including name, email, and phone number.
  • After mapping, click on ‘Save and Send Test Request’ to verify the integration.

Check your Google Sheet to confirm that the dummy lead information has been added successfully. This indicates that the integration is working as intended through Pabbly Connect.


4. Testing the Workflow

To ensure everything is functioning correctly, you need to test the workflow in Pabbly Connect. Go back to the lead ads testing tool and refresh the page. Select your page and form, and enter new dummy lead details.

Submit the form and then return to your Google Sheets to verify if the new lead has been captured. If successful, you will see the new dummy lead details reflected in your spreadsheet.

This step validates that Pabbly Connect has successfully linked Facebook Lead Ads with Google Sheets, allowing for seamless data transfer.


5. Summary of Integration Steps

In summary, the integration process using Pabbly Connect involves several key steps: setting up Facebook Lead Ads as the trigger, connecting it to Pabbly Connect, and configuring Google Sheets to add new rows for each lead.

By following these steps, you can automate the process of collecting leads from Facebook and storing them in Google Sheets, enhancing efficiency for your handloom business. This integration not only saves time but also ensures that you never miss a lead.


Conclusion

Using Pabbly Connect to integrate Facebook leads into Google Sheets can streamline your handloom business operations. This automated process ensures that every lead is captured efficiently, allowing you to focus on growing your business.

Ensure you check out Pabbly Connect to create business automation workflows and reduce manual tasks. Pabbly Connect currently offer integration with 2,000+ applications.

How to Sync Asana Tasks with Toggl Track Tasks Using Pabbly Connect

Learn how to sync Asana tasks with Toggl Track tasks using Pabbly Connect. Follow our detailed tutorial for a seamless integration process. Build sophisticated automated workflows in less time than you think. This guide translates complex integrations into straightforward steps for immediate implementation.

Watch Step By Step Video Tutorial Below


1. Setting Up Pabbly Connect for Integration

To sync Asana tasks with Toggl Track tasks, you need to set up Pabbly Connect. This platform serves as the central hub for integrating various applications. Start by signing into your Pabbly Connect account, or sign up for free if you are a new user.

Once logged in, navigate to the dashboard. Click on the ‘Create Workflow’ button located in the top right corner. This action will prompt you to name your workflow, which you can title ‘Sync Asana Tasks with Toggl Track Tasks’. Select the folder where you want to save this workflow, such as the ‘Asana Toggl Track Automation’ folder, and click ‘Create’.


2. Configuring Asana as the Trigger Application

The next step in using Pabbly Connect is to set up Asana as the trigger application. In the trigger window, search for Asana and select it. The trigger event you want to choose is ‘New Task in Project’, which will activate whenever a new task is added in Asana.

  • Search for Asana in the trigger application.
  • Select ‘New Task in Project’ as the trigger event.
  • Click on ‘Connect’ to establish a connection with Asana.

After clicking ‘Connect’, you will be prompted to grant authorization. Once successfully connected, you will see the Asana application linked with Pabbly Connect. Select the specific project from which you want to sync tasks.


3. Setting Up Toggl Track as the Action Application

Now that Asana is configured as the trigger, it’s time to set up Toggl Track as the action application in Pabbly Connect. In the action window, search for Toggl Track and select it. The action event to choose is ‘Create New Task’. This will allow you to create a corresponding task in Toggl Track whenever a new task is created in Asana.

Click on ‘Connect’ to establish a connection with Toggl Track. You will need to input your username and password, and select the appropriate version. Once connected, you will be able to choose the workspace and project in Toggl Track where the new task will be created.

  • Search for Toggl Track in the action application.
  • Select ‘Create New Task’ as the action event.
  • Establish a connection using your credentials.

After setting up the action application, map the task details from Asana to Toggl Track. This mapping is crucial as it ensures that the task names and other details are consistent across both applications.


4. Testing the Integration Between Asana and Toggl Track

With both Asana and Toggl Track configured, it’s time to test the integration using Pabbly Connect. To do this, create a new task in Asana. For example, name the task ‘Create Content Calendar for Clients’ and assign it to a user with a due date set for the 29th.

Once the task is created in Asana, return to Pabbly Connect and click on ‘Save and Test Request’. This action will capture the details of the newly created task and confirm that the integration is working correctly. If successful, you will receive a positive response indicating that the task details have been captured.

Create a new task in Asana. Click ‘Save and Test Request’ in Pabbly Connect. Check for a positive response confirming task creation.

After confirming that the task details are captured, you can now proceed to create the task in Toggl Track using the information from Asana. This ensures that the tasks are synchronized across both platforms seamlessly.


5. Finalizing the Automation Setup

To finalize the integration setup in Pabbly Connect, ensure that the task details from Asana are correctly mapped to Toggl Track. This includes the task name, project, and any other relevant details. Click on ‘Save and Send Test Request’ to create the task in Toggl Track.

Upon successful creation, check your Toggl Track account to confirm that the task named ‘Create Content Calendar for Clients’ appears in the designated project. If everything is set up correctly, this process will now run automatically, syncing tasks between Asana and Toggl Track whenever a new task is created.

This integration allows for efficient task management and ensures that you never miss a task in either application. By using Pabbly Connect, you can streamline your workflow and enhance productivity across your team.


Conclusion

In this tutorial, we demonstrated how to sync Asana tasks with Toggl Track tasks using Pabbly Connect. By following these steps, you can automate your task management and improve efficiency.

Ensure you check out Pabbly Connect to create business automation workflows and reduce manual tasks. Pabbly Connect currently offer integration with 2,000+ applications.

How to Send WhatsApp Messages to Facebook Leads for Your Plywood Business

Learn how to automate sending WhatsApp messages to Facebook leads for your plywood business using Pabbly Connect. Step-by-step guide included! This comprehensive guide reveals exactly how to connect your applications and automate repetitive tasks — accessible for professionals of all technical backgrounds.

Watch Step By Step Video Tutorial Below


1. Accessing Pabbly Connect for Automation

To send WhatsApp messages to Facebook leads for your plywood business, start by accessing Pabbly Connect. This platform allows you to automate the entire process seamlessly. If you’re new, sign up for a free account to explore its functionalities.

Once logged in, navigate to the dashboard where you can see options for creating workflows. Click on the ‘Create Workflow’ button to begin setting up the automation process. This is where you will integrate Facebook Lead Ads with WhatsApp using Pabbly Connect.


2. Creating Your Workflow in Pabbly Connect

In this section, you will set up your workflow to automate sending WhatsApp messages. Click on the ‘Create Workflow’ button and name it appropriately, such as ‘Woodcastle Plywood Facebook Lead to WhatsApp Message’. Choose a folder to organize your workflows effectively.

  • Name your workflow clearly for easy identification.
  • Select a folder for better organization of your workflows.
  • Ensure the name reflects the purpose of the automation.

After naming your workflow, select the trigger application as Facebook Lead Ads and the trigger event as ‘New Lead Instant’. This setup ensures that every time a new lead is generated, Pabbly Connect captures the data instantly.


3. Connecting Facebook Lead Ads to Pabbly Connect

To connect Facebook Lead Ads to Pabbly Connect, click on the connect button and choose to add a new connection. You will need to authorize your Facebook account, which allows Pabbly Connect to access your lead data.

Once connected, select your Facebook page and the lead generation form you previously created. For example, you might choose the ‘Woodcastle Plywood Form’. After selecting the form, click on ‘Save and Send Test Request’ to ensure everything is working correctly.


4. Setting Up WhatsApp Cloud API in Pabbly Connect

Next, you will set up the action application as WhatsApp Cloud API in Pabbly Connect. Choose the action event as ‘Send Template Message’. This action will send a WhatsApp message to your new lead.

To connect, you will need your WhatsApp Cloud API credentials, including the token, phone number ID, and WhatsApp business account ID. These can be obtained from your WhatsApp Cloud API account on the Meta for Developers platform. Enter these details into Pabbly Connect to establish the connection.

  • Copy your token, phone number ID, and WhatsApp business account ID from Meta.
  • Paste these details into the respective fields in Pabbly Connect.
  • Ensure all information is accurate to avoid connection issues.

After entering the required information, select the message template you created earlier. This template should include dynamic variables to personalize the message for each lead. Once everything is set, click on ‘Save and Send Test Request’ to test the integration.


5. Testing the Integration with Pabbly Connect

To ensure that your automation is working correctly, you need to test the integration. Start by generating a new lead using the Lead Ads Testing Tool on the Meta for Developers site. Make sure to delete any previous leads to avoid conflicts.

After submitting a new lead, check your WhatsApp to see if the message has been received. The message should confirm the lead’s interest and provide information about your offerings. This step verifies that Pabbly Connect is successfully sending WhatsApp messages to your leads.

With this process, you can efficiently manage leads for your plywood business, ensuring timely communication through WhatsApp. The integration of Facebook Lead Ads and WhatsApp via Pabbly Connect automates and enhances your customer engagement.


Conclusion

In this tutorial, we explored how to send WhatsApp messages to Facebook leads for your plywood business using Pabbly Connect. By following these steps, you can automate your lead communication effectively and improve your business operations.

Ensure you check out Pabbly Connect to create business automation workflows and reduce manual tasks. Pabbly Connect currently offer integration with 2,000+ applications.

Integrate Facebook Leads to Google Sheets Using Pabbly Connect

Learn how to automate adding Facebook leads to Google Sheets using Pabbly Connect. Follow this step-by-step tutorial specifically designed for web development agencies. Transform complex automation concepts into accessible, actionable steps that eliminate unnecessary manual work while maximizing existing application capabilities.

Watch Step By Step Video Tutorial Below


1. Accessing Pabbly Connect for Your Web Development Agency

To integrate Facebook leads into Google Sheets, you need to access Pabbly Connect. Start by visiting the Pabbly Connect landing page and choose to sign in or sign up for free if you’re a new user. Signing up is quick and gives you access to 100 free tasks every month.

After signing in, you will reach the Pabbly Connect dashboard. Here, you can create a new folder for your workflows. Click on the folder icon, name it ‘Facebook leads to Google Sheets’, and create it. This organization helps manage your automation tasks effectively.


2. Creating a Workflow to Capture Facebook Leads

In this section, you will create a workflow in Pabbly Connect that captures leads from Facebook. Click on ‘Create Workflow’ and name it ‘Facebook leads to Google Sheets for web development agencies’. Select the folder you just created to save this workflow.

  • Choose Facebook Lead Ads as the trigger application.
  • Select the trigger event as ‘New Lead Instant’.
  • Click connect and set up a new connection to your Facebook account.

This setup allows Pabbly Connect to listen for new leads generated by your Facebook lead ads. Make sure your lead ads form is active to receive data correctly.


3. Testing Facebook Leads Integration with Pabbly Connect

After setting up the trigger, it’s time to test the integration. Click on ‘Save and Send Test Request’ in Pabbly Connect. This action will prompt you to generate a test lead. Visit the Meta for Developers page to use the lead ads testing tool.

Follow these steps to create a test lead:

  • Select your Facebook page (Elite Web Crafters) and lead form.
  • Delete any existing test lead to create a new one.
  • Fill in the test lead form and submit it.

Once submitted, return to Pabbly Connect to check if the lead data has been captured successfully. This confirms that your trigger is working correctly.


4. Adding Captured Leads to Google Sheets

Now that you’ve successfully tested the Facebook leads integration, it’s time to set up the action to add these leads to Google Sheets using Pabbly Connect. Choose Google Sheets as your action application and select the action event as ‘Add New Row’.

Connect your Google Sheets account by selecting ‘Add New Connection’ and granting the necessary permissions. After connecting, you will be prompted to select your spreadsheet and sheet where the data will be added.

Map the fields from your Facebook lead ads to the corresponding columns in Google Sheets. Ensure the columns match (name, email, phone number). Click ‘Save and Send Test Request’ to send data to Google Sheets.

After testing, check your Google Sheets to confirm that the new lead has been added successfully. This completes the integration process.


5. Summary and Conclusion of the Integration Process

In this tutorial, we demonstrated how to use Pabbly Connect to integrate Facebook leads into Google Sheets. The trigger application was Facebook Lead Ads, and the action application was Google Sheets. By following the steps outlined, you can automate the process of adding leads to your Google Sheets seamlessly.

To summarize, the steps included creating a workflow in Pabbly Connect, setting up the trigger and action applications, testing the integration, and mapping the data into Google Sheets. This automation can significantly enhance the efficiency of your web development agency.

Conclusion

This guide summarizes the key points and helps you understand the essential features and benefits of using this tool.

Ensure you check out Pabbly Connect to create business automation workflows and reduce manual tasks. Pabbly Connect currently offer integration with 2,000+ applications.


By utilizing Pabbly Connect, you can streamline your lead management process. This integration allows you to focus on growing your business while ensuring that all leads are captured accurately and efficiently.