Integrating Facebook Leads to Google Sheets Using Pabbly Connect

Learn how to seamlessly integrate Facebook leads into Google Sheets for your Pest Control business using Pabbly Connect with this detailed step-by-step tutorial. Explore efficient methods for automating routine tasks with clear, concise instructions suited for both newcomers and experienced professionals.

Watch Step By Step Video Tutorial Below


1. Accessing Pabbly Connect for Integration

To begin adding Facebook leads to Google Sheets, we need to access Pabbly Connect. Start by navigating to the Pabbly website and signing up for a free account if you don’t have one.

Once logged in, click on the ‘Access Now’ button under Pabbly Connect. This will take you to the dashboard where you can create a new workflow for connecting Facebook Leads to Google Sheets.


2. Creating a New Workflow in Pabbly Connect

In this step, we will create a new workflow in Pabbly Connect. Click on the ‘Create Workflow’ button and name your workflow, such as ‘Add Facebook Leads to Google Sheets for Pest Control Business’.

  • Select the folder where the workflow will be saved.
  • You will see two boxes: Trigger and Action.
  • The Trigger application is Facebook Lead Ads, and the Action application is Google Sheets.

Now, set up the trigger by selecting Facebook Lead Ads and choosing the trigger event as ‘New Lead Instant’. This will allow Pabbly Connect to capture new leads from your Facebook ads automatically.


3. Connecting Facebook Lead Ads to Pabbly Connect

After setting up the trigger, you need to connect your Facebook Lead Ads account to Pabbly Connect. Click on ‘Connect’ and then ‘Add New Connection’.

Grant access to your Facebook account, and once connected, you will see options to select your Facebook page and lead generation form. Choose the appropriate page and form from the dropdown menus to ensure Pabbly Connect can pull the correct lead details.


4. Setting Up Google Sheets Action in Pabbly Connect

Next, we will configure the action in Pabbly Connect to add new rows in Google Sheets. Select Google Sheets as your action application and choose the action event ‘Add New Row’.

Connect Google Sheets to Pabbly Connect by clicking on ‘Connect’ and authorizing your Google account. Now, select the specific spreadsheet and worksheet where you want to add the lead details.

  • Map the fields: Full Name, Email, and Phone Number from Facebook leads to the corresponding columns in Google Sheets.
  • Ensure all details are correctly mapped to capture the lead information accurately.

Once mapping is done, click on ‘Save and Send Test Request’ to check if the integration works correctly. You should see a positive response indicating that the data has been added to your Google Sheet.


5. Testing and Verifying the Integration

Finally, to ensure that the integration between Facebook Lead Ads and Google Sheets via Pabbly Connect is functioning, create a test lead using your Facebook lead form.

After submitting a test lead, check your Google Sheet to confirm that the new lead details appear correctly. This verifies that the workflow is set up properly and that new leads will be automatically added in real-time.

By following these steps, you can efficiently manage leads for your Pest Control Business using Pabbly Connect, ensuring that no leads are missed and all details are captured seamlessly in Google Sheets.


Conclusion

This tutorial provided a detailed guide on how to integrate Facebook leads into Google Sheets using Pabbly Connect. By automating this process, you can streamline your lead management for your Pest Control Business effectively.

Ensure you check out Pabbly Connect to create business automation workflows and reduce manual tasks. Pabbly Connect currently offer integration with 2,000+ applications.

Automate File Sharing from Gmail to WhatsApp with Pabbly Connect

Learn how to automate file sharing from Gmail to WhatsApp using Pabbly Connect. Follow this step-by-step tutorial to streamline your workflow. Discover how to seamlessly connect your essential tools through accessible instructions that make powerful automation available to professionals at every skill level.

Watch Step By Step Video Tutorial Below


1. Setting Up Pabbly Connect for Automation

To begin automating file sharing from Gmail to WhatsApp, first, you need to set up Pabbly Connect. This powerful integration platform allows you to create workflows that connect different applications seamlessly. Start by signing up for a free account on Pabbly Connect, which can be done in just a few minutes.

After logging into your Pabbly Connect account, navigate to the dashboard and click on the ‘Create Workflow’ button. Name your workflow something like ‘Share File from Email to WhatsApp’ and select the folder for your automation. Click on ‘Create’ to proceed. This is where the magic happens, as you will set up triggers and actions to facilitate the integration.


2. Configuring Gmail Integration with Pabbly Connect

To automate the process of sending files from Gmail to WhatsApp, you need to set Gmail as your trigger application in Pabbly Connect. However, direct integration with Gmail isn’t possible. Instead, you will use the Email Parser feature in Pabbly Connect to capture incoming emails.

  • Copy the email address provided by the Email Parser in Pabbly Connect.
  • Go to your Gmail account and set up forwarding to this email address.
  • Confirm the forwarding by entering the verification code sent to the Pabbly Connect email address.

Once the forwarding is set up, any new email received in your Gmail account will be forwarded to Pabbly Connect. This allows you to capture all email details, including the sender’s name, email address, and any attachments. This step is crucial for ensuring that the automation works effectively.


3. Sending Files from Gmail to WhatsApp

Now that you have successfully configured Gmail with Pabbly Connect, it’s time to set up WhatsApp as your action application. For this, you will use the Wati application, which provides access to the official WhatsApp API. Select Wati as your action application in Pabbly Connect.

In the action event, choose ‘Send Template Message’. You will need to connect your Wati account by entering the API endpoint and access token. You can find these details in the Wati API documentation. After connecting, specify the WhatsApp number where you want to send the messages.

  • Select the template you want to use for sending the WhatsApp message.
  • Map the variables from the Gmail email such as sender name, email address, and file link into the template.
  • Test the integration by sending a sample message to your WhatsApp.

With this setup, every time an email arrives in your Gmail account, the details will be forwarded to WhatsApp automatically, allowing you to streamline your communication process.


4. Adding Filters to Control Which Files are Sent

To refine your automation process in Pabbly Connect, you can set filters to control which emails trigger the WhatsApp messages. This is particularly useful if you only want to send specific files, such as invoices or receipts.

In your Pabbly Connect workflow, add a filter step after the Gmail trigger. You can specify conditions based on the email subject or body. For example, set conditions to only proceed if the subject contains the words ‘invoice’ or ‘receipt’. This allows you to manage your workflow efficiently.

Select the filter type (e.g., ‘Contains’) and specify the keywords. Add multiple conditions using ‘OR’ to ensure flexibility. Test the filter by sending a test email that meets the conditions.

By implementing these filters, you ensure that only relevant emails are forwarded to WhatsApp, making your automation more targeted and effective.


5. Conclusion: Streamline Your Workflow with Pabbly Connect

Integrating Gmail with WhatsApp using Pabbly Connect allows you to automate file sharing efficiently. By following the steps outlined in this tutorial, you can streamline your workflow and ensure timely communication. With the added ability to filter specific emails, you can maintain control over what gets sent to WhatsApp.

Ensure you check out Pabbly Connect to create business automation workflows and reduce manual tasks. Pabbly Connect currently offer integration with 2,000+ applications.

Utilizing Pabbly Connect not only saves time but also enhances productivity by reducing manual tasks. Start automating your processes today for a more efficient workflow!

Automate Shopify Blogs with Google Sheets and OpenAI Using Pabbly Connect

Learn how to automate Shopify blogs using Google Sheets and OpenAI with Pabbly Connect. Follow our step-by-step tutorial to streamline your blogging process. Master proven automation processes with practical implementation examples and strategic recommendations you can apply immediately in your workflow.

Watch Step By Step Video Tutorial Below


1. Accessing Pabbly Connect for Automation

To automate Shopify blogs using Google Sheets and OpenAI, first, access Pabbly Connect. This platform is essential for integrating multiple applications seamlessly. Start by visiting the Pabbly Connect homepage; if you are a new user, click on ‘Sign Up for Free’ to create an account and receive 100 free tasks monthly.

Once signed up, log in to your account. You will be directed to the dashboard where you can create workflows. Click on ‘Create Workflow’ to begin the automation process. Enter a name for your workflow, such as ‘Create Shopify Blogs from Google Sheets with OpenAI,’ and select a folder to save it. This organization helps in managing multiple workflows efficiently.


2. Setting Up Google Sheets Trigger in Pabbly Connect

In this step, we will set up Google Sheets as the trigger application in Pabbly Connect. Select Google Sheets as the trigger app and choose the event as ‘New or Updated Spreadsheet Row.’ This means that whenever a new title is added to Google Sheets, it will trigger the workflow.

  • Select Google Sheets as the application.
  • Choose the trigger event: New or Updated Spreadsheet Row.
  • Copy the provided webhook URL for integration.

Next, navigate to your Google Sheets. Under ‘Extensions,’ click on ‘Add-ons’ and search for ‘Pabbly Webhooks’ to install the add-on. After installation, refresh your Google Sheets to see the Pabbly Webhooks option. In the initial setup, paste the webhook URL and set the trigger column to the one where titles will be entered, usually column B. Test the connection to ensure data flows correctly into Pabbly Connect.


3. Integrating OpenAI for Content Generation

With Google Sheets set up, the next step is to integrate OpenAI for generating blog content. In Pabbly Connect, add OpenAI as the action application and select the event ‘Generate Content.’ This action will create blog content based on the title provided in Google Sheets.

You will need to connect your OpenAI account by providing the API key. Once connected, enter the prompt for content generation, such as ‘Generate a blog on’ followed by mapping the title from the previous Google Sheets step. Set parameters like maximum tokens and sampling type to control the output of the generated content.

  • Select the AI model, like text-davinci-003.
  • Set maximum tokens for content length (e.g., 300).
  • Adjust sampling parameters for content variety.

After setting these parameters, save the configuration and send a test request to generate a blog post. If successful, you will receive a response containing the generated content, ready for posting on Shopify.


4. Posting Generated Content to Shopify

The final integration step involves posting the generated blog content to your Shopify store. In Pabbly Connect, add Shopify as the action application and select ‘Create Blog Entry’ as the action event. This allows you to publish the content generated by OpenAI directly to your Shopify blog.

To connect Shopify, enter your store’s subdomain and API access token, which can be obtained by creating a private app in Shopify. After configuring the connection, map the title and content fields from the previous steps. Ensure the publish status is set to true to make the blog live immediately.

Enter your Shopify store’s subdomain. Provide the API access token from your Shopify app. Map the title and content fields for the blog post.

Once all fields are configured, save the action and send a test request. If successful, you will see the blog post appear in your Shopify store, confirming that the integration is complete.


5. Conclusion: Automate Shopify Blogs with Ease

By following these steps, you have successfully automated the process of creating and posting Shopify blogs using Google Sheets and OpenAI through Pabbly Connect. This integration allows for seamless content generation and publishing, saving you time and effort.

Ensure you check out Pabbly Connect to create business automation workflows and reduce manual tasks. Pabbly Connect currently offer integration with 2,000+ applications.

Check out Pabbly Connect – Automate your business workflows effortlessly! Sign Up Free – Start your journey with ease! 10,000+ Video Tutorials – Learn step by step! Join Pabbly Facebook Group – Connect with 21,000+ like minded people!

Now, whenever you add a new title to your Google Sheets, a blog will be generated and published automatically on your Shopify store. This workflow not only enhances your blogging efficiency but also leverages the power of AI to create quality content effortlessly.

With Pabbly Connect, you can explore further integrations and automations to streamline your business processes even more. Start using it today to unlock new levels of productivity!

How to Publish Instagram Posts to LinkedIn Using Pabbly Connect

Learn how to automate publishing Instagram posts to LinkedIn using Pabbly Connect. Follow this step-by-step guide to streamline your social media management. Develop expertise in application integration and learn how to design streamlined automation workflows using proven, simplified approaches.

Watch Step By Step Video Tutorial Below


1. Accessing Pabbly Connect for Instagram to LinkedIn Integration

To publish Instagram posts to LinkedIn, you first need to access Pabbly Connect. Start by signing in to your existing Pabbly Connect account or create a new account if you are a first-time user. Pabbly Connect offers a free tier that allows you to perform 100 tasks monthly, making it accessible for everyone.

Once logged in, navigate to the Pabbly Connect dashboard. Here, you can create a new workflow that will automate the process of sharing your Instagram posts on LinkedIn. Follow the steps to set up your workflow effectively.


2. Creating Your Workflow in Pabbly Connect

After accessing your Pabbly Connect dashboard, click on the ‘Create Workflow’ button located at the top right corner. In the dialog box that appears, name your workflow something descriptive, such as ‘Publish Instagram Post to LinkedIn’. You can also choose a folder to save this workflow for better organization.

  • Select a descriptive name for your workflow.
  • Choose a folder to keep your workflows organized.
  • Click ‘Create’ to proceed to the next step.

Once you have created the workflow, you will be taken to a screen where you can set up triggers and actions. This is where Pabbly Connect shines, allowing you to define how your Instagram posts will trigger actions on LinkedIn.


3. Setting Up Trigger and Action for Instagram and LinkedIn

In this step, you will set up Instagram as your trigger application in Pabbly Connect. Select ‘Instagram for Business’ as the trigger app and choose the event ‘New Media Posted’. This means that every time you post something new on Instagram, it will trigger the workflow. using Pabbly Connect

Next, you will need to set LinkedIn as your action application. Choose ‘Share an Article or URL’ as the action event. This setup ensures that whenever you post on Instagram, the same content will be shared on LinkedIn automatically, streamlining your social media presence.

  • Select ‘Instagram for Business’ for the trigger application.
  • Choose ‘New Media Posted’ as the trigger event.
  • Set LinkedIn as the action application with ‘Share an Article or URL’.

With the trigger and action set, Pabbly Connect will now automate the process of sharing new Instagram posts on LinkedIn, enhancing your marketing efforts.


4. Connecting Applications in Pabbly Connect

To successfully connect your Instagram and LinkedIn accounts, click on the ‘Connect’ button in the trigger section. After that, you will be prompted to log into your Instagram account. Ensure you have already logged in to your account in another tab for a smoother connection process.

Once connected, you will see a confirmation message indicating that Instagram is successfully linked with Pabbly Connect. Repeat this process for LinkedIn by clicking on the ‘Connect’ button in the action section and logging into your LinkedIn account. This will establish the necessary connections for automation.


5. Testing and Verifying the Integration

After connecting both applications, it’s time to test your integration. Create a new post on Instagram, ensuring it has a caption and an image. Once published, return to Pabbly Connect and click on ‘Save and Send Test Request’. This action will check for new data from your Instagram account. using Pabbly Connect

After a few moments, you should see a response in Pabbly Connect that confirms the new post has been captured. This includes the post’s caption and image URL. Finally, to verify that the integration works, check your LinkedIn account. You should see the Instagram post shared automatically.

Now, your workflow is complete, and you can rest assured that any new Instagram post will be shared on LinkedIn without any manual effort.


Conclusion

In this tutorial, we demonstrated how to use Pabbly Connect to automate publishing Instagram posts to LinkedIn. By following these steps, you can streamline your social media management efficiently.

Ensure you check out Pabbly Connect to create business automation workflows and reduce manual tasks. Pabbly Connect currently offer integration with 2,000+ applications.

How to Generate Lecture Notes using OpenAI with Pabbly Connect

Learn how to automate lecture note generation using OpenAI, Google Sheets, and Google Docs with Pabbly Connect. Step-by-step guide included. Learn to create powerful connections between your critical applications without requiring specialized programming knowledge or extensive technical background.

Watch Step By Step Video Tutorial Below


1. Setting Up Pabbly Connect for Automation

To start generating lecture notes using OpenAI, we first need to set up Pabbly Connect. This platform allows seamless integration between Google Sheets and Google Docs via OpenAI. Access Pabbly Connect by navigating to Pabbly.com/connect in your browser.

Once on the homepage, you can either sign in or create a free account. New users will receive 100 free tasks each month, which is perfect for testing this automation. After signing in, click on the ‘Access Now’ button to enter the Pabbly Connect dashboard where you can create workflows.


2. Creating a Workflow in Pabbly Connect

To automate the lecture note generation, we will create a workflow in Pabbly Connect. Click on the ‘Create Workflow’ button in the top right corner. Name your workflow, such as ‘Generate Class Lecture Notes using OpenAI’. Select a folder where you want to save this workflow.

  • Click on the ‘Create’ button to proceed.
  • Select Google Sheets as the trigger application.
  • Choose ‘New or Updated Spreadsheet Row’ as the trigger event.

After selecting the trigger, Pabbly Connect will provide a webhook URL. This URL will allow Google Sheets to send data to Pabbly Connect. Copy this URL as you will need it in the next steps.


3. Connecting Google Sheets to Pabbly Connect

Next, we will connect Google Sheets to Pabbly Connect. Open your Google Sheet where you want to add the lecture topics. Go to the ‘Extensions’ menu, select ‘Add-ons’, and then ‘Get add-ons’. Search for ‘Pabbly Connect Webhooks’ and install it.

After installation, refresh your Google Sheets. Go to ‘Extensions’, find ‘Pabbly Connect Webhooks’, and click on ‘Initial Setup’. Here, paste the webhook URL you copied earlier and set the trigger column to the column that contains the data you want to send to Pabbly Connect.


4. Generating Notes with OpenAI through Pabbly Connect

Now that Google Sheets is connected, we will set up OpenAI as the action in Pabbly Connect. Select OpenAI from the action applications and choose ‘Generate Content’ as the action event. Connect your OpenAI account by entering your API key.

In the action setup, select the AI model (e.g., text-davinci-003) and set the prompt to generate class notes based on the topic received from Google Sheets. Map the topic variable from the previous step into the prompt to ensure dynamic content generation. For example, your prompt could be: ‘Generate class notes for the topic: {{Topic}}’.

  • Set the maximum tokens for output (e.g., 800).
  • Choose sampling types and set their values as needed.

After configuring these settings, test the action to confirm that notes are generated successfully. The response should include the generated notes based on the topic provided.


5. Creating Documents in Google Docs

Finally, we will create Google Docs to store the generated notes. Add another action step in Pabbly Connect and select Google Docs. Choose ‘Create a Blank Document’ as the action event. Connect your Google Docs account if not already connected.

In the document setup, map the topic name from Google Sheets as the document title. This ensures that each document is named after the respective topic. After saving the document, use another action to append the generated notes into the document.

Select ‘Append a Paragraph to Document’ as the action event. Map the document ID and the generated notes.

After testing this step, you should see that a new document is created in Google Docs with the generated notes appended correctly. This confirms that your workflow is fully functional.


Conclusion

In this tutorial, we learned how to automate the generation of lecture notes using OpenAI, Google Sheets, and Google Docs through Pabbly Connect. By following these steps, you can efficiently create class notes and manage them in your Google Docs without manual effort. This integration not only saves time but also enhances productivity in managing educational content.

Ensure you check out Pabbly Connect to create business automation workflows and reduce manual tasks. Pabbly Connect currently offer integration with 2,000+ applications.

Automatically Capture Webpage Screenshots from Google Forms Responses & Save in Google Drive Using Pabbly Connect

Learn how to automatically capture webpage screenshots from Google Forms responses and save them in Google Drive using Pabbly Connect. Follow our step-by-step tutorial! Eliminate manual repetitive tasks from your workflow. Discover proven automation methods with intuitive steps designed for efficiency-minded professionals.

Watch Step By Step Video Tutorial Below


1. Setting Up Pabbly Connect for Automation

To begin automating the process of capturing webpage screenshots, you first need to set up Pabbly Connect. Start by signing up for a free account on Pabbly Connect. Once you have access to the dashboard, click on ‘Create Workflow’ to initiate your automation.

Give your workflow a name, such as ‘Capture Website Screenshot Automatically’. Select the appropriate folder in your Pabbly account where this workflow will be saved and click on ‘Create’. This sets the stage for the automation process to capture screenshots based on Google Forms responses.


2. Setting Google Forms as the Trigger in Pabbly Connect

In this step, you’ll configure the trigger in Pabbly Connect to respond to new Google Forms submissions. Select Google Forms as the app and choose the trigger event ‘New Response Received’. After selecting this, Pabbly Connect will provide you with a webhook URL.

  • Copy the webhook URL provided by Pabbly Connect.
  • Open your Google Form and ensure the last question is marked as required.
  • Link the Google Form responses to a new Google Sheet.

This setup allows Pabbly Connect to capture responses directly from Google Forms, which will be essential for the next steps in your automation process.


3. Linking Google Sheets with Pabbly Connect

Next, you need to connect Google Sheets to your Pabbly Connect workflow. In your Google Sheet, install the Pabbly Connect Webhooks add-on. After installation, refresh your Google Sheet and navigate to Extensions > Pabbly Connect Webhooks > Initial Setup. using Pabbly Connect

In the setup, select the sheet containing your form responses, paste the copied webhook URL, and set the trigger column. This column should correspond to the last column where data will be entered, typically the column that captures the URL input. Click ‘Submit’ to finalize this integration.


4. Capturing Webpage Screenshots with HTML to Image

With the Google Sheets integration complete, the next step is to capture the webpage screenshot. In the action step of Pabbly Connect, select ‘HTML to Image’ and choose the action event ‘Capture Website Screenshot’. Connect your HTML to Image account using the API key provided on their website.

  • Map the URL from the Google Sheets response to the HTML to Image action.
  • Set the viewport dimensions and specify whether you want a full-page screenshot.
  • Click ‘Save and Send Test Request’ to capture the screenshot.

This will generate a screenshot of the webpage linked in the Google Form submission and provide you with a URL for the image.


5. Uploading Screenshots to Google Drive

Finally, you need to upload the captured screenshot to Google Drive. In the action step of Pabbly Connect, select Google Drive and choose the action event ‘Upload a File’. Connect your Google Drive account by signing in and granting necessary permissions.

Map the URL of the captured screenshot from the HTML to Image response to the Google Drive upload action. Specify the folder ID where you want to save the images and set a file name that includes the user’s name and the website URL. Click ‘Save and Send Test Request’ to complete the upload process.


Conclusion

By following these steps, you can effectively automate the process of capturing webpage screenshots from Google Forms responses and saving them in Google Drive using Pabbly Connect. This integration streamlines your workflow, allowing for efficient data collection and management.

Ensure you check out Pabbly Connect to create business automation workflows and reduce manual tasks. Pabbly Connect currently offer integration with 2,000+ applications.

Integrating Pabbly Subscription Billing Refund Details into Google Sheets

Learn how to automate adding Pabbly Subscription Billing refund details into Google Sheets using Pabbly Subscription Billing. Step-by-step tutorial with detailed instructions. This detailed guide shows you how to implement powerful subscription billing mechanisms with no technical knowledge required.

Watch Step By Step Video Tutorial Below


1. Accessing Pabbly Subscription Billing for Refund Details

To begin with adding refund details to Google Sheets, you first need access to Pabbly Subscription Billing. This platform allows you to manage subscriptions and automate tasks effectively. Start by visiting the Pabbly Subscription Billing homepage and logging into your account.

Once logged in, navigate to the settings section. Here, you can manage your products and set up webhooks for automation. Webhooks will play a crucial role in sending refund data to Google Sheets automatically whenever a refund occurs in your Pabbly Subscription Billing account.


2. Setting Up Pabbly Connect for Automation

Next, you will need to set up Pabbly Connect to facilitate the integration between Pabbly Subscription Billing and Google Sheets. This integration will automate the process of logging refund details. Click on the ‘Create Workflow’ option in Pabbly Connect to get started.

  • Choose a name for your workflow, such as ‘Pabbly Subscription Billing Refund Details in Google Sheets’.
  • Select Pabbly Subscription Billing as the trigger application.
  • Choose the trigger event as ‘Payment Refund’.

After setting up the trigger, you will receive a webhook URL. This URL is essential as it will connect your Pabbly Subscription Billing account to Pabbly Connect, allowing data transfer when a refund is processed.


3. Configuring Pabbly Subscription Billing for Webhooks

In this section, you will configure your Pabbly Subscription Billing account to use the webhook URL provided by Pabbly Connect. Go to the ‘Webhook’ section in your Pabbly Subscription Billing settings and click on ‘Add Webhook’.

  • Enter a name for the webhook, such as ‘New Refund’.
  • Select the product for which you want to track refunds.
  • Paste the webhook URL you copied from Pabbly Connect.
  • Choose the event as ‘Payment Refund’ and click save.

After saving, Pabbly Subscription Billing will now send refund details to Pabbly Connect whenever a refund occurs, enabling seamless data transfer to Google Sheets.


4. Connecting Google Sheets for Data Logging

Now that the webhook is set up, the next step involves connecting Google Sheets to log the refund details. In Pabbly Connect, select Google Sheets as your action application. Choose the action event as ‘Add New Row’. using Pabbly Connect

To connect Google Sheets, you will need to authenticate your Google account. Click on ‘Add New Connection’ and sign in to your Google account. Ensure you allow permissions for Pabbly Connect to access your Google Sheets.

After establishing the connection, select the spreadsheet where you want to log the refund details. Map the fields such as product name, customer name, email, amount, and reason for the refund to their respective columns in Google Sheets. This mapping ensures that the correct data is logged each time a refund occurs.


5. Testing the Integration for Successful Automation

To ensure everything is working correctly, you need to test the integration. Start by making a test purchase in Pabbly Subscription Billing. After processing the payment, create a refund for that purchase.

Check Pabbly Connect to see if the refund details are captured. If successful, the information should automatically appear in your designated Google Sheet as a new row. This indicates that your integration between Pabbly Subscription Billing and Google Sheets is working flawlessly.

Repeat the test with different products to confirm consistent results. Once verified, you can confidently use this automation for all future refunds, saving time and effort in manual data entry.


Conclusion

This tutorial demonstrated how to automate the addition of Pabbly Subscription Billing refund details into Google Sheets using Pabbly Connect. By following these steps, you can streamline your refund management process efficiently.

Ensure you check out Pabbly Connect to create business automation workflows and reduce manual tasks. Pabbly Connect currently offer integration with 2,000+ applications.

How to Generate Images from Notion Using OpenAI & Share on Facebook Page with Pabbly Connect

Learn how to automate image generation from Notion using OpenAI and share it on Facebook using Pabbly Connect in this detailed tutorial. Build sophisticated automated workflows in less time than you think. This guide translates complex integrations into straightforward steps for immediate implementation.

Watch Step By Step Video Tutorial Below


1. Accessing Pabbly Connect for Automation

To start generating images from Notion using OpenAI and share them on Facebook, first access Pabbly Connect. You can do this by visiting the homepage at Pabbly.com/connect. Once there, you will see options to sign in or sign up for free.

If you are a new user, click on the sign-up button to create an account. Upon creating your account, you will receive 100 free tasks every month to explore Pabbly Connect. Existing users can simply sign in to access the dashboard.


2. Creating a Workflow in Pabbly Connect

Once logged into Pabbly Connect, you will find the option to create a new workflow. Click on the ‘Create Workflow’ button, and a dialog box will prompt you to name your workflow. Name it ‘Generate Images Using OpenAI from Notion and Share on Facebook Pages’.

  • Select the folder to save your workflow.
  • Click on ‘Create’ to open the trigger and action setup.

In this workflow, we will set Notion as the trigger and OpenAI and Facebook as actions. The trigger is the event that starts the workflow, while actions are the subsequent steps that respond to the trigger.


3. Setting Up Notion as the Trigger in Pabbly Connect

In your newly created workflow, select Notion as the trigger application. Then, choose the trigger event as ‘New Database Item’, which will activate the workflow whenever a new item is added to your Notion database.

Click on ‘Connect’ to establish a connection with your Notion account. You will need to authorize Pabbly Connect to access your Notion pages. Select the pages you want to give access to and click ‘Allow Access’. After authorization, select your database, which should be named ‘New Images for Social Media’.


4. Generating Images Using OpenAI in Pabbly Connect

After setting up the trigger, the next step is to connect OpenAI as the action application. Choose the action event as ‘Generate Image Using D E3’. Click ‘Connect’ and select your existing connection to OpenAI. using Pabbly Connect

You will need to provide details for generating the image. Enter the prompt as ‘Generate image on’ and map the title received from Notion. This mapping allows the title to change dynamically with each new entry in Notion, ensuring the image generated corresponds to the current title.

  • Select the model (D E2 or D E3) and size for the image.
  • Choose the quality and style of the image.

After entering all necessary details, click on ‘Save and Send Test Request’ to generate the image. You will receive a URL for the generated image, confirming that OpenAI has successfully created it.


5. Sharing the Generated Image on Facebook Using Pabbly Connect

The final step is to share the generated image on your Facebook page. Add another action step in Pabbly Connect and select Facebook Pages as the application. Choose the action event as ‘Create Page Post’. Click ‘Connect’ and use your existing connection to Facebook.

In this action step, select the Facebook page where you want to share the image. Enter the message you want to accompany the image, using the title from Notion. Finally, map the URL of the generated image and click ‘Save and Send Test Request’. You will receive a response confirming that the image has been successfully posted to your Facebook page.


Conclusion

This tutorial demonstrated how to automate the process of generating images from Notion using OpenAI and sharing them on Facebook using Pabbly Connect. By following these steps, you can easily set up this integration to enhance your social media presence.

Ensure you check out Pabbly Connect to create business automation workflows and reduce manual tasks. Pabbly Connect currently offer integration with 2,000+ applications.

How to Send Order Confirmation SMS for Multiple Items | Shopify to Twilio Integration Using Pabbly Connect

Learn how to automate order confirmation SMS for multiple items using Pabbly Connect to integrate Shopify and Twilio seamlessly. Explore efficient methods for automating routine tasks with clear, concise instructions suited for both newcomers and experienced professionals.

Watch Step By Step Video Tutorial Below


1. Setting Up Pabbly Connect for Shopify and Twilio Integration

To start sending order confirmation SMS for multiple items, you first need to set up Pabbly Connect. This platform is crucial for integrating Shopify with Twilio to automate SMS notifications. Begin by creating an account on Pabbly Connect, which can be done in just a few minutes.

Once logged in, navigate to the dashboard. Click on the blue ‘Create Workflow’ button to initiate a new integration process. Give your workflow a name, such as ‘Send Order Confirmation SMS for Multiple Products’, and select the folder for your automation. Click ‘Create’ to proceed.


2. Linking Shopify with Pabbly Connect

The next step involves connecting your Shopify store to Pabbly Connect. You will need to set a trigger event in Pabbly Connect that activates when a new order is placed. In the trigger section, select ‘New Order’ from the available options.

  • Select ‘New Order’ as the trigger event.
  • Copy the generated webhook URL.
  • Disable simple response and enable advanced response in Shopify settings.

Paste the webhook URL in the Shopify settings under the notifications section. This setup ensures that every time an order is created, the details are sent to Pabbly Connect, allowing for further processing.


3. Placing an Order and Capturing Data in Pabbly Connect

After linking Shopify with Pabbly Connect, you can now place a dummy order in your Shopify store. This order can include multiple products to test the SMS functionality. For instance, add items like LED bulbs, tube lights, and beauty blenders to your cart, and proceed to checkout.

Once the order is placed, Pabbly Connect will capture the order details, including product names, quantities, and customer information. You can verify this data by checking the response received in Pabbly Connect’s dashboard. This step confirms that the integration is functioning correctly.


4. Formatting Order Data for SMS Using Pabbly Connect

To send an SMS with the order details, you need to format the captured data into a readable format. In Pabbly Connect, add a new action step and select ‘Code by Pabbly’. Choose the ‘Run JavaScript’ action event to process the order data.

  • Add JavaScript code to format the line items.
  • Map the line item data to ensure it updates automatically with each new order.
  • Test the JavaScript action to confirm it works as expected.

Once the data is formatted correctly, you can proceed to send the SMS to the customer using Twilio.


5. Sending SMS through Twilio Using Pabbly Connect

Finally, to send the SMS, add another action step in Pabbly Connect and select Twilio as the application. Choose the ‘Send SMS Message’ action event to configure the SMS details.

Fill in the required fields such as the body of the SMS, sender number, and receiver number. Ensure to include the mapped customer name and order details in the SMS body. For example, the message could be: ‘Hello [Customer Name], your order is successful. Here are the product details…’.

After setting up the SMS content, click on ‘Save’ to finalize the integration. Now, every time an order is placed, an automatic SMS will be sent to the customer, confirming their order details.


Conclusion

Using Pabbly Connect, you can effectively automate the process of sending order confirmation SMS for multiple items from Shopify to Twilio. This integration streamlines communication with customers, ensuring they receive timely updates about their orders.

Ensure you check out Pabbly Connect to create business automation workflows and reduce manual tasks. Pabbly Connect currently offer integration with 2,000+ applications.

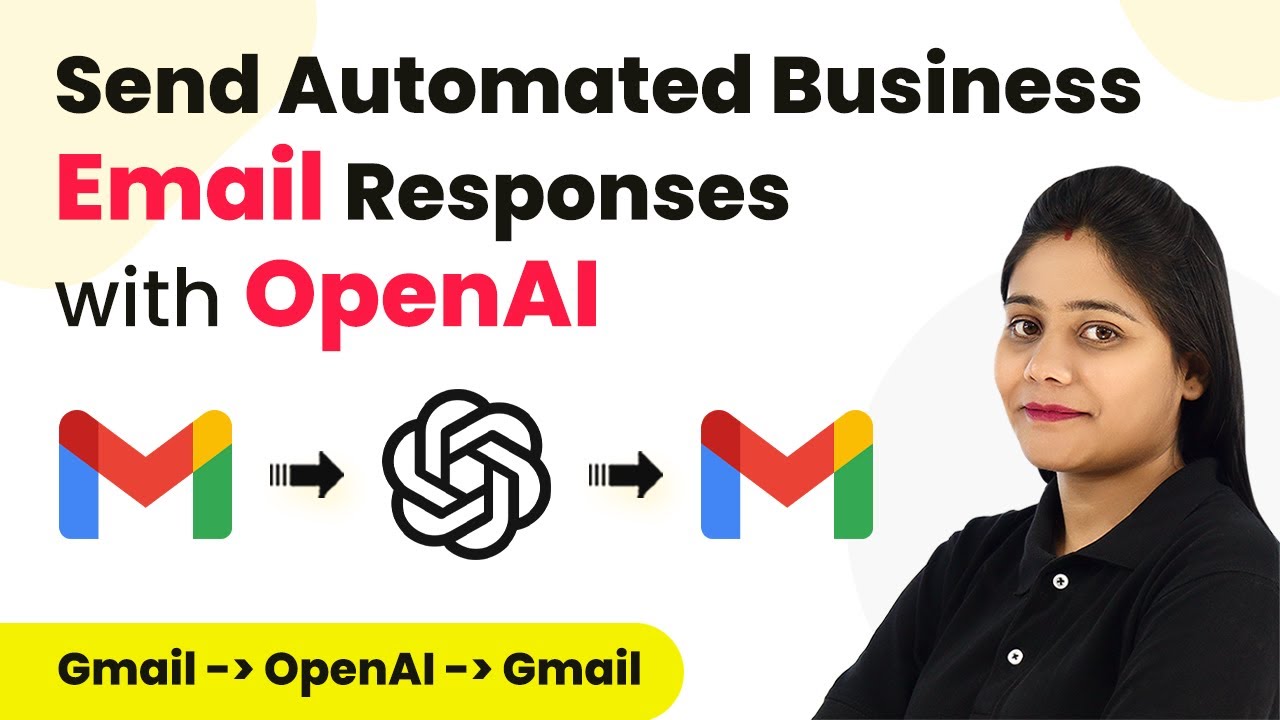
Automate Business Email Responses with Pabbly Connect and OpenAI

Learn how to automate business email responses using Pabbly Connect and OpenAI with this step-by-step tutorial. Streamline your email management today! Implement the precise methodologies leading organizations use to automate repetitive tasks, illustrated with practical examples designed for immediate application.

Watch Step By Step Video Tutorial Below


1. Accessing Pabbly Connect for Email Automation

To automate business email responses, you first need to access Pabbly Connect. This integration platform allows you to connect various applications seamlessly. Begin by creating a free account on Pabbly Connect, which takes just a couple of minutes.

Once logged in, navigate to the dashboard and click on the blue button labeled ‘Create Workflow’. You will be prompted to name your workflow. For our example, name it ‘Automate Email Responses with OpenAI’. This workflow will facilitate the integration between Gmail and OpenAI.


2. Setting Up Gmail Integration with Pabbly Connect

In this step, you will set up Gmail within Pabbly Connect to enable email parsing. Since Gmail is not directly selectable, you will use the Email Parser feature. Copy the email address provided by Pabbly Connect and add it as a forwarding address in your Gmail settings.

  • Go to Gmail settings and click on ‘Forwarding and POP/IMAP’.
  • Add the Pabbly Connect email address as a forwarding address.
  • Verify the forwarding address using the code sent to Pabbly Connect.

After verification, enable the forwarding option in Gmail settings. This setup allows any incoming email to be forwarded to Pabbly Connect, which will trigger the automation workflow.


3. Configuring OpenAI Integration in Pabbly Connect

With Gmail set up, the next step is to integrate OpenAI using Pabbly Connect. Select OpenAI from the list of applications and choose the action event to be ‘Chat GPD’. You will need to provide your OpenAI API key to establish the connection.

Click on the hyperlink to generate a new API key if you haven’t already. Once the key is entered, you can map the incoming email details to create a prompt for OpenAI. For example, instruct OpenAI to generate a reply for the incoming email by providing the body text and sender’s name.

  • Map the body text of the incoming email.
  • Specify the sender’s name in the prompt.
  • Save the request to generate a response.

After setting this up, OpenAI will automatically generate responses based on the incoming emails, streamlining your email management process.


4. Sending Automated Email Responses via Pabbly Connect

Now that OpenAI is configured, the next step is to send the generated replies back through Gmail, using Pabbly Connect. Add another action step in your workflow and select Gmail to send an email. You will map the recipient email address from the incoming email data.

Fill in the required fields such as subject and email content. For the content, map the response generated by OpenAI. This ensures that the reply is sent to the same email thread automatically. Click ‘Save and Send Test Request’ to finalize this step.

Map the recipient email address from the parsed email. Set the subject line to indicate it’s a reply. Send the email using the mapped content from OpenAI.

This step completes the automation process, allowing Pabbly Connect to handle responses automatically without manual intervention.


5. Applying Filters and Conditions in Pabbly Connect

The final step involves applying filters and conditions to control when automated replies are sent using Pabbly Connect. You can set conditions based on keywords in the email subject or body. This ensures that only relevant emails trigger automatic replies.

To set a filter, select the filter option in Pabbly Connect and define the conditions. For instance, you can specify that replies should only be generated if the subject contains keywords like ‘startup’ or ‘investment’. This targeted approach helps in managing responses effectively.

Choose the criteria for filtering emails. Define keywords that trigger the automation. Test the filter to ensure it works correctly.

With these filters in place, you can manage your email responses more effectively, ensuring that only pertinent emails receive automated replies.


Conclusion

In this tutorial, we explored how to automate business email responses using Pabbly Connect and OpenAI. By following these steps, you can streamline your email management and enhance productivity with automation.

Ensure you check out Pabbly Connect to create business automation workflows and reduce manual tasks. Pabbly Connect currently offer integration with 2,000+ applications.