WhatsApp Business Automation Using Pabbly Connect: A Step-by-Step Guide

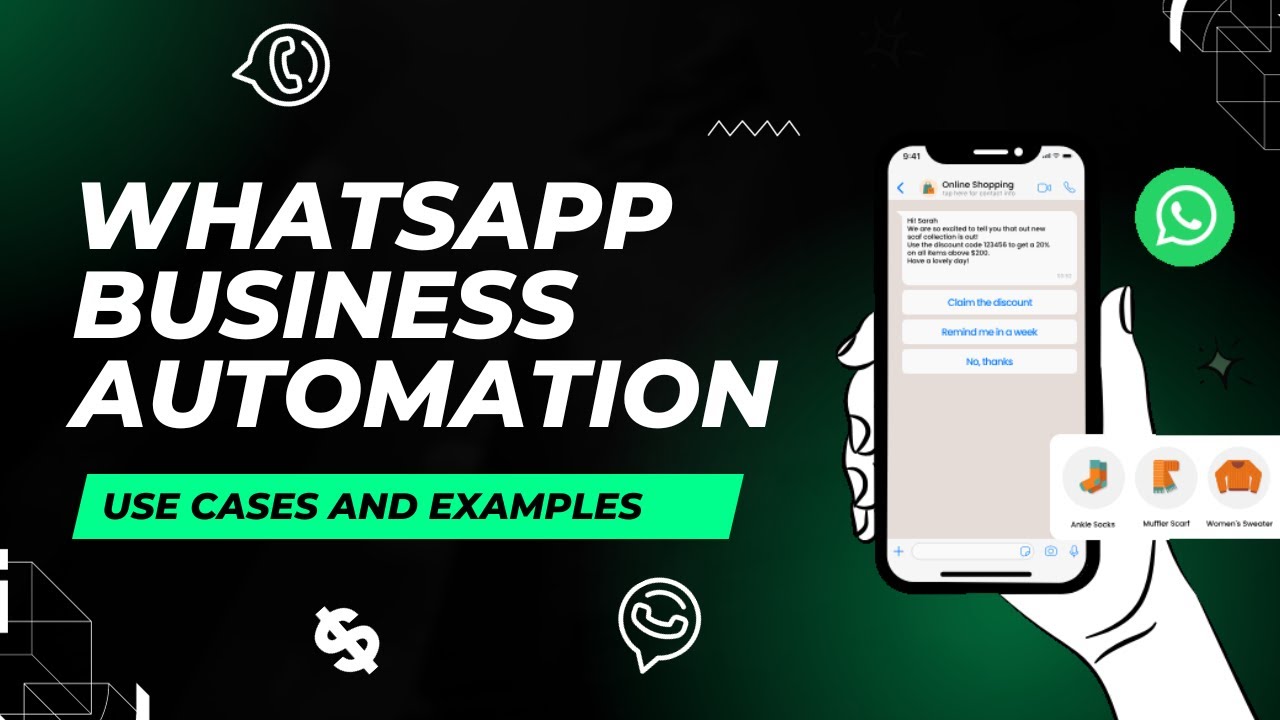
Learn how to automate WhatsApp messages for your business using Pabbly Connect. This guide covers integration with Google Forms, Shopify, and more. Revolutionize your productivity approach with just a few strategic clicks. Uncover professional methods for connecting applications and creating workflows that reclaim hours of your week.

Watch Step By Step Video Tutorial Below


1. Understanding WhatsApp Automation with Pabbly Connect

WhatsApp has evolved into a powerful tool for businesses, and Pabbly Connect is the platform that enables automation of conversations with customers. By automating WhatsApp messages, businesses can enhance customer engagement and streamline communication processes.

For instance, e-commerce stores can send order notifications automatically. Similarly, clinics can send appointment reminders, improving customer satisfaction while reducing manual effort. The automation process significantly enhances response times and operational efficiency.


2. Setting Up Pabbly Connect for WhatsApp Automation

To get started with WhatsApp automation using Pabbly Connect, first, access the platform by visiting Pabbly.com/connect. Sign up for a free account, which includes free tasks to test your automations.

Once logged in, you can create a new workflow by clicking the blue button labeled ‘Create Workflow’. This is where you will set up the integration between WhatsApp and other applications like Google Forms or Shopify.

  • Visit Pabbly Connect and sign up for an account.
  • Create a new workflow by clicking ‘Create Workflow’.
  • Select your desired applications for integration.

After creating your workflow, you will need to establish triggers and actions. The trigger will initiate the automation whenever a specific event occurs, such as a new form submission.


3. Integrating Google Forms with WhatsApp via Pabbly Connect

In this section, we will integrate Google Forms with WhatsApp using Pabbly Connect. Start by selecting Google Forms as your trigger application and the event as ‘New Response Received’. This will capture responses submitted through your Google Form.

Next, connect your Google Form to Pabbly Connect by copying the webhook URL provided by Pabbly and pasting it into the Google Forms add-on. This will allow the form submissions to trigger actions in Pabbly Connect.

  • Select Google Forms as the trigger application.
  • Choose ‘New Response Received’ as the event.
  • Paste the webhook URL into the Google Forms add-on.

Once connected, every new response submitted through the Google Form will automatically trigger the workflow in Pabbly Connect, allowing you to send automated WhatsApp messages.


4. Defining a Lookup Table in Pabbly Connect

To customize the WhatsApp messages sent to customers, we will define a lookup table in Pabbly Connect. This table will match customer requirements with the appropriate response, such as sending a specific brochure based on the selected travel destination.

In your workflow, add a new action step for the lookup table. Here, you will define the requirements and link them to the respective brochures. For example, if a customer selects ‘Shimla Manali’, the corresponding brochure link will be sent.

Add a new action step for the lookup table. Define customer requirements and corresponding responses. Map the requirements dynamically from the form submissions.

This lookup table functionality ensures that the right information is sent to the right customer based on their input, enhancing the personalization of your WhatsApp communications.


5. Sending WhatsApp Messages Using Pabbly Connect

Finally, to send the WhatsApp messages, select the action event ‘Send Template Message’ from your WhatsApp integration in Pabbly Connect. You will need to connect your WhatsApp account using the API endpoint and access token from your WhatsApp service provider.

Once connected, configure the message template, including dynamic fields for customer names and brochure links. This allows the messages to be personalized for each recipient based on their form submission.

Select ‘Send Template Message’ as the action event. Connect your WhatsApp account using the API and access token. Configure the message template with dynamic fields.

After setting up the message, every time a new form submission occurs, Pabbly Connect will automatically send the relevant WhatsApp message to the customer, streamlining communication and enhancing customer engagement.


Conclusion

In this tutorial, we explored how to automate WhatsApp messages using Pabbly Connect. From integrating Google Forms to sending personalized messages, Pabbly Connect serves as a powerful tool for enhancing business communication and efficiency.

Ensure you check out Pabbly Connect to create business automation workflows and reduce manual tasks. Pabbly Connect currently offer integration with 2,000+ applications.

How to Add Academy LMS Registrations to Google Sheets Using Pabbly Connect

Learn how to seamlessly integrate Academy LMS registrations into Google Sheets using Pabbly Connect for efficient data management. Explore efficient methods for automating routine tasks with clear, concise instructions suited for both newcomers and experienced professionals.

Watch Step By Step Video Tutorial Below


1. Accessing Pabbly Connect for Integration

To add Academy LMS registrations to Google Sheets, the first step is to access Pabbly Connect. This platform enables the seamless integration of various applications, including Academy LMS and Google Sheets.

As an existing user, you can sign in to your Pabbly Connect account. If you are new, click on the ‘Sign up for free’ button to create an account. Once logged in, navigate to the ‘All Applications’ page and select Pabbly Connect to reach your dashboard.


2. Creating a Workflow in Pabbly Connect

In this section, we will create a new workflow in Pabbly Connect to automate the registration process. Click on the ‘Create Workflow’ button on the right side of your dashboard.

  • Name your workflow, e.g., ‘Add Academy LMS Registrations to Google Sheets’.
  • Choose a folder to save your workflow, such as ‘Academy LMS’.
  • Click on the ‘Create’ button to proceed.

After creating the workflow, you will see a window for setting up the trigger and action. Remember, Pabbly Connect operates on the trigger-action principle, where the trigger initiates the action.


3. Setting Up Trigger for Academy LMS

To set up the trigger in Pabbly Connect, search for ‘Academy LMS’ as your trigger application. The trigger event will be ‘New Student Registration’. This means that whenever a new student registers, the workflow will activate.

After selecting the trigger, Pabbly Connect will provide a webhook URL. This URL acts as a bridge between Academy LMS and Pabbly Connect. You will need to copy this URL to establish a connection in your Academy LMS settings.


4. Connecting Academy LMS to Pabbly Connect

Next, navigate to your Academy LMS plugin in WordPress. Go to the ‘Add-ons’ section and find the ‘Webhooks’ option. Here, you will add the webhook URL provided by Pabbly Connect.

  • Click on ‘Add Webhook’.
  • Enter a title for the webhook, e.g., ‘New Registration’.
  • Set the status to ‘Published’ and choose the event as ‘New Student Registration’.
  • Paste the webhook URL and click ‘Add Webhook’.

Once the webhook is created, Pabbly Connect will wait for a response. You can test this by registering a new student in the Academy LMS.


5. Adding Registration Details to Google Sheets

After successfully setting up the trigger, the next step is to add the registration details to Google Sheets. In Pabbly Connect, select ‘Google Sheets’ as your action application.

Choose the action event as ‘Add New Row’. You will need to connect your Google account to Pabbly Connect. After successful authorization, select the spreadsheet where you want to store the data and map the fields from the registration response.

Map the ID, Name, and Email from the response. Click on ‘Save & Test Request’ to ensure everything is working correctly.

Once you have tested the request, check your Google Sheets to see if the new registrant’s details have been added successfully. This confirms that the integration between Academy LMS and Google Sheets via Pabbly Connect is working perfectly.


Conclusion

In this tutorial, we explored how to integrate Academy LMS registrations into Google Sheets using Pabbly Connect. This powerful platform enables seamless automation, ensuring that every new registration is recorded efficiently. Now you can manage your data effortlessly!

Ensure you check out Pabbly Connect to create business automation workflows and reduce manual tasks. Pabbly Connect currently offer integration with 2,000+ applications.

How to Send Automated Emails for Multiple Orders Paid via Razorpay with Pabbly Connect

Learn how to automate emails for multiple orders paid via Razorpay using Pabbly Connect. Step-by-step guide for seamless integration. Navigate the automation landscape confidently with clear, structured guidance suitable for professionals regardless of prior technical experience.

Watch Step By Step Video Tutorial Below


1. Accessing Pabbly Connect for Integration

To send automated emails for multiple orders paid via Razorpay, start by accessing Pabbly Connect. Visit the Pabbly website and sign in or create a new account if you are a first-time user.

After logging in, you will land on the dashboard. Here, you can manage your workflows and integrations. Ensure you have a clear understanding of your objectives, as you will be integrating Razorpay and Gmail through Pabbly Connect.


2. Creating a New Workflow in Pabbly Connect

Next, create a new workflow in Pabbly Connect. Click on the ‘Create Workflow’ button located at the top right corner of the dashboard. A dialog box will appear asking for a workflow name.

Enter a descriptive name such as ‘Send Email for Razorpay Payment for Multiple Products’. Select a folder to save this workflow. After naming your workflow, click ‘Create’. You will see two sections: Trigger and Action.

  • Select Razorpay as the trigger application.
  • Choose ‘Payment Captured’ as the trigger event.

This setup allows Pabbly Connect to capture payment details whenever a transaction occurs in Razorpay.


3. Setting Up Webhook in Razorpay

After selecting Razorpay as your trigger, Pabbly Connect will provide a webhook URL. Copy this URL to connect Razorpay with Pabbly. Navigate to your Razorpay dashboard and go to the Account and Settings section.

In the Webhooks section, click on ‘Add New Webhook’. Paste the copied URL into the Webhook URL field and select the event ‘Payment Captured’. Finally, click on ‘Create Webhook’ to save the configuration.


4. Testing the Integration with Razorpay

With the webhook set up, it’s time to test the integration. Go back to Pabbly Connect and ensure it is waiting for a webhook response. Now, simulate a payment in Razorpay by selecting a product and completing the payment process.

Once the payment is successful, return to Pabbly Connect. You should see the payment details captured in the response. This confirms that Razorpay is successfully sending data to Pabbly Connect.

  • Check the payment status, order ID, and customer details.
  • Verify that the payment amount is formatted correctly.

This step ensures that the integration is functioning as expected before proceeding to the email setup.


5. Sending Automated Emails via Gmail

Now, set up the action step for sending emails. In Pabbly Connect, select Gmail as the action application. Choose ‘Send Email’ as the action event. Connect your Gmail account to allow Pabbly to send emails on your behalf.

Fill in the recipient’s email address using the email captured from the Razorpay payment response. Customize the email subject and body to reflect the order details. Ensure you map the customer name and product details dynamically to personalize the message.

Set a static sender name for consistency. Include a personalized message thanking the customer for their purchase.

After configuring the email settings, test the email sending function. Upon successful testing, you can finalize the workflow, ensuring that every payment processed through Razorpay triggers an email sent via Gmail, all managed seamlessly by Pabbly Connect.


Conclusion

Automating emails for multiple orders paid via Razorpay using Pabbly Connect streamlines your communication with customers. By following these steps, you can ensure timely and personalized email responses for every purchase.

Ensure you check out Pabbly Connect to create business automation workflows and reduce manual tasks. Pabbly Connect currently offer integration with 2,000+ applications.

Automate Social Media Posts with Pabbly Connect and OpenAI

Learn how to automate social media posts using Pabbly Connect and OpenAI in this detailed tutorial. Create engaging content effortlessly! Follow this definitive guide to creating powerful automated workflows with straightforward, efficiency-focused solutions that save valuable time.

Watch Step By Step Video Tutorial Below


1. Setting Up Pabbly Connect for Social Media Automation

To automate social media posts, start by accessing Pabbly Connect. First, create a free account on the Pabbly Connect website, which takes only a couple of minutes. Once logged in, navigate to the dashboard where you can create a new workflow.

Click on the blue button labeled ‘Create Workflow’. You will need to name your automation; for this example, we will use ‘Create Social Media Post using OpenAI’. Choose a folder for your workflow and click ‘Create’. This sets the foundation for your social media automation.


2. Connecting Google Sheets with Pabbly Connect

In this step, we will connect Google Sheets to Pabbly Connect to trigger the automation. Select Google Sheets as the trigger application and choose the event ‘New or Updated Spreadsheet Row’. This means that whenever a new row is added, it will trigger the automation.

  • Select the Google Sheets account you want to connect.
  • Authorize Pabbly Connect to access your Google Sheets.
  • Select the specific spreadsheet and worksheet you want to monitor.

After setting up the trigger, you’ll receive a webhook URL. Copy this URL, as it will be used in your Google Sheets add-on for integration. This allows Pabbly Connect to receive data whenever a new topic and image URL are added.


3. Configuring Google Sheets to Work with Pabbly Connect

Now that we have the webhook URL, we need to configure Google Sheets. Click on ‘Extensions’, then ‘Add-ons’, and search for the Pabbly Connect Webhooks add-on. Install it if you haven’t already.

After installation, open the Pabbly Connect Webhooks add-on and enter the webhook URL you copied earlier. Specify the trigger column where your data will be filled. In this case, we will use column B to trigger the automation whenever a new entry is made.

  • Ensure that the data is entered in column B.
  • Click on ‘Send Test’ to ensure that Pabbly Connect receives the data correctly.

Once the test is successful, enable the ‘Send on Event’ option. This ensures that every time new data is added, it will automatically send the information to Pabbly Connect.


4. Generating Content Using OpenAI via Pabbly Connect

Next, we will set up OpenAI as the action application in Pabbly Connect. Select OpenAI and choose the action event ‘ChatGPT’. Connect your OpenAI account by entering your API key.

Map the fields from Google Sheets to OpenAI. For example, use the topic and image URL from your spreadsheet as the prompt for generating social media content. This mapping allows the automation to dynamically insert the relevant data from your Google Sheets into the OpenAI request.

Choose the model you want to use (e.g., GPT-3.5 Turbo). Set the prompt to include the topic and image URL from the spreadsheet.

After setting up the action, test the integration. If successful, you will receive a generated caption that can be used for your social media posts. This shows how Pabbly Connect streamlines the process of generating content automatically.


5. Posting to Facebook and Instagram via Pabbly Connect

With the content generated, it’s time to post on social media. First, connect Facebook as the next action application in Pabbly Connect. Choose the action event ‘Create Page Photo Post’. Authorize your Facebook account and select the page where you want to post.

Map the generated caption and image URL from OpenAI to the Facebook post fields. After configuring the settings, click ‘Save and Send Test Request’. Once the test is successful, check your Facebook page to see the newly created post.

Ensure that you have the correct page selected. Verify that the caption and image URL are correctly mapped.

Repeat the same process for Instagram by selecting it as an action application in Pabbly Connect. Choose ‘Publish a Photo’ as the action event and map the same fields. After testing, your posts should appear on both Facebook and Instagram automatically, showcasing the power of automation with Pabbly Connect.


Conclusion

This tutorial demonstrates how to automate social media posts using Pabbly Connect and OpenAI. By following these steps, you can efficiently create and publish engaging content across various platforms without manual effort. Embrace automation today!

Ensure you check out Pabbly Connect to create business automation workflows and reduce manual tasks. Pabbly Connect currently offer integration with 2,000+ applications.

How to Add Facebook Leads to Google Sheets for Your Furniture Business Using Pabbly Connect

Learn how to seamlessly integrate Facebook Leads into Google Sheets for your furniture business using Pabbly Connect. Step-by-step guide included! Learn to create powerful connections between your critical applications without requiring specialized programming knowledge or extensive technical background.

Watch Step By Step Video Tutorial Below


1. Accessing Pabbly Connect for Facebook Leads Integration

To add Facebook leads to Google Sheets for your furniture business, the first step is accessing Pabbly Connect. You can start by signing in to your existing account or create a new one if you are a new user. Pabbly Connect offers 100 free tasks every month, making it accessible for small businesses.

Once logged in, navigate to the Pabbly Connect dashboard by clicking on the ‘Access Now’ button. Here, you can create a new workflow that will automate the process of capturing leads from Facebook and adding them to Google Sheets.


2. Creating a New Workflow in Pabbly Connect

After accessing Pabbly Connect, click on the ‘Create Workflow’ button located in the top right corner of the dashboard. Name your workflow something descriptive, like ‘Add Facebook Leads to Google Sheets’. It’s also recommended to save this workflow in a folder, such as ‘Facebook Lead Ads’.

  • Click on the ‘Create’ button to proceed.
  • You will be directed to a new window where you can set your trigger and action applications.
  • Define your trigger application as Facebook Lead Ads and the action application as Google Sheets.

In this section, you will set up your trigger event as ‘New Lead Instant’. This ensures that every time a new lead is received, the workflow will execute automatically. This is crucial for timely updates in your Google Sheets.


3. Connecting Facebook Lead Ads to Pabbly Connect

Now that your workflow is set, the next step involves connecting Facebook Lead Ads to Pabbly Connect. Click on the ‘Connect’ button within the trigger settings. Since you are already logged into your Facebook account, the authorization process should be straightforward.

After successful authorization, select the Facebook page associated with your furniture business, such as ‘ARA Furniture Store’. Next, choose the lead generation form linked to this page, for example, ‘ARA Furniture Contact Form New’. This step is essential, as it determines which leads will be captured for your Google Sheets.


4. Testing the Integration with a Test Lead

With your Facebook Lead Ads connected to Pabbly Connect, it’s time to test the integration. Click on ‘Save and Test Request’. The system will now wait for a web response, which means you need to create a test lead to confirm the setup.

To do this, navigate to the Meta for Developers page and use the Lead Ads Testing Tool. Here’s how to create a test lead:

  • Select your Facebook page from the dropdown.
  • Choose the appropriate lead form.
  • Fill in the required fields and submit the form.

If everything is set up correctly, you should see the lead details captured in Pabbly Connect. This confirms that your trigger is working as intended.


5. Adding Leads to Google Sheets

Now that you have successfully tested the Facebook Lead Ads integration with Pabbly Connect, the next step is to add the captured leads to Google Sheets. Start by connecting Google Sheets to Pabbly Connect by clicking on the ‘Connect’ button in the action settings.

Sign in to your Google account and authorize the connection. Once connected, select the spreadsheet you created, named ‘Facebook Leads New’, and specify the sheet where the data will be stored. Use the mapping feature to ensure that lead details such as email, name, and phone number are dynamically added to the correct columns in your Google Sheet.

Map the email field from Facebook to the corresponding column in Google Sheets. Do the same for the lead name and phone number fields. Click on ‘Save and Send Test Request’ to see if the data is correctly added.

After sending the test request, check your Google Sheet. If the test lead details appear as expected, your integration is successfully set up. From now on, every new lead from Facebook will automatically populate in your Google Sheets, streamlining your lead management process.


Conclusion

In this tutorial, we explored how to add Facebook leads to Google Sheets for your furniture business using Pabbly Connect. By following these steps, you can automate your lead management efficiently and ensure that you never miss out on potential customers.

Ensure you check out Pabbly Connect to create business automation workflows and reduce manual tasks. Pabbly Connect currently offer integration with 2,000+ applications.

How to Send Automated WhatsApp Messages to Your Automobile Spare Parts Business Leads Using Pabbly Connect

Learn how to send automated WhatsApp messages to your automobile spare parts business leads using Pabbly Connect. This detailed guide provides step-by-step instructions for integration.

Watch Step By Step Video Tutorial Below


1. Accessing Pabbly Connect to Set Up Automation

To send automated WhatsApp messages to your automobile spare parts business leads, you first need to access Pabbly Connect. Start by signing in to your Pabbly account. If you are new, click on the ‘Sign Up for Free’ button to create an account and receive 100 free tasks every month.

After logging in, navigate to the ‘All Applications’ page and click on Pabbly Connect. From there, access your dashboard to begin creating your workflow for automation.


2. Creating a Workflow in Pabbly Connect

In this section, you will create a workflow to automate WhatsApp messaging. Click on the ‘Create Workflow’ button located at the top right corner of your dashboard. Name your workflow as ‘Send Automated WhatsApp Message to Facebook Leads’ and save it in the folder named ‘Facebook Lead Ads’. using Pabbly Connect

  • Click on the ‘Create’ button to proceed.
  • You will see options for trigger and action applications.
  • Select Facebook Lead Ads as the trigger application.

Once you select Facebook Lead Ads, choose ‘New Lead Instant’ as the trigger event. This setup allows Pabbly Connect to initiate the workflow automatically whenever a new lead is generated through your Facebook ads.


3. Connecting Facebook Lead Ads to Pabbly Connect

Next, you need to establish a connection between Facebook Lead Ads and Pabbly Connect. Click on the ‘Connect’ button in the trigger window. A prompt will appear asking you to log into your Facebook account if you haven’t done so already.

After successful authorization, select the Facebook page that you have created for your automobile spare parts business. You will also need to select the lead generation form associated with that page.

  • Choose your page (e.g., ‘Tire Store’).
  • Select the lead form (e.g., ‘Tire Store Contact Form’).

After selecting both, click on ‘Save and Test Request’. This will prepare Pabbly Connect to receive data from Facebook Lead Ads.


4. Sending Automated WhatsApp Messages via Pabbly Connect

Now, it’s time to configure the action application to send WhatsApp messages. In the action window, select ‘Vati’ as the application to send the WhatsApp message. Choose the action event as ‘Send Template Message’.

To connect Vati with Pabbly Connect, click on the ‘Connect’ button and provide the API endpoint and access token from your Vati account. Copy the necessary details from Vati API documentation and paste them into the respective fields in Pabbly Connect.

Map the phone number field from the Facebook lead data. Select the WhatsApp template you created for leads.

Once you have configured these settings, click on ‘Save and Test Request’ to send a test WhatsApp message to the lead. This confirms that your integration is working correctly.


5. Testing the Integration Success

After completing the setup, it’s crucial to test the integration to ensure everything functions as intended. Use the Meta for Developers tool to create a test lead. Fill in the required fields and submit the lead form.

Upon successful submission, return to Pabbly Connect to check if the lead data has been captured. You should see the details such as full name, email, and phone number from the test lead.

Confirm that the WhatsApp message is received on the specified number. Check that the message includes the lead’s name dynamically.

If the test is successful, your automation is complete. Now, every time a new lead comes through Facebook, an automated WhatsApp message will be sent to that lead, enhancing your customer engagement.


Conclusion

Using Pabbly Connect, you can effortlessly send automated WhatsApp messages to your automobile spare parts business leads. This integration not only streamlines your communication but also enhances customer engagement effectively.

Ensure you check out Pabbly Connect to create business automation workflows and reduce manual tasks. Pabbly Connect currently offer integration with 2,000+ applications.

How to Send Automated WhatsApp Messages to Facebook Leads for Your Furniture Business Using Pabbly Connect

Learn how to automate WhatsApp messages to Facebook leads for your furniture business using Pabbly Connect. Step-by-step guide included. This comprehensive guide reveals exactly how to connect your applications and automate repetitive tasks — accessible for professionals of all technical backgrounds.

Watch Step By Step Video Tutorial Below


1. Setting Up Pabbly Connect for WhatsApp Automation

To send automated WhatsApp messages to Facebook leads for your furniture business, you will first need to access Pabbly Connect. Start by signing into your Pabbly account or create a new account if you are a new user. Pabbly Connect provides a seamless integration platform that allows you to connect different applications easily.

Once logged in, navigate to the Pabbly Connect dashboard. Here, you can create a new workflow specifically for sending automated messages. Click on the ‘Create Workflow’ button, name it ‘Send Automated WhatsApp Message to Facebook Leads’, and choose a folder to save it in, like ‘Facebook Lead Ads’.


2. Configuring the Trigger Application in Pabbly Connect

In the next step, you will configure the trigger application, which is Facebook Lead Ads. This is where Pabbly Connect shines by allowing you to set up a trigger that activates when a new lead is received. Choose Facebook as your trigger application and select the trigger event as ‘New Lead Instant’.

  • Select Facebook as the trigger application.
  • Choose the trigger event ‘New Lead Instant’.
  • Click on connect to link Pabbly Connect with Facebook.

After connecting, you’ll need to select the specific Facebook page and lead gen form associated with your furniture business. This setup ensures that every new lead from your Facebook ads will trigger the subsequent actions in your workflow.


3. Testing the Trigger Setup in Pabbly Connect

After configuring the trigger, it’s essential to test the setup to ensure everything is working correctly. In Pabbly Connect, click on ‘Save and Send Test Request’. This action will prompt the system to wait for a webhook response from Facebook. using Pabbly Connect

To generate a test lead, navigate to the Meta for Developers page. Use the lead ads testing tool to create a test lead for your ARA Furniture Store page. Fill out the necessary details like full name, phone number, and email, then submit the form.

  • Go to Meta for Developers and select your page.
  • Use the lead ads testing tool to create a test lead.
  • Submit the test lead to trigger the webhook response.

Once the test lead is submitted, Pabbly Connect should capture the lead details, confirming that the trigger is functioning as intended.


4. Setting Up Action Application to Send WhatsApp Messages

Now that the trigger is successfully set up, it’s time to configure the action application. In this case, you will use WhatsApp, specifically through the Wati service. Select Wati as your action application in Pabbly Connect and choose the action event ‘Send Template Message’.

You will need to connect Wati with Pabbly Connect by entering the API endpoint and access token. This information can be found in the Wati API documentation. After entering the required details, click on save to establish the connection.

Choose Wati as the action application. Select ‘Send Template Message’ as the action event. Enter the API endpoint and access token from Wati.

Once connected, you will map the WhatsApp number and template details from the captured lead data. This mapping ensures that the correct information is sent to the lead automatically.


5. Finalizing the Integration and Sending Messages

To finalize the integration, you will need to specify the WhatsApp number of the lead and select the template message to be sent. Ensure that your template is set up in Wati and is named appropriately, such as ‘Facebook Lead Ads’.

After selecting the template, map the lead’s name into the custom parameters to personalize the message. This mapping allows the message to dynamically change based on the lead’s information. Finally, click on ‘Save and Send Test Request’ to test the entire workflow.

Once the test is successful, you will see the WhatsApp message sent to the test lead, confirming that your integration using Pabbly Connect is complete. This automation will now run seamlessly, sending automated WhatsApp messages to all new Facebook leads for your furniture business.


Conclusion

In conclusion, using Pabbly Connect to send automated WhatsApp messages to Facebook leads for your furniture business is an effective way to enhance customer engagement. This tutorial provided a detailed step-by-step guide to set up the integration successfully.

Ensure you check out Pabbly Connect to create business automation workflows and reduce manual tasks. Pabbly Connect currently offer integration with 2,000+ applications.

How to Add Facebook Leads to Google Sheets Using Pabbly Connect

Learn how to integrate Facebook leads into Google Sheets for your Dog Training Centre using Pabbly Connect. Step-by-step guide for seamless automation. Build sophisticated automated workflows in less time than you think. This guide translates complex integrations into straightforward steps for immediate implementation.

Watch Step By Step Video Tutorial Below


1. Setting Up Pabbly Connect for Facebook Leads

To integrate Facebook leads into Google Sheets, first, you need to set up Pabbly Connect. This integration platform allows you to automate the process seamlessly. Start by visiting the Pabbly Connect website and signing up if you are a new user. Existing users can log in directly to access their dashboard.

Once logged in, navigate to the Pabbly Connect application. Click on the ‘Create Workflow’ button located in the top right corner of the dashboard. In the dialog box that appears, name your workflow. For this tutorial, we will call it ‘Add Facebook Leads to Google Sheets’ and save it in a folder named ‘Facebook Lead Ads’.


2. Choosing Trigger and Action Applications in Pabbly Connect

In this section, you will set up the trigger and action applications in Pabbly Connect. The trigger application will be Facebook, while the action application will be Google Sheets. Click on the trigger window and select Facebook Lead Ads as your trigger application. The trigger event should be set to ‘New Lead Instant’.

  • Select Facebook as the trigger application.
  • Set the trigger event to ‘New Lead Instant’.
  • Proceed to the action window and select Google Sheets.
  • Set the action event to ‘Add New Row’.

Now, you have established the basic framework for your integration. The next step is to connect your Facebook account to Pabbly Connect to start receiving leads.


3. Connecting Facebook Leads to Pabbly Connect

To connect Facebook leads to Pabbly Connect, click on the ‘Connect’ button in the trigger window. You will be prompted to log into your Facebook account. After logging in, authorize the connection. Once the authorization is successful, you will see a confirmation message indicating that Facebook Lead Ads is successfully connected.

Next, select the Facebook page you created for your Dog Training Centre. Choose the corresponding lead generation form associated with the page. In this case, select the ‘Dog Training Contact Form’. After making your selections, click on ‘Save and Send Test Request’ to proceed.


4. Testing Integration and Mapping Data to Google Sheets

After saving your settings in Pabbly Connect, the system will wait for a webhook response. To test the integration, you will need to create a test lead using the Meta for Developers tool. Navigate to the lead ads testing tool, select your Facebook page, and the lead form you previously set up.

  • Fill out the test lead form with details such as full name, email, and phone number.
  • Submit the form to send the test lead to Pabbly Connect.

Once the test lead is submitted, return to Pabbly Connect to check if the response has been captured. You should see the details of the test lead, confirming that your integration is working correctly.


5. Adding Lead Details to Google Sheets

Now that you have successfully tested the integration, it’s time to connect Google Sheets to Pabbly Connect. Click on the ‘Connect’ button in the action window and sign in with your Google account. Authorize the connection and select the Google Sheet where you want to add the lead details.

In this case, select the ‘Facebook Leads New’ sheet, which contains columns for lead email, lead name, and phone number. Map the lead details from Facebook to the corresponding fields in Google Sheets. This mapping ensures that new lead data is dynamically updated in your sheet.

Finally, click on ‘Save and Send Test Request’ again to confirm that the lead details are added to your Google Sheet. After a successful test, check your Google Sheet to see the new row with the lead details populated correctly.


Conclusion

This tutorial demonstrated how to integrate Facebook leads into Google Sheets using Pabbly Connect. By following these steps, you can automate your lead management process efficiently. With Pabbly Connect, you can streamline data entry and focus more on your dog training business.

Ensure you check out Pabbly Connect to create business automation workflows and reduce manual tasks. Pabbly Connect currently offer integration with 2,000+ applications.

How to Create an AI Writer Using Google Forms, OpenAI, and Google Docs with Pabbly Connect

Learn to automate content creation using Google Forms, OpenAI, and Google Docs with Pabbly Connect. Step-by-step guide to set up your AI writer. Discover hidden automation capabilities within your existing tools. This guide shows you how to connect your essential applications and permanently eliminate redundant manual processes.

Watch Step By Step Video Tutorial Below


1. Overview of Pabbly Connect for Automation

Pabbly Connect is a powerful automation tool that allows you to connect various applications seamlessly. In this tutorial, we will use Pabbly Connect to integrate Google Forms, OpenAI, and Google Docs for creating an AI writer. This integration will enable automatic content generation based on user submissions.

To get started, create your free account on Pabbly Connect. Once logged in, you will have access to a user-friendly dashboard where you can create workflows. Follow these steps to set up your automation.


2. Creating Your Workflow in Pabbly Connect

To create your AI writer workflow, navigate to the Pabbly Connect dashboard and click on the blue ‘Create Workflow’ button. Name your workflow something descriptive, like ‘AI Writer Using Google Forms, OpenAI, and Google Docs.’ Choose a folder for your workflow and click ‘Create’ to proceed.

  • Select Google Forms as the Trigger Application.
  • Choose the trigger event as ‘New Responses Received’.
  • Copy the webhook URL provided by Pabbly Connect.

After setting the trigger, you can move on to the next steps in your automation. Remember, the workflow will execute every time a new response is submitted in Google Forms, thanks to Pabbly Connect.


3. Integrating Google Forms with Pabbly Connect

Next, we will connect Google Forms to Pabbly Connect. Open your Google Form and create a new spreadsheet to collect responses. In the spreadsheet, go to Extensions > Add-ons > Get Add-ons and search for Pabbly Connect Webhook.

  • Install the Pabbly Connect Webhook add-on.
  • Open the add-on and select ‘Initial Setup’.
  • Paste the webhook URL from Pabbly Connect and set the trigger column to the column where your data will be filled.

Once set up, test the connection by submitting a sample response in your Google Form. This will send data to Pabbly Connect, confirming the integration works correctly.


4. Integrating OpenAI with Pabbly Connect

After successfully connecting Google Forms, the next step is to integrate OpenAI. In your Pabbly Connect workflow, add OpenAI as the Action Application. Select the action event as ‘Create Completion’ and connect your OpenAI account.

Here’s what you need to do:

Choose the AI model (like GPT-3.5) for generating content. Map the prompt from the Google Forms response to the OpenAI action. Test the action to ensure content generation works as expected.

Once the OpenAI integration is complete, every new submission in Google Forms will trigger content generation through Pabbly Connect.


5. Integrating Google Docs with Pabbly Connect

The final step is to connect Google Docs to Pabbly Connect. Add Google Drive as the next action application and select the action event as ‘Create File’. Choose the folder where you want to save the generated content.

To complete this integration, follow these steps:

Map the file name to the topic submitted in Google Forms. Select the file type as ‘Document’. Test the action to create a new document in Google Drive.

This setup will automatically create a Google Docs file with the content generated by OpenAI every time a new topic is submitted in Google Forms, all managed through Pabbly Connect.


Conclusion

In this tutorial, we demonstrated how to create an AI writer using Google Forms, OpenAI, and Google Docs with the help of Pabbly Connect. This automation allows for efficient content generation, enabling you to focus on other tasks while the system works in the background. By following these steps, you can easily set up your own AI writing tool.

Ensure you check out Pabbly Connect to create business automation workflows and reduce manual tasks. Pabbly Connect currently offer integration with 2,000+ applications.

Automate WhatsApp Messages for Dog Training Centre Leads with Pabbly Connect

Learn how to automate WhatsApp messages to your dog training center leads using Pabbly Connect and Facebook lead ads in this detailed tutorial. Discover how to seamlessly connect your essential tools through accessible instructions that make powerful automation available to professionals at every skill level.

Watch Step By Step Video Tutorial Below


1. Accessing Pabbly Connect for Integration

To send automated WhatsApp messages to your dog training center leads, you first need to access Pabbly Connect. Start by visiting the Pabbly website, where you can sign up for a free account if you’re new or log in if you already have an account.

Once logged in, navigate to the dashboard of Pabbly Connect. Here, you can create a new workflow that will facilitate the integration between Facebook lead ads and WhatsApp messaging. This setup will allow you to automate responses to new leads effectively.


2. Creating a New Workflow in Pabbly Connect

In the Pabbly Connect dashboard, click on the ‘Create Workflow’ button. You will be prompted to name your workflow; for this purpose, you can name it something like ‘Automated WhatsApp Messages for Dog Training Leads’. This helps in identifying the workflow later.

  • Select the folder where you want to save this workflow.
  • Click on the ‘Create’ button to proceed.

After creating the workflow, you will see two main sections: Trigger and Action. The Trigger application will be Facebook Lead Ads, and the Action application will be WhatsApp via Wati. This setup ensures that when a new lead is generated, an automated message will be sent to them.


3. Setting Up the Trigger in Pabbly Connect

The next step is to set up the Trigger in Pabbly Connect. Click on the Trigger section and select Facebook Lead Ads as your application. Choose the trigger event as ‘New Lead Instant’. This event will initiate the workflow whenever a new lead is captured.

To connect Facebook Lead Ads with Pabbly Connect, click on the ‘Connect’ button and follow the prompts to authenticate your Facebook account. Once connected, you will need to select the Facebook Page associated with your dog training center and the specific lead generation form you are using.


4. Mapping Lead Details in Pabbly Connect

After setting up the trigger, it’s time to map the details of the lead that you will be sending a WhatsApp message to. In the Pabbly Connect interface, you will see fields for the lead’s full name, email, and phone number. Ensure that you have filled out a sample submission in your lead form to test the integration.

  • Make a sample submission using the lead generation form on Facebook.
  • Return to Pabbly Connect and click on ‘Save and Send Test Request’ to retrieve the lead details.

Once you have the lead details, you can map the phone number and full name to the WhatsApp message template you will be using. This ensures that each new lead receives a personalized message upon submission.


5. Sending WhatsApp Message Using Pabbly Connect

For the final step in your workflow, set up the Action section in Pabbly Connect. Select Wati as your action application and choose the action event as ‘Send Template Message’. This will allow you to send a predefined message to the lead via WhatsApp.

To connect Wati with Pabbly Connect, you will need to provide the API endpoint and access token from your Wati account. After entering these details, you can select the template message you created for your leads. Make sure to map the name and phone number of the lead correctly to personalize the message.

After filling in all the required fields, click on ‘Save and Send Test Request’. If everything is set up correctly, you will receive a confirmation that the message has been sent successfully to the lead via WhatsApp.


Conclusion

This tutorial demonstrated how to automate WhatsApp messages for your dog training center leads using Pabbly Connect. By setting up a workflow that integrates Facebook lead ads with WhatsApp, you can efficiently respond to new leads and enhance your engagement. Start using Pabbly Connect today to streamline your communications and improve your business processes.

Ensure you check out Pabbly Connect to create business automation workflows and reduce manual tasks. Pabbly Connect currently offer integration with 2,000+ applications.