Automate Facebook Leads to Google Sheets Using Pabbly Connect

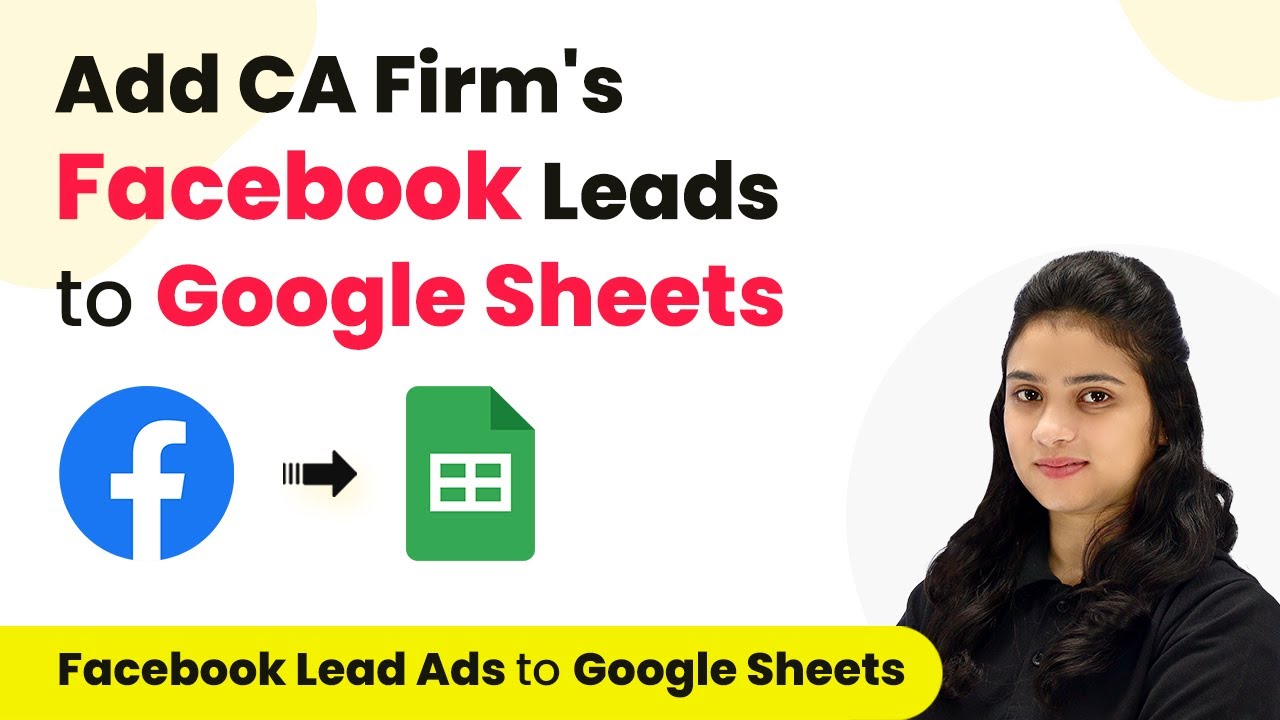
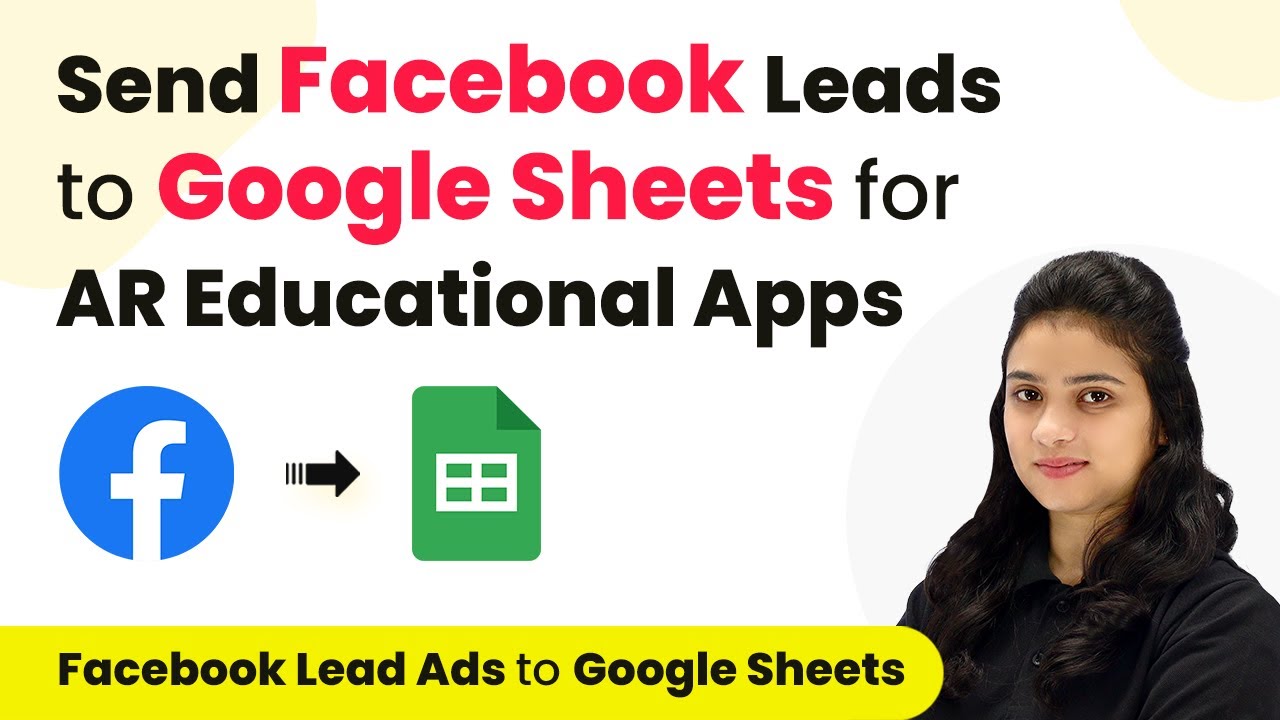
Learn how to automate Facebook leads into Google Sheets using Pabbly Connect. Follow this step-by-step guide for seamless integration without coding. Implement the precise methodologies leading organizations use to automate repetitive tasks, illustrated with practical examples designed for immediate application.

Watch Step By Step Video Tutorial Below


1. Accessing Pabbly Connect for Integration

To start automating your Facebook leads into Google Sheets, you first need to access Pabbly Connect. Visit the Pabbly Connect website and either sign in or create a new account. New users can enjoy 100 free tasks each month to explore the platform.

Once logged in, navigate to the dashboard where you will find various Pabbly products. Click on the ‘Access Now’ button for Pabbly Connect. This will take you to the workflow creation area where all automations can be set up.


2. Creating a New Workflow in Pabbly Connect

In this section, we will create a new workflow to automate the integration between Facebook lead ads and Google Sheets using Pabbly Connect. Click on the ‘Create Workflow’ option located in the top right corner of the dashboard.

  • Name your workflow, such as ‘Add Facebook Leads to Google Sheets for AR Educational Apps’.
  • Select a folder for organizing your workflows, for instance, ‘Facebook Marketing Automations’.

After naming and organizing your workflow, click on the ‘Create’ button. This will set the stage for defining the trigger and action needed for automation through Pabbly Connect.


3. Setting Up the Trigger with Facebook Lead Ads

Now, let’s set up the trigger for the workflow in Pabbly Connect. Choose Facebook Lead Ads as your trigger application. The trigger event we will select is ‘New Lead Instant’. This means that whenever a new lead is generated, it will trigger the workflow.

Click on the ‘Connect’ button to establish a connection with your Facebook account. If prompted, authorize Pabbly Connect to access your Facebook Lead Ads. After successful authentication, select the Facebook page and the lead generation form you want to use. For example, choose ‘Wonders Scope’ as your page and ‘Wonders Scope Contact Form’ as your lead form.


4. Testing the Integration with Pabbly Connect

Once the trigger is set, it’s important to test the integration. Click on the ‘Save and Send Test Request’ button in Pabbly Connect. The system will show ‘Waiting for Webhook Response’, indicating it is ready to receive data from Facebook.

To test, go to the Facebook Developer Tools and use the Lead Ads Testing Tool. Select your page and the form, then submit a test lead. After submission, return to Pabbly Connect to see if the response is captured. If successful, you will see the lead details populated in the response section.


5. Adding Leads to Google Sheets via Pabbly Connect

Now that the trigger is functioning, it’s time to set up the action to add the lead details to Google Sheets. Choose Google Sheets as your action application and select the action event ‘Add New Row’. This action will automatically add new lead details into your specified Google Sheet.

Connect your Google Sheets account to Pabbly Connect. After connecting, select the spreadsheet you want to use, such as ‘Leads Data’. Then, map the fields from the Facebook lead response to the corresponding columns in your Google Sheet, including name, email, and phone number.

Finally, click on ‘Save and Send Test Request’ to ensure the data is being added correctly. Check your Google Sheet to confirm that the new lead details have been added successfully.


Conclusion

In this tutorial, we learned how to automate the process of adding Facebook leads to Google Sheets using Pabbly Connect. By following the steps outlined, you can streamline your workflow without any coding skills, ensuring that every new lead is captured efficiently.

Ensure you check out Pabbly Connect to create business automation workflows and reduce manual tasks. Pabbly Connect currently offer integration with 2,000+ applications.

How to Create Sub-Folders & Share Folders with Team Members in Pabbly Connect

Learn how to create sub-folders and share folders with team members in Pabbly Connect. Step-by-step guide for effective team collaboration. Develop expertise in application integration and learn how to design streamlined automation workflows using proven, simplified approaches.

Watch Step By Step Video Tutorial Below


1. Creating Sub-Folders in Pabbly Connect

Creating sub-folders in Pabbly Connect is essential for organizing your automation workflows. To start, log into your Pabbly Connect account and navigate to the left sidebar where your folders are listed. Here, you can see existing folders such as Company A, Company B, and Company C.

To create a sub-folder, click on the three dots next to the folder name (e.g., Company A) and select the ‘Create Folder’ option. You will need to enter a name for your new sub-folder, such as ‘HR’. Make sure to select the parent folder (Company A) from the dropdown menu before clicking on ‘Create Folder’.


2. Organizing Workflows within Sub-Folders

Once you’ve set up your sub-folders in Pabbly Connect, it’s time to organize your automation workflows. You can create multiple sub-folders under each main folder. For example, under Company A, you might want to create another sub-folder called ‘Support Team’.

  • Click on the three dots next to Company A and select ‘Create Folder’.
  • Name the sub-folder (e.g., ‘Support Team’) and select Company A as its parent folder.
  • Click ‘Create Folder’ to finalize the creation.

After creating the ‘Support Team’ sub-folder, you can create another sub-folder within it, like ‘Zendesk’. This structure allows you to maintain a clear hierarchy and manage your workflows efficiently.


3. Sharing Folders with Team Members in Pabbly Connect

Sharing folders in Pabbly Connect is a straightforward process that enhances collaboration. To share a folder, navigate to the folder you wish to share (for example, the ‘Zendesk’ sub-folder). Click on the three dots next to the folder name and select the ‘Share’ option.

You will be directed to the team member section. Here, click on the ‘Add Team Member’ button and enter the email address of the team member you want to invite. Instead of sharing individual workflows, you can select the entire sub-folder (e.g., Zendesk) to share with them. Click on the ‘Add’ button to complete the process.


4. Managing Automation Workflows in Shared Folders

After sharing folders in Pabbly Connect, managing automation workflows becomes seamless. If you want to move workflows into the shared sub-folder, select the workflows you want to move, click on ‘Select Action’, and choose ‘Move Workflow’. You will see a dropdown to select the target folder or sub-folder.

  • Choose the ‘Zendesk’ sub-folder as the destination.
  • Click ‘Move’ to transfer the selected workflows.

Any changes made in the shared folder will reflect in the team member’s account. If you move a workflow out of the sub-folder, it will no longer be visible to the team member. This allows for effective workflow management and real-time updates.


5. Finalizing Folder Sharing and Access Control

Finalizing folder sharing in Pabbly Connect ensures that your team members have the right access to necessary workflows. To share a complete folder (like Company A), click on the share button and enter the team member’s email address. Select the root folder you want to share and click ‘Add’.

Once shared, all sub-folders and their workflows under Company A will be accessible to the team member. Any changes made within these folders will be reflected in both your account and the team member’s account, ensuring everyone stays updated.

Conclusion

This guide summarizes the key points and helps you understand the essential features and benefits of using this tool.

Ensure you check out Pabbly Connect to create business automation workflows and reduce manual tasks. Pabbly Connect currently offer integration with 2,000+ applications.


In conclusion, using Pabbly Connect to create sub-folders and share them with team members streamlines workflow management. This tutorial covers the essential steps for effective organization and collaboration within your automation processes.

Creating and Updating Google Calendar Events from Google Sheets Using Pabbly Connect

Learn how to automate Google Calendar event creation and updates directly from Google Sheets using Pabbly Connect. Follow this step-by-step guide for seamless integration. Follow this definitive guide to creating powerful automated workflows with straightforward, efficiency-focused solutions that save valuable time.

Watch Step By Step Video Tutorial Below


Accessing Pabbly Connect for Google Sheets and Calendar Integration

To create or update Google Calendar events from Google Sheets, you will need to access Pabbly Connect. Start by opening a new tab and searching for Pabbly Connect. Once on the landing page, you can either sign in if you already have an account or sign up for free if you are new to Pabbly.

After logging in, navigate to the dashboard where you can create a new workflow. Click on the ‘Create Workflow’ button and name your workflow, such as ‘Create or Update Google Calendar Event from Google Sheets’. Select the folder where you want to save this workflow and proceed to set up your trigger and action applications.


Setting Up Trigger with Google Sheets in Pabbly Connect

In this step, you will set up the trigger for your workflow using Pabbly Connect. Select Google Sheets as your trigger application and choose the event ‘New or Updated Spreadsheet Row’. This will allow Pabbly Connect to detect any new rows added to your Google Sheet automatically.

Next, you will connect your Google Sheets with Pabbly Connect. For this, copy the provided Webhook URL from Pabbly Connect. Go to your Google Sheet, click on the ‘Extensions’ menu, and select ‘Pabbly Connect Webhook’. If you do not see this option, you may need to install the Pabbly Connect Webhook add-on from the Google Workspace Marketplace.

  • Open Extensions in Google Sheets.
  • Select Pabbly Connect Webhook.
  • Paste the Webhook URL and set your trigger column (e.g., Column G).

After completing these steps, click on ‘Send Test’ to ensure the connection is working properly. Once the test is successful, submit the setup, and you will see a confirmation response from Pabbly Connect.


Configuring Action to Create or Update Google Calendar Events

Now that you have set up the trigger, it’s time to configure the action part of your workflow using Pabbly Connect. Select Google Calendar as your action application and choose the action event ‘Create Event’. This allows Pabbly Connect to create a new event in your Google Calendar when a new row is added to your Google Sheet.

Connect your Google Calendar with Pabbly Connect by clicking on ‘Add New Connection’. You will be prompted to sign in and grant access to Pabbly Connect. After connecting, select the calendar where you want to create the events. Fill in the required fields such as event title, description, start date and time, end date and time, and guest email from your Google Sheet data.

  • Map the event title and description from your Google Sheet.
  • Ensure the date and time are in UTC format.
  • Choose the correct time zone (e.g., Asia/Kolkata).

Once all details are mapped correctly, click on ‘Save and Send Test’ to create the event. You should receive a positive response indicating that the event has been successfully created in your Google Calendar.


Updating Existing Google Calendar Events via Pabbly Connect

In this section, you will learn how to update existing Google Calendar events using Pabbly Connect. If you have an event already created, you can update it by adding the event ID in your Google Sheet. Set up a new route in Pabbly Connect to handle updates by selecting the ‘Router’ application.

Within the router, create a condition to check if the event ID is not empty. If it is not empty, proceed to select Google Calendar again as the action application and choose ‘Update Event’ as the action event. This will allow you to modify the existing event with new details.

Map the existing event ID from your Google Sheet. Update the event title, description, start and end times as needed. Save changes and send the test to confirm updates.

Once you receive a success message, check your Google Calendar to verify that the event details have been updated accordingly. This integration through Pabbly Connect ensures that your Google Calendar stays in sync with your Google Sheets data seamlessly.


Conclusion

In this tutorial, we explored how to use Pabbly Connect to create and update Google Calendar events directly from Google Sheets. By following the detailed steps, you can automate this process effectively, enhancing productivity and ensuring your calendar is always up to date.

Ensure you check out Pabbly Connect to create business automation workflows and reduce manual tasks. Pabbly Connect currently offer integration with 2,000+ applications.

How to Add Facebook Leads to Google Sheets for CA Firm Using Pabbly Connect

Learn how to automate adding Facebook leads to Google Sheets for CA firms using Pabbly Connect. Step-by-step guide for seamless integration. Build sophisticated automated workflows in less time than you think. This guide translates complex integrations into straightforward steps for immediate implementation.

Watch Step By Step Video Tutorial Below


1. Accessing Pabbly Connect for Automation

To start automating the process of adding Facebook leads to Google Sheets, access Pabbly Connect by visiting its homepage. Once there, you can either sign in if you already have an account or click on ‘Sign up for free’ to create a new account. New users receive 100 free tasks every month to explore the platform.

After signing in, you’ll be directed to the dashboard of Pabbly Connect. Here, you can create workflows to automate various tasks. Click on the ‘Create Workflow’ button to begin setting up your integration between Facebook leads and Google Sheets.


2. Creating the Workflow in Pabbly Connect

In this step, you will create a workflow to connect Facebook leads to Google Sheets using Pabbly Connect. Name your workflow appropriately, for example, ‘Add Facebook Leads to Google Sheets for CA Firm’. Select the folder where you’d like to save this workflow.

  • Click on ‘Create’ to open the trigger and action setup.
  • Select ‘Facebook Lead Ads’ as your trigger application.
  • Choose ‘New Lead Instant’ as the trigger event.

After setting the trigger, click on ‘Connect’ to establish a connection with your Facebook account. If prompted, authorize Pabbly Connect to access your Facebook leads account. This connection is crucial for capturing lead data automatically.


3. Configuring Facebook Leads in Pabbly Connect

Once the connection is established, you need to configure the Facebook lead settings in Pabbly Connect. First, select the Facebook page associated with your lead generation form. Then, choose the specific lead gen form you’ve created for your CA firm.

  • Click ‘Save and Send Test Request’ to test the connection.
  • Submit a test lead using the lead ads testing tool provided by Facebook.
  • Check for a successful response in Pabbly Connect.

This step ensures that every new lead generated through your Facebook lead ads is captured and ready for the next stage of integration with Google Sheets.


4. Adding Google Sheets as an Action in Pabbly Connect

Now that you have successfully connected Facebook leads, it’s time to add Google Sheets as an action in your workflow. Select ‘Google Sheets’ as your action application and choose ‘Add New Row’ as the action event. This will allow you to automatically add lead details into your Google Sheets.

After connecting Google Sheets to Pabbly Connect, select the specific spreadsheet where you want to store your lead data. Ensure that the fields in your Google Sheets (like name, email, and phone number) match the fields from your Facebook lead form.

Map the data from the Facebook lead response to the corresponding fields in Google Sheets. Click ‘Save and Send Test Request’ to add a test lead to your Google Sheets.

Check your Google Sheets to confirm that the lead details have been added successfully, demonstrating that the integration works flawlessly through Pabbly Connect.


5. Completing the Workflow and Final Checks

With the workflow set up, you can now ensure that every new lead generated from Facebook will automatically populate in your Google Sheets. This automation saves time and ensures accurate record-keeping for your CA firm.

Review your entire setup in Pabbly Connect to ensure everything is configured correctly. Make sure the connections between Facebook leads and Google Sheets are functioning as intended. You can run additional tests to confirm that new leads are being captured and recorded seamlessly.

By following these steps, you have successfully automated the process of adding Facebook leads to Google Sheets. This integration not only streamlines your workflow but also enhances your efficiency in managing leads for your CA firm.


Conclusion

In this tutorial, we explored how to use Pabbly Connect to automate adding Facebook leads to Google Sheets for CA firms. By following the precise steps outlined, you can efficiently manage your lead data without manual entry, enhancing your firm’s productivity.

Ensure you check out Pabbly Connect to create business automation workflows and reduce manual tasks. Pabbly Connect currently offer integration with 2,000+ applications.

Send WhatsApp Messages to Facebook Leads for Sustainable Products Using Pabbly Connect

Learn how to send WhatsApp messages to Facebook leads for sustainable products using Pabbly Connect. Follow this step-by-step tutorial for seamless integration. Build sophisticated automated workflows in less time than you think. This guide translates complex integrations into straightforward steps for immediate implementation.

Watch Step By Step Video Tutorial Below


1. Accessing Pabbly Connect for WhatsApp Integration

To send WhatsApp messages to Facebook leads for sustainable products, you first need to access Pabbly Connect. This platform enables seamless integration between various applications, making it essential for your automation needs.

Navigate to the Pabbly Connect homepage by entering the URL in your browser. Here, you will find options to sign in or sign up. If you are a new user, click on ‘Sign Up Free’ to create an account and explore the features available.


2. Creating a Workflow in Pabbly Connect

Once you are signed in to Pabbly Connect, you will see the dashboard. Click on the ‘Create Workflow’ button located at the top right corner. This initiates the process of setting up your automation.

  • Give your workflow a name, such as ‘Green Horizon Facebook Lead Ads to WhatsApp Message’.
  • Select a folder for your workflow to keep it organized.
  • Click on the ‘Create’ button to finalize your workflow setup.

After creating the workflow, you will see the trigger and action setup options. The trigger application will be Facebook Lead Ads, and the action application will be WhatsApp Cloud API, allowing you to automate the message sending process.


3. Setting Up the Trigger with Facebook Lead Ads

To begin automation, you must set up the trigger in Pabbly Connect. Select Facebook Lead Ads as your trigger application and choose the event ‘New Lead Instant’. This ensures that the workflow activates whenever a new lead is generated.

Next, click on ‘Connect’, and if you don’t have an existing connection, select ‘Add New Connection’. Authorize your Facebook account and choose the relevant page named ‘Green Horizons’. After selecting the page, choose the lead form you created, such as the ‘Organic Product Form’.


4. Testing the Trigger Setup in Pabbly Connect

After selecting your lead form, click ‘Save and Send Test Request’ in Pabbly Connect. This action will prompt you to perform a test submission to ensure the connection works correctly. Use the Meta for Developers tool to submit a test lead.

  • Select your Facebook page and lead form in the Meta tool.
  • Enter dummy data for the test lead, including a name and phone number.
  • Submit the form to generate a test lead.

Return to Pabbly Connect to confirm that you have received the response with the lead’s details, ensuring that the trigger setup is successful.


5. Setting Up the Action with WhatsApp Cloud API

Now that the trigger is set up, it’s time to configure the action in Pabbly Connect. Select WhatsApp Cloud API as your action application and choose the event ‘Send Template Message’. Click on ‘Connect’ to establish a connection.

You will need to enter your temporary access token, phone number ID, and WhatsApp Business Account ID from your WhatsApp Cloud API setup. After pasting these details, select your message template, such as ‘Facebook Leads Message’. This template contains dynamic variables that will personalize the message sent to each lead.

Before finalizing the setup, ensure you map the recipient’s mobile number and other variables from the Facebook lead data. Click ‘Save and Send Test Request’ to send a test message. Check your WhatsApp to confirm that the message has been successfully received, completing the integration process using Pabbly Connect.


Conclusion

This tutorial detailed how to send WhatsApp messages to Facebook leads for sustainable products using Pabbly Connect. By following these steps, you can automate your lead nurturing process effectively and efficiently.

Ensure you check out Pabbly Connect to create business automation workflows and reduce manual tasks. Pabbly Connect currently offer integration with 2,000+ applications.

How to Add Facebook Lead Ads Leads to Privyr Using Pabbly Connect

Learn how to integrate Facebook Lead Ads with Privyr using Pabbly Connect for seamless lead management. Step-by-step tutorial included. Follow this definitive guide to creating powerful automated workflows with straightforward, efficiency-focused solutions that save valuable time.

Watch Step By Step Video Tutorial Below


1. Accessing Pabbly Connect for Facebook Lead Ads Integration

To begin the integration of Facebook Lead Ads with Privyr, you must first access Pabbly Connect. This powerful automation tool allows you to connect various applications seamlessly. Start by visiting the Pabbly Connect homepage by typing the URL in your browser.

Once on the homepage, you will see options to sign in or sign up for free. If you are a new user, click on the ‘Sign Up for Free’ button to create your account. Existing users can simply sign in. By creating your account, you receive 100 free tasks every month to explore the features of Pabbly Connect.


2. Creating a Workflow in Pabbly Connect

After signing in, you will be directed to the dashboard of Pabbly Connect. This dashboard displays all your workflows. To create a new workflow, click on the ‘Create Workflow’ option. A dialog box will prompt you to name your workflow, so enter a name like ‘Add Facebook Leads to Privyr’.

  • Select a folder to save your workflow.
  • Click on ‘Create’ to proceed.
  • You will see two windows for Trigger and Action.

In this workflow, the trigger will be Facebook Lead Ads, and the action will be Privyr. Understanding this concept is crucial for automating the process effectively using Pabbly Connect.


3. Setting Up Facebook Lead Ads as Trigger

Next, select Facebook Lead Ads as your trigger application. You will then need to choose the trigger event, which should be set to ‘New Lead Instant’. This event ensures that whenever a new lead is generated, the workflow is triggered automatically.

Click on ‘Connect’ and select ‘Add New Connection’ to establish a connection with your Facebook account. After successful authorization, select the page and the lead generation form you want to use. For example, you might select your page named ‘Digital Dynamics’ and the lead form you created.

  • Choose the appropriate Facebook page from the dropdown.
  • Select the lead gen form you created for capturing leads.

After selecting these options, click on the ‘Save and Send Test Request’ button to test the connection. This step is crucial to ensure that Pabbly Connect is correctly capturing leads from Facebook.


4. Testing the Integration with Privyr

To test the integration, you will need to perform a test submission of your lead form. Navigate to the Facebook Lead Ads testing tool, select your page and form, and submit a dummy lead. This step allows Pabbly Connect to capture the lead details and verify that the integration is functioning correctly.

Once you submit the form, return to Pabbly Connect and wait for the response. You should see the details of the submitted lead appear, confirming that the connection between Facebook Lead Ads and Pabbly Connect is successful.

Ensure that you see the lead details such as name, email, and phone number. Verify that the lead is captured successfully before moving to the next step.

Once confirmed, you can proceed to integrate with Privyr to add the lead as a new client.


5. Adding Leads to Privyr CRM Using Pabbly Connect

Now that your lead is captured in Pabbly Connect, the next step is to connect Privyr as your action application. Select Privyr and choose the action event ‘Create Client’. Click on ‘Connect’ to establish a connection with your Privyr account.

To connect, you will need an authentication token from Privyr. Navigate to the integration section of Privyr, find the token, and copy it into Pabbly Connect. After saving the connection, map the lead data fields from Facebook Lead Ads to the corresponding fields in Privyr, such as name, email, phone number, and source.

Map the name field to the lead’s name. Set the lead source as ‘Facebook Lead Ads’. Complete the mapping for email and phone number.

After mapping all necessary fields, click on the ‘Save and Send Test Request’ button. If successful, the lead will be added to Privyr as a new client, confirming that your integration is complete and functional.


Conclusion

This tutorial demonstrated how to use Pabbly Connect to automate the process of adding Facebook Lead Ads leads to Privyr. By following the steps outlined, you can efficiently manage leads without any coding skills. Automate your lead management process today with Pabbly Connect for seamless integration.

Ensure you check out Pabbly Connect to create business automation workflows and reduce manual tasks. Pabbly Connect currently offer integration with 2,000+ applications.

How to Add IndiaMART Leads to Microsoft Excel Automatically Using Pabbly Connect

Learn how to automate the process of adding IndiaMART leads to Microsoft Excel using Pabbly Connect. Step-by-step tutorial with detailed instructions. Follow this definitive guide to creating powerful automated workflows with straightforward, efficiency-focused solutions that save valuable time.

Watch Step By Step Video Tutorial Below


1. Accessing Pabbly Connect for Automation

To automate the process of adding IndiaMART leads to Microsoft Excel automatically, you need to access Pabbly Connect. Begin by searching for ‘Pabbly.com/connect’ in your browser. Once on the homepage, you will see options to sign in or sign up for free.

If you are an existing user, simply sign in. New users can click on the ‘Sign up for free’ button. Pabbly Connect offers 100 free tasks every month, making it easy to get started with your automation needs.


2. Creating a New Workflow in Pabbly Connect

After signing in to Pabbly Connect, navigate to the dashboard. To create a new workflow, click on the ‘Create Workflow’ button located in the upper right corner. A dialog box will prompt you to name your workflow; enter ‘Add IndiaMART Leads to Microsoft Excel Automatically’.

  • Name your workflow appropriately.
  • Select an existing folder or create a new one for organization.
  • Click on the ‘Create’ button to proceed.

Once created, you will arrive at a window where you can set up your trigger and action. This is where the automation process begins, allowing you to connect IndiaMART as the trigger application with Microsoft Excel as the action application.


3. Setting Up Trigger and Action in Pabbly Connect

In Pabbly Connect, you will define the trigger and action for your workflow. For this integration, select ‘IndiaMART’ as your trigger application and set the trigger event to ‘New Leads’. This means that every time a new lead is captured through IndiaMART, the automation will activate.

Next, for the action application, choose ‘Microsoft Excel’ and set the action event to ‘Add Row to Worksheet’. This configuration allows the lead details to be automatically added to your specified Excel spreadsheet. Ensure that you establish a connection between IndiaMART and Pabbly Connect by clicking on the ‘Connect’ button and entering your CRM API key from your IndiaMART account settings.


4. Connecting Microsoft Excel to Pabbly Connect

After setting up the trigger, it’s time to connect Microsoft Excel to Pabbly Connect. Click on the ‘Connect with Microsoft Excel’ button. Make sure your spreadsheet is open in another tab. You will need to authorize access to allow Pabbly Connect to interact with your Excel files.

Once authorized, select your specific spreadsheet from the dropdown menu. This should be the spreadsheet you created for IndiaMART leads. It will automatically detect the worksheet you want to use. Map the necessary fields from the IndiaMART leads to the corresponding columns in your Excel spreadsheet.

  • Map the contact number, company name, city, and query subject.
  • Ensure the mapping is dynamic to accommodate new leads.
  • Click on ‘Save and Send Test Request’ to check the connection.

Once the test request is successful, you will see the lead details added in a new row in your Microsoft Excel spreadsheet, confirming that the automation is working as intended.


5. Conclusion: Automating Your Lead Management

By following these steps, you can effectively automate the process of adding IndiaMART leads to Microsoft Excel using Pabbly Connect. This integration ensures that your lead management is efficient and up-to-date, allowing you to focus on closing deals rather than manual data entry.

Ensure you check out Pabbly Connect to create business automation workflows and reduce manual tasks. Pabbly Connect currently offer integration with 2,000+ applications.

With Pabbly Connect, you can seamlessly connect various applications and automate repetitive tasks, enhancing productivity and saving time. Start using Pabbly Connect today to streamline your workflows and improve business efficiency.


Automate PDF Generation with Pabbly Connect and Google Docs

Learn how to automatically generate PDFs from Google Docs and save them in Google Drive using Pabbly Connect. Step-by-step guide with detailed instructions. Explore efficient methods for automating routine tasks with clear, concise instructions suited for both newcomers and experienced professionals.

Watch Step By Step Video Tutorial Below


1. Accessing Pabbly Connect for PDF Automation

To begin automating your PDF generation, first access Pabbly Connect by visiting the official website. Here, you will find options to sign in or sign up for a free account, which allows you to explore the software with 300 tasks per month.

Once you log in, you will be directed to the Pabbly Connect dashboard. This interface is where you can create and manage your workflows. Click on the ‘Create Workflow’ button to start setting up the automation process.


2. Creating a Workflow in Pabbly Connect

After clicking on ‘Create Workflow’, you need to name your workflow. For this example, name it ‘Autogenerate PDFs and Save in Google Drive’. You can also choose a folder for better organization. using Pabbly Connect

  • Name your workflow appropriately.
  • Select a folder for your workflows.

Next, you need to set up a trigger by selecting Google Docs as the trigger application and choosing the event as ‘New Document’. Click on ‘Connect’ to establish a connection with your Google Docs account.


3. Setting Up the Trigger in Pabbly Connect

In the trigger setup, select ‘New Document’ as the trigger event. If you want to restrict the automation to specific folders, you can choose ‘New Document in a Folder’ instead. After selecting the appropriate event, click on ‘Add New Connection’. using Pabbly Connect

Log in with your Google account and allow access to Pabbly Connect. Once authenticated, click on ‘Save and Send Test Request’ to ensure the connection is successful. You should receive a response confirming that the trigger is set up correctly.


4. Adding a Filter Step in Pabbly Connect

To ensure only your documents are converted to PDFs, add a filter step using Pabbly Connect. Select ‘Filter by Pabbly’ as the action and set the filter condition to match your email address.

  • Choose ‘Filter by Pabbly’ as your action application.
  • Set the condition to filter documents owned by you.

After setting the filter, click on ‘Save and Send Test Request’. This step ensures that only your documents will be processed further in the workflow, optimizing your automation.


5. Generating PDF and Uploading to Google Drive

Now, add another action step to generate a PDF link using Google Drive. Choose ‘Share a File with Anyone’ as the action event. Connect your Google Drive account if not already connected, and map the file ID from the previous steps. using Pabbly Connect

After mapping the file ID, click on ‘Save and Send Test Request’. You will receive a successful response with the PDF link. Next, add another action to upload the file to Google Drive, specifying the folder ID where you want to save the PDFs.


Conclusion

In this tutorial, you learned how to use Pabbly Connect to automate the generation of PDFs from Google Docs and save them in Google Drive. This process enhances efficiency by eliminating manual tasks and ensuring your documents are always accessible in PDF format.

Ensure you check out Pabbly Connect to create business automation workflows and reduce manual tasks. Pabbly Connect currently offer integration with 2,000+ applications.

Automate NDAs with Pabbly Connect: A Step-by-Step Guide

Learn how to automate NDAs using Pabbly Connect with Google Sheets, Google Docs, and Gmail for enhanced confidentiality. Discover hidden automation capabilities within your existing tools. This guide shows you how to connect your essential applications and permanently eliminate redundant manual processes.

Watch Step By Step Video Tutorial Below


1. Access Pabbly Connect for NDA Automation

To automate NDAs effectively, you need to access Pabbly Connect. Start by visiting the Pabbly Connect website and signing into your account. If you are new, you can sign up for free, allowing you to utilize 100 free tasks each month.

Once logged in, navigate to the dashboard. Here, you will see several applications available. Select Pabbly Connect by clicking on the ‘Access Now’ button. This will lead you to the workflow creation interface.


2. Create a New Workflow in Pabbly Connect

To set up your NDA automation, you need to create a new workflow in Pabbly Connect. Click on the ‘Create Workflow’ button located in the top right corner. A dialog box will appear prompting you to name your workflow.

  • Name your workflow, e.g., ‘Automate NDAs with Google Sheets and Send via Gmail’.
  • Select a folder to save your workflow, such as ‘Gmail Automations’.
  • Click on the ‘Create’ button to finalize the workflow setup.

After creating the workflow, you will see two main sections: Trigger and Action. The Trigger section is where you define what event will initiate the workflow, while the Action section specifies what happens as a result.


3. Set Up the Trigger for Google Sheets

The first step in your automation is to set up a trigger in Pabbly Connect. Click on the arrow in the Trigger section to select Google Sheets as your trigger application. The event you want to select is ‘New or Updated Spreadsheet Row’.

After selecting the trigger, Pabbly Connect will provide you with a unique webhook URL. Copy this URL as it will be used to connect Google Sheets with Pabbly Connect.

  • Open your Google Sheets document where you will input employee data.
  • Click on ‘Extensions’, then ‘Add-ons’, and select ‘Get Add-ons’ to search for the Pabbly Connect Webhook add-on.
  • Install the add-on and return to the Extensions menu to begin the initial setup.

Paste the copied webhook URL in the dialog box and set the Trigger Column to capture the relevant data. This setup allows Pabbly Connect to monitor the Google Sheet for new entries.


4. Define Action Steps in Pabbly Connect

After setting up the trigger, it’s time to define the action steps in Pabbly Connect. The first action you want to add is a filter to ensure that the NDA is only created if the corresponding field in Google Sheets indicates ‘Yes’ for sending an NDA.

To do this, select the Filter application in the Action section. Set the filter type to check if the non-disclosure agreement field equals ‘Yes’. This ensures that an NDA will only be generated when required.

Add another action step to create a document from a template in Google Docs. Choose your non-disclosure agreement template from Google Docs. Map the employee information from the trigger step to the template fields.

After mapping the necessary fields, click on ‘Save and send test request’ to confirm that the document is generated correctly.


5. Send the NDA via Gmail

Once the NDA document is successfully created, the next step is to send it via Gmail using Pabbly Connect. Add another action step and select Gmail as the application. For the action event, choose ‘Send Email’.

In the email setup, map the recipient’s email from your Google Sheets data. Customize the email subject and body to include personalized greetings and information about the NDA. Make sure to attach the PDF version of the NDA generated from the previous action.

Set the sender’s name as ‘Team Innova Tech’. Use a clear subject line like ‘Non-Disclosure Agreement NDA for [Employee Name]’. Include the body content that explains the NDA requirements clearly.

After filling out all the details, click on ‘Save and send test request’. Check your Gmail to confirm that the NDA email has been sent successfully with the correct attachment.


Conclusion

In this tutorial, we explored how to automate NDAs using Pabbly Connect with Google Sheets, Google Docs, and Gmail. By following these steps, you can ensure confidentiality and streamline your NDA process efficiently.

Ensure you check out Pabbly Connect to create business automation workflows and reduce manual tasks. Pabbly Connect currently offer integration with 2,000+ applications.

Utilizing Pabbly Connect not only saves time but also enhances the accuracy of your NDA distribution process. Start automating your NDAs today!

How to Add New Leads from Instagram Lead Ads to Salesforce Using Pabbly Connect

Learn how to automate adding new leads from Instagram Lead Ads to Salesforce using Pabbly Connect. Follow our step-by-step tutorial for seamless integration. Learn to create powerful connections between your critical applications without requiring specialized programming knowledge or extensive technical background.

Watch Step By Step Video Tutorial Below


1. Accessing Pabbly Connect for Integration

To automate adding new leads from Instagram Lead Ads to Salesforce, you first need to access Pabbly Connect. Start by opening a new browser tab and navigating to the Pabbly Connect website.

Once on the landing page, you will see two options: ‘Sign Up Free’ or ‘Sign In’. If you are new, click on ‘Sign Up Free’ to create your account in just two minutes. For existing users, click ‘Sign In’ to access your account.


2. Creating a Workflow in Pabbly Connect

After signing in to Pabbly Connect, you will be directed to the ‘All Apps’ page. Click on the ‘Access Now’ button below Pabbly Connect to reach the dashboard. Here, you can create a new automation workflow.

  • Click on the ‘Create Workflow’ button.
  • Name your workflow, for example, ‘Instagram Lead Ads to Salesforce’.
  • Select the folder where you want to save this workflow.

After clicking ‘Create’, you will see the workflow interface with two windows: the trigger window and the action window. This is where you will set up the automation.


3. Setting Up the Trigger for Instagram Lead Ads

In the trigger window, select ‘Instagram Lead Ads’ as the app. For the trigger event, choose ‘New Lead’. This setup allows Pabbly Connect to capture new leads generated from your Instagram ads.

Next, click the ‘Connect’ button to link your Instagram account. Select ‘Add New Connection’, and follow the prompts to connect your Facebook account associated with your Instagram profile. This is essential for capturing leads through Pabbly Connect.

  • Choose the Facebook page linked to your Instagram account.
  • Select the lead generation form you want to use.
  • Click ‘Save and Send Test Request’ to test the connection.

After the test request, Pabbly Connect will wait for a webhook response, indicating that it is ready to receive lead data.


4. Connecting Salesforce in Pabbly Connect

Once the trigger is set up, scroll down to the action step and choose ‘Salesforce’ as the app. From the dropdown, select ‘Create Lead’ as the action event. This action enables Pabbly Connect to send captured lead details to Salesforce.

Click on the ‘Connect’ button and select ‘Add New Connection’. Follow the prompts to connect your Salesforce account to Pabbly Connect. Allow access when prompted to establish the connection.

Map the lead details from Instagram to Salesforce fields. Fill in the required fields like last name, first name, email, and phone number. Click ‘Save and Send Test Request’ to finalize the setup.

After mapping the details, Pabbly Connect will send the information to Salesforce, confirming that the lead has been added successfully.


5. Testing the Integration Workflow

To ensure the integration works, you should test the workflow. Use the Facebook Lead Ads Testing Tool to generate a test lead. This allows you to see if Pabbly Connect captures the lead correctly and sends it to Salesforce.

After generating a test lead, check Salesforce to confirm that the lead appears with the correct details. If everything is set up correctly, you will see the same lead information in Salesforce as entered in the testing tool.

Delete the existing test lead before creating a new one. Refresh the page to ensure the new lead is captured. Verify that the new lead appears in Salesforce.

This testing confirms that the automation created using Pabbly Connect is functioning perfectly, allowing seamless lead management between Instagram Lead Ads and Salesforce.


Conclusion

In this tutorial, we explored how to automate adding new leads from Instagram Lead Ads to Salesforce using Pabbly Connect. This integration streamlines lead management, ensuring you never miss a potential customer.

Ensure you check out Pabbly Connect to create business automation workflows and reduce manual tasks. Pabbly Connect currently offer integration with 2,000+ applications.