Automatically Share WooCommerce Products on Instagram with Pabbly Connect

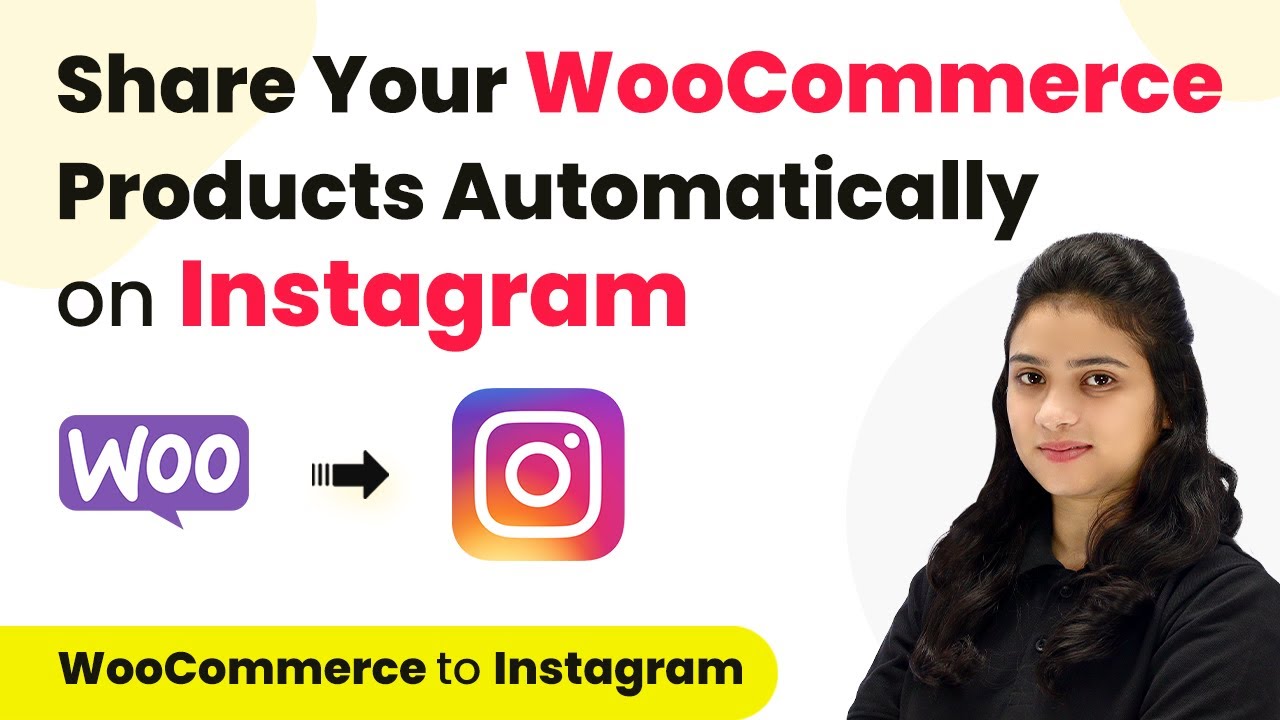
Learn how to automatically share WooCommerce products on Instagram using Pabbly Connect. Step-by-step tutorial for seamless integration. Discover hidden automation capabilities within your existing tools. This guide shows you how to connect your essential applications and permanently eliminate redundant manual processes.

Watch Step By Step Video Tutorial Below


1. Accessing Pabbly Connect for WooCommerce and Instagram Integration

To start the integration process, you first need to access Pabbly Connect. Go to the Pabbly Connect homepage by typing ‘Pabbly.com/connect’ in your browser. If you are a new user, click on ‘Sign Up for Free’ to create an account and receive 100 free tasks every month.

Once you sign in, you will be directed to the dashboard of Pabbly Connect. Here, you can view all your workflows. To create a new workflow, click on the ‘Create Workflow’ button located at the top right corner.


2. Creating a Workflow in Pabbly Connect for WooCommerce Products

After clicking ‘Create Workflow’, you will be prompted to name your workflow. For this integration, name it ‘Share WooCommerce Products on Instagram’. Select the folder to save your workflow if needed, and click ‘Create’. This action sets up the framework for your integration.

  • Select WooCommerce as the trigger application.
  • Choose ‘New Product Created’ as the trigger event.
  • Copy the provided webhook URL for further setup.

Next, you need to set up the WooCommerce store to send product data to Pabbly Connect. This involves pasting the webhook URL into the WooCommerce settings under the Advanced section.


3. Setting Up the Webhook in WooCommerce

To configure the webhook, navigate to your WordPress dashboard and select WooCommerce, then click on Settings. From the Settings menu, go to the Advanced tab and choose Webhooks.

  • Click on ‘Add Webhook’.
  • Name your webhook, for example, ‘Instagram Post’.
  • Set the status to ‘Active’ and select ‘Product Created’ as the topic.
  • Paste the webhook URL from Pabbly Connect in the Delivery URL field.

Once you save the webhook, it will be ready to capture new product details from your WooCommerce store and send them to Pabbly Connect.


4. Testing the Integration with a New Product

With the webhook set up, you can now test the integration. To do this, create a new product in your WooCommerce store. Fill in the product details such as name, price, description, and upload an image.

Name the product (e.g., ‘Ebook on Social Media Marketing’). Set the regular price and sale price. Add a short description and product image.

After publishing the product, return to Pabbly Connect and click on ‘Recapture Webhook Response’. This will allow you to capture the product details sent from WooCommerce.


5. Sharing Product Details on Instagram via Pabbly Connect

Now that you have successfully captured the product details, the next step is to share this information on Instagram. In your Pabbly Connect workflow, select Instagram for Business as the action application.

Choose ‘Publish Photo’ as the action event. Connect your Instagram account to Pabbly Connect. Map the photo URL and caption using the data from the WooCommerce response.

Finally, click on ‘Save and Send Test Request’. Upon receiving a successful response, check your Instagram account to see the newly created post with the product details. This confirms that your integration is working perfectly via Pabbly Connect.


Conclusion

In this tutorial, we explored how to automatically share WooCommerce products on Instagram using Pabbly Connect. By following these steps, you can streamline your product promotions and enhance your online presence effortlessly.

Ensure you check out Pabbly Connect to create business automation workflows and reduce manual tasks. Pabbly Connect currently offer integration with 2,000+ applications.

Automatically Remove User from Google Sheets on Shopify Refund Using Pabbly Connect

Learn how to automatically remove users from Google Sheets upon receiving a Shopify refund using Pabbly Connect. Follow this step-by-step tutorial. Follow this definitive guide to creating powerful automated workflows with straightforward, efficiency-focused solutions that save valuable time.

Watch Step By Step Video Tutorial Below


1. Setting Up Pabbly Connect for Shopify and Google Sheets Integration

To automatically remove users from Google Sheets upon receiving a Shopify refund, we will use Pabbly Connect. First, access Pabbly Connect by navigating to their website and signing in or signing up for a free account, which takes just a couple of minutes.

Once logged in, you will be directed to the Pabbly Connect dashboard. Here, you can create a workflow that integrates Shopify with Google Sheets. Click on the ‘Create Workflow’ button and name your workflow ‘Automatically Remove User from Google Sheets on Shopify Refund’. Select the folder where you want to save this workflow.


2. Configuring the Trigger Event in Pabbly Connect

The next step involves setting up the trigger event in Pabbly Connect. In the workflow, you will find two boxes labeled ‘Trigger’ and ‘Action’. Select Shopify as your trigger application and choose ‘New Refund’ as the trigger event. This event will initiate the workflow when a refund is processed in Shopify.

  • Select Shopify from the trigger application menu.
  • Choose ‘New Refund’ as the trigger event.
  • Connect your Shopify account using the provided webhook URL.

To connect Shopify, copy the webhook URL generated by Pabbly Connect and navigate to your Shopify settings. Create a new webhook under notifications, select ‘Refund Create’ as the event, and paste the copied URL. Save the webhook settings to establish the connection.


3. Setting Up the Action Event in Google Sheets

After configuring the trigger, the next step in Pabbly Connect is to set up the action event. For this, select Google Sheets as your action application and choose ‘Lookup Spreadsheet Row’ as your action event. This action will allow you to search for the order details in your Google Sheets whenever a refund occurs.

Connect your Google Sheets account by clicking on ‘Add New Connection’ and granting access. Once connected, select the spreadsheet named ‘Shopify Orders’ and specify the lookup column, which will be the column containing order IDs. Map the order ID from the refund details to the lookup value in your Google Sheet.

  • Select the ‘Shopify Orders’ spreadsheet.
  • Map the order ID to the lookup value.
  • Test the action to ensure it retrieves the correct row.

Once the action is successfully set up, Pabbly Connect will return the details of the order associated with the refund, including the row index, which you will need for the next step.


4. Deleting the Row from Google Sheets

The final step in Pabbly Connect is to delete the row from Google Sheets. To do this, add another action step in your workflow, selecting Google Sheets again and choosing ‘Delete Rows’ as the action event. This will allow you to remove the row containing the refunded order.

For the delete action, you need to specify the starting and ending row numbers based on the row index retrieved earlier. Use the ‘Number Formatter’ tool in Pabbly Connect to perform mathematical operations to determine these values. For example, if the row index is 3, set the start row to 2 (3-1) and the end row to 3 (3+0).

Add a new action step for Google Sheets. Select ‘Delete Rows’ as the action event. Map the calculated start and end row numbers.

After configuring the delete action, save your workflow. Now, whenever a refund is initiated in Shopify, Pabbly Connect will automatically find the corresponding order in Google Sheets and delete the relevant row.


5. Summary and Conclusion

This tutorial demonstrates how to use Pabbly Connect to automate the removal of users from Google Sheets when a refund is issued in Shopify. By setting up the trigger and action events, you can streamline your order management process.

In summary, the steps include configuring the trigger for Shopify refunds, setting up the action to look up the order in Google Sheets, and finally deleting the corresponding row. This integration saves time and reduces manual errors, ensuring your Google Sheets remain accurate.

With Pabbly Connect, you can easily manage integrations between various applications, enhancing your workflow efficiency. Follow these steps to implement this automation and improve your operational processes.

Conclusion

This guide summarizes the key points and helps you understand the essential features and benefits of using this tool.

Ensure you check out Pabbly Connect to create business automation workflows and reduce manual tasks. Pabbly Connect currently offer integration with 2,000+ applications.


How to Create Taskade Task from Email Using Pabbly Connect

Learn how to automate task creation in Taskade from Gmail using Pabbly Connect. Follow this detailed tutorial for seamless integration. Master proven automation processes with practical implementation examples and strategic recommendations you can apply immediately in your workflow.

Watch Step By Step Video Tutorial Below


1. Accessing Pabbly Connect for Taskade Integration

To create a Taskade task from Gmail, we will use Pabbly Connect as the integration platform. Start by visiting the Pabbly Connect homepage by typing Pabbly.com/connect in your browser. Here, you can either sign in if you are an existing user or click on the ‘Sign Up for Free’ button to create a new account.

Once logged in, you will be directed to the dashboard of Pabbly Connect. This area displays all your workflows. To create a new workflow, click on the ‘Create Workflow’ button located in the top right corner. A dialog box will appear for you to name your workflow, such as ‘Create Task from Email’, and select the folder for saving it.


2. Setting Up Email Parser in Pabbly Connect

In this step, we will set up the Email Parser within Pabbly Connect to fetch emails from Gmail. After naming your workflow, you will see options for selecting a trigger and an action. Choose ‘Email Parser’ as the trigger application to capture emails.

  • Select ‘Email Parser’ as the trigger application.
  • Copy the provided email hook to connect with Gmail.
  • Go to your Gmail settings and add this email hook under the forwarding section.

After adding the forwarding address, you will receive a confirmation email. Click on the link provided in that email to confirm the forwarding. Once confirmed, return to Pabbly Connect and click on ‘Re-capture Email Parser Response’ to ensure that new emails will be captured correctly.


3. Filtering Emails for Relevant Tasks

Now that we have set up the Email Parser, we need to filter emails to ensure only relevant task-related emails trigger the workflow. In Pabbly Connect, add a filter action after the Email Parser step.

  • Select ‘Filter’ as the action application.
  • Set the condition to check if the subject contains the word ‘task’.
  • Map the subject from the Email Parser response.

This filter ensures that only emails with the subject containing ‘task’ will continue through the workflow. After setting the filter, save your settings and proceed to the next action step.


4. Creating a Task in Taskade

With the filter set, it’s time to create a task in Taskade using the information captured from the email. In this step, select ‘Taskade’ as the action application in Pabbly Connect.

Choose the action event ‘Create Task’. You will need to connect your Taskade account to Pabbly Connect by allowing access. Once connected, fill in the required fields such as Workspace ID, Folder ID, and the task details.

Select the workspace and folder where the task should be created. Map the task name and due date from the Email Parser response. Set the timezone to Asia/Kolkata if you’re in India.

After entering all the required information, click on ‘Save and Send Test Request’. If successful, you will see a confirmation that the task has been created in Taskade.


5. Conclusion

In this tutorial, we successfully integrated Gmail with Taskade using Pabbly Connect. By setting up an email parser, applying filters, and creating tasks automatically, we streamlined the task management process. This integration not only saves time but also enhances productivity by ensuring that no task-related emails are overlooked.

Ensure you check out Pabbly Connect to create business automation workflows and reduce manual tasks. Pabbly Connect currently offer integration with 2,000+ applications.

Check out Pabbly Connect – Automate your business workflows effortlessly! Sign Up Free – Start your journey with ease! 10,000+ Video Tutorials – Learn step by step! Join Pabbly Facebook Group – Connect with 21,000+ like minded people!

By following the steps outlined in this guide, you can easily set up similar automations using Pabbly Connect to integrate various applications and improve your workflow efficiency.


Automate Google Calendar Events for Jira Issues Using Pabbly Connect

Learn how to automate Google Calendar events for Jira issues using Pabbly Connect. Follow this detailed step-by-step guide for seamless integration. Navigate the automation landscape confidently with clear, structured guidance suitable for professionals regardless of prior technical experience.

Watch Step By Step Video Tutorial Below


Setting Up Pabbly Connect for Google Calendar and Jira Integration

To automate event creation in Google Calendar for every new Jira issue, we will use Pabbly Connect. Begin by logging into your Pabbly Connect account. If you don’t have one, you can create a free account in just a few minutes.

Once logged in, navigate to the dashboard and click on the blue ‘Create Workflow’ button. Give your workflow a name, such as ‘Create Event in Assignee’s Google Calendar for Jira Issue Automatically,’ and select the main workflow folder. Click on ‘Create’ to proceed.


Configuring Trigger in Pabbly Connect

In the new workflow, you will need to set up a trigger. Choose ‘Jira’ as the application and select the trigger event as ‘New Issue Created.’ This means that whenever a new issue is created in Jira, it will trigger an action in Pabbly Connect.

Next, you will see a webhook URL generated by Pabbly Connect. Copy this URL and go to your Jira settings. Navigate to the ‘System’ settings, find the ‘Webhooks’ section, and click on the plus icon to create a new webhook.

  • Provide a name for the webhook, such as ‘Connection with Pabbly Connect’.
  • Paste the copied webhook URL in the URL field.
  • Set the status to ‘Enabled’ and select the event for issue creation.

Finally, click on the ‘Create’ button to save your webhook settings. This completes the trigger setup in Pabbly Connect.


Setting Up Action to Create Calendar Events

After configuring the trigger, the next step is to set up the action. Choose ‘Google Calendar’ as the application and select the action event ‘Create Event’. Here, Pabbly Connect will automate the creation of events in the assigned team member’s Google Calendar.

You will need to connect your Google Calendar account to Pabbly Connect. Click on ‘Add New Connection’ and sign in with your Google account. Grant the necessary permissions to allow Pabbly Connect to access your Google Calendar.

  • Select the calendar where you want to create the event.
  • Map the event title to the issue summary from Jira.
  • Set the start and end times based on the issue creation date and due date.

Once all fields are mapped correctly, click on the ‘Save and Send Test Request’ button to create a test event in Google Calendar.


Testing the Integration with Pabbly Connect

To ensure that the integration works correctly, create a new issue in Jira. Fill in the required fields like summary, description, assignee, and due date. As you create the issue, Pabbly Connect will capture the event details and create an event in the corresponding Google Calendar.

Check the Google Calendar of the assigned team member to verify that the event appears correctly. The event should include the title, description, and the correct start and end times. This confirms that the integration is functioning as intended.

If the event does not appear or there are discrepancies in the timing, review the mapping in Pabbly Connect to ensure all fields are configured correctly. Adjust any time zone settings if necessary to match your local time.


Conclusion

In this tutorial, we explored how to automate the creation of events in Google Calendar for Jira issues using Pabbly Connect. By following these steps, you can streamline your workflow and ensure that team members are notified of new tasks directly in their calendars. This integration enhances productivity and keeps everyone informed.

Ensure you check out Pabbly Connect to create business automation workflows and reduce manual tasks. Pabbly Connect currently offer integration with 2,000+ applications.

Integrate Google Sheets with Pabbly Connect for Lead Generation

Learn how to automate lead generation by integrating Google Sheets with Pabbly Connect. Follow this step-by-step guide for seamless automation. Explore systematic approaches to creating efficient automation solutions that convert technical concepts into practical, implementable instructions.

Watch Step By Step Video Tutorial Below


1. Introduction to Pabbly Connect for Lead Generation

In this tutorial, we will explore how to use Pabbly Connect to integrate Google Sheets for effective lead generation. This integration allows you to collect lead data from various applications and store it in Google Sheets automatically.

With Pabbly Connect, you can streamline your lead generation processes. Whether you’re capturing leads from Facebook ads or other platforms, this integration simplifies data management and enhances efficiency.


2. Creating a Pabbly Connect Workflow for Google Sheets

To start using Pabbly Connect, log into your account. If you don’t have an account, you can create a free one in just a few minutes. Once logged in, navigate to the dashboard and click on the ‘Create Workflow’ button.

Now, name your workflow, for example, ‘Add Facebook Lead Ads Data to Google Sheets Automatically’. Select the folder where you want to save this workflow and click on ‘Create’. This will bring you to the trigger and action setup page.

  • Select Facebook Lead Ads as the trigger application.
  • Choose the trigger event ‘New Lead’.
  • Connect your Facebook account to Pabbly Connect.

After setting up the trigger, you will see options to select your Facebook page and lead form. This connection allows Pabbly Connect to capture lead data from your Facebook ads directly into Google Sheets.


3. Automating Lead Data Transfer to Google Sheets

Once the trigger is set, the next step is to connect Google Sheets as the action application. In the action setup, select Google Sheets and choose the action event ‘Add a New Row’.

Connect your Google account to Pabbly Connect and select the spreadsheet where you want to store the lead data. You will need to map the fields from the Facebook lead form to the corresponding columns in your Google Sheets.

  • Map the ‘Name’ field from Facebook to the ‘Name’ column in Google Sheets.
  • Map the ‘Email’ field to the ‘Email’ column.
  • Map the ‘Phone Number’ field to the ‘Phone Number’ column.

After mapping the fields, click on ‘Save and Send Test Request’ to ensure that the data is being correctly sent to Google Sheets. If successful, you will see the lead data populated in your spreadsheet, demonstrating the effectiveness of Pabbly Connect.


4. Sending Emails Automatically from Google Sheets

Now that you have integrated Google Sheets with Pabbly Connect for lead generation, you can also automate sending emails to your leads directly from the spreadsheet. Create a new workflow and name it ‘Send Email to Google Sheets Data Automatically’.

In this workflow, select Google Sheets as the trigger application and choose the event ‘New or Updated Spreadsheet Row’. Connect your Google account and select the same spreadsheet that contains your leads.

Configure the trigger column to identify when new data is added. Use the Pabbly Connect Webhook Add-on to connect your spreadsheet. Test the connection to ensure data is being captured correctly.

This setup allows you to send personalized emails to your leads automatically. Choose Gmail as the action application and configure the email content, including the recipient’s email address and the message body.


5. Conclusion

In conclusion, integrating Google Sheets with Pabbly Connect significantly enhances your lead generation efforts. This automation not only captures lead data in real time but also allows you to engage with your leads effectively through automated emails. By following this tutorial, you can streamline your processes and improve your business efficiency.

Ensure you check out Pabbly Connect to create business automation workflows and reduce manual tasks. Pabbly Connect currently offer integration with 2,000+ applications.

Check out Pabbly Connect – Automate your business workflows effortlessly! Sign Up Free – Start your journey with ease! 10,000+ Video Tutorials – Learn step by step! Join Pabbly Facebook Group – Connect with 21,000+ like minded people!

Utilizing Pabbly Connect for these integrations will save you time and effort, enabling you to focus on growing your business.

Integrating WooCommerce with Slack Notifications Using Pabbly Connect

Learn how to automate Slack notifications for multiple product orders in WooCommerce using Pabbly Connect. Step-by-step tutorial included. Revolutionize your productivity approach with just a few strategic clicks. Uncover professional methods for connecting applications and creating workflows that reclaim hours of your week.

Watch Step By Step Video Tutorial Below


1. Setting Up Pabbly Connect for WooCommerce and Slack Integration

To automate Slack notifications for multiple product orders in WooCommerce, you need to set up Pabbly Connect. Start by creating an account on the platform if you haven’t already. Once logged in, you will access the dashboard where you can create workflows that connect WooCommerce and Slack.

Click on the ‘Create Workflow’ button to begin. Name your workflow something relevant, like ‘Send Slack Notification for Multiple Product Orders in WooCommerce’. After naming, select the appropriate folder for organization and click ‘Create’. This initiates the process of setting up your integration.


2. Choosing Trigger and Action Applications in Pabbly Connect

In this step, you need to define the trigger and action applications. The trigger will be WooCommerce, specifically when a new order is created. The action application will be Slack, where notifications will be sent. Select ‘WooCommerce’ as your trigger application and choose the event ‘New Order Created’.

  • Select ‘WooCommerce’ as the trigger application.
  • Choose ‘New Order Created’ as the trigger event.
  • Select ‘Slack’ as the action application.
  • Choose ‘Send Channel Message’ as the action event.

After selecting these options, Pabbly Connect will generate a webhook URL. This URL will be used to connect WooCommerce with Pabbly Connect. Copy this URL for later use in WooCommerce settings.


3. Configuring WooCommerce Webhooks for Pabbly Connect

Now, navigate to your WooCommerce dashboard. Go to the ‘Advanced’ section and select ‘Webhooks’. Here, you will create a new webhook using the URL generated by Pabbly Connect. Enter the webhook name, set the status to active, and select the topic ‘Order Created’.

Paste the copied webhook URL into the delivery URL field. Once you save the webhook, it will establish a connection between WooCommerce and Pabbly Connect. This allows WooCommerce to send order data to Pabbly Connect whenever a new order is created.


4. Testing the Integration Between WooCommerce and Slack

With the webhook successfully created, it’s time to test the integration. Place a new order in your WooCommerce store with multiple products. Make sure to complete the checkout process. Once the order is placed, return to Pabbly Connect and click on ‘Recapture Webhook Response’ to fetch the order details.

After a few moments, you should see the order details appear in Pabbly Connect. This confirms that the integration is working. The data will include customer information and product details in a structured format, ready to be sent to Slack.


5. Sending Notifications to Slack with Pabbly Connect

Now that the order data is captured, you can format the notification message to send to Slack. In the action step of Pabbly Connect, choose the Slack channel where you want to send the notifications. Compose your message, including the order details and customer information.

After composing the message, click on the send button to test the notification. If everything is set up correctly, you will see the message appear in your Slack channel, notifying your team about the new order. This automation will run in the background, ensuring that your team is always updated on new orders without manual intervention.


Conclusion

In this tutorial, you learned how to automate Slack notifications for multiple product orders in WooCommerce using Pabbly Connect. By following these steps, you can streamline your order management process, ensuring your team stays informed in real time.

Ensure you check out Pabbly Connect to create business automation workflows and reduce manual tasks. Pabbly Connect currently offer integration with 2,000+ applications.

How to Create a Taskade Task from Google Calendar Events Using Pabbly Connect

Learn how to automate task creation in Taskade from Google Calendar events using Pabbly Connect. Follow this step-by-step guide for seamless integration. Master proven automation processes with practical implementation examples and strategic recommendations you can apply immediately in your workflow.

Watch Step By Step Video Tutorial Below


1. Introduction to Pabbly Connect for Google Calendar Events

In this tutorial, we will learn how to use Pabbly Connect to automate the creation of tasks in Taskade from Google Calendar events. This integration allows you to streamline your workflow by automatically generating tasks based on scheduled events.

To start, access Pabbly Connect by visiting the Pabbly website. If you do not have an account, you can sign up for free, which will only take a couple of minutes. After logging in, you will be directed to the Pabbly Connect dashboard, where you can create new workflows.


2. Creating a New Workflow in Pabbly Connect

To create a new workflow, click on the ‘Create Workflow’ button in Pabbly Connect. You will need to name your workflow, such as ‘Create Taskade Task from Google Calendar Events’. Additionally, select a folder to save your workflow, such as ‘Home’.

After naming your workflow, you will see two main sections: Trigger and Action. The Trigger section is where you will set up the event that will initiate the workflow. In this case, select Google Calendar as the trigger application, and choose ‘New Event’ as the trigger event.

  • Click on ‘Connect’ to link your Google Calendar account with Pabbly Connect.
  • Choose the calendar you want to use for the integration.

After setting up the trigger, verify that your connection is successful. You can now proceed to create a new event in Google Calendar to test the integration.


3. Testing the Google Calendar Trigger in Pabbly Connect

Now that you have set up the trigger in Pabbly Connect, it’s time to test it. Create a new event in Google Calendar by clicking on the ‘Create’ button. Fill in the event details, including the title, date, time, and description.

For this example, create an event titled ‘Test Event’ scheduled for December 7th, 12 PM to 1 PM, in the Indian Standard Time zone. Once the event is saved, go back to Pabbly Connect and click on the ‘Save and Test’ button to retrieve the event details.

  • Ensure that the event details appear successfully in Pabbly Connect.
  • If the response is not instant, wait a few minutes as it may take up to 10 minutes for the data to be retrieved.

This step confirms that your Google Calendar is properly connected to Pabbly Connect and is ready to send data to Taskade.


4. Formatting Dates for Taskade Tasks

Before creating a task in Taskade, you need to format the dates from the Google Calendar event. Use the Date and Time Format tool available in Pabbly Connect. Add an action step and select ‘Format Date’ as the action event.

Map the start date and end date from the Google Calendar response to ensure they are in the correct format for Taskade. Choose the appropriate date format, such as year-month-date, and click ‘Save’ and ‘Test’ to confirm the changes.

Repeat the same process for both the start and end dates to ensure they are formatted correctly. This is crucial since Taskade requires specific date formats to create tasks successfully.


5. Creating a Task in Taskade Using Pabbly Connect

With the dates formatted, you can now add another action step in Pabbly Connect. Search for Taskade as the action application and select ‘Create Task’ as the action event. Connect your Taskade account to Pabbly Connect by clicking on ‘Add New Connection’.

Fill in the required details such as Workspace ID, Folder ID, and Project ID. Map the necessary fields from the previous steps, including the description, start date, end date, and time zone. Click ‘Save’ and ‘Test’ to create the task.

Once the task is created, you can verify it by checking your Taskade project. You should see the new task with the details from your Google Calendar event, confirming that the integration works perfectly.


Conclusion

In this tutorial, we demonstrated how to use Pabbly Connect to automate the creation of tasks in Taskade from Google Calendar events. By following the steps outlined here, you can enhance your productivity and streamline your workflow effectively.

Ensure you check out Pabbly Connect to create business automation workflows and reduce manual tasks. Pabbly Connect currently offer integration with 2,000+ applications.

How to Get Customer Details via Gmail for Razorpay Order | Razorpay Gmail Integration

Learn how to automate customer detail retrieval from Razorpay using Pabbly Connect and Gmail. Follow this step-by-step tutorial for seamless integration. Discover hidden automation capabilities within your existing tools. This guide shows you how to connect your essential applications and permanently eliminate redundant manual processes.

Watch Step By Step Video Tutorial Below


1. Accessing Pabbly Connect for Razorpay Integration

To automate the retrieval of customer details through Gmail for Razorpay orders, the first step is to access Pabbly Connect. You can do this by typing Pabbly.com/connect in your browser. Once on the homepage, you will find options to sign in or sign up for free.

If you are a new user, click on the ‘Sign up for free’ button to create an account, which gives you 100 free tasks each month. Existing users can directly sign in. After logging in, navigate to the all apps section where you can find Pabbly Connect to start creating your workflow.


2. Creating a Workflow in Pabbly Connect

Once you are in Pabbly Connect, the next step is to create a new workflow for the Razorpay and Gmail integration. Click on the ‘Create Workflow’ button located at the top right corner of the dashboard. A dialog box will appear prompting you to name your workflow.

  • Name your workflow ‘Get Customer Details via Gmail for Razorpay Order’.
  • Select the folder where you want to save this workflow.
  • Click on ‘Create’ to proceed.

After creating the workflow, you will see two windows open: one for the trigger and another for the action. The trigger will be Razorpay, and the action will be Gmail. This setup allows Pabbly Connect to automate the process of sending email notifications whenever a new order is paid in Razorpay.


3. Setting Up the Trigger with Razorpay

In this step, you will set up the trigger for your workflow using Pabbly Connect. Select Razorpay as your trigger application and choose the trigger event as ‘Order Paid’. This means that every time an order is paid, the workflow will be activated.

After selecting the trigger event, Pabbly Connect will provide you with a webhook URL. Copy this URL and go to your Razorpay account. In the Razorpay dashboard, navigate to the settings and find the ‘Webhooks’ option. Here, you can add a new webhook by pasting the copied URL and selecting the ‘Order Paid’ event as the active event.


4. Testing the Integration with a Test Payment

Now that your trigger is set up, it’s time to test the integration. Make a test payment through Razorpay to ensure that the webhook is functioning correctly. Open the payment link for a product in test mode and complete the payment process.

Once the payment is successful, return to Pabbly Connect, where you should see that the response has been captured. This response will contain all the order details, including the order ID, customer name, and payment amount. If the amount appears incorrect, you can use the number formatter feature in Pabbly Connect to adjust it accordingly.


5. Finalizing Email Notifications via Gmail

The final step is to set up Gmail to send email notifications using Pabbly Connect. In the action section of your workflow, select Gmail and choose the action event as ‘Send Email’. Connect your Gmail account by allowing Pabbly Connect to access it safely.

Fill in the required fields, such as the recipient email address, sender name, and email subject. In the email content, you can map the order details that were captured in the previous steps. Once you have customized your email, click on ‘Save and Send Test Request’ to ensure that the email is sent successfully.

After completing these steps, you will receive an email notification with all customer and order details whenever a new order is paid through Razorpay. This integration streamlines the process and ensures you never miss an order notification.


Conclusion

This tutorial has guided you through automating the retrieval of customer details via Gmail for Razorpay orders using Pabbly Connect. By following these steps, you can efficiently manage notifications for new orders without any manual effort, enhancing your workflow and customer service.

Ensure you check out Pabbly Connect to create business automation workflows and reduce manual tasks. Pabbly Connect currently offer integration with 2,000+ applications.

A Beginner’s Guide to API Integrations with Pabbly Connect

Learn how to use Pabbly Connect for API integrations with Google Sheets and MailerLite in this beginner’s guide to popular platforms. Transform complex automation concepts into accessible, actionable steps that eliminate unnecessary manual work while maximizing existing application capabilities.

Watch Step By Step Video Tutorial Below


1. Introduction to Pabbly Connect and API Integrations

In this tutorial, we will learn how to use Pabbly Connect for API integrations with various applications. API by Pabbly allows you to connect applications that do not have a native integration. This is particularly useful for automating workflows between popular platforms.

The focus will be on integrating Google Sheets and MailerLite using Pabbly Connect. By following these steps, you can easily set up your API integrations, enabling efficient data transfer and automation.


2. Setting Up Your Workflow in Pabbly Connect

To start, access your Pabbly Connect account and create a new workflow. You will begin by selecting Google Sheets as your trigger application. This allows you to capture customer data stored in your Google Sheets.

Once you have created your workflow, follow these steps to set up your Google Sheets trigger:

  • Select Google Sheets as the trigger application.
  • Choose the specific trigger event (e.g., New Row).
  • Connect your Google Sheets account to Pabbly Connect.

After this setup, Pabbly Connect will capture the customer details such as first name, last name, email, and contact number from the Google Sheets data. This information will be used in the subsequent steps for integration with MailerLite.


3. Integrating MailerLite Using API by Pabbly

Next, we will integrate MailerLite with Pabbly Connect using the API feature. Since MailerLite does not have a native integration, we will utilize the API by selecting it as the action application.

Follow these steps to set up the MailerLite integration:

  • Select API by Pabbly as the action application.
  • Choose the action event as Execute API Request.
  • Set the request method to POST for sending data.

Now, you need to refer to the MailerLite API documentation to find the API endpoint URL for creating a new subscriber. Copy this URL and paste it into Pabbly Connect.


4. Configuring API Parameters and Authentication

In this step, we will configure the API parameters required for MailerLite. After pasting the API endpoint URL, you will need to specify the payload type as application/json. The next crucial part is authentication.

For MailerLite, you will need to provide your API key for authentication. Follow these steps:

Select the authentication type as No Auth if it doesn’t require it. In the header section, add your API key. Map the necessary parameters such as email and subscriber type (active).

Ensure that you map the email dynamically from the Google Sheets trigger, allowing Pabbly Connect to automatically update with new customer data.


5. Testing the Integration and Conclusion

After configuring everything, you can test the integration by clicking on Save and Send Test Request in Pabbly Connect. This action will send the data to MailerLite and create a new subscriber.

Once the test is successful, you can verify in your MailerLite account that the new subscriber has been added. This demonstrates how Pabbly Connect can facilitate seamless data transfer between applications without native integrations.

In conclusion, using Pabbly Connect for API integrations is a powerful way to automate workflows between popular platforms. By following the steps outlined in this guide, you can efficiently connect applications like Google Sheets and MailerLite, enhancing your automation capabilities.

Conclusion

This guide summarizes the key points and helps you understand the essential features and benefits of using this tool.

Ensure you check out Pabbly Connect to create business automation workflows and reduce manual tasks. Pabbly Connect currently offer integration with 2,000+ applications.


How to Create FluentCRM Contact from Moxie Client Using Pabbly Connect

Learn how to create FluentCRM contacts from Moxie Client using Pabbly Connect. Follow this detailed tutorial for seamless integration. Discover how to seamlessly connect your essential tools through accessible instructions that make powerful automation available to professionals at every skill level.

Watch Step By Step Video Tutorial Below


1. Accessing Pabbly Connect for Integration

To create FluentCRM contacts from Moxie Client, you first need to access Pabbly Connect. This platform is essential for automating workflows between applications. Start by visiting the Pabbly website and signing in or signing up for a free account if you don’t have one.

Once you log in, navigate to the dashboard where you can see various applications supported by Pabbly Connect. Click on the ‘Access Now’ button under Pabbly Connect to enter the workflow section, where you will create your integration.


2. Creating a New Workflow in Pabbly Connect

After accessing Pabbly Connect, you will need to create a new workflow. Click on the ‘Create Workflow’ button, and a window will pop up prompting you to name your workflow. For this integration, name it ‘Create FluentCRM Contact from Moxie Client’ and select a folder to save it.

Once the workflow is created, you will see two main sections: Trigger and Action. The Trigger is set to Moxie, and the Action is set to FluentCRM. This setup allows you to define when a new client in Moxie triggers the creation of a contact in FluentCRM.

  • Click on ‘Create Workflow’.
  • Name your workflow appropriately.
  • Select the desired folder for saving your workflow.

With your workflow set up, you can now proceed to define the Trigger event.


3. Setting Up the Trigger Event in Pabbly Connect

The next step involves setting up the Trigger event in Pabbly Connect. Search for the Moxie application and select it as your Trigger. You will then be prompted to choose a Trigger event; select ‘Client Created’ from the options.

To connect Moxie to Pabbly Connect, you will need to use a webhook URL provided by Pabbly. Copy this URL and navigate to the Moxie workspace settings, where you will set up the integration by pasting the URL into the appropriate field.

  • Select ‘Client Created’ as your Trigger event.
  • Copy the webhook URL from Pabbly Connect.
  • Paste the URL in Moxie’s integration settings.

After saving the webhook in Moxie, return to Pabbly Connect, where it will indicate that it is waiting for a response from Moxie. To test this, create a new client in Moxie.


4. Creating a New Client in Moxie

To trigger the integration, you need to create a new client in Moxie. Navigate to the clients section and click on the plus button to add a new client. Fill in the required details such as first name, last name, email, phone number, and address.

Once you save the new client, Pabbly Connect will receive the client details. This data will be utilized in the next step to create a new contact in FluentCRM automatically. Ensure that all the information is accurate for a successful integration.

Click on the plus button to add a new client. Fill out the client details accurately. Save the client to trigger the integration.

With the client created, return to Pabbly Connect to see the response containing the client information.


5. Setting Up the Action Event in Pabbly Connect

Now that you have the client information in Pabbly Connect, it’s time to set up the Action event. Search for FluentCRM in the Action application section and select it. Choose the action event ‘Create Contact’ to proceed.

Next, you will need to connect FluentCRM to Pabbly Connect. Provide the necessary credentials, including your username, password, and site URL. This connection is crucial for ensuring that the contact is created based on the information received from Moxie.

Select ‘Create Contact’ as your action event. Enter your FluentCRM credentials accurately. Save the connection to proceed with mapping the client details.

After the connection is established, map the client details from the Moxie response to the FluentCRM fields. This step ensures that the correct information is transferred and stored in FluentCRM.


Conclusion

In this tutorial, we explored how to create a FluentCRM contact from Moxie Client using Pabbly Connect. By following the steps outlined, you can automate the integration between Moxie and FluentCRM efficiently. This process not only saves time but also ensures that client data is accurately captured and managed.

Ensure you check out Pabbly Connect to create business automation workflows and reduce manual tasks. Pabbly Connect currently offer integration with 2,000+ applications.