Integrate Here, WhatsApp, and More Using Pabbly Connect

Learn how to seamlessly integrate Here, WhatsApp, and other applications using Pabbly Connect with this step-by-step tutorial. Learn to create powerful connections between your critical applications without requiring specialized programming knowledge or extensive technical background.

Watch Step By Step Video Tutorial Below


1. Accessing Pabbly Connect for Integration

To start integrating Here, WhatsApp, and other applications, first access Pabbly Connect through your web browser. Type in the URL to reach the landing page, where you will find options to sign in or sign up for free.

If you are a new user, click on ‘Sign up for free’ to create an account. Existing users should click on ‘Sign in’ and then select ‘Access Now’ for Pabbly Connect to get to the dashboard, where you can manage your workflows.


2. Creating a New Workflow in Pabbly Connect

Once you are on the Pabbly Connect dashboard, you need to create a new workflow. Click on the ‘Create Workflow’ option located in the upper right corner. You will be prompted to name your workflow; choose a relevant name that reflects its purpose.

  • Click on ‘Create’ after naming your workflow.
  • You will see two windows: one for triggers and another for actions.

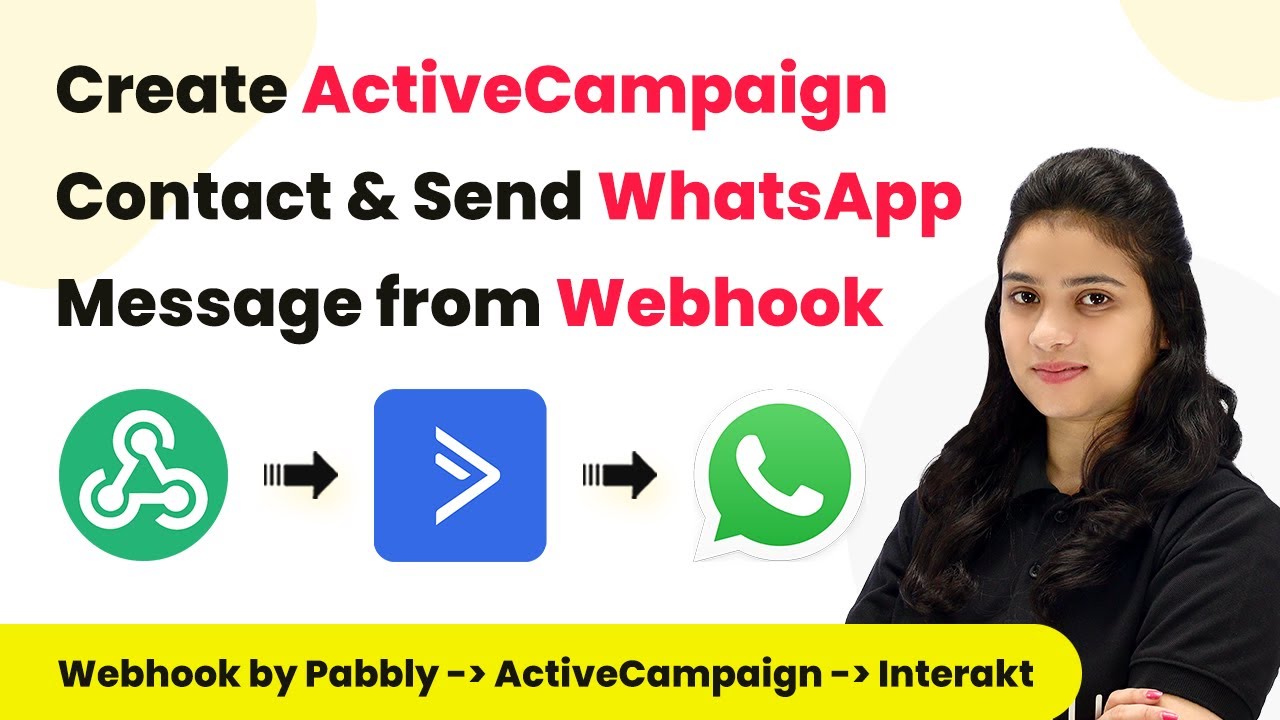
In this case, the trigger will be a new webhook response received via Here, and the actions will involve creating a contact in Active Campaign and sending a WhatsApp message. This setup will allow Pabbly Connect to automate these tasks seamlessly.


3. Setting Up the Trigger with Here

To set up the trigger in Pabbly Connect, select Here as your trigger application. Choose the event ‘New Webhook Response’ to initiate the process. You will receive a webhook URL that needs to be copied.

Next, navigate to your Here account and paste the copied webhook URL into the integration settings. After completing the integration, perform a test submission to ensure Pabbly Connect captures the response correctly. Confirm that you see the response reflected back in your Pabbly Connect dashboard.


4. Adding Actions to Create Contacts and Send Messages

After setting the trigger, it’s time to add actions. Start by selecting Active Campaign as your action application in Pabbly Connect. Choose ‘Create Contact’ as the action event. You will need to connect your Active Campaign account by entering your API key and URL.

  • Map the fields from the webhook response to the corresponding fields in Active Campaign.
  • After mapping, click ‘Save and Send Test Request’ to verify that a contact is created successfully.

Once confirmed, add another action for sending a WhatsApp message. Select Interact as your action application, and choose ‘Send WhatsApp Message’ as the action event. Again, connect your Interact account and fill in the necessary details for the WhatsApp message.


5. Verifying the Integration and Testing

After setting up all actions in Pabbly Connect, it’s crucial to test the entire workflow. Check your Active Campaign to ensure the new contact was created with the correct details. Then verify that the WhatsApp message was sent successfully to the intended recipient.

Finally, if everything works as expected, your integration is complete. You can now automate the process of creating contacts and sending messages whenever a new webhook response is received, all facilitated by Pabbly Connect.


Conclusion

In this tutorial, we demonstrated how to integrate Here, WhatsApp, and other applications using Pabbly Connect. By following these steps, you can automate workflows effectively and enhance productivity.

Ensure you check out Pabbly Connect to create business automation workflows and reduce manual tasks. Pabbly Connect currently offer integration with 2,000+ applications.

Integrating Google My Business Reviews with Google Sheets Using Pabbly Connect

Learn how to automate Google My Business reviews into Google Sheets using Pabbly Connect for efficient data management. Learn to create powerful connections between your critical applications without requiring specialized programming knowledge or extensive technical background.

Watch Step By Step Video Tutorial Below


1. Setting Up Pabbly Connect for Google My Business Integration

To start automating your Google My Business reviews into Google Sheets, you need to set up Pabbly Connect. First, sign up for a free account on the Pabbly Connect website. Once registered, log in to access your dashboard.

From the dashboard, click on the ‘Create Workflow’ button. You will be prompted to name your workflow. Choose a relevant name to easily identify your automation later. Once named, click on the ‘Create’ button to proceed to the workflow page.


2. Configuring the Trigger with Google My Business

In this step, you will set Google My Business as the trigger in Pabbly Connect. Select Google My Business from the available applications and choose the trigger event as ‘New Review’. Click on the ‘Connect’ button to establish a connection.

  • Select ‘Add New Connection’ and sign in with your Google account.
  • Grant the necessary permissions to allow Pabbly Connect access to your Google My Business account.
  • After connecting, choose your business location and click on ‘Save and Send Test Request’ to retrieve the latest review.

After successfully fetching the latest review, you will see details such as the star rating, reviewer’s name, and comment. This information will be used in the next steps to organize reviews into Google Sheets.


3. Creating Conditional Paths for Review Ratings

Next, you will set up conditional paths using the router feature in Pabbly Connect. This allows you to handle reviews differently based on their star ratings. First, click on the ‘Add Action Step’ button and select ‘Router’ to create two routes: one for reviews with more than three stars and another for reviews with less than three stars.

For the first route, click on ‘Set Filter and Action Steps’. Choose the star rating from the previous step and set the condition to check if the rating is greater than three. This ensures that only reviews with a rating of more than three stars will proceed through this route.


4. Using Lookup Table to Convert Ratings

To effectively manage the ratings in Pabbly Connect, you will need to convert the star ratings from words to integers. Add another action step and select ‘Lookup Table’. Here, you can create key-value pairs for star ratings such as ‘five’ = 5, ‘four’ = 4, etc.

  • Map the star rating from the previous step into the lookup key field.
  • Set the corresponding integer value for each rating.
  • Test the lookup table to ensure it returns the correct integer values.

Once the lookup table is configured, you can use the integer rating in your filter conditions to route the reviews accordingly.


5. Saving Reviews to Google Sheets

Finally, you will save the reviews into Google Sheets using Pabbly Connect. For the route with more than three stars, select Google Sheets as the action application and choose ‘Add New Row’ as the action event. Connect your Google Sheets account and select the spreadsheet you created for this purpose.

Map the relevant fields from the previous steps to the Google Sheets headers, such as star rating, review comment, and date. Test the connection by clicking on ‘Save and Send Test Request’. You should see the data reflected in your Google Sheets immediately.

Repeat the process for the second route for reviews with less than three stars, ensuring you select the appropriate sheet in Google Sheets. This completes the automation process, allowing you to collect and organize reviews efficiently.


Conclusion

In this tutorial, we demonstrated how to use Pabbly Connect to automate the collection of Google My Business reviews into Google Sheets. This integration saves time and enhances data management, allowing you to focus on your business growth.

Ensure you check out Pabbly Connect to create business automation workflows and reduce manual tasks. Pabbly Connect currently offer integration with 2,000+ applications.

Automate Student Enrollment with Pabbly Connect: A Step-by-Step Guide

Learn how to automate student enrollment in Teachable from DigiStore24 using Pabbly Connect. Follow this detailed guide for seamless integration. Master proven automation processes with practical implementation examples and strategic recommendations you can apply immediately in your workflow.

Watch Step By Step Video Tutorial Below


1. Setting Up Pabbly Connect for Automation

To begin automating student enrollment, first access Pabbly Connect. This is the platform that facilitates the integration between DigiStore24 and Teachable. Sign up for a free account if you haven’t already, and log in to reach your dashboard.

Once in the dashboard, click on the ‘Create Workflow’ button. Here, you will need to name your workflow appropriately. For example, you could name it ‘DigiStore24 to Teachable Enrollment’. After naming, click on the ‘Create’ button to proceed.


2. Configuring the Trigger Event in Pabbly Connect

The next step involves configuring the trigger event in Pabbly Connect. Click on the trigger section and select DigiStore24 as your trigger application. Choose the trigger event as ‘New Order’. This setup will start the workflow whenever a new order is placed on DigiStore24.

  • Select DigiStore24 as the trigger application.
  • Choose ‘New Order’ as the trigger event.
  • Copy the webhook URL provided by Pabbly Connect.

Now, go to your DigiStore24 account, navigate to the settings, and select the Integrations IPN. Here, you will create a new connection using the webhook URL you just copied. This will enable DigiStore24 to communicate with Pabbly Connect.


3. Setting Up DigiStore24 Integration

In the DigiStore24 settings, click on ‘Add New Connection’. You will be prompted to provide a name for this connection. Choose a name like ‘Pabbly Connect Integration’. Scroll down to find the webhooks tab and paste the copied webhook URL here. using Pabbly Connect

After pasting the URL, select the events you want to receive notifications for. Ensure you check the box for ‘Orders by Customers’ to capture the necessary data for automation. Finally, click on ‘Save’ to finalize the connection.


4. Capturing Data from DigiStore24 in Pabbly Connect

Once the DigiStore24 connection is saved, Pabbly Connect will start waiting for a response. To test this connection, create a test purchase in DigiStore24. Navigate to your products and select the course you are selling. Click on ‘Make Test Purchase’ to proceed.

  • Fill in the customer details for the test purchase.
  • Click on ‘Buy Now’ to complete the test order.
  • Check Pabbly Connect for the captured data response.

Once the test purchase is completed, return to Pabbly Connect to see if the data has been captured correctly. You should see details like the customer’s name, email address, and course information. This data will be used for enrolling the student in Teachable.


5. Enrolling Student in Teachable via Pabbly Connect

Now that you have captured the customer data, the next step is to enroll the student in Teachable. In Pabbly Connect, select Teachable as the action application. Choose the action event as ‘Enroll User in Course’.

Connect your Teachable account by providing the required credentials, including the subdomain of your Teachable school. Once connected, map the student’s email and name from the captured data in the previous step. Finally, click on ‘Save and Send Test Request’ to enroll the student.

Check your Teachable account to confirm that the student has been successfully enrolled. You should see the new student listed in your course dashboard, confirming that the automation is working smoothly.


Conclusion

In this tutorial, we demonstrated how to use Pabbly Connect to automate student enrollment from DigiStore24 to Teachable. This integration saves time and eliminates manual effort, allowing you to focus on your educational content.

Ensure you check out Pabbly Connect to create business automation workflows and reduce manual tasks. Pabbly Connect currently offer integration with 2,000+ applications.

Integrate Google Sheets with JotForm Using Pabbly Connect

Learn how to integrate Google Sheets with JotForm using Pabbly Connect for seamless data automation. Step-by-step guide included. Implement the precise methodologies leading organizations use to automate repetitive tasks, illustrated with practical examples designed for immediate application.

Watch Step By Step Video Tutorial Below


1. Setting Up Pabbly Connect for Integration

To start integrating Google Sheets with JotForm, you first need to access Pabbly Connect. After logging in, click on the ‘Create Workflow’ button to begin your automation process.

Provide a name for your workflow. For this example, you can name it ‘Capture Webhook Response in Google Sheets’. This name helps you identify the workflow later. After naming, click on the ‘Create’ button to proceed.


2. Selecting Webhook as Trigger in Pabbly Connect

In this step, you’ll select Webhook as the trigger application in Pabbly Connect. This means that whenever a specific event occurs in JotForm, it will trigger the automation.

  • Select the ‘Webhook’ option from the list of apps.
  • Copy the generated Webhook URL provided by Pabbly Connect.
  • This URL will be used in JotForm to send data.

Now, you need to integrate this Webhook URL with your JotForm. Head over to your JotForm account, edit the form from which you want to capture responses, and navigate to the ‘Settings’ section. Here, look for the ‘Integrations’ option and select Webhook to paste the copied URL.


3. Configuring JotForm to Send Data to Pabbly Connect

Once you have pasted the Webhook URL in JotForm, you need to complete the integration. Click on the ‘Complete Integration’ button in JotForm to finalize the setup. This step ensures that JotForm will send data whenever a form is submitted.

After completing the integration, you can test it by submitting a sample form. Fill in the details like first name, last name, email, and phone number, and submit the form. This action will trigger the Webhook and send the data to Pabbly Connect.

Once the form is submitted, return to Pabbly Connect to verify that the data has been captured successfully. You should see the submitted details displayed in the Webhook response section, confirming that the connection is working correctly.


4. Sending Captured Data to Google Sheets

Now that you have successfully captured the data using Pabbly Connect, the next step is to send this data to Google Sheets. In the action step of your workflow, select Google Sheets as the application.

  • Choose the action event as ‘Add a New Row’.
  • Click on ‘Sign in with Google’ to connect your Google account.
  • Select the specific Google Sheets document where you want to store the data.

After connecting Google Sheets, map the fields from your JotForm submission to the corresponding columns in your Google Sheets. This mapping ensures that the data is placed in the correct position automatically with each new submission.


5. Finalizing the Integration and Testing

After mapping the fields, click on the ‘Save and Send Test Request’ button in Pabbly Connect. This action will send a test row to your selected Google Sheets document to ensure everything is working as intended.

Once the test is successful, check your Google Sheets to confirm that the data has been added correctly. You should see the same details that were submitted through the JotForm in the designated columns.

This streamlined integration process using Pabbly Connect allows you to automate data entry into Google Sheets effectively, saving time and reducing manual errors. You can now enjoy a fully automated workflow between JotForm and Google Sheets!


Conclusion

This tutorial demonstrated how to integrate Google Sheets with JotForm using Pabbly Connect. By following these steps, you can automate data collection and improve efficiency in your workflow.

Ensure you check out Pabbly Connect to create business automation workflows and reduce manual tasks. Pabbly Connect currently offer integration with 2,000+ applications.

Integrate Slack with Multiple Applications Using Pabbly Connect

Learn how to seamlessly integrate Slack with various applications using Pabbly Connect in this detailed step-by-step tutorial. Learn to create powerful connections between your critical applications without requiring specialized programming knowledge or extensive technical background.

Watch Step By Step Video Tutorial Below


1. Setting Up Pabbly Connect for Slack Integration

To begin integrating Slack with other applications, access Pabbly Connect by typing Pabbly.com in your browser and clicking on ‘Connect’. Once signed in, you will be directed to the dashboard where you can create a new workflow.

Click on ‘Create Workflow’ and name it appropriately, such as ‘Slack Integration’. This name will help you identify the workflow later. After naming, click on ‘Create’ to proceed.


2. Integrating Trello with Slack Using Pabbly Connect

In this section, we will integrate Trello with Slack using Pabbly Connect. First, select Trello as the trigger application and set the trigger event to ‘New Card’. This means that whenever a new card is created in Trello, it will trigger the workflow.

Next, connect your Trello account by providing the necessary API key and token. Once connected, you can set the action to send a message to Slack. Here’s how to do it:

  • Select ‘Slack’ as your action application.
  • Choose ‘Send Channel Message’ as the action event.
  • Connect your Slack account and select the channel where you want to send the message.

After mapping the necessary fields, click on ‘Save and Send Test Request’ to check if the integration works. You should see a confirmation message in your selected Slack channel.


3. Integrating Google Sheets with Slack Using Pabbly Connect

Next, we will integrate Google Sheets with Slack. Start by choosing Google Sheets as the trigger application in Pabbly Connect and set the trigger event to ‘New Spreadsheet Row’. This means that every time a new row is added to your Google Sheet, it will trigger the workflow.

Connect your Google Sheets account and specify the spreadsheet you want to monitor. Then set the action to send a message to Slack. Here’s how:

  • Select ‘Slack’ as your action application.
  • Choose ‘Send Channel Message’ as the action event.
  • Map the fields from Google Sheets to Slack, including the message content.

Click on ‘Save and Send Test Request’ to confirm that the integration is functioning correctly. A message should appear in your designated Slack channel.


4. Sending WhatsApp Notifications to Slack Using Pabbly Connect

In this section, we will learn how to send WhatsApp messages to Slack. Choose WhatsApp as the trigger application and set the trigger event to ‘New Message’. This means that each time a new message is received on WhatsApp, it will trigger the workflow. using Pabbly Connect

Connect your WhatsApp account using the API token provided by your WhatsApp service provider. After connecting, set the action to send a message to Slack:

Select ‘Slack’ as your action application. Choose ‘Send Channel Message’ as the action event. Map the WhatsApp message fields to the Slack message.

After saving the configuration, click on ‘Save and Send Test Request’. You should see the WhatsApp message reflected in your Slack channel.


5. Automating Google Calendar Reminders to Slack Using Pabbly Connect

Finally, let’s integrate Google Calendar with Slack. Start by selecting Google Calendar as your trigger application and set the trigger event to ‘New Event’. This means that every time a new event is created in Google Calendar, it will trigger the workflow. using Pabbly Connect

Connect your Google Calendar account and specify the calendar you want to monitor. Set the action to send a message to Slack:

Choose ‘Slack’ as your action application. Select ‘Send Channel Message’ as the action event. Map the event details to the Slack message.

Click on ‘Save and Send Test Request’ to confirm that the integration works. A reminder message should appear in your selected Slack channel.


Conclusion

Integrating Slack with various applications using Pabbly Connect streamlines workflows and enhances communication. With this tutorial, you can efficiently set up integrations for Trello, Google Sheets, WhatsApp, Google Calendar, and more.

Ensure you check out Pabbly Connect to create business automation workflows and reduce manual tasks. Pabbly Connect currently offer integration with 2,000+ applications.

Automate Notion Database Items from Microsoft Teams with Pabbly Connect

Learn how to automate Notion database items from Microsoft Teams using Pabbly Connect. Step-by-step tutorial for seamless integration. Develop expertise in application integration and learn how to design streamlined automation workflows using proven, simplified approaches.

Watch Step By Step Video Tutorial Below


1. Setting Up Pabbly Connect for Microsoft Teams and Notion Integration

To automate Notion database items from Microsoft Teams, start by using Pabbly Connect. This powerful integration tool allows seamless connections between applications. First, log into your Pabbly Connect account or create a free account in just a couple of minutes.

Once logged in, navigate to the dashboard and click on the blue button labeled ‘Create Workflow’. Name your workflow, for instance, ‘Create Notion Database Items from Microsoft Teams’, and click ‘Create’. This sets the stage for the automation process.


2. Configuring the Trigger in Pabbly Connect

In this section, you will set up the trigger for your workflow using Pabbly Connect. Select Microsoft Teams as the application for the trigger event. Choose the event type as ‘New Channel Message’ to capture messages posted in your specified channel.

  • Select Microsoft Teams from the trigger application dropdown.
  • Choose ‘New Channel Message’ as the trigger event.
  • Connect your Microsoft Teams account by clicking ‘Connect’ and following the prompts.

After connecting, you will see the teams available in your Microsoft Teams account. Choose the team and the specific channel you want to monitor. Pabbly Connect will now listen for new messages in that channel.


3. Mapping Data from Microsoft Teams to Notion

Next, you will set up the action in Pabbly Connect to send the captured messages to Notion. Select Notion as the action application and the action event as ‘Create Database Item’. This will allow you to save messages directly into your Notion database.

After connecting to your Notion account, select the database where you want to save the messages. You will see the columns from your Notion database, such as Date, User, and Message.

  • Select the relevant Notion database from the dropdown list.
  • Map the fields from Microsoft Teams to the corresponding fields in Notion.
  • Ensure that the data is organized correctly for automatic saving.

Once the mapping is complete, you can test the workflow to ensure that messages from Microsoft Teams are correctly saved in Notion. This step is crucial for confirming that everything is set up properly.


4. Testing and Finalizing the Automation

With your workflow configured in Pabbly Connect, it’s time to test the automation. Click on the ‘Save and Send Test Request’ button to check if the integration works smoothly. Pabbly Connect will send a test message to your Notion database.

Check your Notion account to verify that the test message has been saved correctly in the specified database. If everything looks good, your automation is successfully set up!

Once confirmed, you can relax as Pabbly Connect will handle the automation for you. Every time a new message is posted in your Microsoft Teams channel, it will automatically be saved in your Notion database without any manual effort.


Conclusion

In this tutorial, we explored how to automate Notion database items from Microsoft Teams using Pabbly Connect. By following the steps, you can streamline your workflow and ensure that important messages are saved effortlessly. Enjoy the benefits of automation!

Ensure you check out Pabbly Connect to create business automation workflows and reduce manual tasks. Pabbly Connect currently offer integration with 2,000+ applications.

Automate WooCommerce Orders with Pabbly Connect and Razorpay

Learn how to automate WooCommerce orders using Pabbly Connect and Razorpay. Follow this step-by-step tutorial to streamline your order processing. Build sophisticated automated workflows in less time than you think. This guide translates complex integrations into straightforward steps for immediate implementation.

Watch Step By Step Video Tutorial Below


1. Setting Up Pabbly Connect for Integration

To automate WooCommerce orders using Pabbly Connect, start by accessing the Pabbly Connect dashboard. If you are new, create an account by clicking the ‘Sign Up Free’ button. Once logged in, you will see the option to create a new workflow.

Click on the blue button labeled ‘Create Workflow’. Choose a name for your workflow, such as ‘Razorpay to WooCommerce Order Automation’. This will help you identify the workflow later. After naming it, click the ‘Create’ button to proceed with the integration setup.


2. Connecting Razorpay to Pabbly Connect

In this step, you’ll connect Razorpay to Pabbly Connect. Select Razorpay as the trigger application and choose the event ‘Order Paid’. This means that whenever an order is paid through Razorpay, it will trigger the workflow to create an order in WooCommerce.

  • Select Razorpay as the trigger application.
  • Choose the trigger event ‘Order Paid’.
  • Copy the webhook URL provided by Pabbly Connect.
  • Go to Razorpay dashboard and paste the webhook URL in the settings.

After setting this up, make a test order in Razorpay. This will help you ensure that the integration is working correctly. Once the payment is successful, Razorpay will send the order details to Pabbly Connect.


3. Creating WooCommerce Order via Pabbly Connect

Next, you will set up the action to create an order in WooCommerce using Pabbly Connect. Select WooCommerce as the action application and choose ‘Create Order’ as the action event. This means that when an order is paid in Razorpay, a corresponding order will be created in WooCommerce.

Before completing this step, you need to connect your WooCommerce account to Pabbly Connect. Enter your WooCommerce store URL, consumer key, and consumer secret obtained from WooCommerce settings. Make sure to grant read and write permissions.

  • Select WooCommerce as the action application.
  • Choose ‘Create Order’ as the action event.
  • Input your WooCommerce store URL and API credentials.
  • Map the necessary fields from Razorpay to WooCommerce.

After mapping the required fields, click on ‘Save and Send Test Request’. This will create a test order in WooCommerce using the data received from Razorpay.


4. Testing the Integration

Once the integration is set up, it’s essential to test it. Go back to your Razorpay payment page and create a test order. Make sure to fill out all required fields and complete the payment. This will send the order details to Pabbly Connect, which will then trigger the creation of an order in WooCommerce.

Check your WooCommerce dashboard for the newly created order. Ensure that all details, such as customer name, email, and order amount, are correctly populated. This confirms that the integration between Razorpay and WooCommerce via Pabbly Connect is functioning correctly.


5. Final Setup and Benefits of Automation

After confirming that the integration works, you can finalize your setup. Ensure that all mappings are correct and that you have configured any additional settings in Pabbly Connect as needed. With this automation in place, every time a customer pays through Razorpay, their order will be automatically created in WooCommerce.

Using Pabbly Connect for this integration not only saves time but also reduces manual errors in order processing. You can focus on other aspects of your business while the automation handles order creation seamlessly.


Conclusion

In this tutorial, we explored how to automate WooCommerce orders using Pabbly Connect and Razorpay. By following these steps, you can streamline your order processing and enhance efficiency in your business operations.

Ensure you check out Pabbly Connect to create business automation workflows and reduce manual tasks. Pabbly Connect currently offer integration with 2,000+ applications.

Integrating Marquiz with Trello Using Pabbly Connect: A Step-by-Step Guide

Learn how to seamlessly integrate Marquiz with Trello using Pabbly Connect for efficient lead management. Follow our detailed tutorial for easy automation. Explore efficient methods for automating routine tasks with clear, concise instructions suited for both newcomers and experienced professionals.

Watch Step By Step Video Tutorial Below


1. Accessing Pabbly Connect for Integration

To start integrating Marquiz with Trello, you need to access Pabbly Connect. This platform allows you to automate workflows without any coding skills. Simply sign up for a free account to get started and access the dashboard.

Once logged in, click on the ‘Create Workflow’ button. You will then be prompted to name your workflow. Choose a name that reflects the integration, like ‘Marquiz to Trello Leads’. After naming, click the ‘Create’ button to proceed to the workflow setup.


2. Setting Up the Trigger in Pabbly Connect

In this section, you will set up the trigger for your workflow using Pabbly Connect. The trigger is the event that starts the workflow, which in this case is receiving new leads from Marquiz. Click on the trigger window and search for ‘Marquiz’.

  • Select ‘New Lead’ as the trigger event.
  • Copy the provided webhook URL for integration.

Next, navigate to your Marquiz dashboard and open the editor for the survey form. Click on the ‘Integrations’ tab, find the ‘Webhooks’ option, and paste the copied URL. After saving the changes, publish the survey form to enable the connection.


3. Testing the Integration with a Submission

Once you have set up the trigger, it’s time to test the integration using Pabbly Connect. Perform a test submission of the survey form you have created. Fill in the required fields with dummy data and submit the form.

After the submission, return to Pabbly Connect to check the response section. You should see the data captured from the form submission, including the lead’s name, email, and other details. This confirms that the connection between Marquiz and Pabbly Connect is working correctly.


4. Creating a Card in Trello Using Pabbly Connect

The next step is to create a card in Trello for each new lead received from Marquiz, facilitated by Pabbly Connect. In your workflow, add a new action step and search for ‘Trello’. Select the action event as ‘Create a Card’.

  • Connect your Trello account by providing your username, API key, and token.
  • Choose the Trello board where the card will be created.
  • Map the lead details from the trigger to the card fields.

After configuring these settings, click on the ‘Save and Send Test Request’ button to create a test card. Verify that the card appears in your chosen Trello board with all the mapped details.


5. Finalizing the Integration with Pabbly Connect

Now that you have successfully created a Trello card for your lead, the integration is complete. With Pabbly Connect, you can automate the process of adding leads from Marquiz to Trello. This automation saves time and reduces manual efforts.

Remember, you only need to set up this workflow once. After that, every time a new lead is generated from Marquiz, a corresponding card will be created in Trello automatically. This ensures you never miss a lead and can manage them efficiently.


Conclusion

Integrating Marquiz with Trello using Pabbly Connect allows for seamless lead management and automation. By following this tutorial, you can efficiently capture leads and manage them in Trello without any manual input. This setup enhances productivity and ensures that you stay organized with your leads.

Ensure you check out Pabbly Connect to create business automation workflows and reduce manual tasks. Pabbly Connect currently offer integration with 2,000+ applications.

Integrating Elementor with Interact Using Pabbly Connect: A Step-by-Step Tutorial

Learn how to integrate Elementor with Interact using Pabbly Connect. This detailed tutorial covers every step for seamless automation. Discover hidden automation capabilities within your existing tools. This guide shows you how to connect your essential applications and permanently eliminate redundant manual processes.

Watch Step By Step Video Tutorial Below


1. Setting Up Pabbly Connect for Elementor and Interact Integration

To start integrating Elementor with Interact, you first need to set up Pabbly Connect. Visit the Pabbly Connect dashboard after creating your free account. Once logged in, click on ‘Create Workflow’ and name it, for example, ‘Elementor to Interact.’ This workflow will automate the process of adding users and creating events in Interact based on Elementor form submissions.

After naming your workflow, you will see two windows: the trigger window and the action window. The trigger window is where you specify what event will start the automation, while the action window defines what happens once the trigger occurs. In this case, the trigger will be a new form submission from Elementor.


2. Configuring the Elementor Trigger in Pabbly Connect

To configure the trigger in Pabbly Connect, select Elementor from the app list in the trigger window. Then, choose the trigger event as ‘New Form Submission.’ This will allow Pabbly Connect to listen for new form submissions from your Elementor forms.

  • Select Elementor as the application.
  • Choose ‘New Form Submission’ as the trigger event.
  • Copy the webhook URL provided by Pabbly Connect.

Next, navigate to your Elementor form settings. In the actions after submit section, select ‘Webhook’ and paste the copied URL into the Webhook URL field. After updating the form, every time a user submits the form, Pabbly Connect will receive the details, triggering the automation.


3. Adding User to Interact via Pabbly Connect

Once the trigger is set, the next step is to add the user to Interact. In the action window of Pabbly Connect, search for Interact and select it. For the action event, choose ‘Create/Update User.’ This allows you to create a new user in Interact based on the form submission details.

To connect your Interact account, you’ll need the secret key from your Interact settings. Go to your Interact account, navigate to settings, and find the developer settings section to copy the key. Paste this key into Pabbly Connect to establish the connection.

  • Select Interact as the application.
  • Choose ‘Create/Update User’ as the action event.
  • Enter the secret key from your Interact account.

After connecting, map the user details from the Elementor form submission to the required fields in Interact. Ensure to include the user’s full phone number, name, email, and age. This mapping will ensure that the correct information is sent to Interact when a user submits the form.


4. Creating an Event in Interact Using Pabbly Connect

The final step in this integration is to create an event for the newly added user in Interact. In the action window, add another action step by selecting Interact again and choosing ‘Create Event.’ This allows you to log an event for the user based on their form submission. using Pabbly Connect

After connecting to Interact, you will be prompted to provide the user’s phone number again, as well as details about the event. You can specify the event name (e.g., ‘New Lead’) and any additional traits you want to include, such as the source of the lead.

Select ‘Create Event’ as the action event. Map the user’s phone number from the Elementor submission. Define the event name and any relevant traits.

After setting up the event details, click on ‘Save and Send Test Request’ to verify that the event is created successfully in Interact. If everything is set up correctly, you should see the new event appear in the user’s profile on Interact.


5. Testing the Integration of Elementor and Interact via Pabbly Connect

To ensure that the integration is working as expected, conduct a test submission using your Elementor form. Fill out the form with sample data and click submit. This action should trigger the workflow in Pabbly Connect, adding the user to Interact and creating an event for them.

After submitting the form, check your Interact account to confirm that the new user has been added and that the event has been logged correctly. If you see the new user and event, congratulations! Your automation is set up successfully.

Remember, this integration allows you to automate the process of managing leads from your Elementor forms directly into Interact, enhancing your workflow efficiency.


Conclusion

This tutorial demonstrated how to use Pabbly Connect to seamlessly integrate Elementor with Interact, automating user creation and event logging. Now you can streamline your lead management process effectively.

Ensure you check out Pabbly Connect to create business automation workflows and reduce manual tasks. Pabbly Connect currently offer integration with 2,000+ applications.

Automate Insta Mojo Sales with Pabbly Connect and Pabbly Email Marketing

Learn how to automate sales notifications from Insta Mojo to Pabbly Connect and WhatsApp using Pabbly Connect. Step-by-step tutorial included. Master proven automation processes with practical implementation examples and strategic recommendations you can apply immediately in your workflow.

Watch Step By Step Video Tutorial Below


1. Setting Up Pabbly Connect for Insta Mojo Integration

To automate your sales process, start by accessing Pabbly Connect. This platform allows you to create workflows that connect various applications seamlessly. Begin by signing in to your Pabbly Connect account and navigate to the dashboard.

On the dashboard, click on the blue button labeled ‘Create Workflow’. Name your workflow something descriptive, like ‘Create Subscriber in Pabbly Email Marketing and Send WhatsApp Message for Insta Mojo Sale’. After naming it, click on ‘Create’ to open a blank workflow.


2. Setting Up Insta Mojo as a Trigger in Pabbly Connect

In this section, we will set up Insta Mojo as the trigger application in Pabbly Connect. Select Insta Mojo from the trigger application options, and choose the event ‘New Sale’. This event will initiate the automation whenever a sale is completed.

  • Select ‘New Sale’ as the trigger event.
  • Copy the provided Web URL from Pabbly Connect.
  • Paste this URL into the Web URL field in your Insta Mojo settings.

Once you have pasted the Web URL into the Insta Mojo settings, save the changes. This will ensure that whenever a sale occurs, the details are sent to Pabbly Connect, allowing you to process them further.


3. Adding a Subscriber in Pabbly Email Marketing

After setting up the trigger, the next step is to add the customer as a subscriber in Pabbly Email Marketing. Click on the plus button to add an action step and select Pabbly Email Marketing as the action application. Choose the action event ‘Add Subscriber’.

Next, connect your Pabbly Email Marketing account by entering the required API token. You can find this token in the Integrations section of your Pabbly Email Marketing dashboard. After entering the token, select the list where you want to add the subscriber. Fill in the customer’s email address and name to complete this step.


4. Sending WhatsApp Message via Interact

Now that the subscriber has been added, it’s time to send a WhatsApp confirmation message using the Interact application. Add another action step in Pabbly Connect and select Interact as the application. Choose the action event ‘Send Template Message’.

  • Connect to Interact by entering the secret key from your Interact account.
  • Map the phone number and country code from the Insta Mojo sale details.
  • Select the WhatsApp template you created for payment confirmations.

Once all fields are filled, click on ‘Save and Send Test Request’. This will send a WhatsApp message to the customer confirming their payment, completing the workflow.


5. Conclusion: Streamlining Sales Notifications with Pabbly Connect

By using Pabbly Connect, you can automate the process of adding subscribers to Pabbly Email Marketing and sending WhatsApp notifications for sales made through Insta Mojo. This integration saves time and ensures that your customers receive timely updates about their purchases.

Ensure you check out Pabbly Connect to create business automation workflows and reduce manual tasks. Pabbly Connect currently offer integration with 2,000+ applications.

Check out Pabbly Connect – Automate your business workflows effortlessly! Sign Up Free – Start your journey with ease! 10,000+ Video Tutorials – Learn step by step! Join Pabbly Facebook Group – Connect with 21,000+ like minded people!

With Pabbly Connect, you can easily connect multiple applications to create efficient workflows that enhance your business operations. Start automating today to improve your customer communication and streamline your sales processes.