Automate Logistics Workflows Using AI Agents with Pabbly Connect

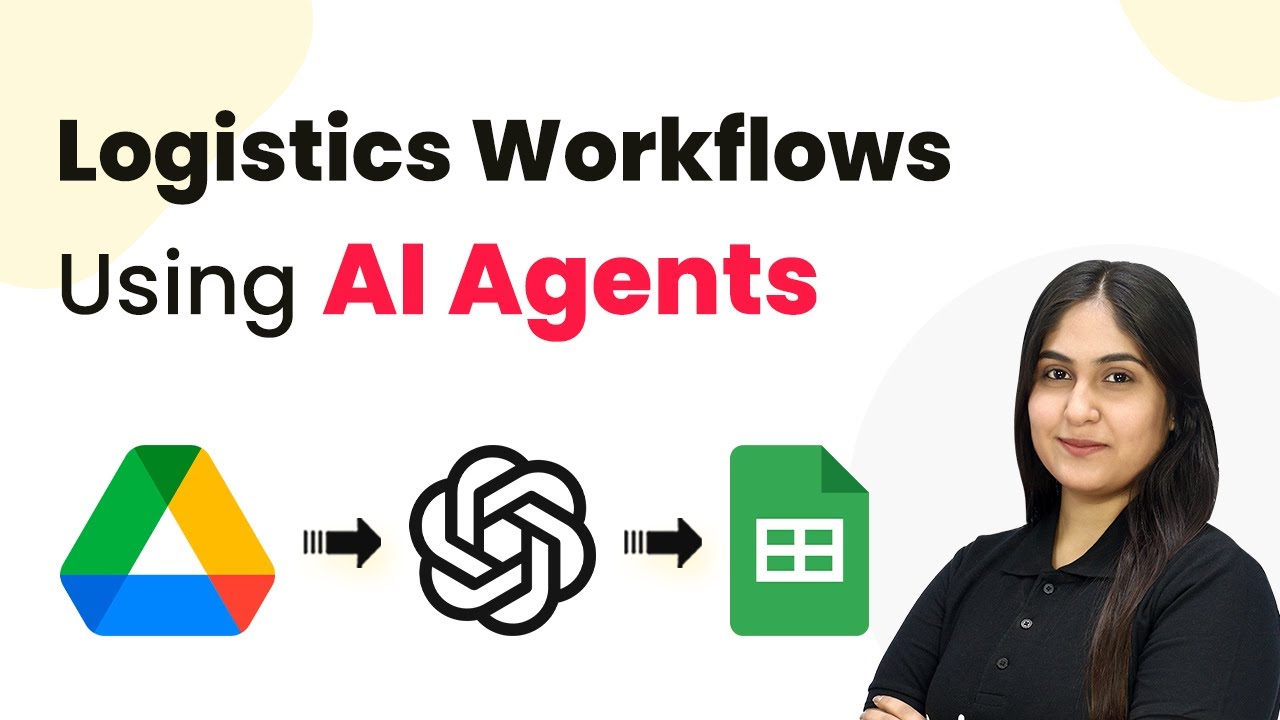
Learn how to automate logistics workflows using Pabbly Connect to integrate Google Drive, Google Sheets, and AI agents for efficient data extraction. Explore systematic approaches to creating efficient automation solutions that convert technical concepts into practical, implementable instructions.

Watch Step By Step Video Tutorial Below


1. Accessing Pabbly Connect for Automation

To automate logistics workflows using AI agents, you first need to access Pabbly Connect. Start by visiting the Pabbly Connect homepage at pav.com/connect. Here, you can sign up for a free account or log in if you’re an existing user.

Once logged in, you’ll see the dashboard displaying all available applications. You can create a new workflow by clicking on the ‘Create Workflow’ button located in the top right corner. This is where the automation process begins.


2. Creating a Workflow in Pabbly Connect

In the workflow dialog box, name your workflow, such as ‘Automate Logistics Workflows Using AI Agents’. You will also select a folder where this workflow will be saved. Choose a relevant folder from the left-hand side or create a new one if necessary. using Pabbly Connect

  • Select the folder for your workflow.
  • Click on the ‘Create’ button to finalize the workflow creation.

After creating the workflow, you will see two main components: trigger and action. The trigger is the event that starts the automation, while the action is what happens as a result. In this case, the trigger will be set to Google Drive.


3. Setting Up the Trigger with Google Drive

To set up your trigger, select Google Drive as your trigger application in Pabbly Connect. Choose the trigger event ‘New File in a Specific Folder’. This means that whenever a new logistics bill is uploaded to your Google Drive, the trigger will activate.

Next, you will need to connect your Google Drive account to Pabbly Connect. Click on ‘Connect’ and select ‘Add New Connection’. Sign in to your Google account and grant necessary permissions. After connecting, select the folder where your logistics bills are stored.

  • Ensure the folder is shared with anyone who has the link for accessibility.
  • Upload a new bill to test the trigger.

Once the file is uploaded, click on ‘Save and Send Test Request’ in Pabbly Connect to confirm that the trigger is working correctly. You should see a successful response indicating that the new file has been detected.


4. Extracting Data Using OpenAI Integration

Now that the trigger is set, the next step is to extract data from the PDF. For this, select OpenAI as your action application in Pabbly Connect. Choose the action event ‘Extract Content from PDF or Image’. This will allow you to retrieve important details from the uploaded logistics bill.

Connect your OpenAI account by clicking on ‘Connect’ and entering your API token. If you do not have an API token, generate one through your OpenAI account settings. Once connected, select the appropriate OpenAI model, such as GPT-4 Mini.

Map the PDF URL from the previous trigger step to ensure dynamic data extraction. Enter a prompt to specify what information to extract from the bill.

After setting up the extraction parameters, click on ‘Save and Send Test Request’ to verify that the data is being extracted correctly. You should receive a structured response with the relevant details from the logistics bill.


5. Updating Google Sheets with Extracted Data

The final step is to add the extracted data into Google Sheets. Select Google Sheets as your action application in Pabbly Connect and choose the action event ‘Add New Row’. This will allow you to insert the extracted data into your specified spreadsheet.

Connect your Google Sheets account by clicking on ‘Connect’ and signing in. After connecting, select the spreadsheet where you want to add the data and the specific sheet within that spreadsheet.

Map the fields from the extracted data to the corresponding columns in Google Sheets. Click on ‘Save and Send Request’ to add the new row.

Once the data is successfully added, you can check your Google Sheets to confirm that all details have been updated correctly. This completes the automation of logistics workflows using AI agents and Pabbly Connect.


Conclusion

In this tutorial, we explored how to automate logistics workflows using Pabbly Connect to integrate Google Drive, OpenAI, and Google Sheets. This process not only saves time but also reduces manual errors, ensuring that your logistics data is organized and accessible efficiently.

Ensure you check out Pabbly Connect to create business automation workflows and reduce manual tasks. Pabbly Connect currently offer integration with 2,000+ applications.

How to Use Pabbly Connect for Fast Contract Clause Extraction and Review Automation

Learn how to use Pabbly Connect for fast contract clause extraction and review automation with Google Drive, AI Agent, and Google Sheets in this detailed tutorial.

Watch Step By Step Video Tutorial Below


1. Accessing Pabbly Connect for Automation

To start using Pabbly Connect for fast contract clause extraction and review automation, first open your browser and visit Pabbly Connect by searching for ‘Pabbly.com/connect’. This will take you to the Pabbly Connect landing page.

On the landing page, you will see options to ‘Sign In’ or ‘Sign Up for Free.’ If you are a new user, click on ‘Sign Up for Free’ to create an account. Existing users should click on ‘Sign In’ to access their dashboard. Once logged in, click on ‘Access Now’ under Pabbly Connect to proceed.


2. Creating a New Workflow in Pabbly Connect

After accessing Pabbly Connect, you will be directed to your dashboard. To create a new workflow, click on the blue button that says ‘Create Workflow.’ You will be prompted to enter a name for your workflow and choose a folder to save it in.

  • Name your workflow as ‘AI Agent for Contract Clause Extraction and Review Automation’.
  • Select the folder named ‘Automations’ or create a new folder if needed.

Once you’ve named your workflow and selected the folder, click on the ‘Create’ button to open the workflow window. This window is crucial as it allows you to set the trigger and action for your automation.


3. Setting Up the Trigger with Google Drive

In the workflow window, the first step is to set up the trigger application. Search for ‘Google Drive’ and select it as your trigger application. Next, choose the trigger event as ‘New File in a Specific Folder’ and click on the ‘Connect’ button.

You will need to create a new connection by clicking on ‘Add a New Connection’. After that, click on the blue button that says ‘Sign in with Google’. Select your Gmail account and allow the necessary permissions for Pabbly Connect to access your Google Drive.

  • Ensure the folder you select is sharable, with access set to ‘Anyone with the link can edit’.
  • Select the folder containing your client agreements.

After selecting the folder, click on ‘Save and Send Test Request’. This step allows Pabbly Connect to check for new files in the selected folder, which will trigger the automation.


4. Integrating AI Agent for Clause Extraction

Once the trigger is set, the next step is to integrate the AI Agent to extract content from the uploaded agreements. Click on the ‘Add Action Application’ and select ‘OpenAI’ for the action application.

For the action event, choose ‘Extract Content from PDF/Image’ and click on ‘Connect’. You will need to add a new connection using your OpenAI API key. Follow the prompts to retrieve your API key from the OpenAI website and paste it into Pabbly Connect.

Select the OpenAI model, such as GPT-3 Mini. Map the PDF URL from the previous Google Drive trigger step. Enter the prompt for extraction: ‘Extract me the details from the given PDF’.

Once all fields are filled, click ‘Save and Send Request’ to allow the AI Agent to extract the necessary details from the agreement.


5. Adding Extracted Data to Google Sheets

After the AI Agent has extracted the details, the next step is to add this information to Google Sheets. Click on ‘Add Action Application’ again and select ‘Google Sheets’.

Choose the action event ‘Add a New Row’ and connect your Google Sheets account. Follow the same process as before to sign in and allow permissions for Pabbly Connect to access your Google Sheets.

Select the spreadsheet and sheet where you want to add the extracted details. Map the extracted details such as client name, vendor name, contract duration, and payment terms.

Once all details are mapped, click on ‘Save and Send Request’ to confirm that the data has been successfully added to your Google Sheets. This completes the workflow, allowing for automated extraction and review of contract clauses.


Conclusion

In this tutorial, we explored how to use Pabbly Connect for fast contract clause extraction and review automation. By integrating Google Drive, AI Agent, and Google Sheets, you can streamline your contract management process efficiently. Start automating your workflows with Pabbly Connect today!

Ensure you check out Pabbly Connect to create business automation workflows and reduce manual tasks. Pabbly Connect currently offer integration with 2,000+ applications.

How to Build an AI Agent to Auto-Summarize Google Drive Deposition Notes Using Pabbly Connect

Learn how to use Pabbly Connect to build an AI agent that auto-summarizes deposition notes from Google Drive into Google Sheets. Step-by-step tutorial included. Explore systematic approaches to creating efficient automation solutions that convert technical concepts into practical, implementable instructions.

Watch Step By Step Video Tutorial Below


1. Accessing Pabbly Connect for Automation

To begin using Pabbly Connect for auto-summarizing deposition notes, first, access the platform by visiting Pabbly Connect at Pabbly.com/connect. Here, you will see options to sign in or sign up for free, allowing new users to explore the application with 100 free tasks each month.

Once signed in, you will be directed to your dashboard. From there, click on the ‘Create Workflow’ button to initiate the automation process. You will need to name your workflow and select a folder to save it in. For this tutorial, we will name it ‘AI Agent to Auto Summarize Google Drive Deposition Notes’ and save it in the automation folder.


2. Setting Up the Trigger with Google Drive

In this section, we will set up the trigger that will initiate the summarization process. Select Google Drive as your trigger application in Pabbly Connect. For the trigger event, choose ‘New File in a Specific Folder.’ This setup allows the automation to respond whenever a new deposition note is added to the selected folder.

  • Select Google Drive as the trigger application.
  • Choose the event ‘New File in a Specific Folder.’
  • Connect your Google Drive account by clicking on ‘Connect’ and following the prompts.

After connecting, ensure that the folder containing your deposition notes is set to be sharable. This is crucial as the AI agent needs access to read the documents. Once the folder is selected, click on ‘Save and Send Test Request’ to confirm the connection. Pabbly Connect will check for new files every ten minutes, ensuring timely summarization.


3. Integrating the AI Agent with OpenAI

Next, we will integrate the AI agent using OpenAI to auto-summarize the deposition notes. In Pabbly Connect, select OpenAI as the action application and choose the action event ‘Extract Content from PDF/Image.’ This will allow the AI agent to process the files uploaded to Google Drive.

To connect with OpenAI, you will need to enter your API key. If you haven’t created one, navigate to the OpenAI API key page and generate a new secret key. After copying the key, paste it into the appropriate field in Pabbly Connect. Then, select the OpenAI model you want to use, such as GPT-4 Mini.

  • Enter the PDF URL, which will be mapped from the Google Drive trigger.
  • Input the prompt: ‘Extract the details from the given document.’
  • Define the structured output using the JSON schema generated from the OpenAI tool.

Once all fields are filled, click on ‘Save and Send Test Request’ to ensure the AI agent successfully extracts the necessary details from your deposition notes.


4. Adding Summarized Data to Google Sheets

After the AI agent has processed the deposition notes, the next step is to add the summarized details to Google Sheets. In Pabbly Connect, select Google Sheets as the action application and choose the action event ‘Add a New Row.’ This will allow you to input the extracted data into your designated spreadsheet.

Connect your Google Sheets account by signing in and granting the necessary permissions. Then, select the spreadsheet where the summaries will be stored and specify the sheet within that spreadsheet. You can now map the extracted details from the AI agent to the corresponding columns in your Google Sheets.

Map the case title, deponent name, and other details extracted by the AI agent. Click on ‘Save and Send Request’ to add the data into the spreadsheet.

Once completed, you will see the summarized details appear in your Google Sheets, confirming that the automation has successfully captured and stored the information.


5. Conclusion: Streamlining Your Workflow with Pabbly Connect

In conclusion, using Pabbly Connect to build an AI agent for auto-summarizing deposition notes can significantly enhance your productivity. By integrating Google Drive, OpenAI, and Google Sheets, you can automate the summarization process, saving time and reducing errors.

Ensure you check out Pabbly Connect to create business automation workflows and reduce manual tasks. Pabbly Connect currently offer integration with 2,000+ applications.

With the steps outlined in this tutorial, you can easily set up your own automation workflow. This integration not only simplifies the management of legal documents but also ensures that you have concise summaries readily available for review.

Try implementing this automation in your own business to experience the benefits of streamlined workflows and enhanced efficiency. Pabbly Connect makes it easy to connect various applications and automate repetitive tasks, allowing you to focus on what truly matters.

Automate Employee Satisfaction Reports Using Pabbly Connect

Learn how to automate employee satisfaction reports using Pabbly Connect with Google Forms, Open AI, and Google Sheets. Step-by-step tutorial included. Navigate the automation landscape confidently with clear, structured guidance suitable for professionals regardless of prior technical experience.

Watch Step By Step Video Tutorial Below


1. Introduction to Automating Employee Satisfaction Reports with Pabbly Connect

In this tutorial, we will explore how to automate employee satisfaction reports using Pabbly Connect. This process eliminates the tedious task of manually generating reports by integrating Google Forms, Open AI, and Google Sheets.

By leveraging Pabbly Connect, you can seamlessly collect employee feedback, analyze sentiments, and generate insightful summaries. This automation will streamline your internal surveys and enhance employee engagement.


2. Accessing Pabbly Connect for Your Automation Needs

To get started, open your browser and navigate to Pabbly Connect by typing in Pabbly.com/connect. If you are a new user, click on ‘Sign up for free’ to create an account. Existing users can click on ‘Sign in’ to access their dashboard.

  • New users can sign up and get 100 free tasks monthly.
  • Existing users should enter their credentials to log in.

Once logged in, you will see various Pabbly applications. Click on ‘Access Now’ under Pabbly Connect to reach your workflow dashboard, where you can create and manage your automation.


3. Creating a Workflow in Pabbly Connect

On your Pabbly Connect dashboard, click on ‘Create Workflow’. You will be prompted to name your workflow; enter ‘Automate Employee Satisfaction Reports Using an AI Agent’. Choose a folder to save your workflow, or create a new folder if necessary.

After naming your workflow, click on ‘Create’. This will open the workflow window where you can set up triggers and actions. In this case, select ‘Google Forms’ as your trigger application and choose ‘New Response Received’ as the trigger event.

  • Select Google Forms as your trigger application.
  • Choose ‘New Response Received’ as the trigger event.
  • Copy the Webhook URL provided for integration.

With this setup, Pabbly Connect will listen for new responses in your Google Form, triggering the next steps in your automation.


4. Linking Google Forms with Google Sheets via Pabbly Connect

To connect Google Forms with Google Sheets, ensure your Google Form is linked to a Google Sheet. In the ‘Responses’ tab of Google Forms, select ‘View in Sheets’ to open the linked spreadsheet.

Next, go to the ‘Extensions’ tab in Google Sheets, select ‘Add-ons’, and search for Pabbly Connect Webhooks. Install the add-on if you haven’t done so already. After installation, refresh your spreadsheet to access the add-on.

Open Google Sheets and link it to your Google Form. Install the Pabbly Connect Webhooks add-on. Refresh the spreadsheet to enable the add-on functionalities.

Now, click on ‘Pabbly Connect Webhooks’ in the Extensions menu and proceed to the initial setup. Paste the Webhook URL copied from your Pabbly Connect workflow and specify the trigger column (e.g., column J) where the data will be sent upon form submission.


5. Using Open AI to Generate Employee Satisfaction Reports

After setting up the Google Forms and Sheets integration, the next step is to utilize Open AI within Pabbly Connect. Select Open AI as the action application and choose ‘Generate Summary’ as the action event.

To connect Open AI, you will need an API key. Go to your Open AI account, create a new secret key, and copy it. Paste this API key into Pabbly Connect to establish the connection.

Select Open AI as the action application within Pabbly Connect. Generate a new API key from your Open AI account. Map the input fields from the Google Form responses to generate a summary.

Once the summary is generated, add another action to update the Google Sheets with the summary. This way, every time a new response is submitted, Pabbly Connect will automatically generate and store the summary in your spreadsheet.


Conclusion

Automating employee satisfaction reports using Pabbly Connect can significantly enhance efficiency and accuracy in your reporting process. By integrating Google Forms, Open AI, and Google Sheets, you can streamline feedback collection and analysis. Implement this automation today to improve employee engagement and insights.

Ensure you check out Pabbly Connect to create business automation workflows and reduce manual tasks. Pabbly Connect currently offer integration with 2,000+ applications.

How to Build an AI Agent to Auto-Generate Google Docs Care Instructions Using Pabbly Connect

Learn how to use Pabbly Connect to automate the generation of Google Docs care instructions with an AI agent, integrating Google Sheets and Google Docs seamlessly.

Watch Step By Step Video Tutorial Below


1. Accessing Pabbly Connect for Automation

To get started with automating the generation of Google Docs care instructions, you need to access Pabbly Connect. Simply visit the Pabbly Connect landing page by searching for ‘Pabbly Connect’ in your browser.

Once on the page, you will see options to sign in or sign up. If you are a new user, click on the ‘Sign up for free’ button to create an account. For existing users, click on the ‘Sign in’ button to access your dashboard. After signing in, choose the ‘Access Now’ button to enter your Pabbly Connect account.


2. Creating a Workflow in Pabbly Connect

After accessing your Pabbly Connect account, you can create a new workflow. Click on the ‘Create Workflow’ button, which prompts you to enter a workflow name. Name your workflow something descriptive, like ‘AI Agent to Auto-Generate Google Docs Care Instructions’ and save it in a relevant folder.

  • Click on ‘Create’ to open the workflow window.
  • In the workflow window, select your trigger application as Google Sheets.
  • Choose the trigger event as ‘New or Updated Spreadsheet Row’.

With these steps, you’ve set up the initial part of your workflow in Pabbly Connect. This setup will allow the workflow to trigger when new data is entered into Google Sheets.


3. Setting Up Google Sheets with Pabbly Connect

To link Google Sheets with Pabbly Connect, you need to copy the webhook URL provided after selecting the trigger event. Open your Google Sheets and navigate to Extensions > Add-ons > Get Add-ons. Search for ‘Pabbly Connect Webhooks’ and install the extension if you haven’t done so already.

After installation, refresh your Google Sheets. Go back to Extensions > Pabbly Connect Webhooks > Initial Setup. Here, paste the copied webhook URL and specify the trigger column (e.g., column D). Click the ‘Submit’ button to complete the setup.


4. Integrating the AI Agent with Pabbly Connect

Next, you will integrate the AI agent, specifically OpenAI, into your workflow. In your Pabbly Connect workflow, select OpenAI as your action application. Choose the action event as ‘Charge’ and connect to your OpenAI account by providing the necessary API key.

  • Enter the prompt for the AI to generate care instructions.
  • Map the input details from the Google Sheets trigger response.
  • Click ‘Save and Send Request’ to generate the care instructions.

Once you click ‘Save and Send Request’, the AI agent will automatically generate the care instructions based on the mapped data, showcasing the power of Pabbly Connect in facilitating this integration.


5. Finalizing Google Docs and Sharing Instructions

After generating the care instructions, the next step is to create a document in Google Docs. Select Google Docs as your action application in Pabbly Connect and choose ‘Create a Blank Document’. Connect your Google Docs account and name the document appropriately.

To append the generated care instructions into the document, add another action step, selecting Google Docs again and choosing ‘Append a Paragraph to a Document’. Map the document ID from the previous step, and insert the care instructions. Finally, to share this document, integrate Google Drive by selecting it as your action application and choosing ‘Share a File with Anyone’. Map the document ID to make it sharable.


Conclusion

In this tutorial, we explored how to build an AI agent using Pabbly Connect to automatically generate Google Docs care instructions. This process enhances productivity by streamlining the documentation workflow for your business. By integrating Google Sheets, Google Docs, and an AI agent, you can efficiently manage care instructions and improve customer service.

Ensure you check out Pabbly Connect to create business automation workflows and reduce manual tasks. Pabbly Connect currently offer integration with 2,000+ applications.

Integrate Google Sheets with WhatsApp Using Pabbly Connect and Pabbly Chatflow

Learn how to seamlessly integrate Google Sheets with WhatsApp using Pabbly Connect and Pabbly Connect for automated customer messaging. Follow this definitive guide to creating powerful automated workflows with straightforward, efficiency-focused solutions that save valuable time.

Watch Step By Step Video Tutorial Below


1. Accessing Pabbly Connect for Integration

To start integrating Google Sheets with WhatsApp, you need to access Pabbly Connect. First, navigate to the Pabbly Connect website at www.Pabbly.com/connect. You will see options to sign in or sign up for free. If you’re a new user, signing up gives you 100 free tasks every month.

After signing in, you will land on the Pabbly Connect dashboard. From here, you can create a new workflow by clicking on the ‘Create Workflow’ button. This is where you will set up the automation process that connects Google Sheets and WhatsApp.


2. Creating a Workflow in Pabbly Connect

Once you are in the Pabbly Connect dashboard, the next step is to create a workflow. Click on the ‘Create Workflow’ button in the top right corner. You will be prompted to name your workflow. For this integration, you can name it ‘Integrate Google Sheets with WhatsApp using Pabbly Chatflow and Pabbly Connect’. using Pabbly Connect

  • Select a specific folder to save your workflow.
  • Click the ‘Create’ button to finalize the workflow setup.

After creating the workflow, you will see two main sections: the trigger window and the action window. The trigger indicates when the automation should start, while the action specifies what should happen next. In this case, the trigger will be set to Google Sheets, and the action will be configured to send a message via WhatsApp using Pabbly Chatflow.


3. Setting Up Google Sheets as the Trigger

In the trigger window, select Google Sheets as the trigger application. The trigger event should be set to ‘New or Updated Spreadsheet Row’. This means that every time you add a new customer in your Google Sheets, the automation will be activated. using Pabbly Connect

Pabbly Connect will provide you with a webhook URL after you set the trigger. Copy this URL, as it will be used to connect Google Sheets with Pabbly Connect. Next, open your Google Sheets and navigate to Extensions > Add-ons > Get Add-ons to install the Pabbly Connect Webhooks add-on if you haven’t done so already.

  • Search for ‘Pabbly Connect Webhooks’ and install it.
  • After installation, refresh your spreadsheet.

Once refreshed, go back to Extensions > Pabbly Connect Webhooks and select ‘Initial Setup’. Paste the webhook URL you copied earlier and set the trigger column to the column where you will enter the customer phone numbers (e.g., Column D). Click the ‘Submit’ button to finalize the setup.


4. Connecting Pabbly Chatflow to Send WhatsApp Messages

Now that you have set up Google Sheets as the trigger, it’s time to configure the action step using Pabbly Chatflow. In the action window, select Pabbly Chatflow as the action application and choose the action event ‘Send Template Message’. using Pabbly Connect

To use Pabbly Chatflow effectively, you need to create a WhatsApp message template. Go to the Pabbly Chatflow website and log in. Once in your dashboard, click on ‘Add New Template’ and fill in the required fields, including the template category, name, and message content. Save your template once done.

Ensure your template includes variables for personalization. Select the template you created when configuring the action in Pabbly Connect.

After selecting the template, you will need to connect your Pabbly Chatflow account by entering your API token from the settings page. This connection allows Pabbly Connect to send messages to your customers via WhatsApp seamlessly.


5. Testing the Integration and Finalizing Setup

With both Google Sheets and Pabbly Chatflow configured, it’s time to test the integration. Go back to your Google Sheets and add a new customer’s details, including their name, email, and phone number. Make sure to enter the phone number in the correct format without the plus sign.

Once you have added the new customer data, return to Pabbly Connect and check if the webhook has captured the new data. If successful, you will see the customer information displayed in the trigger response section. This confirms that Google Sheets is correctly connected to Pabbly Connect.

Click on ‘Save and Send Test Request’ to send a test message via WhatsApp. Check your WhatsApp for the welcome message sent to the new customer.

Once you confirm that the message has been received, your integration is complete. Now, every time you add a new customer in Google Sheets, they will automatically receive a welcome message on WhatsApp, thanks to the powerful automation capabilities of Pabbly Connect.


Conclusion

In this tutorial, we explored how to integrate Google Sheets with WhatsApp using Pabbly Connect and Pabbly Chatflow. By following these steps, you can automate your customer messaging process efficiently, ensuring timely communication with your new clients.

Ensure you check out Pabbly Connect to create business automation workflows and reduce manual tasks. Pabbly Connect currently offer integration with 2,000+ applications.

How to Build an AI Agent to Auto-Summarize Gmail Client Proposals Using Pabbly Connect

Learn how to build an AI agent to auto-summarize Gmail client proposals using Pabbly Connect. Step-by-step guide for seamless integration. Implement the precise methodologies leading organizations use to automate repetitive tasks, illustrated with practical examples designed for immediate application.

Watch Step By Step Video Tutorial Below


1. Accessing Pabbly Connect for Integration

To begin building your AI agent to auto-summarize Gmail client proposals, you first need to access Pabbly Connect. Visit the website and either sign in if you are an existing user or sign up for a free account to get started.

Once logged in, you will be directed to the Pabbly apps window. Here, you should select Pabbly Connect by clicking on the ‘Access Now’ button, which will take you to the dashboard where you can create your workflow.


2. Creating a Workflow in Pabbly Connect

In your Pabbly Connect dashboard, click the ‘Create Workflow’ button located at the top right corner. A dialog box will prompt you to name your workflow. Enter a name such as ‘AI Agent to Auto Summarize Gmail Client Proposals’.

Next, select a folder to save your workflow. Choose a specific folder from the dropdown menu, for example, select the folder labeled ‘AI Agents’. After naming your workflow and selecting the folder, click the ‘Create’ button to finalize the setup.

  • Navigate to the Pabbly Connect dashboard.
  • Click ‘Create Workflow’ and name it.
  • Select a folder to save your workflow.

Your workflow is now created, and you will see two windows: one for triggers and one for actions. This is where the actual automation process will begin.


3. Setting Up the Trigger in Pabbly Connect

The next step involves setting up the trigger for your workflow in Pabbly Connect. For this, select the ‘Email Parser’ as your trigger application. This feature allows you to connect your Gmail account to Pabbly Connect.

Choose the trigger event as ‘New Email Received’. Pabbly Connect will provide you with a forwarding email address. Copy this address and log into your Gmail account. In Gmail, navigate to settings, go to the ‘Forwarding and POP/IMAP’ tab, and add this forwarding address to enable email parsing.

  • Select ‘Email Parser’ as the trigger application.
  • Set the trigger event to ‘New Email Received’.
  • Copy the forwarding email address and add it to Gmail settings.

After setting up the forwarding address, send a test email with an attachment to ensure that your Gmail is properly connected to Pabbly Connect.


4. Filtering Emails in Pabbly Connect

Once the trigger is set, the next step is to filter the emails to ensure only client proposals proceed through the workflow in Pabbly Connect. For this, add a filter action.

Select ‘Filter by Pabbly’ as your action application, and set the action event to ‘Filter Values’. Configure the filter to check for the existence of an attachment link in the received email. This ensures that only emails with proposals are processed further in the workflow.

Add a filter action to check for attachment links. Set the action event to ‘Filter Values’. Ensure only emails with valid proposals are processed.

After setting up the filter, you can proceed to the next action step in your workflow to extract details from the attachments.


5. Extracting Details Using an AI Agent

The final step is to extract the details from the attachment using an AI agent. In this case, select ‘OpenAI’ as your action application and choose the action event as ‘Extract Content from PDF or Image’.

Connect OpenAI to Pabbly Connect by generating an API token. Once connected, map the attachment link from the previous step as the source for extraction. Write a prompt for the AI agent to specify what details you want extracted, such as client name, project scope, and budget.

Select ‘OpenAI’ for extracting details from attachments. Map the attachment link for extraction. Specify the details you want in the prompt.

After configuring the AI extraction, you can add another action to save the extracted data into Google Sheets, ensuring all client proposal details are systematically recorded for easy access.


Conclusion

Using Pabbly Connect, you can effectively automate the process of summarizing client proposals received via Gmail. By integrating various applications like OpenAI and Google Sheets, you streamline your workflow, saving time and improving efficiency in handling client requests.

Ensure you check out Pabbly Connect to create business automation workflows and reduce manual tasks. Pabbly Connect currently offer integration with 2,000+ applications.

This tutorial demonstrated how to set up an AI agent to auto-summarize Gmail client proposals, ensuring that you can quickly review and respond to important emails without manual effort.

How to Create a Telegram Chatbot with Image Generation and Smart Replies Using Pabbly Connect

Learn how to create a Telegram chatbot that generates images and smart replies using Pabbly Connect. Step-by-step guide included. Explore efficient methods for automating routine tasks with clear, concise instructions suited for both newcomers and experienced professionals.

Watch Step By Step Video Tutorial Below


1. Accessing Pabbly Connect to Create Your Telegram Chatbot

To create a Telegram chatbot with image generation and smart replies, the first step is accessing Pabbly Connect. Start by visiting the Pabbly Connect website at www.Pabbly.com/connect.

If you are a new user, sign up for free to get 100 free tasks each month. For existing users, simply log into your account. Once logged in, you will see the Pabbly dashboard where you can select Pabbly Connect by clicking on the ‘Access Now’ button.


2. Creating a Workflow in Pabbly Connect

After accessing Pabbly Connect, the next step is to create a workflow for your Telegram bot. Click on the ‘Create Workflow’ button located in the top right corner of the dashboard. A dialog box will appear prompting you to name your workflow.

  • Enter a name for your workflow, such as ‘Create Telegram Chatbot with Image Generation and Smart Replies’.
  • Select a folder to save your workflow.
  • Click the ‘Create’ button to finalize your workflow setup.

Your workflow will now be created. You will see two windows: the trigger window and the action window. The trigger window will capture events from your Telegram bot, while the action window will define what happens when a trigger occurs using Pabbly Connect.


3. Setting Up Trigger for Telegram Bot

In this step, you will set up the trigger for your Telegram bot using Pabbly Connect. For the trigger application, select ‘Telegram Bot’. The trigger event should be set to ‘Set Webhook to Watch Updates’. This setup allows Pabbly Connect to capture messages sent to your bot.

To create a connection, click on the ‘Connect’ button. A new window will pop up asking for a token. To generate this token, you will need to create a bot using the BotFather on Telegram. Search for ‘BotFather’ in your Telegram app, and start a chat with it.

  • Use the command /newbot to create a new bot.
  • Follow the prompts to name your bot and create a username.
  • Copy the provided token and paste it into the token field in Pabbly Connect.

After entering the token, click the ‘Save’ button to establish the connection. Your Telegram bot is now set up as a trigger in Pabbly Connect.


4. Action Steps for AI Integration Using OpenAI

Now that your trigger is set up, the next step involves integrating AI to generate smart replies. For this, select ‘OpenAI’ as the action application in Pabbly Connect. Set the action event to ‘ChatGPT’. This integration allows the bot to generate responses based on user queries.

Click on the ‘Connect’ button and add a new connection by entering your OpenAI API key. Once connected, you will need to select the AI model, which can be ‘GPT-3’ or ‘GPT-4’ depending on your preference. In the prompt field, you will need to define how the AI should respond to user queries.

Write a clear prompt that instructs the AI to provide helpful, polite, and concise responses. Map the data from the previous step to include the user’s message. Click the ‘Save and Send Test Request’ button to test the integration.

Once the test is successful, the AI will generate a response based on the user’s query, which will be sent back to the Telegram bot using Pabbly Connect.


5. Image Generation and Sending Back to Telegram

The final step involves generating an image based on the user query. In this step, add another action in your workflow and select ‘OpenAI’ again, but this time, set the action event to ‘Generate Image’. This allows Pabbly Connect to create a visual representation of the query.

After connecting, enter the prompt for image generation. This prompt should describe what the image should depict based on the user’s question. Set the image size and quality as per your requirements.

Map the data from the previous AI response to guide the image generation. Click ‘Save and Send Test Request’ to generate the image. Copy the image URL generated and prepare to send it back to the user.

Finally, add another action step to send the generated image and the AI response back to the Telegram user. This completes your chatbot setup using Pabbly Connect.


Conclusion

By following these steps, you can successfully create a Telegram chatbot that generates images and smart replies using Pabbly Connect. This integration not only enhances user interaction but also automates responses efficiently.

Ensure you check out Pabbly Connect to create business automation workflows and reduce manual tasks. Pabbly Connect currently offer integration with 2,000+ applications.

Using Pabbly Connect, you can streamline various automation tasks and improve engagement with your audience through smart AI responses and visual content generation.

Automate Research Report Generation with Pabbly Connect and AI Agent

Learn how to automate research report generation using Pabbly Connect with Google Sheets, OpenAI, and Google Docs in this step-by-step tutorial. Navigate the automation landscape confidently with clear, structured guidance suitable for professionals regardless of prior technical experience.

Watch Step By Step Video Tutorial Below


1. Accessing Pabbly Connect for Automation

To automate research report generation, the first step is to access Pabbly Connect. This platform is essential for integrating applications like Google Sheets, OpenAI, and Google Docs.

Open your browser and visit Pabbly Connect. If you are a new user, click on ‘Sign Up Free’ to create an account. Existing users can click ‘Sign In’ to access their dashboard. Once logged in, you will see options to create workflows that automate processes seamlessly.


2. Creating a Workflow in Pabbly Connect

Next, you will create a workflow in Pabbly Connect to facilitate the automation process. Click on the ‘Create Workflow’ button located at the top right corner of the dashboard.

  • Name your workflow, e.g., ‘Automate Research Report Generation’.
  • Select a folder for organization, if needed.
  • Click on ‘Create’ to finalize your workflow setup.

Now that you have created the workflow, you can proceed to set up the trigger event that will initiate the automation.


3. Setting Up Trigger with Google Sheets

The next step in using Pabbly Connect is to set up a trigger event. Select Google Sheets as your trigger application and choose the event as ‘New or Updated Spreadsheet Row’. This means that whenever you add a new detail in your Google Sheet, it will trigger the automation.

After selecting the trigger, you will receive a webhook URL. This URL is crucial as it allows Pabbly Connect to capture data from your Google Sheets. Copy this URL and set it up in your Google Sheets by installing the Pabbly Connect Webhooks add-on.


4. Integrating OpenAI for Report Generation

Now that the trigger is set up, the next step is to connect OpenAI with Pabbly Connect. Choose OpenAI as your action application and select ‘Send Prompt’ as the action event. This connection will enable OpenAI to generate the research report based on the details provided in your Google Sheets.

  • Map the relevant fields from Google Sheets to the prompt in OpenAI.
  • Set up the API token for OpenAI in Pabbly Connect to authenticate the connection.
  • Test the connection to ensure data is being sent correctly.

Once the integration is successful, OpenAI will generate the report based on the information received from Google Sheets.


5. Creating Documents in Google Docs

After generating the research report using OpenAI, the final step is to save this report in Google Docs using Pabbly Connect. Select Google Docs as your action application and choose ‘Create Document’ as your action event.

Map the necessary fields from the OpenAI response to the document fields in Google Docs. This will ensure that the generated report is saved correctly as a new document in your Google account.

Finally, test the action to confirm that the document is created successfully in Google Docs. Once confirmed, your automation is complete, and you can now generate research reports automatically with just a few clicks.


Conclusion

In this tutorial, we explored how to automate research report generation using Pabbly Connect, Google Sheets, OpenAI, and Google Docs. By following these steps, you can save time, enhance accuracy, and streamline your reporting process effectively.

Ensure you check out Pabbly Connect to create business automation workflows and reduce manual tasks. Pabbly Connect currently offer integration with 2,000+ applications.

Automate Task Management Using AI Agent with Pabbly Connect

Learn how to automate task management using Pabbly Connect to integrate Google Drive, OpenAI, and Google Sheets seamlessly. Discover how to seamlessly connect your essential tools through accessible instructions that make powerful automation available to professionals at every skill level.

Watch Step By Step Video Tutorial Below


1. Access Pabbly Connect for Automation

To automate task management using Pabbly Connect, you first need to access the platform. Start by navigating to Pabbly Connect by entering ‘Pabbly.com/connect’ in your web browser. This will take you to the Pabbly Connect homepage where you can sign up or log in.

If you are a new user, click on ‘Sign Up Free’ to create an account and receive 100 free tasks each month. Existing users can simply click on ‘Sign In’. After logging in, you will be directed to your Pabbly Connect dashboard, which is essential for creating your automation workflows.


2. Create a Workflow in Pabbly Connect

Once you are in your Pabbly Connect dashboard, the next step is to create a workflow. Click on the ‘Create Workflow’ button located at the top right corner of the dashboard. In the dialog box that appears, name your workflow something like ‘Automate Task Management Using AI Agent’. using Pabbly Connect

  • Choose a folder to save your workflow.
  • Select an existing folder or create a new one as needed.
  • Click ‘Create’ to finalize your workflow setup.

After creating the workflow, you will see the two main components of automation: Trigger and Action. Triggers will initiate the automation process, while actions define what happens in response to those triggers.


3. Set Up Trigger with Google Drive

In this section, you will set up the trigger using Google Drive. Select Google Drive as your trigger application and choose the event ‘New File in Specific Folder’. This ensures that the workflow is activated whenever a new file is uploaded to the designated folder.

To connect your Google Drive with Pabbly Connect, click on ‘Connect’ and select ‘Add New Connection’. Sign in with your Google account and allow Pabbly Connect the necessary permissions. Once connected, select the specific folder where your project files will be uploaded.


4. Extract Tasks Using OpenAI

After setting up the trigger, the next step is to extract tasks from the uploaded file using OpenAI. In the action step, select OpenAI as your application and choose the action event ‘Extract Content from PDF or Image’. This action will allow you to extract actionable tasks from the uploaded project report. using Pabbly Connect

  • Enter your OpenAI API token to establish a connection.
  • Map the PDF URL from the previous trigger step to enable data flow.
  • Provide a relevant prompt to guide the AI in extracting the necessary task details.

Once you have configured these settings, click ‘Save and Send Test Request’ to verify the connection and ensure that task details are successfully extracted.


5. Add Extracted Tasks to Google Sheets

Finally, to complete the automation process, you will add the extracted tasks into Google Sheets. Select Google Sheets as your action application and choose the event ‘Add a New Row’. This action will take the task details extracted by OpenAI and log them into your specified Google Sheets document.

Connect to Google Sheets by clicking ‘Connect’ and signing in with your Google account. Choose the spreadsheet and specific sheet where you want the tasks to be recorded. Map the fields accordingly, such as client name and task description, to ensure accurate data entry.

After mapping the necessary fields, click ‘Save and Send Request’. You should see a successful response indicating that the new row has been added to your Google Sheets. This completes the automation setup using Pabbly Connect.


Conclusion

In this tutorial, we demonstrated how to automate task management using Pabbly Connect to integrate Google Drive, OpenAI, and Google Sheets. By following the specified steps, you can streamline your workflow and enhance productivity effectively.

Ensure you check out Pabbly Connect to create business automation workflows and reduce manual tasks. Pabbly Connect currently offer integration with 2,000+ applications.