Automate Daily Tweets Using Pabbly Connect and Google Sheets

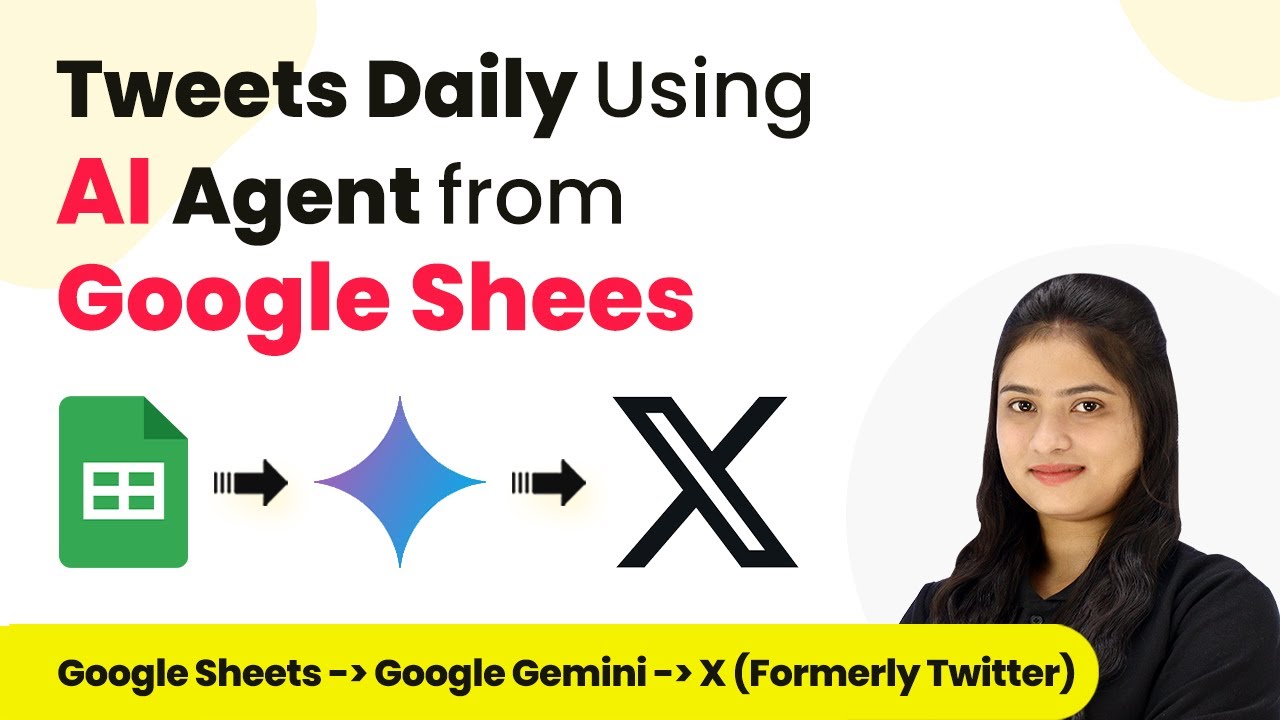
Learn how to automate daily tweets using Pabbly Connect, Google Sheets, and AI agents like Gemini. Step-by-step tutorial for seamless integration. Discover hidden automation capabilities within your existing tools. This guide shows you how to connect your essential applications and permanently eliminate redundant manual processes.

Watch Step By Step Video Tutorial Below


1. Accessing Pabbly Connect for Automation

To automate daily tweets using Pabbly Connect, first, access the platform by visiting Pabbly Connect at Pabbly.com/connect. Here, you will find options to sign in or sign up for free.

If you’re new, click on the ‘Sign up for free’ button to create an account. Once registered, you’ll receive 100 free tasks monthly to explore the powerful features of Pabbly Connect and test various automations.


2. Creating a Workflow in Pabbly Connect

After signing in, navigate to the dashboard of Pabbly Connect. Click on the ‘Create Workflow’ option to start building your automation. Name your workflow ‘Tweet Daily Using AI Agents from Google Sheets’ and select an appropriate folder for organization.

  • Select the trigger application: Google Sheets.
  • Choose the trigger event: New or Updated Spreadsheet Row.
  • Connect Google Sheets to Pabbly Connect using the provided webhook URL.

After configuring the trigger, your automation is set to respond when new data is added to Google Sheets, allowing the AI agent to generate tweets automatically.


3. Setting Up Google Sheets with Pabbly Connect

To link Google Sheets with Pabbly Connect, install the Pabbly Connect Webhooks add-on from the Google Workspace Marketplace. Once installed, refresh your spreadsheet to access the add-on.

In the add-on settings, paste the webhook URL from Pabbly Connect and specify the trigger column where new tweet titles will be added. For example, if column B is your title column, set it as your trigger column.

  • Test the connection by clicking ‘Send Test’ in the add-on.
  • Ensure data is sent successfully to Pabbly Connect.

By completing this setup, you ensure that every new title added in your Google Sheets triggers the automation process in Pabbly Connect.


4. Integrating AI Agent with Pabbly Connect

Next, set up the AI agent, Gemini, as an action in Pabbly Connect. Select Google AI Studio as your action application and choose the action event to generate content.

Connect your Gemini account by providing the API key obtained from the Google AI Studio. This key allows Pabbly Connect to access Gemini’s capabilities for generating tweet content based on the titles from Google Sheets.

Input the prompt for generating tweets, ensuring it aligns with your digital marketing theme. Map the title from the previous step to ensure dynamic content generation.

Once configured, Pabbly Connect will automatically generate tweets based on the titles provided in Google Sheets, streamlining your social media engagement.


5. Posting Tweets Automatically with Pabbly Connect

To finalize the automation, set up the action to post tweets on X (formerly Twitter). Select X as your action application and choose the action event ‘Create Tweet’.

Connect your X account to Pabbly Connect by providing the required client ID and secret obtained from your X developer account. This establishes a secure connection for posting tweets.

Map the tweet content generated by Gemini to the tweet message field. Click ‘Save and Send Test Request’ to ensure the tweet posts successfully.

With this setup, every time a new title is added to Google Sheets, Pabbly Connect will generate and post a tweet automatically, ensuring consistent engagement on your X handle.


Conclusion

By following this tutorial, you can effectively automate your tweeting process using Pabbly Connect, Google Sheets, and AI agents like Gemini. This integration not only saves time but also enhances your social media strategy.

Ensure you check out Pabbly Connect to create business automation workflows and reduce manual tasks. Pabbly Connect currently offer integration with 2,000+ applications.

Integrate Pabbly Form Builder Submissions into Google Sheets with Pabbly Connect

Learn how to automate Pabbly Connect submissions into Google Sheets using Pabbly Connect in this step-by-step tutorial. Follow this definitive guide to creating powerful automated workflows with straightforward, efficiency-focused solutions that save valuable time.

Watch Step By Step Video Tutorial Below


1. Accessing Pabbly Connect for Automation

To automate Pabbly Form Builder submissions into Google Sheets, start by accessing Pabbly Connect. Open your web browser and navigate to Pabbly Connect’s homepage by typing the URL Pabbly.com/connect/inr.

Once on the homepage, you will see options to sign in or sign up for free. If you are a new user, click on sign up for free to create an account. Existing users should click sign in to access their dashboard. After logging in, you will arrive at the Pabbly Connect dashboard where you can create workflows.


2. Creating a New Workflow in Pabbly Connect

After accessing the Pabbly Connect dashboard, the next step is to create a new workflow. Click on the create workflow button. A dialog box will prompt you to name your workflow. Enter a name like ‘Pabbly Form Builder Submission in Google Sheets’ and select an appropriate folder for organization.

  • Click on create to proceed.
  • You will see two sections: Trigger and Action.
  • Select Pabbly Form Builder as the trigger application.

By setting up this workflow, you can automate the process of adding form submissions to Google Sheets. The trigger will initiate the workflow when a new form submission occurs in Pabbly Form Builder.


3. Setting Up the Trigger with Pabbly Form Builder

In the trigger section, select Pabbly Form Builder and choose the event New Form Submission. This means that every time a form is submitted, it will trigger the workflow. You will receive a webhook URL that acts as a bridge between Pabbly Form Builder and Pabbly Connect.

Next, go to your Pabbly Form Builder dashboard, find the form you want to connect, and navigate to the Integration section. Here, click on Create Webhook. Paste the webhook URL you copied from Pabbly Connect and click on Save. This setup allows Pabbly Connect to receive data from form submissions.


4. Adding Google Sheets as an Action in Pabbly Connect

After setting up the trigger, it’s time to define the action. Select Google Sheets as the action application and choose the event Add New Row. This action will create a new row in your specified Google Sheet every time a form is submitted.

  • Click on Connect to establish a connection with Google Sheets.
  • Authorize Pabbly Connect to access your Google account.
  • Select the specific spreadsheet where you want to add the records.

Ensure that the fields in your Google Sheet match the data you want to collect, such as first name, last name, email, phone number, and course name. This mapping allows the data to flow seamlessly from Pabbly Form Builder to Google Sheets.


5. Testing the Integration Between Pabbly Form Builder and Google Sheets

Once you have set up the action, it’s crucial to test the integration. Go back to your Pabbly Form Builder, open the form, and make a test submission. Fill in the required fields and click Submit. This action will send the data to Pabbly Connect.

Return to the Pabbly Connect dashboard. You should see that the response has been captured. Check your Google Sheets to confirm that a new row has been added with the submitted information. This confirms that your integration is functioning correctly.

Repeat the test with different data to ensure consistency in capturing form submissions. By following these steps, you can effectively automate the process of adding Pabbly Form Builder submissions into Google Sheets without any coding.


Conclusion

In this tutorial, we explored how to integrate Pabbly Form Builder submissions into Google Sheets using Pabbly Connect. By following the steps outlined, you can automate your data collection process efficiently. This integration saves time and ensures that all submissions are recorded accurately in Google Sheets.

Ensure you check out Pabbly Connect to create business automation workflows and reduce manual tasks. Pabbly Connect currently offer integration with 2,000+ applications.

How to Send & Get Automated WhatsApp Messages on Gravity Forms Submission using Pabbly Chatflow

Learn how to automate WhatsApp messages on Gravity Forms submissions using Pabbly Connect and Pabbly Connect. Step-by-step guide included. Explore efficient methods for automating routine tasks with clear, concise instructions suited for both newcomers and experienced professionals.

Watch Step By Step Video Tutorial Below


1. Setting Up Pabbly Connect for Integration

To begin automating WhatsApp messages on Gravity Forms submission, you need to access Pabbly Connect. This platform enables seamless integration between various applications, including Gravity Forms and WhatsApp.

Start by visiting the Pabbly Connect homepage. If you are a new user, sign up for a free account to explore its features. Existing users can simply log in to their accounts. Once logged in, you will be directed to the main dashboard where you can create workflows.


2. Creating a Workflow in Pabbly Connect

In this section, you will create a workflow that connects Gravity Forms with WhatsApp using Pabbly Connect. Click on the ‘Create Workflow’ button located at the top right corner of the dashboard.

  • Name your workflow, for example, ‘Send and Get Automated WhatsApp Message on Gravity Forms Submission’.
  • Select a folder to save your workflow, or create a new folder if necessary.

After naming your workflow and selecting a folder, you will see the trigger and action setup. The trigger will be set to ‘Gravity Forms’ to capture new submissions.


3. Configuring Gravity Forms to Trigger Pabbly Connect

Next, you need to configure the Gravity Forms to send data to Pabbly Connect. Select the ‘New Response’ trigger event. This means that whenever a new form submission occurs, Pabbly Connect will capture the response.

After selecting the trigger event, you will receive a webhook URL. Copy this URL as it will be used to connect Gravity Forms with Pabbly Connect. Now, head over to your WordPress dashboard where Gravity Forms is installed.

  • Navigate to the Forms section and select the form you want to integrate.
  • Go to Settings and then Webhooks to add a new webhook.
  • Paste the copied webhook URL and configure the request method as POST with the format as JSON.

After saving the settings, you will have successfully connected Gravity Forms with Pabbly Connect.


4. Sending Automated WhatsApp Messages Using Pabbly Chatflow

Now that you have set up the webhook, it’s time to send automated WhatsApp messages using Pabbly Chatflow. In your Pabbly Connect workflow, select ‘Pabbly Chatflow’ as the action application.

Choose the action event as ‘Send Template Message’. You will need to connect your Pabbly Chatflow account by entering the API token from your Chatflow settings. Once connected, you can map the recipient’s phone number from the Gravity Forms submission directly into the workflow.

Ensure the phone number is entered without the plus sign and includes the country code. Select the template name you created in Pabbly Chatflow for the message.

After configuring these settings, save and test the workflow to ensure that the WhatsApp message is sent successfully upon a new Gravity Forms submission.


5. Receiving Lead Alerts on WhatsApp

To complete the automation, set up another action in your Pabbly Connect workflow to send lead alert messages to your WhatsApp. Again, choose ‘Pabbly Chatflow’ and select the action event as ‘Send Template Message’. using Pabbly Connect

For this step, enter your own WhatsApp number as the recipient to receive alerts for new leads. Select the lead alert template you created in Pabbly Chatflow, which includes variables for the lead’s name, email, and phone number.

Map the lead’s details as variables in the message template. Save the settings and test the workflow.

Once configured, you will receive an automated lead alert on WhatsApp each time a new form submission occurs, ensuring timely follow-ups.


Conclusion

In this tutorial, we explored how to use Pabbly Connect and Pabbly Chatflow to send and receive automated WhatsApp messages upon Gravity Forms submissions. This integration enhances communication and streamlines lead management for your business.

Ensure you check out Pabbly Connect to create business automation workflows and reduce manual tasks. Pabbly Connect currently offer integration with 2,000+ applications.

Integrate Zoho Books with Razorpay Using Pabbly Connect: A Step-by-Step Guide

Learn how to automate invoice creation in Zoho Books when receiving payments via Razorpay using Pabbly Connect. Follow our detailed tutorial for seamless integration. Explore efficient methods for automating routine tasks with clear, concise instructions suited for both newcomers and experienced professionals.

Watch Step By Step Video Tutorial Below


1. Setting Up Pabbly Connect for Zoho Books and Razorpay Integration

To automate the process of creating a Zoho Books invoice upon receiving payments through Razorpay, you will first need to set up Pabbly Connect. This integration platform allows you to connect various applications seamlessly.

Start by visiting the Pabbly Connect homepage. If you are a new user, click on ‘Sign Up Free’ to create an account and receive 100 free tasks. Existing users should click on ‘Sign In’. After logging in, you will access the dashboard where you can create a new workflow.


2. Creating a Workflow in Pabbly Connect

In this section, you will create a workflow that connects Razorpay to Zoho Books using Pabbly Connect. Click on the ‘Create Workflow’ button located in the top right corner of the dashboard.

When prompted, name your workflow something like ‘Create Zoho Books Invoice on Razorpay Payment’. After naming, select a folder to save your workflow. You can create multiple folders for better organization. Now, let’s set up the trigger and action steps for this workflow.

  • Click ‘Create’ to start your workflow.
  • Choose Razorpay as your trigger application.
  • Select the trigger event as ‘Payment Captured’.

After selecting the trigger, Pabbly Connect will generate a webhook URL. This URL will be used to connect Razorpay to Pabbly Connect for capturing payment events.


3. Configuring Razorpay to Send Data to Pabbly Connect

Next, you need to configure Razorpay to send payment data to Pabbly Connect. Log in to your Razorpay account and navigate to the ‘Account and Settings’ section. Here, you will find the option for webhooks.

Click on ‘Add a New Webhook’. In the dialog box, paste the webhook URL you copied from Pabbly Connect. Set the active event to ‘Payment Captured’, matching the event you selected in your workflow. After saving, enable the webhook to start sending data to Pabbly Connect.


4. Testing the Integration with a Payment

To ensure your integration works correctly, you will need to test it by making a payment through Razorpay. Go to your Razorpay payment page and fill in the required details such as first name, last name, email, and phone number.

Select the payment option (e.g., UPI) and complete the payment. After making the payment, return to Pabbly Connect and check for a successful webhook response that includes the payment details.

  • Verify that the payment amount is correct.
  • Ensure that customer details are accurately captured.

Once you receive the response, you can proceed with creating the invoice in Zoho Books.


5. Creating an Invoice in Zoho Books

After successfully capturing the payment details, the next step is to create a new customer and invoice in Zoho Books using Pabbly Connect. Add a new action step in your workflow and select Zoho Books as the action application.

Choose ‘Create Contact’ as your action event. Connect your Zoho Books account by entering the domain name and authorizing Pabbly Connect to access your account. Map the customer details from the Razorpay payment data to create a new customer in Zoho Books.

Select the organization in Zoho Books. Map the customer’s name, email, and phone number.

Following this, add another action step to create an invoice by selecting ‘Create Sales Invoice’. Map the necessary fields such as customer ID, product name, and amount. Finally, send the request to create the invoice, which will appear in your Zoho Books account.


Conclusion

By following this tutorial, you have successfully integrated Razorpay with Zoho Books using Pabbly Connect. This automation allows you to create invoices seamlessly whenever a payment is received, saving you time and reducing errors in your financial records. Automate your processes today with Pabbly Connect for efficient management of your business operations.

Ensure you check out Pabbly Connect to create business automation workflows and reduce manual tasks. Pabbly Connect currently offer integration with 2,000+ applications.

How to Create LiveWebinar Registrant from Instagram Lead Ads Leads Using Pabbly Connect

Learn how to create a LiveWebinar registrant from Instagram Lead Ads leads using Pabbly Connect. Follow this step-by-step guide for seamless integration. Master proven automation processes with practical implementation examples and strategic recommendations you can apply immediately in your workflow.

Watch Step By Step Video Tutorial Below


1. Accessing Pabbly Connect for Instagram Lead Ads Integration

To create a LiveWebinar registrant from Instagram Lead Ads leads, start by accessing Pabbly Connect. This powerful integration platform simplifies the process of connecting various applications.

First, visit the Pabbly Connect website and sign in to your account. If you’re new, you can sign up for free and receive 100 tasks every month. Once logged in, click on the ‘Access Now’ button to navigate to the Pabbly Connect dashboard.


2. Creating a New Workflow in Pabbly Connect

Once in the Pabbly Connect dashboard, the next step is to create a new workflow. Click on the ‘Create Workflow’ button located in the top right corner. This will prompt a dialog box asking for the workflow name and folder selection. using Pabbly Connect

  • Name your workflow as ‘Create Live Webinar Registrant from Instagram Lead Ads Leads’.
  • Select a folder to save your workflow, such as ‘Live Webinar Automations’.

After entering the name and selecting the folder, click on the ‘Create’ button. You will now see two windows: one for the trigger and one for the action. This setup is crucial for automating the process.


3. Setting Up the Trigger with Instagram Lead Ads

The next step is to set up the trigger in Pabbly Connect. Choose ‘Instagram Lead Ads’ as your trigger application and select the event ‘New Lead Instant’. This ensures that every time a new lead is generated, it will trigger the workflow. using Pabbly Connect

Click the ‘Connect’ button to establish a connection. You will be prompted to add a new connection or select an existing one. Choose to connect with Instagram Leads and authorize the connection using your Facebook account.

  • Select the Facebook page associated with your Instagram account.
  • Choose the lead form you created, such as ‘New Lead Form’.

After saving the settings, you can generate a test lead using Instagram Lead Ads to ensure the connection is successful. This will confirm that Pabbly Connect is capturing the lead data.


4. Configuring the Action to Create a LiveWebinar Registrant

Now that the trigger is set up, it’s time to configure the action. Select ‘Live Webinar’ as the action application and choose the event ‘Create Webinar Registrant’. Click the ‘Connect’ button to establish a connection to your Live Webinar account. using Pabbly Connect

Authorize the connection by clicking on the ‘Authorize’ button. Once connected, you will need to select the specific webinar where you want to register the lead. Choose the webinar titled ‘Mastering Business Automation Strategies for Coaches’.

Map the registrant’s first name, last name, and email from the captured lead data. Ensure to set the confirmation email option to ‘Yes’.

After filling in all required details, click on the ‘Save and Test Request’ button to finalize the setup. This will create a registrant in your Live Webinar account using the lead data captured from Instagram.


5. Verifying the Successful Registration in Live Webinar

To confirm that the integration is successful, go to your Live Webinar account and check the registrants list. Under the ‘Manage Registrants’ section, you should see the new lead registered with the details provided during the test.

This automation between Instagram Lead Ads and Live Webinar using Pabbly Connect ensures that you can manage your leads efficiently without manual intervention. Now, every new lead from your Instagram ads will automatically be registered for your webinars.


Conclusion

In this tutorial, we demonstrated how to create a LiveWebinar registrant from Instagram Lead Ads leads using Pabbly Connect. By automating this process, you can focus on delivering valuable content to your audience without the hassle of manual data entry.

Ensure you check out Pabbly Connect to create business automation workflows and reduce manual tasks. Pabbly Connect currently offer integration with 2,000+ applications.

How to Create Brevo Contact on Gravity Forms Submission Using Pabbly Connect

Learn how to automate Brevo contact creation from Gravity Forms submissions using Pabbly Connect in this detailed step-by-step tutorial. Transform complex automation concepts into accessible, actionable steps that eliminate unnecessary manual work while maximizing existing application capabilities.

Watch Step By Step Video Tutorial Below


1. Accessing Pabbly Connect for Integration

To begin the process of creating a Brevo contact on Gravity Forms submission, you need to access Pabbly Connect. This platform serves as the central hub for automating your workflow.

After navigating to the Pabbly Connect website, sign in to your account. If you are a new user, you can sign up for free and receive 100 free tasks every month. Once logged in, you will see the dashboard where you can select the Pabbly Connect application by clicking on the ‘Access Now’ button.


2. Creating a Workflow in Pabbly Connect

After accessing Pabbly Connect, the next step is to create a workflow. Click on the ‘Create Workflow’ button located at the top right corner of your dashboard. A dialog box will appear, prompting you to name your workflow.

  • Name your workflow as ‘Create Brevo Contact on Gravity Form Submission’.
  • Select a folder where you want to save this workflow, such as ‘Gravity Forms Automations’.

Once you have named your workflow and selected the appropriate folder, click on the ‘Create’ button. This will set up your workflow, and you will see two windows: one for Trigger and another for Action. The trigger will capture the Gravity Forms submission while the action will create a contact in Brevo.


3. Setting Up the Trigger in Pabbly Connect

The first step in your workflow is to set up the trigger. For this integration, select ‘Gravity Forms’ as the trigger application. Then choose the event as ‘New Response’. This event will capture any new submissions made through your Gravity Forms.

After selecting the trigger application and event, Pabbly Connect will provide you with a unique webhook URL. Copy this URL as you will need it to connect your Gravity Forms with Pabbly Connect.

  • Log in to your Gravity Forms account and open the form you want to connect.
  • Go to Settings > Webhooks and click on ‘Add New’.
  • Paste the webhook URL into the URL field and select POST as the request method.
  • Save the settings to complete the webhook setup.

Now your Gravity Forms are connected to Pabbly Connect, and it will wait for a response from the form submission.


4. Setting Up the Action in Pabbly Connect

Once the trigger is set up, it’s time to configure the action step. For this, select ‘Brevo’ as the action application and choose the action event as ‘Create or Update Contact’. Click on the ‘Connect’ button to establish a connection.

A window will pop up asking for your Brevo domain and API key. You can find your API key in your Brevo account under SMTP & API settings. Generate a new API key if you haven’t done so already and paste it into the provided field in Pabbly Connect.

Select the list where you want your new contacts to be added, such as ‘New Leads’. Map the fields from the Gravity Forms submission to the corresponding fields in Brevo. Click on ‘Save and Send Test Request’ to verify the connection.

Once the test is successful, you will see the new contact added in your Brevo account, confirming that your workflow is functioning correctly through Pabbly Connect.


5. Testing the Integration of Gravity Forms and Brevo

To ensure everything is set up correctly, you can perform a test submission using your Gravity Forms. Click on the ‘Preview Form’ button to fill out the form with test data.

After submitting the form, return to your Pabbly Connect dashboard to check if the response has been captured. If everything is connected properly, you should see the new lead’s details reflected in your Brevo account.

Submit the form with test data, such as name, email, and phone number. Check your Brevo account to see if the new contact appears in the selected list.

This testing process confirms that your integration is successful and that Pabbly Connect has effectively automated the contact creation process.


Conclusion

In this tutorial, we explored how to automate the creation of Brevo contacts from Gravity Forms submissions using Pabbly Connect. By following these steps, you can streamline your lead management process and enhance your email marketing efforts seamlessly.

Ensure you check out Pabbly Connect to create business automation workflows and reduce manual tasks. Pabbly Connect currently offer integration with 2,000+ applications.

How to Create Brevo Contact on Zoho Forms Submission Using Pabbly Connect

Learn to create Brevo contacts automatically from Zoho Forms submissions using Pabbly Connect. Follow this detailed guide for seamless integration. Explore systematic approaches to creating efficient automation solutions that convert technical concepts into practical, implementable instructions.

Watch Step By Step Video Tutorial Below


1. Accessing Pabbly Connect for Integration

To create Brevo contacts from Zoho Forms submissions, you first need to access Pabbly Connect. Start by navigating to the Pabbly Connect landing page by entering Pabbly.com/connect in your browser’s address bar.

If you are a new user, click on the ‘Sign Up for Free’ button to create an account. Existing users can simply click on ‘Sign In’ to access their dashboard. Once logged in, locate the option to create a new workflow by clicking on the ‘Create Workflow’ button.


2. Creating a Workflow in Pabbly Connect

In this step, you will create a workflow to link Zoho Forms and Brevo through Pabbly Connect. After clicking ‘Create Workflow’, you will be prompted to name your workflow. Enter a suitable name, such as ‘Create Brevo Contact on Zoho Form Submission’, and select a folder to save your workflow.

Once the workflow is created, you will be directed to the workflow window. Here, you will set up the trigger and action. The trigger signifies an event that starts the workflow, while actions are the tasks performed in response. For this integration, select ‘Zoho Forms’ as the trigger application and ‘New Form Submitted’ as the trigger event.

  • Select ‘Zoho Forms’ from the application list.
  • Choose ‘New Form Submitted’ as the trigger event.
  • Copy the provided webhook URL for integration.

After copying the webhook URL, you will use it to connect your Zoho Forms account with Pabbly Connect.


3. Configuring Zoho Forms with Pabbly Connect

Now, log into your Zoho Forms account to integrate it with Pabbly Connect. Locate the form you want to use for this automation and click on ‘Edit’. In the form settings, navigate to the ‘Integrations’ tab and select ‘Webhooks’.

Here, enable the webhook status and paste the copied webhook URL into the designated field. For content type, select ‘application/json’ and set the authorization type to ‘None’. Finally, enter any required payload parameters and click ‘Save’ to complete the integration.

  • Enable the webhook status.
  • Paste the webhook URL into the webhook URL field.
  • Select ‘application/json’ for content type.

Once saved, your Zoho Forms will now send data to Pabbly Connect whenever a new form submission occurs.


4. Testing the Integration in Pabbly Connect

After configuring Zoho Forms, you need to test the integration to ensure it works correctly with Pabbly Connect. Perform a test submission on your Zoho form. Fill in the required fields, such as first name, last name, phone number, and email address, then submit the form.

Once submitted, return to your Pabbly Connect workflow. You should see that the webhook response has been captured, displaying the data you entered in the test submission. This confirms that the connection between Zoho Forms and Pabbly Connect is functioning as intended.


5. Creating Brevo Contact from Zoho Forms Submission

Now, it’s time to set up the action that will create a Brevo contact using the data captured from the Zoho Forms submission. In your workflow, select ‘Brevo’ as the action application and choose ‘Create or Update Contact’ as the action event. using Pabbly Connect

To connect your Brevo account, you will need to provide your Brevo domain and API key. Retrieve your API key from the SMTP and API section of your Brevo account. Once connected, map the fields from the Zoho form submission to the corresponding fields in Brevo, ensuring that all necessary details are included.

Select ‘Brevo’ as the action application. Choose ‘Create or Update Contact’ as the action event. Map the fields from Zoho Forms to Brevo.

Once the mapping is complete, save the action and run a test to verify that a new contact is created in your Brevo account. This finalizes the integration process, allowing you to automate contact creation seamlessly.


Conclusion

In this tutorial, we explored how to create Brevo contacts automatically from Zoho Forms submissions using Pabbly Connect. By following the steps outlined, you can streamline your workflow and enhance your email marketing efforts efficiently. Automation through Pabbly Connect ensures that every lead is captured without manual intervention, saving you time and resources.

Ensure you check out Pabbly Connect to create business automation workflows and reduce manual tasks. Pabbly Connect currently offer integration with 2,000+ applications.

Integrating Zoho Forms with Mailercloud Using Pabbly Connect

Learn how to automate Mailercloud subscriber creation or updates through Zoho Forms submissions using Pabbly Connect. Step-by-step guide included. Discover hidden automation capabilities within your existing tools. This guide shows you how to connect your essential applications and permanently eliminate redundant manual processes.

Watch Step By Step Video Tutorial Below


1. Accessing Pabbly Connect for Integration

To begin the integration process, you need to access Pabbly Connect. Start by searching for Pabbly.com/connect in your browser. Once on the landing page, you will see options to sign in or sign up for free. If you are a new user, click on ‘Sign up for free’ to get started with 100 tasks free every month.

As an existing user, click on ‘Sign in’. After signing in, you will be directed to the dashboard where you can access various Pabbly applications. Click on the ‘Access Now’ button under Pabbly Connect to proceed to your account dashboard. From here, you can create a new workflow to automate the process of creating or updating Mailercloud subscribers.


2. Creating a New Workflow in Pabbly Connect

In your Pabbly Connect dashboard, click on the ‘Create Workflow’ button. You will be prompted to name your workflow and select a folder for saving it. Name the workflow something descriptive, like ‘Create or Update Mailercloud Subscriber on Zoho Forms Submission’ and choose the ‘Automations’ folder. using Pabbly Connect

  • Click on the ‘Create’ button to open the workflow window.
  • This window will allow you to set up triggers and actions for your automation.

In the workflow window, you will select Zoho Forms as the trigger application. This means that whenever a new form submission is made, it will trigger the workflow. After selecting Zoho Forms, choose the trigger event as ‘New Form Submitted’. This sets up the initial condition for your automation.


3. Setting Up Zoho Forms for Pabbly Connect

After selecting your trigger event, Pabbly Connect will provide you with a webhook URL. Copy this URL as you will need it to configure your Zoho Forms. Log into your Zoho Forms account and navigate to the form you want to integrate. Click on ‘Edit’ to modify the form settings.

In the editing interface, find the ‘Integrations’ section on the left sidebar. Click on ‘Webhooks’ and enable it if it is not already enabled. Paste the copied webhook URL into the designated field and set the content type to ‘application/json’. After this, save your changes to link Zoho Forms with Pabbly Connect.


4. Testing the Integration with a Submission

To ensure that the integration works correctly, you need to perform a test submission on your Zoho form. Access the form and fill in the required fields with test data. For instance, you might enter a first name, last name, phone number, and email address.

  • After completing the form, click on ‘Submit’.
  • Pabbly Connect will capture this submission and process it according to the workflow you set up.

Once the submission is made, return to your Pabbly Connect workflow. You should see that the webhook response has been received, confirming that the data was successfully sent from Zoho Forms to Pabbly Connect. This indicates that your trigger step is functioning as intended.


5. Integrating Mailercloud with Pabbly Connect

Now that your Zoho Forms submission is successfully triggering the workflow, it’s time to set up the action to create or update a Mailercloud subscriber. In the action application section, search for Mailercloud and select it. Choose the action event as ‘Create or Update Subscriber’.

You will need to connect your Mailercloud account by providing the API key. You can find this key in your Mailercloud account under the API Integrations section. Copy the API key and paste it into the appropriate field in Pabbly Connect.

Select the list where you want to add the subscriber. Map the fields from the Zoho Forms submission to the corresponding fields in Mailercloud.

After mapping the necessary fields, click on ‘Save’. You will receive a confirmation that the subscriber has been successfully created or updated in your Mailercloud account. This demonstrates how Pabbly Connect efficiently automates the process, eliminating the need for manual entries.


Conclusion

In this tutorial, we explored how to automate the creation or updating of Mailercloud subscribers using Zoho Forms submissions through Pabbly Connect. This integration allows for seamless data management and enhances engagement without manual effort. By following these steps, you can easily set up similar automations for your business needs.

Ensure you check out Pabbly Connect to create business automation workflows and reduce manual tasks. Pabbly Connect currently offer integration with 2,000+ applications.

Integrating IndiaMART Leads to Google Sheets Using Pabbly Connect

Learn how to automate adding IndiaMART leads to Google Sheets for Biotechnology Services using Pabbly Connect. Step-by-step tutorial included. Discover how to seamlessly connect your essential tools through accessible instructions that make powerful automation available to professionals at every skill level.

Watch Step By Step Video Tutorial Below


1. Introduction to Pabbly Connect for Automation

In this section, we will explore how to utilize Pabbly Connect to automate the process of adding IndiaMART leads to Google Sheets. This integration is essential for streamlining lead management for biotechnology services. By using Pabbly Connect, you can ensure that every new lead generated in your IndiaMART account is recorded automatically in Google Sheets.

To get started, visit the Pabbly Connect website and sign in to your account. If you are a new user, you can register for free and receive 100 tasks monthly. Once logged in, you will be presented with the dashboard where you can create workflows to connect various applications seamlessly.


2. Creating a Workflow in Pabbly Connect

To create a new workflow in Pabbly Connect, click on the ‘Create Workflow’ button located at the top right corner of the dashboard. A dialog box will appear asking for a workflow name and folder selection. Name your workflow as ‘Add IndiaMART Leads to Google Sheets for Biotechnology Services’ and select the appropriate folder to save this workflow.

  • Click on the ‘Create’ button to finalize the workflow.
  • You will see a split screen with two sections: Trigger and Action.

The next step is to set up the trigger for your workflow. Select ‘IndiaMART’ as the trigger application and choose the event as ‘New Leads’. This setup ensures that every time a new lead is generated, Pabbly Connect will capture the details automatically.


3. Setting Up the Trigger in Pabbly Connect

After selecting ‘IndiaMART’ as your trigger application, Pabbly Connect will provide you with a webhook URL. Copy this URL, as you will need it to connect your IndiaMART account with Pabbly Connect. Log into your IndiaMART account and navigate to the Lead Manager section.

  • Go to ‘Import/Export Leads’ and select the ‘Push API’ option.
  • In the platform name field, enter ‘Pabbly Connect’ and paste the webhook URL.
  • Click on the ‘Save’ button to establish the connection.

Once the webhook is set up in IndiaMART, return to Pabbly Connect. You will see a message indicating that it is waiting for a webhook response. To test the connection, generate a test lead in your IndiaMART account to verify that Pabbly Connect captures the details correctly.


4. Configuring the Action in Google Sheets

Now that the trigger is successfully set up, it’s time to configure the action in Google Sheets using Pabbly Connect. Select ‘Google Sheets’ as your action application and choose the event ‘Add New Row’. This action will allow you to create a new record in your Google Sheets for every new lead captured.

Click on the ‘Connect’ button and authorize Pabbly Connect to access your Google Sheets. After authorization, select the specific spreadsheet where you want to store the lead details. Ensure that your spreadsheet has headers for all the necessary fields such as Unique Query ID, Name, Email, Phone Number, Company, Address, City, State, Country, Product Name, and Message.

Map the data fields from the previous step to the corresponding headers in your Google Sheets. Ensure that all required fields are filled with the correct data.

After mapping the fields, click on the ‘Save and Send Test Request’ button. If everything is set up correctly, you should receive a positive response indicating that the lead details have been successfully added to your Google Sheets.


5. Verifying the Integration Success

To confirm that the integration between IndiaMART and Google Sheets via Pabbly Connect is successful, check your Google Sheets for the new lead record. The details should appear in the specified spreadsheet with all mapped fields populated correctly.

This automation saves you time and effort by eliminating manual data entry. You can now focus on engaging with your potential clients and converting leads into customers. With Pabbly Connect, you can automate not just this process but many others, enhancing your overall productivity.

In summary, using Pabbly Connect to integrate IndiaMART leads into Google Sheets streamlines your workflow and ensures that you never miss a lead again. By following the steps outlined above, you can set up this automation quickly and efficiently.


Conclusion

In conclusion, integrating IndiaMART leads with Google Sheets using Pabbly Connect is a powerful way to automate your lead management process. This tutorial provided a step-by-step guide to ensure you can set up the integration smoothly. Now, you can focus on converting leads into customers without the hassle of manual entry.

Ensure you check out Pabbly Connect to create business automation workflows and reduce manual tasks. Pabbly Connect currently offer integration with 2,000+ applications.

How to Add IndiaMART Leads to Salesforce Using Pabbly Connect

Learn how to seamlessly integrate IndiaMART leads into Salesforce for Digital Flex Printing Services using Pabbly Connect. Step-by-step tutorial included. Revolutionize your productivity approach with just a few strategic clicks. Uncover professional methods for connecting applications and creating workflows that reclaim hours of your week.

Watch Step By Step Video Tutorial Below


1. Accessing Pabbly Connect for Integration

To integrate IndiaMART leads into Salesforce, start by accessing Pabbly Connect. First, go to the Pabbly Connect website and log in to your account. If you are a new user, you can sign up for free and receive 100 free tasks each month, making it easy to get started.

Once logged in, you will see the dashboard. Click on the ‘Access Now’ button under Pabbly Connect. This will take you to the Pabbly Connect dashboard where you can create a new workflow. Follow these steps to initiate the integration process:

  • Go to the top right corner and click on ‘Create Workflow’.
  • Name your workflow, for instance, ‘Add IndiaMART Leads to Salesforce’.
  • Select a folder to save your workflow.

By following these steps, you will successfully set up the groundwork for integrating IndiaMART leads into Salesforce using Pabbly Connect.


2. Setting Up the Trigger for IndiaMART Leads

Next, it is essential to set up the trigger in your Pabbly Connect workflow. The trigger will initiate the process whenever a new lead is generated in your IndiaMART account. Select IndiaMART as the trigger application and choose the event as ‘New Leads’.

After selecting the trigger, Pabbly Connect will provide you with a unique webhook URL. Copy this URL to connect your IndiaMART account. To do this, log into your IndiaMART account and navigate to the Lead Manager section. Click on the menu button and select ‘Import/Export Leads’, then go to the Push API section where you will configure the webhook.

  • Select ‘Other’ as the source platform.
  • Enter ‘Pabbly Connect’ as the platform name.
  • Paste the copied webhook URL in the URL field.

By completing these steps, you will successfully set up the trigger for capturing leads from IndiaMART using Pabbly Connect.


3. Testing the Trigger Connection

Once the webhook is configured, it’s crucial to test the connection to ensure everything is set up correctly. In Pabbly Connect, the workflow will show ‘Waiting for webhook response’. To test, generate a test lead in your IndiaMART account.

To create a test lead, navigate to your IndiaMART user account and select a dummy product. Click on the ‘Contact Supplier’ button and fill in the inquiry message. After submitting the inquiry, return to Pabbly Connect and check if the test lead’s details have been captured successfully.

Ensure the response includes details such as lead ID, name, and inquiry message. Verify that the status shows success in the webhook response.

Once the test lead is captured, it confirms that the connection between IndiaMART and Pabbly Connect is working effectively.


4. Setting Up the Action in Salesforce

Now that the trigger is set up, the next step is to configure the action in Salesforce. In Pabbly Connect, select Salesforce as the action application and choose ‘Create Lead’ as the action event. Click on the connect button to authorize the Salesforce account.

After connecting, Pabbly Connect will prompt you to fill in the details required to create a lead in Salesforce. You will need to map the fields from the previous step to ensure that the lead details are correctly transferred. This includes mapping the first name, last name, company name, and contact details.

Map the first name and last name from the lead response. Set the title as ‘New Lead’ and specify the source as ‘IndiaMART Lead’. Fill in the address, city, and other required fields.

Completing these mappings ensures that every new lead generated in IndiaMART is automatically added to Salesforce through Pabbly Connect.


5. Finalizing the Integration and Verifying Leads

After mapping all the necessary fields, click on the ‘Save and Test Request’ button in Pabbly Connect. This will send the lead information to Salesforce. Once you receive a positive response, check your Salesforce account to confirm that the new lead has been created.

Refresh the leads page in Salesforce, and you should see the new lead listed with all the details you mapped. This confirms that the integration is successful and that Pabbly Connect is effectively automating the process of adding IndiaMART leads to Salesforce.

Verify that all lead details match the inquiry submitted from IndiaMART. Check the status and ensure it reflects the correct information.

This step finalizes the integration process, allowing you to manage your leads more efficiently using Pabbly Connect.


Conclusion

Integrating IndiaMART leads into Salesforce using Pabbly Connect streamlines the management of inquiries for Digital Flex Printing Services. By following the steps outlined in this tutorial, you can automate lead capture, ensuring no potential orders are missed and enhancing customer relationships effectively.

Ensure you check out Pabbly Connect to create business automation workflows and reduce manual tasks. Pabbly Connect currently offer integration with 2,000+ applications.