Creating Templates Inside Pabbly Chatflow: A Step-by-Step Guide

Learn how to create templates inside Pabbly Connect using Pabbly Connect for seamless automation. Follow our detailed tutorial for effective WhatsApp messaging. Navigate the automation landscape confidently with clear, structured guidance suitable for professionals regardless of prior technical experience.

Watch Step By Step Video Tutorial Below


1. Accessing Pabbly Chatflow and Understanding Templates

To begin using Pabbly Connect for creating templates in Pabbly Chatflow, first, log into your Pabbly Chatflow account. Once logged in, navigate to the left sidebar where you will find the ‘Templates’ option. This section is crucial as it houses all your created templates and allows you to manage them efficiently.

Templates in Pabbly Chatflow are pre-approved message formats designed to streamline your communication with customers via WhatsApp. They enable businesses to send structured, automated messages without needing constant approvals. These templates can be used for various purposes such as order confirmations, appointment reminders, and customer feedback requests.


2. Creating Your First Template in Pabbly Chatflow

To create a new template, click on the ‘Add New Template’ button, which is highlighted in blue. You will then be directed to the new template creation section where you can start building your template. The first step is to select the category of your template, either ‘Marketing’ or ‘Utility’, based on your needs. using Pabbly Connect

  • Marketing templates are for promotional messages.
  • Utility templates are for transactional messages.

After selecting the appropriate category, provide a specific name for your template using only lowercase letters and underscores. Next, choose the language for your message and specify the type of template, such as text, image, or document. This structured approach ensures that your template meets the requirements for effective customer communication.


3. Customizing Your Template with Variables and Buttons

Once the basic details are set, you can move on to customizing your template. In this step, you can add a header, body, and footer to your message. For instance, you might enter a header like ‘Thank You for Shopping’ to grab attention. The body of the message is where you can engage with your customers by using dynamic variables. using Pabbly Connect

  • Use variables to personalize messages, such as customer names or product details.
  • You can also add interactive buttons for quick replies.

For example, if you want to ask for feedback on a product, you can create a message that dynamically includes the customer’s name and the product they purchased. This personalization enhances customer engagement and makes your communication more effective.


4. Submitting Your Template for Approval

After customizing your template, the next step is to submit it for approval. Click the ‘Submit’ button to send your template to the Pabbly Connect system for review. Once approved, your template will be listed in the template management area where you can monitor its status. using Pabbly Connect

Approved templates can be utilized for sending messages to customers, ensuring that your communications are consistent and professional. You can also track the health of your templates based on customer interactions, which helps you refine your messaging strategy over time.


5. Using Templates to Enhance Customer Communication

Once your templates are approved, you can start using them to send messages to customers through Pabbly Chatflow. For instance, if you created a feedback request template, you can easily deploy it to gather customer insights. This not only saves time but also ensures that your messages are aligned with your brand’s voice. using Pabbly Connect

Additionally, you can manage customer replies effectively within Pabbly Chatflow. The system allows you to see which messages were sent and the responses received, providing valuable data for improving customer interactions. This way, Pabbly Connect not only facilitates the creation of templates but also enhances overall communication efficiency.


Conclusion

Creating templates inside Pabbly Chatflow using Pabbly Connect is a powerful way to automate your WhatsApp messaging. By following this tutorial, you can efficiently set up templates that cater to your business needs, improve customer engagement, and streamline communication.

Ensure you check out Pabbly Connect to create business automation workflows and reduce manual tasks. Pabbly Connect currently offer integration with 2,000+ applications.

Pabbly Chatflow Contact Overview: A Comprehensive Tutorial

Learn how to effectively manage contacts using Pabbly Connect and Pabbly Connect in this detailed tutorial. Discover step-by-step integration processes. Navigate the automation landscape confidently with clear, structured guidance suitable for professionals regardless of prior technical experience.

Watch Step By Step Video Tutorial Below


1. Accessing Pabbly Connect for Contact Management

To start using Pabbly Connect for managing your contacts, first, log into your Pabbly account. Once logged in, navigate to the Pabbly Chatflow dashboard where you will find options to manage your contacts effectively.

In the dashboard, locate the ‘Contacts’ section on the left-hand side. This area provides a well-organized view of all your contacts. You can see the total number of contacts added to your Pabbly Chatflow account, along with their opt-in status for receiving messages.


2. Creating Contact Lists in Pabbly Chatflow

Creating contact lists is essential for organizing your audience in Pabbly Connect. To create a new contact list, click on the ‘Add New Contact List’ button. This will prompt you to enter the name of your contact list and select relevant tags.

  • Enter the name for your contact list.
  • Choose tags that categorize your contacts.
  • Select the opt-in status for your contacts.

After entering these details, click the ‘Add’ button to create your contact list. This allows you to efficiently manage contacts based on various criteria such as location and interest.


3. Adding Contacts Manually and in Bulk

In Pabbly Connect, you can add contacts either manually or in bulk. To add a single contact, click on the ‘Add Contact’ button and fill in the required fields such as name, phone number, and email address.

  • Input the contact’s first name and last name.
  • Enter the phone number and email address.
  • Select the opt-in status.

For bulk adding, you can upload a CSV file containing all your contacts. Ensure that the CSV file is formatted correctly with the necessary fields. Drag and drop the file into the designated area in the Pabbly Chatflow interface to import your contacts seamlessly.


4. Managing Custom Fields in Pabbly Chatflow

Custom fields in Pabbly Connect allow you to store additional information about your contacts. To manage these fields, go to the ‘Contact Custom Fields’ section in the settings. Here, you can create fields for data such as address, company name, or any other relevant details.

After creating custom fields, they will appear when adding or editing contacts. This feature enables you to personalize your communication and segment your audience more effectively based on the custom data collected.


5. Using Tags for Efficient Segmentation

Tags are crucial for organizing your contacts in Pabbly Connect. In the ‘Tags’ section, you can create and manage tags that help you categorize your contacts based on behavior or any other criteria. For instance, you might want to tag contacts who have purchased a specific product.

To create a tag, click on the ‘Add Tag’ button, enter a name for the tag, and save it. You can then apply tags to individual contacts or bulk apply them to multiple contacts for easier segmentation.


Conclusion

In this tutorial, we explored how to manage contacts using Pabbly Connect and Pabbly Chatflow. We covered accessing the platform, creating contact lists, adding contacts, managing custom fields, and using tags for segmentation. By following these steps, you can efficiently manage your contacts and enhance your communication strategies.

Ensure you check out Pabbly Connect to create business automation workflows and reduce manual tasks. Pabbly Connect currently offer integration with 2,000+ applications.

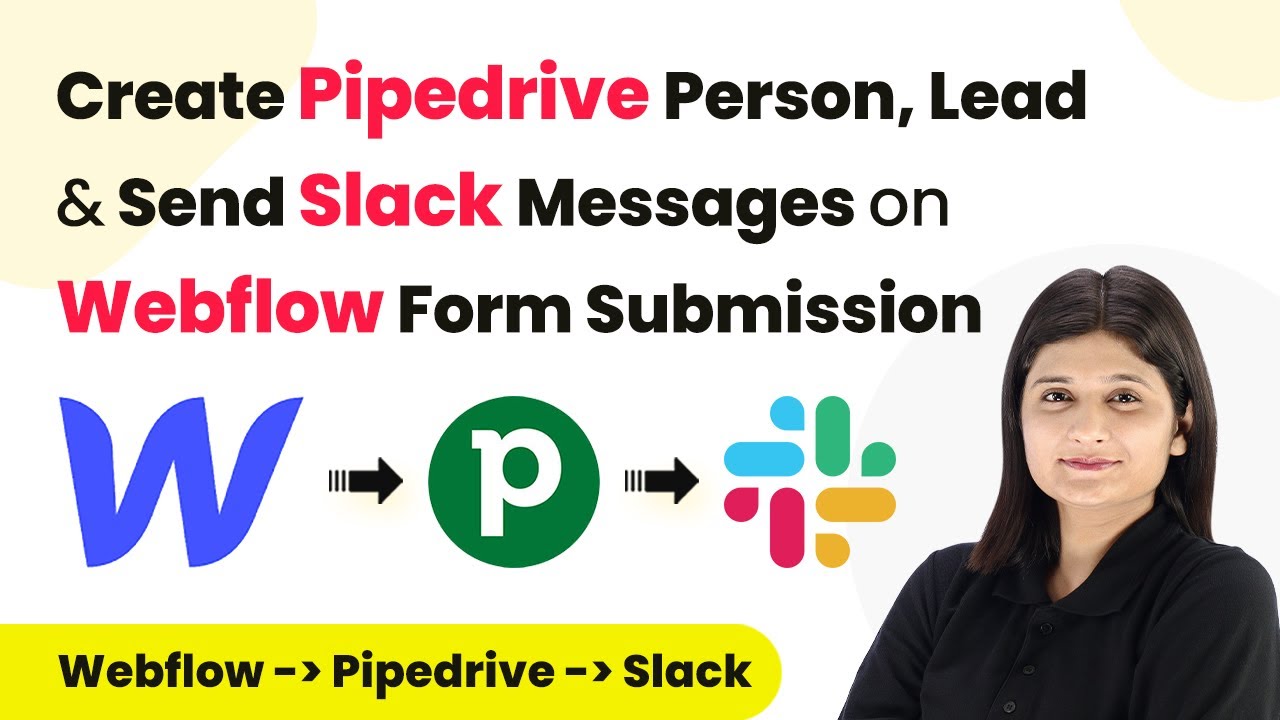
Integrate Slack and Pipedrive with Webflow Using Pabbly Connect

Learn how to automate Pipedrive and Slack integrations with Webflow form submissions using Pabbly Connect. Step-by-step tutorial for seamless workflows. Transform complex automation concepts into accessible, actionable steps that eliminate unnecessary manual work while maximizing existing application capabilities.

Watch Step By Step Video Tutorial Below


1. Accessing Pabbly Connect for Integration

To start the integration process, first, access Pabbly Connect. This platform allows you to automate workflows between various applications, including Slack, Pipedrive, and Webflow.

Begin by visiting the Pabbly Connect website and signing in to your account. If you’re a new user, you can sign up for free, which grants you 100 tasks monthly. Once logged in, navigate to the Pabbly Connect dashboard, where you can create and manage your workflows.


2. Setting Up Webflow Form Submission Trigger

In this section, we will set up the trigger for our workflow using Pabbly Connect. The goal is to capture form submissions from Webflow and initiate the automation.

  • Select Webflow as your trigger application.
  • Choose the trigger event as ‘Form Submitted.’
  • Create a new connection by entering the API token from your Webflow account.

After entering the necessary details, click on the ‘Save and Send Test Request’ button. This will ensure that the connection is properly established, and you will receive a response indicating successful setup.


3. Creating a Pipedrive Person and Lead

Next, we will create a Pipedrive person and lead based on the information received from the Webflow form submission. This step is crucial for managing your leads effectively using Pabbly Connect.

In the action application section, select Pipedrive. Choose the action event as ‘Create Person.’ You will need to connect your Pipedrive account by providing the API token. This token can be found in your Pipedrive account settings under API.

  • Map the fields from Webflow to Pipedrive, such as first name, last name, and email.
  • Ensure all required fields in Pipedrive are filled with the corresponding data from the Webflow submission.

After mapping the fields, click on ‘Save and Send Test Request’ to create the person and lead in Pipedrive. Confirm that the lead has been successfully created in your Pipedrive account.


4. Sending Slack Messages with Pabbly Connect

Once the Pipedrive person and lead have been created, it’s time to notify your team via Slack using Pabbly Connect. This ensures that your team is immediately informed of new leads.

Select Slack as your action application and choose the action event as ‘Send Channel Message.’ Connect your Slack account by providing the necessary permissions and token. Once connected, you can specify which channel to send messages to.

Draft a message that includes details like the lead’s name and email. Use dynamic fields to personalize the message based on the lead’s information.

After drafting the message, click on ‘Save and Send Test Request’ to verify that the message is sent successfully to the designated Slack channel.


5. Conclusion: Automating Workflow with Pabbly Connect

In conclusion, using Pabbly Connect to integrate Slack, Pipedrive, and Webflow allows for a streamlined workflow that saves time and enhances productivity. By following the steps outlined above, you can easily automate the process of creating leads and notifying your team.

Ensure you check out Pabbly Connect to create business automation workflows and reduce manual tasks. Pabbly Connect currently offer integration with 2,000+ applications.

Check out Pabbly Connect – Automate your business workflows effortlessly! Sign Up Free – Start your journey with ease! 10,000+ Video Tutorials – Learn step by step! Join Pabbly Facebook Group – Connect with 21,000+ like minded people!
This automation not only improves efficiency but also ensures that your team is always updated with new leads in real-time. Start using Pabbly Connect today to enhance your business processes!

Pabbly Chatflow Team Member Overview: A Comprehensive Guide

Learn how to manage your WhatsApp communications using Pabbly Connect and Pabbly Connect in this detailed tutorial. Perfect for team collaboration! Explore efficient methods for automating routine tasks with clear, concise instructions suited for both newcomers and experienced professionals.

Watch Step By Step Video Tutorial Below


1. Introduction to Pabbly Chatflow and Pabbly Connect

Pabbly Chatflow is an all-in-one solution for managing WhatsApp communications, and it integrates seamlessly with Pabbly Connect. This integration allows for efficient team collaboration in handling WhatsApp messages, organizing contacts, and conducting broadcast campaigns.

To get started, access your Pabbly Chatflow dashboard where you can manage team members and WhatsApp chats. With Pabbly Connect, you can share access with team members, enabling them to manage chats effectively.


2. How to Manage Team Members in Pabbly Chatflow

Managing your team in Pabbly Chatflow is straightforward. First, navigate to the Team Queue section in the left sidebar. Here, you will find the team list option, which displays all team members and the number of chats assigned to them.

  • Click on the Team Members option to view details.
  • Check the status of each chat assigned to team members.
  • Update chat status using the dropdown menu.

By utilizing Pabbly Connect, you can ensure that every WhatsApp query is properly assigned, preventing delays in responses and enhancing overall efficiency.


3. Adding a New Team Member in Pabbly Chatflow

To add a new team member, click on the Settings option in the left sidebar, then select Team Members. Here, you will see the number of unique team members already added to your account.

To add a new member, click the button in the top right corner. Enter the email address of the new team member, ensuring they have a valid Pabbly account. You can then select the level of access: either full account access or read-only access.

  • Full account access allows complete control over WhatsApp messages and settings.
  • Read-only access allows viewing conversations without the ability to send messages.

Once you have filled in the required details, click the Add button. The new team member will be immediately added to your Pabbly Chatflow account, allowing for seamless collaboration.


4. Setting Up Chat Assignment Rules with Pabbly Connect

To set up chat assignment rules, go back to the Settings menu and select Chat Assignment Rules under Team Members. This section allows you to configure how incoming WhatsApp chats are assigned to your team.

The system utilizes a round-robin method for chat distribution, ensuring that chats are evenly assigned among team members. To enable this feature, make sure to toggle the Ticket Assigned To button.

Enable automatic assignment for specific team members based on their availability. This method ensures no single team member is overwhelmed.

This setup, facilitated by Pabbly Connect, allows for efficient management of WhatsApp conversations, ensuring quick response times and effective team collaboration.


5. Managing Incoming WhatsApp Chats in Pabbly Chatflow

When a new WhatsApp message arrives, it first appears in the Inbox section of your Pabbly Chatflow dashboard. The chat is then automatically assigned to a team member based on the established round-robin rules.

Each team member can view their assigned chats in the Team Queue section. They can change the status of the chat from new to opened, replied, closed, or resolved, ensuring that everyone is updated on the chat’s progress.

With Pabbly Connect, team members have real-time visibility into chat assignments, leading to improved response times and overall efficiency in managing WhatsApp communications.


Conclusion

In this tutorial, we explored how to effectively manage team members and WhatsApp communications using Pabbly Connect and Pabbly Chatflow. By implementing these strategies, you can enhance team collaboration and ensure efficient handling of WhatsApp inquiries.

Ensure you check out Pabbly Connect to create business automation workflows and reduce manual tasks. Pabbly Connect currently offer integration with 2,000+ applications.

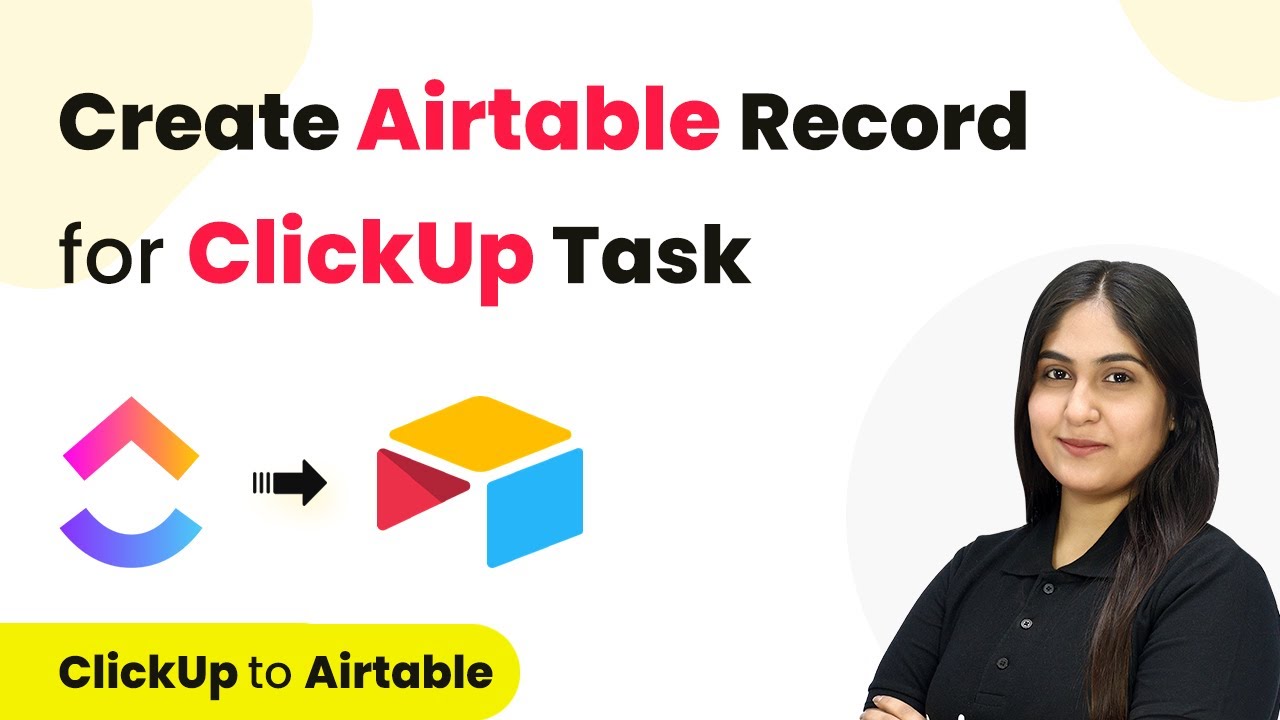
Integrate ClickUp and Airtable with Pabbly Connect: A Step-by-Step Guide

Learn how to create Airtable records for ClickUp tasks using Pabbly Connect. This detailed tutorial covers all steps and integrations. Transform complex automation concepts into accessible, actionable steps that eliminate unnecessary manual work while maximizing existing application capabilities.

Watch Step By Step Video Tutorial Below


1. Setting Up Pabbly Connect for Integration

To create an Airtable record for a ClickUp task, you first need to set up Pabbly Connect. This platform allows you to automate workflows between different applications, enhancing your productivity.

Start by visiting the Pabbly Connect homepage and sign in or create an account. Once logged in, you can access the dashboard where you will create a new workflow for the integration.


2. Creating a New Workflow in Pabbly Connect

In your Pabbly Connect dashboard, click on the ‘Create Workflow’ button in the top right corner. This action opens a dialog box where you can name your workflow.

For this integration, name your workflow something descriptive like ‘Create Airtable Record for ClickUp Task’. Choose a folder for organization, such as ‘Automations’. After naming your workflow, click on the ‘Create’ button to proceed.

  • Click on ‘Create Workflow’.
  • Name your workflow appropriately.
  • Select an appropriate folder.

After creating the workflow, you will need to set up a trigger and action. The trigger will be ClickUp, and the action will be Airtable.


3. Configuring the ClickUp Trigger in Pabbly Connect

In the workflow setup, select ClickUp as your trigger application. Choose the event as ‘New Task’. This means that every time a new task is created in ClickUp, Pabbly Connect will initiate the workflow.

Next, click on ‘Connect’ to build a new connection. You will need to enter your ClickUp API token. To find this, log into your ClickUp account, click on your profile icon, and navigate to ‘Settings’ > ‘Apps’ to copy your API token.

  • Select ClickUp as the trigger application.
  • Choose ‘New Task’ as the trigger event.
  • Enter your API token from ClickUp.

Once you have entered the API token, click ‘Save’ to establish the connection. This step is crucial as it allows Pabbly Connect to monitor new tasks in your ClickUp account.


4. Setting Up the Airtable Action in Pabbly Connect

After configuring the ClickUp trigger, it’s time to set up the Airtable action. Select Airtable as your action application and choose ‘Create Record’ as the action event. This will allow Pabbly Connect to create a new record in your Airtable account every time a task is created in ClickUp.

Now, connect your Airtable account to Pabbly Connect by clicking on ‘Connect’. Authorize Pabbly Connect to access your Airtable account. You will need to select the base and table where the new records will be created.

Select Airtable as the action application. Choose ‘Create Record’ as the action event. Connect your Airtable account to Pabbly Connect.

Once connected, you will need to map the fields from ClickUp to Airtable. This includes the task name, priority, assignee name, and assignee email. Mapping ensures that the correct data is sent to Airtable.


5. Testing and Activating Your Integration

After setting up both the ClickUp trigger and Airtable action, it’s time to test your integration. Create a new task in your ClickUp account and then return to Pabbly Connect to send a test request. This will verify that the integration works correctly.

If the test is successful, you will see a new record created in Airtable with the details of the ClickUp task. Once confirmed, activate your workflow to make it live. This means that every new task you create in ClickUp will automatically generate a record in Airtable.

In summary, this integration allows for seamless data management between ClickUp and Airtable, enhancing your project management capabilities. By using Pabbly Connect, you can automate repetitive tasks and improve efficiency.


Conclusion

Using Pabbly Connect, you can easily integrate ClickUp and Airtable. This tutorial has covered the exact steps to create Airtable records for new ClickUp tasks, streamlining your workflow and enhancing productivity.

Ensure you check out Pabbly Connect to create business automation workflows and reduce manual tasks. Pabbly Connect currently offer integration with 2,000+ applications.

How to Write & Publish Articles on WordPress Using AI Agent from Google Sheets with Pabbly Connect

Learn how to automate article writing and publishing on WordPress using Google Sheets and AI Agent with Pabbly Connect. Step-by-step guide included. This comprehensive guide reveals exactly how to connect your applications and automate repetitive tasks — accessible for professionals of all technical backgrounds.

Watch Step By Step Video Tutorial Below


1. Setting Up Pabbly Connect for Google Sheets and WordPress Integration

To begin the process of writing and publishing articles on WordPress using the AI Agent from Google Sheets, you need to set up Pabbly Connect. This platform serves as the central hub for integrating Google Sheets, AI agents, and WordPress seamlessly. Start by signing into your Pabbly Connect account. If you are a new user, you can sign up for free and get 100 tasks each month.

Once logged in, navigate to the Pabbly Connect dashboard. Here, you will create a new workflow by clicking the ‘Create Workflow’ button. A dialog box will appear where you can name your workflow, such as ‘Write and Publish Articles on WordPress Using AI Agent from Google Sheets’. Choose a folder to save your workflow, then click the ‘Create’ button to proceed.


2. Trigger Setup with Google Sheets in Pabbly Connect

Now that you have set up your workflow in Pabbly Connect, it’s time to configure the trigger step. Click on the trigger application and select ‘Google Sheets’ as your trigger application. For the trigger event, choose ‘New or Updated Spreadsheet Row’. This setup allows Pabbly Connect to monitor your Google Sheets for any new entries or updates.

  • Select ‘Google Sheets’ as the trigger application.
  • Choose the event ‘New or Updated Spreadsheet Row’.
  • Copy the provided webhook URL for later use.

After selecting these options, Pabbly Connect will generate a unique webhook URL. You will need this URL to connect your Google Sheets to Pabbly Connect. Open your Google Sheets, navigate to Extensions > Add-ons, and search for ‘Pabbly Connect Webhooks’. Install it if you haven’t already, and then set it up using the webhook URL you copied.


3. Configuring the AI Agent with Pabbly Connect

With the trigger set up, the next step is to configure the AI Agent, which will generate content based on the titles entered in your Google Sheets. In Pabbly Connect, add an action step and select ‘Google AI Studio’ (Gemini) as your action application. For the action event, choose ‘Generate Content’. This will instruct Pabbly Connect to utilize the AI Agent to create content based on the specified title and keywords.

To connect with the AI Agent, you will need an API key from Google AI Studio. Click on the ‘Get API Key’ button in Google AI Studio, select your project, and create the API key. Copy this key and paste it into Pabbly Connect when prompted. After entering the API key, map the blog title and keywords from the previous Google Sheets step into the content generation prompt.

  • Select ‘Google AI Studio’ as the action application.
  • Choose ‘Generate Content’ as the action event.
  • Map the blog title and keywords to the prompt for content generation.

Once you have completed these steps, Pabbly Connect will be ready to generate blog content automatically based on the titles you input in your Google Sheets.


4. Publishing Generated Content to WordPress via Pabbly Connect

After the AI Agent generates the content, the next step is to publish this content on your WordPress site. In your Pabbly Connect workflow, add another action step and select ‘WordPress’ as your action application. Choose ‘Create Post’ as the action event. This step will allow Pabbly Connect to publish the generated content directly to your WordPress account.

To connect Pabbly Connect to WordPress, you will need to provide your WordPress site’s base URL, username, and password. Make sure to enter the correct details to establish a successful connection. After connecting, map the post title and content generated by the AI Agent to the respective fields in the create post action.

Select ‘WordPress’ as the action application. Choose ‘Create Post’ as the action event. Map the post title and content fields accordingly.

Once you have set this up, Pabbly Connect will automatically publish the generated blog post on your WordPress site, saving you time and effort in manual posting.


5. Updating Google Sheets with Vlog Links

The final step in this automation process is to update your Google Sheets with the links to the newly published blog posts. In your Pabbly Connect workflow, add another action step and select ‘Google Sheets’ as the action application again. This time, choose ‘Update Row’ as the action event. This will allow you to update the specific row in your Google Sheets with the URL of the newly published blog post.

Connect to Google Sheets again and select the spreadsheet and sheet you want to update. Map the row index to the row you wish to update and insert the blog link you received from the previous WordPress action. This ensures that your Google Sheets will always have the latest links to your published content.

Select ‘Google Sheets’ as the action application. Choose ‘Update Row’ as the action event. Map the row index and insert the blog link into the designated field.

After completing this step, Pabbly Connect will update your Google Sheets with the new blog links, providing you with a comprehensive record of all your published articles.


Conclusion

In conclusion, using Pabbly Connect to automate the writing and publishing of articles on WordPress from Google Sheets is an efficient way to streamline your content creation process. By integrating these applications, you can save time and enhance your audience engagement with fresh content. This step-by-step guide illustrates how to set up triggers, configure AI agents, and publish content seamlessly.

Ensure you check out Pabbly Connect to create business automation workflows and reduce manual tasks. Pabbly Connect currently offer integration with 2,000+ applications.

Pabbly Chatflow Inbox Overview: A Comprehensive Guide

Explore the Pabbly Connect Inbox features, learn how to manage WhatsApp conversations, and utilize Pabbly Connect for seamless integration. Transform complex automation concepts into accessible, actionable steps that eliminate unnecessary manual work while maximizing existing application capabilities.

Watch Step By Step Video Tutorial Below


1. Pabbly Chatflow Inbox Overview

In this section, we will explore the Pabbly Chatflow Inbox, a powerful feature that centralizes communication between businesses and their users via WhatsApp messages. Using Pabbly Connect, you can integrate various platforms to enhance your messaging capabilities.

The Pabbly Chatflow Inbox allows users to manage all WhatsApp conversations efficiently. This feature ensures that businesses can handle multiple chats without missing any messages, making communication faster and more organized.


2. Accessing Pabbly Chatflow Inbox

To access the Pabbly Chatflow Inbox, navigate to the left panel of your Pabbly Chatflow account. Click on the ‘Inbox’ section to open the interface where all conversations are displayed. Here, Pabbly Connect plays a crucial role in consolidating messages from different sources.

Once in the Inbox, you will see three main sections: the chat list, message section, and contact details panel. This layout allows users to quickly view and respond to messages. Here are the key features of each section:

  • **Chat List**: Displays all WhatsApp conversations in one place.
  • **Message Section**: Where you can type replies and manage attachments.
  • **Contact Details Panel**: Shows customer information and conversation history.

In this way, Pabbly Connect ensures that all chats are easily accessible and manageable from one interface, enhancing user experience.


3. Managing Conversations in Pabbly Chatflow

Managing conversations in the Pabbly Chatflow Inbox is straightforward. Users can search for specific contacts within the chat list by typing the name in the search bar. This feature is vital for quickly locating conversations, especially in a busy environment.

Furthermore, you can add new contacts directly from the Inbox. Click on ‘Add New Contact,’ enter the mobile number, and click ‘Add’ to include the contact in your Pabbly Chatflow account. This seamless integration is powered by Pabbly Connect, allowing for instant updates to your contact list.

Additionally, filtering conversations based on various criteria enhances the management process. Utilize filters such as:

  • **Created At**: Filter by specific date ranges.
  • **Opted In/Out Status**: View only opted-in conversations.
  • **Read Status**: Check if messages are read or unread.

By using these filters, Pabbly Connect helps streamline communication and ensures that important messages are not overlooked.


4. Sending Messages via Pabbly Chatflow

Sending messages through the Pabbly Chatflow Inbox is efficient and user-friendly. In the message section, you can type your response and send it directly to your customers. You can also attach files, images, or documents, enhancing the communication experience.

To further personalize your messages, use quick replies and templates. Quick replies allow you to send frequently used messages with just a click. For instance, typing a slash (/) brings up your saved quick replies, making it easy to respond without typing the full message.

Moreover, the formatting options available in the message section enable you to create visually appealing messages. You can bold, italicize, or strike through text to emphasize important points. This feature, combined with Pabbly Connect, allows you to maintain a professional appearance in all communications. Here are the capabilities:

**Emoji Support**: Add emojis for a friendly touch. **File Attachments**: Send various file types including PDFs and images. **Message Templates**: Use pre-defined templates for efficiency.

These features ensure that your messages are not only effective but also engaging, thanks to the integration capabilities of Pabbly Connect.


5. Configuring Inbox Settings in Pabbly Chatflow

Configuring settings in the Pabbly Chatflow Inbox is essential for managing automated responses. By navigating to the settings section, you can set up welcome messages for new users during business hours and automated replies for off-hours inquiries. This ensures that customers receive timely responses, even when you are unavailable.

To set these up, toggle the welcome message feature on and select a predefined template or write a custom message. Similarly, configure the off-hours message to ensure customers are informed when they reach out outside of business hours. This automation is made possible through Pabbly Connect, which allows you to define your business hours and set appropriate responses.

Additionally, managing opt-in and opt-out settings is crucial for compliance with communication regulations. You can add keywords for customers to opt-in or out of messaging, ensuring that your communications are respectful and compliant. This management is streamlined through Pabbly Connect, which tracks customer preferences effectively. Here’s how to manage these settings:

**Opt-in Keywords**: Define keywords that customers can use to consent to receive messages. **Opt-out Keywords**: Set keywords for customers to withdraw their consent. **SLA Configuration**: Set a time frame for responding to customer inquiries.

These settings ensure a professional and compliant communication strategy powered by Pabbly Connect.


Conclusion

The Pabbly Chatflow Inbox is a powerful tool for managing WhatsApp communications effectively. By utilizing Pabbly Connect, businesses can streamline their messaging processes, ensuring timely and professional responses to customer inquiries. This tutorial has covered the essential features and settings to optimize your use of Pabbly Chatflow Inbox.

Ensure you check out Pabbly Connect to create business automation workflows and reduce manual tasks. Pabbly Connect currently offer integration with 2,000+ applications.

Broadcast Messages and API Campaigns with Pabbly Chatflow: A Comprehensive Tutorial

Learn how to use Pabbly Connect and Pabbly Connect for effective broadcast messaging and API campaigns. Step-by-step guide included. Transform complex automation concepts into accessible, actionable steps that eliminate unnecessary manual work while maximizing existing application capabilities.

Watch Step By Step Video Tutorial Below


1. Introduction to Pabbly Chatflow and Pabbly Connect

Pabbly Connect is an automation solution that allows you to integrate various applications seamlessly. In this tutorial, we will explore how to use Pabbly Connect alongside Pabbly Chatflow to send broadcast messages on WhatsApp and set up API campaigns. This integration provides a powerful way to engage your users effectively.

To get started, log into your Pabbly Chatflow account. From the left sidebar, navigate to the ‘Broadcast’ section. Here, you can view details about your previous broadcasts, including total broadcasts sent, live broadcasts, and scheduled broadcasts. This dashboard is essential for managing your messaging campaigns effectively.


2. Creating a Broadcast Campaign in Pabbly Chatflow

To create a broadcast campaign, click on the ‘Add Broadcast’ button. In the broadcast type selection, choose ‘Campaign’ to send a direct broadcast message. Enter a name for your broadcast, such as ‘New Blog Announcement’. This name will help you identify the campaign later. using Pabbly Connect

  • Select the contact list to whom you want to send the message.
  • Choose the message type: either a pre-approved template message or a regular message.
  • If using a template, ensure it is approved by Meta (Facebook).

After selecting the contact list and message type, you can proceed to customize your message. If you opt for a regular message, ensure that you have an active 24-hour chat window with your contacts to comply with WhatsApp’s messaging policies.


3. Customizing Your Broadcast Message

In the message customization section, you can select the type of message you wish to send. For instance, if you choose to send an image, you can upload the file or provide a URL. You can also add captions and other media types such as videos or audio files. using Pabbly Connect

For template messages, select the approved template from your Pabbly Chatflow account. You can insert dynamic fields to personalize the message, such as including the recipient’s name or specific blog details. This personalization enhances user engagement.

  • Use placeholders for dynamic content in your template.
  • Preview your message to ensure it appears correctly before sending.
  • Test the broadcast message to verify delivery and appearance.

Once you are satisfied with your message, you can either send it immediately or schedule it for a later time. This flexibility allows you to plan your communication strategy effectively.


4. Setting Up an API Campaign with Pabbly Connect

To set up an API campaign, go back to the ‘Add Broadcast’ button and select ‘API Campaign’ as the broadcast type. Give your API campaign a name, such as ‘Order Confirmation’. This name will help you track the purpose of the campaign.

Next, select the approved template message you wish to use for this campaign. This template will be triggered through API calls made via Pabbly Connect. Ensure that your API request contains all necessary parameters required by the template.

Define the body parameters in your API request. Use JSON format for your API calls. Test the API campaign to ensure it functions correctly.

By integrating your e-commerce platform with Pabbly Connect, you can automate the process of sending WhatsApp messages based on specific triggers, such as new orders. This automation saves time and enhances customer communication.


5. Testing and Finalizing Your Campaigns

After setting up both your broadcast and API campaigns, it’s crucial to test them. Use the test feature provided in Pabbly Chatflow to send a test message to your own WhatsApp number. This step ensures that the messages are formatted correctly and that all dynamic fields are populating as expected.

Once testing is complete and you are satisfied with the results, you can finalize your campaigns. Click on the ‘Add Broadcast’ button to save your settings. You will see the status of your broadcasts in the dashboard, where you can monitor delivery and engagement metrics.

Utilizing the capabilities of Pabbly Connect and Pabbly Chatflow together allows you to create effective communication strategies that engage your audience through WhatsApp. Whether through direct broadcasts or automated API campaigns, these tools provide a seamless experience.


Conclusion

In this tutorial, we explored how to use Pabbly Connect and Pabbly Chatflow to send broadcast messages and set up API campaigns effectively. You can engage your audience through personalized messaging on WhatsApp, enhancing your communication strategy.

Ensure you check out Pabbly Connect to create business automation workflows and reduce manual tasks. Pabbly Connect currently offer integration with 2,000+ applications.

How to Send WhatsApp Messages to IndiaMART Leads Using Pabbly Connect

Learn how to send WhatsApp messages to IndiaMART leads using Pabbly Connect and Pabbly Connect in this detailed tutorial. Step-by-step instructions included. Learn to create powerful connections between your critical applications without requiring specialized programming knowledge or extensive technical background.

Watch Step By Step Video Tutorial Below


1. Accessing Pabbly Connect for Integration

To send WhatsApp messages to IndiaMART leads, you first need to access Pabbly Connect. Begin by visiting the Pabbly Connect website and signing in to your account. If you’re a new user, you can sign up for free, which gives you access to 100 tasks monthly.

Once logged in, you’ll land on the dashboard. Here, you can create a new workflow by selecting the option to create a connection between IndiaMART and WhatsApp through Pabbly Connect. This setup will allow you to automate the process of sending messages to new leads directly.


2. Creating a Workflow in Pabbly Connect

In this section, you will set up a workflow in Pabbly Connect to send messages when new leads are generated from IndiaMART. Click on ‘Create Workflow’ to begin. You will see two boxes: one for the trigger and another for the action.

  • Select ‘IndiaMART’ as the trigger application.
  • Choose ‘New Lead’ as the trigger event.
  • Set up the connection with your IndiaMART account.

After setting up the trigger, proceed to select WhatsApp as the action application. This step is crucial as it defines what action will occur when a new lead is received. Ensure you configure the action to send a WhatsApp message through Pabbly Chatflow.


3. Setting Up IndiaMART for Integration

To connect IndiaMART with Pabbly Connect, you need to access your IndiaMART account. Navigate to the lead manager section and find the option for API integration. Here, you will be provided with a webhook URL that will allow Pabbly Connect to receive lead data.

Copy the webhook URL and paste it into the appropriate field in your IndiaMART account settings. This action establishes a bridge between IndiaMART and Pabbly Connect. After saving the details, you can test the connection to ensure it works correctly.


4. Configuring WhatsApp Messages with Pabbly Chatflow

Next, you will configure the WhatsApp messages that will be sent to your leads. Go to Pabbly Chatflow to create a message template. Select ‘Add New Template’ and fill in the necessary details such as the template name and message content.

  • Choose a category for your template, like Marketing.
  • Enter the message header and format your message properly.
  • Add custom variables to personalize the messages.

After creating your template, submit it for approval. Once approved, you can use this template in your Pabbly Connect workflow to send customized WhatsApp messages to your IndiaMART leads.


5. Testing the Integration for Success

Finally, it’s essential to test the integration to ensure everything is functioning correctly. In Pabbly Connect, go back to your workflow and perform a test submission from IndiaMART. This action should trigger the workflow and send a WhatsApp message to the specified number.

Check your WhatsApp to confirm that the message has been received. If successful, your integration is complete. You can now automate sending WhatsApp messages for all new leads from IndiaMART using Pabbly Connect.


Conclusion

By following these steps, you can effectively send WhatsApp messages to IndiaMART leads using Pabbly Connect. This integration automates your communication process, ensuring timely responses to inquiries and enhancing customer engagement.

Ensure you check out Pabbly Connect to create business automation workflows and reduce manual tasks. Pabbly Connect currently offer integration with 2,000+ applications.

How to Add IndiaMART Leads to Salesforce Using Pabbly Connect

Learn how to automate the process of adding IndiaMART leads to Salesforce for home appliances repair services using Pabbly Connect. Step-by-step tutorial included. Discover how to seamlessly connect your essential tools through accessible instructions that make powerful automation available to professionals at every skill level.

Watch Step By Step Video Tutorial Below


1. Accessing Pabbly Connect for Integration

To begin the process of adding IndiaMART leads to Salesforce, first, you need to access Pabbly Connect. This platform allows seamless integration between various applications without coding.

Visit the Pabbly Connect website by typing ‘Pabbly.com/connect’ in your browser. Once there, you can sign in if you are an existing user or sign up for free if you are new. Signing up gives you 100 tasks free on a monthly basis, which is perfect for testing the integration.


2. Creating a Workflow in Pabbly Connect

After logging into Pabbly Connect, the next step is to create a new workflow. Click on the ‘Create New Workflow’ button. This action will prompt you to set up a trigger and an action.

  • Select ‘IndiaMART’ as the trigger application.
  • Choose the trigger event, which is when a new lead is created.
  • Set ‘Salesforce’ as the action application.
  • Select the action event to create a new lead in Salesforce.

This setup ensures that every time a new lead is generated on IndiaMART, it will automatically trigger the creation of a lead in Salesforce.


3. Configuring IndiaMART Trigger

Next, you need to configure the IndiaMART trigger within Pabbly Connect. This involves connecting your IndiaMART account to Pabbly. You will need to provide a webhook URL generated by Pabbly Connect.

Log into your IndiaMART account and navigate to the ‘Lead Manager’. From there, select the option for ‘Import/Export Leads’ and then choose ‘Push API’. Here, you will enter the webhook URL provided by Pabbly Connect.

  • Enter your CRM platform name as ‘Pabbly Connect’.
  • Paste the webhook URL into the appropriate field.
  • Complete the integration by clicking on ‘Save Details’.

After saving, ensure that the webhook is active by sending a test lead from IndiaMART to verify the connection.


4. Setting Up Salesforce Action

Now, it’s time to configure the Salesforce action in Pabbly Connect. This step involves connecting your Salesforce account to Pabbly Connect to allow for the creation of leads.

Click on the action step and select Salesforce as the application. You will need to log into your Salesforce account and authorize Pabbly Connect to access your data. Once authorized, you can map the fields from the IndiaMART lead to the corresponding fields in Salesforce.

Map the lead’s first name, last name, email, and phone number. Ensure all necessary fields are filled to create a complete lead. Click on ‘Save’ to finalize the setup.

Once you have mapped the fields and saved the action, you can send a test request to ensure that the lead is created successfully in Salesforce.


5. Testing the Integration

The final step is to test the entire integration process using Pabbly Connect. This ensures that every new lead captured from IndiaMART is accurately reflected in Salesforce.

Submit a test lead through your IndiaMART account. After submitting, check your Salesforce account to see if the lead appears as expected. If everything is set up correctly, the lead should be created automatically without any manual intervention.

This automation significantly reduces the time and effort required to manage leads, allowing you to focus on providing exceptional home appliances repair service.


Conclusion

In conclusion, using Pabbly Connect to integrate IndiaMART leads with Salesforce streamlines the process of managing enquiries for home appliances repair services. This automation enhances efficiency and ensures that no leads are missed.

Ensure you check out Pabbly Connect to create business automation workflows and reduce manual tasks. Pabbly Connect currently offer integration with 2,000+ applications.

By following the steps outlined in this tutorial, you can easily set up and manage your lead generation process effectively.