How to Create a WhatsApp Chatbot for Facebook Lead Nurturing Using Pabbly Connect

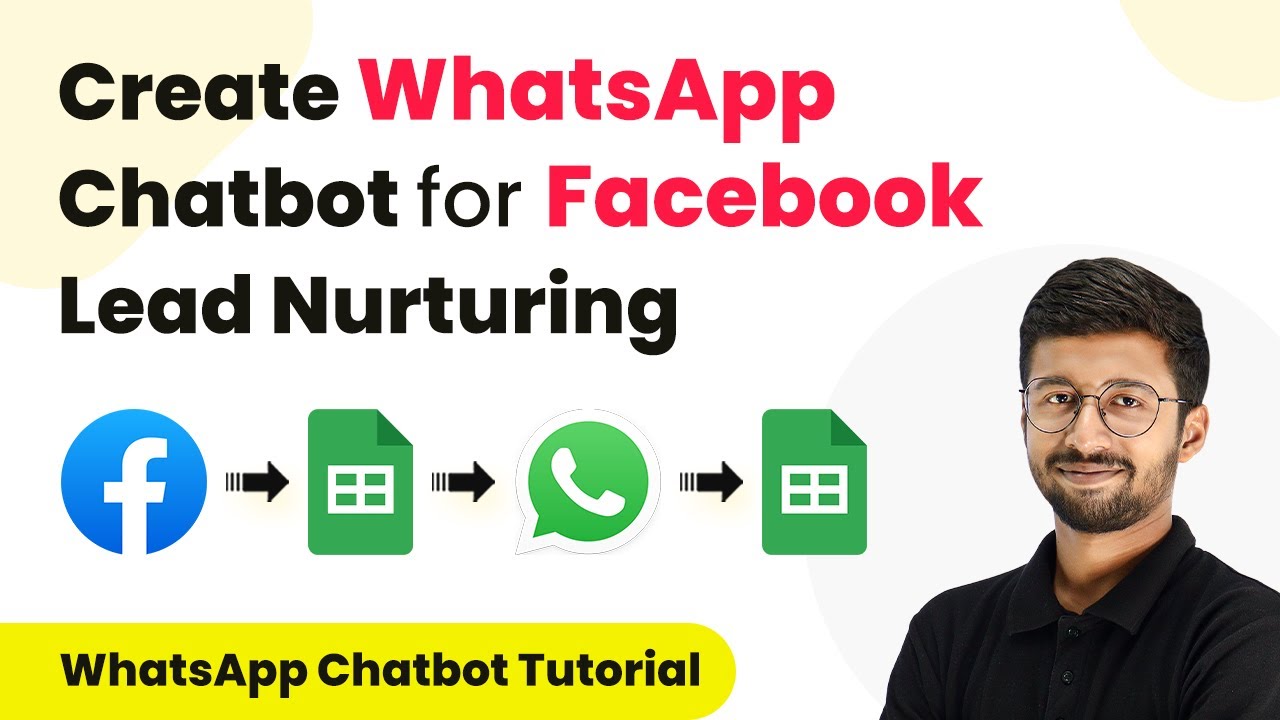
Learn how to create a WhatsApp chatbot for Facebook lead nurturing using Pabbly Connect and Pabbly Connect. Step-by-step guide for seamless integration. Learn to create powerful connections between your critical applications without requiring specialized programming knowledge or extensive technical background.

Watch Step By Step Video Tutorial Below


1. Setting Up Pabbly Connect for Facebook Lead Nurturing

To create a WhatsApp chatbot for Facebook lead nurturing, we will use Pabbly Connect as our primary automation platform. Start by accessing your Pabbly Connect account and click on the ‘Create Workflow’ button. Name your workflow something descriptive, like ‘Facebook to Google Sheets to Pabbly Chatflow’. This will help you keep track of your automation.

Once you have named your workflow, select the appropriate folder in your Pabbly Connect account for organization. Click on ‘Create’ to open the workflow editor, where you will set up the integration process.


2. Integrating Facebook Lead Ads with Pabbly Connect

The first step in our automation is to connect Facebook Lead Ads to Pabbly Connect. In the trigger section, search for ‘Facebook Lead Ads’ and select it. Choose the trigger event as ‘New Lead Instant’. This allows Pabbly Connect to capture new leads as they come in.

  • Click on ‘Connect’ and then select ‘Add New Connection’.
  • Authenticate your Facebook account to allow Pabbly Connect to access your leads.
  • Select your Facebook page and the lead generation form you want to use.

After saving your configuration, Pabbly Connect will wait for a response from Facebook. You can test this by generating a dummy lead using the Facebook Lead Ads testing tool. Once you submit a test lead, you will see the details captured in Pabbly Connect, confirming the integration is successful.


3. Adding Lead Details to Google Sheets

Next, we will store the captured lead details in Google Sheets using Pabbly Connect. In the action step, search for ‘Google Sheets’ and select it. Choose the action event as ‘Add New Row’ to insert the lead information into your spreadsheet.

Authenticate your Google Sheets account in Pabbly Connect, and select the spreadsheet you want to use. Map the fields from the Facebook lead data to the corresponding columns in your Google Sheet, such as name, email, mobile number, and city. This ensures that all relevant lead information is stored correctly.


4. Sending WhatsApp Messages Using Pabbly Chatflow

Now, we will send a WhatsApp message to the newly captured lead using Pabbly Chatflow. In the next action step of your Pabbly Connect workflow, search for ‘Pabbly Chatflow’ and select the action event ‘Send Template Message’. This will initiate the WhatsApp conversation with the lead.

Connect your Pabbly Chatflow account by providing the API key. Map the mobile number of the lead captured from Facebook to the recipient mobile number field in Pabbly Chatflow. Select the template message you want to send, which could include a greeting and options for the lead to choose from.


5. Creating the Chatflow for Lead Nurturing

In Pabbly Chatflow, create a flow that will handle the responses from the lead. Start by defining the flow with options based on the initial WhatsApp message sent. You can set up various paths depending on the lead’s responses, such as property type, budget, and preferred location.

After the lead responds, update their information in Pabbly Connect by sending the collected data back to your Google Sheets. Use the webhook feature in Pabbly Connect to capture the responses and map them back to the respective columns in your Google Sheet.


Conclusion

By following these steps, you can successfully create a WhatsApp chatbot for Facebook lead nurturing using Pabbly Connect and Pabbly Chatflow. This automation streamlines the process of capturing leads, nurturing them through WhatsApp, and managing their information in Google Sheets, enhancing your lead management efficiency.

Ensure you check out Pabbly Connect to create business automation workflows and reduce manual tasks. Pabbly Connect currently offer integration with 2,000+ applications.

How to Create a WhatsApp Chatbot Using Pabbly Connect and Pabbly Chatflow

Learn how to create a WhatsApp chatbot using Pabbly Connect and Pabbly Connect. Follow our step-by-step guide to automate customer interactions effectively. Implement the precise methodologies leading organizations use to automate repetitive tasks, illustrated with practical examples designed for immediate application.

Watch Step By Step Video Tutorial Below


1. Introduction to Pabbly Connect for WhatsApp Chatbot

Creating a WhatsApp chatbot can significantly improve customer interaction, and Pabbly Connect is the ideal platform to facilitate this process. In this tutorial, we will walk through the steps to set up a WhatsApp chatbot using Pabbly Connect and Pabbly Chatflow. This integration will help automate responses to customer inquiries and streamline communication.

To get started, log in to your Pabbly Connect account. Once logged in, navigate to the dashboard where you can access various features. We will specifically focus on the Pabbly Chatflow feature, which allows you to create flows for your chatbot. This guide will use a Wellness Center as an example to demonstrate how to set up the chatbot.


2. Setting Up the Flow in Pabbly Chatflow

In Pabbly Connect, the first step is to create a new flow for your WhatsApp chatbot. Click on the ‘Flows’ option in the left sidebar. Here, you will see a list of existing flows. To create a new flow, click on the ‘Add Flow’ button.

  • Click on ‘Add Flow’ to initiate a new flow.
  • Name your flow appropriately, for example, ‘Wellness Center Chatbot’.
  • Select the trigger type as ‘Keywords’ to activate the chatbot when specific keywords are sent by users.

After setting up the trigger, you will need to enter keywords, such as ‘hi’, ‘hello’, or specific terms related to the services offered by the Wellness Center. This setup ensures that the chatbot responds appropriately to customer inquiries.


3. Creating the Chatbot Conversation Flow

Once the keywords are set, the next step involves creating the conversation flow using Pabbly Chatflow. This is where you can personalize interactions with customers. Start by dragging and dropping the ‘Ask Question’ action from the options available.

In the message field, you can write a welcoming message. For example, you can say, ‘Hello! Welcome to Harmony Wellness Center. We offer personalized health and wellness programs. May I know your name?’ This personalization helps engage the user right from the start.

  • Drag and drop the ‘Ask Question’ action.
  • Enter your welcoming message.
  • Connect this action to the previous trigger.

After the user responds with their name, you can continue building the flow by offering a list of services available at the Wellness Center. This can be done using the ‘List’ action in Pabbly Chatflow, allowing customers to select from various options such as yoga, physiotherapy, or ayurvedic healing.


4. Adding Actions and Media Responses

As customers select services from the list, you can automate responses that provide further information. For example, if a customer selects ‘Guided Yoga Sessions’, the chatbot can respond with a brochure detailing the sessions. To do this, use the ‘Media’ action to send documents or videos.

In Pabbly Connect, you can upload the required media files directly. For instance, drag and drop the media action and select the document type. Upload the brochure file and add a caption to accompany the file. This ensures that the customer receives detailed information about the selected service.

Use the ‘Media’ action to send files. Upload your brochure or video file. Add a caption to provide context to the media sent.

This approach not only enhances customer engagement but also provides them with the necessary resources to make informed decisions about their wellness journey.


5. Testing and Finalizing Your WhatsApp Chatbot

After setting up the entire flow, it’s crucial to test the chatbot to ensure it functions as intended. Use Pabbly Connect to simulate customer interactions by sending messages that trigger the flow. For example, send a message like ‘Hey, I want to know more about your yoga plan’ to check if the chatbot responds correctly.

Once testing is complete and you are satisfied with the flow, save your work in Pabbly Connect. Ensure that the flow is enabled, allowing it to run whenever a customer sends a message that matches the defined keywords.

Remember, the success of your WhatsApp chatbot relies on continuous monitoring and adjustments based on customer interactions. Utilize the analytics provided by Pabbly Connect to refine and improve your chatbot’s performance over time.


Conclusion

In this tutorial, we explored how to create a WhatsApp chatbot using Pabbly Connect and Pabbly Chatflow. By automating customer interactions and providing instant responses, businesses can enhance customer engagement and streamline their operations. Implementing this chatbot can significantly reduce manual efforts while improving service delivery in wellness centers and beyond.

Ensure you check out Pabbly Connect to create business automation workflows and reduce manual tasks. Pabbly Connect currently offer integration with 2,000+ applications.

How to Generate Video Scripts for Training Videos using Pabbly Connect

Learn how to automate video script generation for training videos using Pabbly Connect, Google Sheets, and AI Agents. Streamline your workflow today! Navigate the automation landscape confidently with clear, structured guidance suitable for professionals regardless of prior technical experience.

Watch Step By Step Video Tutorial Below


1. Accessing Pabbly Connect for Video Script Generation

To start generating video scripts for training videos, the first step is to access Pabbly Connect. Open your browser and navigate to the Pabbly website, where you can either sign in or create a new account.

Once logged in, you will find various applications offered by Pabbly. For this tutorial, focus on Pabbly Connect, which is essential for integrating different applications such as Google Sheets and AI agents. Click on the ‘Access Now’ button to enter your dashboard.


2. Creating a Workflow in Pabbly Connect

To create a workflow for generating video scripts, click on the ‘Create Workflow’ button in Pabbly Connect. You will need to name your workflow, for example, ‘Generate Video Scripts for Training Videos using AI Agent,’ and select a folder to save it in.

  • Click on ‘Create’ to open the workflow window.
  • Select Google Sheets as your trigger application.
  • Choose the trigger event as ‘New or Updated Spreadsheet Row.’

This setup will allow Pabbly Connect to monitor your Google Sheets for any new entries, which will trigger the workflow to generate scripts automatically.


3. Setting Up Google Sheets with Pabbly Connect

Next, you need to set up Google Sheets to work with Pabbly Connect. Open your Google Sheets and navigate to Extensions > Add-ons > Get Add-ons. Search for Pabbly Connect Webhooks and install it if you haven’t already done so.

After installation, refresh your Google Sheets. Go to Extensions > Pabbly Connect Webhooks, and enter the webhook URL provided by Pabbly Connect. Set the trigger column to the final data column where the video details will be inputted.


4. Integrating AI Agent with Pabbly Connect

Once your Google Sheets is set up, the next step is to integrate your AI agent with Pabbly Connect. For this, select OpenAI as your action application in the workflow. Choose the action event as ‘Chat GPT’ and connect your OpenAI account using the API key.

Map the necessary fields, including the video topic and target audience, to generate a structured video script. This mapping allows Pabbly Connect to dynamically insert data from Google Sheets into the AI agent’s prompt.

  • Select the AI model, preferably GPT-4.
  • Enter a prompt that instructs the AI to generate a script based on the details provided.

This process ensures that Pabbly Connect effectively facilitates the generation of scripts based on real-time data from your Google Sheets.


5. Finalizing the Workflow and Testing

In the final step, you will add actions to store the generated script in Google Docs and update the Google Sheets with the document link. First, select Google Docs as the action application and choose ‘Create Blank Document’ to store the script.

Next, append the script to this document and make it shareable using Google Drive. Finally, update the Google Sheets with the link to the Google Document. This will allow you to access the generated script directly from your spreadsheet.

After completing these steps, perform a test entry in Google Sheets to ensure that the entire workflow functions correctly. The integration of Pabbly Connect will automate the script generation process seamlessly.


Conclusion

Using Pabbly Connect, you can efficiently generate video scripts for training videos by integrating Google Sheets and AI agents. This automation streamlines your workflow, saving time and effort while ensuring high-quality output.

Ensure you check out Pabbly Connect to create business automation workflows and reduce manual tasks. Pabbly Connect currently offer integration with 2,000+ applications.

Automate Facebook Comment Replies with Pabbly Connect and AI Agent

Learn how to automate Facebook comment replies using Pabbly Connect and an AI agent. Step-by-step guide to set up seamless integrations. This comprehensive guide reveals exactly how to connect your applications and automate repetitive tasks — accessible for professionals of all technical backgrounds.

Watch Step By Step Video Tutorial Below


1. Setting Up Pabbly Connect for Facebook Comment Automation

To automate Facebook comment replies, you first need to set up Pabbly Connect. This platform serves as the central integration hub connecting your Facebook page with an AI agent.

Start by signing up for a free account on Pabbly Connect. Once you have access to the dashboard, create a new workflow by clicking on the ‘Create Workflow’ button. Name your workflow, for example, ‘AI Agent for Facebook Comments Auto Reply’ and select a folder to save it in.


2. Configuring the Trigger Event in Pabbly Connect

In this step, you will configure the trigger event that captures new comments on your Facebook page. In the trigger window, select ‘Facebook Pages’ from the app options and choose the trigger event as ‘New Comment’. using Pabbly Connect

  • Select your Facebook account by clicking ‘Connect’.
  • Choose the specific Facebook page you want to monitor for comments.
  • Click on ‘Save and Send Test Request’ to ensure the connection is successful.

After setting up the trigger, make a test comment on your Facebook page. Pabbly Connect will capture the details of this comment, which will be used in subsequent steps of the automation.


3. Sending the Comment to the AI Agent for Reply Generation

Once the comment is captured, the next step is to send it to the AI platform via Pabbly Connect. In the action step, select ‘OpenAI’ and choose the action event ‘Chat GPT’.

To connect your OpenAI account, you will need to enter your API key. You can obtain this key from the OpenAI dashboard by creating a new API key. Once connected, specify the AI model you want to use, such as ‘GPT-4 Mini’.

  • Enter a prompt detailing your business and the comment received.
  • Map the name of the commenter and the actual comment to personalize the reply.

After completing the prompt, click ‘Save and Send Test Request’ to generate the reply. The output will be the AI-generated response to the comment.


4. Posting the AI-Generated Reply on Facebook

The final step is to post the AI-generated reply back to the original comment on your Facebook page using Pabbly Connect. Add a new action step and select ‘Facebook Comments’ as the app.

Choose the action event ‘Reply Comment on Page Post’. Connect your Facebook account again and select the same Facebook page. You will need to map the Post ID and the Top Level Comment ID from the trigger step to ensure the reply is posted correctly.

Enter the AI-generated reply in the comment field. Click ‘Save and Send Test Request’ to confirm the reply is posted.

After testing, you should see the AI-generated reply appear under the original comment on your Facebook page.


5. Testing and Optimizing Your Facebook Comment Automation

Now that your automation is set up, it’s time to test it. Post a new comment on your Facebook page and observe how Pabbly Connect processes it through the AI agent.

Make sure to refine your prompt in the AI step based on the feedback and responses you receive. This will help improve the quality of replies over time.

Monitor the responses for accuracy and relevance. Adjust the prompt details as necessary to enhance personalization.

With continuous optimization, your AI agent will become more efficient in handling Facebook comments, providing timely and relevant replies.


Conclusion

In this tutorial, we explored how to automate Facebook comment replies using Pabbly Connect and an AI agent. By following the steps outlined, you can streamline your customer interactions and enhance engagement on your Facebook page.

Ensure you check out Pabbly Connect to create business automation workflows and reduce manual tasks. Pabbly Connect currently offer integration with 2,000+ applications.

Utilizing Pabbly Connect for this integration not only saves time but also ensures that your responses are prompt and personalized, improving your overall customer experience.

How to Create a DeepSeek AI Agent for Google Sheets Using Pabbly Connect

Learn how to integrate Google Sheets with DeepSeek AI using Pabbly Connect to automate content generation effortlessly. Follow this definitive guide to creating powerful automated workflows with straightforward, efficiency-focused solutions that save valuable time.

Watch Step By Step Video Tutorial Below


1. Introduction to Pabbly Connect and Setting Up Google Sheets

In this section, we will explore how to use Pabbly Connect to integrate Google Sheets with DeepSeek AI for content generation. Start by accessing your Pabbly Connect dashboard, where you can create a workflow that will enable this automation.

To begin, ensure you have a Google Sheet ready with a list of topics. The integration will allow you to input topics into your Google Sheet, which will then be sent to DeepSeek AI for content generation. This process is facilitated entirely through Pabbly Connect, ensuring seamless communication between the applications.


2. Creating a Workflow in Pabbly Connect

To create a workflow in Pabbly Connect, click on the ‘Create Workflow’ button in your dashboard. Name your workflow something like ‘DeepSeek AI Agent for Google Sheets’ and select the appropriate folder for organization. This will help in managing your workflows efficiently.

  • Click on ‘Create Workflow’ in Pabbly Connect.
  • Name your workflow appropriately.
  • Select a folder in your Pabbly account.

Once the workflow is created, you will see two windows: the trigger window and the action window. The trigger is where you will set up the Google Sheets integration, and the action window will handle content generation through DeepSeek AI.


3. Connecting Google Sheets to Pabbly Connect

In the trigger window, select Google Sheets as the app. Choose the trigger event as ‘New or Updated Spreadsheet Row’. This allows Pabbly Connect to monitor your Google Sheet for any new entries or updates.

After selecting the trigger event, Pabbly Connect will provide you with a webhook URL. This URL needs to be integrated into your Google Sheet using the Pabbly Connect Webhooks add-on. Go to your Google Sheet, click on Extensions, and then Add-ons to install the Pabbly Connect Webhooks add-on.

  • Select Google Sheets and choose the trigger event.
  • Copy the provided webhook URL.
  • Install the Pabbly Connect Webhooks add-on in Google Sheets.

After installation, refresh your Google Sheet and navigate to Extensions > Pabbly Connect Webhooks > Initial Setup. Here, paste the webhook URL and select the trigger column.


4. Configuring DeepSeek AI Integration

Once your Google Sheets is connected, it’s time to set up DeepSeek AI in the action window of Pabbly Connect. Search for DeepSeek and select the action event as ‘Create Chat Completion’. This action will send the topic from your Google Sheet to DeepSeek AI for content generation.

To connect DeepSeek with Pabbly Connect, you will need an API key from your DeepSeek account. Navigate to the API key section in your DeepSeek account, create a new secret key, and copy it into Pabbly Connect to establish the connection.

Select DeepSeek as the application in the action window. Choose the action event ‘Create Chat Completion’. Enter your DeepSeek API key to connect.

After connecting, specify the prompt for content generation, including the topic and platform from your Google Sheet. This structured prompt will guide DeepSeek AI in generating relevant content.


5. Updating Google Sheets with Generated Content

Once DeepSeek AI generates the content, the next step is to update your Google Sheet with the results. In the action window of Pabbly Connect, add another action step and select Google Sheets again. This time, choose the action event ‘Update Spreadsheet Row’.

Connect your Google Sheets account again if prompted, and select the spreadsheet and sheet you want to update. Map the row index from the trigger step to ensure you update the correct row with the newly generated content from DeepSeek AI.

Add an action step for Google Sheets to update the row. Map the row index to ensure the correct row is updated. Select the fields to update with content from DeepSeek.

Once everything is set up, test your workflow by entering a new topic in your Google Sheet. The AI agent will generate content and update it in the same row, showcasing the seamless integration powered by Pabbly Connect.


Conclusion

In this tutorial, we explored how to create a DeepSeek AI agent for Google Sheets using Pabbly Connect. By following these steps, you can automate content generation based on topics entered in Google Sheets, enhancing productivity and efficiency.

Ensure you check out Pabbly Connect to create business automation workflows and reduce manual tasks. Pabbly Connect currently offer integration with 2,000+ applications.

Utilizing Pabbly Connect allows for seamless integration, making it a valuable tool for automating workflows across various applications. Start leveraging this powerful combination today to streamline your content generation process.

Integrate Zoho CRM and ActiveCampaign with Facebook Lead Ads Using Pabbly Connect

Learn how to seamlessly integrate Zoho CRM and ActiveCampaign with Facebook Lead Ads using Pabbly Connect. Automate your lead management process effortlessly. Discover hidden automation capabilities within your existing tools. This guide shows you how to connect your essential applications and permanently eliminate redundant manual processes.

Watch Step By Step Video Tutorial Below


1. Accessing Pabbly Connect for Integration

To start integrating Zoho CRM and ActiveCampaign with Facebook Lead Ads, first access Pabbly Connect. This powerful automation platform allows you to create workflows without any coding skills.

Visit the Pabbly Connect website and sign in or create a new account. Once logged in, you will be directed to the dashboard where you can manage your workflows. Here, you can easily create a new workflow to automate your lead management process.


2. Creating a New Workflow in Pabbly Connect

Next, you will create a new workflow in Pabbly Connect. Click on the ‘Create Workflow’ button and provide a name for your workflow, such as ‘Create Zoho CRM Lead & ActiveCampaign Contact for Facebook Lead Ads’. Select the appropriate folder for organization.

  • Name your workflow clearly for easy identification.
  • Choose a folder to save your workflow.

This workflow will trigger when a new lead is generated from Facebook Lead Ads. Ensure that you have all necessary permissions set up in Pabbly Connect to connect with Facebook, Zoho CRM, and ActiveCampaign.


3. Connecting Facebook Lead Ads with Pabbly Connect

In this step, you will connect Facebook Lead Ads to Pabbly Connect. Choose Facebook as your trigger application and select the trigger event as ‘New Lead’. This will initiate the workflow whenever a new lead is captured.

Authenticate your Facebook account by following the prompts. Once connected, select the Facebook page and lead form you want to use. This setup allows Pabbly Connect to fetch leads directly from your Facebook Lead Ads.


4. Creating a Lead in Zoho CRM via Pabbly Connect

Now, you will set up the action to create a lead in Zoho CRM through Pabbly Connect. Select Zoho CRM as your action application and choose ‘Create Lead’ as the action event. Authenticate your Zoho CRM account to allow Pabbly Connect to manage leads.

  • Map the fields from Facebook Lead Ads to Zoho CRM, ensuring that first name, last name, and email are correctly assigned.
  • Test the connection to verify that leads are created successfully.

After setting up the fields, test the integration to ensure that every new lead from Facebook is correctly added to Zoho CRM. This step is crucial for maintaining an accurate lead database.


5. Adding a Contact in ActiveCampaign

Finally, set up the action to create a contact in ActiveCampaign using Pabbly Connect. Choose ActiveCampaign as your action application and select ‘Create Contact’ as the action event. Connect your ActiveCampaign account by providing the necessary API key and URL.

Map the lead information from Facebook to the corresponding fields in ActiveCampaign. Ensure that the data flows seamlessly from Facebook Lead Ads to both Zoho CRM and ActiveCampaign. This will enable effective follow-up and marketing automation.


Conclusion

By following this tutorial, you can effectively integrate Zoho CRM and ActiveCampaign with Facebook Lead Ads using Pabbly Connect. Automating this process saves time and ensures that all leads are captured accurately, enabling better lead management and marketing strategies.

Ensure you check out Pabbly Connect to create business automation workflows and reduce manual tasks. Pabbly Connect currently offer integration with 2,000+ applications.

How to Add IndiaMART Leads to Google Sheets Using Pabbly Connect for Tax Consultancy Services

Learn how to automate adding IndiaMART leads to Google Sheets for tax consultancy services using Pabbly Connect. Step-by-step tutorial with detailed instructions. Implement the precise methodologies leading organizations use to automate repetitive tasks, illustrated with practical examples designed for immediate application.

Watch Step By Step Video Tutorial Below


1. Accessing Pabbly Connect for Automation

To start automating the process of adding IndiaMART leads to Google Sheets for tax consultancy services, you first need to access Pabbly Connect. This platform allows you to create workflows that integrate various applications effortlessly.

Begin by visiting the Pabbly website at Pabbly.com/connect. Sign in with your existing account or create a new one to get started. Once logged in, navigate to the Pabbly Connect dashboard, where you can manage your workflows.


2. Creating a New Workflow in Pabbly Connect

After accessing the dashboard, the next step is to create a new workflow. Click on the ‘Create Workflow’ button. You will be prompted to name your workflow, which should reflect its purpose, such as ‘Add IndiaMART Leads to Google Sheets for Tax Consultancy Services’. using Pabbly Connect

  • Provide a descriptive name for your workflow.
  • Select a folder to save this workflow.
  • Click on the ‘Create’ button to finalize.

Once created, you will see two boxes labeled ‘Trigger’ and ‘Action’. The trigger is the event that starts the automation, while the action is what happens as a result. Here, the trigger will be IndiaMART, and the action will be Google Sheets.


3. Setting Up the IndiaMART Trigger in Pabbly Connect

To set up the trigger, select IndiaMART as your trigger application. Under the trigger event, choose ‘New Leads’. This will ensure that every time a new lead is generated in IndiaMART, it will trigger the workflow in Pabbly Connect.

Next, you will need to connect your IndiaMART account to Pabbly Connect using a webhook URL. Copy the webhook URL provided by Pabbly Connect and log into your IndiaMART account. Navigate to the Lead Manager section, and under the options, select ‘Import/Export Leads’ and then ‘Push API’.

  • Select ‘Other’ as the source.
  • Paste the copied webhook URL into the appropriate field.
  • Enter ‘Pabbly Connect’ as your CRM platform name.

After saving the details, you will need to generate an OTP and confirm the connection. Once this is done, return to Pabbly Connect to check the webhook response.


4. Testing the IndiaMART Trigger and Setting Up Google Sheets Action

To test the trigger, you need to submit a query from your IndiaMART profile. This action will help verify if the webhook is capturing the data correctly. After submitting a query, return to your Pabbly Connect dashboard to see if the response has been recorded. using Pabbly Connect

Once the trigger is confirmed to be working, the next step is to set up the action. Select Google Sheets as your action application and choose ‘Add New Row’ as your action event. You will need to connect your Google Sheets account to Pabbly Connect, which can be done by clicking on the ‘Connect’ button.

Authorize Pabbly Connect to access your Google account. Select the Google Sheets spreadsheet where you want to add leads.

After selecting the spreadsheet, use the mapping method to dynamically insert data from the IndiaMART lead response into the respective fields in Google Sheets.


5. Finalizing the Integration and Testing

After mapping all necessary fields from the IndiaMART response to your Google Sheets, click on the ‘Save and Send Test Request’ button. This will send a test entry to your Google Sheets. Check your spreadsheet to ensure that the new lead details have been added correctly.

For final verification, submit another test lead through your IndiaMART profile. If the details appear automatically in Google Sheets, your integration is successful. This process allows you to automate the addition of leads, saving you time and ensuring accuracy.

This entire automation process is facilitated by Pabbly Connect, which acts as the bridge between IndiaMART and Google Sheets. With this setup, you can focus more on your tax consultancy services while Pabbly Connect handles the lead management efficiently.


Conclusion

In conclusion, using Pabbly Connect to add IndiaMART leads to Google Sheets for tax consultancy services streamlines your workflow. By following these steps, you can automate lead management effectively, ensuring timely responses to inquiries.

Ensure you check out Pabbly Connect to create business automation workflows and reduce manual tasks. Pabbly Connect currently offer integration with 2,000+ applications.

How to Send WhatsApp Messages to IndiaMART Leads Using Pabbly Connect

Learn how to automate WhatsApp messages to IndiaMART leads using Pabbly Connect and Pabbly Connect. Step-by-step tutorial included. Eliminate manual repetitive tasks from your workflow. Discover proven automation methods with intuitive steps designed for efficiency-minded professionals.

Watch Step By Step Video Tutorial Below


1. Accessing Pabbly Connect for Automation

To start sending WhatsApp messages to IndiaMART leads, first, access Pabbly Connect by visiting the official website. After arriving at the homepage, you will see options to sign in or sign up. If you are an existing user, click on the ‘Sign In’ button located at the top right corner of the page. New users can create an account by selecting ‘Sign Up for Free’, which offers 100 free tasks monthly.

Once logged in, you will be directed to the Pabbly apps page. Here, locate Pabbly Connect and click on it to access your dashboard. From this dashboard, you can manage all your workflows efficiently, including creating new automation between IndiaMART and WhatsApp.


2. Creating a New Workflow in Pabbly Connect

In this step, you will create a new workflow to automate WhatsApp messages for IndiaMART leads. Click on the ‘Create Workflow’ button. You will need to name your workflow, such as ‘Send WhatsApp Message to IndiaMART Leads’. Select the appropriate folder for organization, like ‘IndiaMART Automations’.

  • Click on ‘Create’ to initiate the workflow.
  • You will see two boxes: Trigger and Action.
  • Select ‘IndiaMART’ as your trigger application and ‘New Leads’ as the trigger event.

With the trigger set up, the next step is to connect your IndiaMART account to Pabbly Connect. This will require a webhook URL that acts as a bridge between the two applications. Copy the webhook URL provided by Pabbly Connect for use in your IndiaMART settings.


3. Configuring IndiaMART to Send Leads to Pabbly Connect

Now, navigate to your IndiaMART account. Go to the Lead Manager section, click on the three dots, and select ‘Import/Export Leads’. From there, choose ‘Push API’ to integrate with Pabbly Connect. In the settings, select ‘Other’ as the source and input your CRM platform name as Pabbly Connect.

  • Paste the webhook URL into the designated field.
  • Click on ‘Save Details’ to complete the connection.
  • Generate and enter the OTP to finalize the setup.

Once the webhook URL is saved, return to Pabbly Connect. You should see a notification indicating that it is waiting for a response from IndiaMART. To test the connection, submit a test lead from your IndiaMART profile, which will allow Pabbly Connect to capture the data.


4. Sending WhatsApp Messages Using Pabbly Chatflow

After successfully capturing the lead data, the next step is to send WhatsApp messages using Pabbly Chatflow. In Pabbly Connect, select Pabbly Chatflow as your action application and choose ‘Send Template Message’ as the action event. Ensure you have created a WhatsApp template in Pabbly Chatflow beforehand.

To create a WhatsApp template, navigate to Pabbly Chatflow and click on ‘Templates’. You can add a new template by clicking on ‘Add New Template’. Fill in the required fields, including template name, language, and message content, ensuring to include custom variables for personalization.

Select the appropriate template type, such as ‘Marketing’. Add custom variables to personalize messages. Submit the template for approval before use.

Once your template is approved, return to Pabbly Connect and connect your Pabbly Chatflow account. Enter your API token from Pabbly Chatflow to establish the connection. After that, map the recipient’s mobile number and template name to ensure the correct data is sent.


5. Testing the Integration and Finalizing the Workflow

With everything set up, it’s time to test the integration. Click on ‘Save and Send Test Request’ in Pabbly Connect to send a test WhatsApp message. Ensure that you have mapped all necessary fields correctly, including the recipient’s phone number and any custom variables in your message.

Check your WhatsApp account to confirm that the message was received. If successful, you will see the message appear in your inbox. This confirms that the automation between IndiaMART and WhatsApp via Pabbly Connect is functioning as intended.

If there are any issues, revisit the mapping and connections in Pabbly Connect and Pabbly Chatflow. Ensure that all variables are dynamic and mapped correctly to maintain the automation process.


Conclusion

In this tutorial, we demonstrated how to automate WhatsApp messages to IndiaMART leads using Pabbly Connect and Pabbly Chatflow. By following these steps, you can efficiently manage inquiries and enhance customer communication without manual effort. This automation not only saves time but also improves customer engagement.

Ensure you check out Pabbly Connect to create business automation workflows and reduce manual tasks. Pabbly Connect currently offer integration with 2,000+ applications.

Create Instagram Stories from WordPress Posts Using Pabbly Connect

Learn how to automate Instagram story creation from WordPress posts using Pabbly Connect in this detailed tutorial. Follow our step-by-step guide for seamless integration. Master proven automation processes with practical implementation examples and strategic recommendations you can apply immediately in your workflow.

Watch Step By Step Video Tutorial Below


1. Setting Up Pabbly Connect for Instagram Story Automation

To create Instagram stories from WordPress posts, start by accessing Pabbly Connect. This powerful automation tool allows you to connect multiple applications without any coding skills. Simply visit the Pabbly Connect homepage by entering the URL Pabbly.com/connect in your browser.

Once on the homepage, you will see options to sign in or sign up. If you are a new user, click on the ‘Sign up for free’ button to create an account. Existing users can click on ‘Sign in’. After signing in, navigate to the dashboard of Pabbly Connect where you can create new workflows.


2. Creating a New Workflow in Pabbly Connect

In the dashboard of Pabbly Connect, click on the ‘Create Workflow’ button. A dialog box will prompt you to name your workflow. Name it ‘Create Instagram Story from WordPress Post’ and select an appropriate folder for organization.

  • Choose the folder for your social media automations.
  • Click ‘Create’ to proceed.

After creating the workflow, you will see two important sections: Trigger and Action. The Trigger is the event that starts the workflow, while the Action is what happens in response. For this integration, we will set WordPress as the trigger and Instagram as the action.


3. Configuring WordPress as the Trigger Application

To set up WordPress as the trigger in Pabbly Connect, select WordPress from the trigger application options. Then, choose the trigger event ‘New Post Published’. This means that every time a new post is published on WordPress, it will trigger the workflow.

Next, Pabbly Connect will provide you with a webhook URL. This URL needs to be added to your WordPress site to establish the connection. You will need to install the WP Webhooks plugin in your WordPress dashboard, which allows you to send data to the webhook.

  • Go to the Plugins section in WordPress and search for WP Webhooks.
  • Install and activate the plugin.

Once activated, go to the WP Webhooks settings and set up the webhook URL you copied from Pabbly Connect. This will allow the data from WordPress to flow into Pabbly Connect whenever a new post is published.


4. Connecting Instagram as the Action Application

After configuring the WordPress trigger, the next step is to set Instagram as the action application in Pabbly Connect. Choose ‘Instagram for Business’ and select the action event ‘Create Story’. This action will allow you to create a story on Instagram based on the new post from WordPress.

To establish this connection, you need to log into your Instagram account through Pabbly Connect. Make sure you are logged into both your Facebook and Instagram accounts, as they are linked. Click on the connect button and follow the prompts to authorize Pabbly Connect to access your Instagram account.

Select the Instagram account you want to connect. Map the necessary fields, such as image URL and story type.

Once the connection is successful, you can proceed to test the integration by creating a new post in WordPress and ensuring it reflects in your Instagram stories.


5. Testing the Integration and Publishing Stories

To test the integration, create a new post in WordPress. After publishing the post, return to Pabbly Connect to see if the webhook captures the new post data. You should see the details of the published post, confirming that the connection is working.

Next, go back to the Instagram action setup in Pabbly Connect and ensure that the story is created. You may need to add an additional action to publish the story on Instagram after creating it. Select ‘Publish Video or Story’ as the action event and map the story ID you received from the previous step.

Ensure the story ID is dynamically mapped to allow for future posts. Test the action to confirm the story is published on your Instagram account.

Once everything is set up and tested, every new WordPress post will automatically create and publish a corresponding story on Instagram, streamlining your content sharing process.


Conclusion

By using Pabbly Connect, you can effortlessly automate the process of creating Instagram stories from your WordPress posts. This integration not only saves time but also ensures your audience stays engaged with your content across platforms. Start using Pabbly Connect today to enhance your social media strategy!

Ensure you check out Pabbly Connect to create business automation workflows and reduce manual tasks. Pabbly Connect currently offer integration with 2,000+ applications.

How to Automatically Enroll Zenler Users from Instagram Lead Ads with Pabbly Connect

Learn how to automate the enrollment of Zenler users from Instagram Lead Ads using Pabbly Connect. Step-by-step guide for seamless integration. Implement the precise methodologies leading organizations use to automate repetitive tasks, illustrated with practical examples designed for immediate application.

Watch Step By Step Video Tutorial Below


1. Access Pabbly Connect to Start Integration

To enroll Zenler users from Instagram Lead Ads automatically, you first need to access Pabbly Connect. Go to the Pabbly Connect homepage by entering the URL in your browser.

Here, you will see options to sign in or sign up. If you are a new user, click on ‘Sign Up for Free’ to create an account. Existing users can simply log in. Remember, signing up gives you access to 100 free tasks each month to explore automation features.


2. Create a Workflow in Pabbly Connect

Once logged into Pabbly Connect, navigate to the dashboard. Here, you can create a new workflow by clicking on the ‘Create Workflow’ button. You will be prompted to name your workflow, so enter a descriptive name like ‘Enroll Zenler Users from Instagram Lead Ads Automatically’.

  • Select the appropriate folder for organization.
  • Click on ‘Create’ to proceed.

This sets up the basic structure for your automation. Now, you will define the trigger and action for the workflow.


3. Set Trigger and Action in Pabbly Connect

In this step, you will set the trigger and action for your workflow. Choose ‘Instagram Lead Ads’ as the trigger application and select ‘New Lead Instant’ as the trigger event. This means every time a new lead is captured, it will trigger the workflow.

Next, connect your Instagram account to Pabbly Connect. Ensure you are logged into your Instagram account and select the Facebook page linked to your ads. Confirm the connection to proceed.


4. Test the Integration with Pabbly Connect

After establishing the connection, it’s essential to test it. You will need to capture a test lead. If you are not running a live campaign, use the Lead Ads Testing Tool provided by Meta to simulate a lead submission.

  • Select your Facebook page and lead form.
  • Submit the form to send a test lead to Pabbly Connect.

Once the test lead is submitted, return to Pabbly Connect to check if the response was captured successfully. You should see the details of the lead displayed in the response section.


5. Add User to Zenler via Pabbly Connect

Now that you have captured the lead, the next step is to add this lead as a user in Zenler. Choose ‘Zenler’ as the action application and select ‘Add New User’ as the action event. Connect your Zenler account by providing your school name and API key. using Pabbly Connect

Map the captured lead details to the corresponding fields in Zenler. This includes first name, last name, email, and setting a password. Use the email as the password for simplicity. After mapping the fields, click ‘Save and Send Test Request’ to finalize adding the user.


Conclusion

Using Pabbly Connect, you can automate the process of enrolling Zenler users from Instagram Lead Ads seamlessly. This integration not only saves time but also enhances user engagement by allowing leads to explore courses immediately.

Ensure you check out Pabbly Connect to create business automation workflows and reduce manual tasks. Pabbly Connect currently offer integration with 2,000+ applications.