How to Reply to Google Business Profile Reviews Using AI Agent with Pabbly Connect

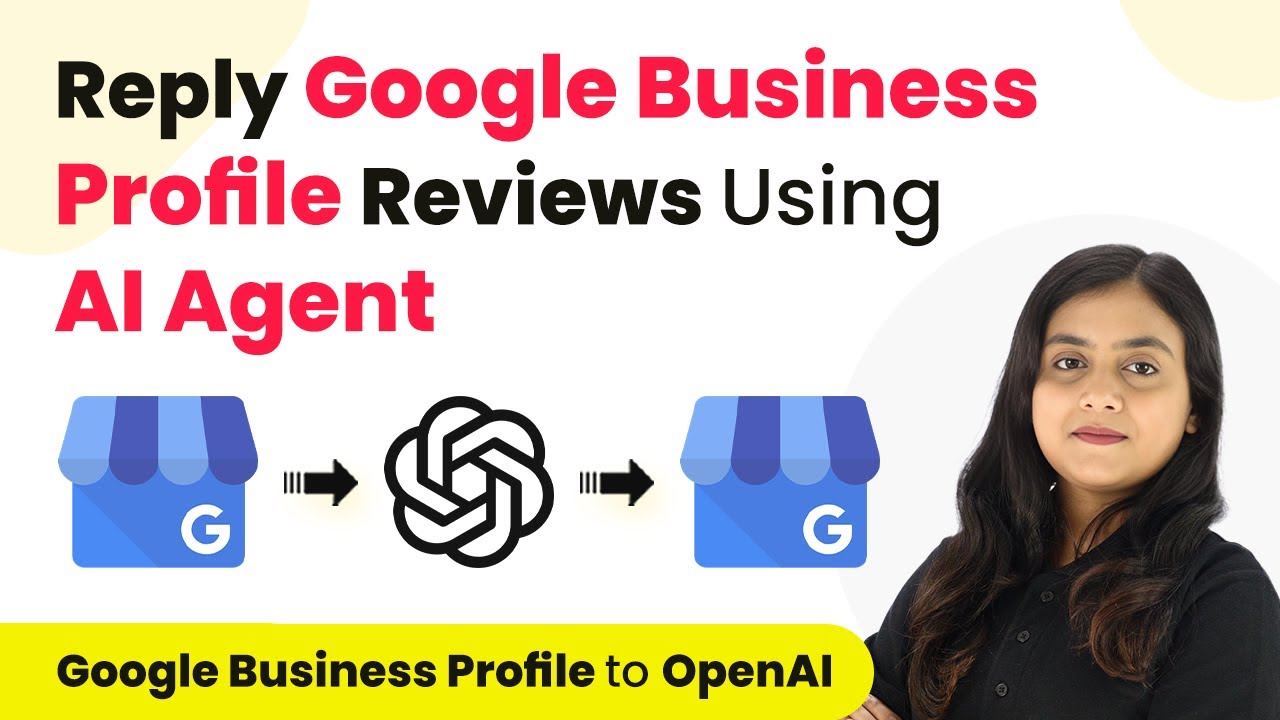
Learn how to automate replies to Google Business Profile reviews using Pabbly Connect and AI Agent. Step-by-step tutorial for seamless integration. Follow this definitive guide to creating powerful automated workflows with straightforward, efficiency-focused solutions that save valuable time.

Watch Step By Step Video Tutorial Below


1. Setting Up Pabbly Connect for Review Automation

To start automating replies to Google Business Profile reviews using Pabbly Connect, first visit the Pabbly Connect website and log in to your account. If you are a new user, you can sign up for free, allowing you to utilize 100 free tasks every month.

Once logged in, navigate to the ‘All Apps’ section and select Pabbly Connect by clicking the ‘Access Now’ button. After that, you will be directed to the Pabbly Connect dashboard where you can create a new workflow for your automation.


2. Creating a Workflow in Pabbly Connect

To create a workflow in Pabbly Connect, click on the ‘Create Workflow’ button located at the top right corner of the dashboard. A dialog box will appear prompting you to name your workflow and select a folder for it. Name your workflow ‘Reply Google Business Profile Reviews Using AI Agent’ and choose an appropriate folder, such as ‘AI Agent Automations’.

  • Click on the ‘Create’ button to finalize your workflow setup.
  • You will see two sections: Trigger and Action, which are essential for your automation.

In this workflow, the trigger will be set to capture new reviews from your Google Business Profile. This setup allows Pabbly Connect to automatically respond to customer reviews as they come in, enhancing your engagement with customers.


3. Configuring the Trigger for New Reviews

To configure the trigger, select ‘Google Business Profile’ as the trigger application. The trigger event will be set to ‘New Review’. This means that every time a new review is posted, Pabbly Connect will capture it, allowing your AI agent to generate a response.

After selecting the trigger application and event, click on the ‘Connect’ button. You will have the option to create a new connection or use an existing one. If you choose to create a new connection, sign in with your Google account and authorize Pabbly Connect to access your Google Business Profile.


4. Using AI Agent to Generate Responses

Once the trigger is set up, the next step is to configure the action that uses the AI agent to generate replies. For the action application, select ‘OpenAI’ and set the action event to ‘ChatGPT’. This integration allows Pabbly Connect to utilize AI to craft thoughtful responses based on the reviews captured.

To connect to OpenAI, you will need an API token. You can generate this token from your OpenAI account. After entering the token in Pabbly Connect, select the AI model you wish to use, such as GPT-4. Then, create a prompt that instructs the AI on how to respond to the reviews.

  • For example, your prompt could be: ‘Generate a polite response for a customer who rated my store 5 stars. Their review is: [insert review].’
  • This mapping allows dynamic data to be inserted into your responses.

Once you have configured the prompt and mapped the necessary data fields, click on the ‘Save and Test Request’ button. You should see the AI-generated response based on the review.


5. Posting the AI-Generated Reply to Google Business Profile

The final step in this automation process is to post the AI-generated reply back to the Google Business Profile. For this, add another action step in your workflow and select ‘Google Business Profile’ again, this time setting the action event to ‘Create Reply’.

After connecting to your Google Business Profile, map the necessary fields such as the review name and the AI-generated content. Once all fields are filled out, click on the ‘Save and Test Request’ button. This will send the AI-generated reply to the specific review on your Google Business Profile, completing the automation.

Now, whenever a new review is posted, Pabbly Connect will automatically generate and post a reply, ensuring timely and engaging responses to your customers.


Conclusion

In this tutorial, we explored how to automate replies to Google Business Profile reviews using Pabbly Connect and AI Agent. This integration streamlines your customer engagement process, saves time, and enhances your brand reputation by ensuring prompt responses.

Ensure you check out Pabbly Connect to create business automation workflows and reduce manual tasks. Pabbly Connect currently offer integration with 2,000+ applications.

How to Schedule Facebook Page Posts Every Day with Pabbly Connect

Learn how to schedule Facebook page posts every day using Pabbly Connect. This detailed tutorial guides you through the integration process with Google Sheets and AI agents.

Watch Step By Step Video Tutorial Below


1. Accessing Pabbly Connect for Scheduling Facebook Posts

To schedule Facebook page posts every day with AI Agent, you need to access Pabbly Connect. Start by visiting the Pabbly Connect website and signing in to your account. If you’re new, you can sign up for free and receive 100 free tasks each month.

Once logged in, you will see the dashboard displaying all Pabbly applications. Click on the ‘Connect’ button to access the Pabbly Connect dashboard. This platform will facilitate the integration between Google Sheets, AI agents, and Facebook, allowing you to automate your posting process effectively.


2. Creating a Workflow in Pabbly Connect

To create a workflow in Pabbly Connect, click on the ‘Create Workflow’ button located at the top right corner of the dashboard. A dialog box will appear prompting you to name your workflow. Enter a name like ‘Schedule Facebook Page Post Every Day with AI Agent’ and select a folder to save it in.

  • Name your workflow as ‘Schedule Facebook Page Post Every Day with AI Agent’.
  • Select an appropriate folder for your workflow.

After naming the workflow and selecting the folder, click on the ‘Create’ button. This will set up your initial workflow, consisting of a trigger and an action, which are crucial for the automation process.


3. Setting Up the Trigger in Pabbly Connect

The next step is to configure the trigger in Pabbly Connect. Click on the trigger application and select ‘Schedule by Pabbly’. This feature allows you to schedule your workflow at specific times, which is essential for posting daily on your Facebook page.

For the trigger event, choose ‘Schedule Workflow’ and set it to run daily. Specify the time you want the posts to go live, for instance, 10:30 AM. After setting the time, click on the ‘Save’ button to confirm your settings.


4. Integrating Google Sheets with Pabbly Connect

Now, it’s time to integrate Google Sheets into your workflow using Pabbly Connect. Select Google Sheets as the action application and choose ‘Lookup Spreadsheet V2’ as the action event. This step allows you to retrieve the necessary post captions and hashtags from your spreadsheet.

  • Connect your Google Sheets account by clicking on ‘Add New Connection’ and authorizing access.
  • Select the spreadsheet containing your Facebook post details and specify the sheet.

After connecting, map the columns for the post date, caption, and hashtags. This mapping ensures that the workflow pulls the correct data for each scheduled post.


5. Using AI Agent to Generate Content and Post on Facebook

With the data retrieved from Google Sheets, the next step is to use an AI agent for content generation. In Pabbly Connect, select OpenAI as the action application and choose ‘Chat GPT’ as the action event. This integration allows you to create engaging content based on the retrieved post captions.

Configure the prompt to instruct the AI on how to generate the content. For example, you can specify that the AI should create a unique and engaging 120-word post based on the caption and hashtags. Once configured, click on ‘Save and Send Test Request’ to generate the content.

Finally, to post on Facebook, select Facebook Pages as the action application and choose ‘Create Page Photo Post’. Map the generated content and the image URL, and then click on ‘Save and Send Test Request’ to publish your post. This entire process automates your daily postings, keeping your audience engaged and your brand active.


Conclusion

By following these steps, you can effectively use Pabbly Connect to schedule Facebook page posts every day with an AI agent. This automation not only saves time but also enhances customer engagement by delivering regular, high-quality content. Streamline your social media strategy today with Pabbly Connect!

Ensure you check out Pabbly Connect to create business automation workflows and reduce manual tasks. Pabbly Connect currently offer integration with 2,000+ applications.

How to Create WordPress Posts for RSS Feed Using Pabbly Connect

Learn how to automate WordPress post creation from RSS feeds using Pabbly Connect and AI agents. Step-by-step guide included. Master proven automation processes with practical implementation examples and strategic recommendations you can apply immediately in your workflow.

Watch Step By Step Video Tutorial Below


1. Accessing Pabbly Connect for RSS to WordPress Integration

To create WordPress posts from an RSS feed using AI, first, access Pabbly Connect. Go to the Pabbly website and log in to your account. If you are a new user, sign up for a free account to get started.

Once logged in, navigate to the Pabbly Connect dashboard. Here, you can manage your workflows efficiently. To begin your integration process, select the option to create a new workflow for RSS feed automation.


2. Setting Up RSS Trigger in Pabbly Connect

In this step, you will set up the RSS trigger in Pabbly Connect. Select ‘RSS by Pabbly’ as your trigger application. This integration allows you to automate the process of checking for new items in your specified RSS feed.

  • Choose ‘New Item in Feed’ as the trigger event.
  • Enter the RSS feed URL you want to monitor.
  • Select the filter type as per your requirements.

After entering these details, click on the ‘Save & Send Test Request’ button. This will test the connection and ensure that Pabbly Connect can successfully retrieve new items from the RSS feed.


3. Using AI to Generate WordPress Posts

Next, you will use an AI agent to generate content for your WordPress posts. In this step, choose ‘OpenAI’ as your action application within Pabbly Connect. This allows you to generate text based on the new RSS feed items.

  • Select ‘Generate Content’ as the action event.
  • Enter your API token from OpenAI for authentication.
  • Craft a prompt that specifies what type of content to generate.

Once you configure these settings, click on ‘Save & Send Test Request’ to generate a sample post. This step ensures that your AI agent is set up correctly to create relevant content for your WordPress posts.


4. Creating WordPress Post Using Pabbly Connect

After generating content with AI, the next step is to create a WordPress post. Choose ‘WordPress’ as your action application in Pabbly Connect. This is where you will post the content generated by the AI agent.

Select ‘Create Post’ as the action event. Map the title and content fields to the generated content from the AI. Configure additional settings like post status and category as needed.

Click on ‘Save & Send Test Request’ to create a test post in WordPress. This will confirm that your integration is functioning correctly, and the post will appear on your WordPress site.


5. Finalizing and Testing the Integration

Once you have set up the integration between RSS, AI, and WordPress using Pabbly Connect, it’s crucial to finalize and test everything. Review all the steps to ensure that the triggers and actions are correctly configured.

After reviewing, perform a final test by adding a new item to your RSS feed. Monitor the workflow in Pabbly Connect to see if the new post is created in WordPress as expected. This will validate that your automation is working seamlessly.


Conclusion

By following these steps, you can automate the process of creating WordPress posts from RSS feeds using Pabbly Connect and AI agents. This integration not only saves time but also ensures that your website is regularly updated with fresh content.

Ensure you check out Pabbly Connect to create business automation workflows and reduce manual tasks. Pabbly Connect currently offer integration with 2,000+ applications.

Utilizing Pabbly Connect for this automation enhances your workflow efficiency, allowing you to focus on other important aspects of your media management.

How to Post Google Business Profile Review on Facebook using Pabbly Connect

Learn how to automate posting Google Business Profile reviews on Facebook using Pabbly Connect. Follow this detailed tutorial for seamless integration. Transform complex automation concepts into accessible, actionable steps that eliminate unnecessary manual work while maximizing existing application capabilities.

Watch Step By Step Video Tutorial Below


1. Accessing Pabbly Connect for Integration

To begin automating the process of posting Google Business Profile reviews on Facebook, you need to access Pabbly Connect. This platform simplifies the integration between various applications without requiring any coding skills.

Start by navigating to the Pabbly website. If you are an existing user, click on the ‘Sign In’ option located at the top right corner. For new users, you can click on ‘Sign Up for Free’ to create an account and receive 100 free tasks monthly.


2. Creating a Workflow in Pabbly Connect

Once you are signed in, you will be directed to the Pabbly Connect dashboard. Here, you can create a new workflow to automate the posting of Google Business Profile reviews. Name your workflow something descriptive like ‘Post Google Business Profile Review on Facebook’. using Pabbly Connect

  • Click on ‘Create Workflow’ to start.
  • Select Google as your trigger application.
  • Choose the trigger event as ‘New Review Received’.

After setting up the trigger, you will need to connect your Google account. Click on the ‘Connect’ button and follow the prompts to authenticate your Google account, ensuring that Pabbly Connect can access your Google Business Profile.


3. Setting Up Facebook to Post Reviews

Now that you have successfully connected Google to Pabbly Connect, the next step is to set up Facebook as your action application. This will allow you to post the reviews received directly to your Facebook page. using Pabbly Connect

In the action step, select Facebook as the application and choose the action event as ‘Create Post’. You will need to connect your Facebook account by clicking on the ‘Connect’ button and logging in with your Facebook credentials.

  • Enter the Page Name where the review should be posted.
  • Map the review details from Google to the Facebook post.

Once you have configured the Facebook setup, ensure that you save the changes. This integration allows you to automatically post reviews from Google Business Profile to your Facebook page.


4. Testing the Integration

With both Google and Facebook connected through Pabbly Connect, it’s time to test the integration. You can do this by sending a test request to see if a review gets posted to Facebook when a new review is received on Google.

Click on ‘Send Test Request’ to initiate the test. If everything is set up correctly, you should see a success message indicating that the review has been posted on your Facebook page. Check your Facebook page to confirm that the review appears as expected.


5. Automating the Review Posting Process

Now that you have successfully tested the integration, the final step is to automate the process. Pabbly Connect will automatically check for new reviews every hour and post them to your Facebook page. using Pabbly Connect

This automation allows you to manage your online presence efficiently without manual intervention. Simply monitor your Google Business Profile and Facebook page to see the reviews being posted automatically.

Remember, every time a new review is posted on Google, Pabbly Connect will trigger the workflow, ensuring your Facebook page is updated in real-time.


Conclusion

In conclusion, using Pabbly Connect to automate posting Google Business Profile reviews on Facebook is a seamless process. By following the steps outlined, you can enhance your business’s online presence effortlessly.

Ensure you check out Pabbly Connect to create business automation workflows and reduce manual tasks. Pabbly Connect currently offer integration with 2,000+ applications.

How to Generate Blog Posts Using AI Agent from Google Sheets to Google Docs with Pabbly Connect

Learn how to automate blog post creation from Google Sheets to Google Docs using Pabbly Connect and an AI agent. Step-by-step guide included! Transform complex automation concepts into accessible, actionable steps that eliminate unnecessary manual work while maximizing existing application capabilities.

Watch Step By Step Video Tutorial Below


1. Accessing Pabbly Connect for Automation

To start generating blog posts using AI agents from Google Sheets to Google Docs, you first need to access Pabbly Connect. Open your browser and navigate to the Pabbly Connect landing page at Pabbly.com/connect.

Once there, you will see options to either sign in or sign up for free. If you are a new user, click on the ‘Sign Up for Free’ button to create an account. Existing users can simply sign in to access their dashboard, where you will manage your automation workflows.


2. Creating Your Workflow in Pabbly Connect

After signing in, the next step is to create a new workflow in Pabbly Connect. Click on the ‘Create Workflow’ button. You will be prompted to name your workflow and choose a folder to save it in. Name your workflow something descriptive, such as ‘Generate Blog Post Using AI Agent from Google Sheets to Google Docs’.

  • Click on the ‘Create’ button to proceed.
  • This opens the workflow setup window where you can define triggers and actions.

In this window, select Google Sheets as your trigger application. Choose the event as ‘New or Updated Spreadsheet Rows’. This will allow your workflow to trigger whenever a new row is added or updated in your Google Sheets document.


3. Connecting Google Sheets to Pabbly Connect

To connect Google Sheets to Pabbly Connect, you will receive a webhook URL. Copy this URL, as it will be used to set up the connection in your Google Sheets account.

Open Google Sheets and navigate to Extensions > Add-ons > Get Add-ons. Search for ‘Pabbly Connect Webhook’ and install the add-on. After installation, refresh your Google Sheets, and you will see the Pabbly Connect Webhook option in the Extensions menu.

  • Select the Pabbly Connect Webhook option and go to Initial Setup.
  • Paste the copied webhook URL into the Webhook URL field and set the trigger column (e.g., ‘B’).

Click on Submit to complete the setup. This establishes a connection between your Google Sheets and Pabbly Connect, allowing data to flow seamlessly.


4. Generating Blog Post Using AI Agent

Now that your Google Sheets is connected, it’s time to generate a blog post using an AI agent. In the next step of Pabbly Connect, select OpenAI as your action application. Choose the action event as ‘ChatGPT’ and connect your OpenAI account using an API key.

To get your API key, go to the OpenAI API keys page, generate a new secret key, and copy it. Paste this key into the Pabbly Connect workflow to authenticate your OpenAI account. After connecting, you will be prompted to select the AI model; choose ‘GPT-4’.

Enter your prompt for the AI to generate the blog post. Map the blog title and target audience from the previous Google Sheets step.

Click on ‘Save and Send Test Request’ to generate the blog post. The content generated will be displayed in the response section of Pabbly Connect, confirming that the blog post has been successfully created.


5. Adding the Blog Post to Google Docs

After generating the blog post, the next step is to add it to Google Docs. In Pabbly Connect, add another action step and select Google Docs as your application. Choose the action event ‘Create Blank Document’ and connect your Google Docs account.

Once connected, map the document name to the blog title. After creating the document, add another action step to append the generated blog content to the newly created document.

Select Google Docs again and choose ‘Append a Paragraph to a Document’. Map the document ID and the content generated from the AI agent.

Click ‘Send Test Request’ to confirm that the content has been successfully added to your Google Docs document. You can then open Google Docs to verify that your blog post is there, formatted and ready for use.


Conclusion

In this tutorial, we demonstrated how to automate the process of generating blog posts using Pabbly Connect, Google Sheets, and Google Docs. By following these steps, you can efficiently create and manage blog content without manual effort. Utilize the power of automation to enhance your content creation process.

Ensure you check out Pabbly Connect to create business automation workflows and reduce manual tasks. Pabbly Connect currently offer integration with 2,000+ applications.

With Pabbly Connect, integrating various applications becomes seamless, allowing you to focus more on your content and less on the technicalities. Start automating your blog post generation today!

Schedule Motivational Quotes on Facebook Using Pabbly Connect and AI Agent

Learn how to automate posting motivational quotes on Facebook using Pabbly Connect and AI Agent in this detailed tutorial. Implement the precise methodologies leading organizations use to automate repetitive tasks, illustrated with practical examples designed for immediate application.

Watch Step By Step Video Tutorial Below


1. Access Pabbly Connect for Automation

To schedule motivational quotes on Facebook using Pabbly Connect, start by accessing the Pabbly Connect dashboard. Open your browser and visit the Pabbly Connect landing page at Pabbly.com/connect.

If you are a new user, click on the ‘Sign up for free’ option to create your account. Existing users can simply click on the ‘Sign in’ button to access their dashboards. Once logged in, navigate to the automation section.


2. Create a New Workflow in Pabbly Connect

After signing into Pabbly Connect, you will see an option to create a new workflow. Click on the ‘Create Workflow’ button to start your automation process. Name your workflow as ‘How to Schedule Motivational Quotes on Facebook using AI Agent’ and select the folder to save it.

Once you click on ‘Create’, you will enter the workflow window where you will set up the trigger and action. The trigger will be the event that starts the workflow, while the action will be what happens when the trigger occurs.


3. Set the Trigger for Scheduling Quotes

In this step, you will set the trigger application to schedule your workflow using Pabbly Connect. Search for the ‘Schedule’ feature and select it. For the trigger event, choose ‘Schedule Workflow Only’ to determine how frequently the workflow will run.

  • Set the frequency to ‘Every Day’.
  • Select the time for the workflow to run, ideally at 10 AM.

After setting these parameters, click on ‘Save’. This setup ensures that every day at 10 AM, your motivational quote will be generated and posted automatically.


4. Integrate AI Agent for Quote Generation

Next, you will integrate the AI Agent to generate motivational quotes. In Pabbly Connect, search for ‘Open AI’ and select it as your action application. Choose the action event as ‘Chat GPT’ and click on ‘Connect’.

You will need to create a new connection by entering your Open AI API key. To obtain the key, visit the Open AI API Keys page, create a new secret key, and copy it into your Pabbly Connect workflow. After entering the key, click on ‘Save’ to establish the connection successfully.


5. Post Generated Quotes on Facebook

Finally, you will set up the action to post the generated quotes on Facebook using Pabbly Connect. Search for ‘Facebook Pages’ and select it as your action application. Choose the action event ‘Create Page Post’ and connect it to your Facebook account.

  • Select the Facebook page where you want to post the quotes.
  • Map the message content from the AI Agent response to the message field.

After mapping the content, click on ‘Send Test Request’ to ensure everything is working correctly. You should see a confirmation that the motivational quote has been posted on your Facebook page. This completes your automation setup using Pabbly Connect.


Conclusion

In this tutorial, you learned how to automate the posting of motivational quotes on Facebook using Pabbly Connect and an AI Agent. This setup allows you to engage your audience effortlessly while saving time. By following these steps, your quotes will be posted daily without manual intervention.

Ensure you check out Pabbly Connect to create business automation workflows and reduce manual tasks. Pabbly Connect currently offer integration with 2,000+ applications.

How to Add IndiaMART Leads to Salesforce Using Pabbly Connect

Learn how to seamlessly integrate IndiaMART leads into Salesforce for web development services using Pabbly Connect. Step-by-step tutorial included. Develop expertise in application integration and learn how to design streamlined automation workflows using proven, simplified approaches.

Watch Step By Step Video Tutorial Below


1. Setting Up Pabbly Connect for Integration

To add IndiaMART leads to Salesforce, the first step is to access Pabbly Connect. This platform allows you to automate workflows between different applications seamlessly. Start by visiting the Pabbly Connect website and signing in to your account. If you are a new user, you can sign up for free and enjoy 100 free tasks every month.

Once logged in, navigate to the dashboard and select Pabbly Connect by clicking on the ‘Access Now’ button. This will take you to the Pabbly Connect dashboard where you can create a new workflow. Click on the ‘Create Workflow’ button located at the top right corner to begin the integration process.


2. Creating a Workflow in Pabbly Connect

When creating a workflow, you will be prompted to name it. For this integration, name your workflow ‘Add IndiaMART Leads to Salesforce for Web Development Services’. Next, select a folder to save your workflow in. Choose a folder that is relevant to your automation, such as ‘IndiaMART Automations’. using Pabbly Connect

  • Name your workflow appropriately.
  • Select the relevant folder for organization.

After naming and selecting the folder, click on the ‘Create’ button. This will set up your workflow where you will define the trigger and action for your integration. The trigger will be set to capture new leads from IndiaMART, while the action will be to create those leads in Salesforce.


3. Setting Up the Trigger with IndiaMART

The next step is to set up the trigger in your Pabbly Connect workflow. Select IndiaMART as the trigger application and choose the event ‘New Leads’. This means that whenever a new lead is generated in your IndiaMART account, it will trigger the workflow.

Once you select the trigger, Pabbly Connect will provide you with a unique webhook URL. Copy this URL and log into your IndiaMART account. Navigate to the Lead Manager section and select ‘Push API’ from the import/export options. Here, paste the webhook URL into the designated field and save the settings.


4. Testing the Trigger in Pabbly Connect

After setting up the webhook in IndiaMART, return to your Pabbly Connect workflow. To test if the connection is successful, click on the ‘Test Webhook URL’ button. This action will send test data to Pabbly Connect, allowing you to confirm that the integration is working correctly.

If the test is successful, you will see the test lead data captured in the trigger status section of your workflow. This data will include essential details like the lead’s name, contact information, and inquiry specifics, confirming that IndiaMART is now integrated with Pabbly Connect.


5. Setting Up the Action to Create Leads in Salesforce

Now that the trigger is set up, the next step is to configure the action. For the action application, select Salesforce and choose the action event ‘Create Lead’. This step will allow you to automatically create a new lead in Salesforce whenever a new lead is captured from IndiaMART. using Pabbly Connect

Click on the connect button to authorize Pabbly Connect to access your Salesforce account. After authorizing, you will need to map the lead data from the previous step to the fields in Salesforce. This includes the lead’s name, email, phone number, and other relevant information.

  • Map the lead’s name to the corresponding Salesforce field.
  • Ensure all required fields in Salesforce are filled with data from IndiaMART.

Once all fields are mapped correctly, click on the ‘Save and Test Request’ button. This action will create a new lead in your Salesforce account, confirming that the integration is successful. Refresh your Salesforce leads page to see the new lead added automatically.


Conclusion

By following this tutorial, you can successfully integrate IndiaMART leads into Salesforce using Pabbly Connect. This automation saves time and ensures that all leads are captured and managed effectively in your CRM. With Pabbly Connect, you can streamline your workflow and focus more on growing your web development services business.

Ensure you check out Pabbly Connect to create business automation workflows and reduce manual tasks. Pabbly Connect currently offer integration with 2,000+ applications.

Automate WhatsApp Messages to IndiaMART Leads Using Pabbly Connect

Learn how to automate sending WhatsApp messages to IndiaMART leads for contract manufacturing services with Pabbly Connect and Pabbly Connect. Step-by-step tutorial included. Eliminate manual repetitive tasks from your workflow. Discover proven automation methods with intuitive steps designed for efficiency-minded professionals.

Watch Step By Step Video Tutorial Below


1. Accessing Pabbly Connect for Integration

To automate sending WhatsApp messages to IndiaMART leads, the first step is to access Pabbly Connect. Sign in to your existing account or create a new one on the Pabbly website. This platform is essential for integrating various applications, including IndiaMART and WhatsApp.

Once logged in, navigate to the Pabbly Connect dashboard. Here, you will create a new workflow for sending WhatsApp messages. Click on the ‘Create Workflow’ button to start your automation process.


2. Creating a Workflow in Pabbly Connect

After accessing Pabbly Connect, you need to set up a workflow specifically for sending WhatsApp messages to your leads. Name your workflow, such as ‘Send WhatsApp Message to IndiaMART Leads for Contract Manufacturing Services,’ and select a folder to save it in.

  • Click the ‘Create’ button to finalize your workflow setup.
  • Choose ‘IndiaMART’ as the trigger application.
  • Set the trigger event to ‘New Lead’ to capture incoming inquiries.

By setting up the trigger in Pabbly Connect, you ensure that every time a new lead is generated, the workflow will activate automatically, allowing for seamless communication with your potential clients.


3. Connecting IndiaMART to Pabbly Connect

To connect IndiaMART with Pabbly Connect, copy the provided webhook URL after setting up your trigger. Log into your IndiaMART account and navigate to the Lead Manager section. Here, you will set up the API integration.

  • Select ‘Import/Export Leads’ from the menu.
  • Click on ‘Push API’ and enter the platform name as ‘Pabbly Connect’.
  • Paste the webhook URL and save the settings.

This connection allows Pabbly Connect to receive real-time lead data from IndiaMART, ensuring that every inquiry is captured and processed efficiently.


4. Setting Up Action Step with Pabbly Chatflow

Once the trigger is set and connected, the next step is to configure the action in Pabbly Connect. Select Pabbly Chatflow as the action application and choose ‘Send Template Message’ as the action event.

To send personalized WhatsApp messages, create a message template in your Pabbly Chatflow account. This template should include dynamic fields such as the lead’s name to personalize each message. Once the template is ready, connect it to your workflow by mapping the necessary fields.

Map the recipient’s mobile number from the lead data captured earlier. Select the created message template for sending. Fill in any additional required fields and save the action.

This step ensures that whenever a new lead is generated, a WhatsApp message is sent automatically, enhancing your communication efficiency.


5. Testing the Integration

After setting up the workflow, it’s crucial to test the integration to ensure everything works smoothly. Generate a test lead in your IndiaMART account and check if Pabbly Connect captures the lead details accurately.

Once the test lead is created, return to Pabbly Connect to verify if the trigger has captured the lead information. If successful, the WhatsApp message should be sent immediately using the configured template.

Finally, check your WhatsApp to confirm receipt of the message. This testing phase is essential to ensure that your automation is functioning as intended, allowing you to engage with leads promptly.


Conclusion

In this tutorial, we explored how to automate sending WhatsApp messages to IndiaMART leads using Pabbly Connect and Pabbly Chatflow. By following these steps, you can streamline your communication with potential clients and enhance your contract manufacturing services.

Ensure you check out Pabbly Connect to create business automation workflows and reduce manual tasks. Pabbly Connect currently offer integration with 2,000+ applications.

Integrating Zoho CRM, Brevo, and Google Sheets with Facebook Lead Ads Using Pabbly Connect

Learn how to automate lead management by integrating Zoho CRM, Brevo, and Google Sheets with Facebook Lead Ads using Pabbly Connect. Follow our step-by-step tutorial!

Watch Step By Step Video Tutorial Below


1. Accessing Pabbly Connect for Integration

To start the integration process, first, access Pabbly Connect. This platform serves as the central hub that connects your Facebook Lead Ads with Zoho CRM, Brevo, and Google Sheets. You can sign up for a free account or log in if you are an existing user.

Once logged in, navigate to the dashboard. Here, you will see the option to create a new workflow. This is where you will set up the automation to ensure that every new lead from Facebook is captured in your CRM, added to your email marketing platform, and logged in Google Sheets for tracking.


2. Creating a Workflow in Pabbly Connect

To create a workflow, click on the ‘Create Workflow’ button in your Pabbly Connect dashboard. Name your workflow something descriptive, like ‘Create Zoho CRM Lead and Brevo Contact from Facebook Lead Ads’. Choose a folder to save this workflow for future reference.

  • Click on the ‘Create’ button after naming your workflow.
  • You will be prompted to select a trigger application; choose ‘Facebook Lead Ads’.
  • Select the trigger event as ‘New Lead’.

After setting up the trigger, proceed to connect your Facebook account with Pabbly Connect. Ensure you are logged into your Facebook account to facilitate a smooth connection process.


3. Testing Facebook Lead Ads Integration

Once your trigger is set, it’s time to test the integration. Use the lead testing tool provided by Meta to generate a test lead. Fill in the necessary details such as service interest, contact information, and submit the form.

After submitting the test lead, check your Pabbly Connect workflow to see if it captures the lead information correctly. You should receive a response indicating successful data capture, which confirms that the integration is functioning as intended.


4. Adding Lead Data to Google Sheets

Next, you will set up an action step to add the captured lead data to Google Sheets. In your Pabbly Connect workflow, select Google Sheets as your action application and choose the action event as ‘Add a New Row’.

  • Connect your Google Sheets account to Pabbly Connect by signing in and granting access.
  • Select the spreadsheet and sheet where you want to log the lead data.
  • Map the lead fields from the Facebook Lead Ads to the corresponding columns in your Google Sheets.

Once the mapping is complete, send a test request. You should see a new row added in your Google Sheets, confirming that the lead data is being logged successfully.


5. Creating Leads in Zoho CRM and Contacts in Brevo

After successfully adding the lead data to Google Sheets, the next step is to create a lead in Zoho CRM and a contact in Brevo. In your Pabbly Connect workflow, add an action step for Zoho CRM and select the action event as ‘Insert or Update a Record’.

Connect your Zoho CRM account to Pabbly Connect, entering your domain name and granting necessary permissions. Map the lead details to the appropriate fields in Zoho CRM, ensuring all required information is included.

Finally, set up another action step for Brevo, choosing the action event as ‘Create or Update a Contact’. Map the lead’s email and other details, and then send a test request to confirm that a new contact is created in Brevo successfully.


Conclusion

This tutorial has guided you through the process of integrating Zoho CRM, Brevo, and Google Sheets with Facebook Lead Ads using Pabbly Connect. By following these steps, you can automate your lead management process, ensuring that every new lead is captured and tracked efficiently across all platforms.

Ensure you check out Pabbly Connect to create business automation workflows and reduce manual tasks. Pabbly Connect currently offer integration with 2,000+ applications.

Using Pabbly Connect for these integrations not only saves time but also reduces errors associated with manual data entry, enhancing your overall marketing efforts.

How to Create Mailchimp Member for WooCommerce Order Using Pabbly Connect

Learn how to integrate WooCommerce and Mailchimp using Pabbly Connect to automate member creation with every order. Learn to create powerful connections between your critical applications without requiring specialized programming knowledge or extensive technical background.

Watch Step By Step Video Tutorial Below


1. Accessing Pabbly Connect for Integration

To begin the integration process, you need to access Pabbly Connect. This powerful automation tool enables seamless connections between WooCommerce and Mailchimp. Start by visiting the Pabbly Connect homepage and either sign in or create a new account.

Once logged in, you will see the dashboard where you can create workflows. Click on the ‘Create Workflow’ button to initiate the setup process. This is where you will define the trigger and action for your integration.


2. Creating a Workflow in Pabbly Connect

In this step, you will create a workflow that connects WooCommerce with Mailchimp. First, name your workflow, for example, ‘Create Mailchimp Member for WooCommerce Order’. Then, select the appropriate folder to save your workflow. using Pabbly Connect

  • Choose a relevant name for easy identification.
  • Select a folder or create a new one for organization.

After naming your workflow and selecting a folder, you will need to set up the trigger event. For this integration, choose ‘New Order Created’ as the trigger from the WooCommerce options. This ensures that every new order placed will initiate the workflow.


3. Setting Up the WooCommerce Trigger

Now that your workflow is created, it’s time to set up the WooCommerce trigger. After selecting the trigger event, Pabbly Connect will provide you with a webhook URL. This URL is crucial for connecting WooCommerce to Pabbly Connect. using Pabbly Connect

Log in to your WooCommerce account, navigate to the settings, and then to the Advanced tab. Here, you will find the Webhooks section. Add a new webhook by entering the required details:

  • Name: New Order
  • Status: Active
  • Topic: Order Created
  • Delivery URL: Paste the webhook URL from Pabbly Connect.

After saving the webhook, you can now test the connection by placing a new order in your WooCommerce store. This will allow Pabbly Connect to capture the order data and proceed with the integration.


4. Connecting Mailchimp with Pabbly Connect

With the WooCommerce trigger set, the next step is to connect your Mailchimp account. In Pabbly Connect, select Mailchimp as the action application. The action event should be set to ‘Add New Member with Custom Fields’ to ensure that every new order creates a corresponding member in Mailchimp. using Pabbly Connect

To establish the connection, click on ‘Connect’ and enter your Mailchimp API key and data center. You can find this information in your Mailchimp account under the profile settings. Once connected, select the audience list where new members will be added.

API Key: Generate a new key in Mailchimp. Data Center: This is usually found in your Mailchimp URL.

After successfully connecting Mailchimp, you can map the customer details from the WooCommerce order to the corresponding fields in Mailchimp. This includes email, first name, last name, and any other relevant information.


5. Testing the Integration

To ensure everything is working correctly, you need to conduct a test. Place a test order in your WooCommerce store and monitor Pabbly Connect for the webhook response. This response should include all the details of the order, confirming that the integration is functioning as intended.

Once the order is placed, check your Mailchimp account to verify that the new member has been created. You should see the customer’s information populated correctly, confirming that the automation is successful.

In summary, this integration allows you to automate member creation in Mailchimp for every new WooCommerce order, enhancing your marketing efforts and customer engagement. By using Pabbly Connect, you save time and reduce manual errors in your marketing processes.


Conclusion

Integrating WooCommerce with Mailchimp using Pabbly Connect is a powerful way to automate your marketing efforts. By following these steps, you can ensure that every new order results in a new member being added to your Mailchimp list, enhancing customer engagement and streamlining your workflow.

Ensure you check out Pabbly Connect to create business automation workflows and reduce manual tasks. Pabbly Connect currently offer integration with 2,000+ applications.